How To Make A Simple Crochet Bracelet.
Hello Hello✨
In many parts of the world, bracelets are more than just mere decorative accessories. To some, it signifies status or wealth and to others it has some spiritual meaning to it.
I remember being told as a kid that a particular locally-made red beaded bracelet was worn only by royalty and as such, they signified status. Nonetheless, I have loved wearing bracelets and wrist watches for as long as I can remember and as such, making a customised one for myself didn't sound like such a bad idea.
Materials Used
- 4.5mm crochet hook
- yarn
- cutter
- darning needle
- a button
Procedure
This crochet bracelet is a really easy craft to make and the interesting fact is that the size of the bracelet can vary depending on the side of the crochet hook being used.
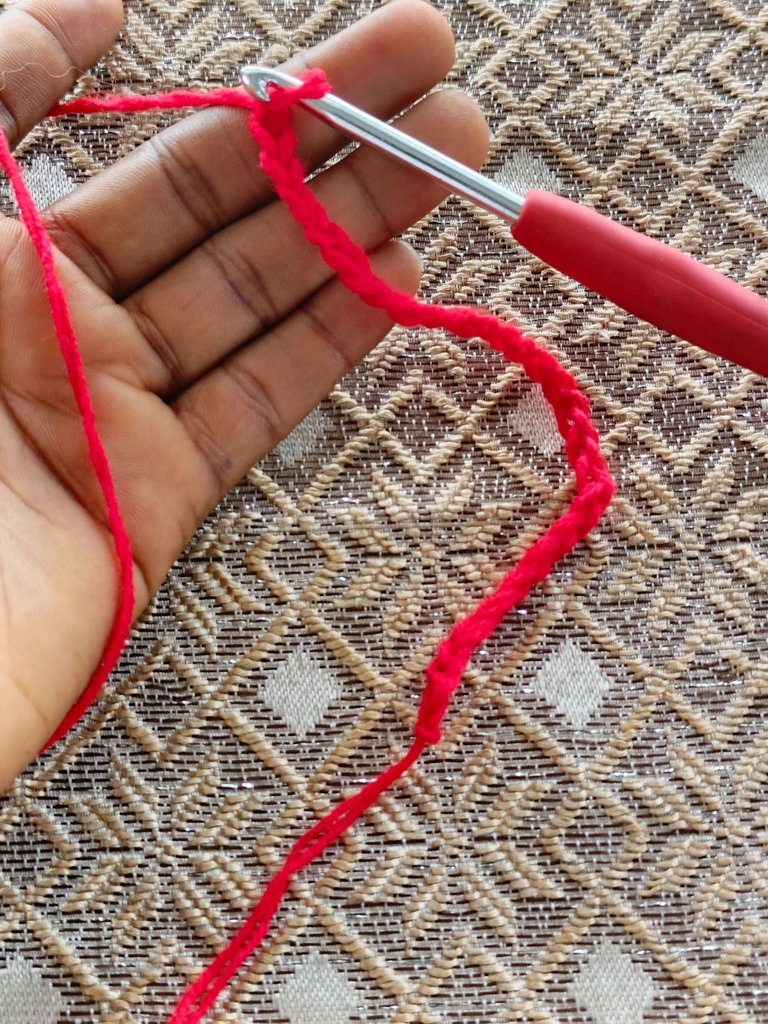
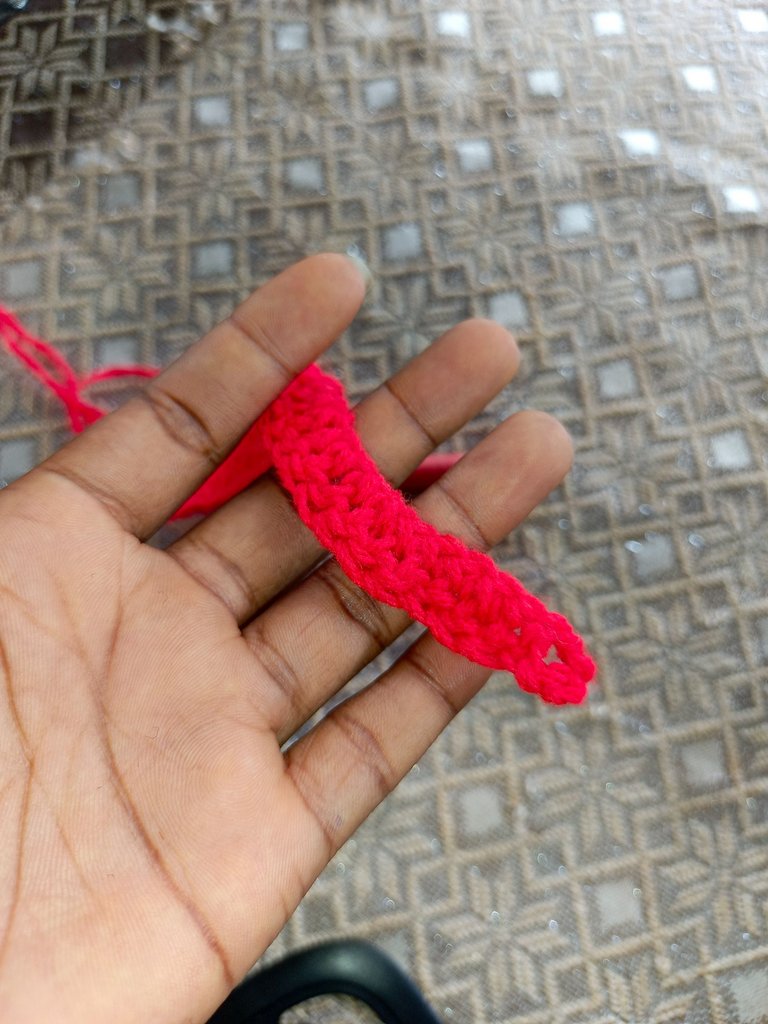
For my craft, I made use of the 4.5mm crochet hook. First off, I made a slip stitch before commencing the process of making a chain long enough to go round my wrist with no extra space. If extra space is kept, the bracelet would end up bigger than your wrist.
After this, I made an extra chain of six. This extra chain is to serve as the button hole. Making this button hole as the very first thing felt a bit off but it was the only way to prevent extra and unnecessary attachments at the end.
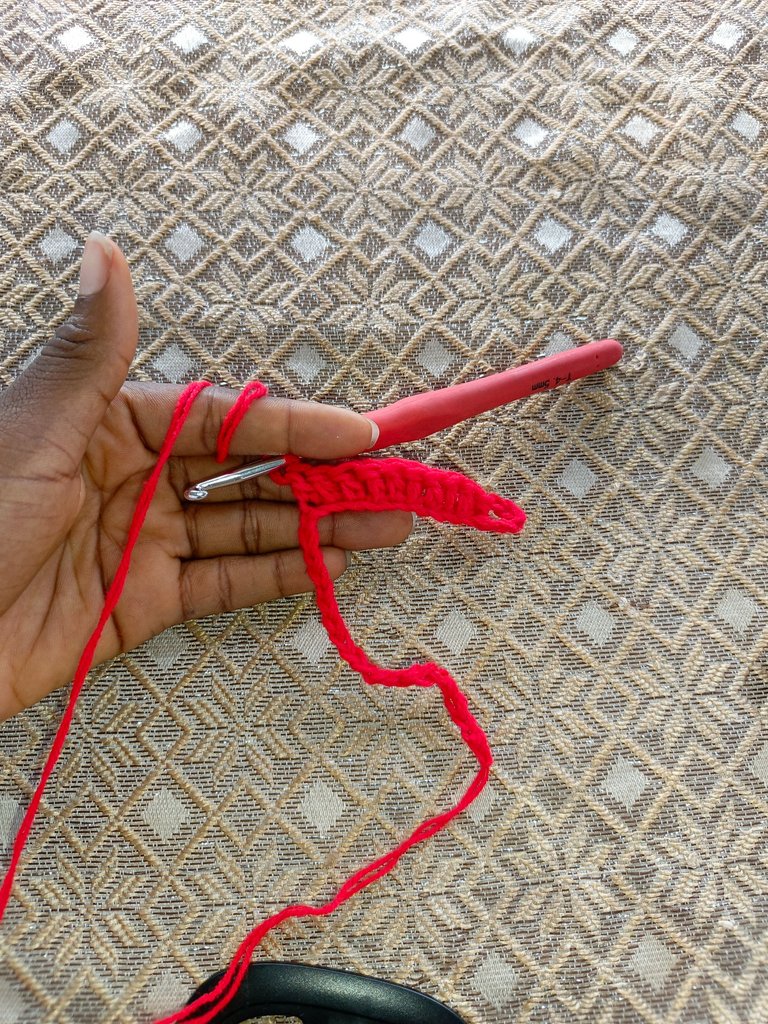
After making the button hole, I proceeded to make double crochet stitches into every chain till the very end. It is important to maintain precision and accuracy to prevent the bracelet from turning out too tight or too wonky.
After making a double crochet stitch into the last chain, I chained one, tightened my edges and went ahead to cut off the yarn. The band was pretty much done.
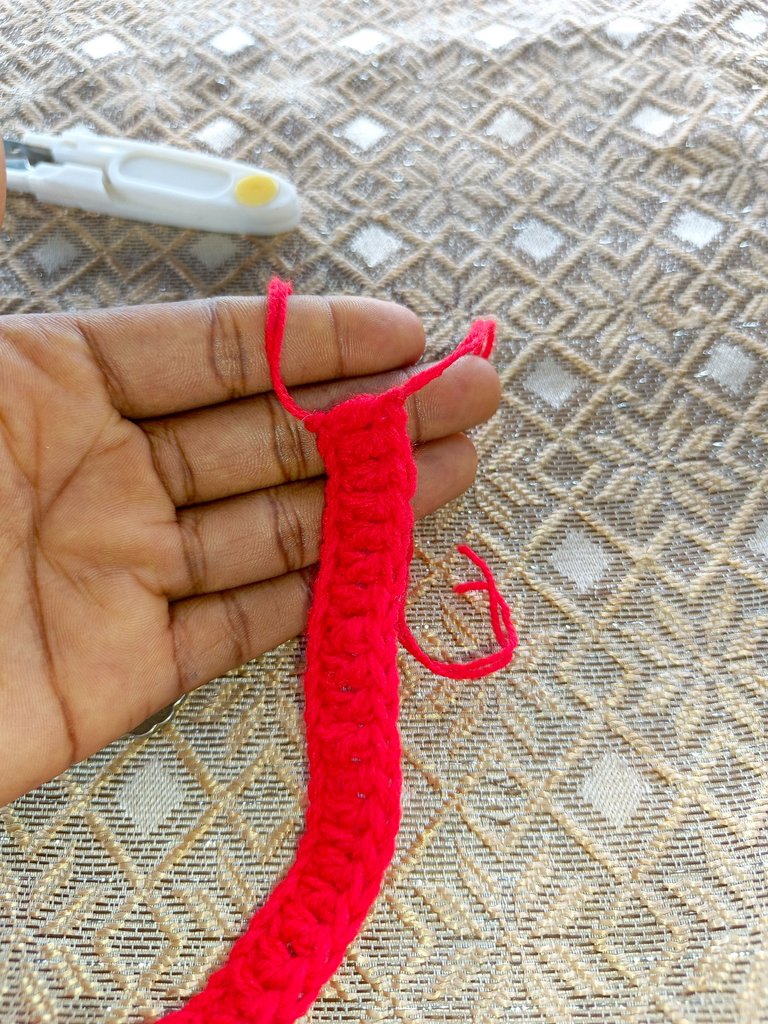
Before cutting off, I left enough yarn to enable me to attach the bottom.
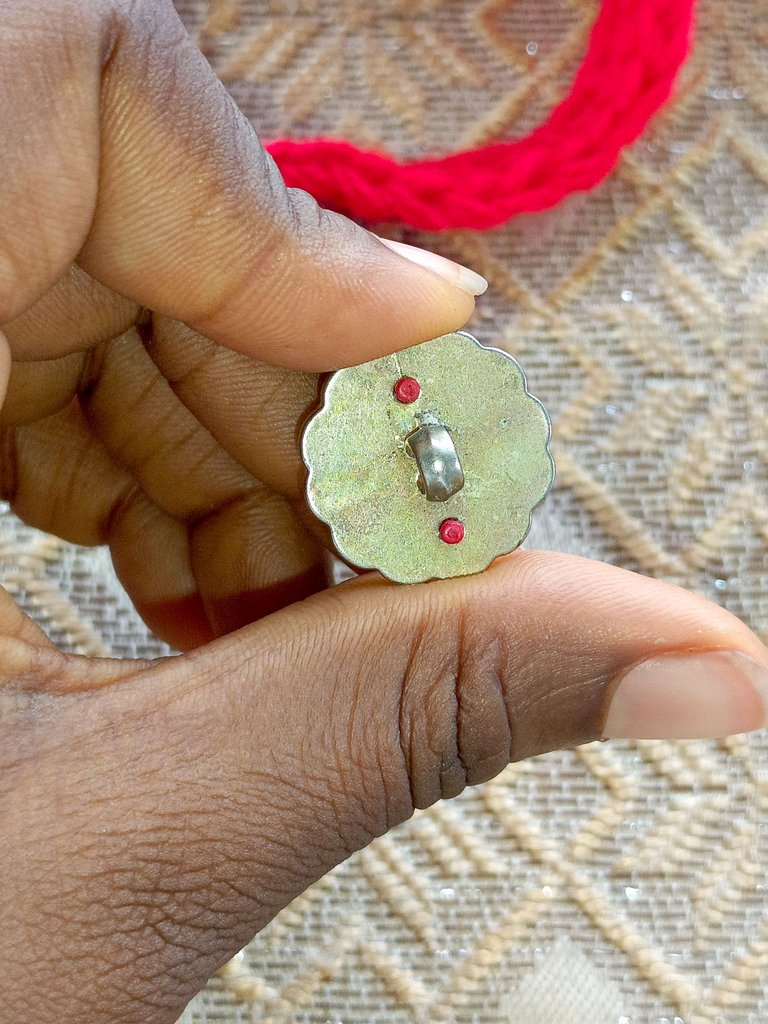
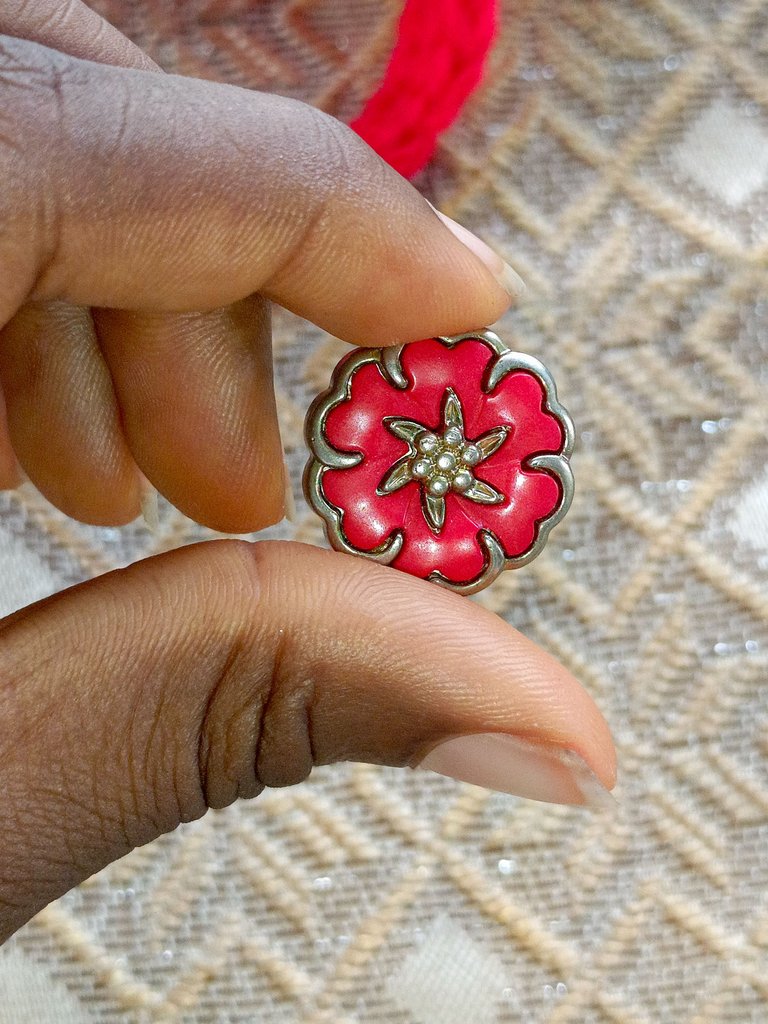
With the extra yarn for attachment, I went ahead to attach the button. Since I was only tying and not crocheting the button in, I ensured I tied over and over again; just to be on the safe side.
After tying the button securely, I proceeded to cut off extra yarn. At this point, it is advisable to burn the ends very carefully to prevent the button from coming off if you're not sure if you tied it securely.
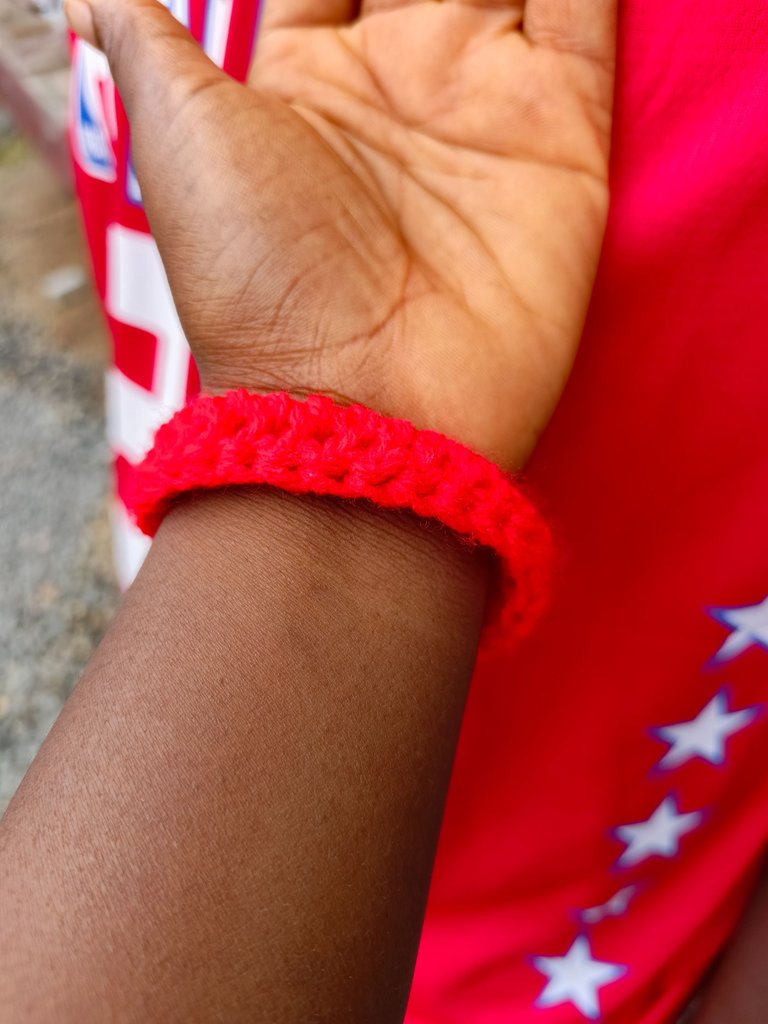
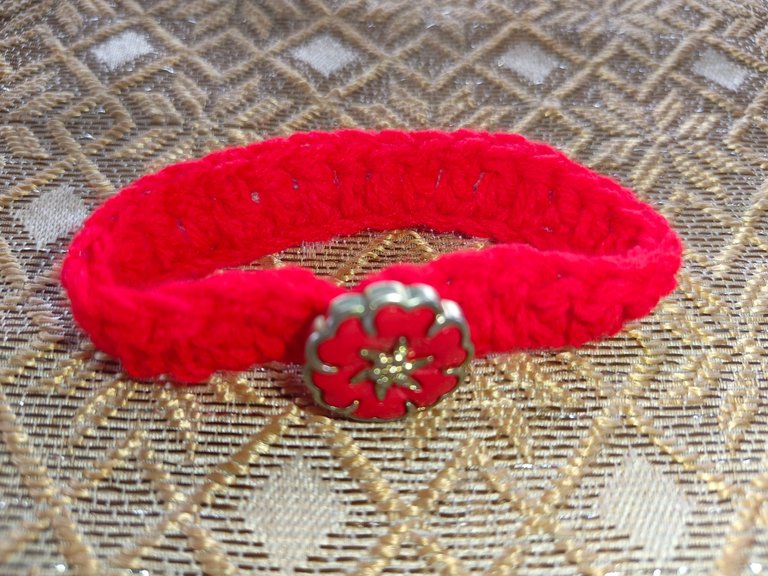
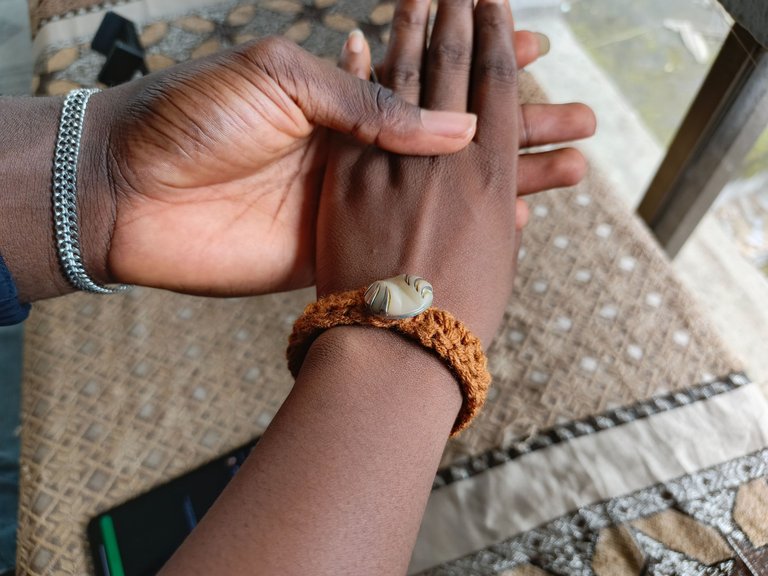
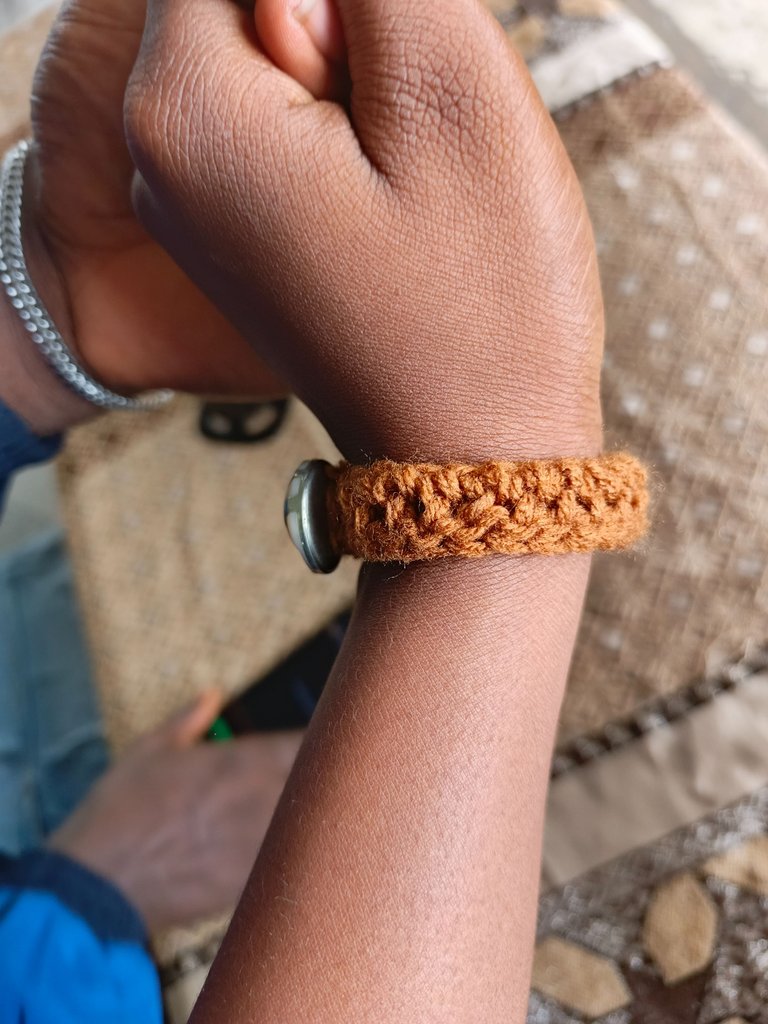
With that, I was done with my bracelet and I think it looks simple yet unique and lovely. On completion, a friend of mine came around and offered to model one of the bracelets for me. I readily agreed.
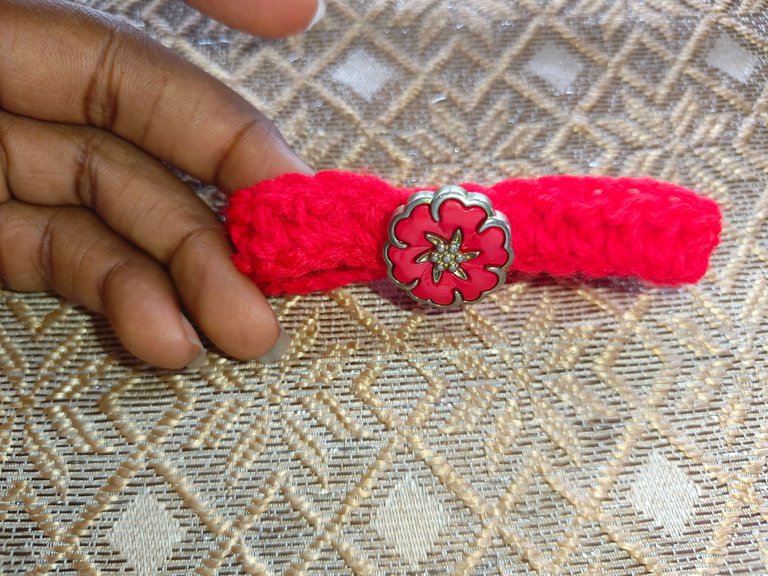
It is worthy to note that the initial measurement for the button hole totally depends on the type of button you want to use. If your buttons are smaller, then less than six extra chains should be made and vice versa.

This brings me to the end of the brief “how to” post. What do you think of bracelets? Which one is your favourite?
Thumbnail edited on Canva
All images used belong to me and were taken with my mobile device except stated otherwise.
Uploaded using 3Speak Mobile App
▶️ 3Speak
Your bracelet is so beautiful and your little back story about the bracelet was superb, it gave your post a different touch. Thanks for sharing Wongi and we hope to see more of your creative works😃
I hope to share more creative works. Thank you so much 😊
Your bracelet looks absolutely beautiful, Best, but my own is shea those dark hands are not who I am thinking they belong to.😂
😂😂
And who do you think they belong to best? 🌝
The bracelets are so lovely, I love the button you added. The red is my fav !diy
Thank you lovely😊
You can query your personal balance by
!DIYSTATSYour style of crocheting is so different. I don't know how people crochet such beautiful things. I know that every time I pick up the needle, it falls out of my hand. I am so lacking.
When you say different, I'm curious, what do you mean?
Over the years, I've come to realize that crocheting takes time and patience to gain mastery. There are times when you're making a project and giving up seems like the best option, but fighting the odds and pulling through is always more rewarding😊
Bravo Wongi! Once again I have the pleasure to agree with your great creativity. I admire very much what you share in your posts, since it is not only the brasalete, but the quality of the step by step presentation through the photographs and the video editing. You are a reference of excellence for our DIYHub community, thanks for being here... My favorite is the red one! 😉
You very thoughtful comment means a whole lot to me. I am so so hounoured and glad that my hard work is paying offf😊.
Thank you so much and.. . the red is my favorite too😄
Simply brilliant my wee imp! And I love that video!!! Well cool these bracelets are.
Thank you so much super star😊
This is beautiful, both the red and the brown colors look great on you, but if I'm to choose a favorite, I will go with the brown one.
Brown is a more tame colour, perfect in it's own way.
Thank you funshee😊
You are welcome 🤗
This is really and so creative of you.
Keep it up
Up is how I intend to keep it.
Thank you✨
Las dos te quedaron muy bonitas 👏👏🌻🦋🌈
muchas gracias. Me gusta mucho apreciar.