Diseña y decora un lindo cintillo, Aprende y hazlo tu mismo.ESP/ENGDesign and decorate a nice headband, Learn and do it yourself.
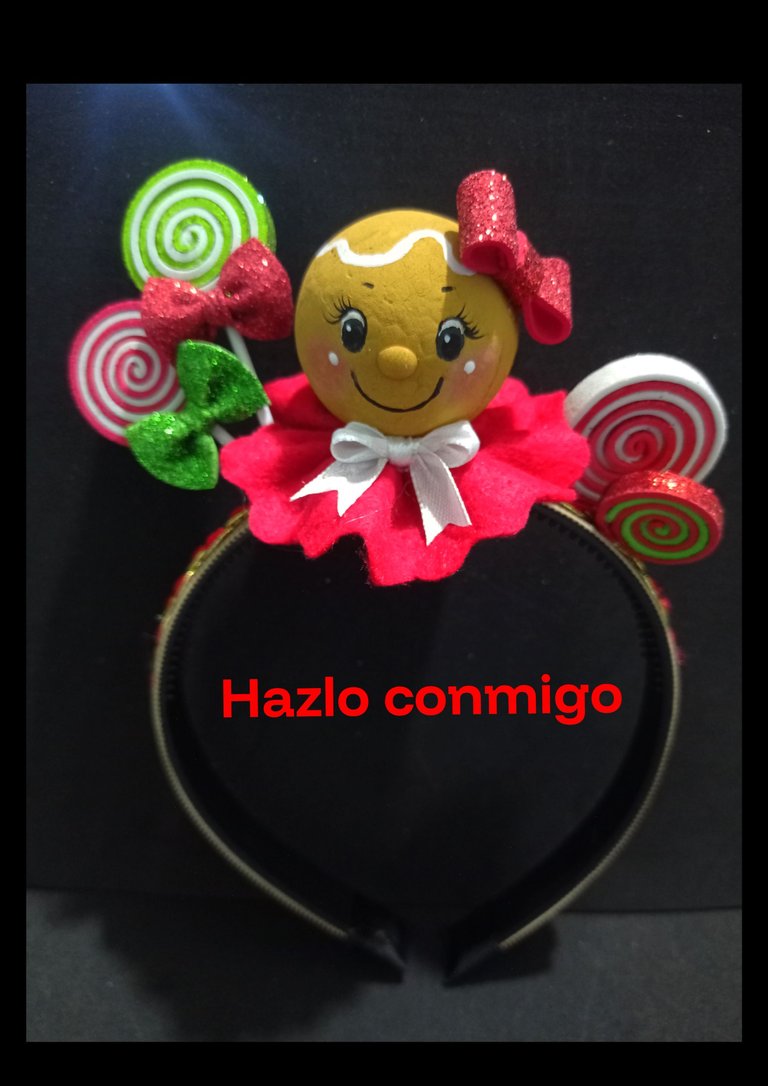
Buenas noches querida comunidad, cómo están?
Así que te invito a que me acompañes a aprender y así puedas realizar tu mismo.
Para este vas a necesitar:
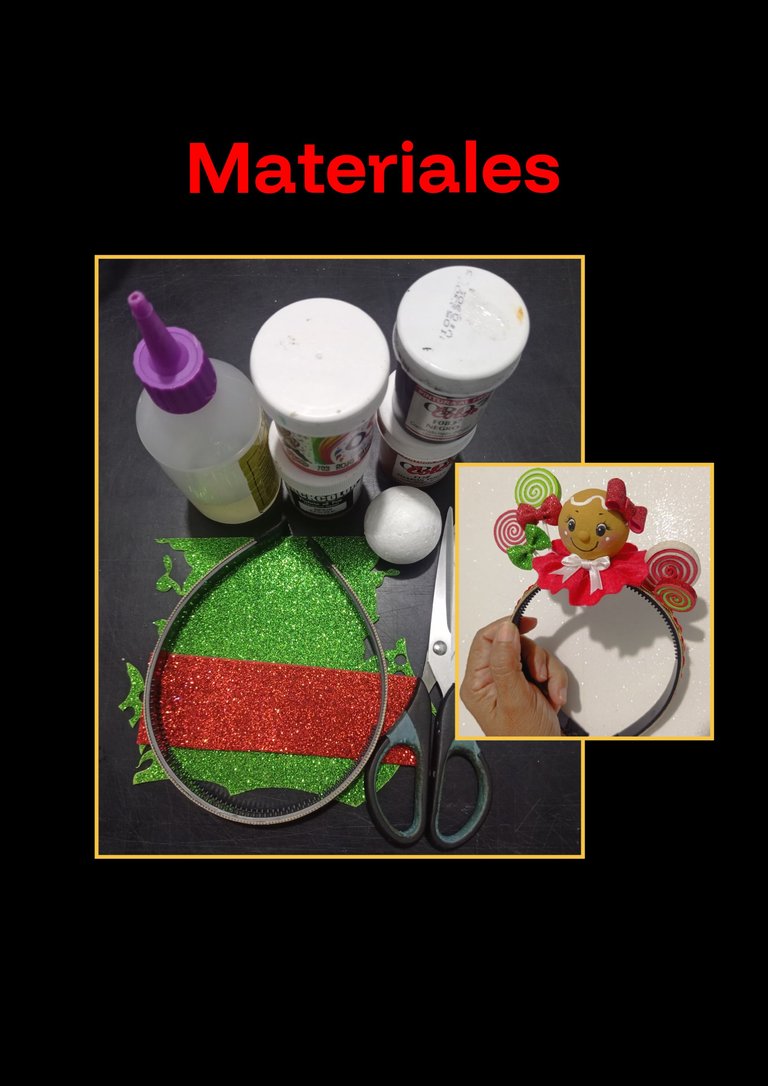
Esfera de icopor
Foami escarchado
Fieltro Retazo
Cinta de tela
Pinturas y pinceles
Silicón
Adorno de tela.
Tijera.
Aguja e hilo.
Empecemos:
Paso 1:
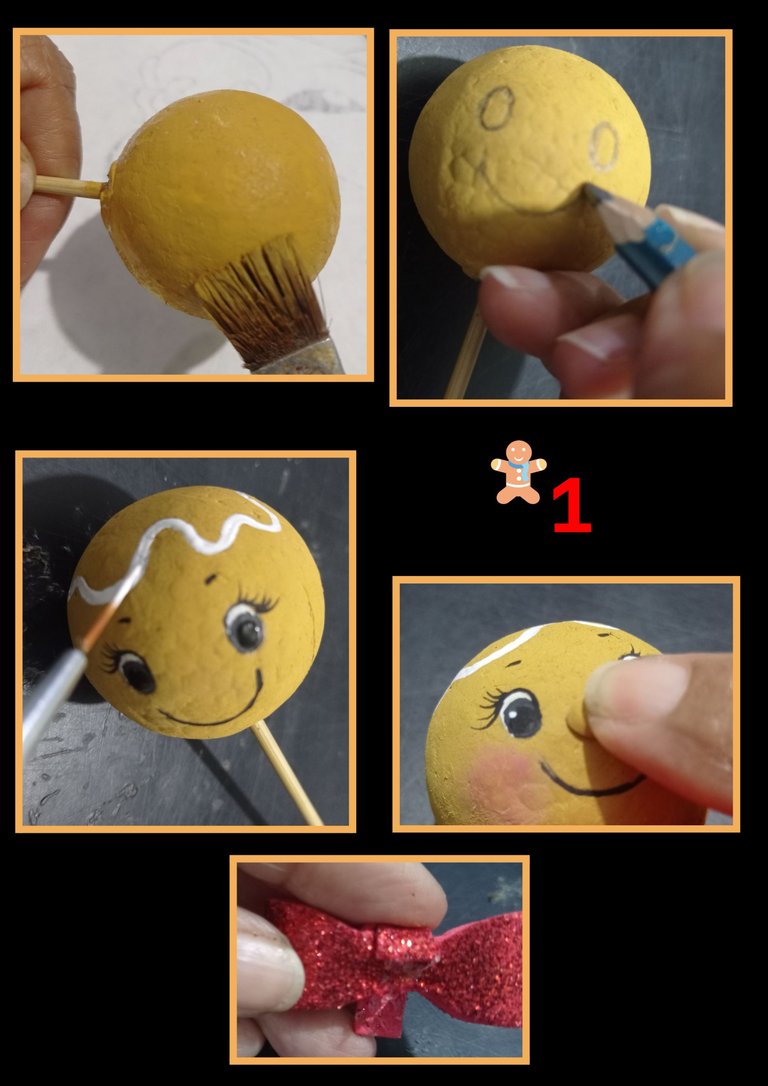
- Pinta la esfera de color marrón o mostaza, aplica una capa, deja secar y luego aplica la 2da. capa, luego con un lápiz de mina, dibuja una carita y pinta la carita y luego con pintura blanca dibuja con pintura blanca el glaseado que llevan las galletas de jengibre.
- Recorta y pega la nariz, luego haz un lacito con el foami, recortando un rectángulo y luego con una tirita de foami pega en el centro hasta formar el lazo y deja secar.
Paso 2:
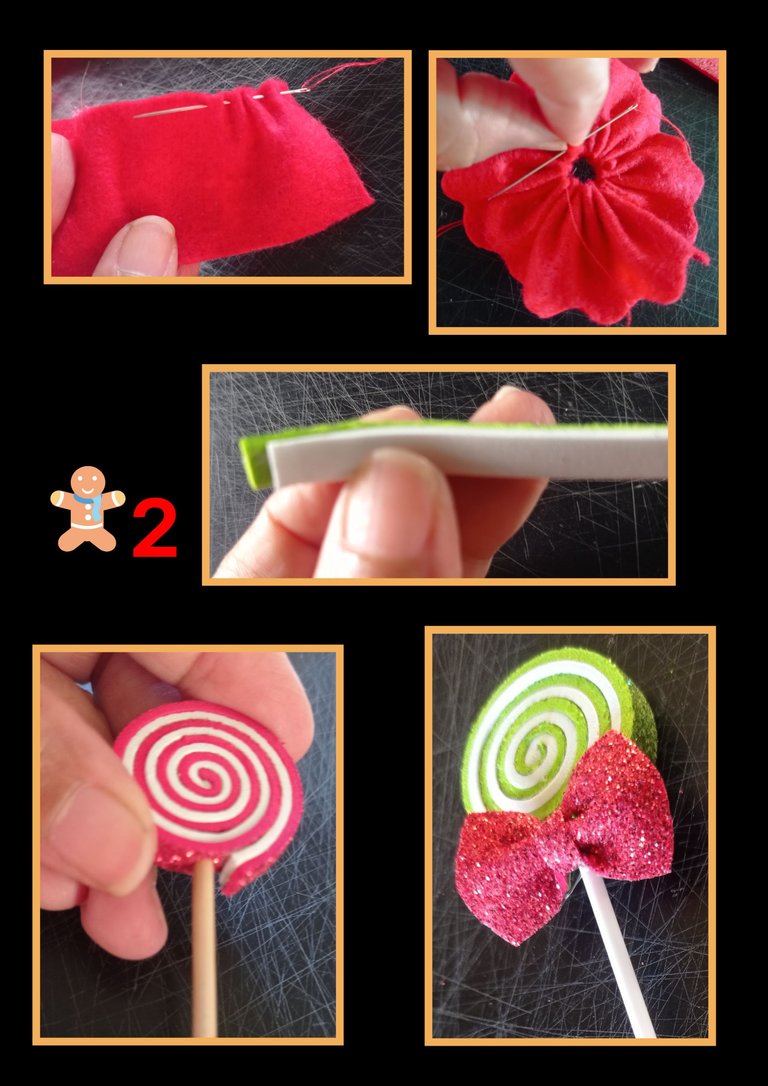
- Recorta en fieltro una tira de 4cms de ancho por 10 de largo, con aguja e hilo, hilvana por uno de los borde largos, luego recorta ondas por la el otro extremo y hala el hilo hasta formar un círculo y une los extremos.
- Aparte recorta tiras de foami de 4 y 5milímetros de ancho por 12 de largo, pega con silicon uno al otro en uno de los extremos y comienza a enrollar dando las vueltas que desees y pega los otros extremos.
- Luego con un palito de altura haz un orificio e inserta un palito de chupeta y decora con un lacito para tapar la unión.
Paso 3:
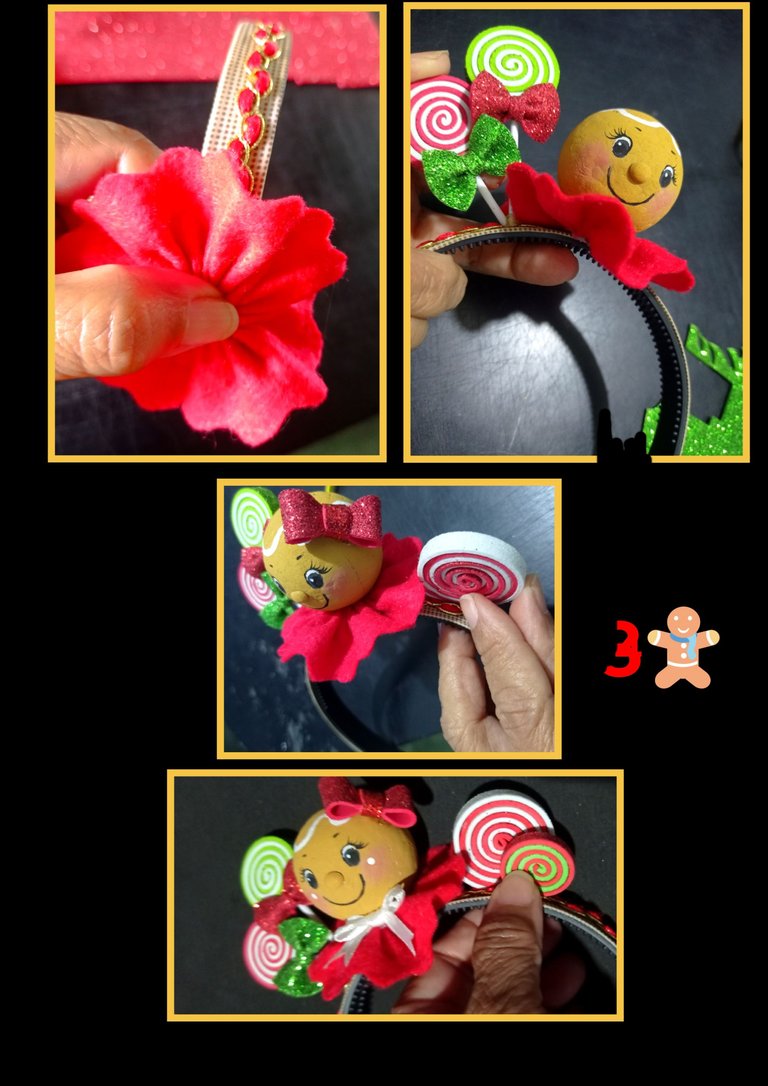
- Decora el cintillo con el adorno pegando de extremo a extremo, después pega la pieza de fieltro y sobre la cabecita de anime, luego pega a un lado los caramelos o chupetas con silicón frío o preferiblemente caliente.
- Después pega el lacito en la cabecita y pega los caramelos restantes.
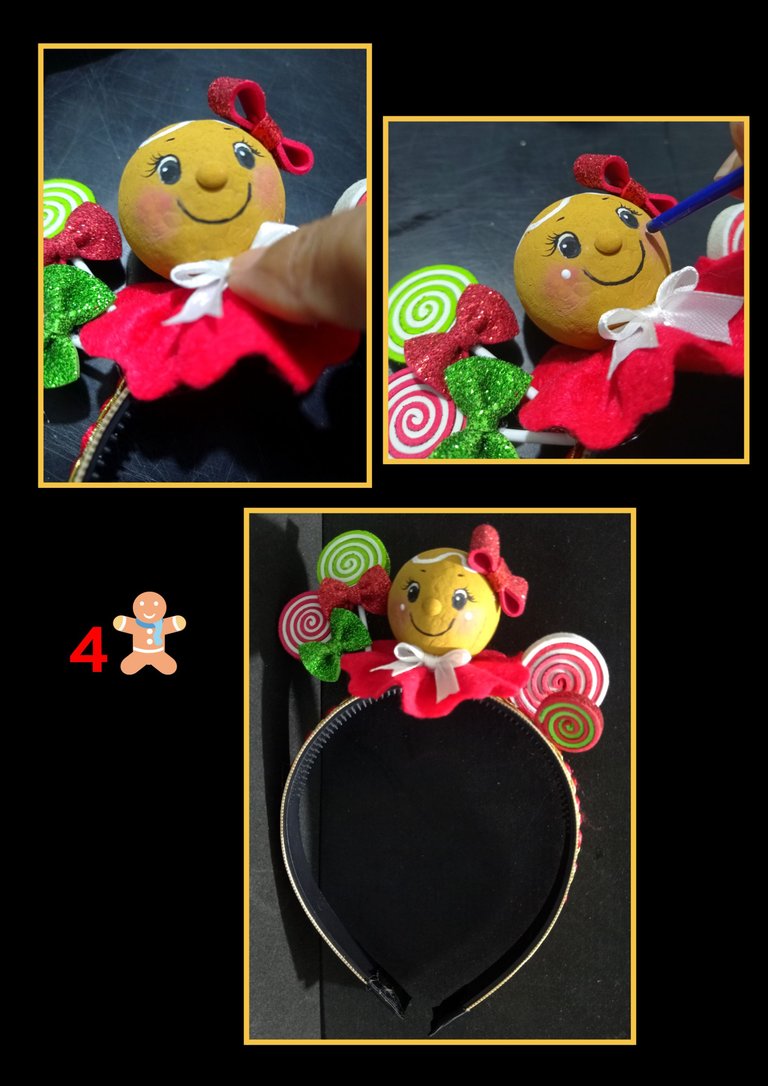
- Por último haz un lacito blanco y pega,pinta las mejillas con tiza o rubor y pon puntos de luz con pintura blanca.
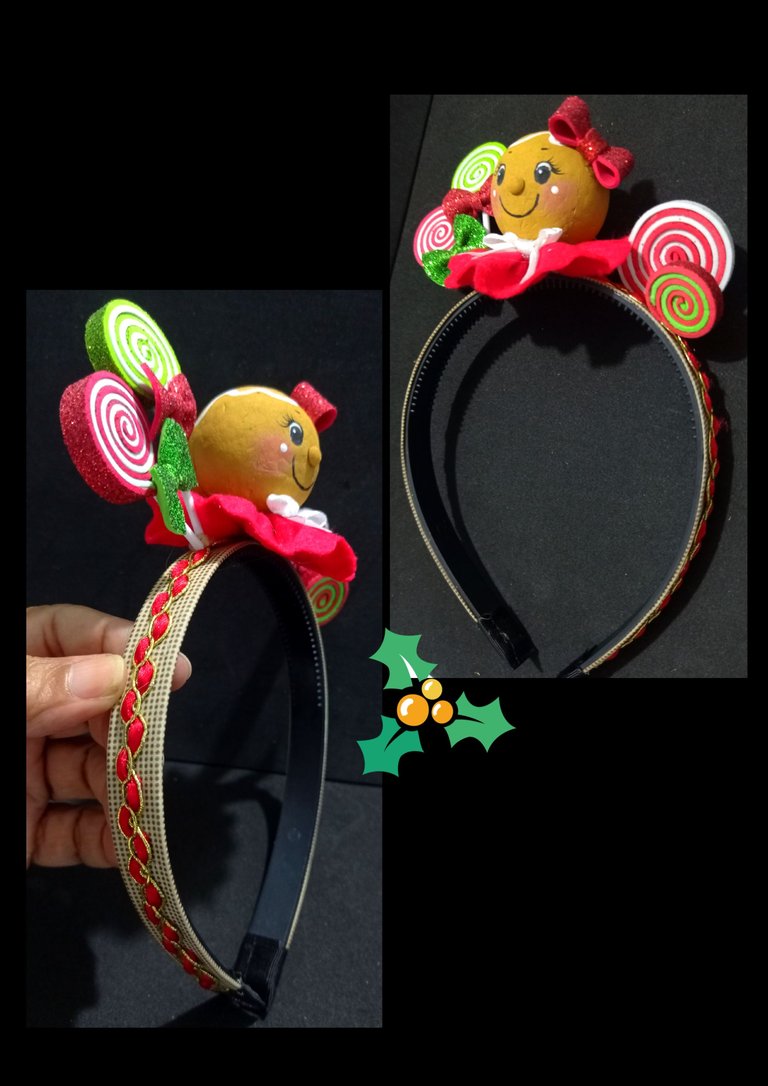
Así quedará listo este hermoso cintillo y te muestro el resultado final.

Teléfono usado: Redmi Note 9
Editor de fotos: GridArt
Mis redes sociales: X elmundodebetty
Instagram: elmundodebetty

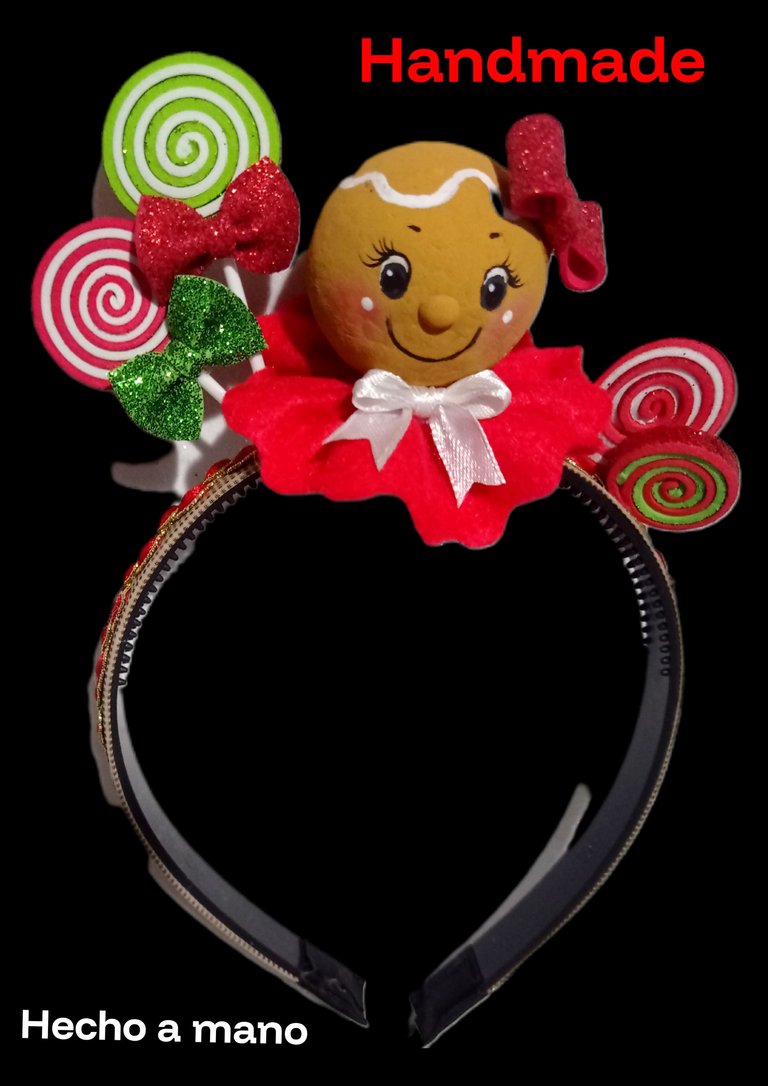
Ahora me despido esperando sea de tu agrado mi paso a paso, espero te sirva de guía para tus próximos trabajos.
Saludos y muchas gracias por tu apoyo y comentario.
Me encantará verte nuevamente por aquí.
English:


Good evening dear community, how are you?
So I invite you to join me to learn how to make it yourself.
For this one you will need:

Isopor sphere
Frosted Foami
Scrap Felt
Cloth tape
Paints and brushes
Silicone
Fabric ornament.
Scissors.
Needle and thread
Let's start:
Step 1:

- Paint the sphere brown or mustard color, apply a coat, let dry and then apply the 2nd coat, then with a lead pencil, draw a little face and paint the little face and then with white paint draw with white paint the icing that the gingerbread cookies have.
- Cut out and glue the nose, then make a bow with the foami, cutting out a rectangle and then with a strip of foami glue in the center to form the bow and let it dry.
Step 2:

- Cut a strip of felt 4 cm wide by 10 cm long, with needle and thread, thread along one of the long edges, then cut waves on the other end and pull the thread to form a circle and join the ends.
- Separately cut strips of foami 4 and 5mil wide by 12 long, glue with silicone one to the other at one end and begin to roll around giving the turns you want and glue the other ends.
- Then, make a hole with a height stick and insert a lollipop stick and decorate with a bow to cover the joint.
Step 3:

- Decorate the headband with the ornament by gluing from end to end, then glue the felt piece and over the anime head, then glue the candies or lollipops to one side with cold or preferably hot silicone.
- Then glue the bow on the head and glue the remaining candies.

- Finally make a white bow and glue, paint the cheeks with chalk or blush and put light spots with white paint.
This way this beautiful headband will be ready and I show you the final result.

Phone used: Redmi Note 9
Photo editor: GridArt
My social networks: X elmundodebetty
Instagram: elmundodedebetty


Now I say goodbye hoping you like my step by step, I hope it will serve as a guide for your next works.
Greetings and thank you very much for your support and comments.
I will be happy to see you again here.
Está muy bonito, muy creativo, y sencillo, con pocos materiales, gracias por compartirlo, saludos.
Saludos @ikigaidesign muchas gracias por tu apoyo y me alegra mucho que te haya gustado mi tutorial.
Lo hago con mucho amor.
Feliz noche.
Wow! This is so breathtaking friend, you did an amazing job with the headband, well done.
Que bueno que le gustó @diyhub, para mi es un placer compartir con ustedes.
Bendiciones.
¡Felicidades! Esta publicación obtuvo upvote y fue compartido por @la-colmena, un proyecto de Curación Manual para la comunidad hispana de Hive que cuenta con el respaldo de @curie.
Si te gusta el trabajo que hacemos, te invitamos a darle tu voto a este comentario y a votar como testigo por La Colmena.
Si quieres saber más sobre nuestro proyecto, te invitamos a acompañarnos en nuestro servidor de Discord.
Gracias por siempre apoyarme @la-colmena,
Saludos.