🧸❤🧸Plush Phone Cover 🧸❤🧸

Hello dear friends! I hope you are feeling well. Being able to personalise our phone cases is a very versatile way to create beautiful details for our phones.

𝓜𝓪𝓽𝓮𝓻𝓲𝓪𝓵𝓼
- Plush fabric
- Scissors
- Instant glue
- Thread and needle
- Telephone lining
𝓢𝓽𝓮𝓹 𝓫𝔂 𝓢𝓽𝓮𝓹
1

We take the lining of our phone and measure the dimensions of our lining with the size of the plush fabric. The piece that comes apart from the camera must be removed from the liner in order to glue the fabric.
2

Once the lining has been glued to the fabric, the fabric must be trimmed and a small border must always be left for the lining. Little by little, the fabric is glued to the edges of the lining.
3
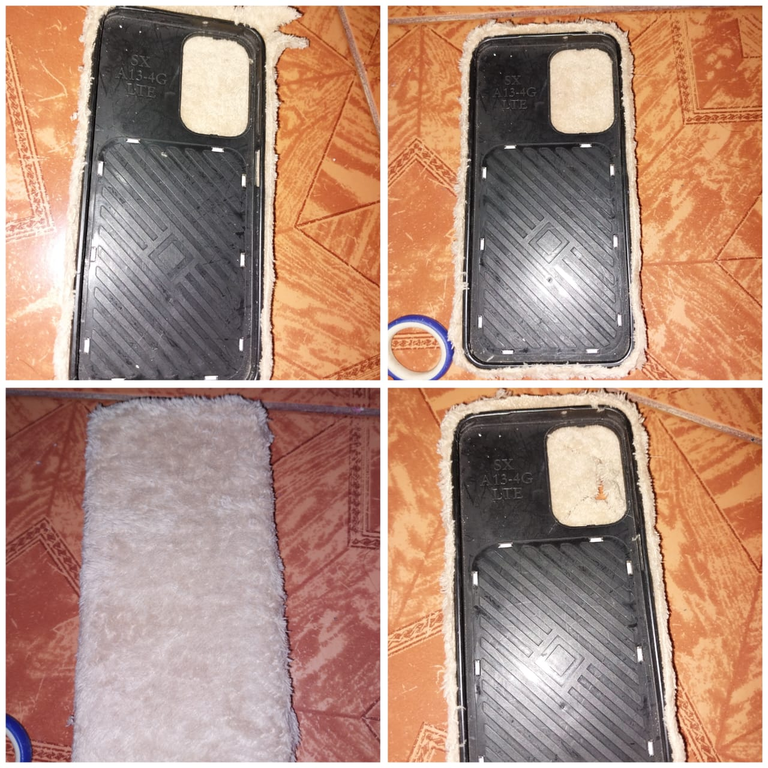
Cut the corner of the lining in half and then glue it across the corner of the lining. Then cut the fabric covering the chamber area with the scissors.
4

Cut the corner of the lining in half and then glue it crosswise over the corner of the lining. Then cut the fabric covering the chamber area with the scissors.
5
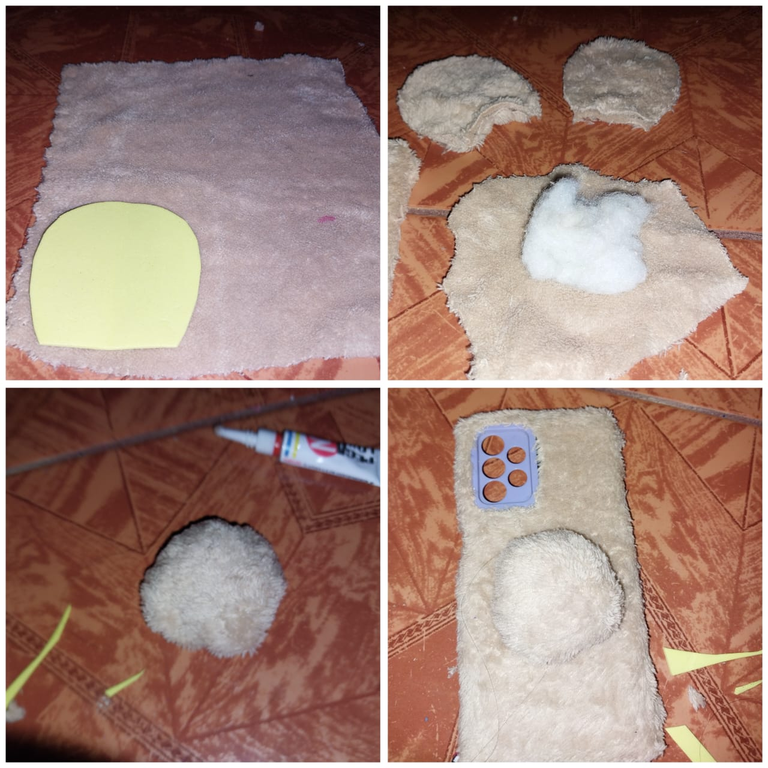
Next, take a piece of cardboard or a piece of paper and draw a small ear. We place it on the fabric and cut it into 4 equal parts. We also take some stuffing and with another piece of fabric we make a little ball. We sew this stuffed ball and glue it to the back of the lining.
6
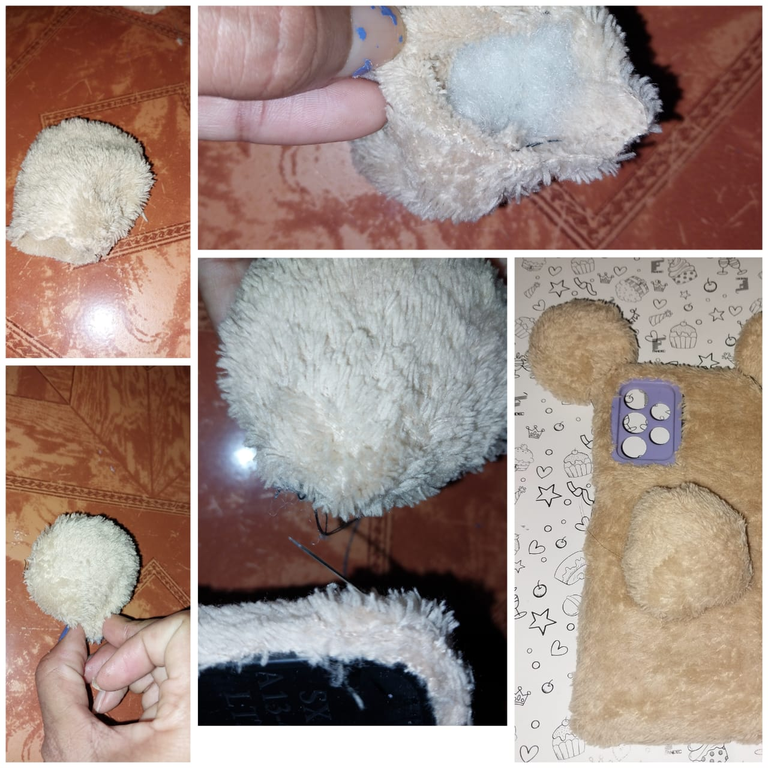
Then we sew the ears and stuff them as well. Sew with stitching and then sew the ears on each side or top corner of the lining.

𝓣𝓱𝓲𝓼 𝓲𝓼 𝓽𝓱𝓮 𝓯𝓲𝓷𝓪𝓵 𝓻𝓮𝓼𝓾𝓵𝓽!
- Images belong to me
- Translator: Deepl Traslator
- Editing: Canva
Hola queridos amigos! Espero que se encuentren muy bien. Poder personalizar nuestros forros para el teléfono es una forma muy versátil de poder crear hermosos detalles para nuestros teléfonos.
𝓜𝓪𝓽𝓮𝓻𝓲𝓪𝓵𝓮𝓼
- Tela de peluche
- Tijera
- Pegamento instantáneo
- Hilo y aguja
- forro de Telefono
𝓟𝓪𝓼𝓸 𝓪 𝓟𝓪𝓼𝓸
1
Tomamos el forro de nuestro teléfono y medimos las dimensiones de nuestro forro con el tamaño de la tela de peluche. La pieza que se desarma de la cámara se debe quitar del forro para poder pegar la tela.
2
Una vez que pegamos el forro a la tela, debemos recortar esta última y dejar siempre un pequeño borde para el forro. Poco a poco, se va pegando la tela a los bordes del forro.
3
Hay que cortar la esquina del forro por la mitad y luego pegarla transversalmente sobre la esquina del forro. Después, hay que cortar con las tijeras la tela que cubre la zona de la cámara.
4
Hay que cortar la esquina del forro por la mitad y luego pegarla transversalmente sobre la esquina del forro. Después hay que cortar con las tijeras la tela que cubre la zona de la cámara.
5
Luego, tomamos una pieza de cartón o una hoja de papel y dibujamos una oreja pequeña. La colocamos sobre la tela y la recortamos en 4 partes iguales. También tomamos un poco de relleno y con otro trozo de tela hacemos una pelotita. Esta pelotica rellena la cosemos y la pegamos en la parte trasera del forro.
6
Después, cosemos las orejas y también las rellenamos. Sellamos con costura y luego cosemos las orejas en cada lado o esquina superior del forro.
𝓔𝓼𝓽𝓮 𝓮𝓼 𝓮𝓵 𝓻𝓮𝓼𝓾𝓵𝓽𝓪𝓭𝓸 𝓯𝓲𝓷𝓪𝓵!
- Las imágenes me pertenecen
- Traductor: Deelp traslator
- Edicion: Canva

Te ha quedado muy lindo este forro de telefono, un diseño bien particular y gracioso. Me gusta mucho!
Muchas gracias hermana de mi corazon!
Que lindoooo, me encanta súper cuchi 😍
Muchas gracias amiga, gracias por el apoyo!
This phone cover looks amazing and it's easy to make. This a very protective element. Great job!
👏👏👏
Thank you my friend
I loke this idea 😋👌👌 and it looks cute 😋👌
Thank you! 🧸🥰
Npr 😋👌👌🦊☕
OMGGGG😱😱😍
Está es la cosita más tierna que mis ojos han visto hoy, me encantó.. gracias por compartir amiga!
Muchas gracias amiga. 🏵️🧸
Pero qué ingeniosa querida @divergente1 , te quedo increíble, muy delicado, y tierno.💗
Muchas gracias amiga! 🧸🏵️
Siempre estaré atenta amiga, es un placer para mí.💞
Que cuhiiii! 🥺 Quedó bellísimo demasiado ingeniosa esa idea ✨
Muchas gracias querida milabarrios
This phone case is beautiful. Nice work
Thanks diyhub! 🧸
You are actually not just creative but also talented as well. Doing this would definitely save you the cost of having to buy the pouch with your money. This is really amazing, well done.
Thanks my friend
Me encantó en resultado 😍ya quiero hacer uno para el mío 🤭🥰
Muchas gracias amiga, seguramente te quedará muy lindo. Saludos y gracias.
😍😊