Maquillaje alternativo morado y rosado con delineado gráfico | Alternative Purple and Pink Makeup with Graphic Eyeliner [ESP-ENG]
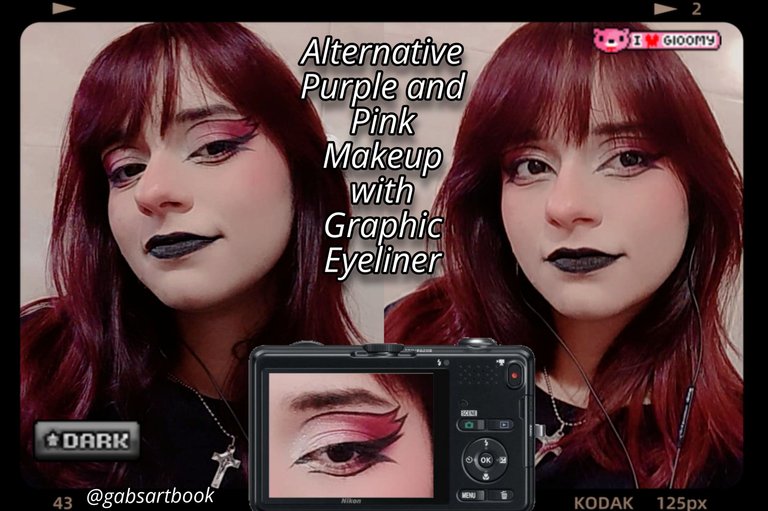

Hola a todos en la bonita comunidad de #Makeuppower ! Hoy les traigo el paso a paso de este maquillaje alternativo que realicé, estuve buscando algunas ideas de maquillajes entre gótico, emo y alternativo para realizarme mañana en año nuevo y aunque vi muchos que llamaron mi atención decidí usar los colores morado y rosado para éste ya que son de mis colores favoritos para mis maquillajes, les comparto fotos del proceso del maquillaje ya que quizás mañana este algo ocupada para tomarme fotos. Así que sin más que decir, los invito a leerme. ❤️✨
Hello to everyone in the beautiful community of #Makeuppower ! Today I bring you the step by step of this alternative makeup I did, I was looking for some ideas of makeup between gothic, emo and alternative to do tomorrow in the new year and although I saw many that caught my attention I decided to use the colors purple and pink for this one since they are my favorite colors for my makeup, I share with you photos of the makeup process since I might be a little busy tomorrow to take pictures. So without more to say, I invite you to read me. ❤️✨

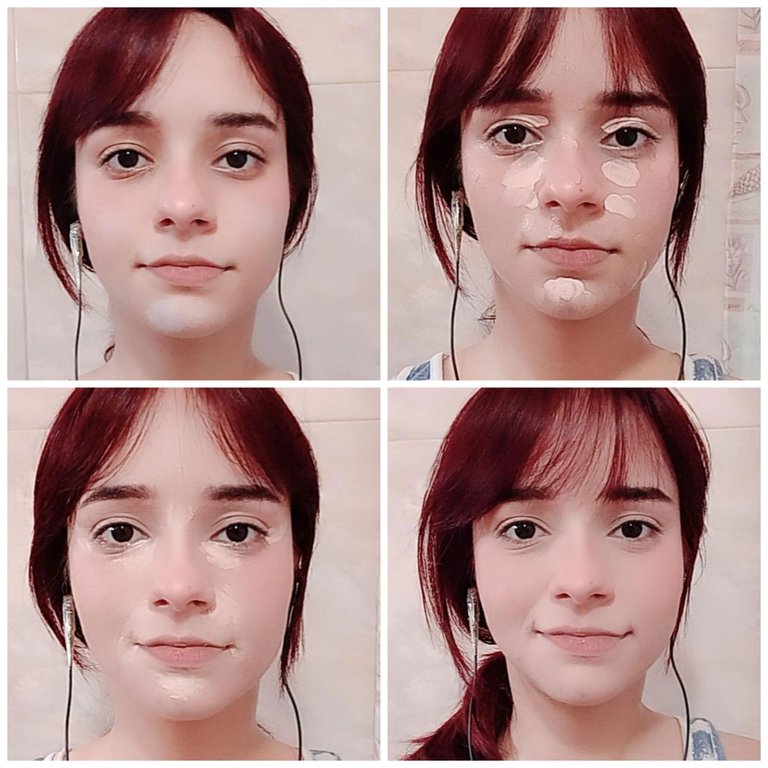
Para comenzar a realizarme el maquillaje lo que hice fue lavar mi rostro y aplicar un primer por toda la zona de mi nariz debajo de mis ojos, en el puente de mi nariz, entre mis cejas y en mi mentón para tapar cualquier poro de mi piel y que ésta al agregar la base quedará completamente lisa. Mientras esperaba a que el primer secara comencé a usar el corrector de ojeras y de manchas, para las manchas de acné use un corrector en tono verde y para agregar luz en mi rostro use uno más claro al tono de la base de mi maquillaje, difumine el corrector con una esponja de maquillaje y luego agregué base, en este maquillaje use dos tipos de base, una más clara a mi tono de piel y otra que es casi del mismo tono de mi piel, el objetivo de la base más clara es dar iluminación en zonas centrales como a los lados de mi nariz y en el mentón. Agregué éstas bases en puntos para que fuera más fácil el difuminar y para no agregar demasiada base, difumine y selle todo con polvo compacto el cual agregué con una esponja en las zonas de las ojeras, a los lados de mi nariz y en el mentón y luego con una brocha para terminar de sellar todo el rostro.
To start doing my makeup I washed my face and applied a primer all over my nose area under my eyes, on the bridge of my nose, between my eyebrows and on my chin to cover any pores in my skin so that when I added the foundation it would be completely smooth. While waiting for the primer to dry I started to use the concealer for dark circles and blemishes, for the acne spots I used a green tone concealer and to add light to my face I used a lighter one to the tone of my foundation, I blended the concealer with a makeup sponge and then I added foundation, in this makeup I used two types of foundation, one lighter to my skin tone and another that is almost the same tone of my skin, the objective of the lighter foundation is to give illumination in central areas like on the sides of my nose and on my chin. I added these foundations in points to make it easier to blend and not to add too much foundation, I blended and sealed everything with pressed powder which I added with a sponge in the areas of the dark circles, on the sides of my nose and chin and then with a brush to finish sealing the entire face.
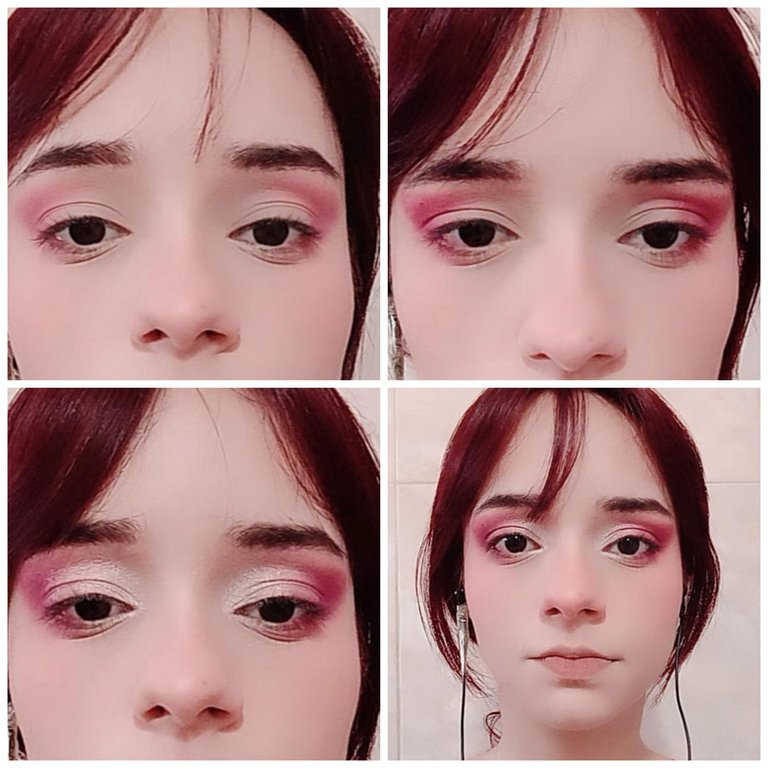
Ya teniendo listo el rostro agregué un poco de sombra marrón a mis cejas y limpié las imperfecciones con base y selle con polvo compacto. Ahora comencé a usar las sombras de ojos primero hice un semi círculo en mis párpados con sombra rosada y la comencé a oscurecer con otros tonos más oscuros, luego de agregar los diferentes tonos de rosa y morado use una sombra brillante blanca y la agregué en el inicio de mi ojo hasta el medio y la difumine con la sombra que había colocado anteriormente. Con una brocha delgada fui agregando los mismos tonos de rosa y morado debajo del final de mis ojos.
Once the face was ready I added some brown shadow to my eyebrows and cleaned the imperfections with foundation and sealed with pressed powder. Now I started to use the eye shadows first I made a semi circle on my eyelids with pink shadow and started to darken it with other darker shades, after adding the different shades of pink and purple I used a white shimmer shadow and added it at the beginning of my eye up to the middle and blended it with the shadow I had placed before. With a thin brush I added the same shades of pink and purple under the end of my eyes.
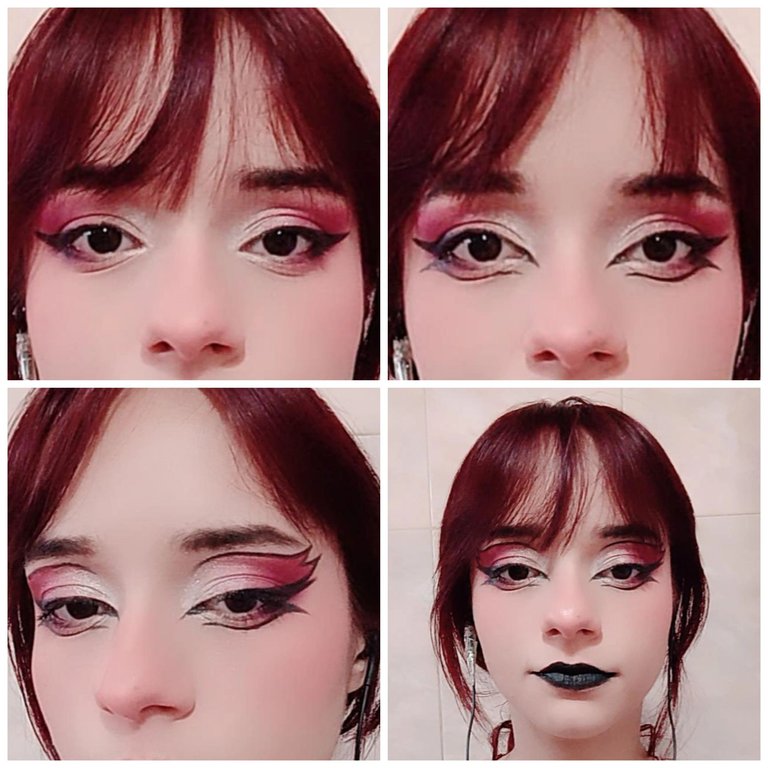
Ya teniendo la sombra de ojos lista comencé a delinear mis ojos con un delineador negro, hice un delineado delgado y como quería que tuviera un toque alternativo agregué unos picos en el inicio de mis ojos con el mismo delineador y luego comencé a hacer el delineado gráfico que son las líneas debajo de mis ojos que se juntan con la parte de abajo de mi delineado y dos picos con una curva hacia el centro de mi ojo encima del delineado principal. Está parte fue un poco complicada ya que quería que ambos lados quedarán iguales pero después de varios intentos pude lograrlo, al tener listo el delineado gráfico le agregué sombra negra para que se notara mejor el negro y luego me pinte los labios con un labial negro y selle con sombra negra.
Once I had the eye shadow ready I started to outline my eyes with a black eyeliner, I made a thin eyeliner and as I wanted it to have an alternative touch I added some peaks at the beginning of my eyes with the same eyeliner and then I started to make the graphic eyeliner which are the lines under my eyes that meet the bottom of my eyeliner and two peaks with a curve towards the center of my eye above the main eyeliner. This part was a little tricky since I wanted both sides to be the same but after several attempts I was able to achieve it, when I had the graphic eyeliner ready I added black shadow to make the black more noticeable and then I painted my lips with a black lipstick and sealed with black shadow.
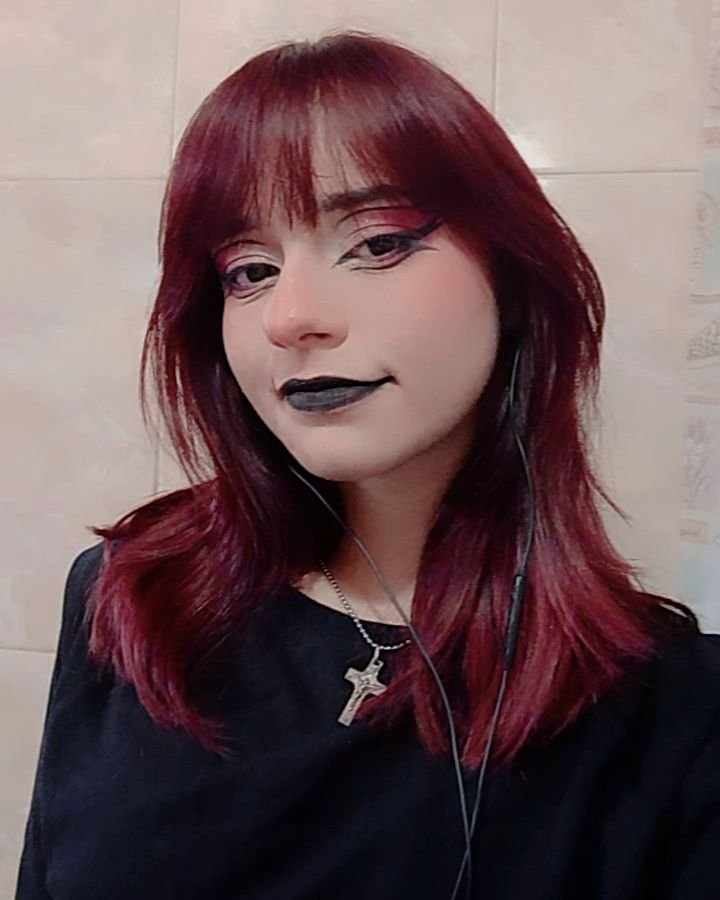
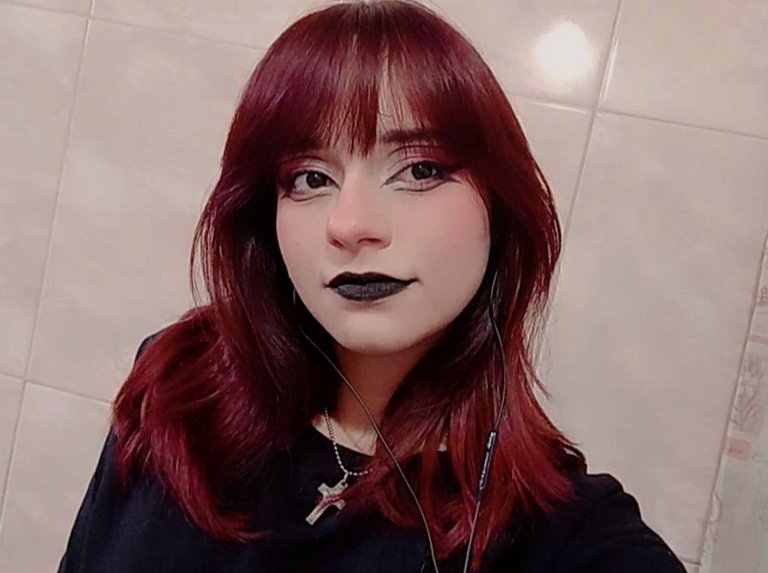
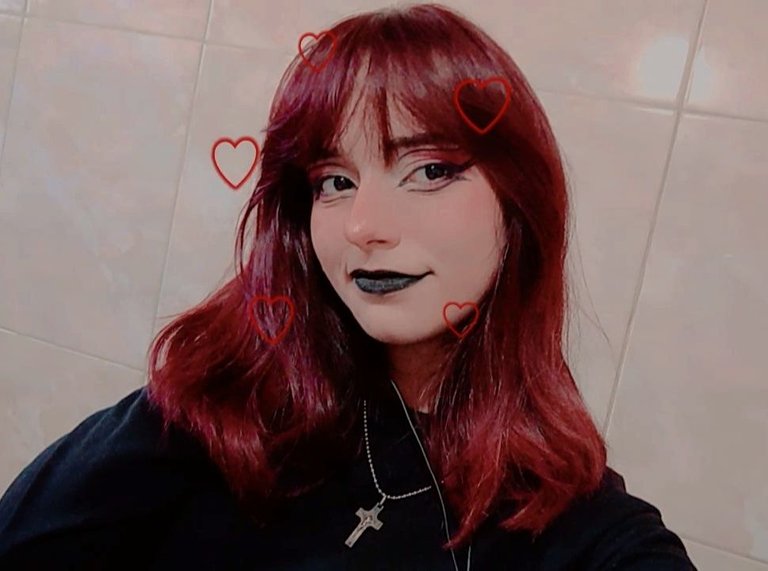
Este es el resultado del maquillaje, agregué más detalles al maquillaje los cuales son el rubor en polvo en un tono rosado y un poco de iluminador en el puente y el centro de mi nariz. Amé el resultado del maquillaje aunque me tardará un poco en terminarlo, este será mi maquillaje para pasar año nuevo con mi familia mañana, decidí hacerlo hoy para asegurarme de que mi idea estuviera bien ejecutada y que el resultado fuera bonito y no muy exagerado y así fue, me encantó también agregar el labial negro ya que siento que le da un toque oscuro al maquillaje y me encanta. Espero les haya gustado el proceso de este maquillaje y deseo que pasen un lindo año nuevo junto a todos sus familiares, amigos o sus mascotas. Gracias por llegar hasta aquí y por leerme, nos vemos pronto ❤️✨
This is the result of the makeup, I added more details to the makeup which are the powder blush in a pink tone and a little bit of highlighter on the bridge and the center of my nose. I loved the result of the makeup although it will take me a little while to finish it, this will be my makeup to spend new year with my family tomorrow, I decided to do it today to make sure that my idea was well executed and that the result was nice and not too exaggerated and so it was, I also loved adding the black lipstick as I feel it gives a dark touch to the makeup and I love it. I hope you liked the process of this makeup and I hope you have a nice new year with all your family, friends or pets. Thanks for making it this far and for reading me, see you soon ❤️✨

Realicé la traducción en:
https://www.deepl.com/es/translator
Todas las imágenes son de mi autoría. | All the photos are my property.
Imágenes editadas con PicsArt y Polarr. | Images edited by PicsArt and Polarr.
0
0
0.000
I love this look! I'm into Goth and Emo and Dark Wave music, and I like the style of people who are into these things. The black lipstick and black outfit with the silver cross are very cool. Your eye makeup is very creative. Great job! :)
Thank you very much! I really like that style but I don't do it often so this was a great practice and with the research I discovered a lot of new things. Thank you for reading me and for your support! ^^
!LOL
Posted using Hive Images
lolztoken.com
Prism, it's a light sentence.
Credit: reddit
@gabsartbook, I sent you an $LOLZ on behalf of hivephoto
(6/10)
NEW: Join LOLZ's Daily Earn and Burn Contest and win $LOLZ
Congratulations @gabsartbook! You have completed the following achievement on the Hive blockchain And have been rewarded with New badge(s)
Your next payout target is 4000 HP.
The unit is Hive Power equivalent because post and comment rewards can be split into HP and HBD
You can view your badges on your board and compare yourself to others in the Ranking
If you no longer want to receive notifications, reply to this comment with the word
STOPCheck out our last posts: