Bambalina FELIZ CUMPLEAÑOS.....Esp-Eng
Saludos a mis amigos aquí en esta comunidad como les digo abejitas o arañitas por ser tan laboriosas, unas hacen miel, las otras tejen y nosotros hacemos muchas cosas.
Ahora en esta ocasión les comparto como hice unas bambalinas de Feliz Cumpleaños, pero digamos como especial y personalizada, muy diferente a las que vemos por ahi en donde venden los articulos para fiestas.
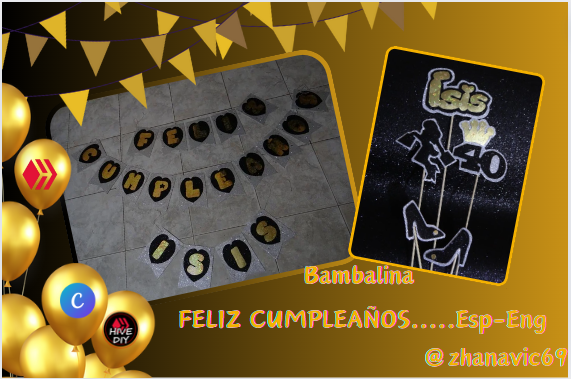
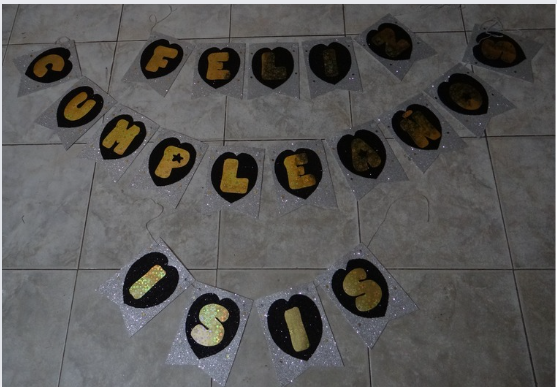
Esta fue para una bella amiga llamada ISIS, que queria su bambalina, estas son para todas las personas sin importar la edad y genero, son parte de las decoraciones, conociendola a ella como es de muy tierna, se la hice asi.
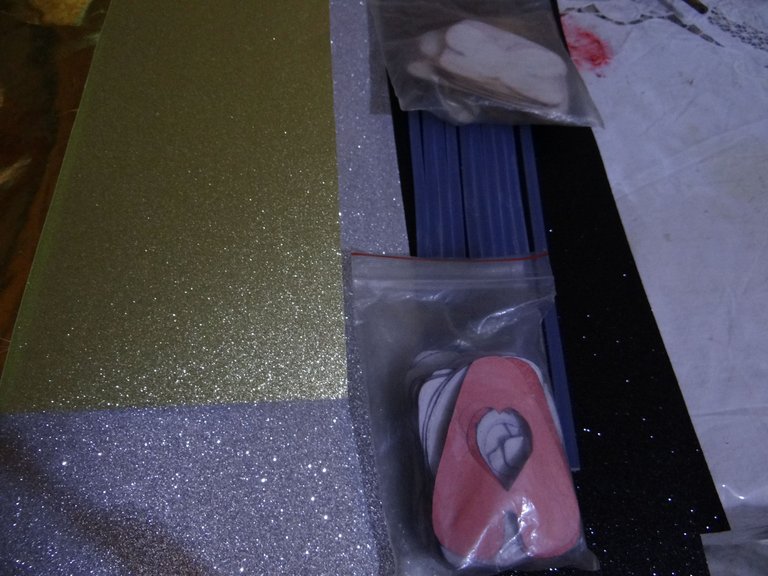
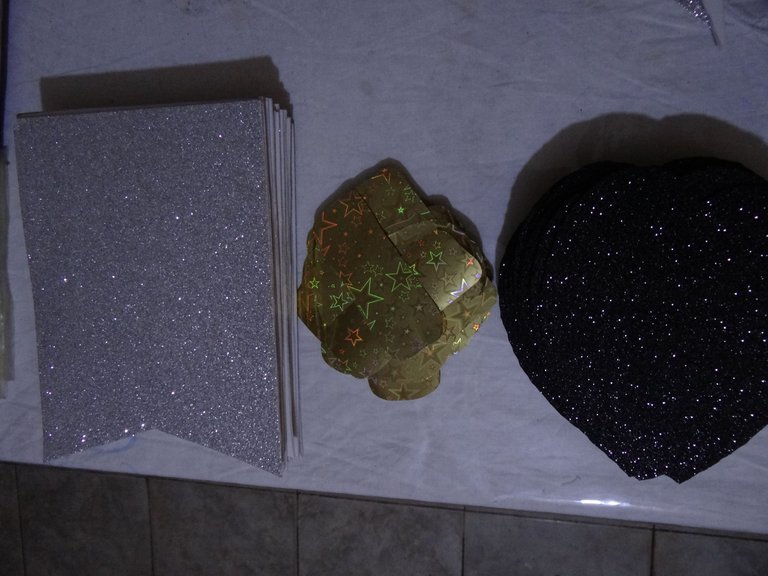
Materiales:
Primero que la pidio en colores Negro, dorado y plateado.
-Foami escarchado negro y plateado.
-Cartulina dorada.
-Hilo pabilo.
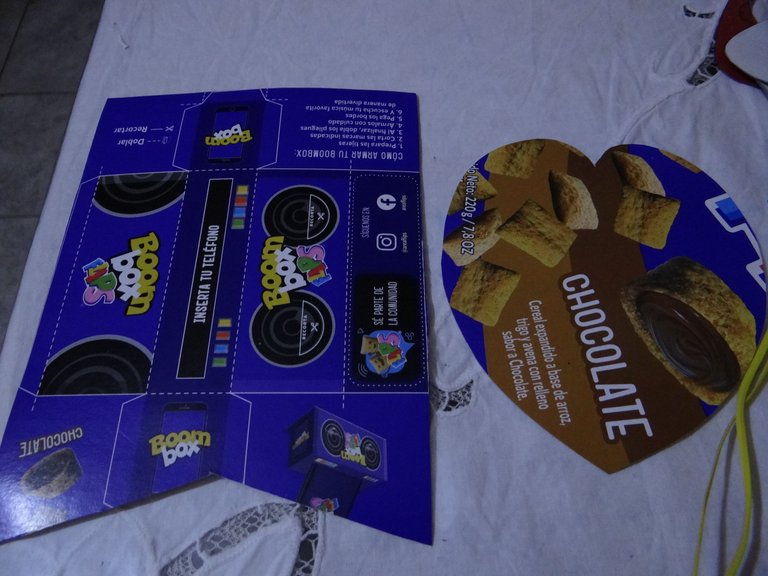
-Cajas de cereal para los patrones.
-Pistola y barras de silicon.
-Lapiz, tijera, regla.
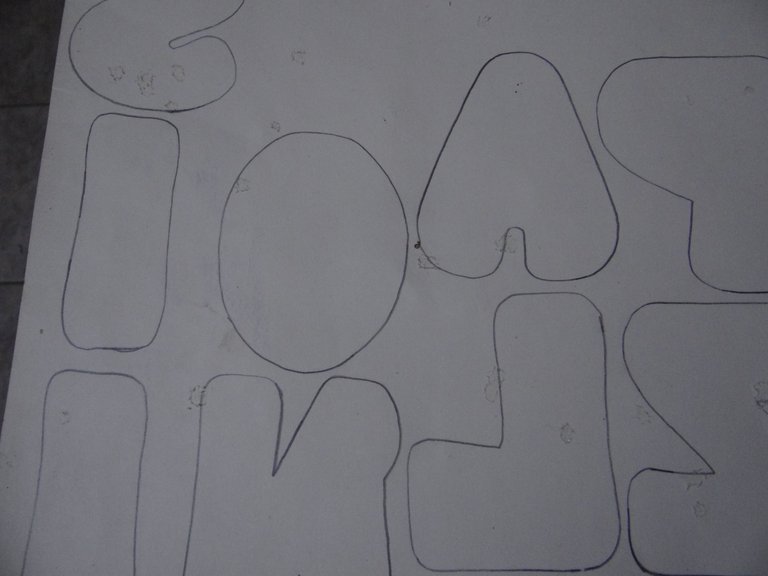
-Moldes de letras.
Manos a la obra:
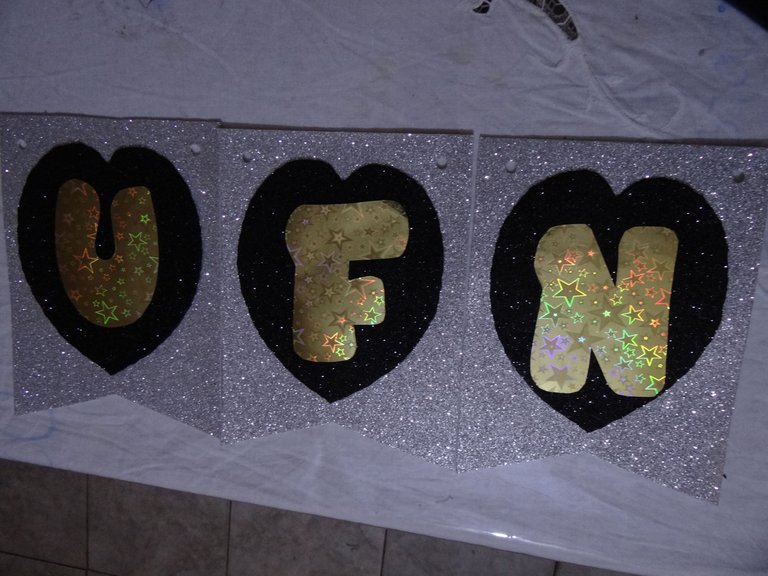
1.- La bambalina se compone de tres partes, la base, luego una segunda parte que es para contrarrestar y la ultima es para la letra.
2.- Para la base corte primero como un rectangulo de 20 x 25 cms, que luego en una de sus partes hago un corte como la parte baja de las felchas como en V pero inversa. Para esta parte fue el foami plateado.

3.- Para la parte del medio, quise hacerlo de corazon, asi que busque un modelo en la internet ya que hay muchos, queria que fuera algo grande donde va le letra luego, pero que tambien quedara centrada en la base, que se notara el contraste de colores. Aqui use el foami negro
4.- Para las letras como tengo varios moldes, use uno que quedara bien en el corazon ni muy grande ni muy pequeño, para ellos use la cartulina dorada.
5.- Ya teniendo todos los patrones listos, los pase a los foamis y cartulinas siempre estos al reves como las letras que al recortar quedan como debe ser al derecho.
6.- Tengo todas las piezas recortadas, para empezar a pegar, todo con silicon caliente, cuidado de no quemarse.
7.- Termine de pegar todas las piezas, ahora armar la bambalina, pero antes abrirle unos huequitos con la perforadora, a 1.5 cm pero en la parte base, por donde pasare luego el hilo pabilo.
8.- Asi ya quedo lista la bambalina, me encanto.
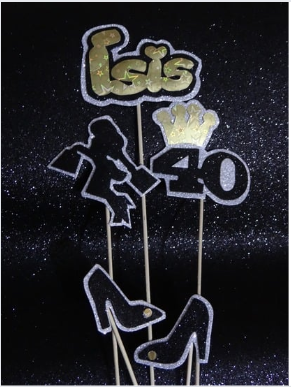
9.- De ñapa como dijeramos en nuestro criollo me dijo que le hicieras unos topper para la torta asi que les hice estos, todo con ese toque femenino.
Asi que ya saben tienen otra idea para hacer sus propias bambalinas, para sus fiestas en casa o se las encarguen.
Cuando hacemos las cosas con amor, porque nos gusta nos queda bien. Tambien que sea con tiempo, nunca me ha gustado hacer las cosas con poco tiempo, no es la idea, porque soy muy detallista o como dicen meticulosa con lo que hago, mas cuando se trata de las manualidades, que hay que cuidar eso los detalles.
Las fotos las tome con mi camara Sony mi fiel compañera para trabajos grandes.
La primera foto fue editada en Canva.
Contenido original y creativo.
Traduccion con la app DeepL.

Greetings to my friends here in this community as I call them bees or spiders for being so industrious, some make honey, others weave and we do many things.
Now this time I share with you how I made some Happy Birthday banners, but let's say as special and personalized, very different from the ones we see out there where they sell party supplies.
This was for a beautiful friend called ISIS, who wanted her own bambalina, these are for all people regardless of age and gender, they are part of the decorations, knowing her as she is very tender, I made it for her like this.
Materials:
First she asked for it in Black, gold and silver colors.
-Black and silver frosted Foami.
-Gold cardboard.
-Wicker thread.
-Cereal boxes for the patterns.
-Silicone gun and sticks.
-Pencil, scissors, ruler.
-Letter molds.
Let's get down to work: 1.
1.- The scenery consists of three parts, the base, then a second part that is to counterbalance and the last one is for the letter.
2.- For the base I first cut a rectangle of 20 x 25 cms, and then in one of its parts I made a cut like the lower part of the felchas like a V but inverted. For this part was the silver foami.
3.- For the middle part, I wanted to make it as a heart, so I looked for a model on the internet because there are many, I wanted it to be something big where the letter goes later, but also to be centered on the base, so that the contrast of colors would be noticed. Here I used the black foami
4.- For the letters as I have several molds, I used one that would fit well in the heart, neither too big nor too small, for them I used the gold cardboard.
5.- Once I had all the patterns ready, I transferred them to the foamis and cardboard, always these to the reverse as the letters that when I cut out are as it should be to the right.
6.- I have all the pieces cut out, to start gluing, all with hot silicone, careful not to burn yourself.
7.-Finish gluing all the pieces, now assemble the bambalina, but first open some holes with the perforator, at 1.5 cm but in the base, where I will then pass the wick thread.
8.- This is how the backdrop is ready, I love it.
9.- As a bonus as we say in our Creole she told me to make some cake toppers, so I made these, all with that feminine touch.
So now you know you have another idea to make your own backdrops, for your home parties or order them.
When we do things with love, because we like it, it looks good. I have never liked to do things with little time, it is not the idea, because I am very detailed or as they say meticulous with what I do, more when it comes to crafts, you have to take care of the details.
The photos were taken with my Sony camera, my faithful companion for big jobs.
The first photo was edited in Canva.
Original and creative content.
Translation with the app DeepL.(free version)

Me encanto tu propuesta del dia, es una gran idea para decorar nuestras fiestas con materiales que podemos conseguir facilmente, saludos,
https://x.com/hivediy47901/status/1814756910857662681
¡Felicidades! Esta publicación obtuvo upvote y fue compartido por @la-colmena, un proyecto de Curación Manual para la comunidad hispana de Hive que cuenta con el respaldo de @curie.
Si te gusta el trabajo que hacemos, te invitamos a darle tu voto a este comentario y a votar como testigo por La Colmena.
Si quieres saber más sobre nuestro proyecto, te invitamos a acompañarnos en nuestro servidor de Discord.
Siempre me ha llamado la atención en como decoran las fiestas de cumpleaños haciendo bambalinas, son muy sorprendentes y llevan mucho trabajo, excelente manualidad!
Escrito por lionsaturbix / Written by lionsaturbix
¡¡¡Buen trabajo!!! Gracias por publicar tu excelente contenido en Hive Diy.
Te quedo bellisima la bambalina para celebrar tu cumpleaños amiga @zhanavic69
Te cuento que me paso como el refran: CASA DE HERRERO, CUCHILLO DE PALO, esa no era para mi, cumpli y no me hice ninguna no estaba de animos asi como para hacer mucgas cosas, pero si comparti una torta con mi mama, mis hijos, aqui en mi casa, tal vez el año proximo haga una jejeje