Turkish Eye Bracelet [ENG][ESP]
Hello, hello happy and blessed Tuesday to all my hivers friends and especially to all those artisans who make life in this wonderful blockchain.
Hola, hola feliz y bendecido día
jueves tengas todos mis hivers amigos y en especial a todos aquellos artesanos que hacen vida en esta maravillosa blockchain.
Today I am going to show you how to make a beautiful macrame bracelet with a Turkish Eye in Chinese thread, and I will be using only the flat knot technique.
It is a very easy technique to make and with which we can have very beautiful results.
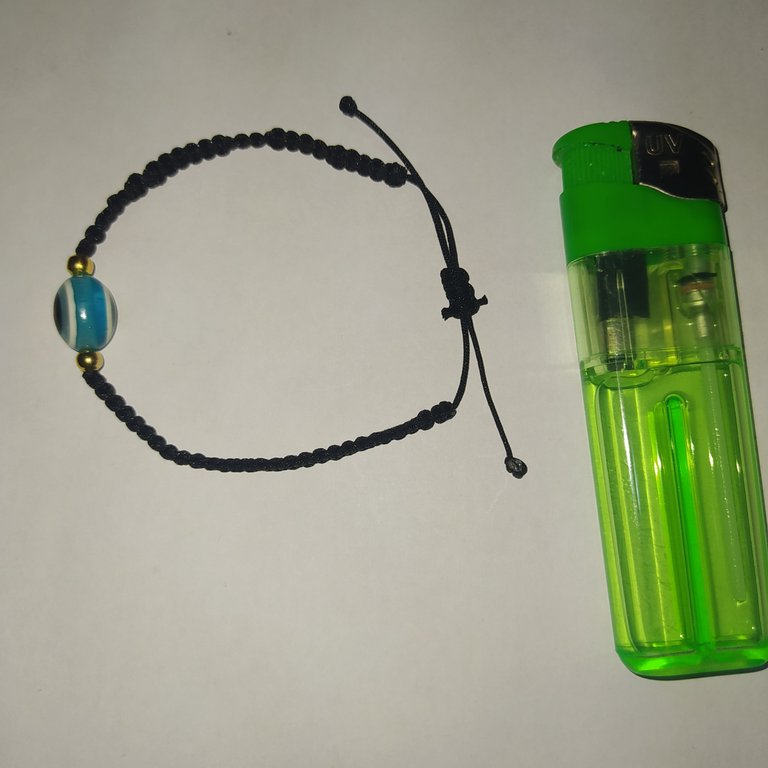
The materials I used are the following.
El día de hoy les voy a enseñar a realizar una linda Pulsera en macramé con un Ojo Turco en hilo chino,y estaré empleando solamente la técnica del nudo plano.
Es una técnica muy fácil de realizar y con la cual podemos tener resultado muy hermosos.
Los materiales que utilice son los siguientes.
Materiales / Materials
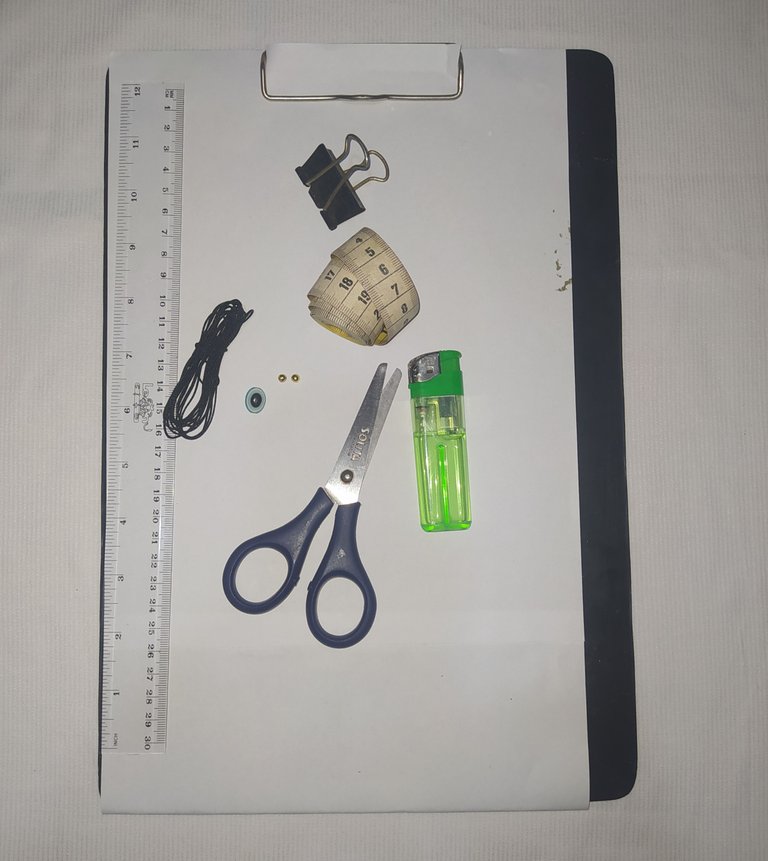
- 2.25 Metros de hilo chino negro.
- Ojo turco azul.
- 2 Balines de ace
- Encendedor.
- Cinta métrica.
- Regla.
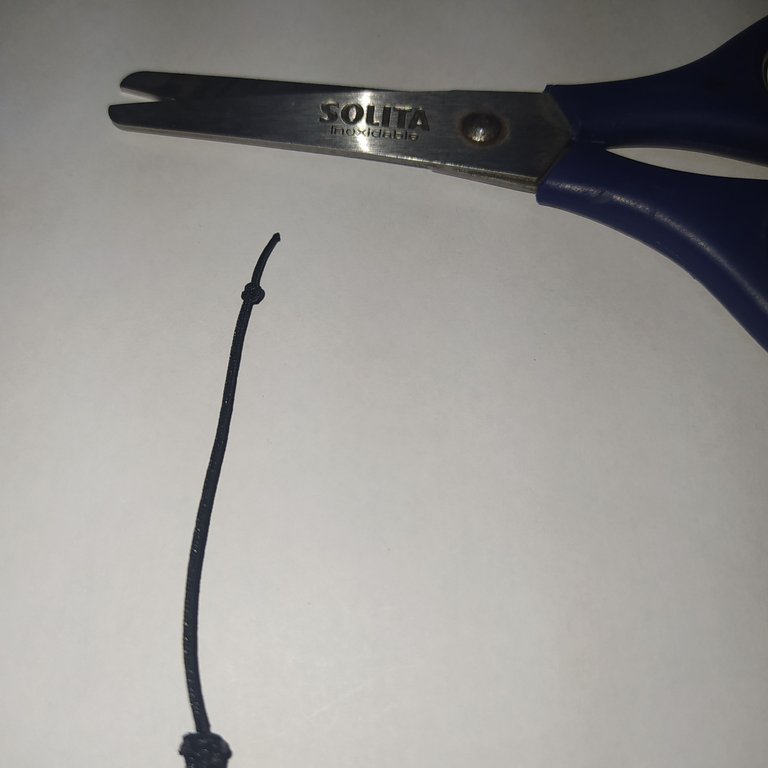
- Tijera.
- Pinzas.
- Tabla.
- 2.25 Meters of black Chinese thread.
- Blue Turkish eye.
- 2 ace pellets.
- Lighter.
- Tape measure.
- Ruler.
- Scissors.
- Tweezers.
- Board.
Step by step
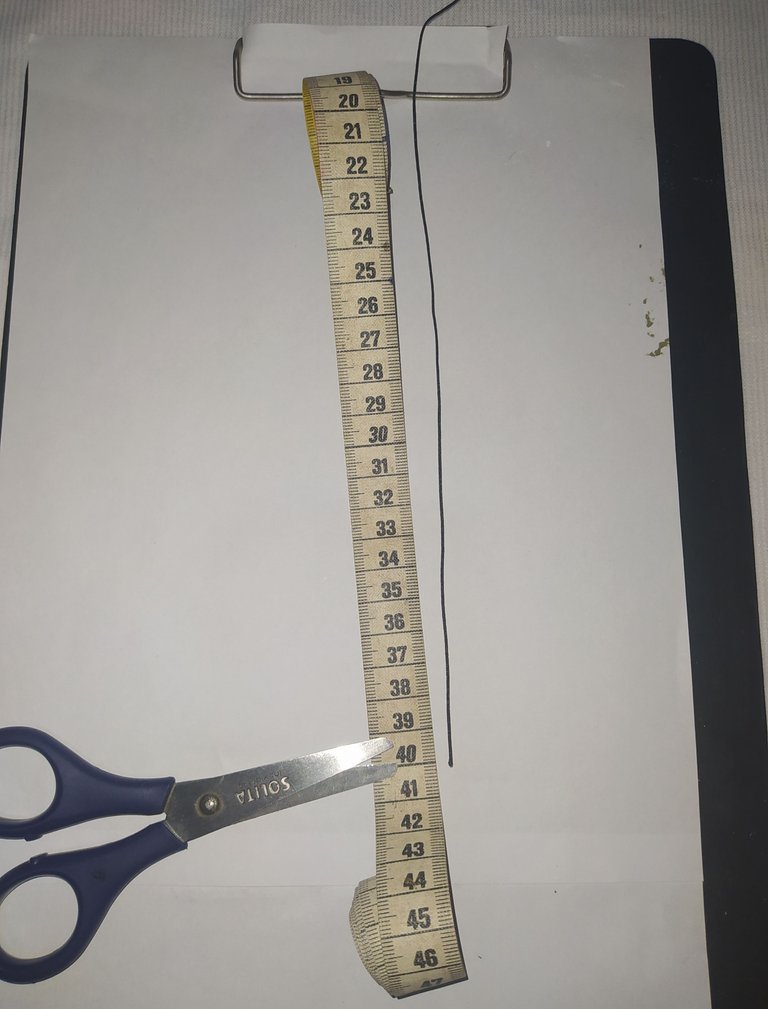
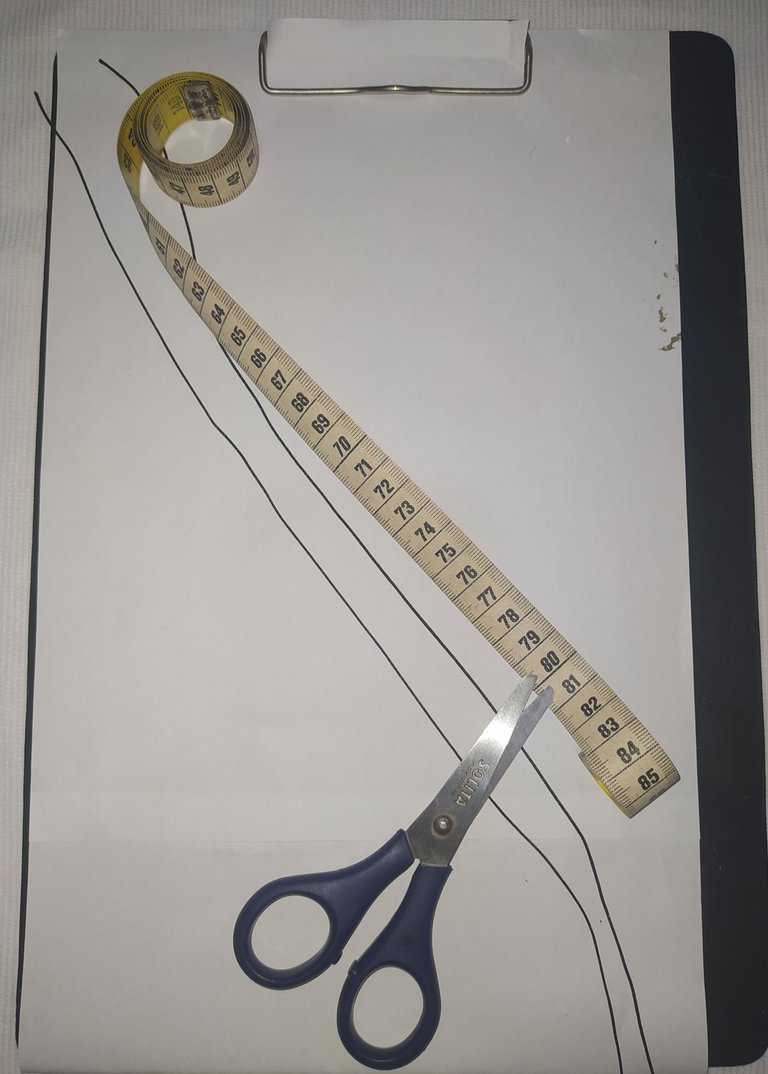
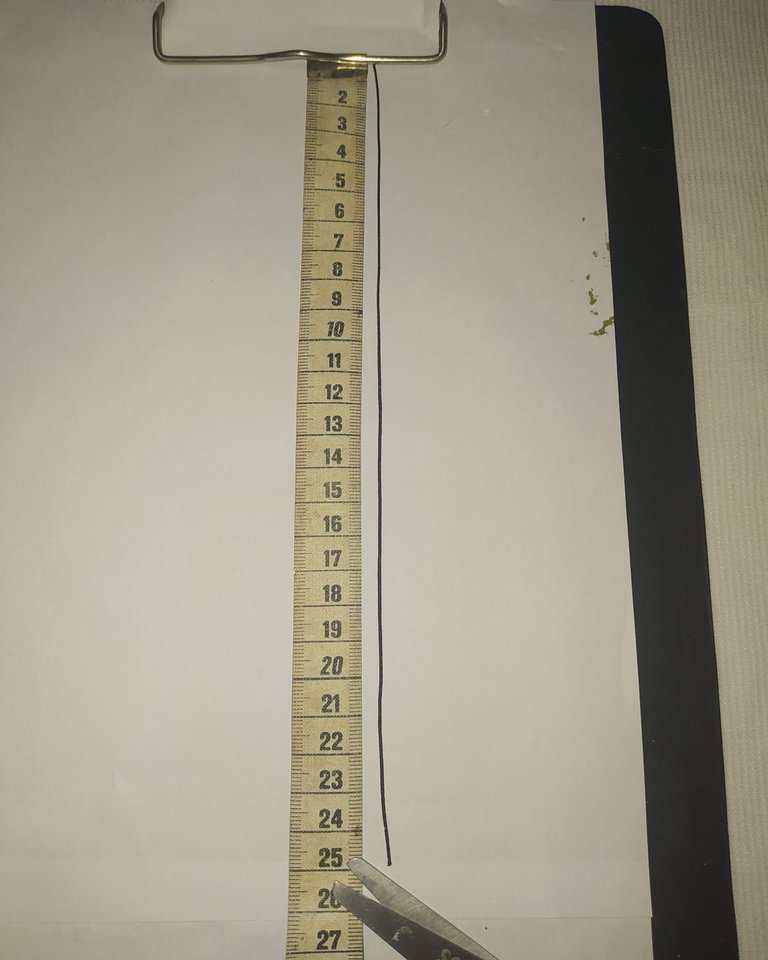
To make this bracelet the first thing we must do is to measure and cut the Chinese thread in several measures to achieve its beautiful result.
Paso a paso
Para realizar esta pulsera lo primero que debemos hacer es medir y cortar el hilo chino en varias medidas para lograr su hermoso resultado.
 |  |  |
|---|
Bracelet base.
- 40 Cm Chinese thread.
Bracelet body.
- 80 Cm Chinese thread two strips.
Bracelet clasp
- 25 cm Chinese thread
Base de la pulsera.
- 40 Cm hilo chino.
Cuerpo de la pulsera.
- 80 Cm de hilo chino dos tiras.
Cierre de la pulsera
- 25 Cm hilo chino.
 |  |
|---|
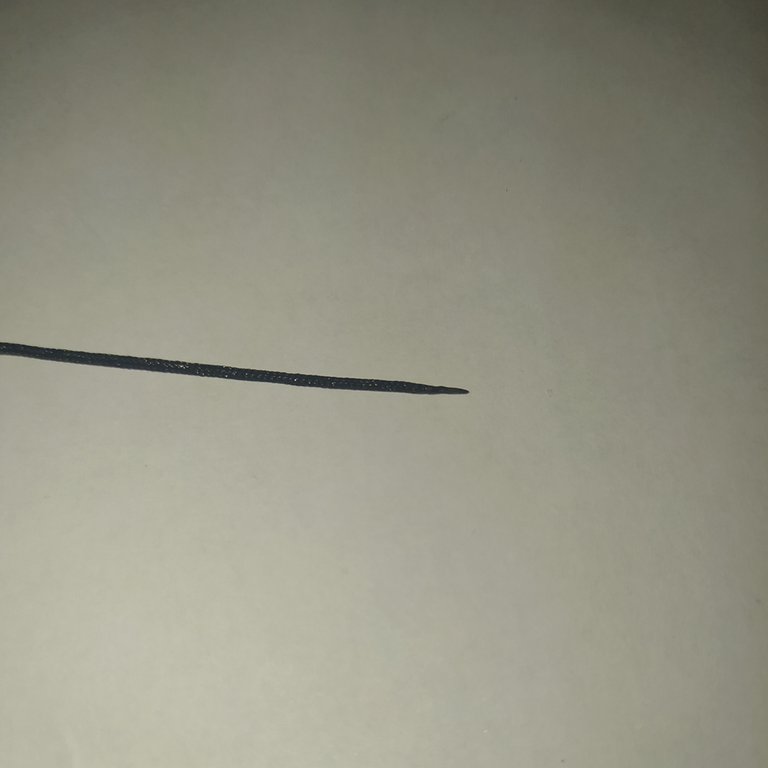
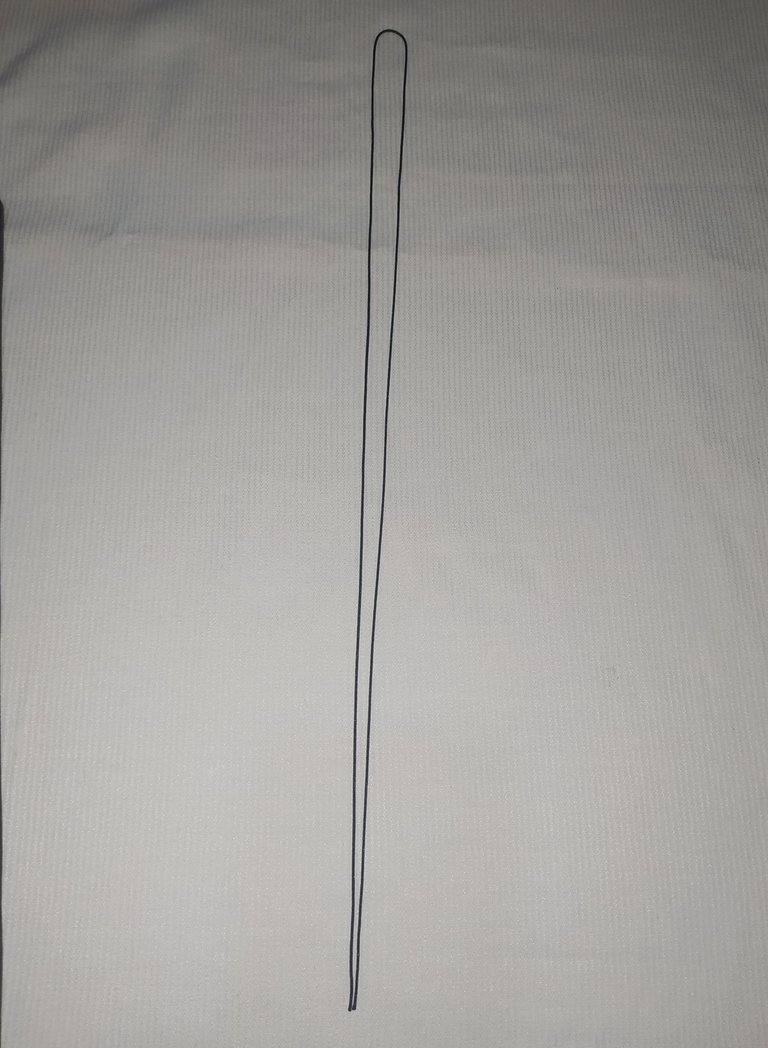
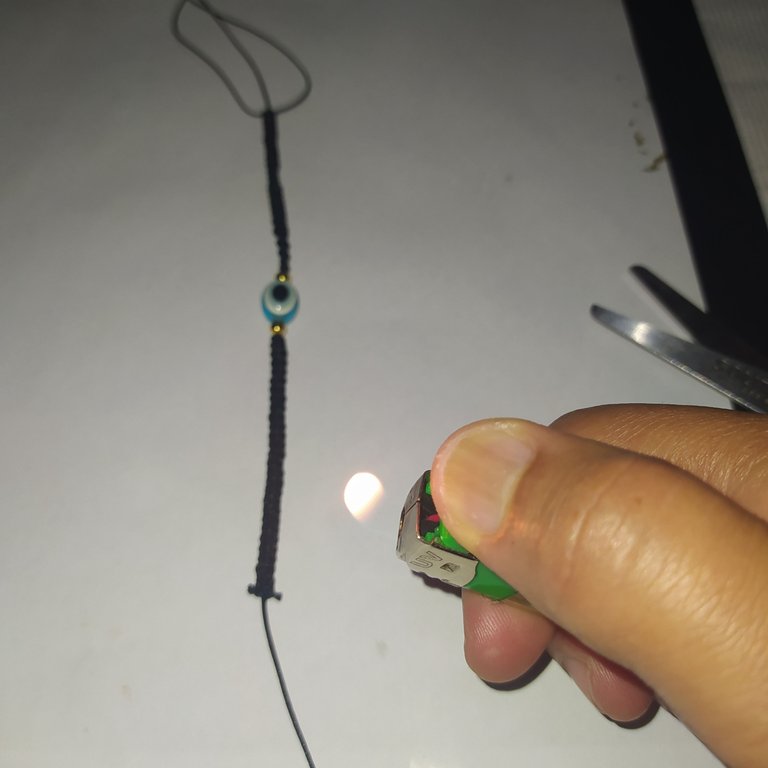
- We take the base thread (40 cm) and pass the tip through the tinder to thin it, giving a quick twist to the tip of the thread with our fingers.
- Tomamos el hilo base (40 cm) y pasamos la punta por el yesquero para adelgazarlo, dándole una vuelta rápida a la punta del hilo con los dedos.
 |  |  |
|---|
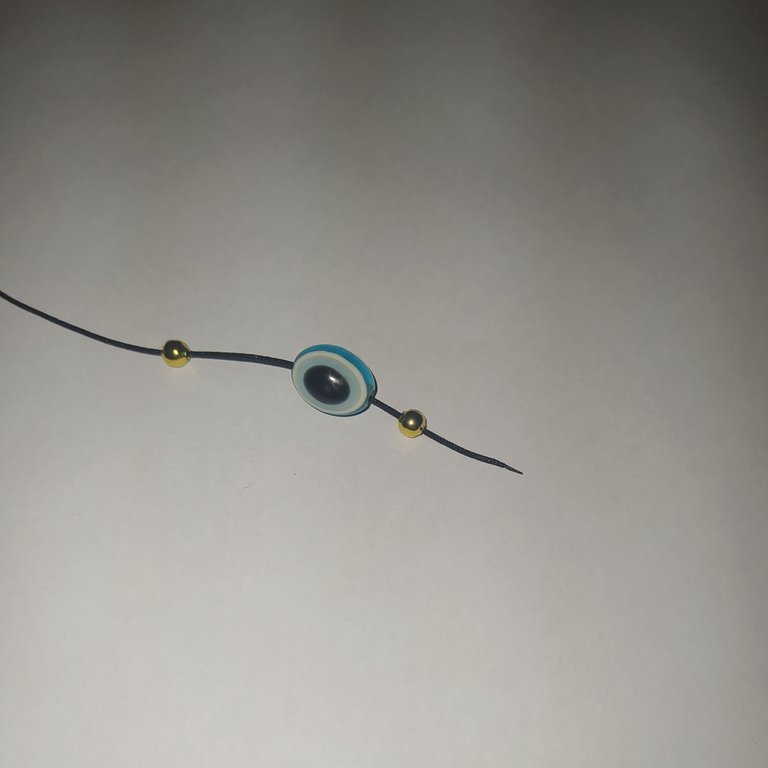
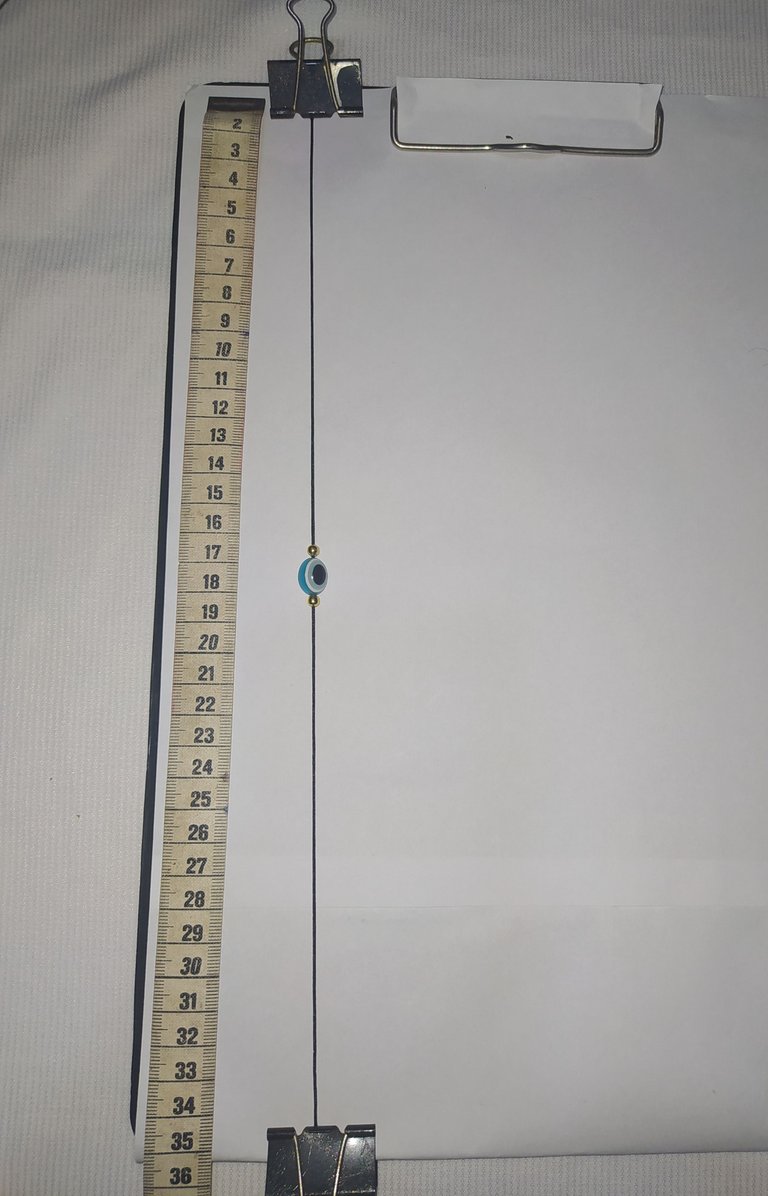
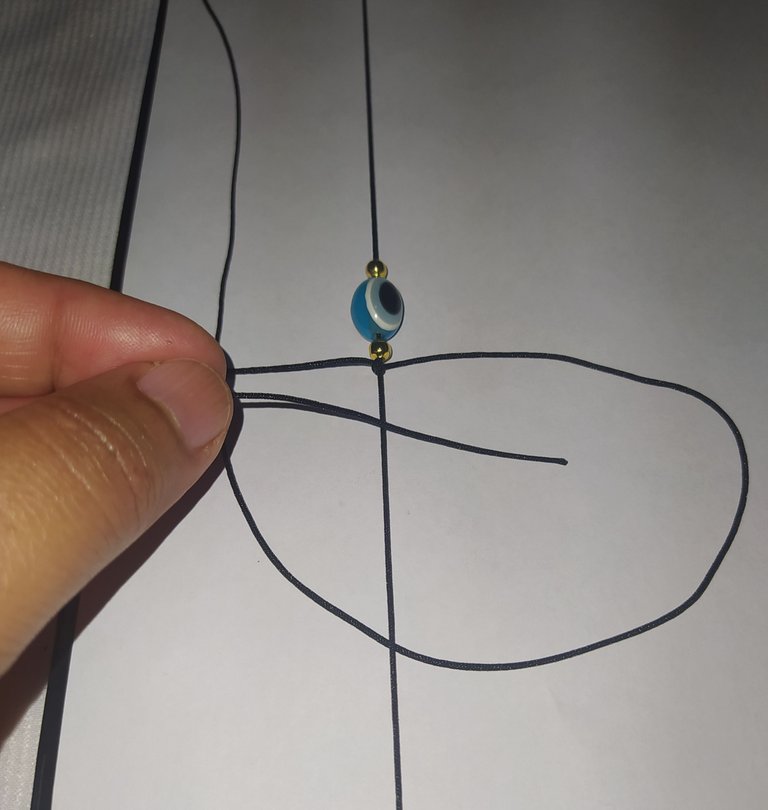
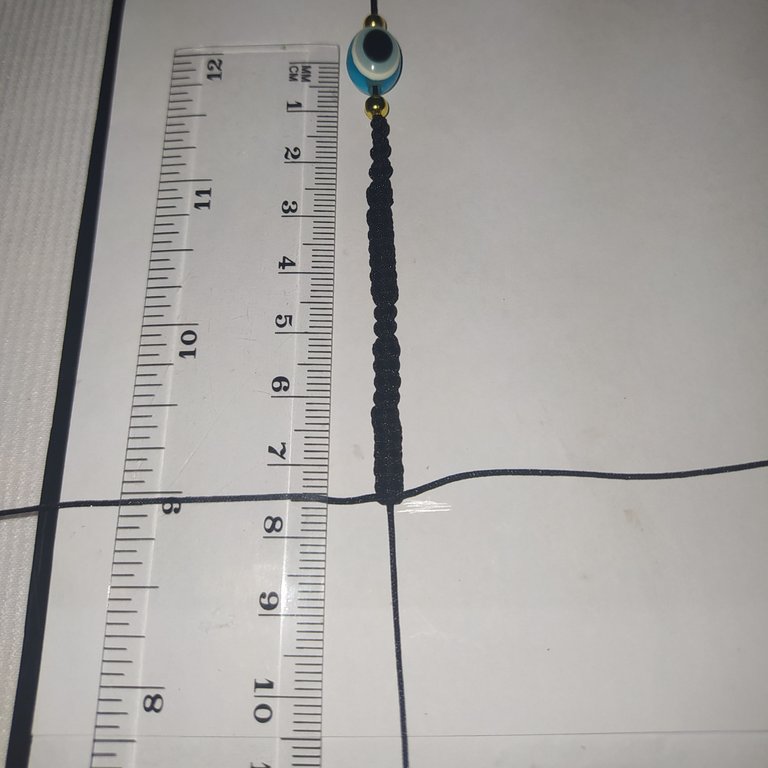
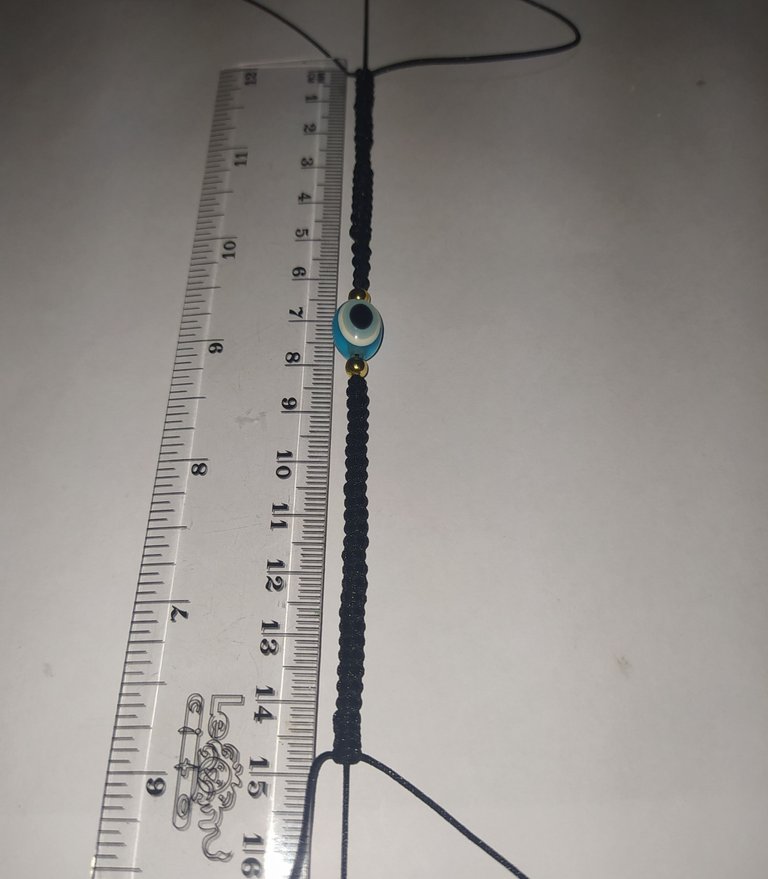
- Then we introduce one pellet, the Turkish eye and the other pellet.
- We calibrate it by placing it in the center.
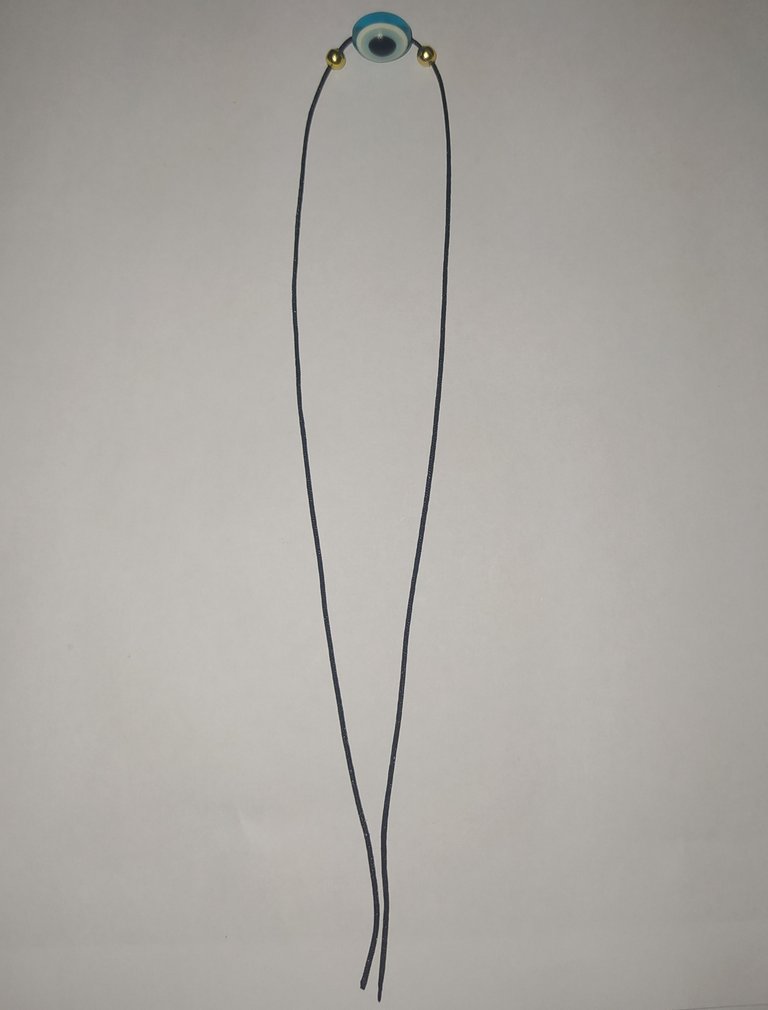
- We take it to the table, secure the tips with the tweezers and measure with the ruler to mark the middle of the bracelet.
- Luego introducimos un balín, el ojo turco y el otro balín.
- Lo calibramos colocándolo en el centro.
- Lo llevamos a la tabla aseguramos las puntas con las pinzas y medimos con la regla para marcar la mitad de la pulsera.
 |  |
|---|
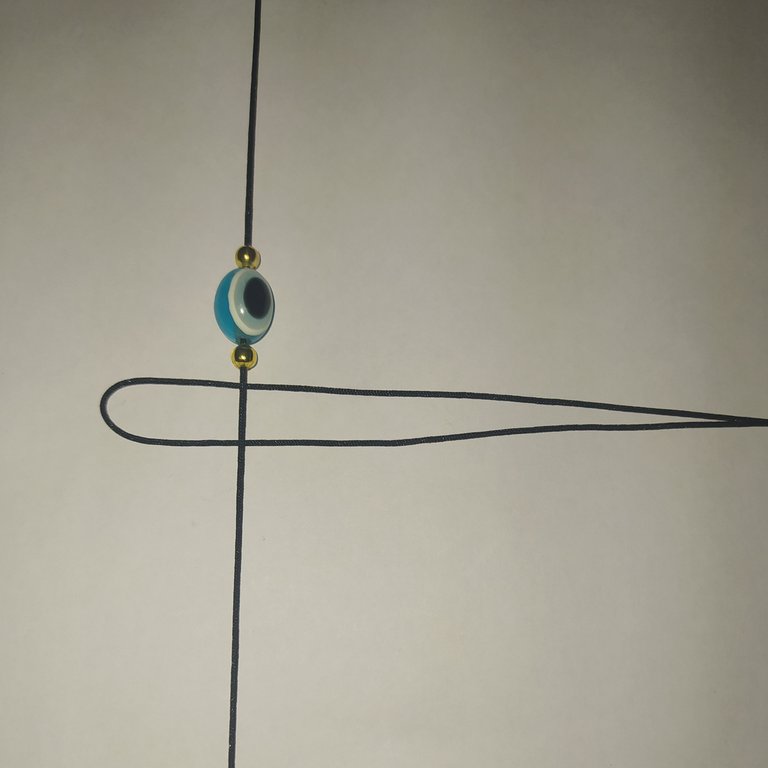
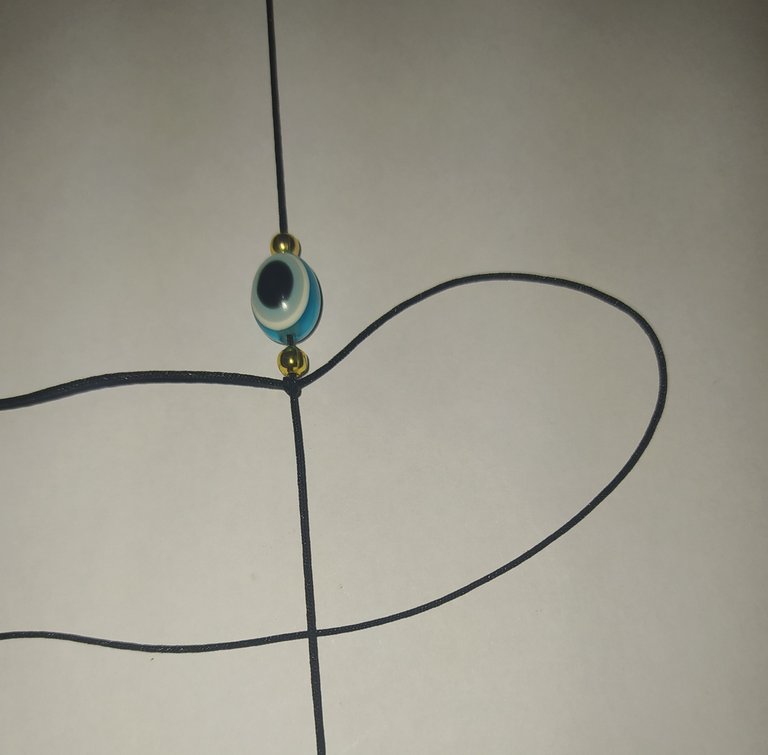
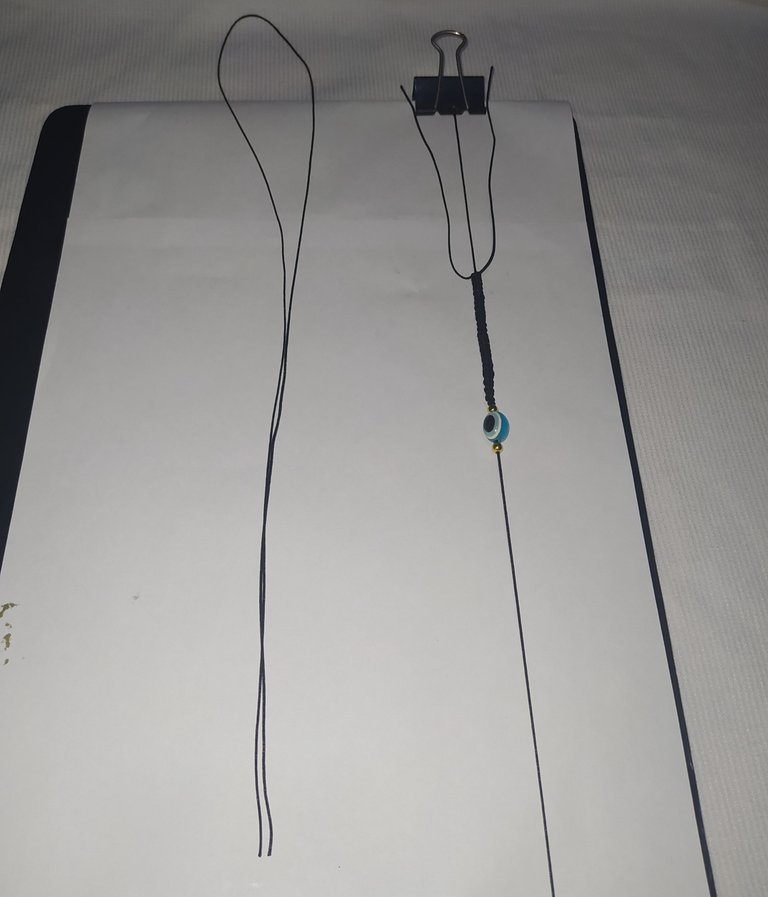
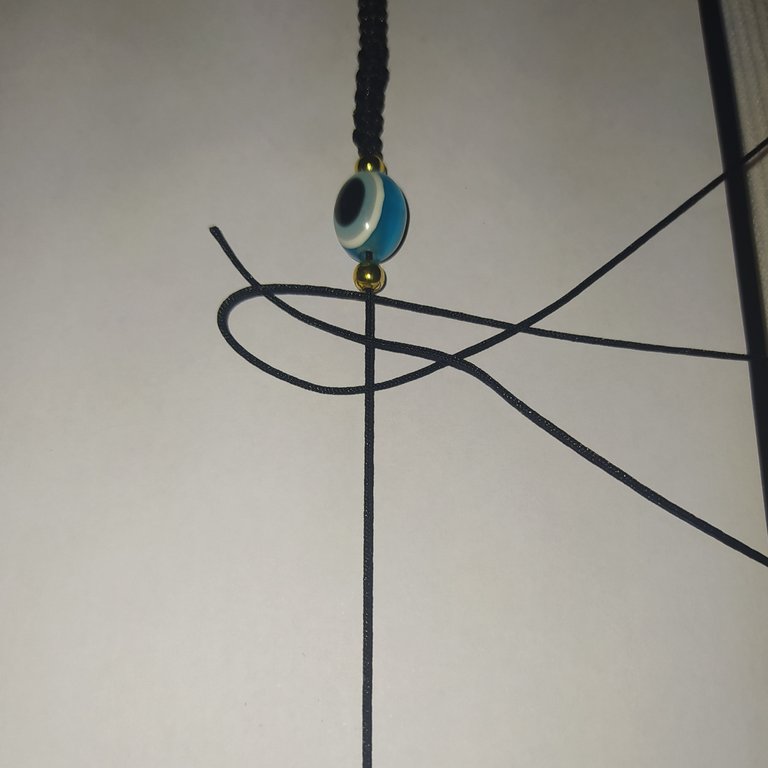
- We take one of the threads of the body of the bracelet (80cm) and fold it in half.
- Then we place it underneath the body thread.
- Tomamos uno de los hilos del cuerpo de la pulsera (80cm) doblamos por la mitad.
- Luego lo colocamos por debajo del hilo del cuerpo.
 |  |
|---|
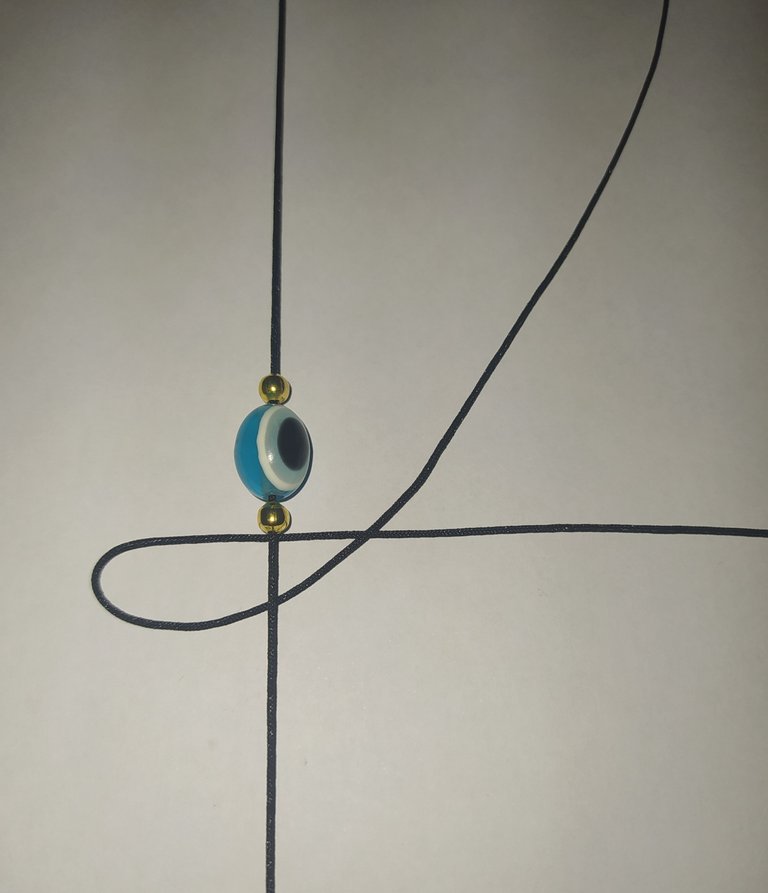
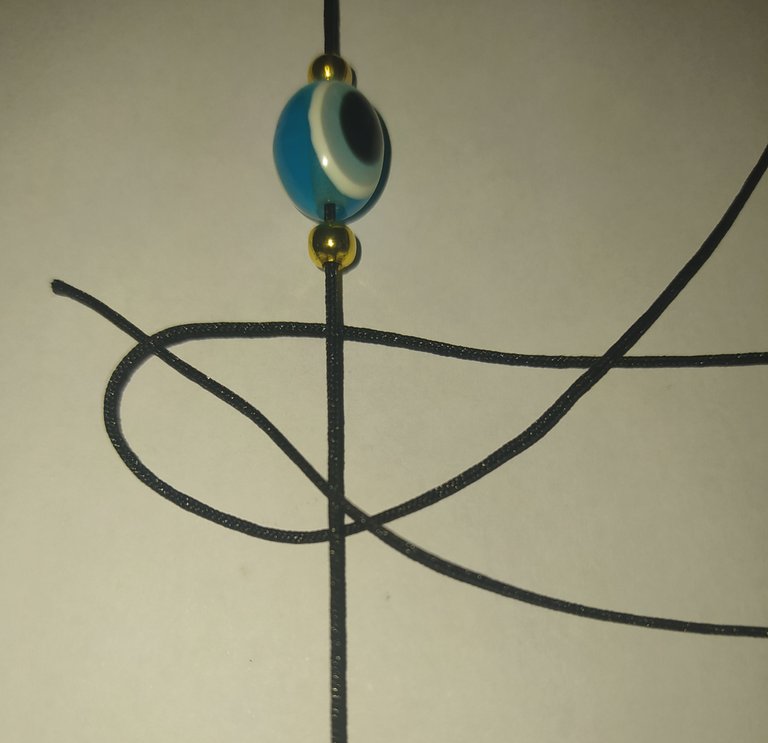
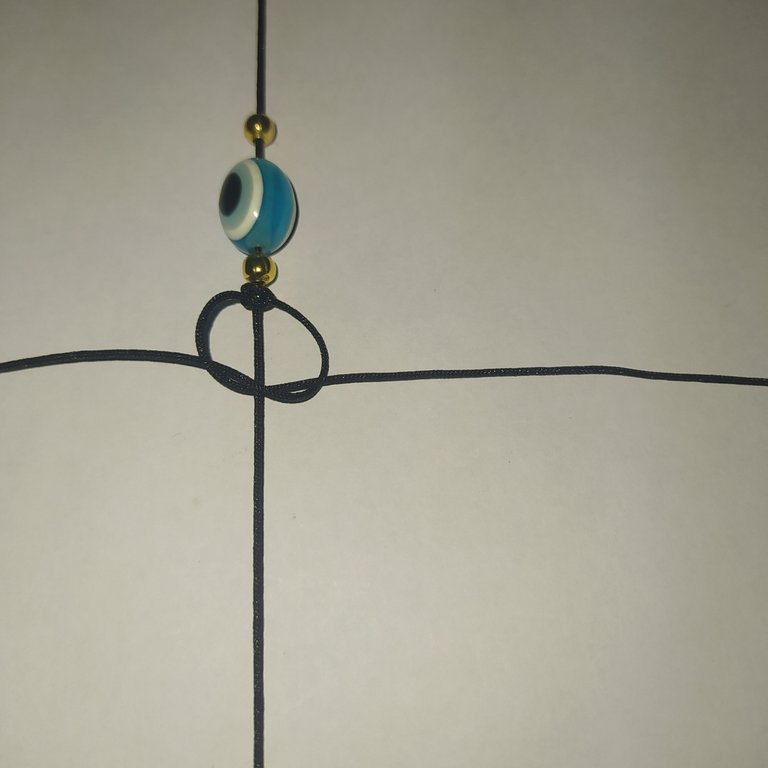
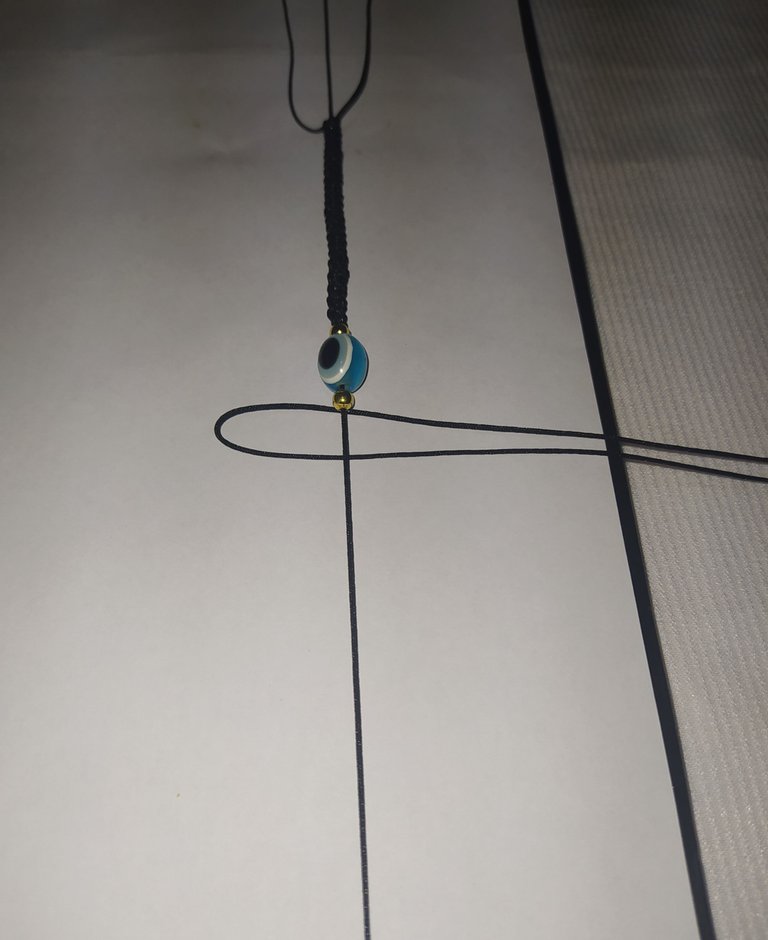
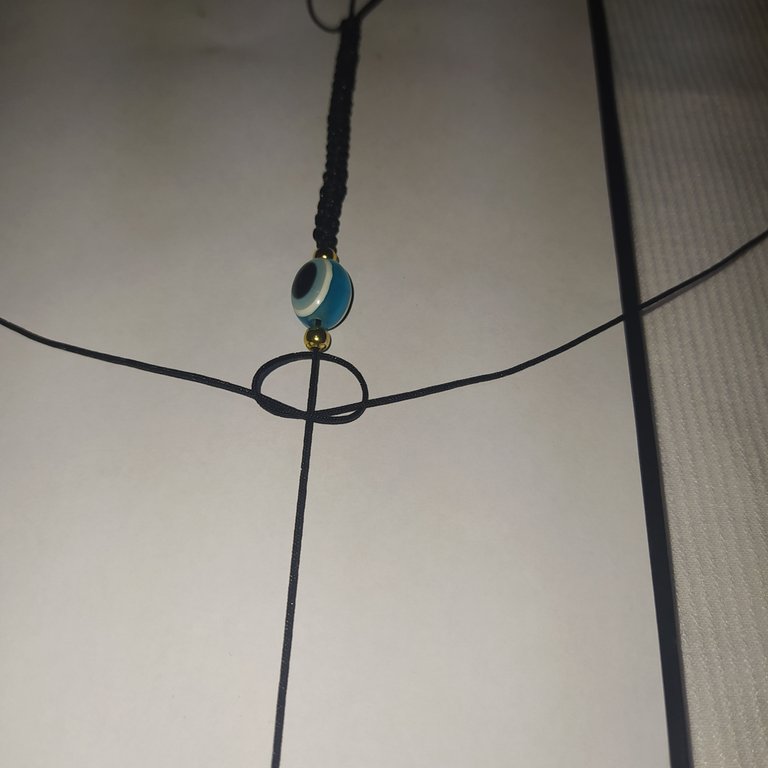
- We take the end of the yarn from the bottom and pass it over the top yarn.
- We make a little ear on the left side as our in the picture.
- Then we take the tip of the top yarn and pass it over the base yarn.
- Then we introduce it through the center of the ear.
- Tomamos la punta del hilo de la parte de abajo y lo pasamos por encima del hilo de arriba.
- Hacemos como una orejita del lado izquierdo como nuestro en la foto.
- Luego tomamos la punta del hilo de arriba y lo pasamos por encima del hilo base.
- Luego lo introducimos por el centro de la orejita.
 |  |
|---|
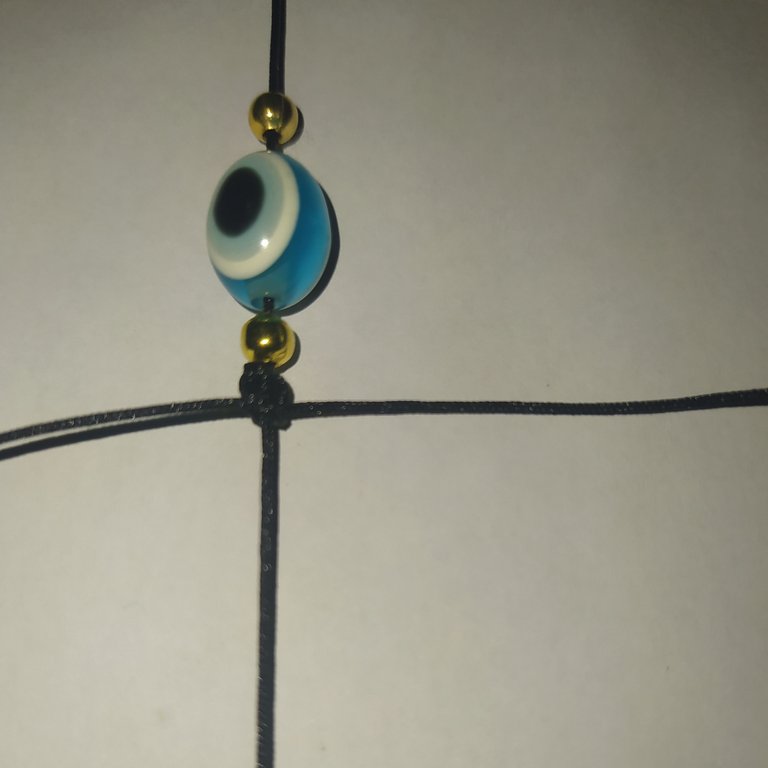
- Pull the two ends together and secure the first flat knot.
- Halamos las dos puntas y aseguramos el primer nudo plano.
 |  |
|---|
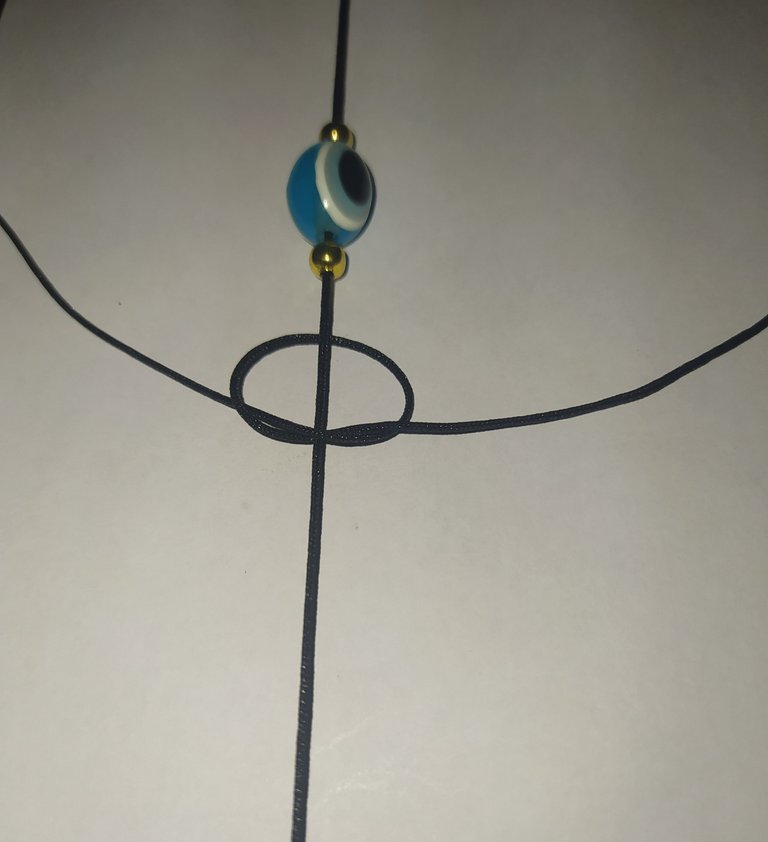
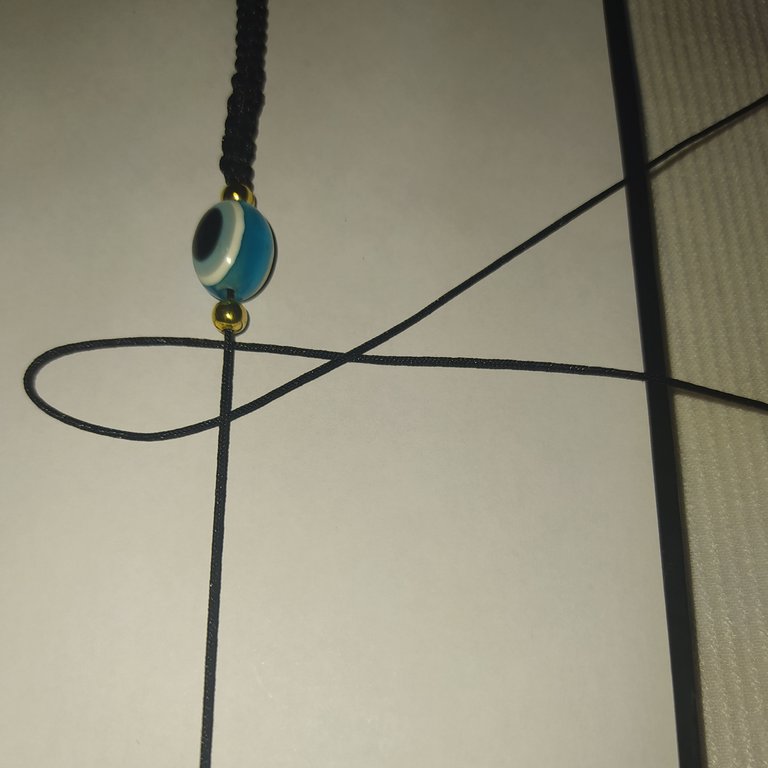
- Now we repeat the same step on the right side.
- We take the yarn from the right side and pass it under the base yarn and form a letter D on the right side.
- Then we pass it over the thread on the left side.
- Then we take the yarn on the left side and pass it over the base yarn, we introduce it through the center of the letter D, and we form a letter D, on the right side.
a D
- Ahora repetimos el mismo paso del lado derecho.
- Tomamos el hilo del lado derecho y lo pasamos por debajo del hilo base y formamos como una letra D, del lado derecho.
- pasamos por encima del hilo de la izquierda.
- Luego tomamos el hilo de la izquierda lo pasamos por encima del hilo base, introducimos por el centro de la letra D
 |  |
|---|
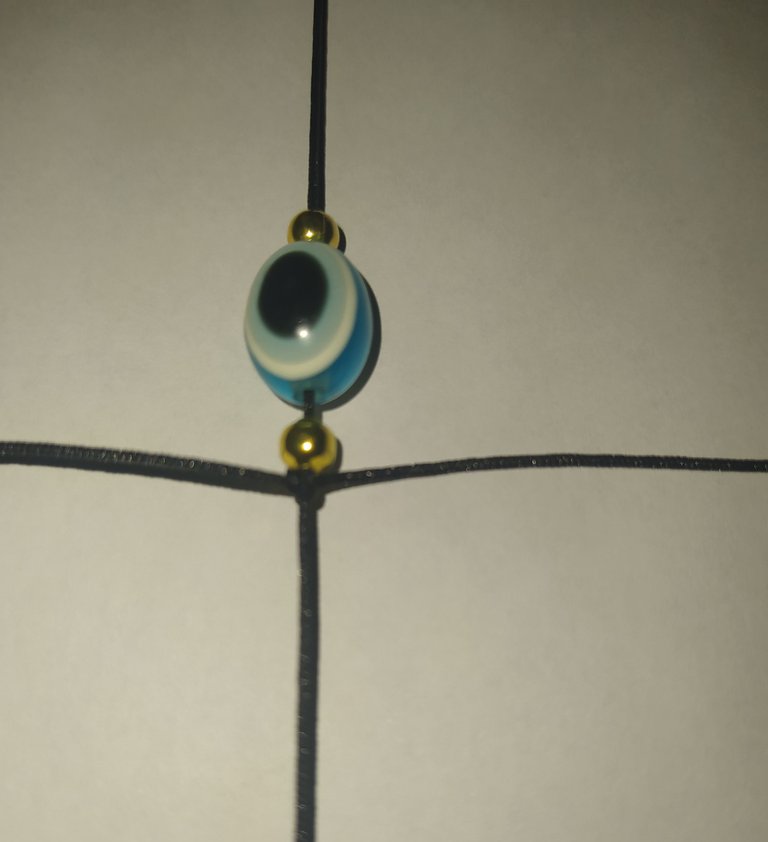
- We pull the two ends of the yarns and tie the knot.
- Halamos las dos puntas de los hilos y realizamos el nudo.
 |  |
|---|
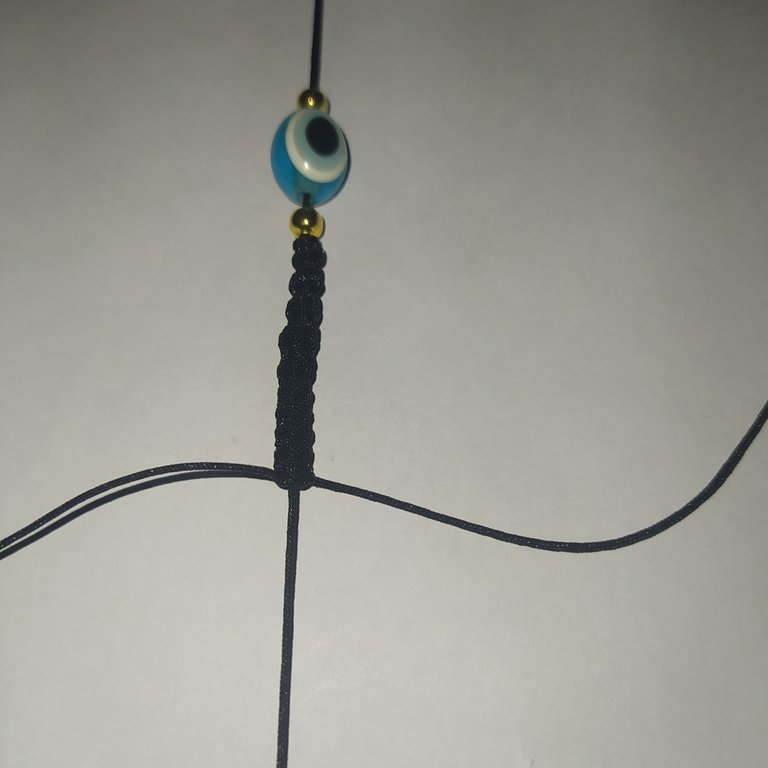
- We continue repeating the same process until we have woven half of the bracelet.
- We measure to make sure
- Seguimos repitiendo el mismo proceso hasta haber tejido la mitad de la pulsera.
- Medimos para asegurarnos.
- We turn the bracelet on the other side, we secure it on the board with the clamps, holding the base thread.
- Take the 80 cm thread and fold it in half.
- Le damos la vuelta a la pulsera por el otro lado, aseguramos en la tabla con las pinzas, sujetando el hilo base.
- Tomamos el hilo de 80 cm lo doblamos a la mitad.
 |  |
|---|
- We repeat the same technique that we have been doing with the flat knot, which I will explain again in case there is any doubt.
- We take the thread and fold it in half.
- We place it underneath the base thread.
- We take the thread of below and we pass it over the one of above.
- On the left side we sign it as an ear.
- Repetimos la misma técnica que venimos realizando del nudo plano, la cual volveré a explicar por si hay alguna duda.
- Tomamos el hilo lo doblamos a la mitad.
- Colocamos por debajo del hilo base.
- Tomamos el hilo de abajo y lo pasamos por encima del de arriba.
- Del lado izquierdo se firma como una oreja.
 |  |
|---|
- We take the thread at the top and pass it over the base thread and introduce it through the center of the ear.
- Pull both ends and form the first knot.
- Tomamos el hilo que está en la parte de arriba y lo pasamos por encima del hilo base e introducimos por el centro de la orejita.
- Halamos ambas puntas y formamos el primer nudo.

- We continue weaving until both sides of the bracelet are finished.
- Seguimos tejiendo hasta haber terminado ambos lados de la pulsera
- After weaving is finished, we measure the bracelet.
- Luego de haber terminado de tejer medimos la pulsera.
- We unravel the excess yarns.
- Revortamos los hilos excedentes.
 |  |
|---|
- With the tinder we burn the ends and glue with the same tinder to the bracelet to secure it.
- Con el yesquero quemamos las puntas y pegamos con el mismo yesquero a la pulsera para asegurarla.
 |  |
|---|
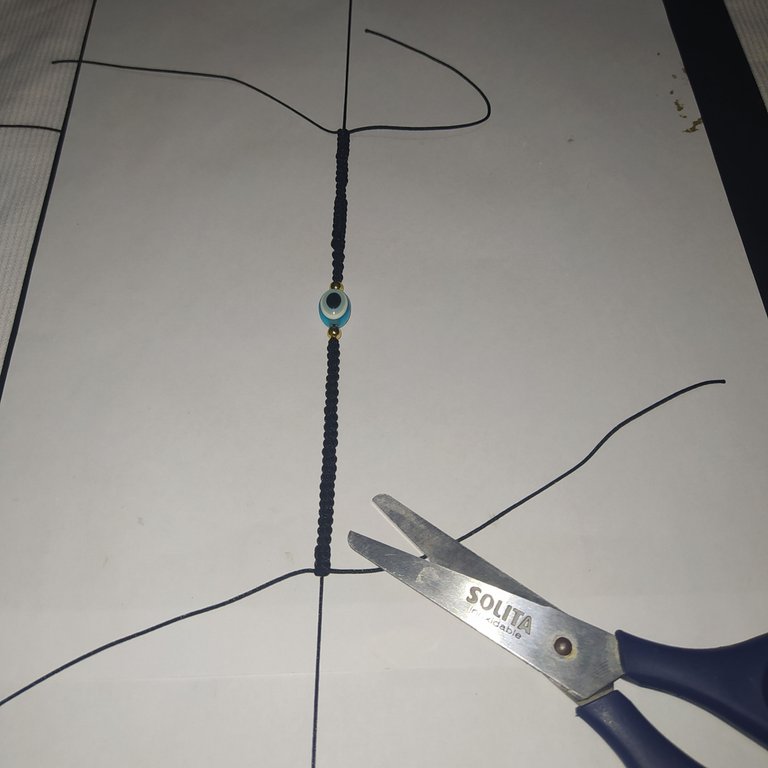
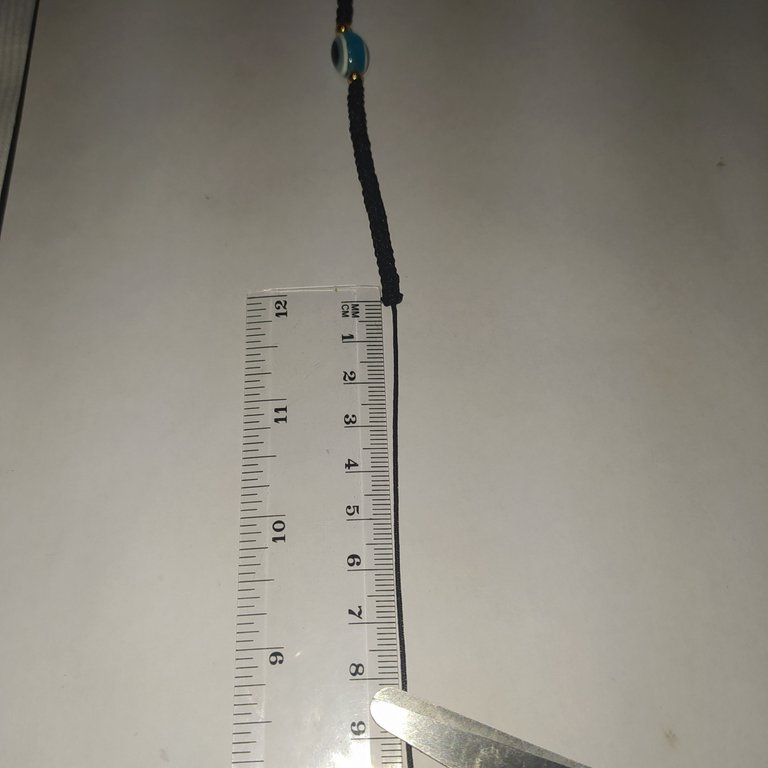
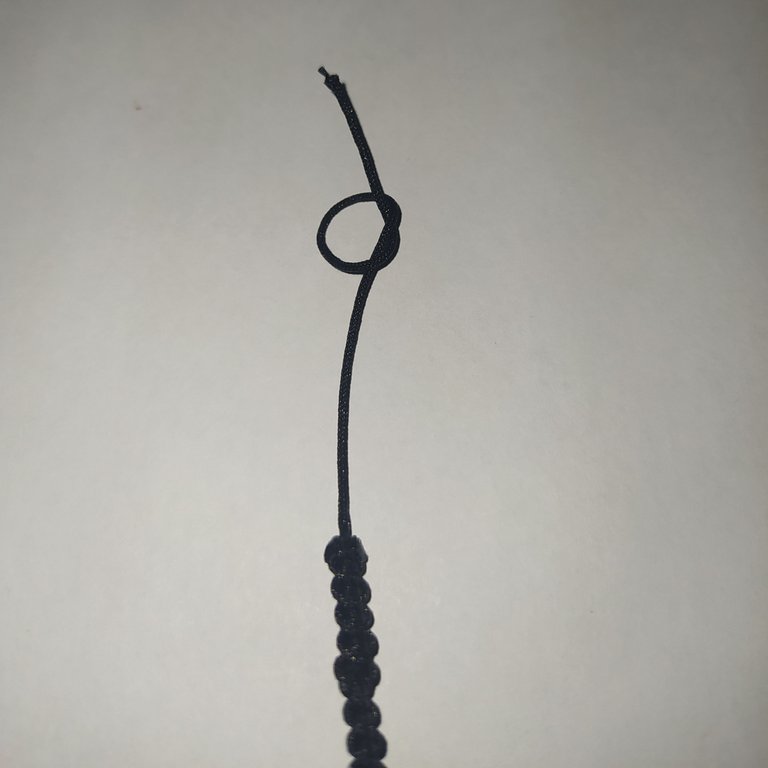
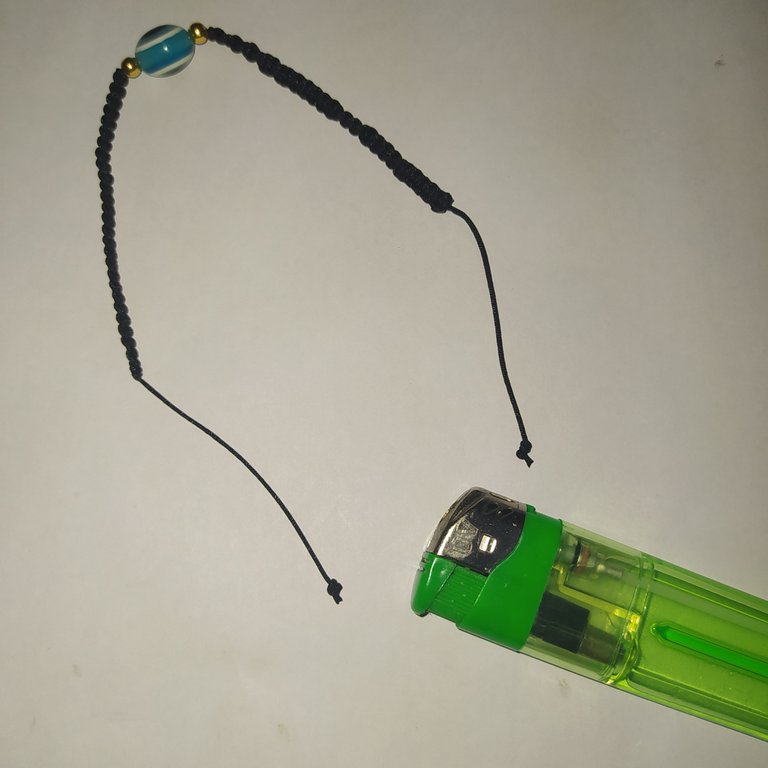
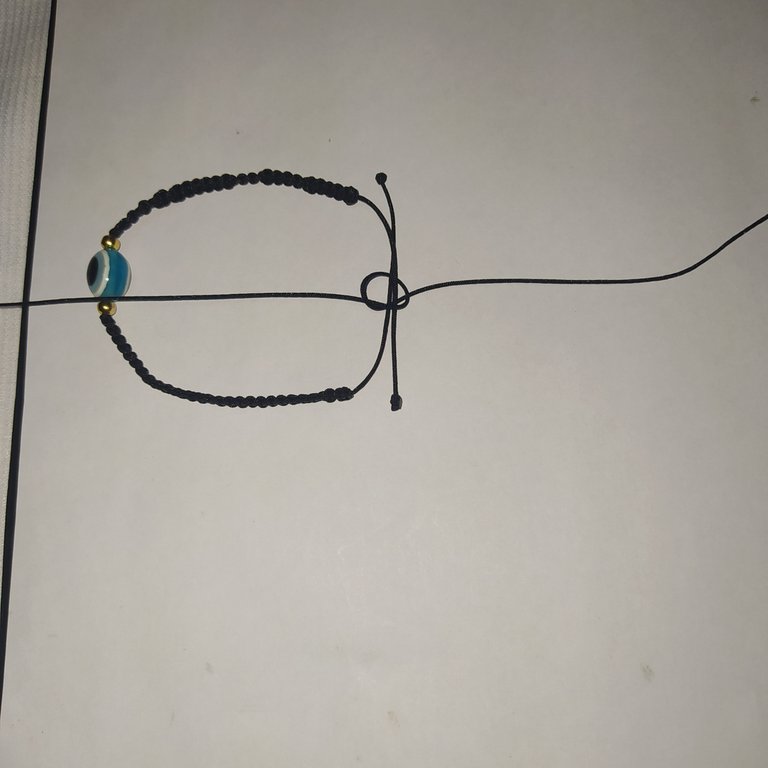
- On the base thread we measure 8 cm, as shown in the photo.
- We make a simple knot.
- En el hilo base medimos 8 cm, como muestro en la foto.
- realizamos un nudo sencillo.
 |  |
|---|
- We cut off the excess and burn with tinder
- Recortamos el excedente y quemamos con el yesquero.
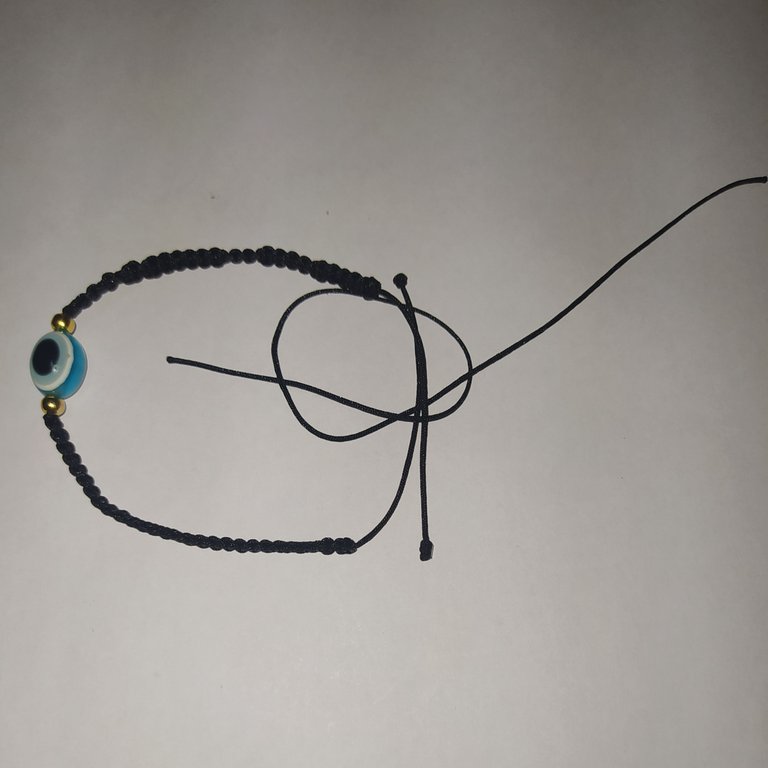
- We center the bracelet and align the threads where we are going to make the clasp.
- We will make a slip knot using the same technique as the flat knot.
- Centramos la pulsera y alineamos los hilos dónde vamos a realizar el cierre.
- Haremos un nudo corredizo aplicando la misma técnica del nudo plano.
 |  |
|---|
 |  |
|---|
 |  |  |
|---|
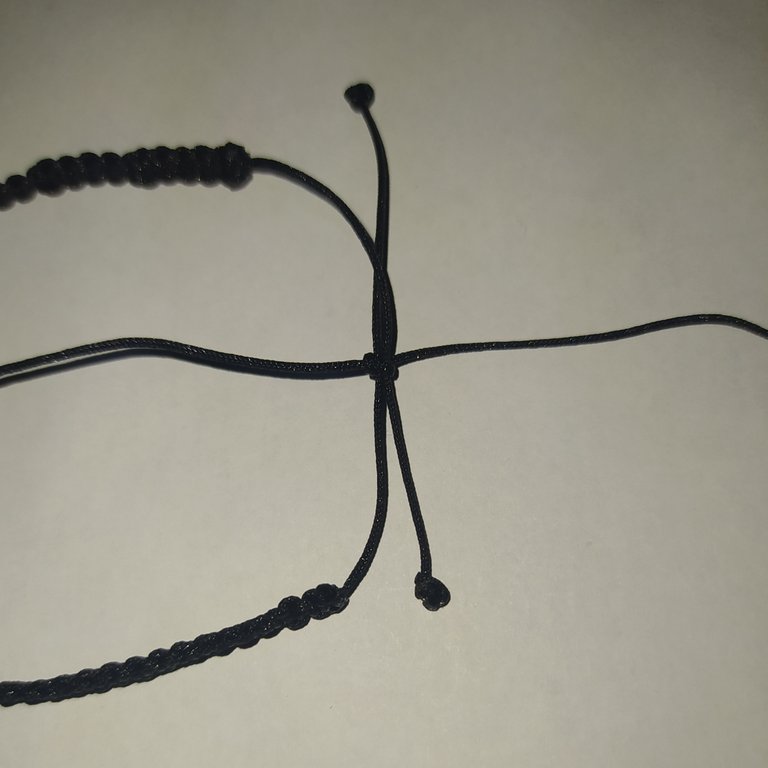
- We take the 25 cm of Chinese thread and we are going to use the flat knot technique that we have been using in the bracelet.
- Tomamos los 25 cm de hilo chino y vamos a emplear la técnica del nudo plano que venimos realizando en la pulsera.
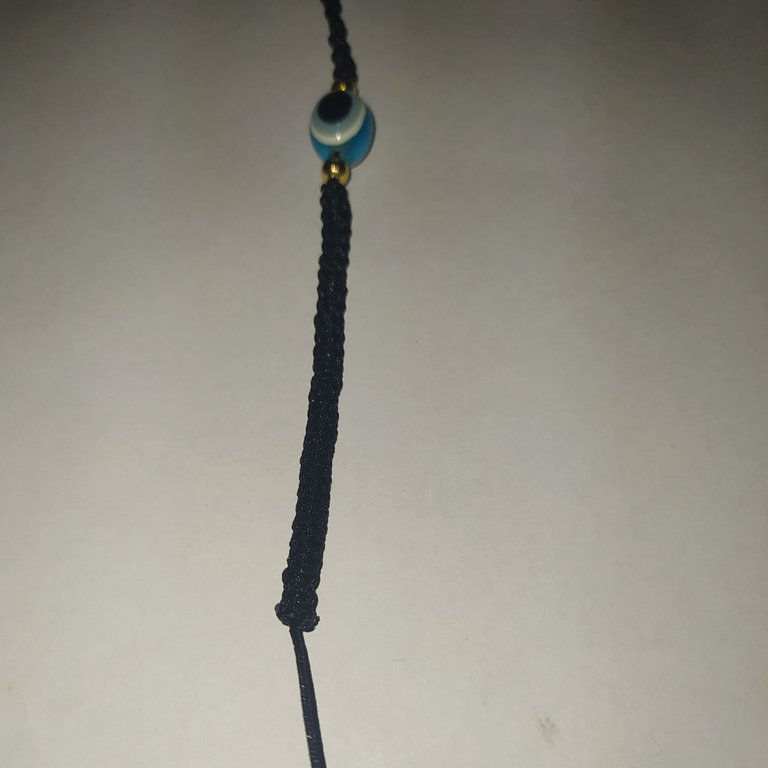
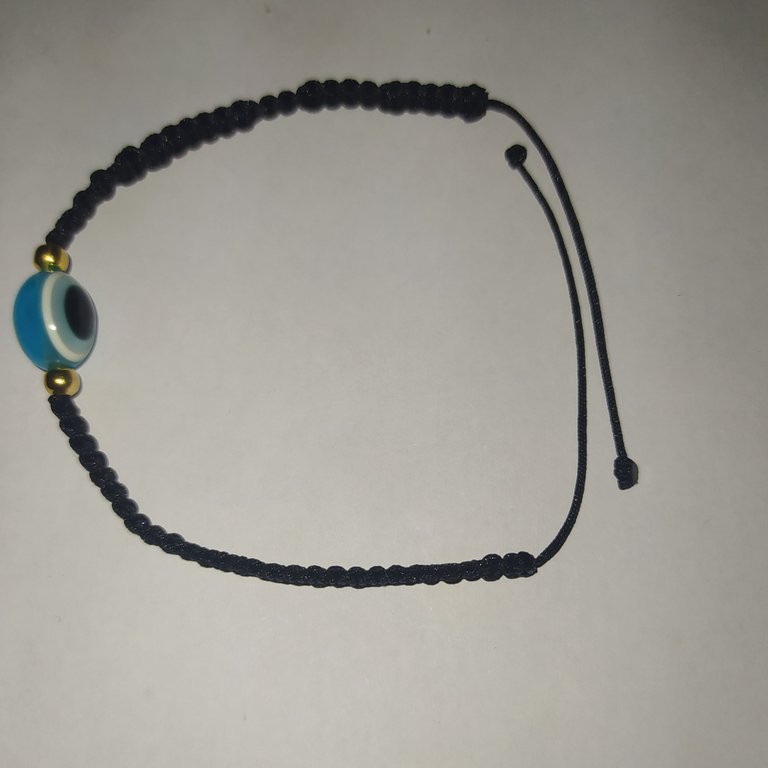
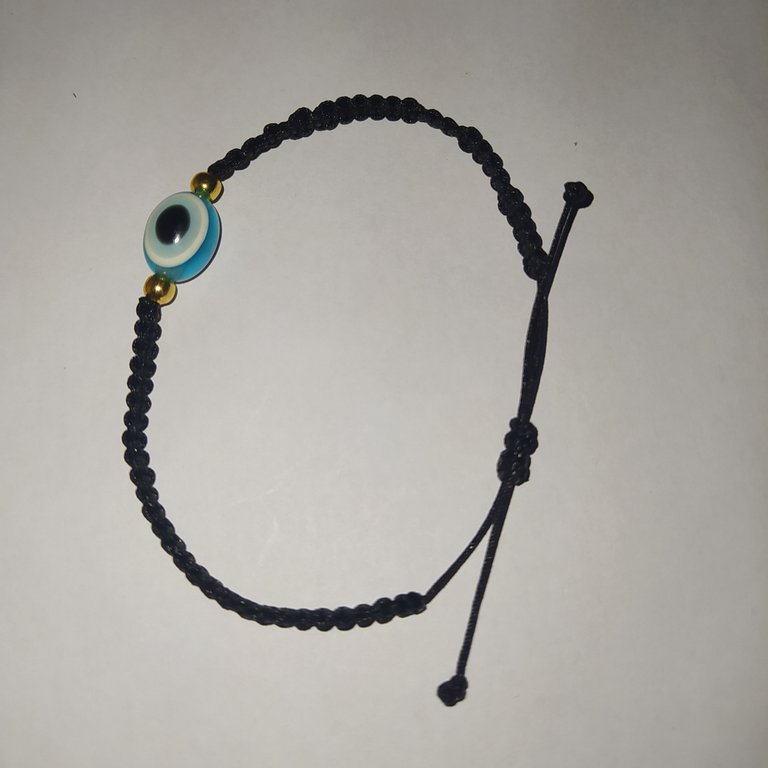
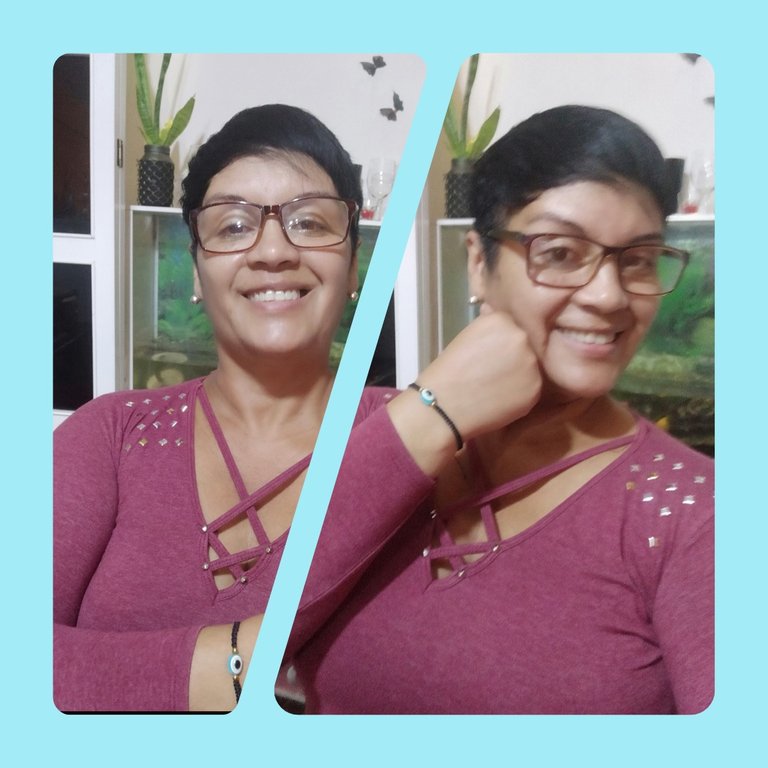
I show you how beautiful the bracelet is, it is ideal for everyday use with any casual look we wear.
Les muestro lo hermosa que quedó la pulsera, es ideal para usarla a diario con cualquier look casual que nos pongamos.
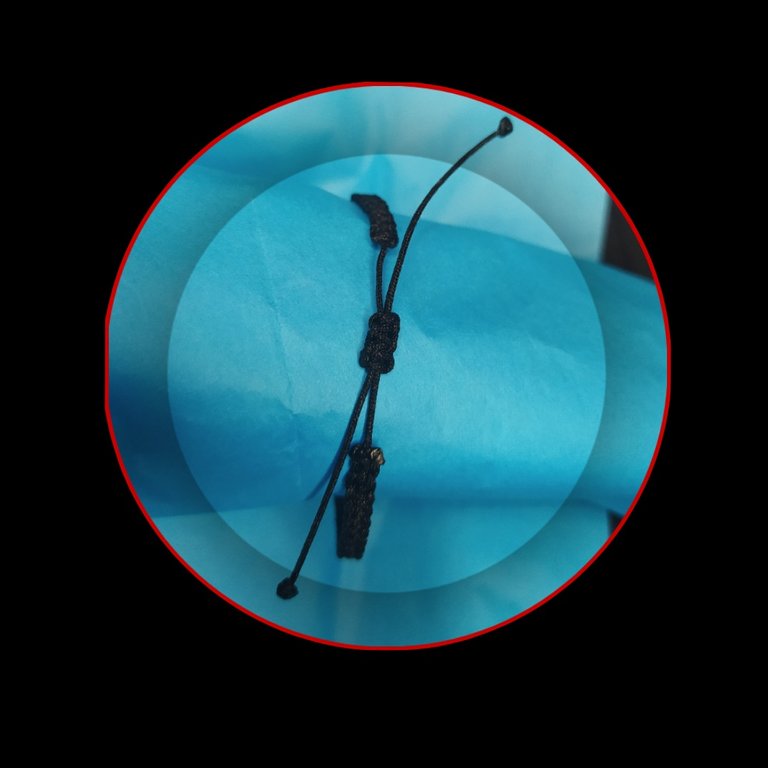
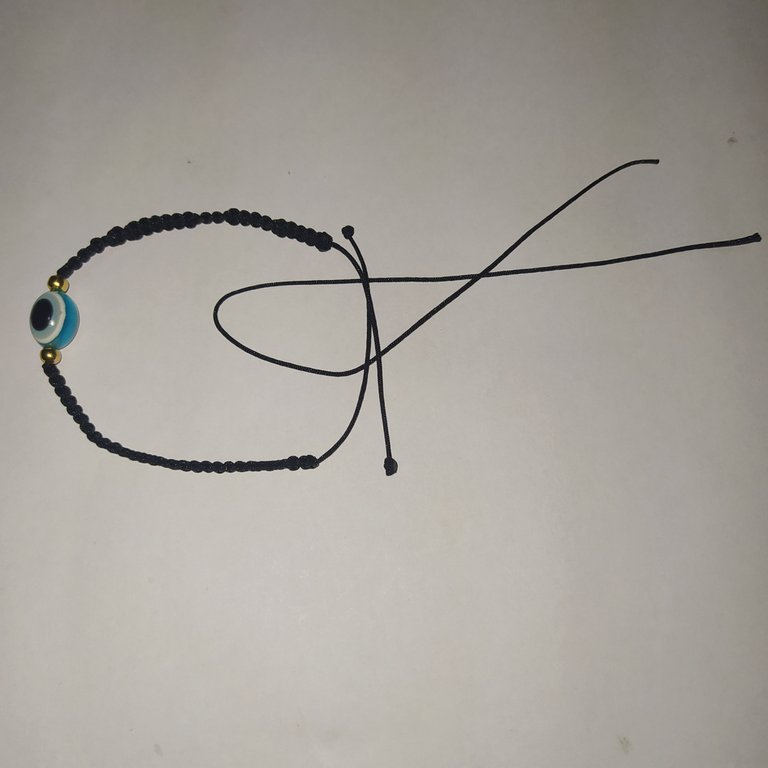
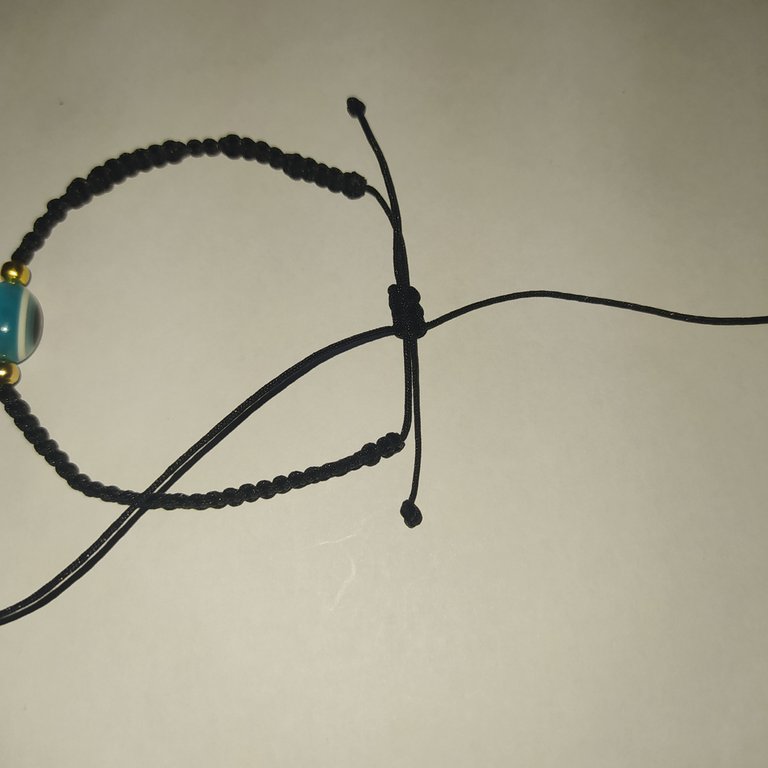
- This is how the bracelet looks on the back with this practical sliding knot.
- Así queda la pulsera por la parte de atras con este práctico nudo corredizo.
Thank you once again for joining me to make this bracelet, I hope you like it and you can make it, I would like to know what you thought, I hope to read you in the comments.
Gracias una vez más por acompañarme a realizar esta pulsera, espero les guste y la puedan realizar, me gustaría saber que les pareció, espero leerlos en los comentarios.

- Photographs taken from my Xiaomi redmi note 8 cell phone.
- Banner made through PicsArt.
- DeepL Translator
- Fotografías tomadas desde mi celular Xiaomi redmi note 8.
- Banner realizado a través de PicsArt.
- Traductor DeepL
Está hermoso gran trabajo me gusta mucha este brazalete
Gracias amiga, me complace mucho tu comentario , gracias por la visita🤗❤️
Has sido curado por @visualblock / You've been curated by @visualblock
Bienvenidas delegaciones / Delegations welcome
Trail de Curación / Curation Trail
Vota por nuestro Testigo aliado - @hispapro / Vote for our allied Witness - @hispapro
Más información sobre el testigo aquí / More information about the witness here
gracias por brindarme su valioso apoyo
¡Tus artesanías sí que son valiosas! 🤗
@tipu curate 8
Upvoted 👌 (Mana: 0/75) Liquid rewards.
gracias
gracias @esalcedo
Admiro el hecho de ir realizando pasos mínimos para alcanzar un total tan espectacular. Tranquilidad y pazciencia es lo que me viene a la mente cuando veo esas piezas. Abrazo.
Hola amigo, lo has descrito perfecto solo eso se necesita para lograr tan lindo resultado, gracias por la visita, me complace mucho
Hola amiga, este tipo de pulseras son mis favoritas, te quedo muy bella💕
Hola querida amiga, gracias que super que sean tus favoritas., que tengas un feliz fin de semana