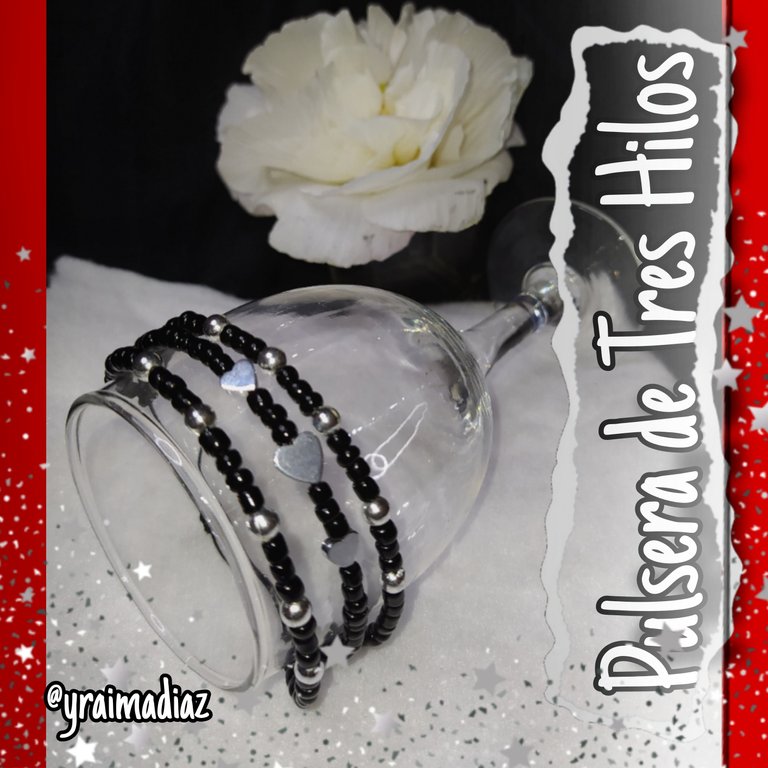
Pulcera de Tres Hilos || Three-wire Bracelet
Hola,hola mis queridos hivers amigos amantes de los accesorios, mi gente bonita de esta increíble comunidad @jewelry les deseo un feliz y bendecido inicio de semana.
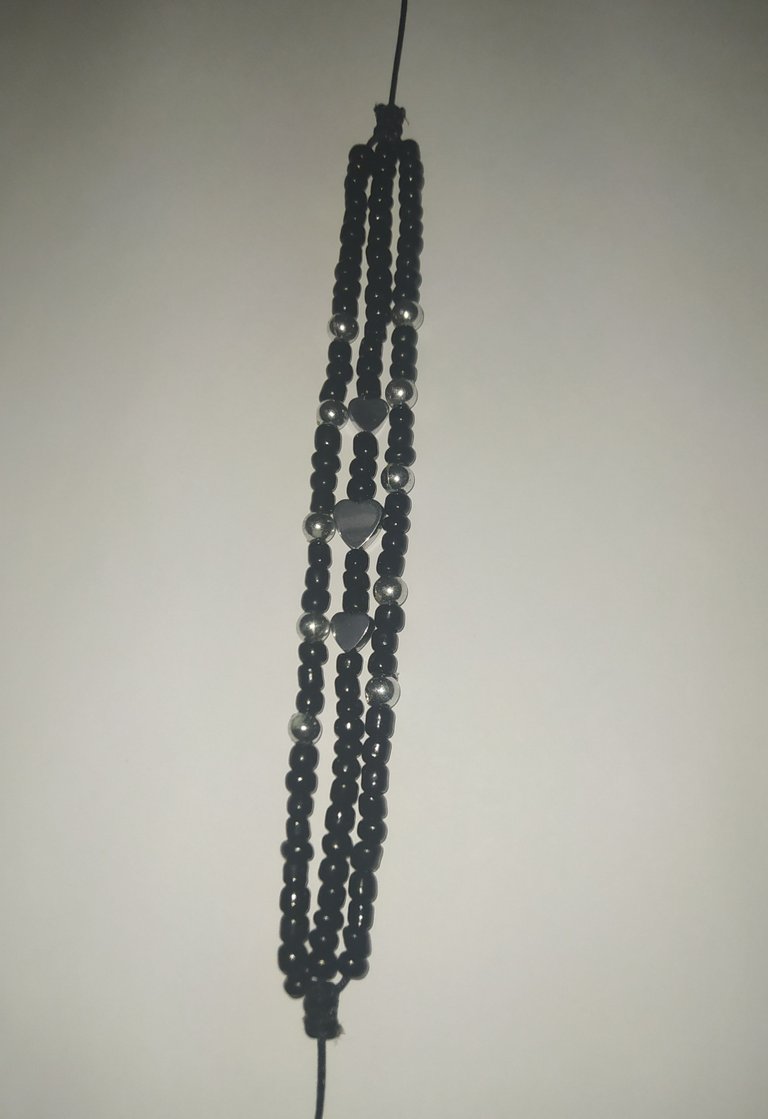
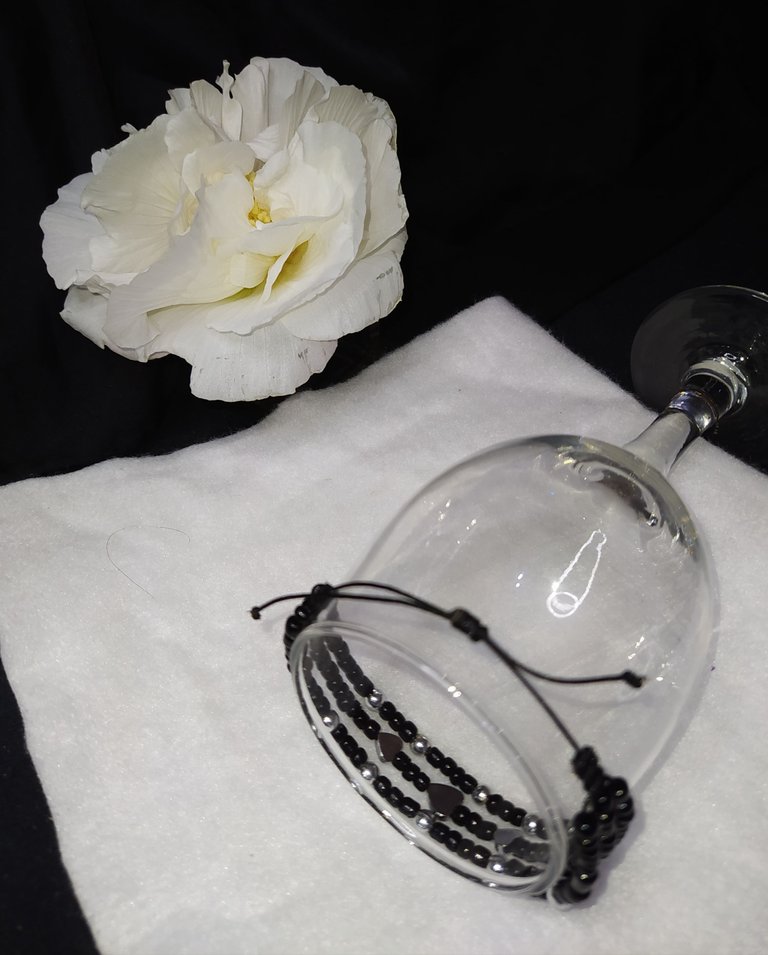
Hoy les he traído un tutorial de una hermoso accesorio se trata de una pulsera de tres hilos elabora con hilo chino, mostacillas y decorada con unos delicados dijes de corazones y unos balines plateados.
Los accesorios son sin duda alguna uno de nuestros mejores aliados para darnos ese toque tan chip y distinguido que nos caracteriza y nos distingue de los demás.
Está bella pulsera es de fácil elaboración, estare empleando la técnica del nudo Plano y la técnica del nudo Franciscano.
Te invito a que me acompañes en su elaboración, a continuacion te estaré compartiendo los materiales que utilice.
Hello, hello my dear hivers accessory loving friends, my beautiful people of this amazing community @jewelry I wish you a happy and blessed start of the week.
Today I have brought you a tutorial of a beautiful accessory it is a three strand bracelet made with Chinese thread, beads and decorated with delicate heart charms and silver plated ballerinas.
The accessories are undoubtedly one of our best allies to give us that touch so chip and distinguished that characterizes us and distinguishes us from others.
This beautiful bracelet is easy to make, I will be using the Flat knot technique and the Franciscan knot technique.
I invite you to join me in its elaboration, next I will be sharing with you the materials I use.
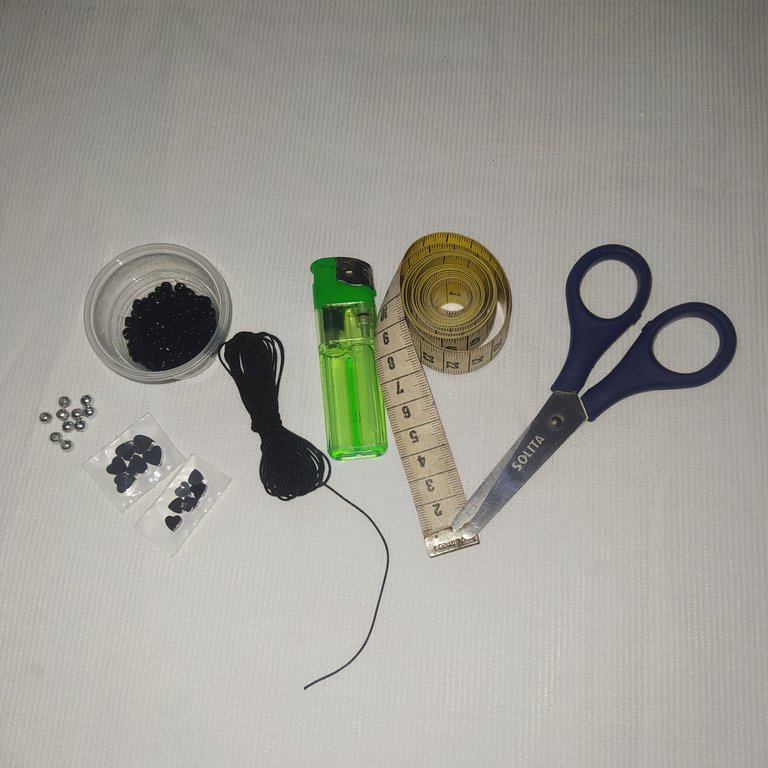
Materiales.
- 100 Mostacillas negras.
- 10 Balines o separadores plateados.
- 1 Dijes de corazones de acero inoxidable mediano.
- 2 Dijes de corazones de acero inoxidable pequeños
- 1.10 Metros de hilo chino negro.
- Cinta métrica.
- Tijeras.
- Encendedor.
Materials.
- 100 black beads.
- 10 silver plated balls or spacers.
- 1 medium size stainless steel heart charms.
- 2 small stainless steel heart charms.
- 1.10 Meters of black Chinese thread.
- Tape measure.
- Scissors.
- Lighter.
Elaboración.
Elaborated
 |  |
|---|
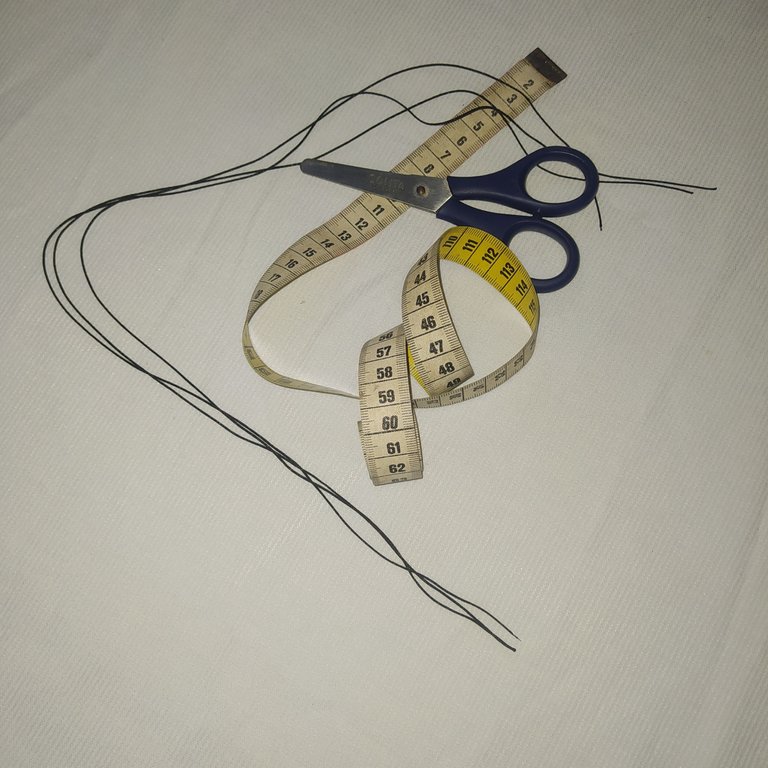
Paso uno.
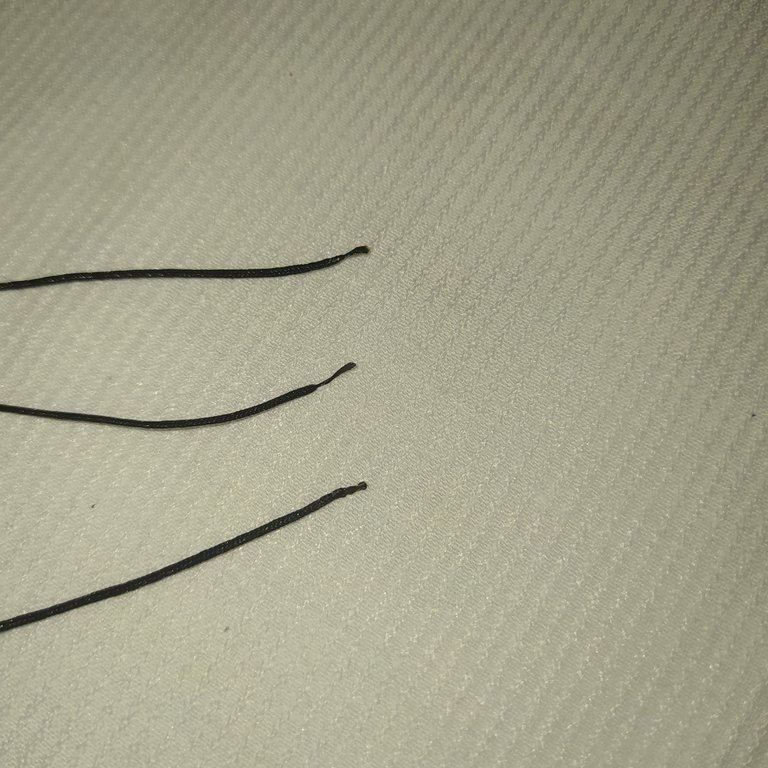
- Recortamos tres hilos de 60 cm cada uno para elaborar la pulsera.
- Recortamos un hilo de 20 cms para cerrar la pulsera.
Step one.
- We cut three threads of 60 cm each to make the bracelet.
- Cut a 20 cm thread to close the bracelet.
 |  |
|---|
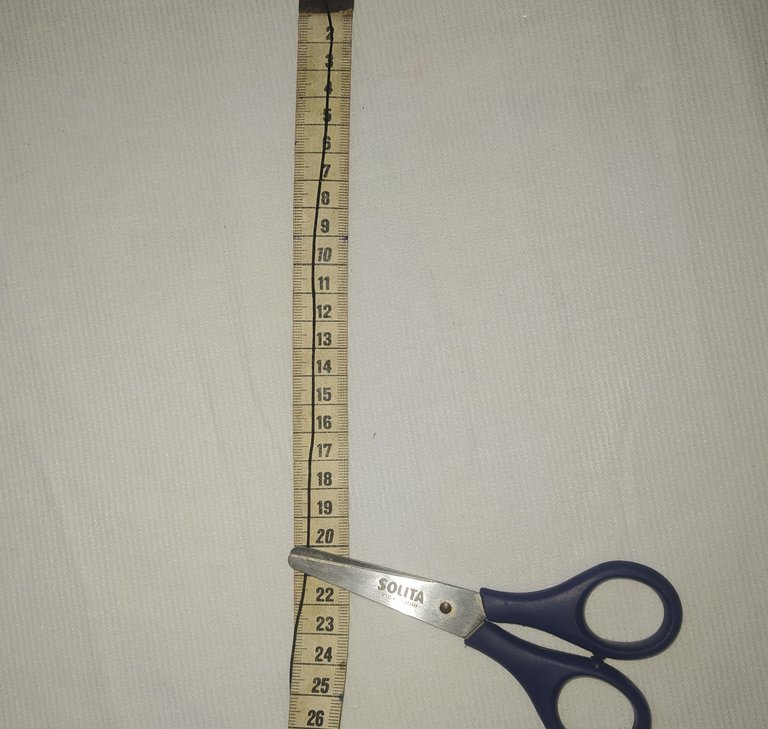
Paso dos.
Elaboración hilo del medio de la pulsera.
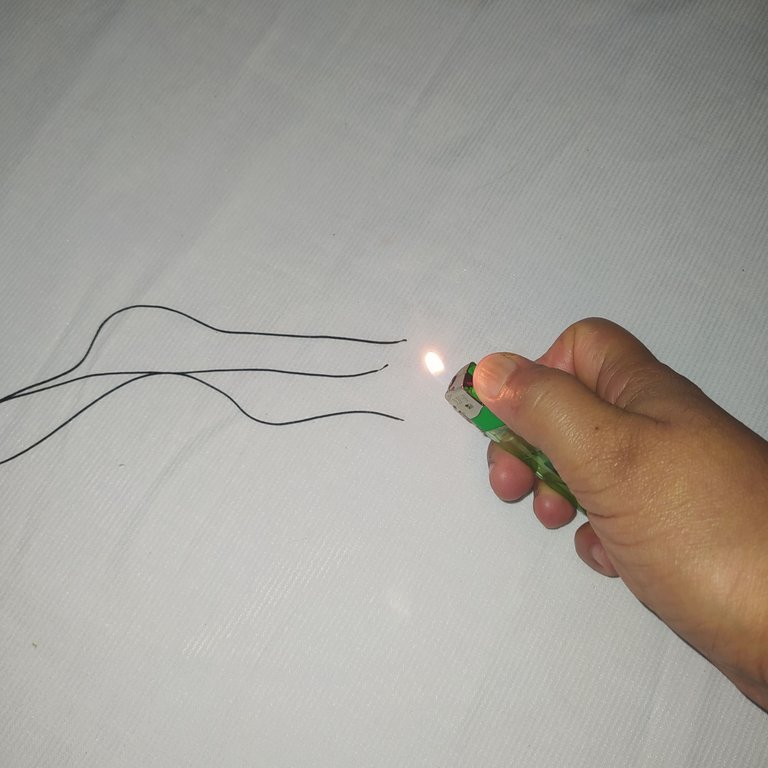
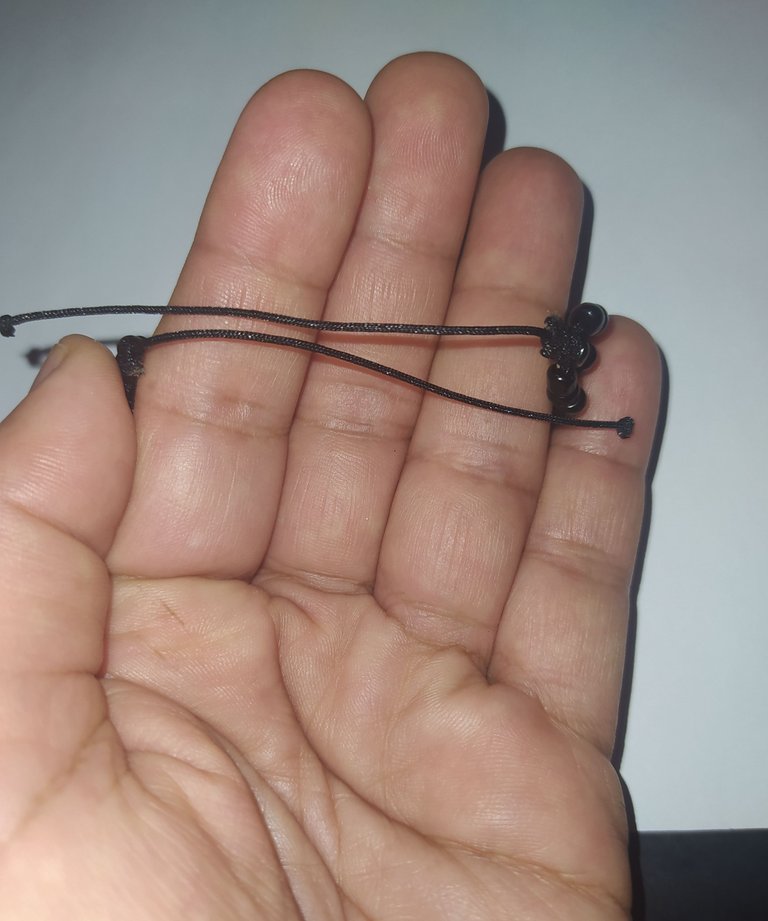
- Luego tomamos los hilos para elaborar la pulsera y le quemamos las puntas con la ayuda del yesquero cuidando que lo hagamos con la parte azul de la llama, con nuestros dedos le hacemos especie de una vuelta para sacarle la punta al hilo y nos quede como muestro a continuación.
Step two.
Elaboration of the middle thread of the bracelet.
- Then we take the threads to make the bracelet and we burn the tips with the help of tinder taking care that we do it with the blue part of the flame, with our fingers we do kind of a turn to remove the tip of the thread and we are as I show below.
 |  |
|---|
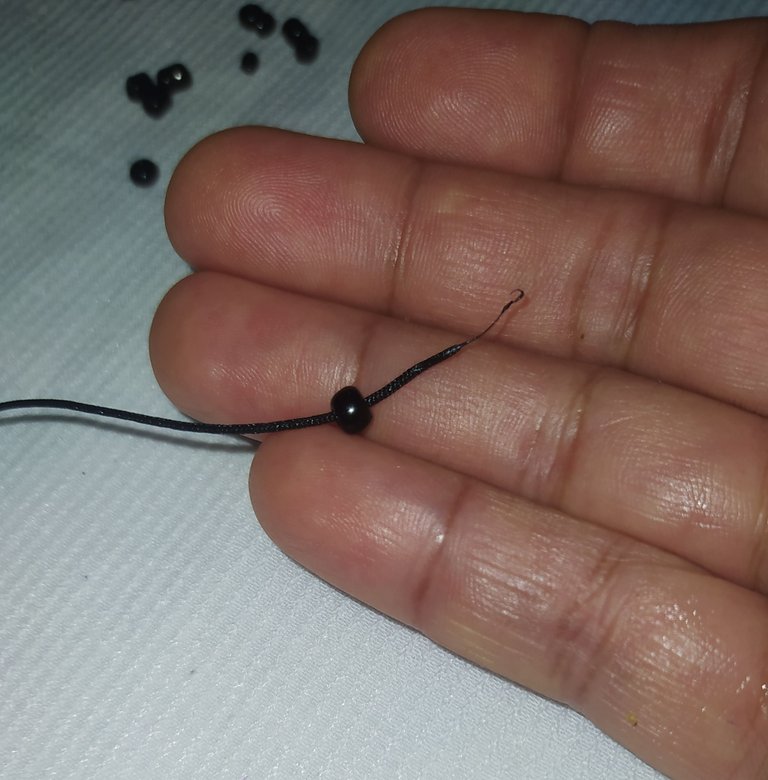
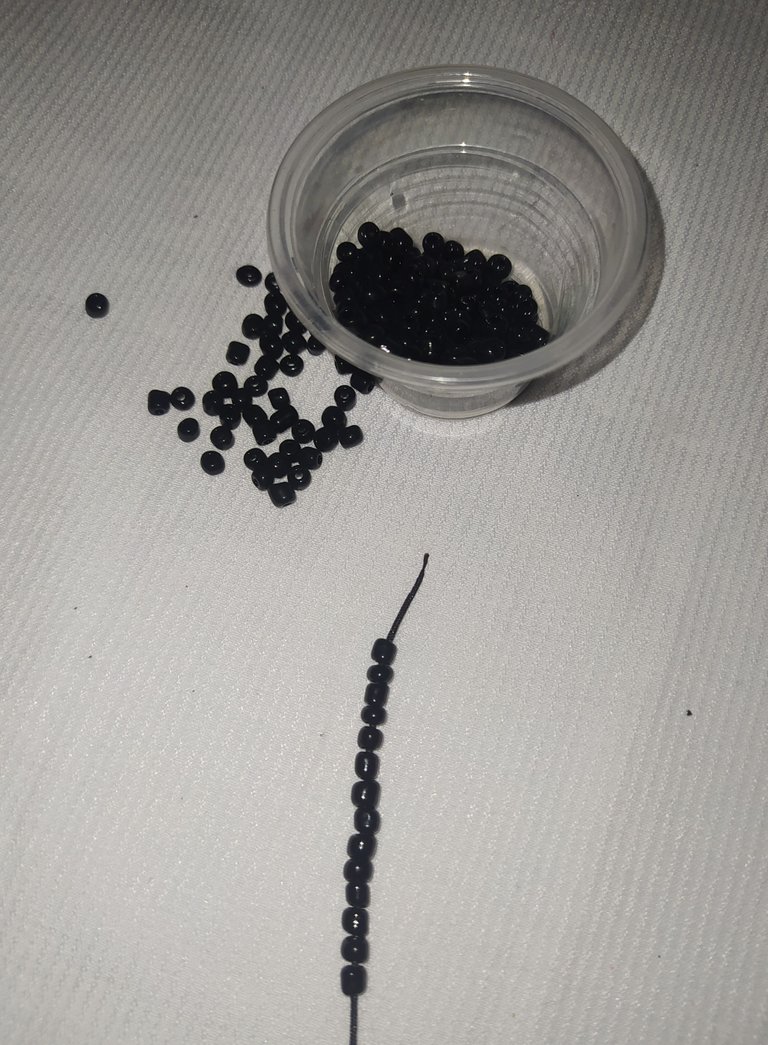
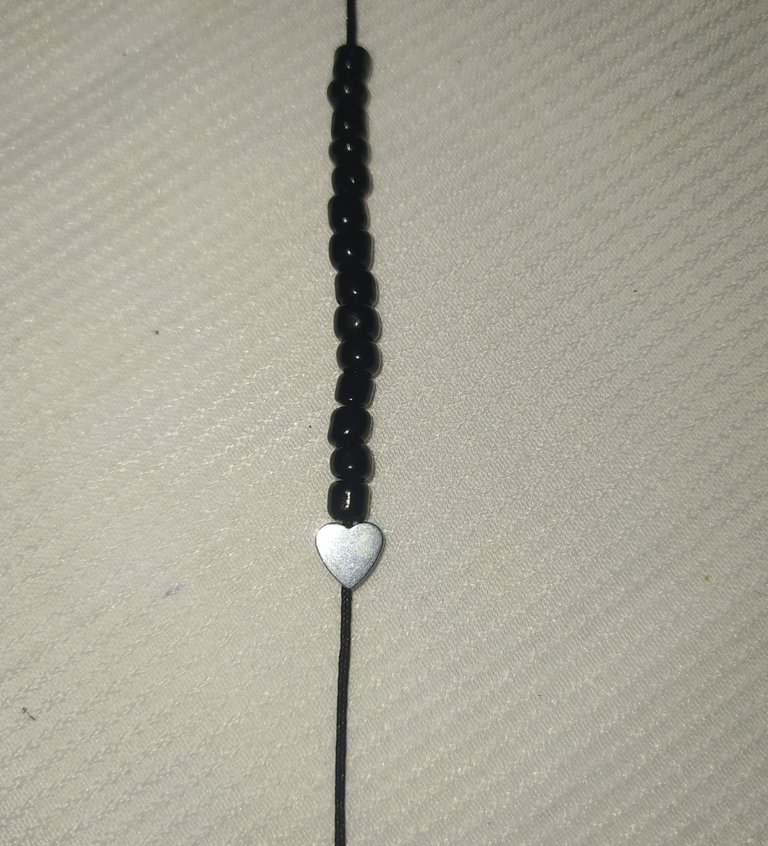
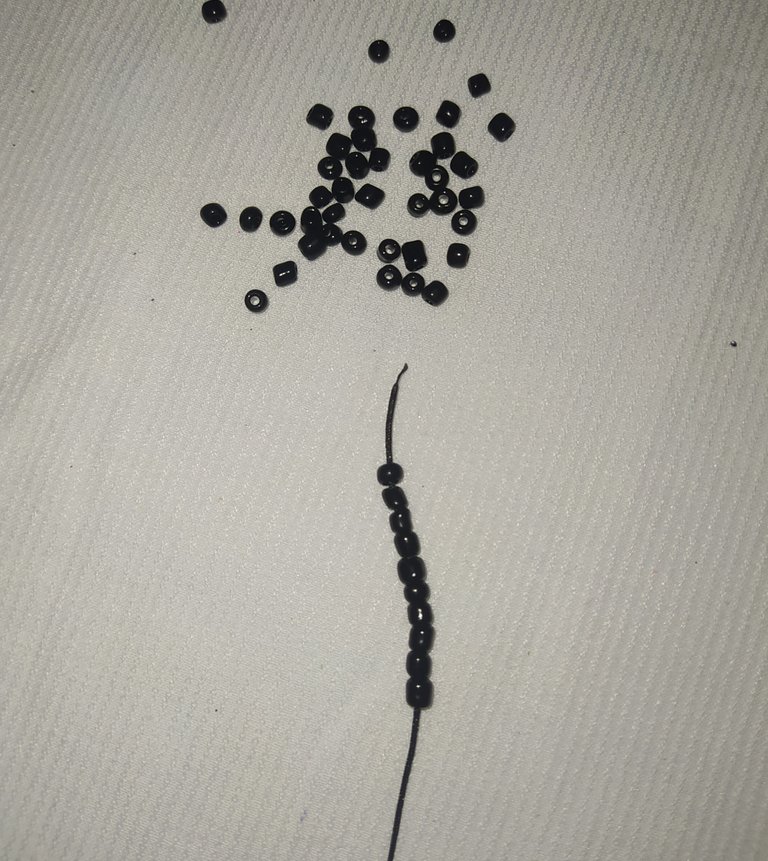
- Tomo uno de los hilos de 60 cm y les coloco 14 mostacillas.
- I take one of the 60 cm strands and place 14 beads on it.
 |  |
|---|
 |  |
|---|
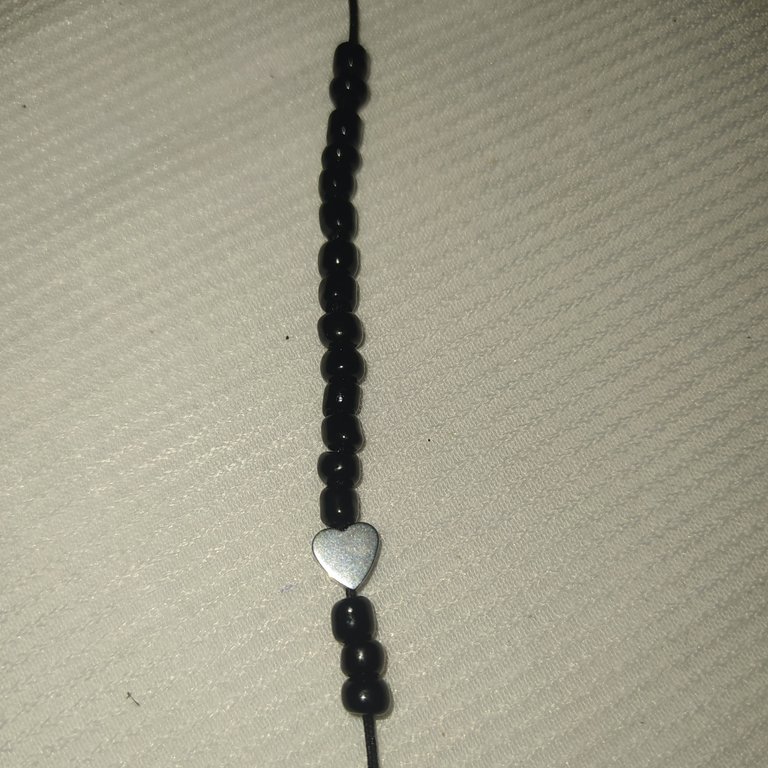
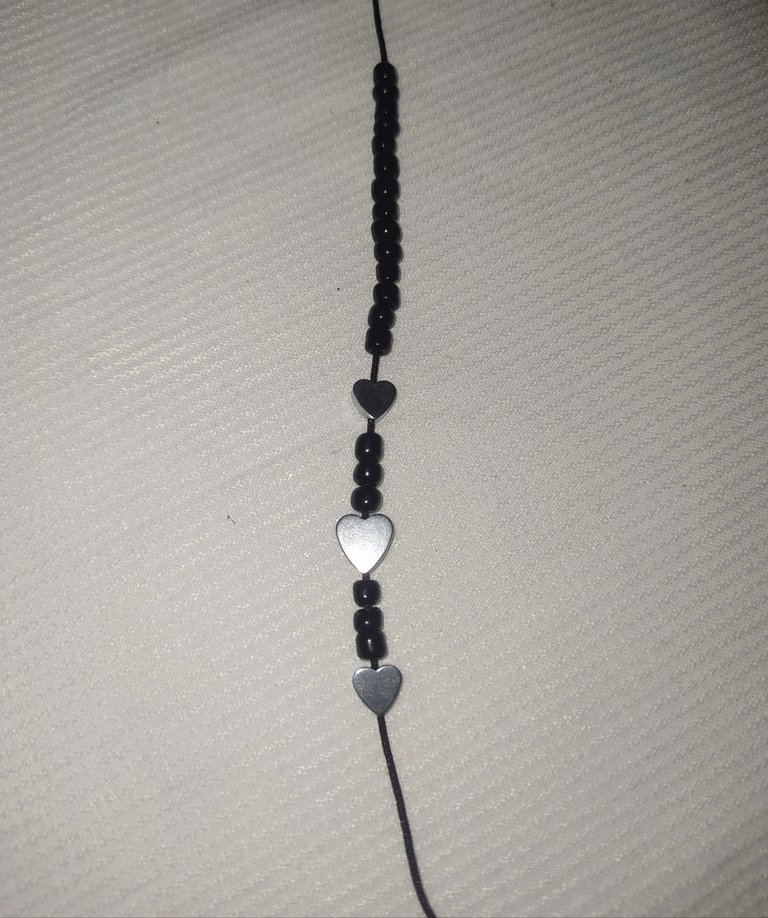
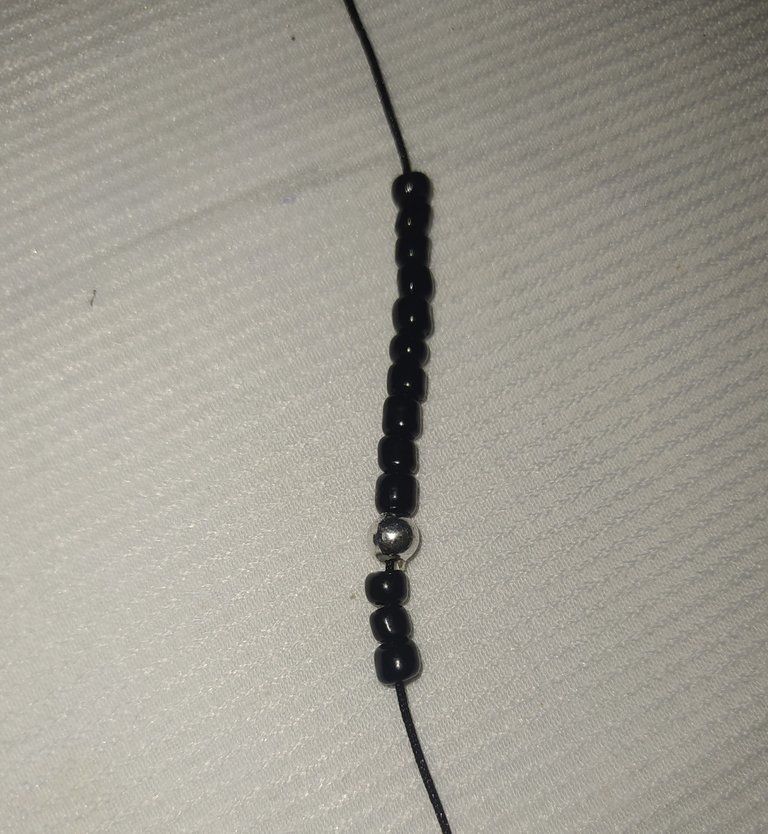
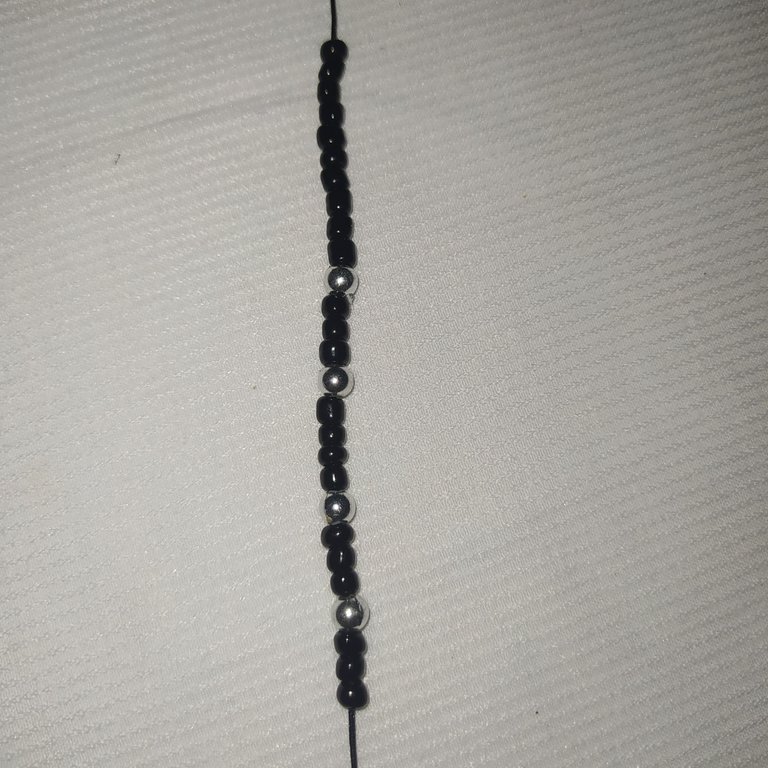
- Introduzco el dije de corazón pequeño.
- Coloco tres mostacillas.
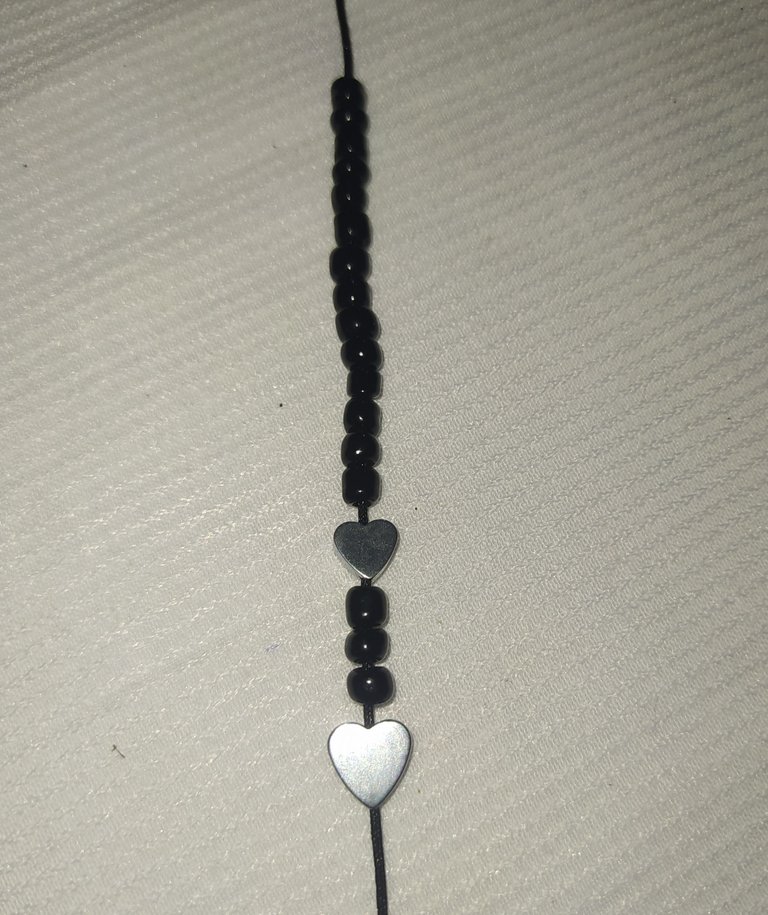
- Luego el dije de corazón mediano y para separar colocamos tres mostacillas.
- I insert the small heart charm.
- I place three beads.
- Then the medium heart charm and to separate we place three beads.
 |  |  |
|---|
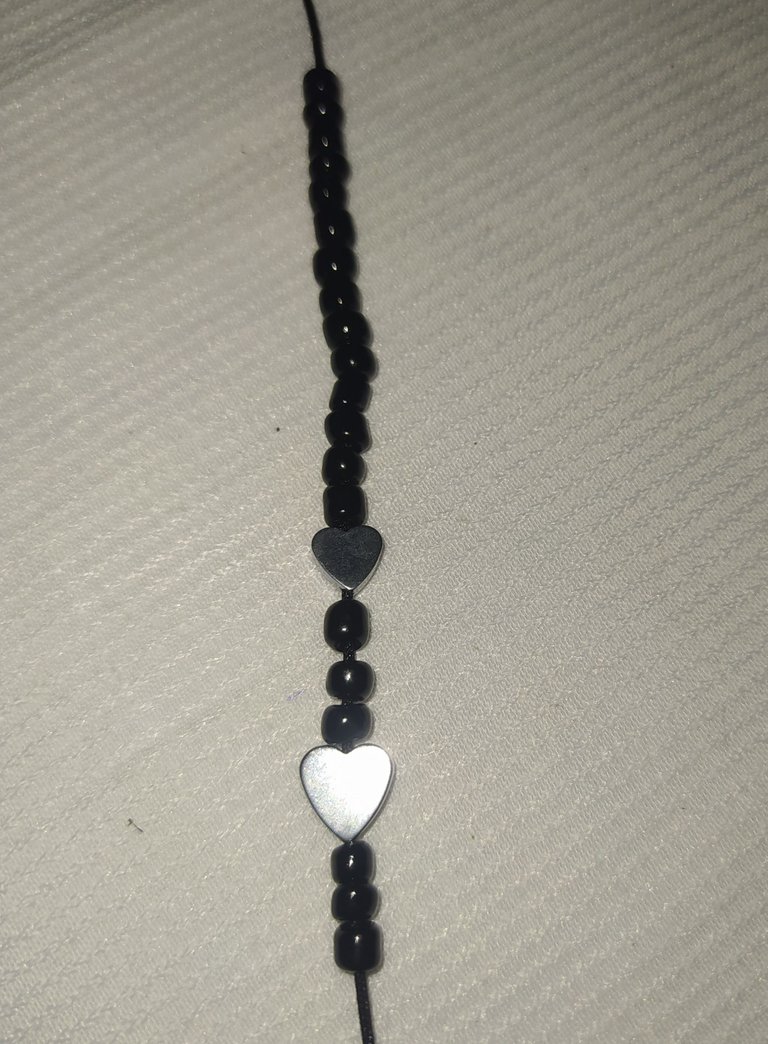
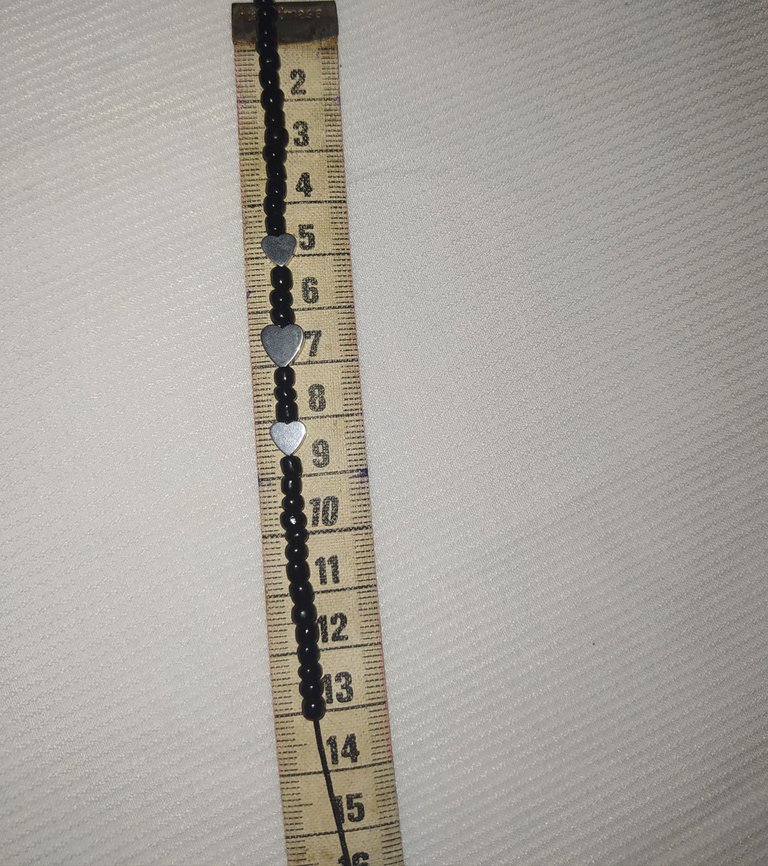
- Insertamos el dije mediano de corazón y terminamos colocando 14 mostacillas.
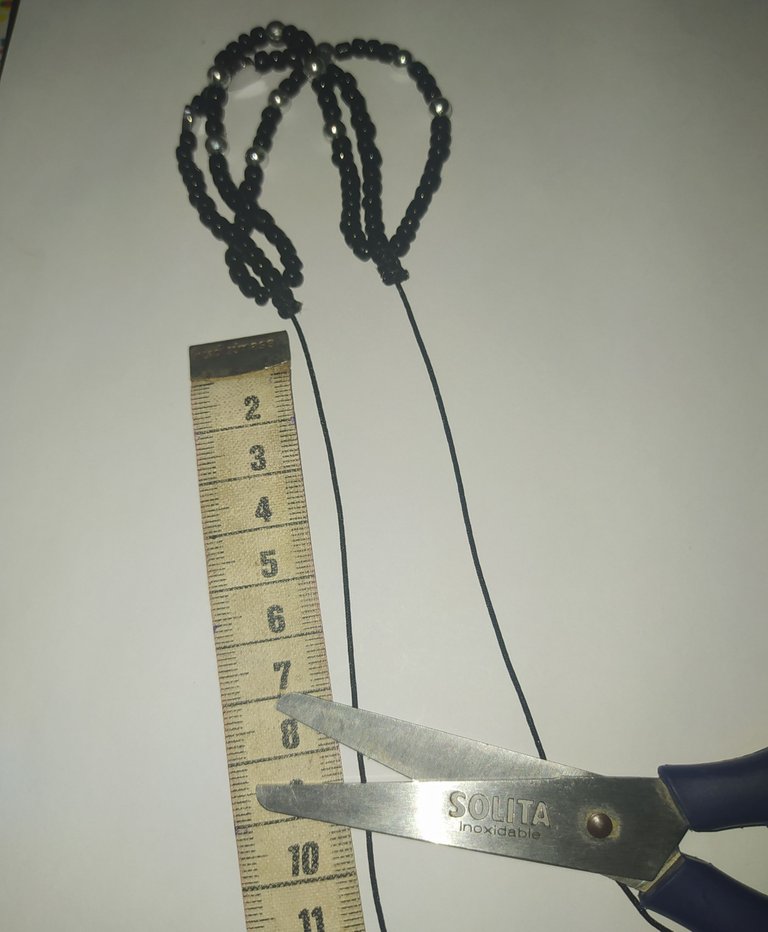
- Medimos 13 cm.
- Insert the medium heart charm and finish by placing 14 beads.
- We measure 13 cm.
Paso número tres.
Elaboración del segundo y tercer hilo de la pulsera.
Step number three.
Making the second and third strands of the bracelet.
 |  |
|---|
 |  |
|---|
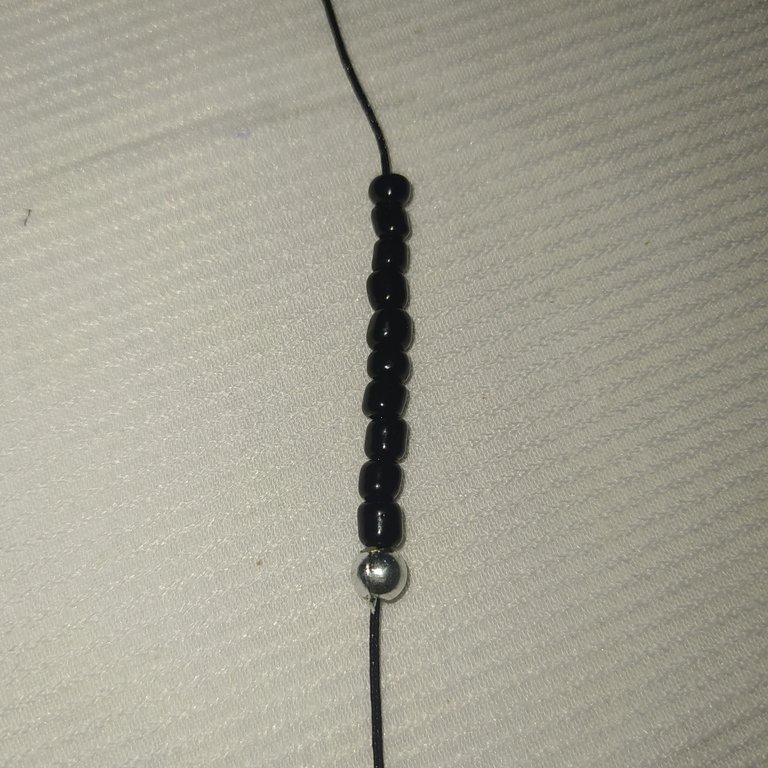
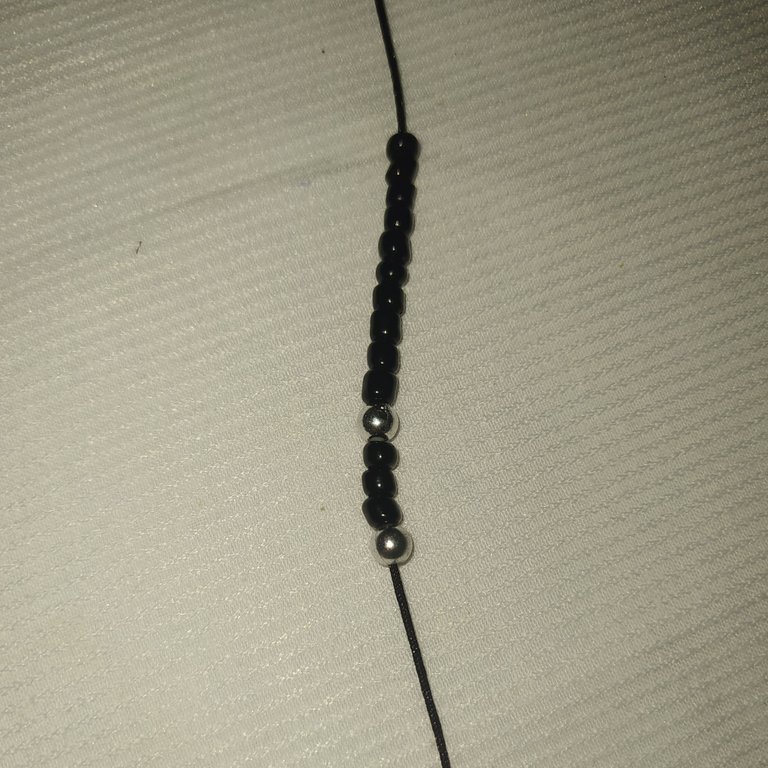
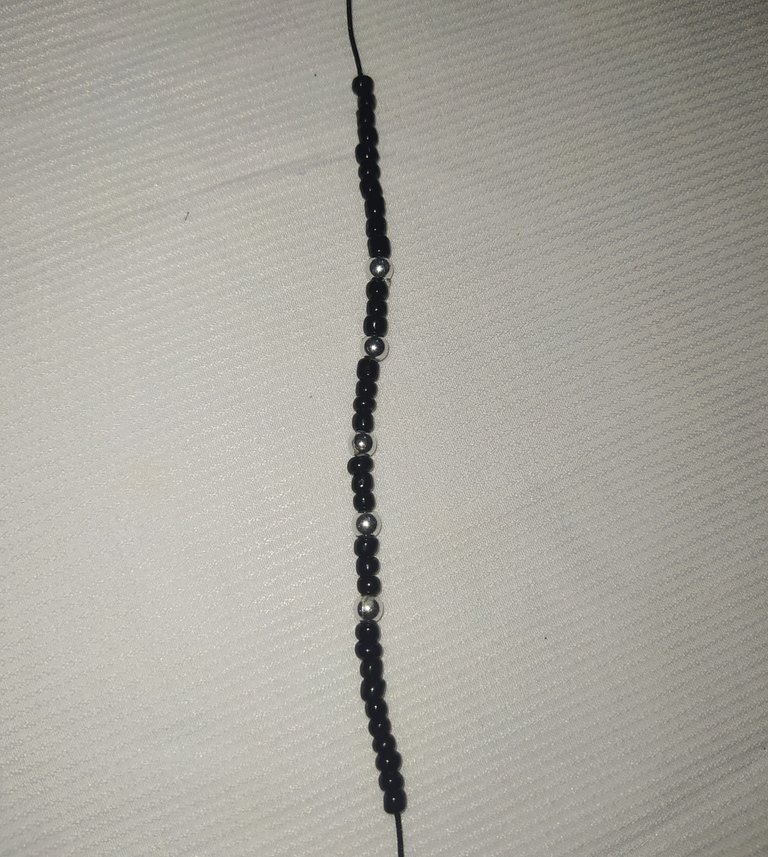
- Colocamos 10 mostacillas en un hilo de 60 cm, luego un balin o separador plateado.
- Tres mostacillas, un separador plateado.
- We place 10 beads on a 60 cm thread, then a silver-plated ball or spacer.
- Three beads, one silver separator.
 |  |
|---|
 |  |
|---|
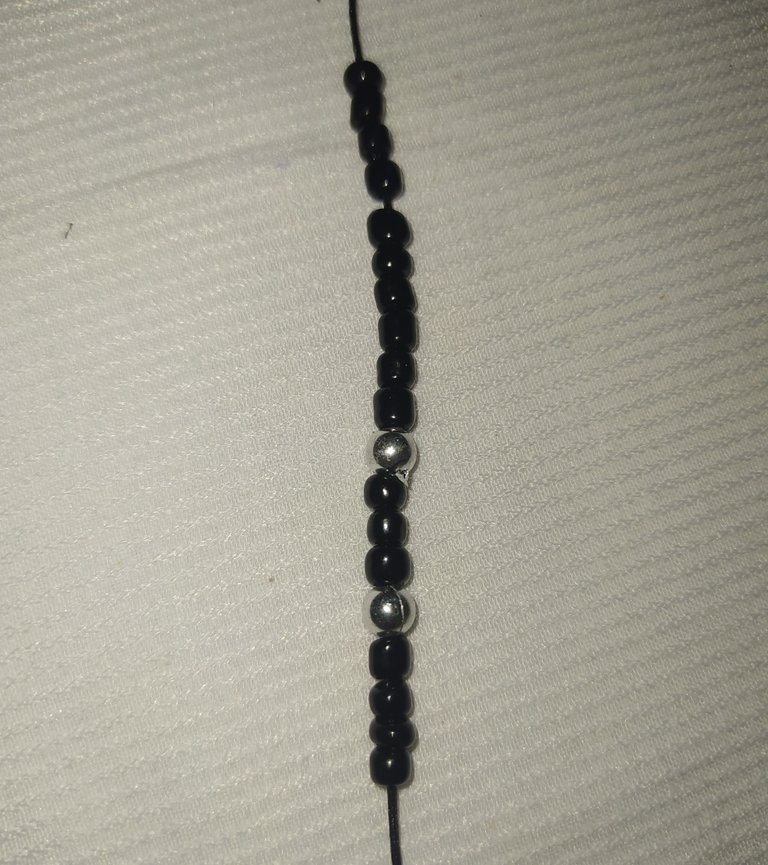
- Cuatro mostacillas.
- Un balín o separador plateado.
- Repetimos insertando nuevamente tres mostacillas y un separador plateado.
- Luego las 10 mostacillas.
- repetimos este mismo paso en el otro hilo de 60 cm.
- Four beads.
- A silver-plated ball or separator.
- We repeat inserting again three beads and a silver separator.
- Then the 10 beads.
- Repeat this same step on the other 60 cm thread.
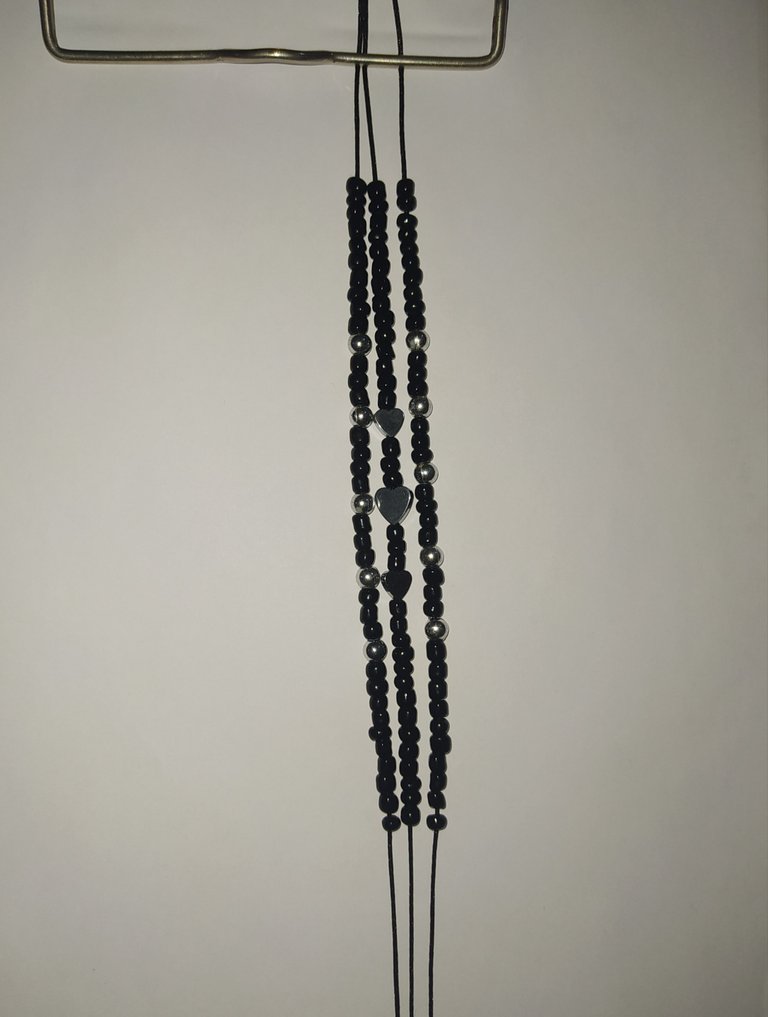
 | 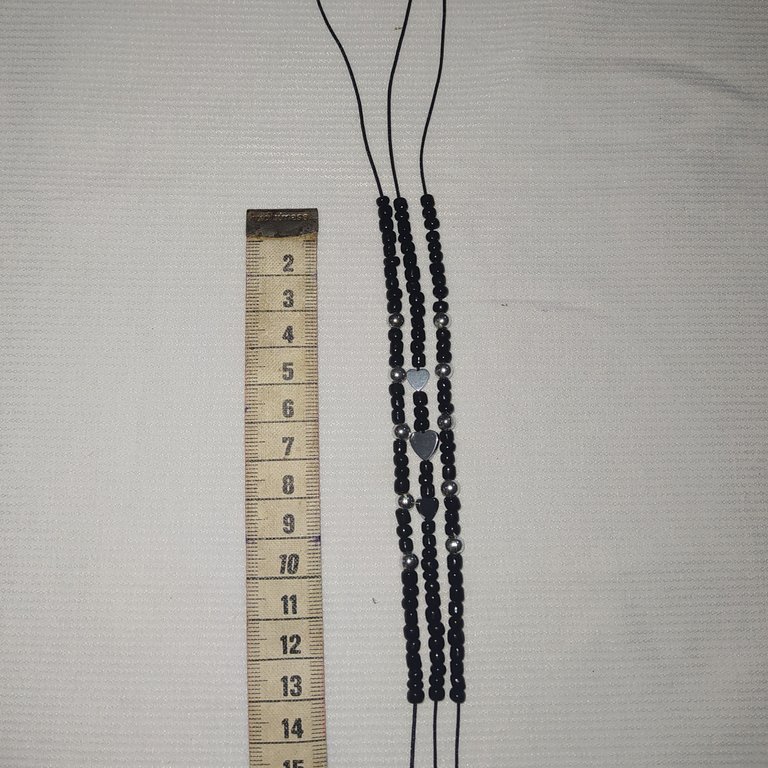 |
|---|
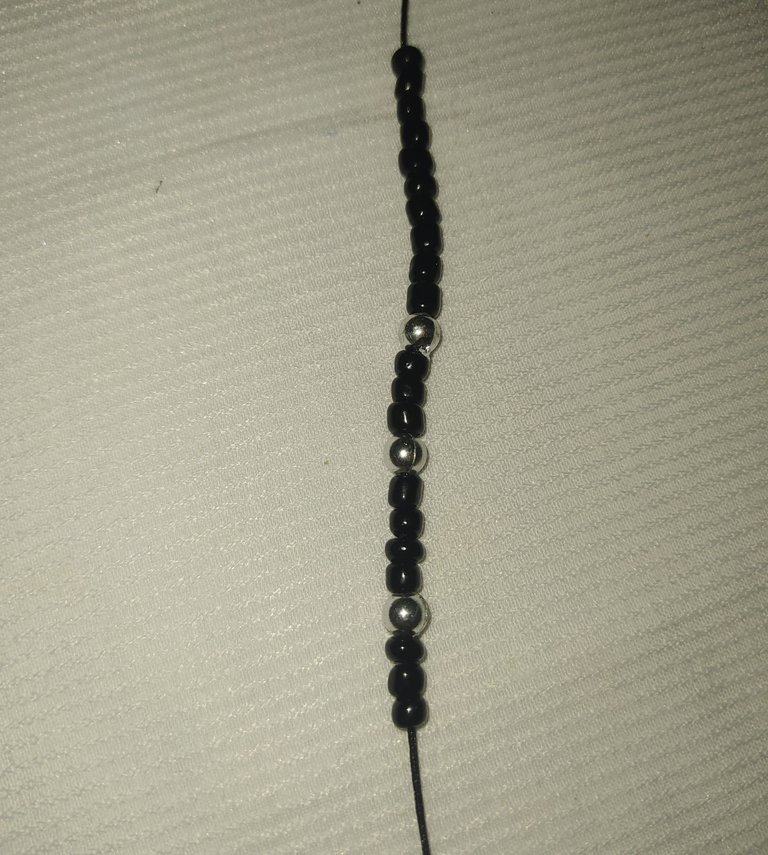
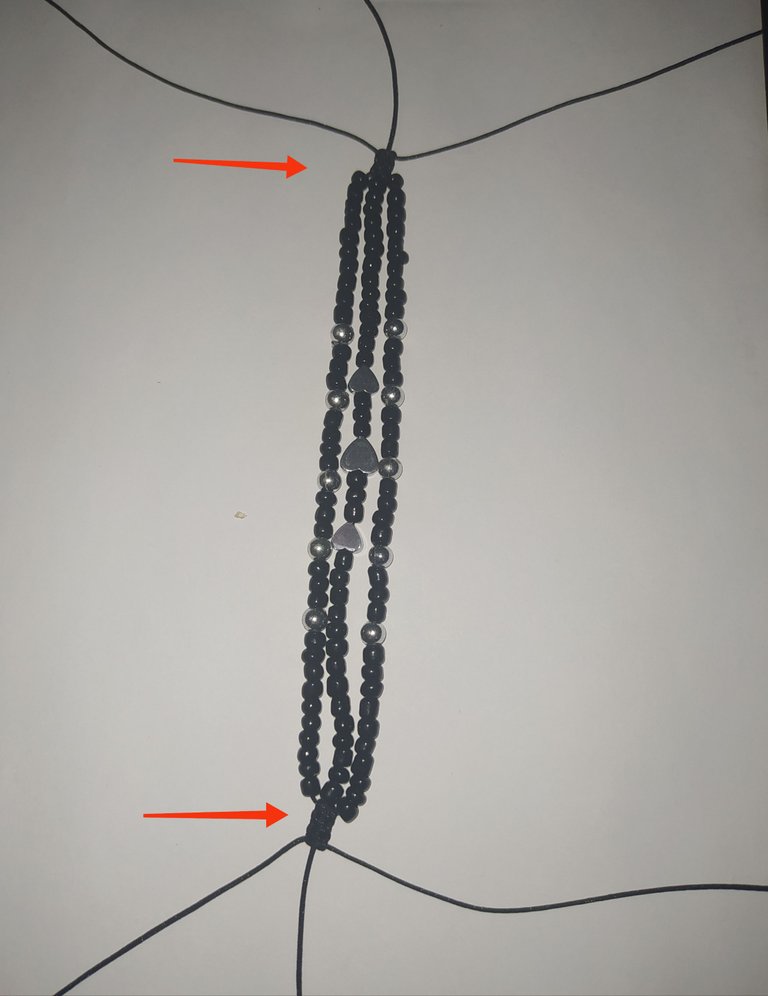
- Una vez terminado medimos los tres hilos, para asegurarnos que tienen 13 cm.
- Once finished, we measure the three threads, to make sure they are 13 cm long.
Paso número cinco.
Técnica de elaboración del nudo plano.
- En nuestra tabla de trabajo aseguramos los hilos con unas pinzas en la parte de arriba y en la parte de abajo aseguramos con la pinza el hilo del centro para que quede fijo.
Step number five.
Flat knot tying technique.
- On our work table we secure the threads with pliers on the upper part and on the lower part we secure with the pliers the thread in the center so that it remains fixed.
 |  |
|---|
Lado derecho.
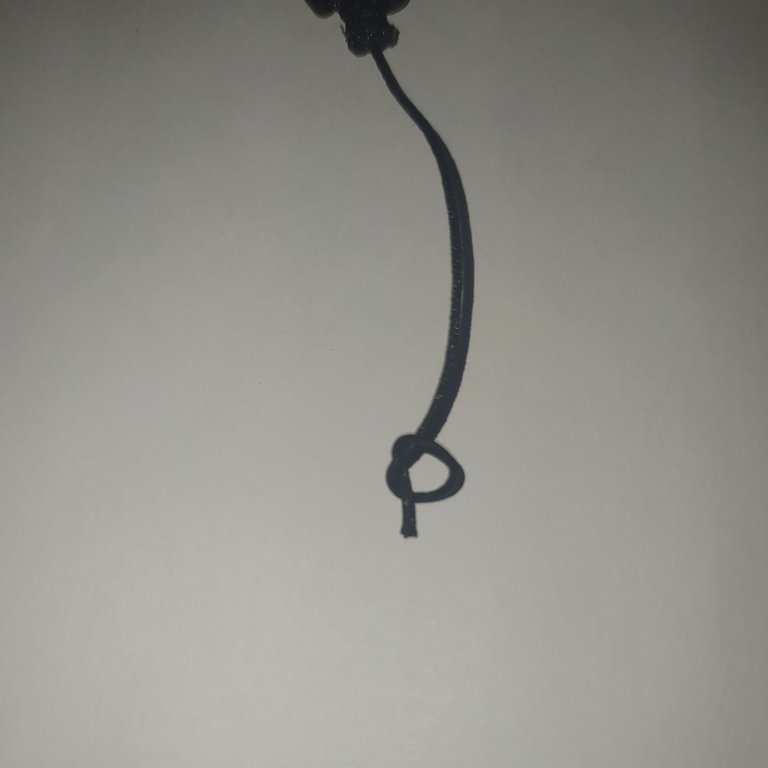
- Tomamos el hilo del lado derecho pasamos por encima del hilo del centro y formamos una letra P, como muestro en la imagen.
- Luego tomamos el hilo de la izquierda y lo pasamos por encima del hilo del lado derecho.
Right side.
- We take the thread on the right side and pass it over the thread in the center and form a letter P, as shown in the picture.
- Then we take the thread on the left side and pass it over the thread on the right side.
 |  |
|---|
- Llevamos la punta del hilo del lado izquierdo y lo pasamos por debajo donde se unen el hilo del lado derecho con el hilo del centro.
- Lo sacamos por todo el centro de la letra P y luego tiramos las dos puntas y apretamos, tomando en cuenta que la pulcera quedé pareja.
- We take the tip of the left side thread and pass it under where the right side thread joins the center thread.
- Pull it through the center of the letter P and then pull the two ends and tighten, making sure that the pulcera is even.
Lado izquierdo.
Left side.
 |  |
|---|
- Tomamos el hilo del lado izquierdo y pasamos por encima del hilo del centro formando como una orejita.
- Luego el hilo de la derecha lopasamospor encima del hilo de la izquierda.
- We take the yarn on the left side and pass it over the center yarn forming a little ear.
- Then we pass the thread on the right side over the thread on the left side.
 |  |
|---|
- Tomamos la punta del hilo del lado derecho y pasamos por debajo dónde se unen el hilo del lado izquierdo con el hilo del centro.
- Luego lo sacamos la punta por el centro de la orejita.
- Debemos asegurarnos que no nos quede templado porque la idea es que la pulsera tenga movimiento.
- We take the tip of the thread on the right side and pass it under where the thread on the left side joins the thread in the center.
- Then we take the tip out through the center of the ear.
- We must make sure that it is not too warm because the idea is that the bracelet has movement.
- Apretamos nuestro nudo.
- Tighten our knot.
- Repetimos estos pasos de ambos lados cinco veces.
- Repeat these steps on both sides five times.
 |  |
|---|
- Recortamos los hilos de los lados, y aseguramos quemando las puntas con el yesquero.
- We cut the threads on the sides, and secure by burning the ends with the tinder.
- De esta forma nos queda terminado el nudo plano.
- This way we have finished the flat knot.
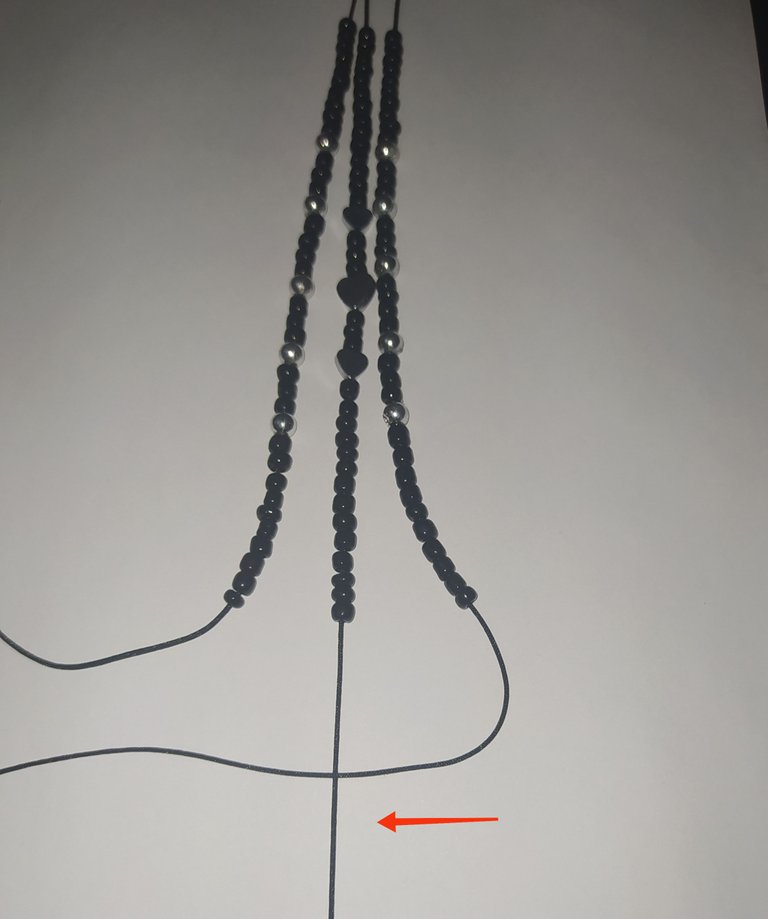
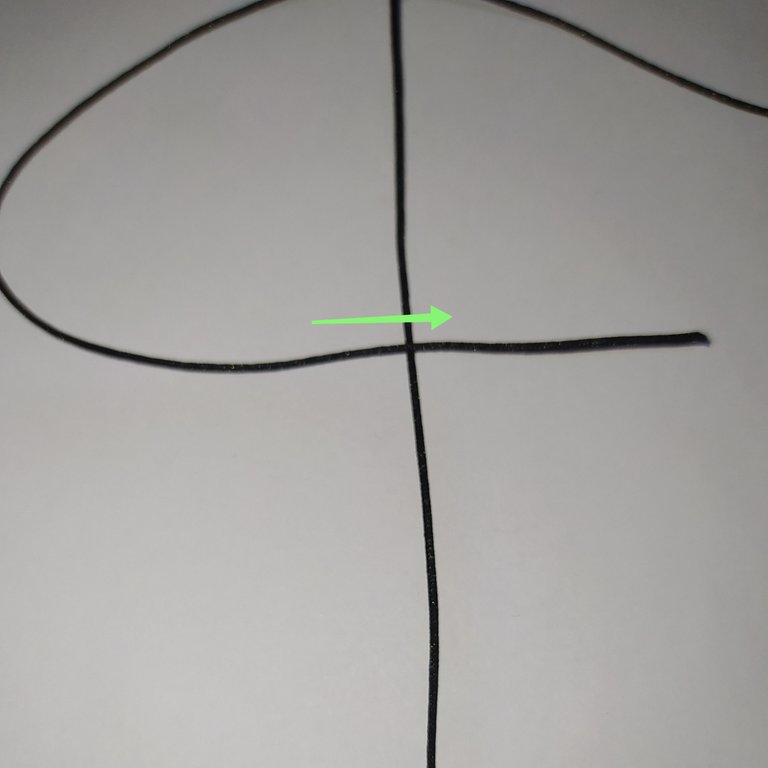
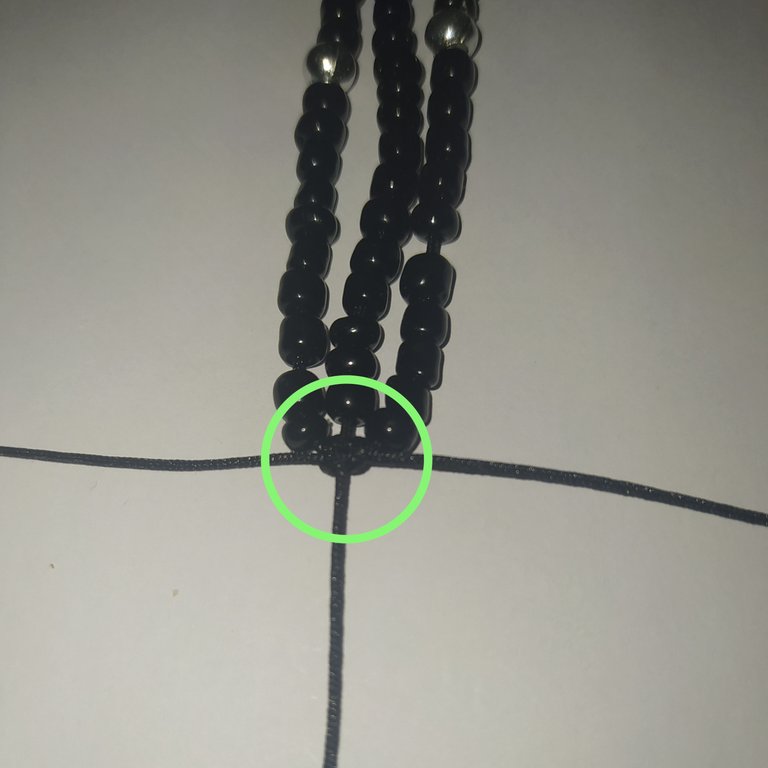
Paso seis.
Cerrando la pulsera con la técnica del nudo Franciscano.
Step six.
Closing the bracelet with the Franciscan knot technique.
 |  |  |
|---|
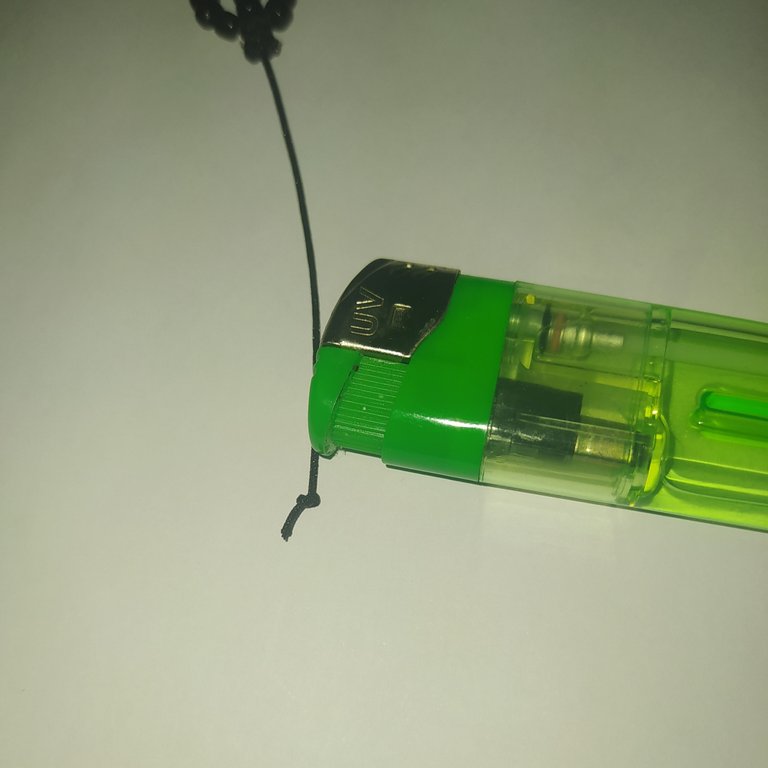
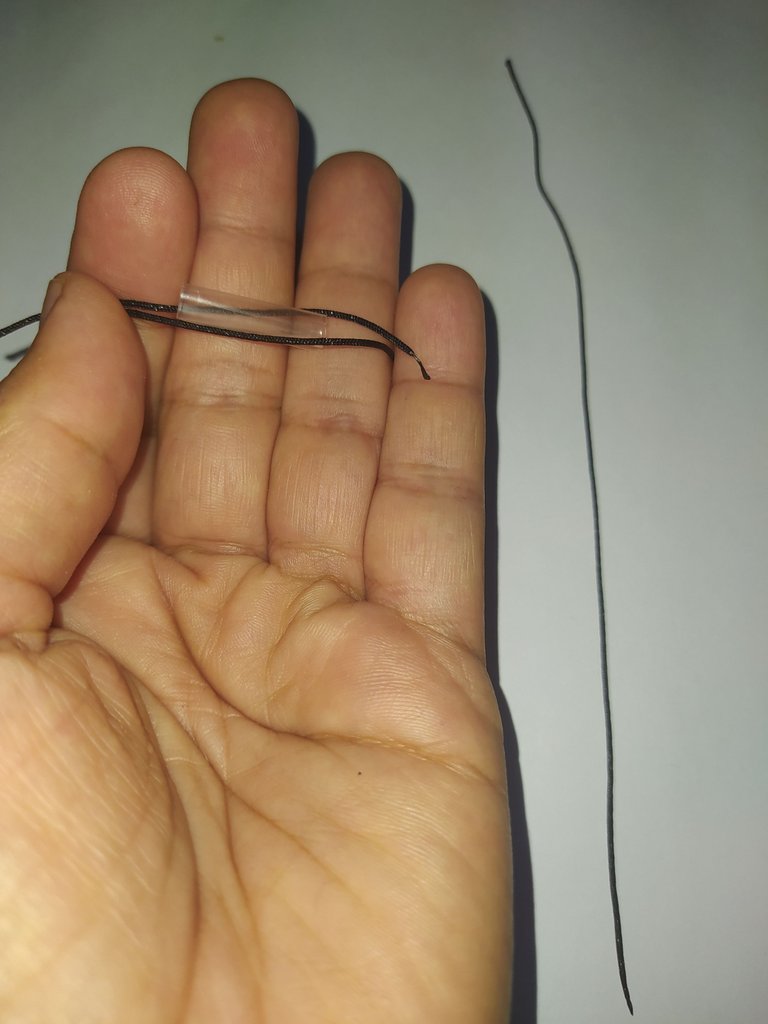
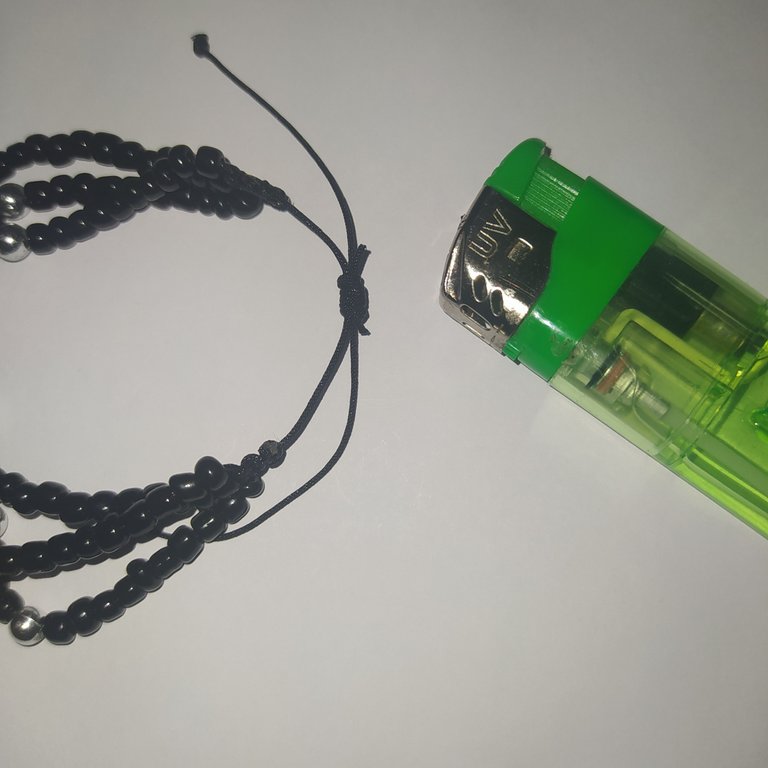
- Medimos 7 cm en cada lado de los hilos de la pulsera,recortamos luego hacemos un nudo sencillo y quemamos la punta con el yesquero.
- We measure 7 cm on each side of the threads of the bracelet, cut then make a simple knot and burn the tip with the tinder.
 |  |
|---|
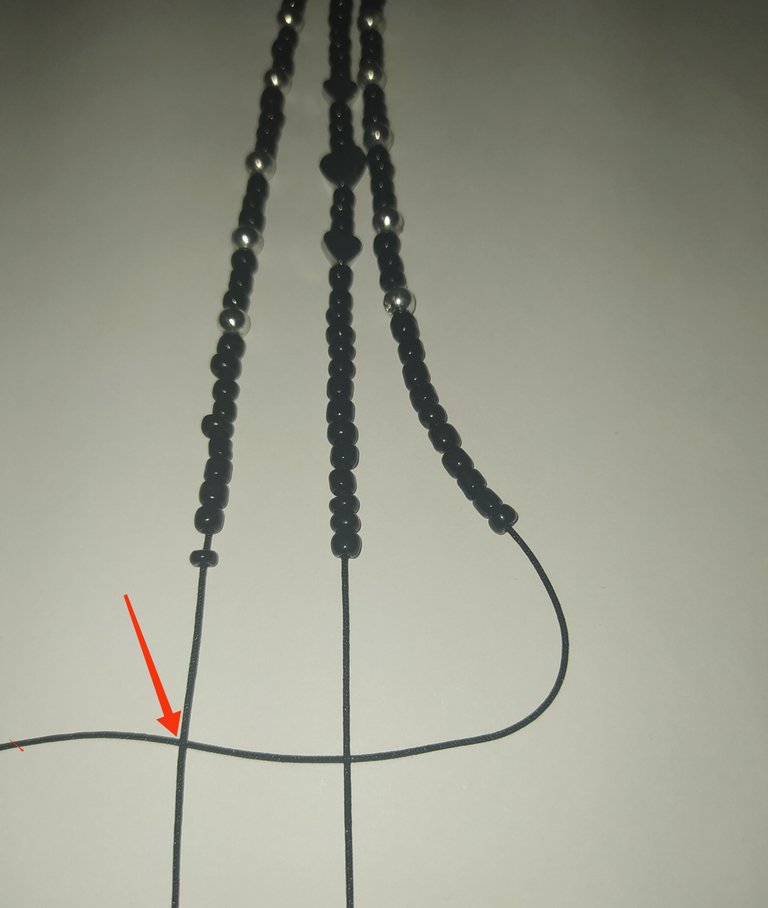
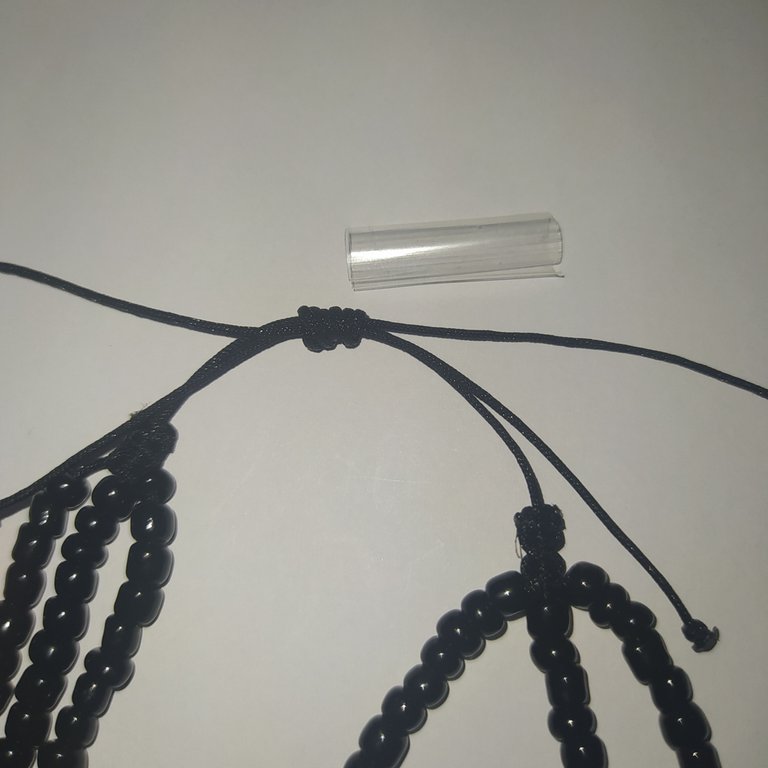
- Colocamos los hilos de la pulsera en nuestra manos colocando uno a cada lado.
- Le colocamos en todo el medio el pedacito del pitillo.
- We place the threads of the bracelet in our hands placing one on each side.
- We place in the middle the little piece of the straw.
 |  |
|---|
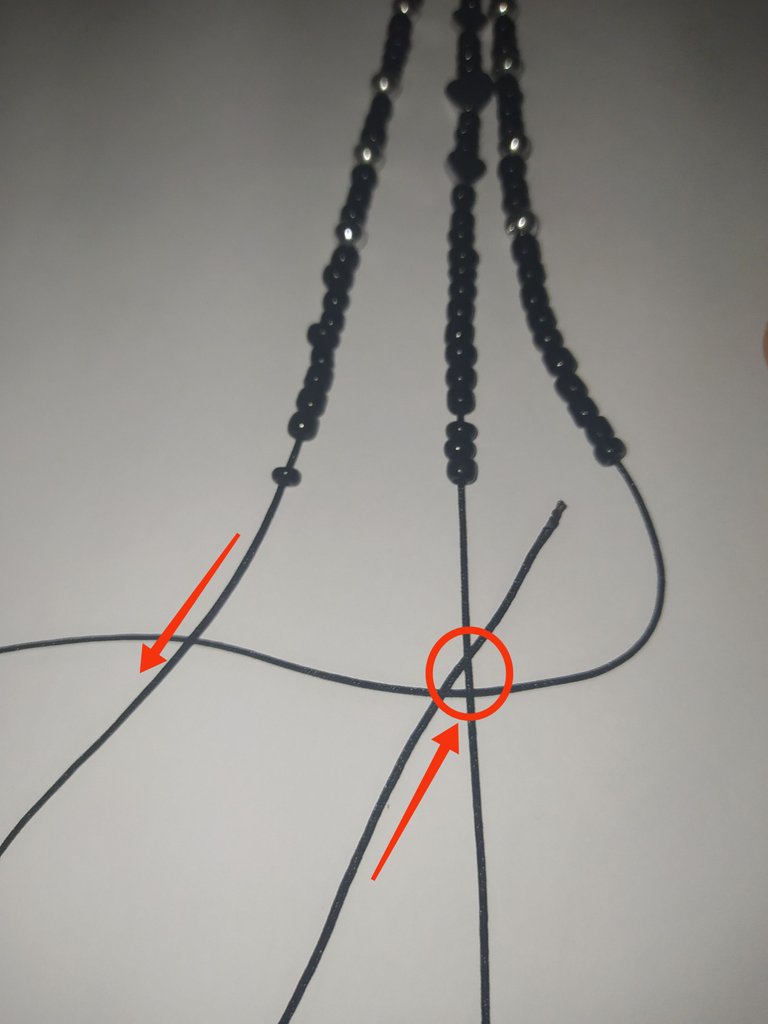
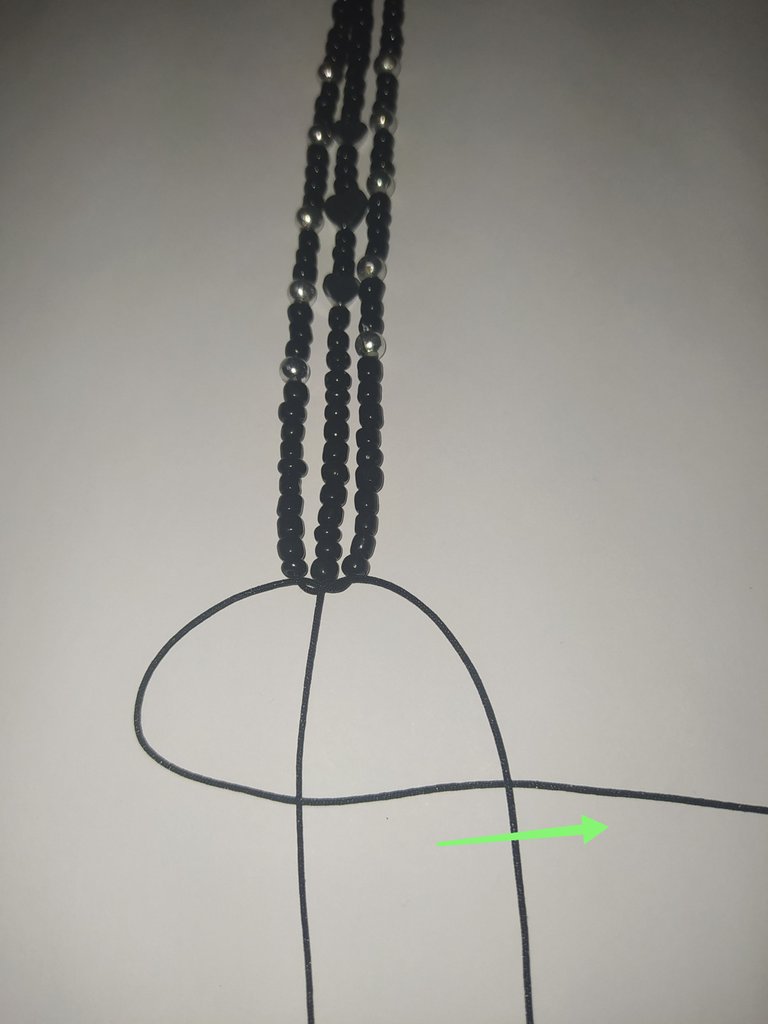
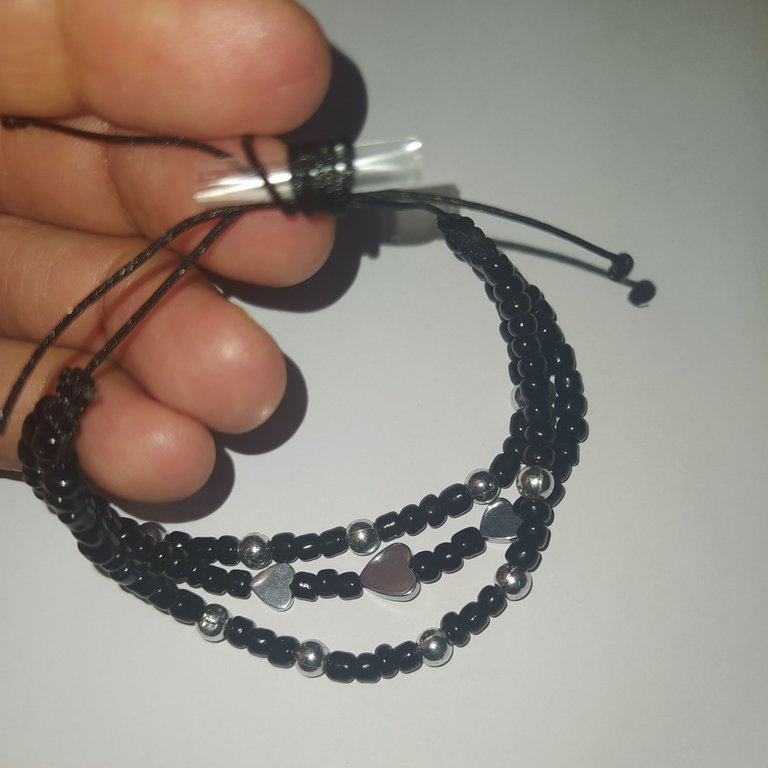
- Tomamos los 20 cm de hilo y colocamos cinco centímetros hacia el lado izquierdo.
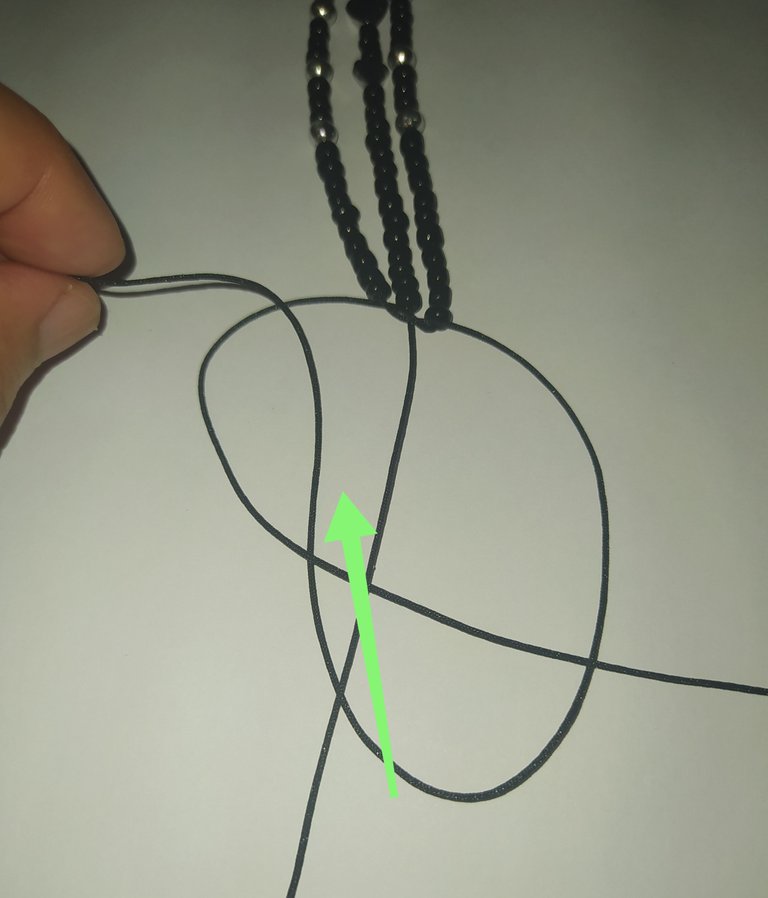
- Con el resto del hilo lo pasamos por encima del pitillo dándole la vuelta y tomando los hilos que están abajo.
- Le damos varias vueltas.
- Luego introducimos esa punta por el centro del pitillo del lado izquierdo.
- We take the 20 cm of yarn and place five centimeters to the left side.
- With the rest of the thread we pass it over the straw turning it around and taking the threads that are below.
- We give it several turns.
- Then we introduce that tip through the center of the straw on the left side.
do.
 |  |
|---|
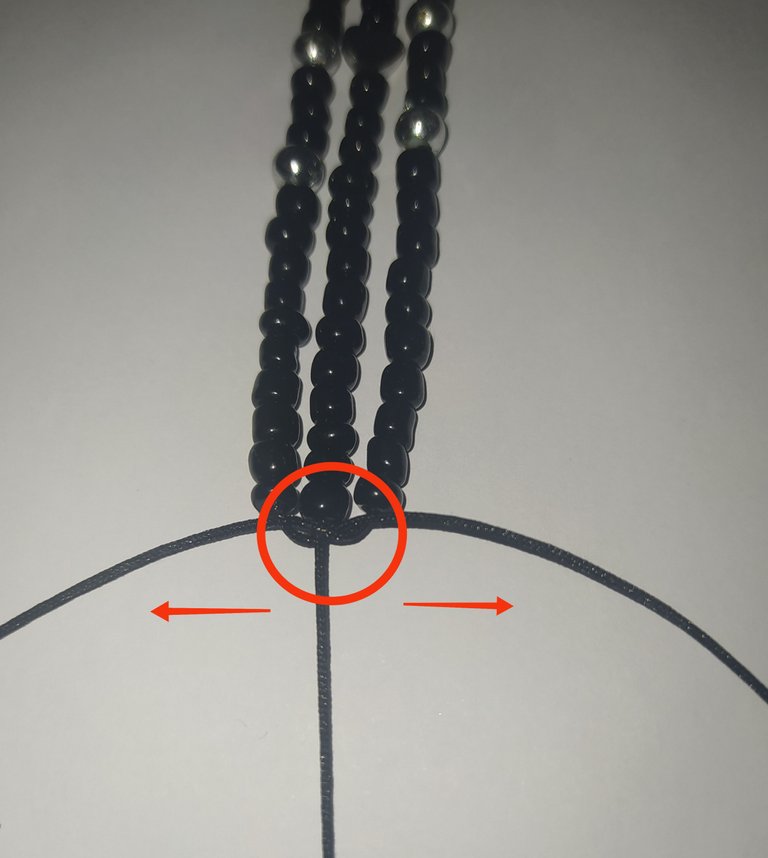
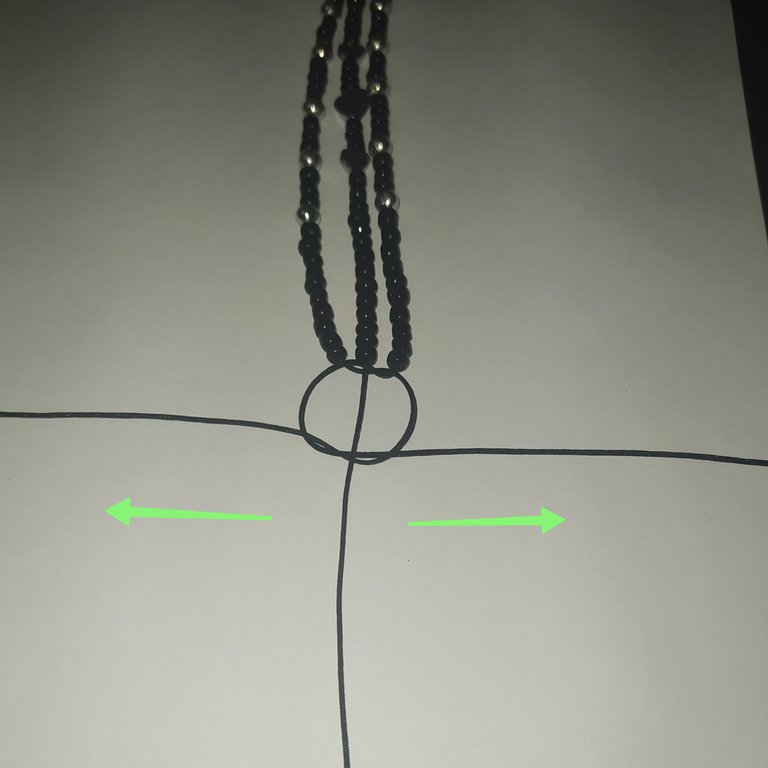
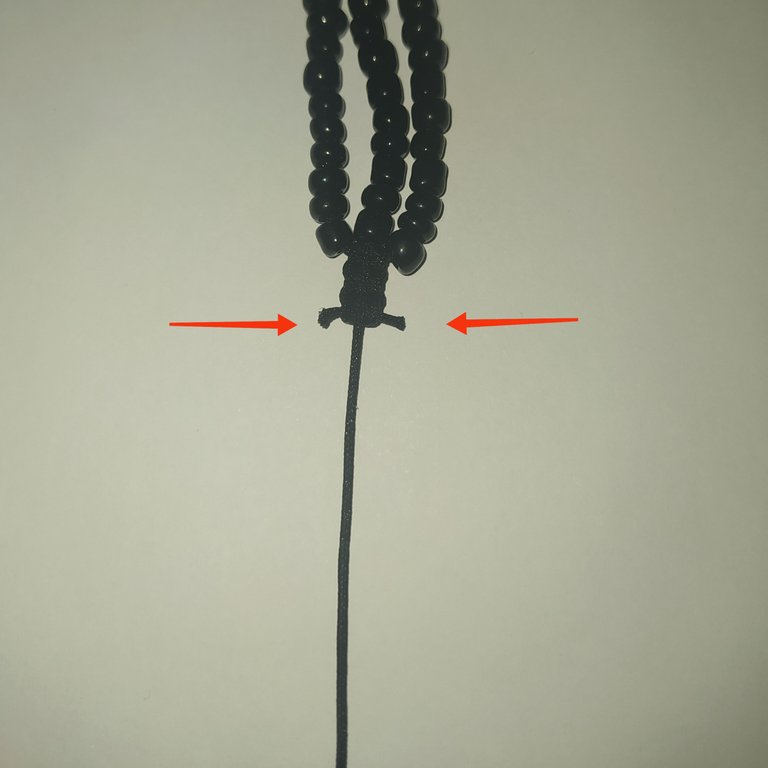
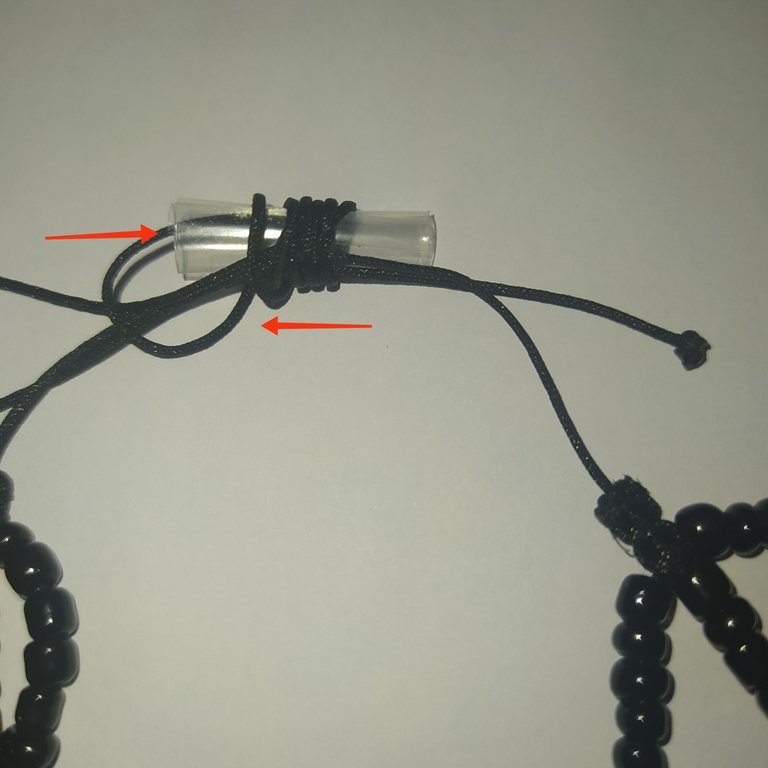
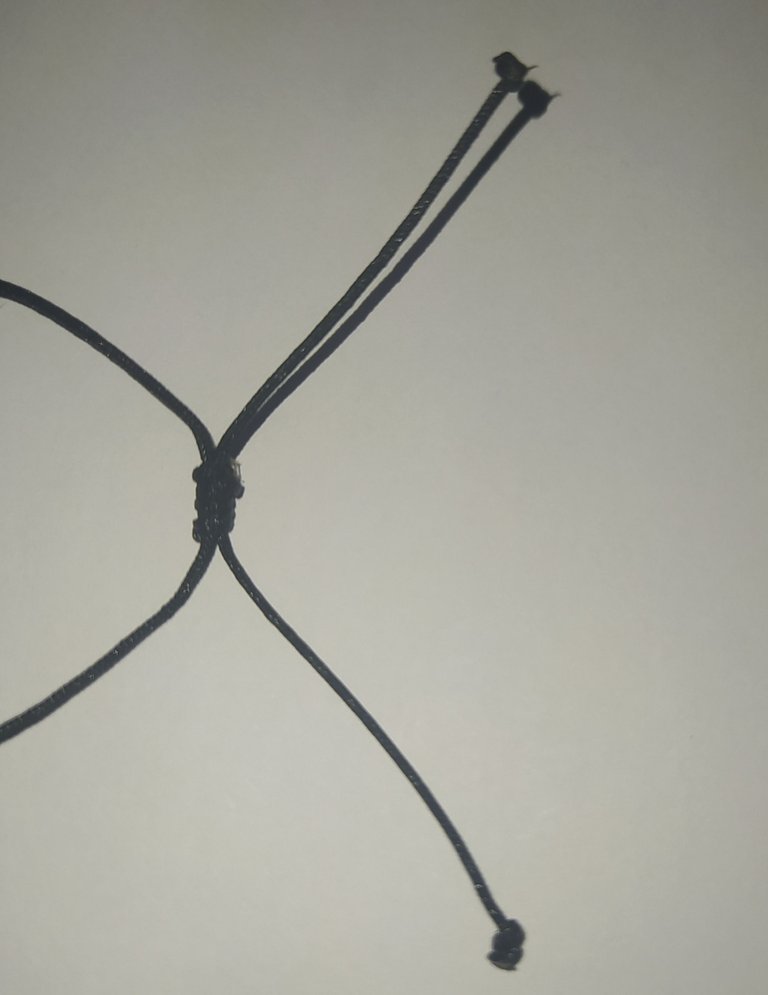
- Vamos sacando poco a poco el pitillo y la punta del hilo.
- Luego tiramos de los hilos para asegurar el nudo.
- We gradually pull out the straw and the end of the thread.
- Then pull the threads to secure the knot.
 |  |
|---|
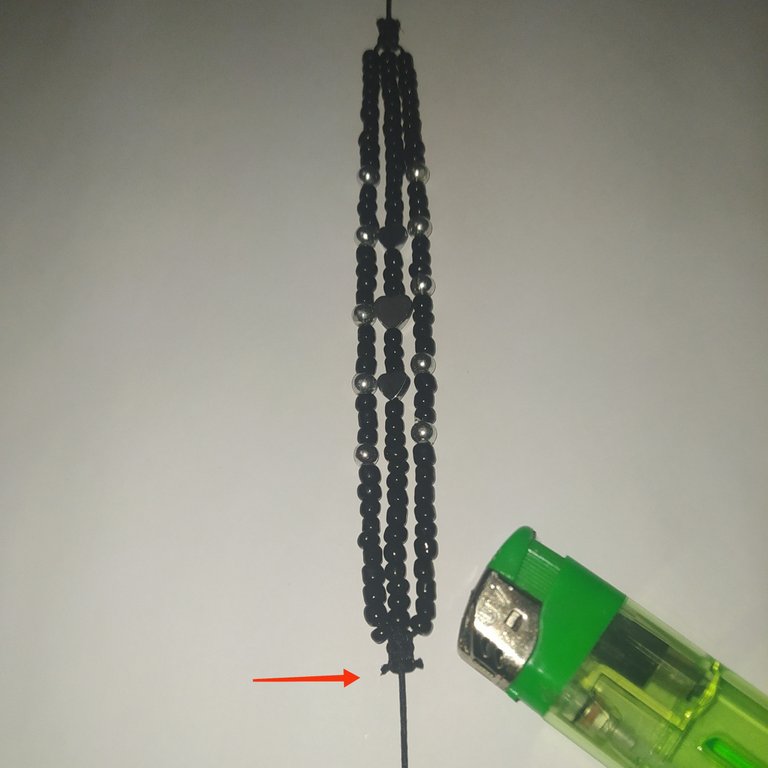
- Recortamos los excedentes y quemamos las puntas.
- Trim the excess and burn the ends.
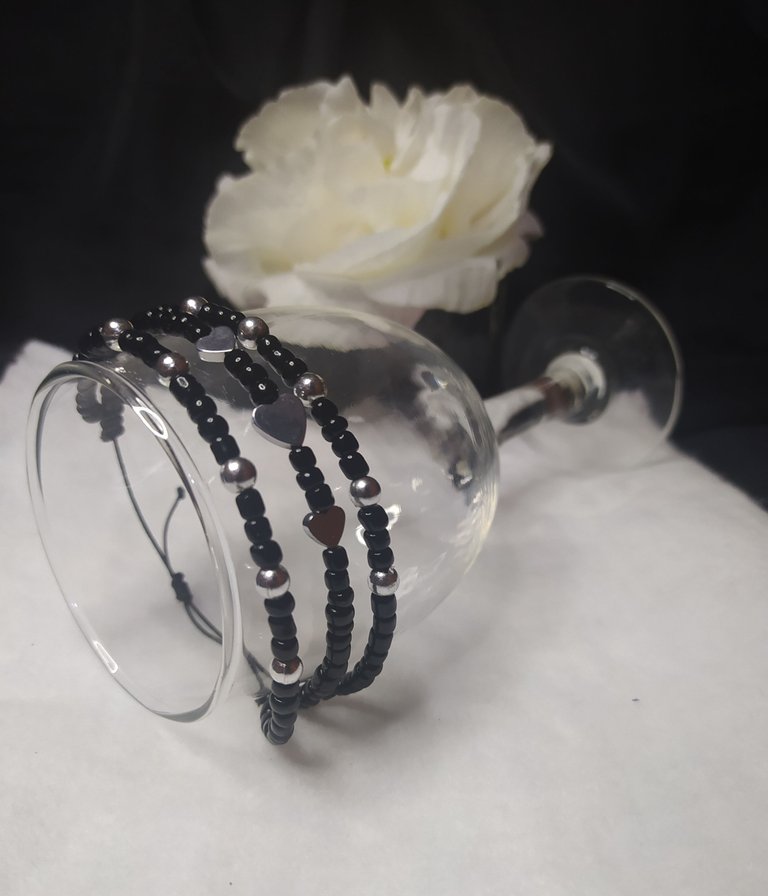
De esta forma tan bella queda la pulsera terminada, para mí luce genial y la puedes lucir en cualquiera ocasión
This is how beautifully the bracelet is finished, for me it looks great and you can wear it on any occasion.

Gracias queridos amigos espero les guste mi trabajo el cual realice con mucho amor.
Los invito a que me dejen sus comentarios dándome su opinión que les pareció y que color les gustaría a ustedes.
Thank you dear friends I hope you like my work which I made with much love.
I invite you to leave me your comments giving me your opinion on what you thought and what color you would like to see.
- Banner realizado a través de PicsArt.
- Fotografías tomadas desde mi celular Xiaomi redmi note 8.
- Banner made through PicsArt.
- Photographs taken from my Xiaomi redmi note 8 cell phone.
Has sido curado por @visualblock / You've been curated by @visualblock
Bienvenidas delegaciones / Delegations welcome
Trail de Curación / Curation Trail
Vota por nuestro Testigo aliado - @hispapro / Vote for our allied Witness - @hispapro
Más información sobre el testigo aquí / More information about the witness here
Gracias infinitas por brindarme su apoyo
🤗🤗🤗
La manualidad te quedó bien fina, muy bonita. 🤗
Gracias mis queridos amigo @visualblock me alegra saber que les gusto, gracias por la visita❤️❤️❤️
Click on the badge to view your board.
Thank you to our sponsors. Please consider supporting them.
Check out our last posts:
gracias por mantenerme al tanto hurra
¡Bravo @yraimadiaz! Este es un gran logro para ti y la comunidad. ¡Sigue así!
Que bellesura amiga, me encanta. Un modelo sencillo con un color y diseño, que sin duda usaría. Saludos bella @yraimadiaz ✨
!DIY
Gracias querida amiga @dayadam❤️❤️❤️
You can query your personal balance by
!DIYSTATSgracias🌷🌷🌷
Click on the badge to view your board.
Thank you to our sponsors. Please consider supporting them.
Check out our last posts:
Gracias queridos amigos @hivebuzz por mantenerme informada❤️❤️❤️
¡Bravo @yraimadiaz! ¡Nos alegra que hayas recibido una nueva insignia! ¡Sigue con estos desafíos!