Learning to make macramé flowers [ENG/ESP]
ENGLISH
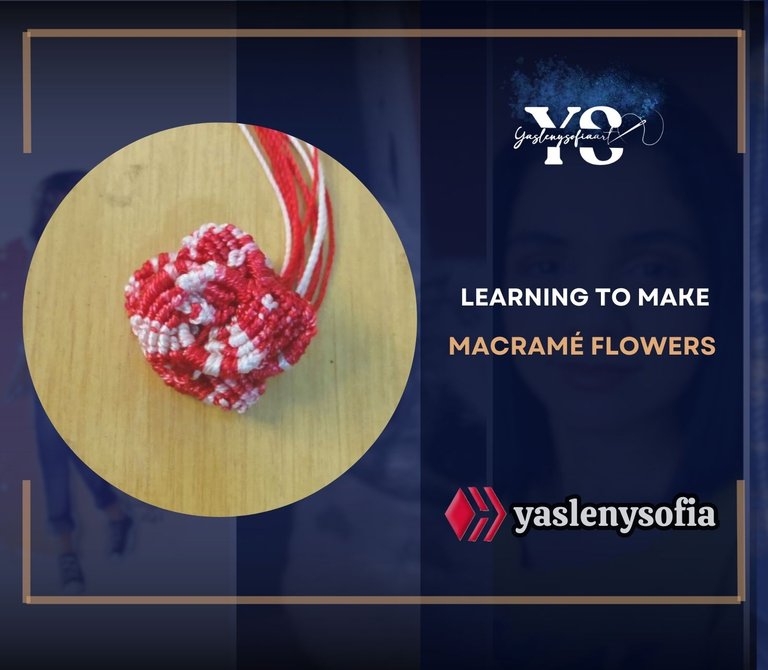
Greetings @needleworkmonday community, a few days ago I was checking Pinterest, looking for ideas and all, and I came across flowers made in macramé and I loved the idea, because it's like crochet, but without the needles, giving me a chance to make them and try to see how was their process. I hope you like the result.

-A hooked board for holding the thread
-A lighter
-Scissors
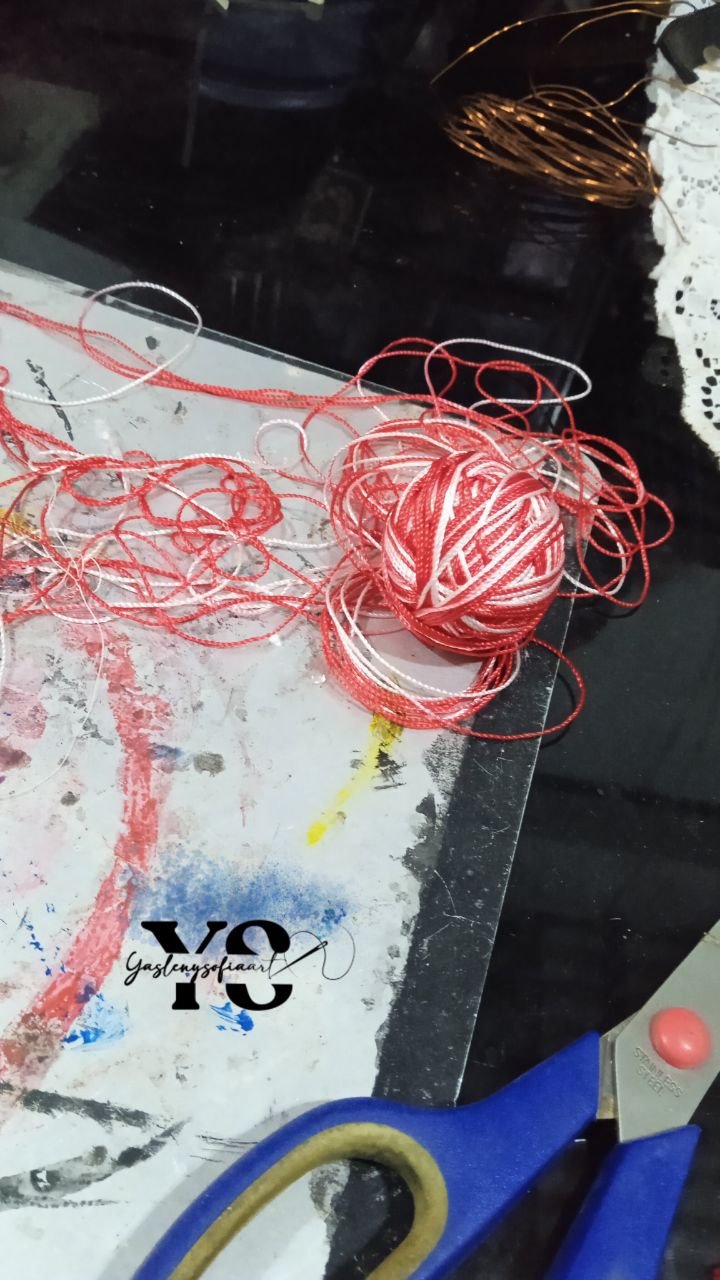

At the beginning I did the process with a thin cotton thread, and the truth is that it did not work, because with this thread the knots were so tight that they did not roll, that is to say, they did not slide and the shape did not come out, so I resorted to a perle thread that I had at hand, which was between red and white.
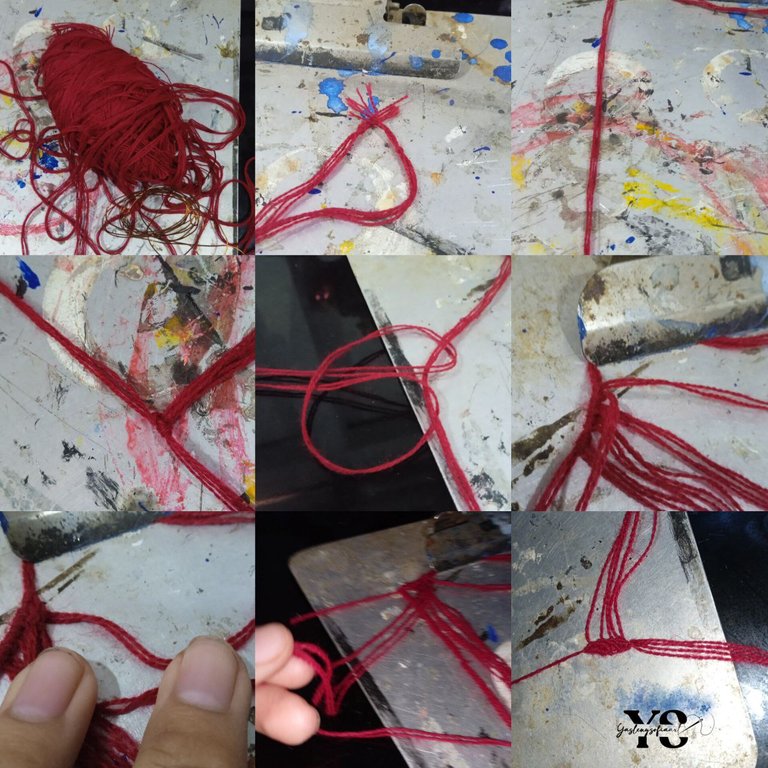
We take five threads of 2 meters each (I had to repeat this process because I was missing thread). One of those threads, we pressed it with a hook board, which a little more than half that on the outside.
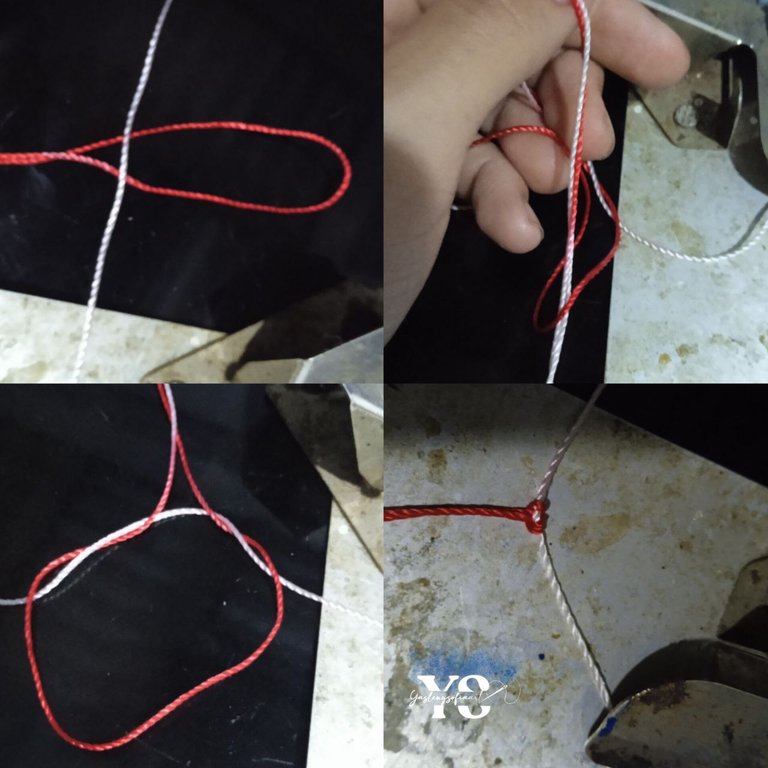
Then, we take another thread, folded in half and we make a lark's knot, which is to pass the loose part of that thread, through the middle of the other one.
With this knot ready, we proceed to make a knot at each end of the knot, i.e., I take right-hand thread and make a knot, I take left-hand thread and make a knot.
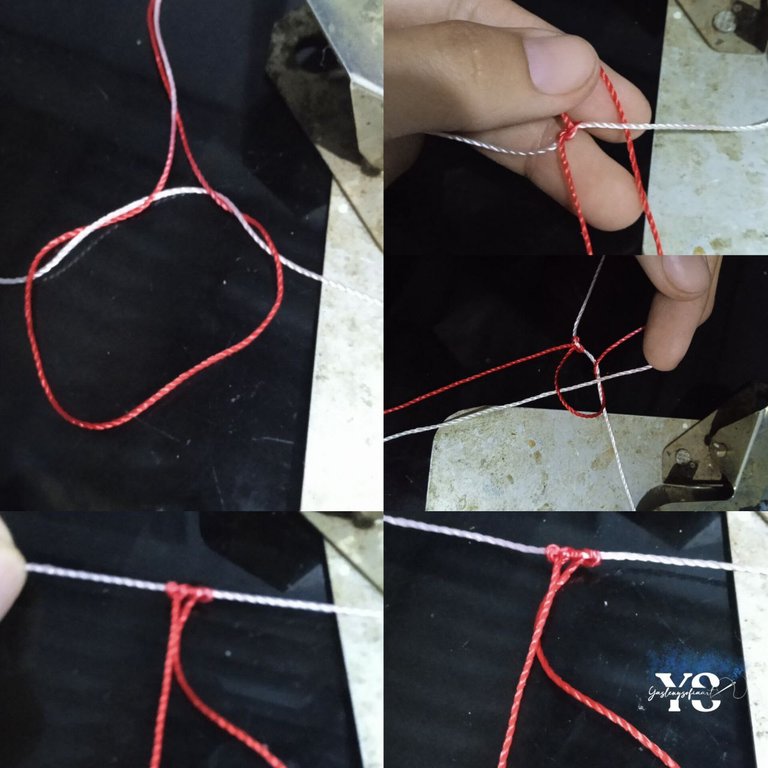
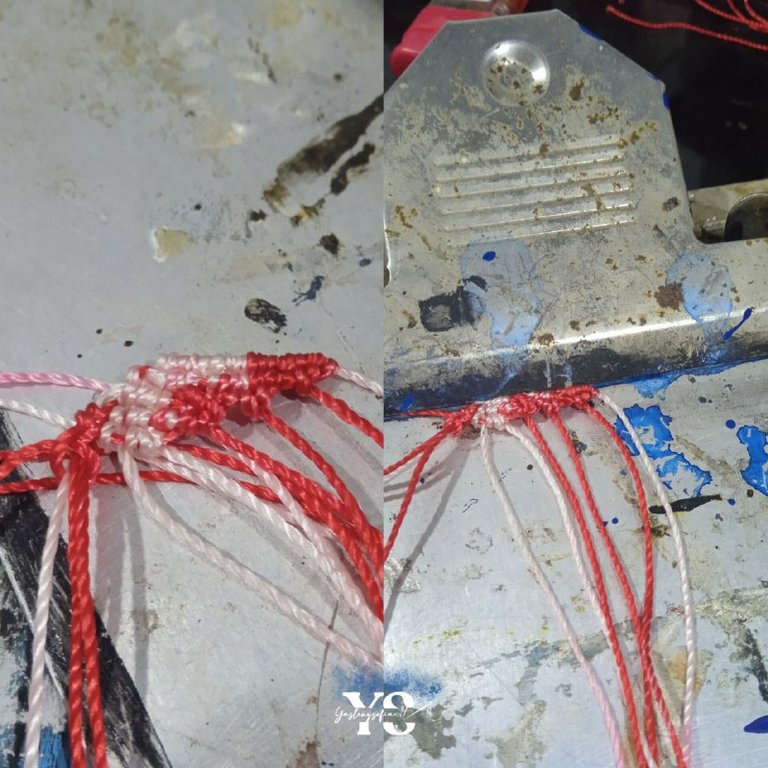
This we do with the remaining 4 threads, resulting in this way.
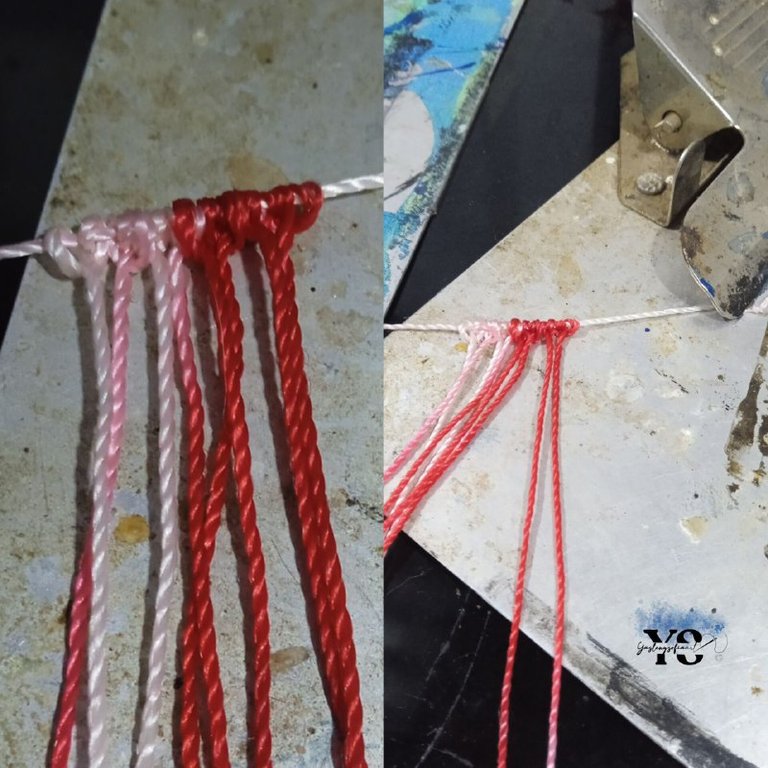
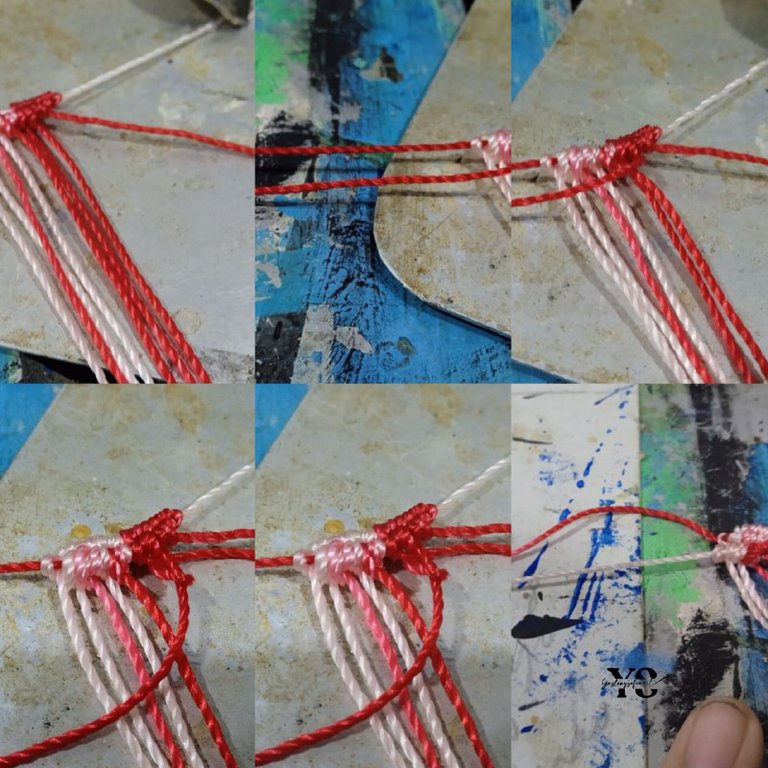
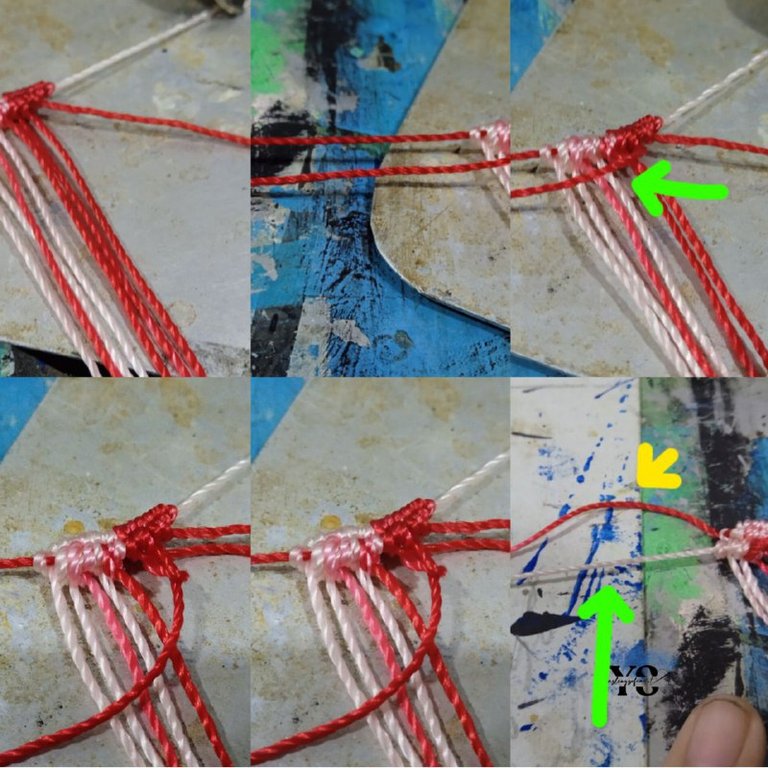
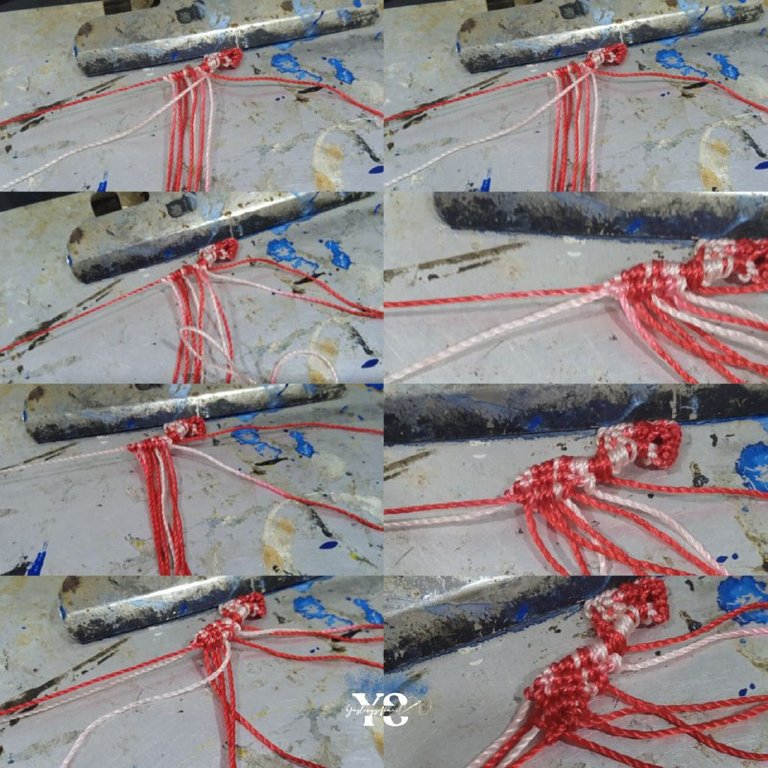
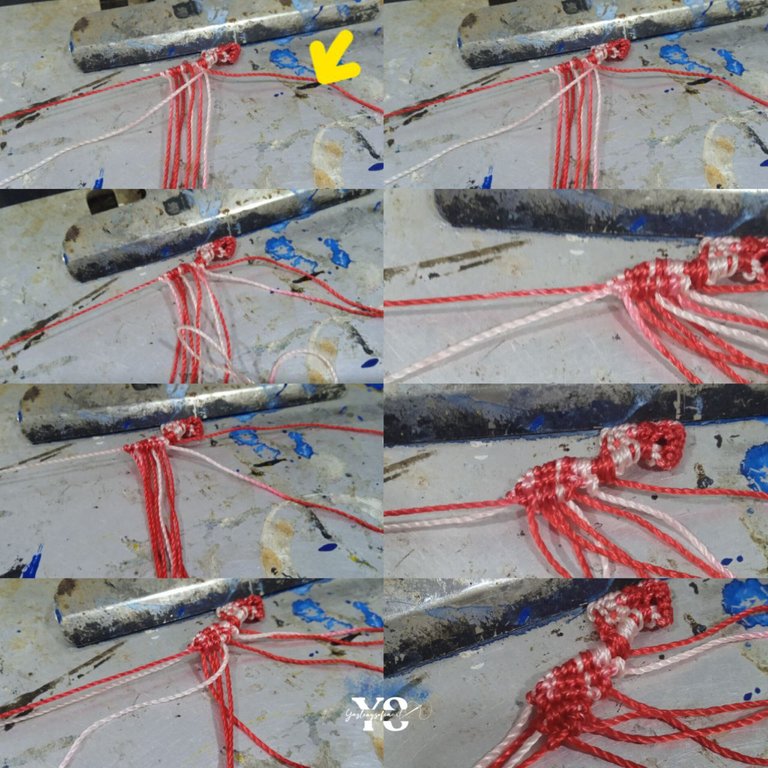
We take the first thread of the row (the one marked with yellow) and we put it on top of the rest, we will call this thread yellow, the next thread after this one is crossed with the yellow thread, that is to say, we make a knot twice and so on with the following threads.
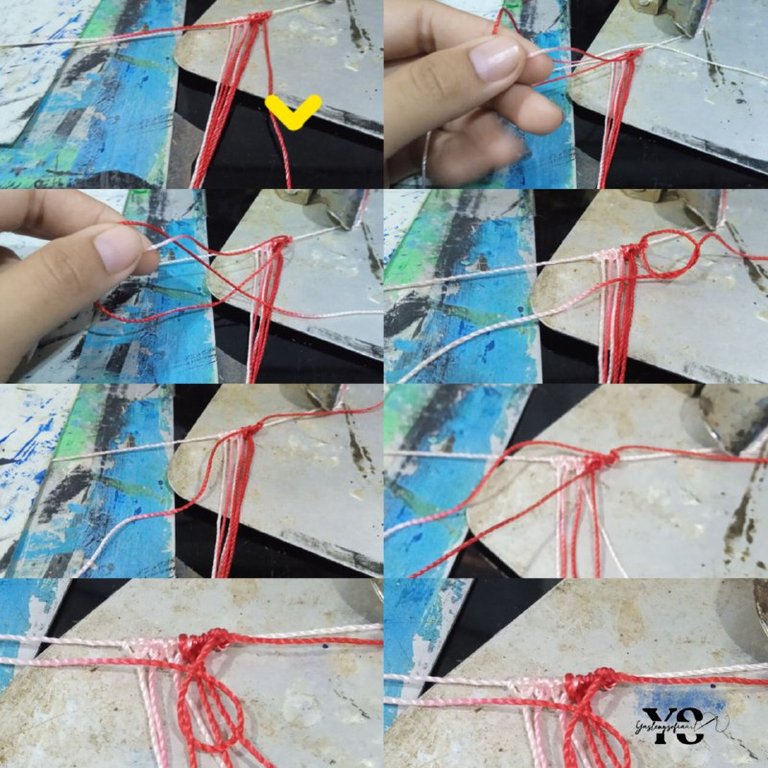
When we are at the end of the row, we pass the guide thread under the yellow one and we tie the knots, leaving this thread on the other side.
For the next row, the first thread is left to one side so the second thread, the one marked with green, we do the same as in the previous step, on top of the others and with the rest we tie the knot, only that when we reach the end we will not tie the knot with the one marked in yellow, in this case there will be two threads left on the other side.
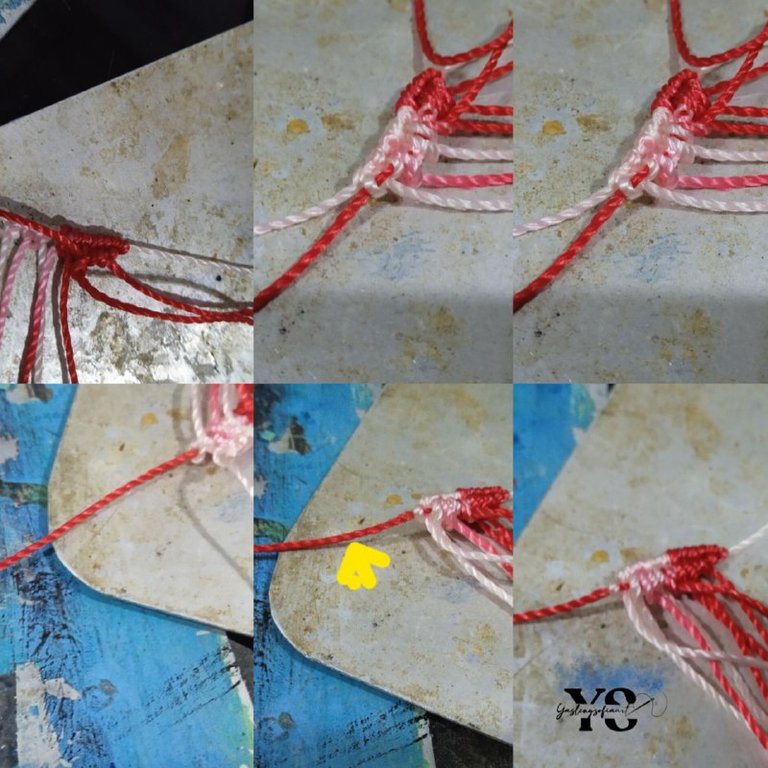
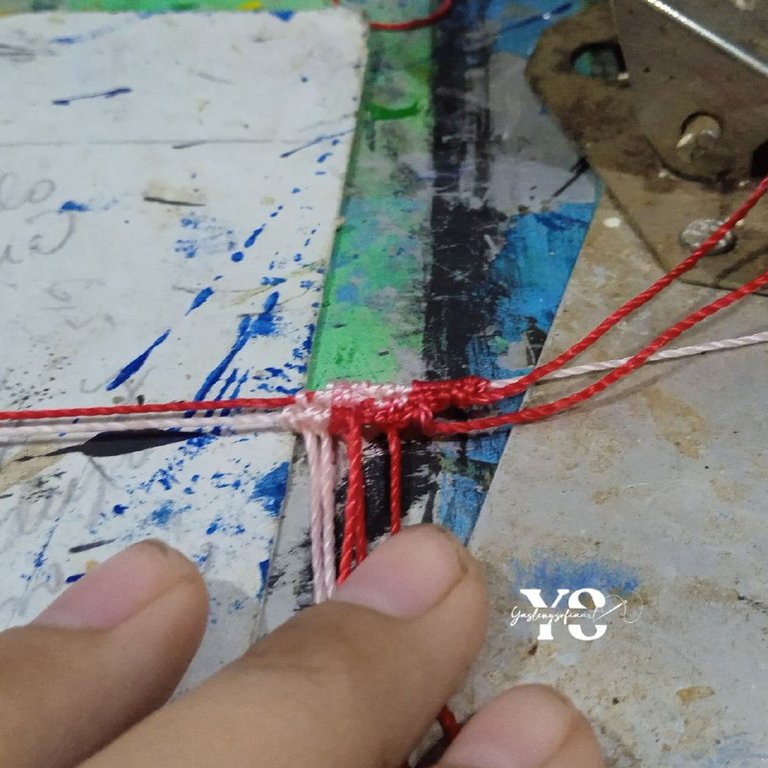
Now, we leave the first two threads to one side, and with the next thread, we make the respective knots. So at the end there would be 3 threads on the other side.
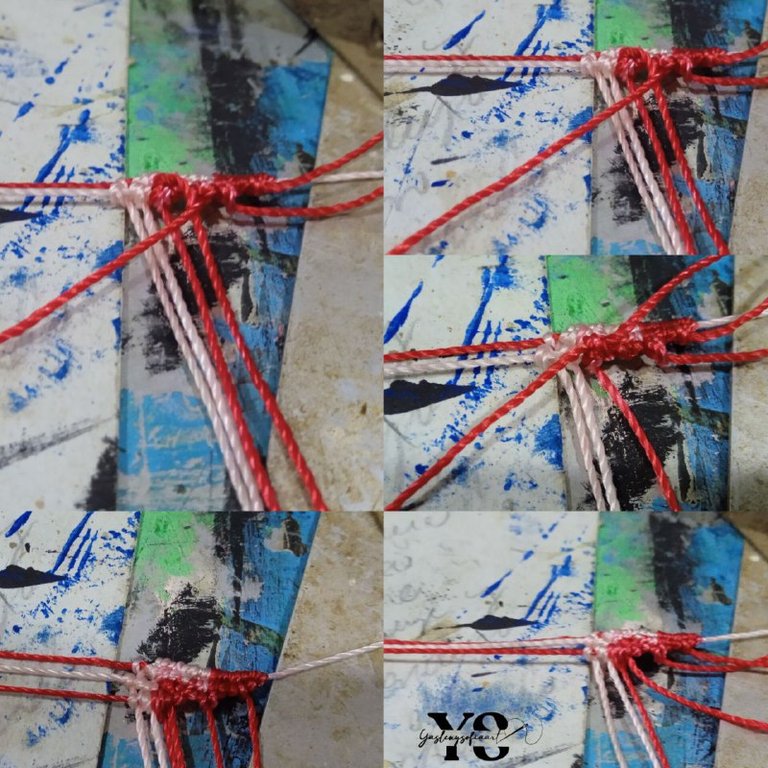
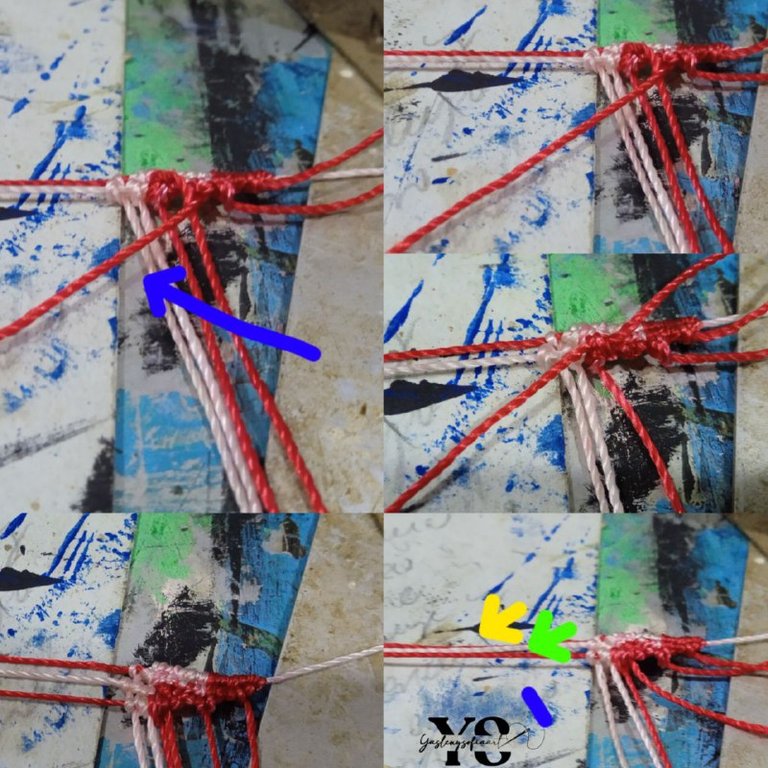
Here we go with the last row, ignoring the first three threads, we do the same process with the remaining ones.
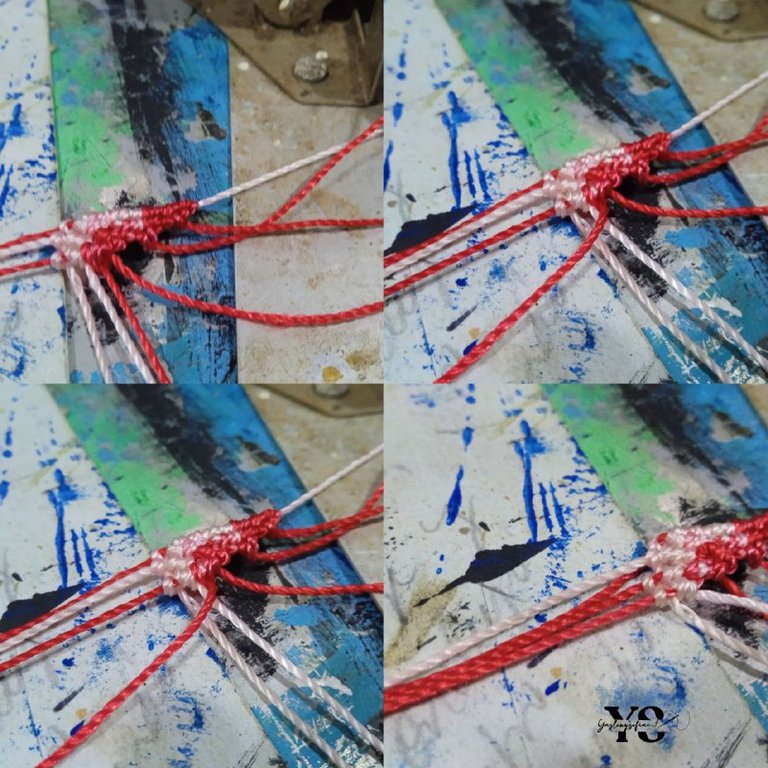
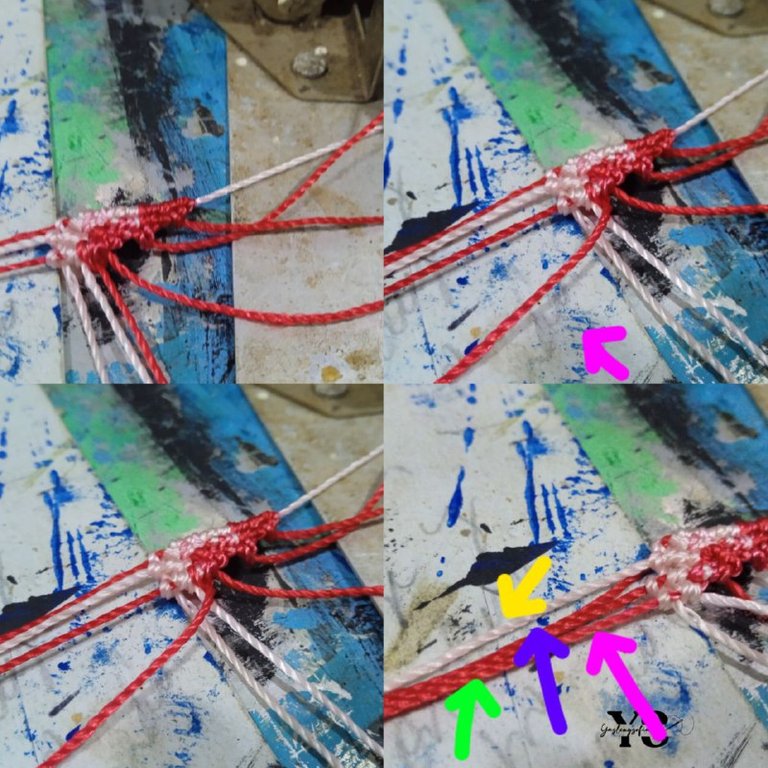

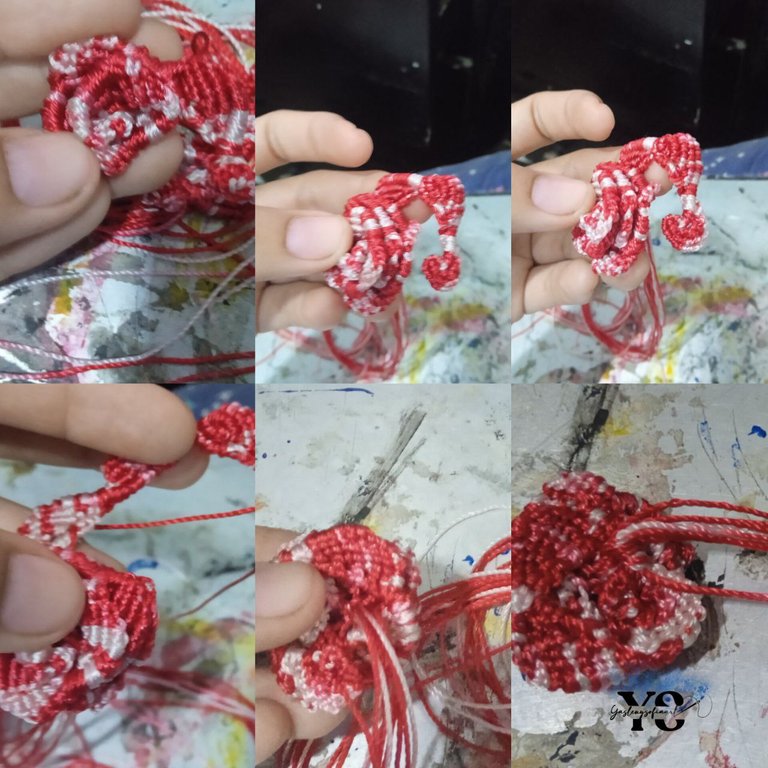
Now, with the four threads that passed the other side, we take the first one from the left to the right, passing it over the next one, where we will make two knots, it is almost the same procedure as the previous ones, only that instead of leaving them aside with the thread that makes the knot, we take them with the first one and we make a knot with the next thread, joining this third one to the other two and we make a knot with the next one.
We release from the hook what has just been made and we hold it horizontally again, making with those 5 threads that you see in the image, the same process as before, first thread, knot with the next one, instead of leaving the one that makes the knot to one side, we join it with the first one and the third thread makes a knot; that 3 joins the other 2 and with the next one we make two knots and so on, completing the first petal.
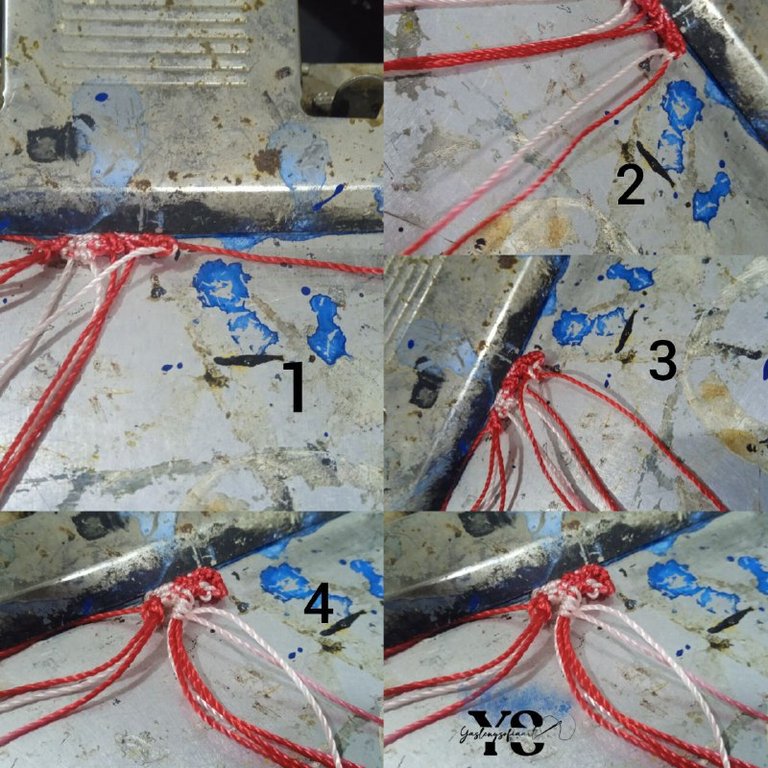
VIDEO 7
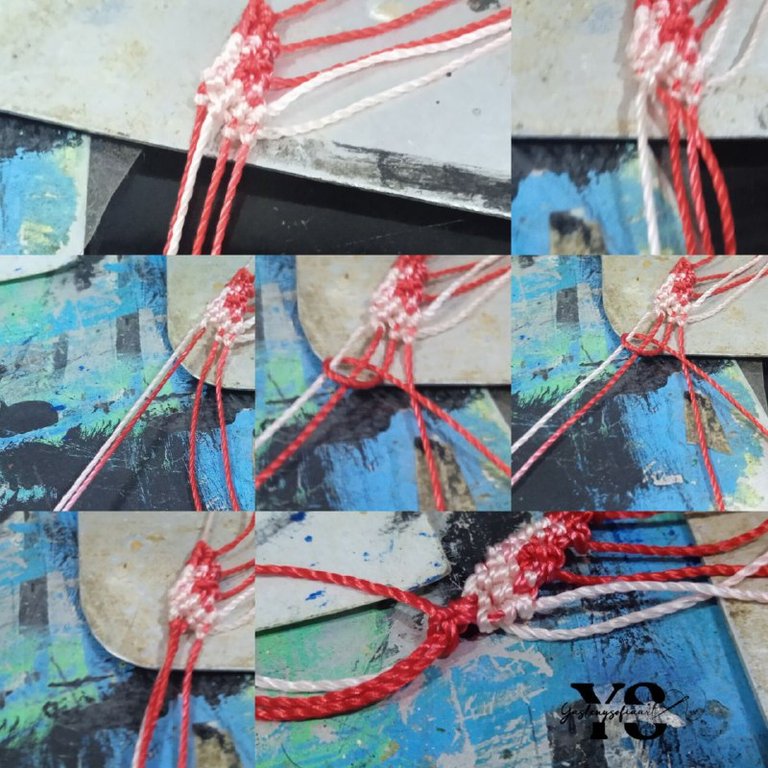
We join those 5 threads with the other 4, grabbing one of them to pass it under the remaining 8 threads, making two knots, and we proceed to make the same with 7 of those 8 threads, since one will remain as a support.
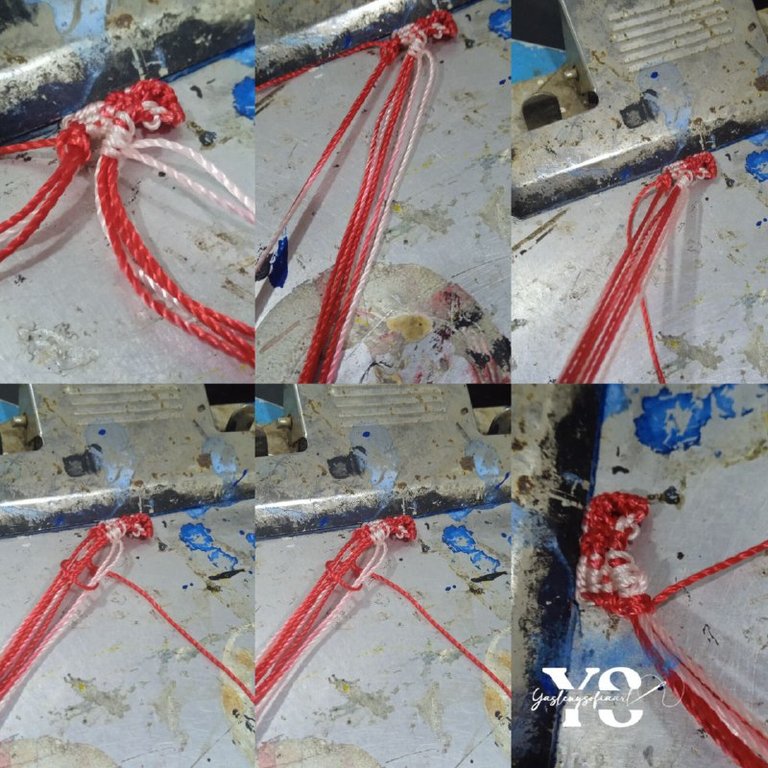
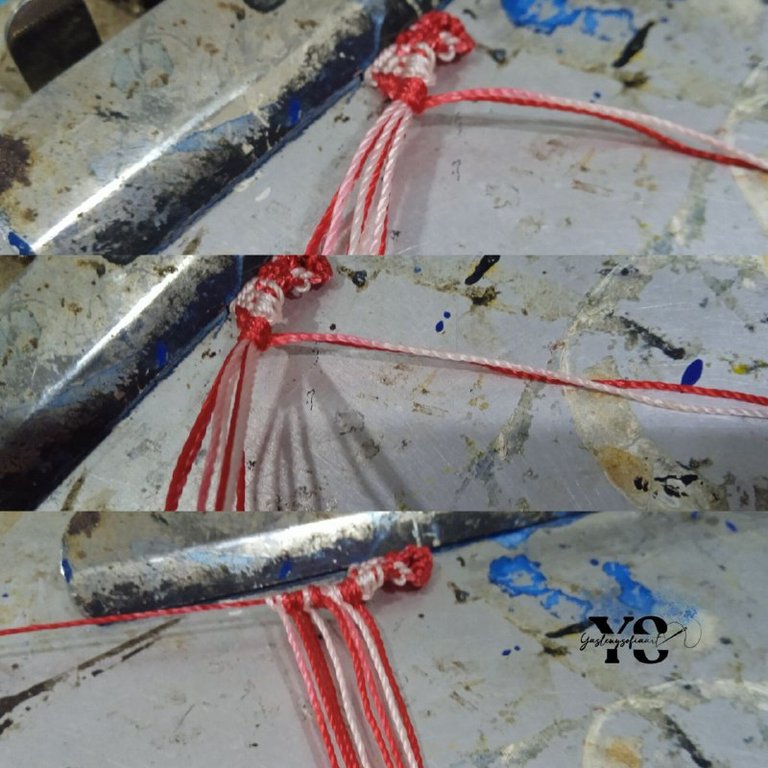
And we do all the previous steps to make the second petal, only, in this case, from the beginning we ignore the first thread, so the second one would remain as the first thread to be knotted.
All this we do 14 times, to have 14 petals, if you do it less, the flower will be a little smaller.
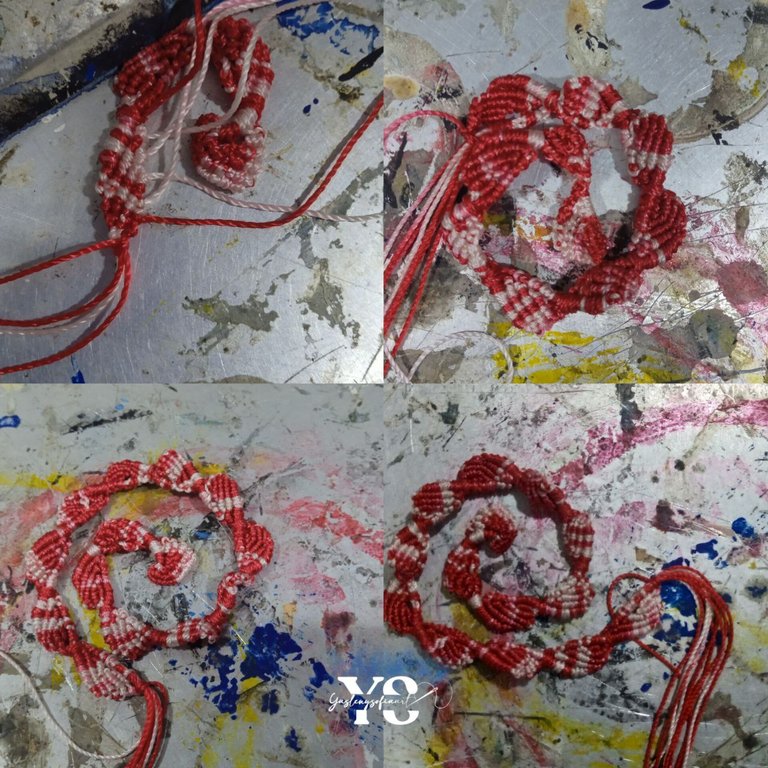
After having the 14 petals, we proceed to take one of the longest leftover threads, and we pass it through one of the holes that you can see in the petal, on the inside, the side that gives for one. This will be done with the following petals, and you will notice that, as you pull, they will roll up.
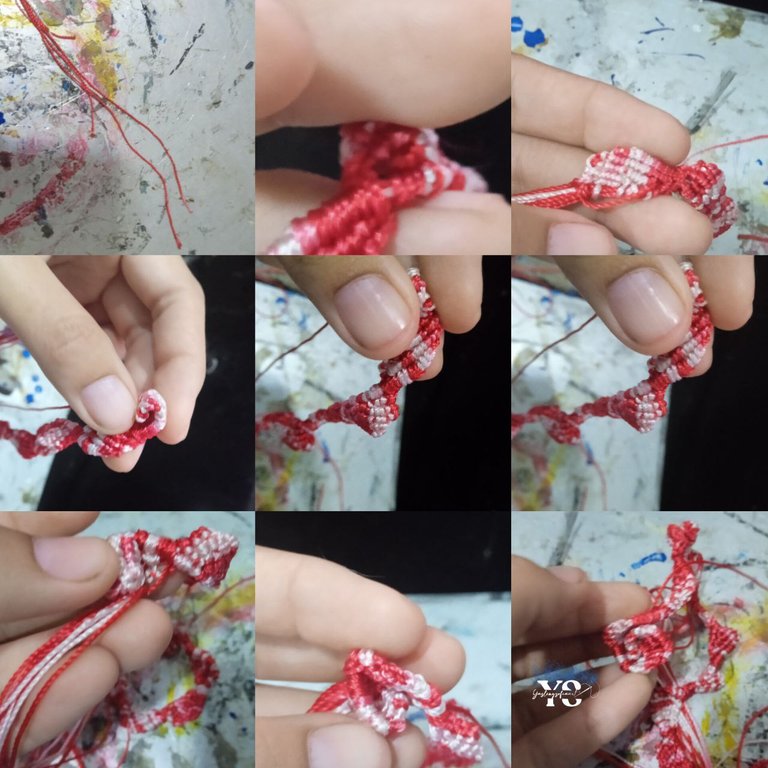
When the last one arrives, behind it, we make a knot with the thread, to close the weft, and with two excess threads, we wind all the excess threads, which remain under the rose already formed, to give closure and firmness to everything.
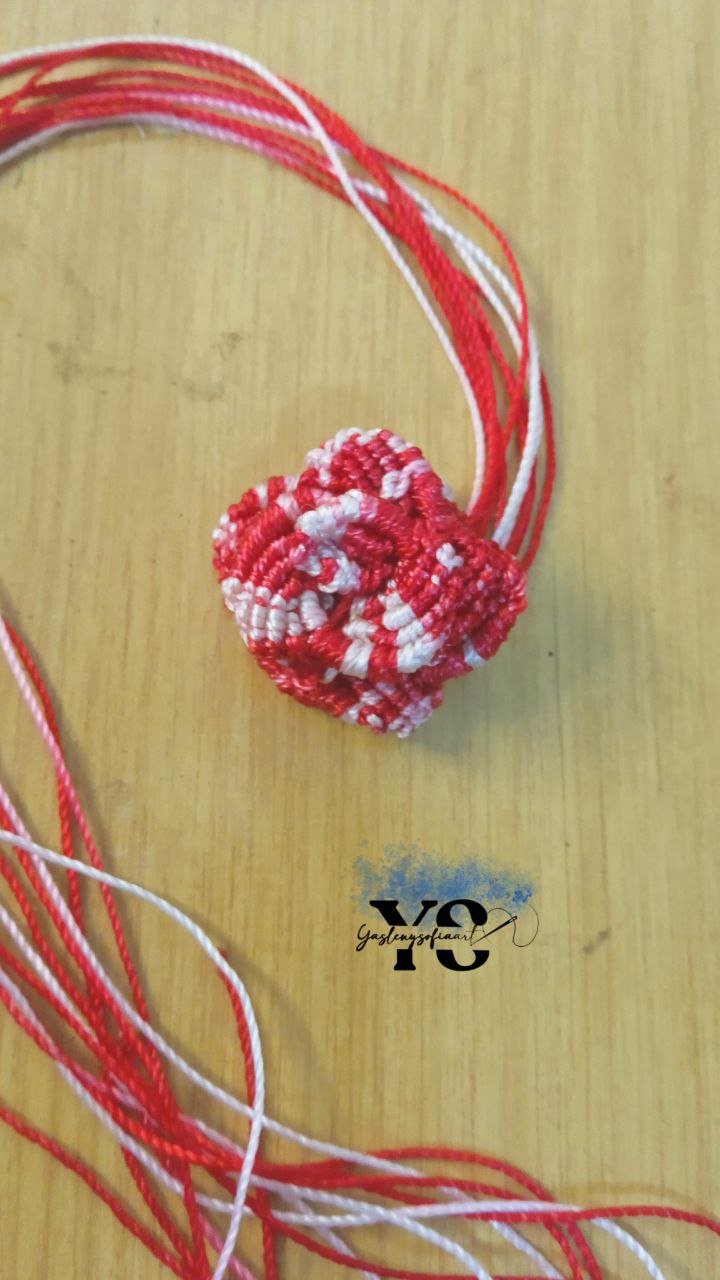
The result is this and I love it, of course with the polyester waxed thread it should be much better and forgive the somewhat complicated explanation, it is that there are many steps, but I hope that, with the colors, have been guided something.


Thank you for reading my post. I hope you liked it. I will be attentive to answer your comments. You can visit my blog, follow my content and social networks.

FACEBOOK / INSTAGRAM / TWITTER

ESPAÑOL
Saludos comunidad de @needleworkmonday, hace unos días estuve revisando Pinterest, buscando ideas y todo ello, y me conseguí con flores hechas en macramé y me encantó la idea, porque es como si fuese a crochet, pero sin las agujas, dándome una oportunidad de realizarlas y probar a ver como era su proceso. Espero les guste el resultado.

-Una tabla de gancho para sujertar el hilo
-Un encendedor
-Tijera


Al inicio hice el proceso con un hilo de algodón fino, y la verdad no me resultó, porqué con este los nudos quedaban tan apretados que no rodaban, es decir, no se deslizaban y la forma no me salía, por lo que recurrí a un hilo perlé que tenia a la mano, que era de color entre rojo y blanco.

Tomamos cinco hilos de 2 metros cada uno (este proceso lo tuve que repetir porque me faltaba hilo). Un de esos hilos, lo prensamos con una tabla de gancho, que un poco más de la mitad que por fuera.

Luego, agarramos otro hilo, doblado por la mitad y hacemos un nudo alondra, que es pasar la parte suelta de ese hilo, por el medio del otro.
Con este nudo listo, se procede hacer un nudo por cada uno de los extremos del mismo, es decir, tomo hilo derecho y hago un nudo, tomo hilo lado izquierdo y hago un nudo.

Este lo hacemos con los 4 hilos restantes, resultando de esta manera.

Tomamos el primero hilo de la hilera (el que este marcado por amarillo) y lo ponemos encima del resto, a este hilo vamos a llamarlo amarillo, el siguiente hilo después de este, se cruza con el hilo amarillo, es decir, se hace un nudo dos veces y así con los hilos siguientes.

Cuando estemos al final de la hilera, el hilo guía lo pasamos por debajo del amarillo y hacemos los nudos, quedando este hilo del otro lado.

Para la siguiente hilera, el primer hilo lo dejamos a un lado por lo que el segundo hilo, el marcado por el verde, hacemos lo mismos que el paso anterior, encima de los otros y con el resto el nudo, solo que cuando se llegue al final no le vamos hacer el nudo con el marcado en amarillo, en este caso van quedando dos hilos por el otro lado.


Ahora, dejamos los dos primeros hilos a un lado, y con el siguiente hilo, hacemos los respectivos nudos. Por lo que al final quedarían 3 hilos al otro lado.


Aquí vamos con la ultima fila, ignorando los tres primeros hilos, hacemos el mismo proceso con los restantes.


Ahora bien, con los cuatros hilos que pasaron el otro lado, tomamos el primero del que esta izquierda a derecha, pasándolo encima del siguiente, donde haremos dos nudos, es casi el mismo procedimiento que los anteriores, solo que en vez de dejar a un lado con el hilo que hace el nudo, nos los llevamos con el primero y hacemos un nudo con el siguiente hilo, juntando este tercero a los otros dos y hacemos nudo con el siguiente.

Soltamos del gancho lo que se acaba de hacer y lo volvemos a sujetar horizontalmente, haciendo con esos 5 hilos que ven en la imagen, el mismo proceso anterior, primer hilo, nudo con el siguiente, en vez de dejar el que hace el nudo a un lado, lo juntamos con el primer y el tercer hilo les hace un nudo; ese 3 se une a los otros 2 y con el siguiente les hacemos dos nudos y así sucesivamente, completando el primer pétalo.


Esos 5 hilos los juntamos con los otros 4, agarrando a uno de esos para pasarlo debajo de los 8 hilos restantes, haciéndole dos nudos, y procedemos hacer los mismos con 7 de esos 8 hilos, pues uno quedará como soporte.


Y hacemos todos los pasos anteriores para hacer el segundo pétalo, solo que, en este caso, desde el inicio ignoramos el primer, hilo por lo que quedaría el segundo como el primer hilo a anudar.


Todo esto lo hacemos 14 veces, para tener 14 pétalos, si lo hacen menos, la flor les quedara un poco más pequeña.

Luego de tener los 14 pétalos, procedemos a tomar uno de los hilos más largos sobrantes, el y lo pasamos por uno de los orificios que se ven en el pétalo, por la parte interna, la cara que da para uno. Así se hará con los siguientes pétalos, y notaran que, a medida que jalan, se van enrollando,

Al llegar el ultimo, por detrás de este, hacemos un nudo con el hilo, para cerrar la trama, y con dos hilos sobrantes, enrollamos a todos los hilos sobrantes, que quedan debajo de la rosa ya formada, para darle cierre y firmeza a todo.

El resultado es este y me encanto, claro está con el hilo encerado de poliéster debe quedar mucho mejor y perdonen la explicación un tanto complicada, es que son muchos pasos, pero espero que, con los colores, se hayan guiado algo.


Gracias por leer mi post. Espero que les haya gustado. Estaré atenta a responder sus comentarios. Pueden visitar mi blog, seguir mis contenidos y redes sociales.

FACEBOOK / INSTAGRAM / TWITTER

0
0
0.000
Vaya, amiga, es un trabajo hermoso, pero también es un trabajo que requiere de muchas paciencia en su ejecución. Te quedó muy bien. Gracias por enseñarnos esta flor en macramé.
Bendiciones.
Ya cuando uno le agarra al proceso, se vuelve más rápido todo 😊. Muchas gracias
The final result is impressive. It looks pretty cool. You did a great job! Keep it up! Thank you for sharing this.
Thank you so much, I loved making it and want to make many more things in macramé.
🤗
Congratulations @yaslenysofia! You have completed the following achievement on the Hive blockchain And have been rewarded with New badge(s)
Your next target is to reach 400 posts.
You can view your badges on your board and compare yourself to others in the Ranking
If you no longer want to receive notifications, reply to this comment with the word
STOPCheck out our last posts:
Thank you 🤗
That's great @yaslenysofia! We're impressed with your progress on Hive! Keep going and reach your new target!
BTW, we noticed we miss your support for our proposal. Mays we ask you to check it out and consider supporting it?
All you need to do is to click on the "support" button on this page: https://peakd.com/proposals/248.
Thank you!
The outcome is beautiful and nice, it a nice learning, keep it up.
Thank you very much 😍
Hola Yasleny. Es lindo el macramé, y entretenido, además de que no necesita muchos elementos. Que bueno que te cruzaste con este tutorial, se ve muy buena la flor. Felicitaciones ❤️
Si, por eso me encantó esta técnica. Muchas gracias 😍