Illustration to celebrate my Birthday / Ilustración para celebrar mi Cumpleaños [ENG/ESP]
ENGLISH
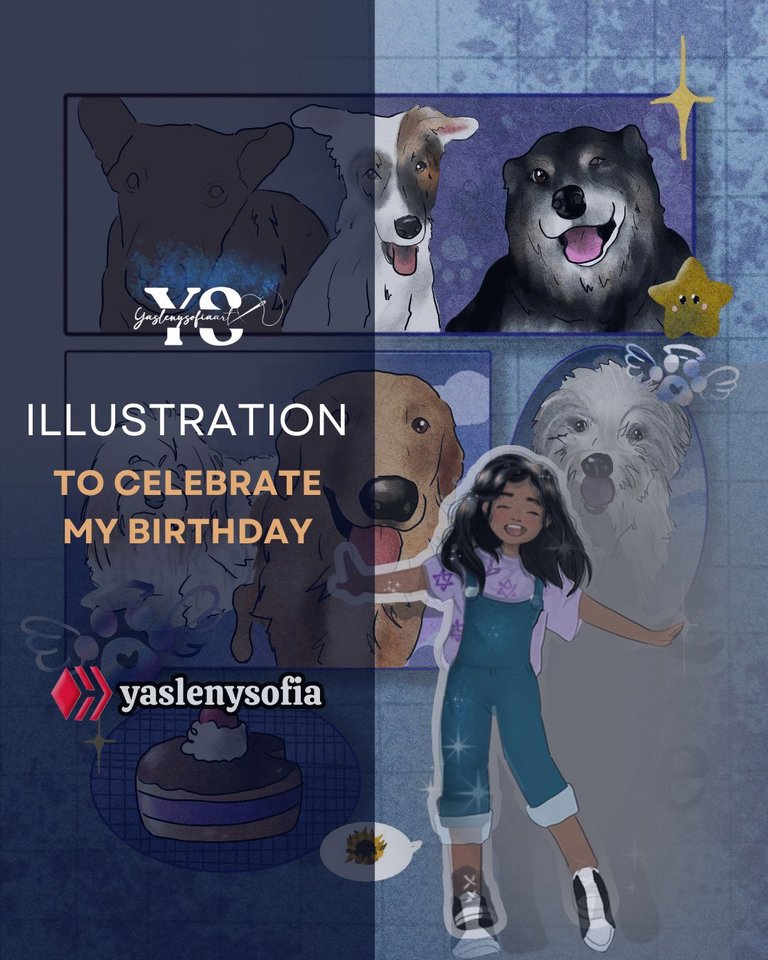
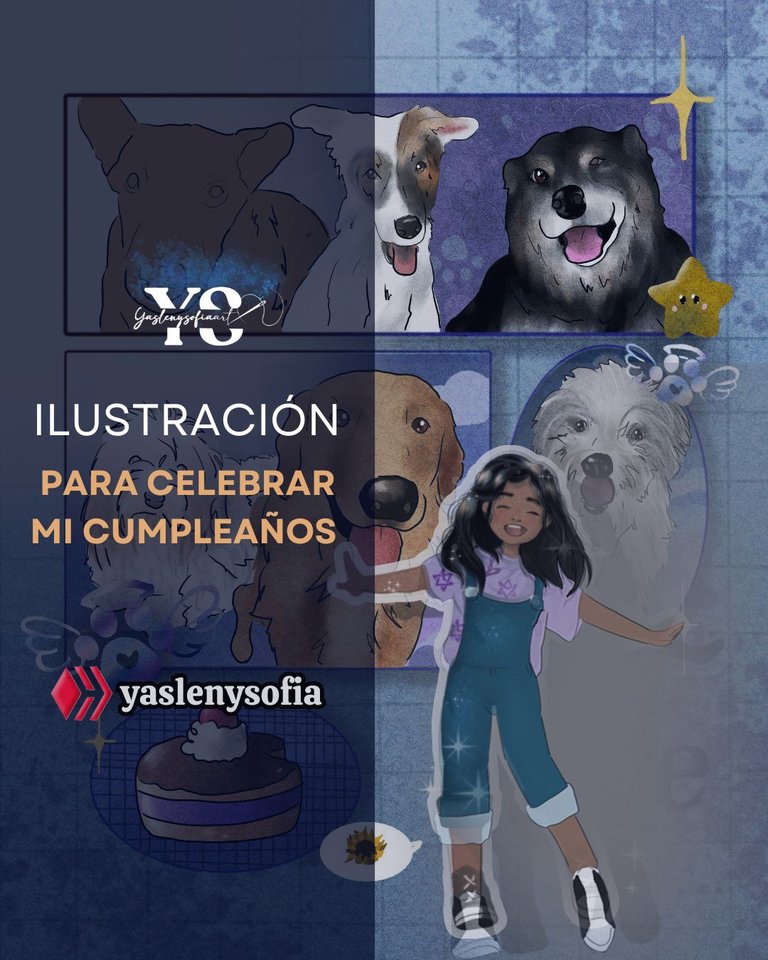
Greetings @skethbook community, today I want to share with you a tradition that I have been doing on each of my birthdays and that is to make me an illustration, although it is tomorrow, I want to share with you the whole process that it took me to make it. At the end I attach the ones I've done so far, along with this year's illustration, which I feel I have improved, I still need to do it, but little by little.
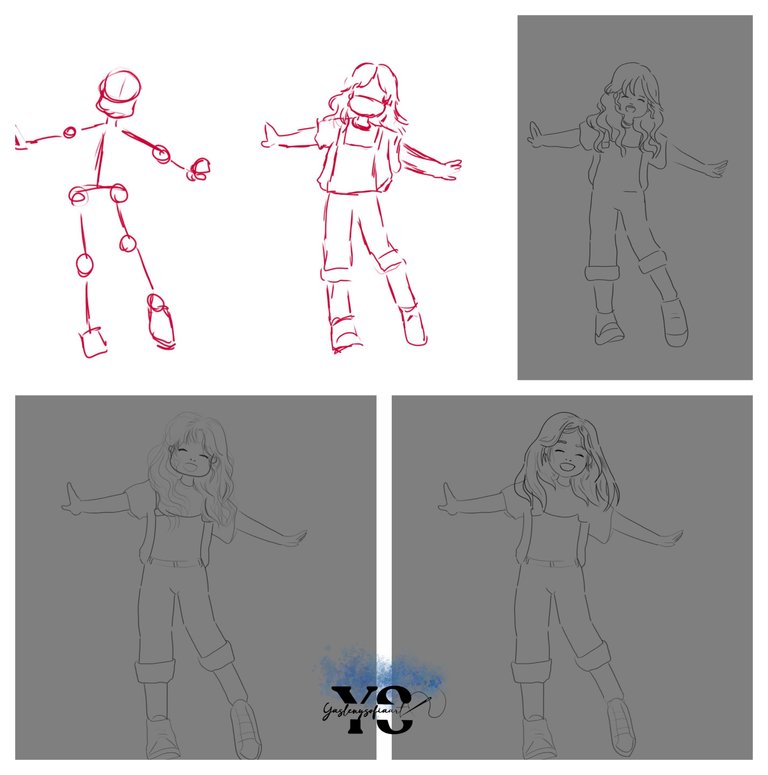
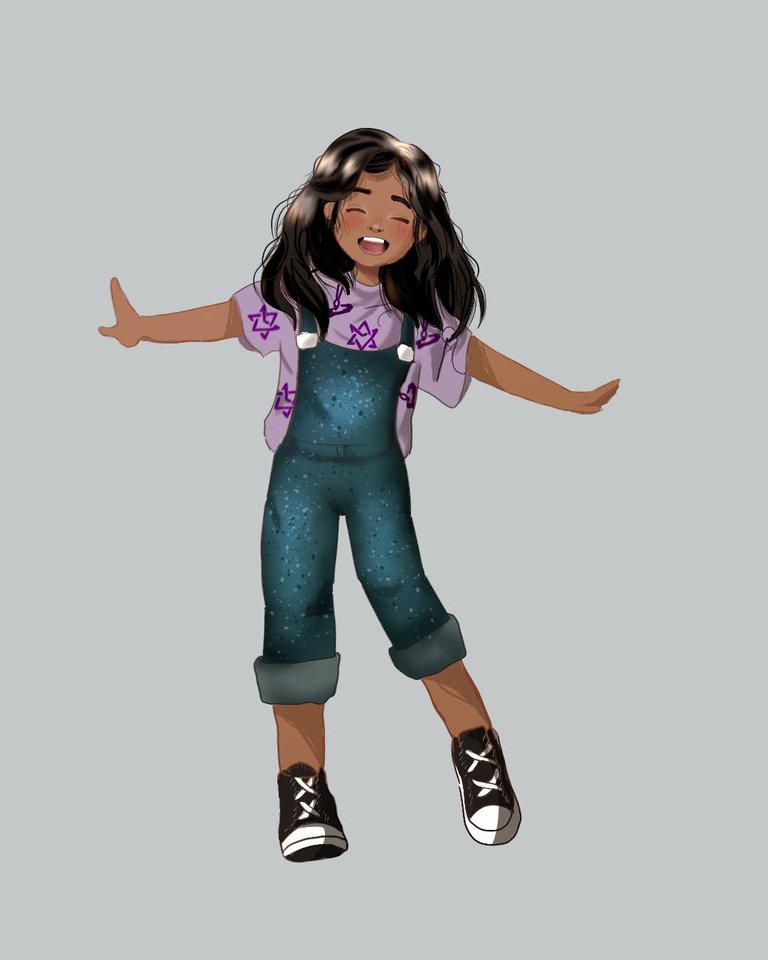
The first thing I did was to open a new document in krita, size 1080x1350 px, with a gray color, so the background would be neutral and that's where I would start making the structure of my character, which in this case is me; I filled the structure and I would give it the final shape. But I didn't like the hair, which I changed many times, until I got the shape that looked like me.
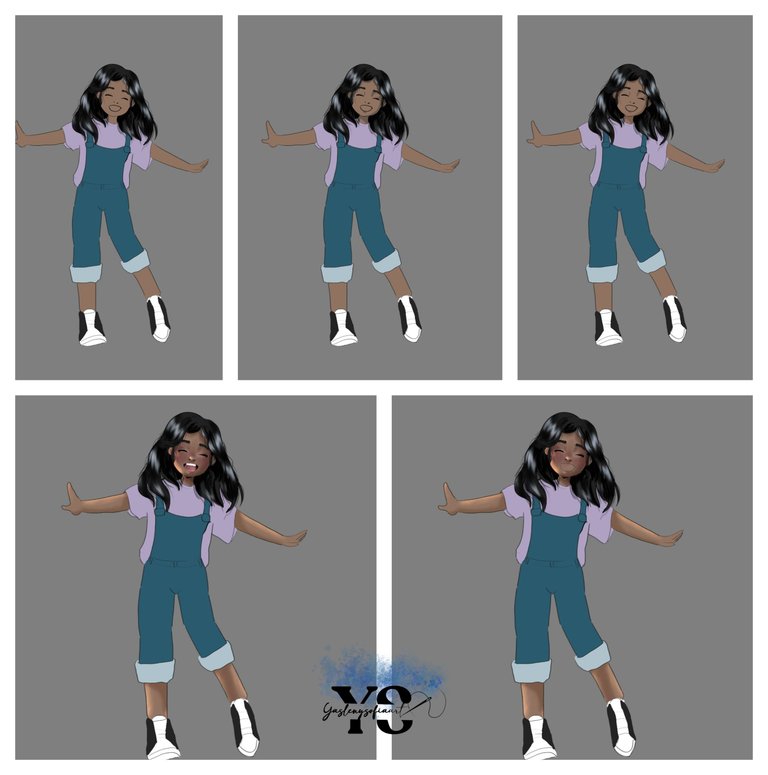
After having the lineart defined, I proceeded to fill it with the base colors and thus give the respective lights and shadows, in this case the projected light is in the upper left. To give the shadows, I follow the advice given by another illustrator, which is to use a light color, it does not matter if it does not go with the same tone in which the skin is, then that layer is given multiply, I go to adjustment and there I change the values, that if the color, saturation and so on, I did with the rest of the body.
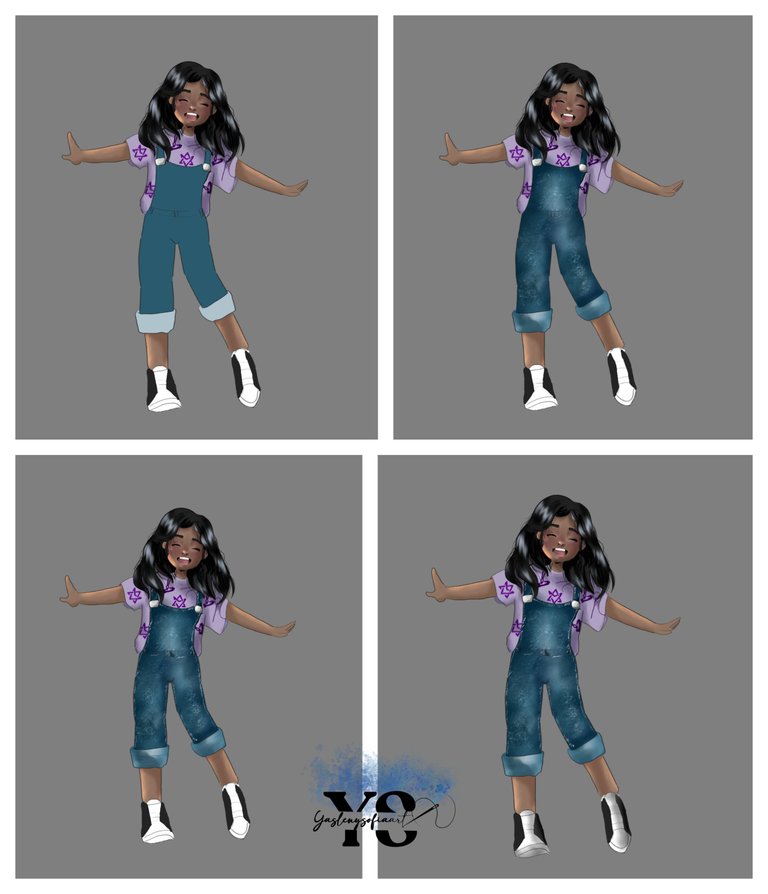
In the part of the shirt, I added the logo of my only Kpop favorite: Astro, plus a brush and a needle, because they are things that I like and I wanted to give that touch to the shirt. To the panty, I added several shades of blue, to give that jean effect, although I didn't achieve it as such, I liked that it looked like a constellation.
Last but not least, it was the shoes.
I exported the drawing in png and transparent background, in order to add a layer with a gradient of earth tones and with the layer in soft light fusion mode. In addition to other textures and some lights and shadows.
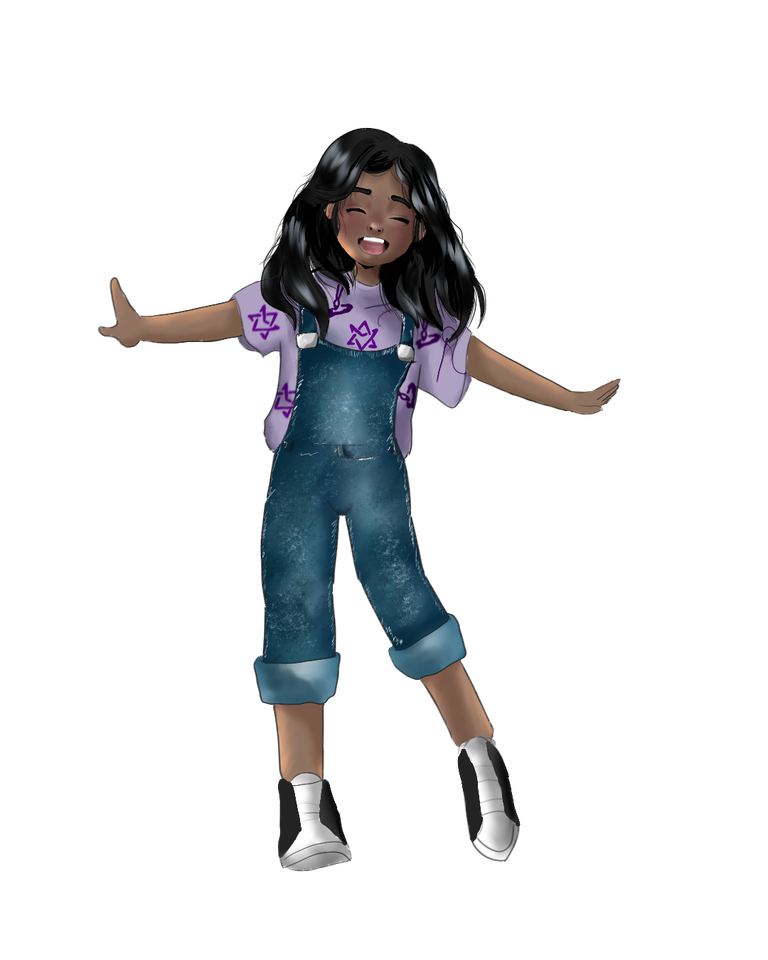
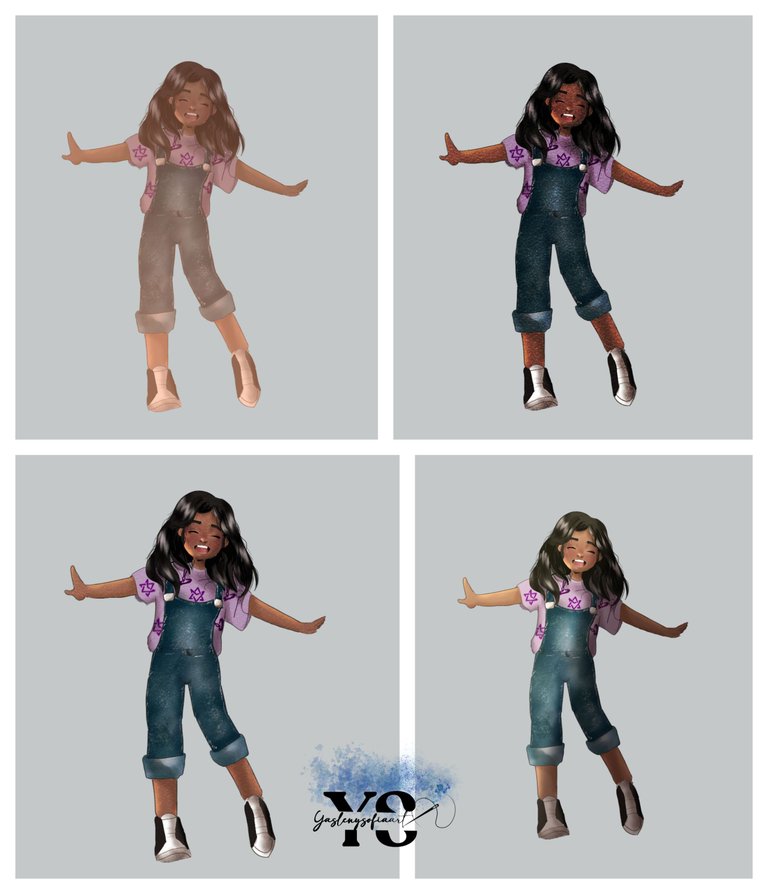
But, at this point I realized that I didn't really like the way the shading was, so I did it again, because the face area looked very dark. Also, I changed the shape of the shoes, because the previous ones looked horrendous; I also changed the line to a pink-brown color, more in the skin areas and certain lines of the rest of the body.
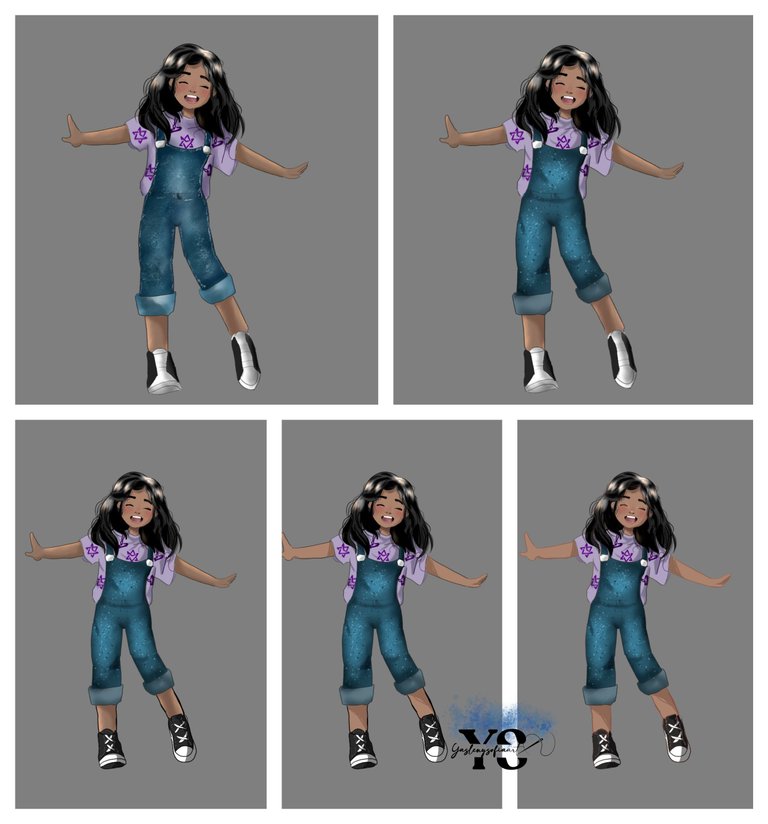
I exported it again in png and transparent, in order to do the same as I did before.
--
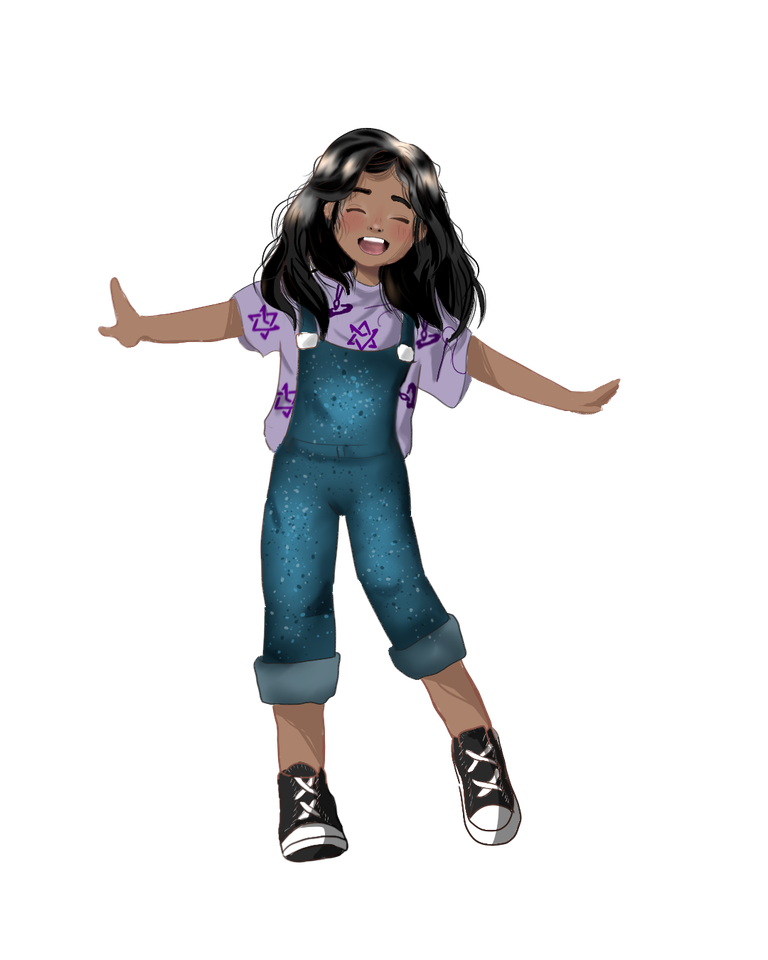
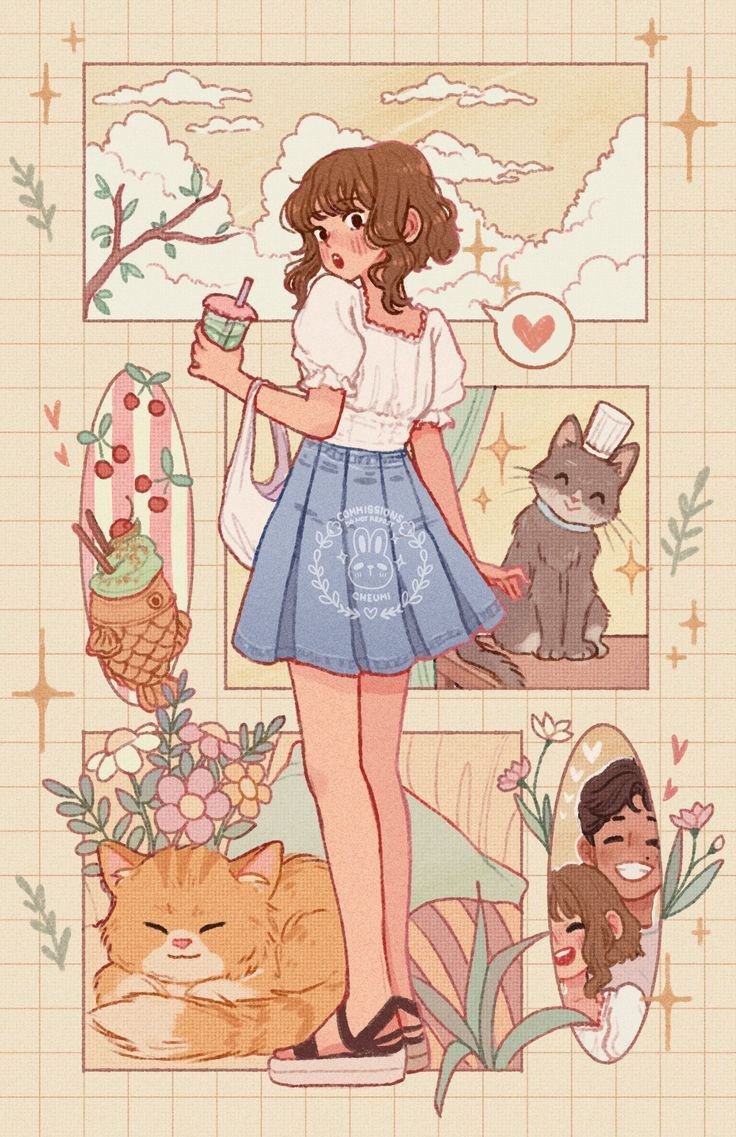
With this part ready, now I focused on what would be in the background, at this time I had seen some illustrations where a character of a girl appeared and behind, manga type, appeared boxes with other elements, here is one that I took as a reference and I wanted to do something like that.
Imagen de referencia de pinterest
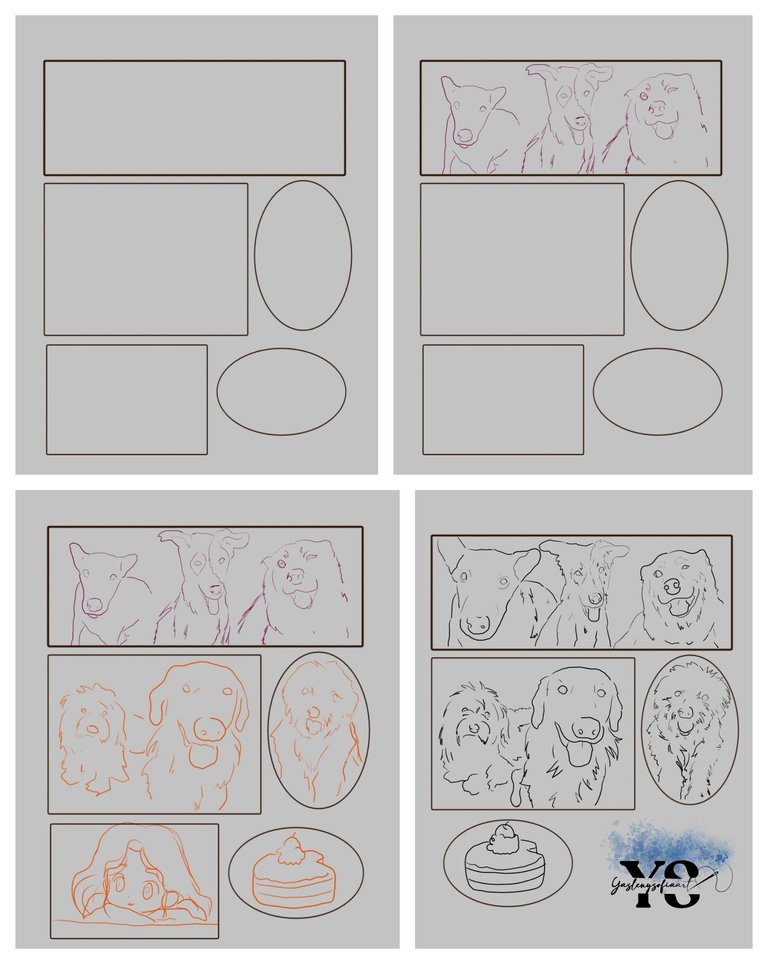
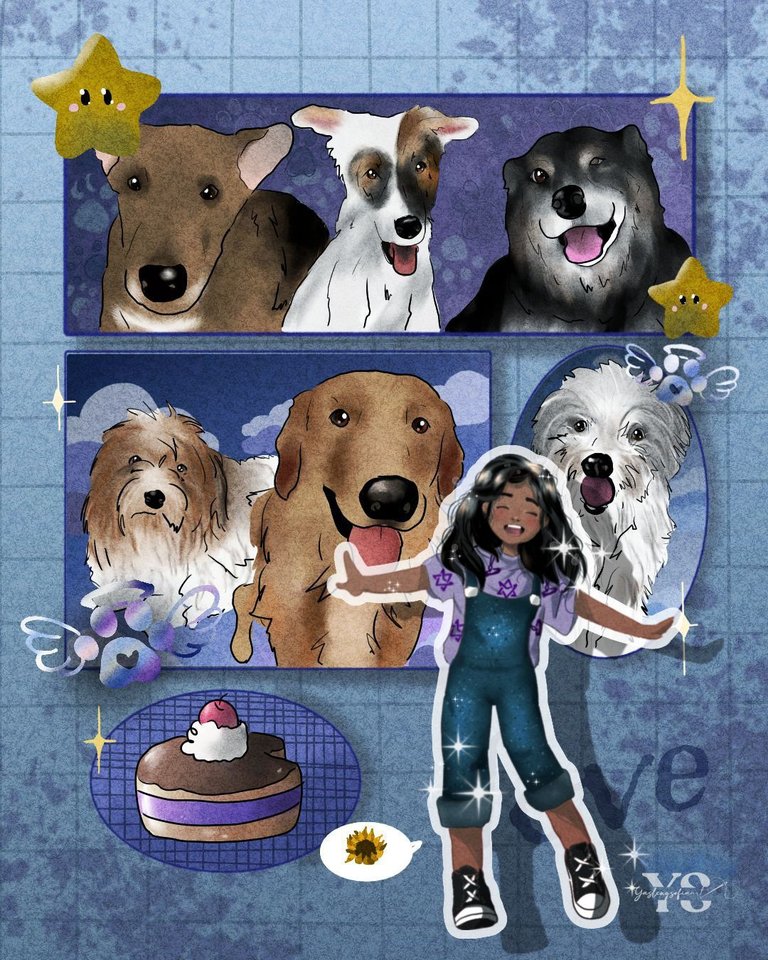
So I opened a new document, with the same size, with a neutral gray background, I began to order the square and circular shapes that would go inside the composition. At the top, I would make the sketch of three of my dogs and in the center the other 3 that are no longer physically with me. In the lower area, there would be a cake, for my birthday, and a chibi of me, which later I would end up eliminating, because it would be covered with the one I had already made.
Already with the lineaart clean, I colored all the base tone and thus give the respective details to each one, I began with my Angela, who is the bold one, then Oddie, the one next to her and lastly Hercules, which I changed the part of the eyes; I am not very good at drawing animals and many painting it, but there they were.
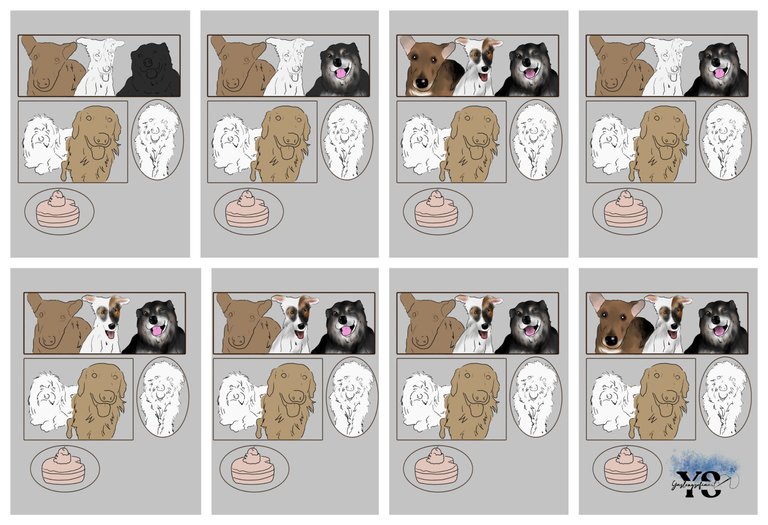
So I proceeded with the other 3, first with Chloe, then Bethoven and finally Bengy and the cake.
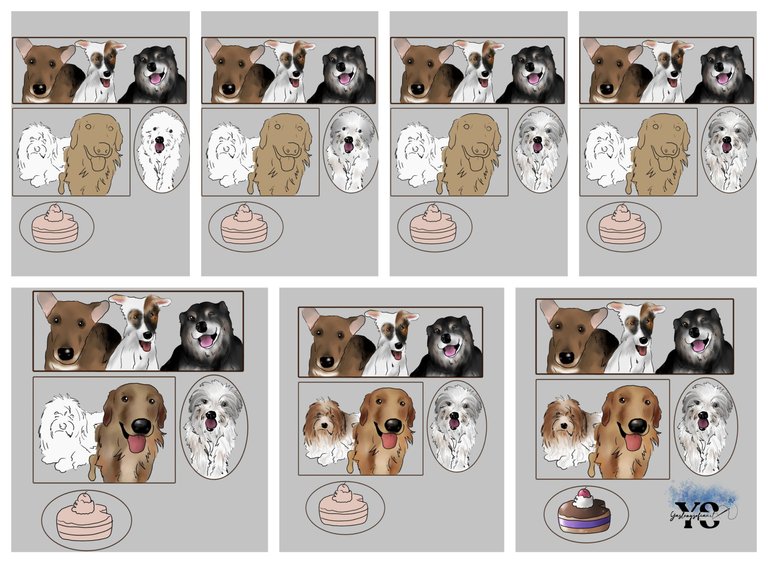
With the figures ready, I colored the background of a blue gradient, because it is my favorite color along with purple, then I added some lines, like a squared notebook and began to make the respective backgrounds to each of the shapes. Where the 3 dogs are together, I made a purple background with dog paws, but then I saw that it didn't harmonize much with the whole background of the illustration, so I added a blue color, lowered a little opacity.
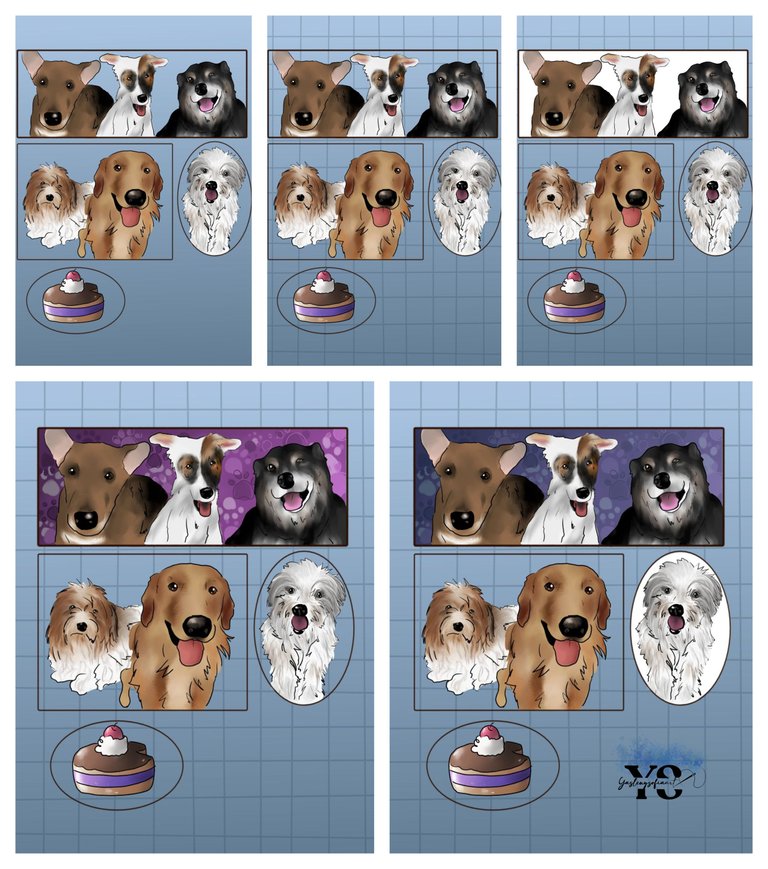
EFor the other 3 puppies, I made a background with clouds and the one on the cake, a checkered background.
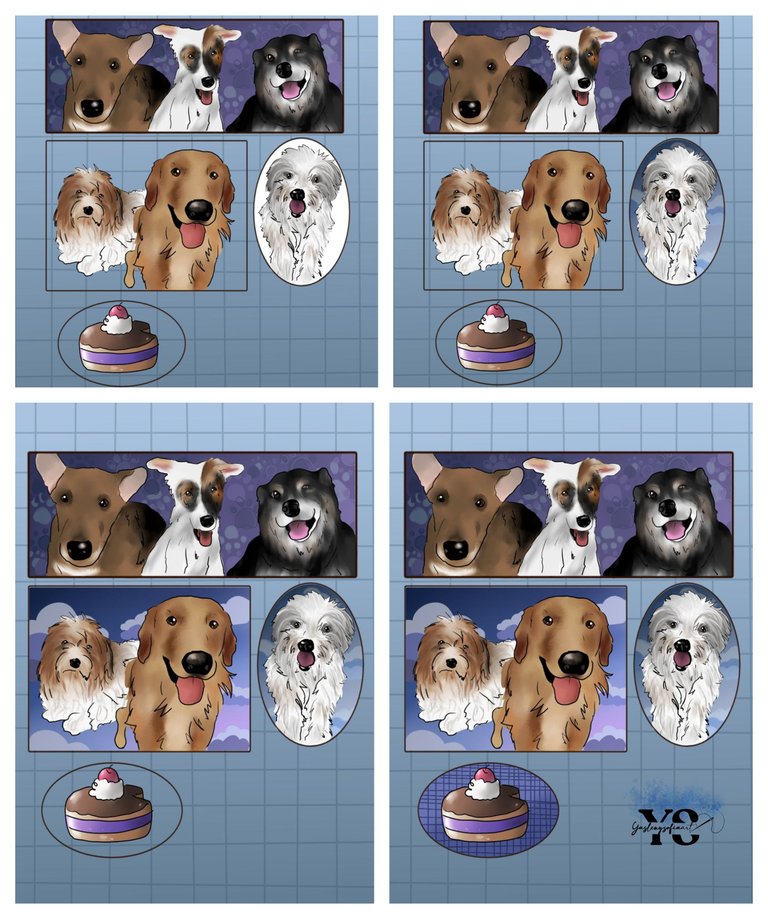
And so, I began to add other details, some little legs with wings and a ring, in the areas of those who are no longer there, some stars with a face in the upper rectangle, some dialogue balloons with a heart and a sunflower inside and other elements. In the background, I added some blue stains like watercolor, this is a brush that Krita brings and I thought it looked good and so I added a word: Love, where the typography is Blackadder ITC.
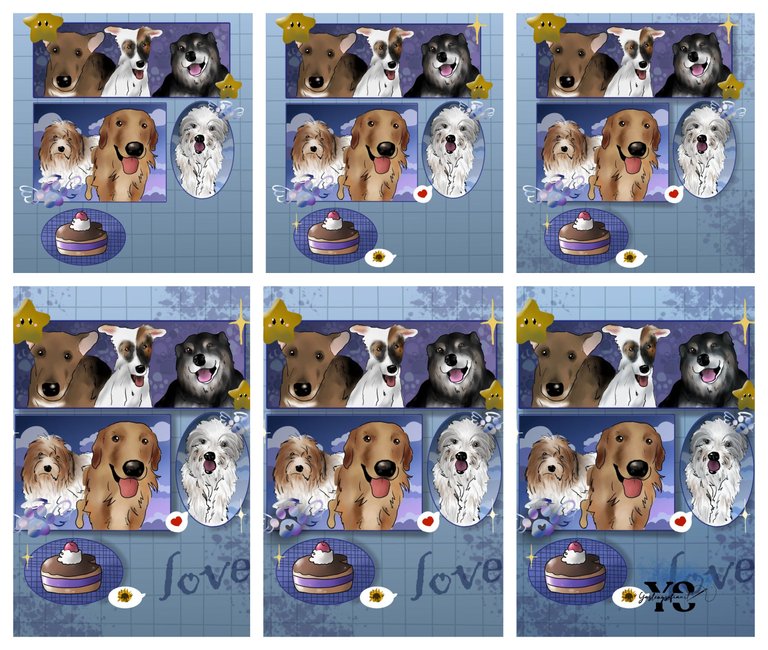
I added a blue color to everything in fusion mode, superimposed and a texture like grams. I ended up exporting it, in jpg to have it around, just like that.
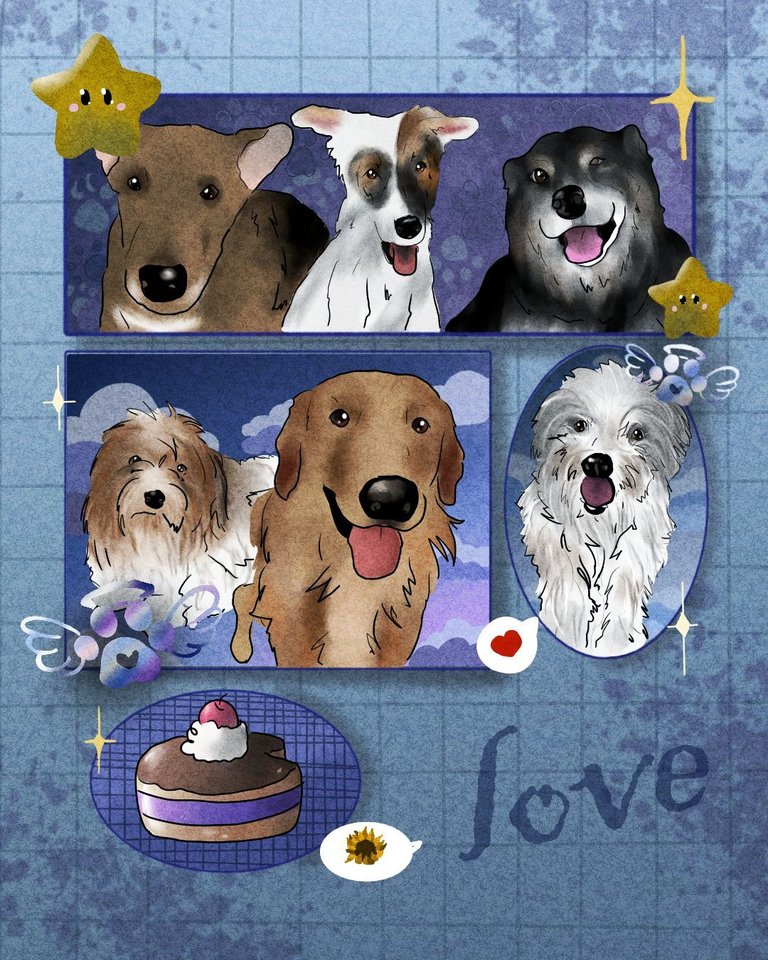
To finish, I added the character that I had already made, here I noticed that it covers the little balloon with the heart, but what else, I left it like that. The figure I added was the one before the gradients in earth tones and the texture, because I felt that it did not harmonize with the blue background.
To the figure, I gave a blue gradient style, a white stroke and a little lowered opacity, plus a cast shadow. Some small lights were added to the figure.
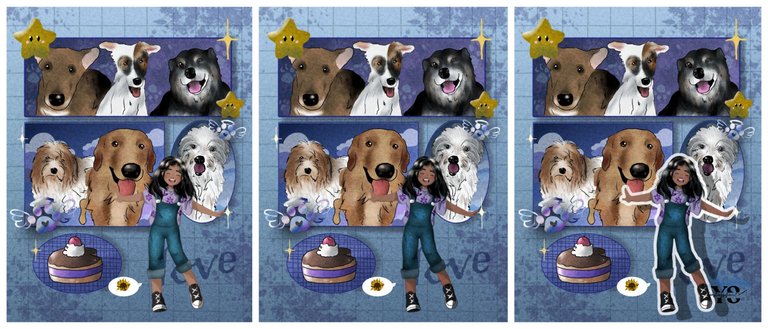
And ready, this is the final result, I hope you like it.
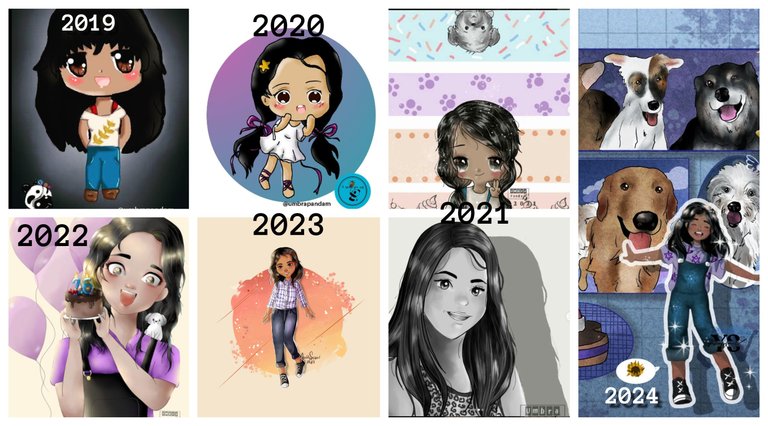
Program: Krita
Tool: Tablet graphic Huion 420
Collages made in Befunky
Translation made in DeepL

Thank you for reading my post. I hope you liked it. I will be attentive to answer your comments. You can visit my blog, follow my content and social networks.
FACEBOOK / INSTAGRAM / TWITTER

ESPAÑOL
Saludos comunidad de @skethbook, hoy les quiero compartir como una tradición que he venido haciendo en cada uno de mis cumpleaños y es hacerme una ilustración, aunque es mañana, deseo compartirles todo el proceso que me llevo hacerla. Al final les adjunto las que he hecho hasta ahora, junto la de este año, que siento que he mejorado, aun me falta, pero poco a poco.
Lo primero que hice fue abrir un nuevo documento en krita, de tamaño 1080x1350 px, con un color gris, para que el fondo fuese neutro y es ahí donde comenzaría haciendo la estructura de mi personaje, que en este caso es mi persona; rellené la estructura y le daría la forma final. Pero no me gustaba el cabello, el cual cambié muchas veces, hasta que conseguí a la forma que se parecía a mí.

Después de tener el lineart definido, procedí a rellenarlo con los colores bases y así darle las respectivas luces y sombras, en este caso la luz proyectada se encuentra en la izquierdo superior. Para dar las sombras, sigo el consejo que dio otro ilustrador, que consiste en usar un color claro, no importa si no va con el mismo tono en el que esta la piel, después a esa capa se le da multiplicar, me dirijo a ajuste y ahí voy cambiando los valores, que si el color, la saturación y así sucesivamente, hice con todo el resto del cuerpo.

En la parte de la camisa, le agregue el logo de mi único favorito de Kpop: Astro, además de un pincel y una aguja, pues son cosas que me gusta y quería darle ese toque a la camisa. A la braga, le agregue varios tonos de azules, para dar ese efecto de jean, aunque no lo logré como tal, me gusto que pareciera una constelación.
Ya de ultimo, fue los zapatos.

El dibujo lo exporte en png y fondo transparente, para así agregarle a todo el conjunto una capa con degradado de tonos tierras y con la capa en modo de fusión luz suave. Además de otras texturas y unas luces y sombras de más.


Pero, en este punto me percaté que no me gustaba mucho como estaba el sombreado, así que lo hice de nuevo, porque la zona de la cara se veía muy oscura. Asimismo, les cambie la forma a los zapatos, porque los anteriores se veían horrendos; también la línea le cambie a un color rosa-marrón, más en las zonas de la piel y ciertas líneas del resto del cuerpo.

La volví a exportar en png y transparente, para así hacer lo mismo que hice anteriormente.
--


Ya con esta parte lista, ahora me enfoque en lo que seria en el fondo, en este momento había visto unas ilustraciones donde aparecía uno personaje de una chica y atrás, tipo manga, aparecía recuadros con otros elementos, aquí le dejo uno que tomé de referencia y pues quise hacer algo así.
Imagen de referencia de pinterest
Por lo que abrí un nuevo documento, con el mismo tamaño, con un fondo gris neutro, empecé a ordenar las formas cuadradas y circulares que irían dentro de la composición. En la parte superior, haría el boceto de tres de mis perros y en el centro los otros 3 que ya no están físicamente conmigo. En la zona inferior, iría un pastel, pues por mi cumpleaños y un chibi de mi persona, el cual más adelante terminaría por eliminar, porque se taparía con la que ya había hecho.

Ya con el lineaart limpio, coloreé todo el tono base y así darle los respectivos detalles a cada uno, comencé con mi Angela, que es la negrita, después Oddie, el que esta a lado de ella y de último Hércules, el cual cambie después la parte de los ojos; no soy muy buena dibujando animales y muchos pintándolo, pero ahí quedaron.

Así procedí con los otros 3, primero con Chloe, luego Bethoven y de ultimo Bengy y el pastel.

Con las figuras lista, coloree el fondo de un degradado el azul, pues es mi color favorito junto con el morado, luego le agregue unas líneas, como de un cuaderno cuadriculado y empecé hacer los fondos respectivos a cada una de las formas. En donde están los 3 perritos juntos, hice un fondo morado con patitas de perros, que luego vi que no armonizaba mucho con el fondo completo de la ilustración, así que le agregué un color azul, bajado un poco de opacidad.

En los otros 3 perritos, les hice un fondo con nubes y el del pastel, un fondo cuadriculado.

Y así, le empecé a dar demás detalles, que si unas patitas con alas y un aro, en las zonas de los que ya no están, unas estrellas con rostro en la parte del rectángulo superior, unos globos de dialogo con un corazón y un girasol en su interior y demás elementos. En el fondo, le agregué unas manchas azules como de acuarela, este es un pincel que trae Krita y me pareció que quedaban bien y así le añadí una palabra: Love, donde la tipografía es Blackadder ITC.

Le incorporé un color azul a todo en modo de fusión, superpuesta y una textura como de gramos. Terminé por exportarlo, en jpg para tenerlo por ahí, así solito.

Para ir finalizando, le agregué el personaje que ya había hecho, aquí me percaté que tapa el globito con el corazón, pero que más, lo dejé así. La figura que le agregué, fue la de antes de los degradados en tonos tierras y la textura, porque sentía que no armonizaba con ese fondo que predomina el azul.
A la figura, le di un estilo de degradado en azul, un trazo en blanco y con un poco bajado de opacidad, además de una sombra proyectada. Unas pequeñas luces fueron adicionadas a la figura.

Y ¡listo!, este es el resultado final, espero les guste.


Programa: Krita
Herramienta: Tablet graphic Huion 420
Collages hechos en Befunky
Traducción hecha en DeepL

Gracias por leer mi post. Espero que les haya gustado. Estaré atenta a responder sus comentarios. Pueden visitar mi blog, seguir mis contenidos y redes sociales.

FACEBOOK / INSTAGRAM / TWITTER

0
0
0.000
this is very beautiful👍
Thank very much 😊
You're welcome.