(ESP-ENG) Linda mariposa hecha en goma eva//Cute butterfly made in eva rubber.
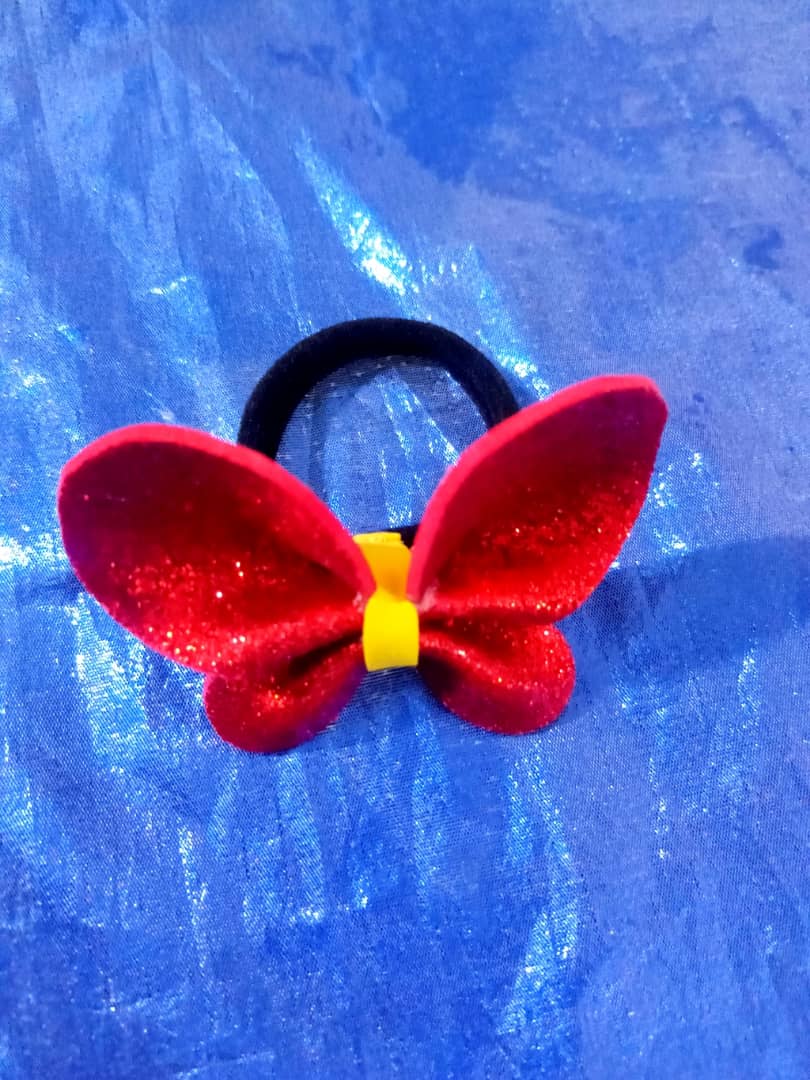
Hola a todos, nuevamente estoy por aquí contenta por compartirles mi trabajo, me gusta mucho trabajar con goma de eva o foami y hoy realice una linda y muy fácil mariposa que nos sirve para el cabello o para decorar
Hello everyone, I'm here again happy to share my work, I really like working with eva rubber or foami and today I made a nice and easy butterfly that can be used for hair or to decorate
.jpeg)
Materiales a utilizar:
Goma eva escarchado rojo de 8x8.
Goma de eva amarilla una tirita.
Silicón.
Lápiz.
Goma o colita negra.
Papel blanco 8x8.
Materials to be used:
Red frosted eva rubber 8x8.
Yellow eva rubber one strip.
Silicone.
Pencil.
Rubber or black glue.
White paper 8x8.
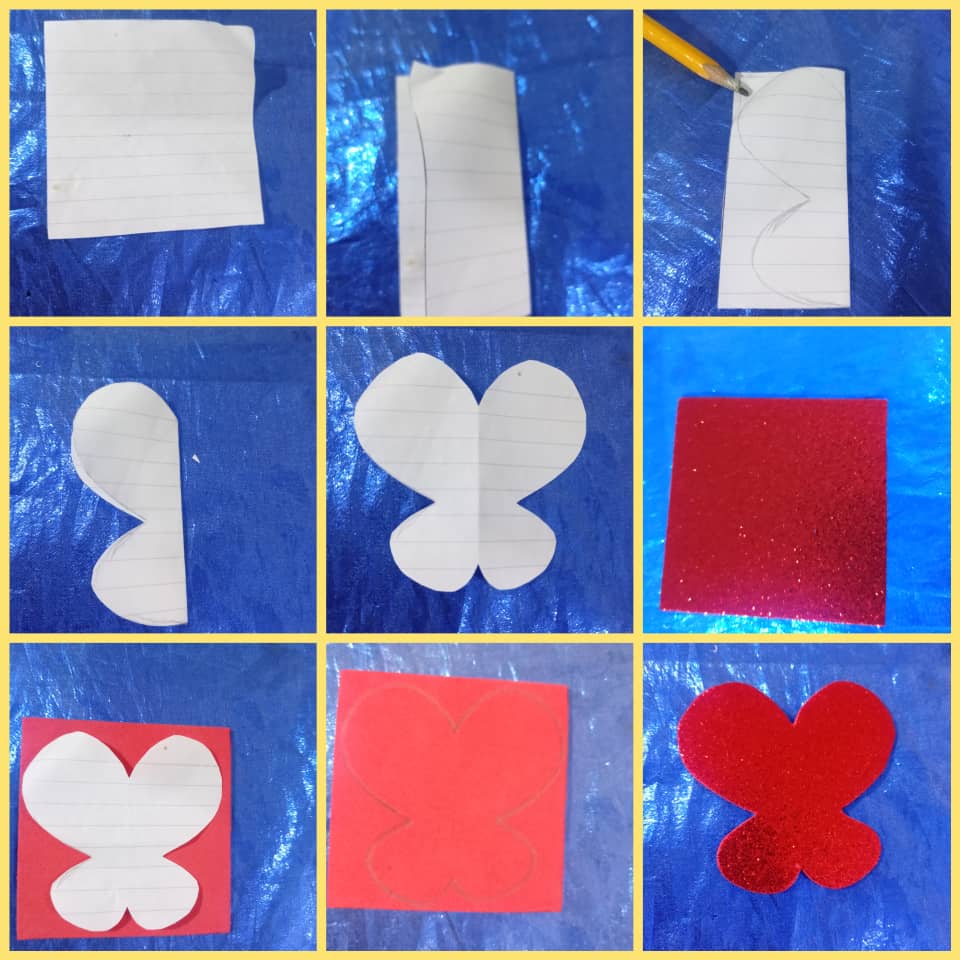
Paso 1
Tomamos el papel y lo doblamos a la mitad dibujamos en el media mariposa y con la tijera lo recortamos y abrimos y tenemos el molde de la mariposa, lo colocamos encima del la goma eva remarcamos con el lápiz y recortamos, y tenemos la mariposa.
Step 1:
Take the paper and fold it in half.
Take the paper and fold it in half, draw on it half a butterfly and with the scissors cut it open and we have the mold of the butterfly, place it on top of the eva rubber, mark it with the pencil and cut it out, and we have the butterfly.
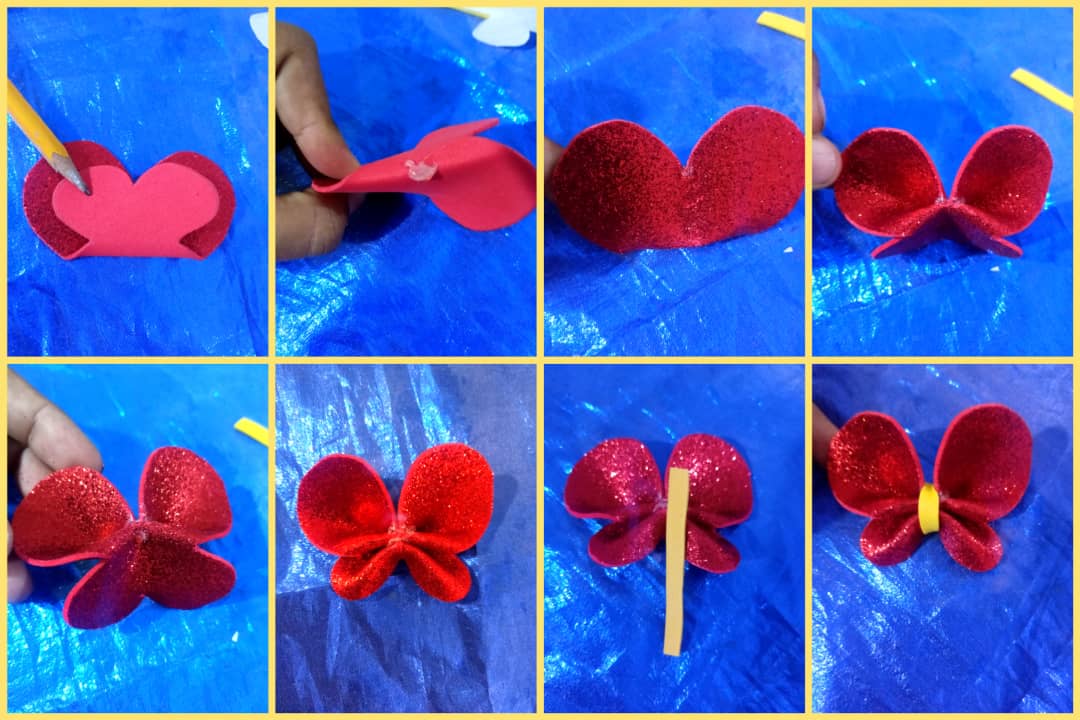
Paso 2
Doblamos la mariposa a la mitad para marcar el centro, colocamos un poquito de silicón por el lado detrás y doblamos hacia adentro para que pegue, después colocamos otro poquito de silicón en el doblez del medio de la mariposa y doblamos la parte de arriba de la mariposa al centro para que pegue y luego repetimos lo mismo con la parte de abajo de la mariposa y por último pegamos el pedacito de goma eva alrededor de la mariposa y queda armada la mariposa.
Step 2: Fold the butterfly in half to mark the center.
Fold the butterfly in half to mark the center, put a little bit of silicone on the back side and fold inward to stick, then put another little bit of silicone on the middle fold of the butterfly and fold the top of the butterfly to the center to stick and then repeat the same with the bottom of the butterfly and finally glue the piece of eva rubber around the butterfly and the butterfly is assembled.
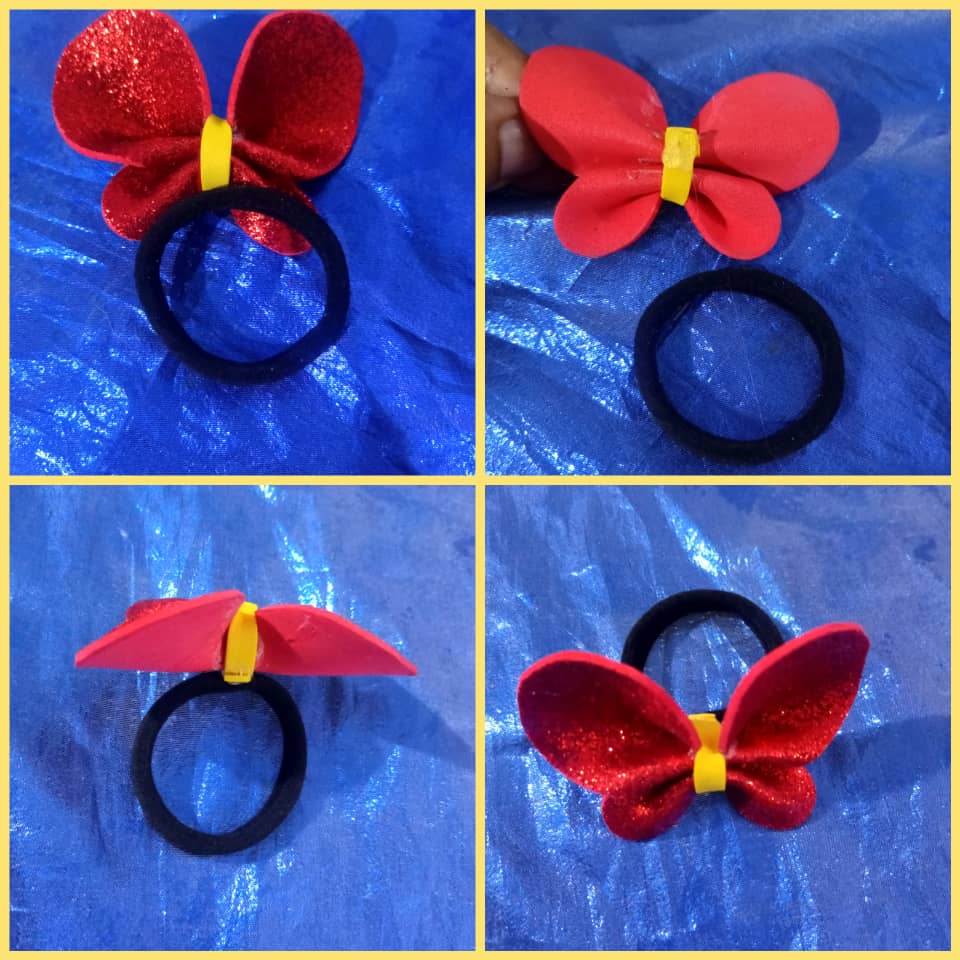
Paso 3
Ya para terminar solo colocamos un poquito de silicón en la parte de atrás de la mariposa y pegamos la colita.
Step 3
To finish we just put a little bit of silicone on the back of the butterfly and glue the tail.
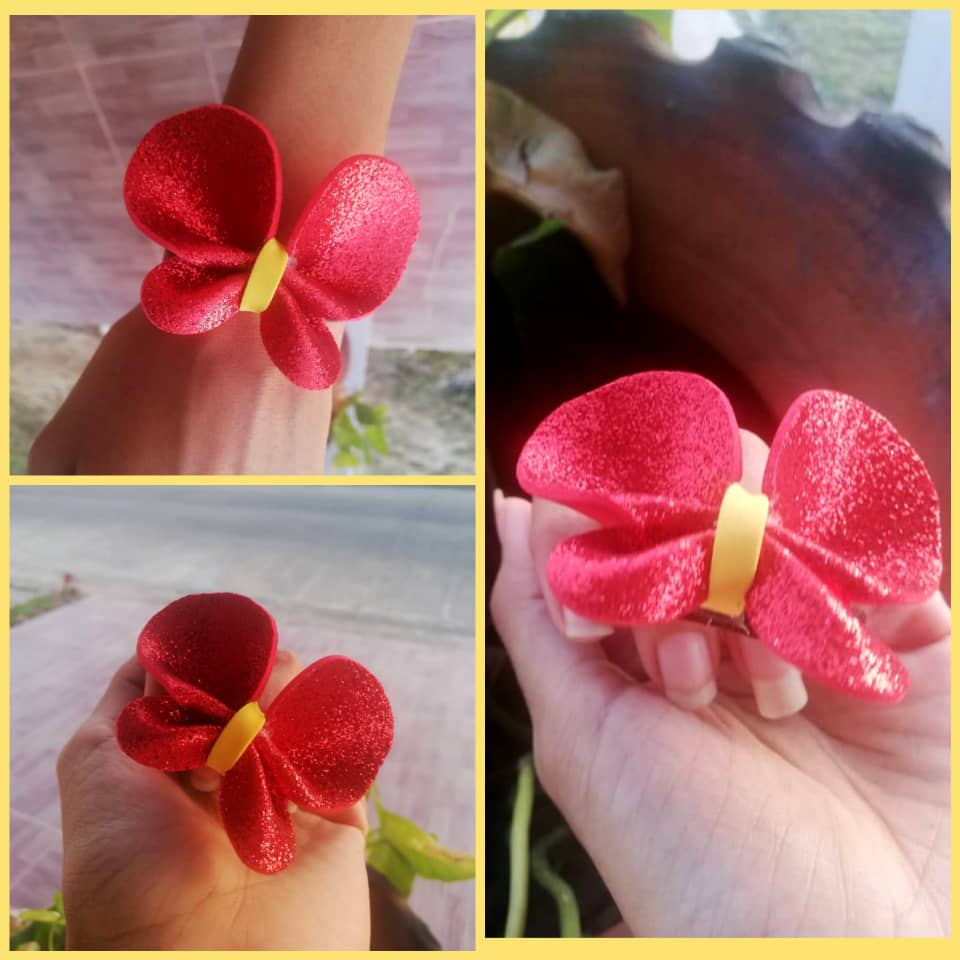
Resultado final
Y así tenemos esta linda mariposa que nos sirve para recogernos el cabello o como una pulsera o simplemente para decorar. Espero les guste. Gracias por llegar al final.
Final result
And so we have this beautiful butterfly that can be used to gather our hair or as a bracelet or simply to decorate. I hope you like it. Thanks for making it to the end.
.jpeg)
Soy la autora de todas mis imágenes y fueron tomadas desde mi tlf android y editadas en canva.
I am the author of all my images and they were taken from my android tlf and edited in canva.

