[Esp/Eng] ✨Bonito colgante para la cocina. // Nice pendant for the kitchen.✨
✨¡Hola amigos amantes de la creatividad! Espero que estén todos bien✨
🔸Sin más que añadir, a continuación los dejo con el paso a paso:
✨¡Hello friends who love creativity! ✨
Good afternoon, friends. Good afternoon, friends. I hope you are having a great week. For my part, I am happy to stop by here to share a new creation with you. On this occasion I am sharing with you the step by step to make a nice pendant for the kitchen. It has been a long time since I made a pendant, I think haha, it is because of so many creations that I do not remember very well, if it takes me a long time to repeat an idea or not, and I forget everything very quickly, you can imagine. But, anyway, since last week I shared a very nice idea for the kitchen, this time I wanted to make a nice pendant that matched another chicken decoration.
🔸Without more to add, then I leave you with the step by step:
♥️ESPERO QUE TE GUSTE,
¡Empecemos!
♥️I HOPE YOU LIKE IT,
Let's start!

✂️ MATERIALES | ✂️ MATERIALS

- Cartón grueso.
- Cartulina corrugada.
- Malla metálica.
- Foami escarchado negro, blanco,
naranja, amarillo y rojo. - Foami escarchado blanco y verde.
- Cinta delgada.
- Lazo.
- Pinturas y marcadores.
- Hoja blanca.
- Pegamento.
- Tijeras.
- Lápiz.
- Thick cardboard.
- Corrugated cardboard.
- Metal mesh.
- Black, white, orange, yellow and red frosted foam.
White and green frosted foam.
Thin ribbon. - Bow.
- Paints and markers.
- White sheet.
- Glue.
- Scissors.
- Pencil.

🌟 PROCEDIMIENTO | 🌟 PROCESS

- PASO 1:
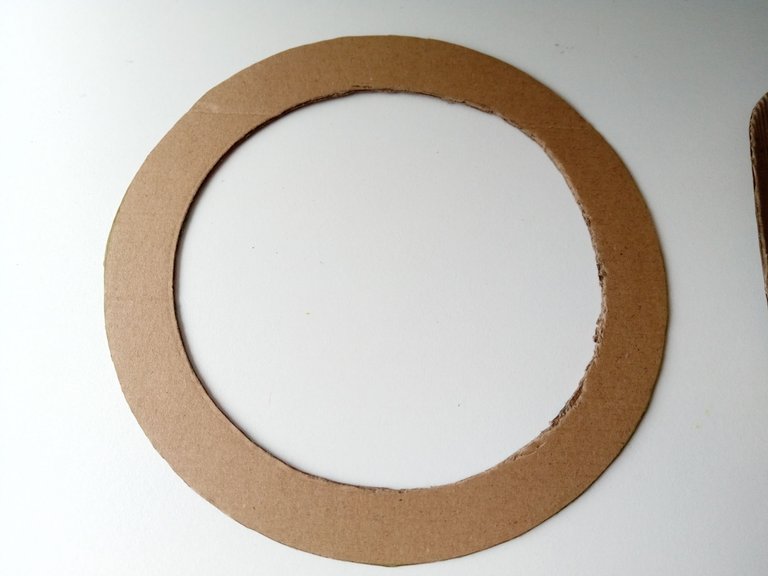
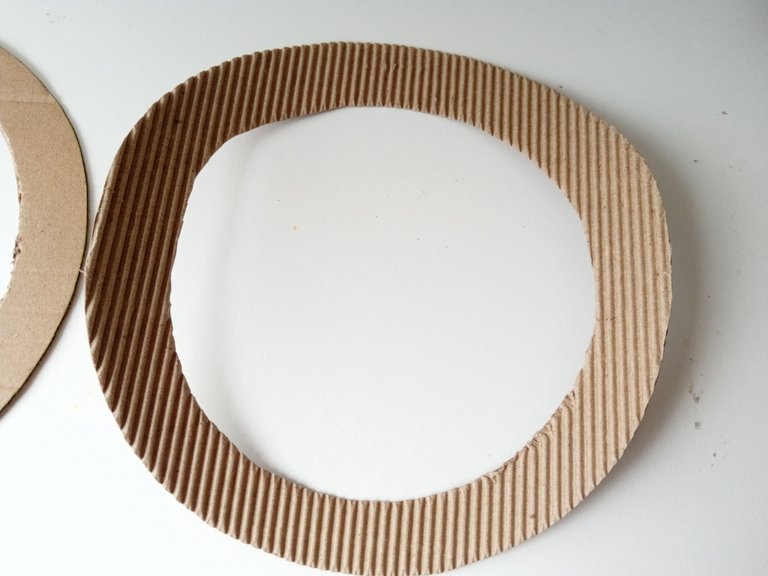
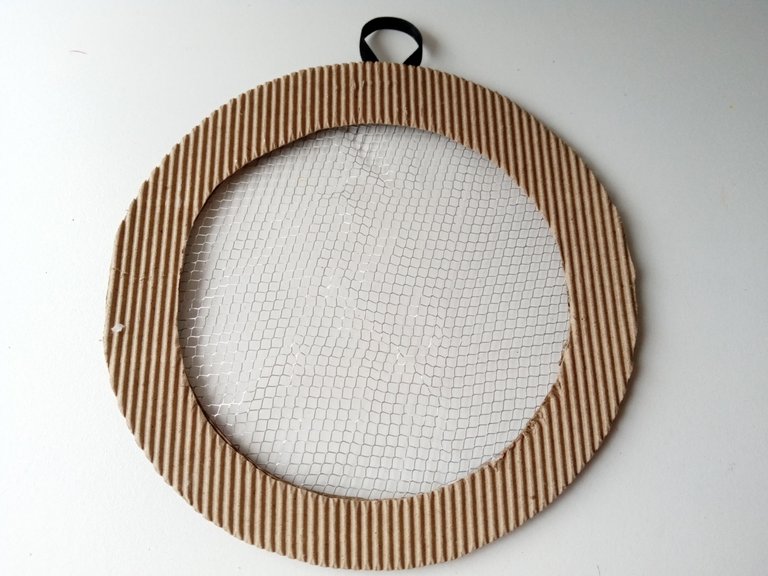
Lo primero que hice fue la circunferencia de la base del colgante, en este caso utilicé las medidas de un plato pequeño y en el centro también tracé y recorté una circunferencia mucho más pequeña, dejando un borde de 2.5 cm de ancho. Al estar listo, simplemente calqué el mismo patrón de la base en cartulina corrugada y recorté.
- STEP 1:
The first thing I did was the circumference of the base of the pendant, in this case I used the measurements of a small plate and in the center I also traced and cut out a much smaller circumference, leaving a 2.5 cm wide border. When it was ready, I simply traced the same pattern of the base on corrugated cardboard and cut it out.


- PASO 2:
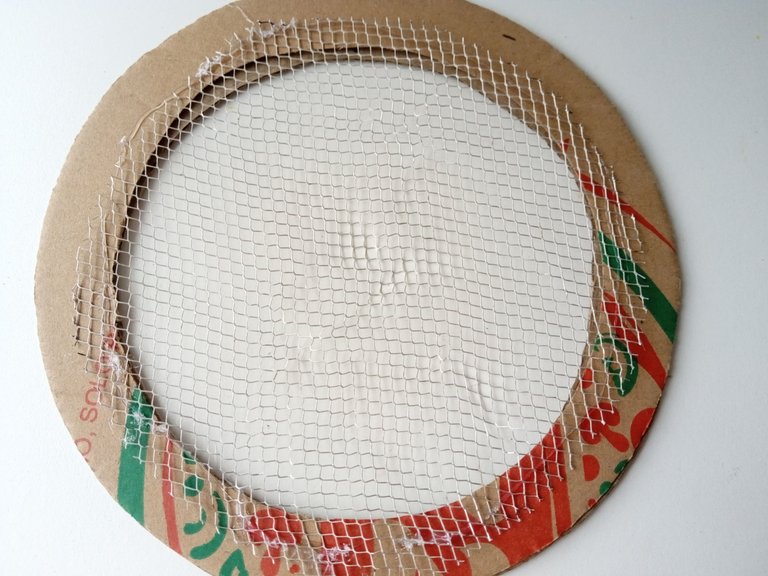
En la circunferencia más pequeña de la base, pegué la malla metálica, la cual recorté dejando un borde para pegar, además pegué la cinta para colgar en el borde superior de la base y encima pegué la circunferencia de cartulina corrugada para cubrir.
- STEP 2:
On the smaller circumference of the base, I glued the metal mesh, which I cut out leaving a border to glue, I also glued the ribbon to hang on the upper edge of the base and on top I glued the corrugated cardboard circumference to cover.


- PASO 3:
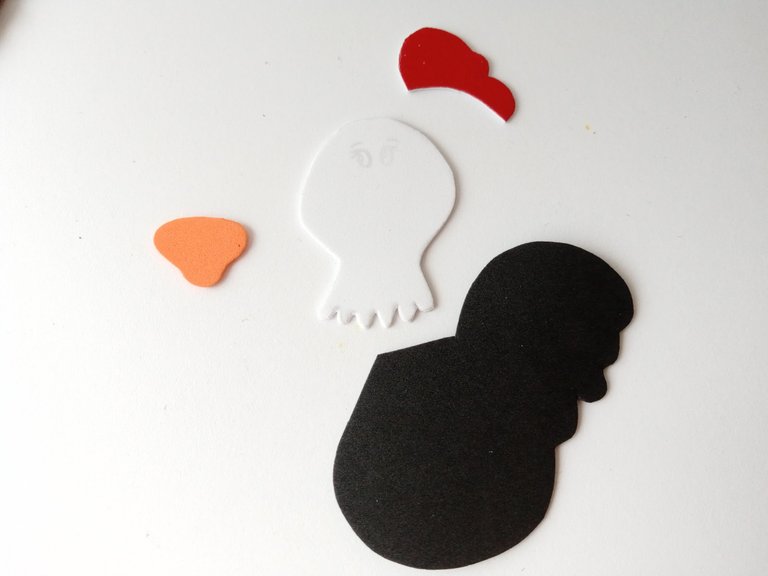
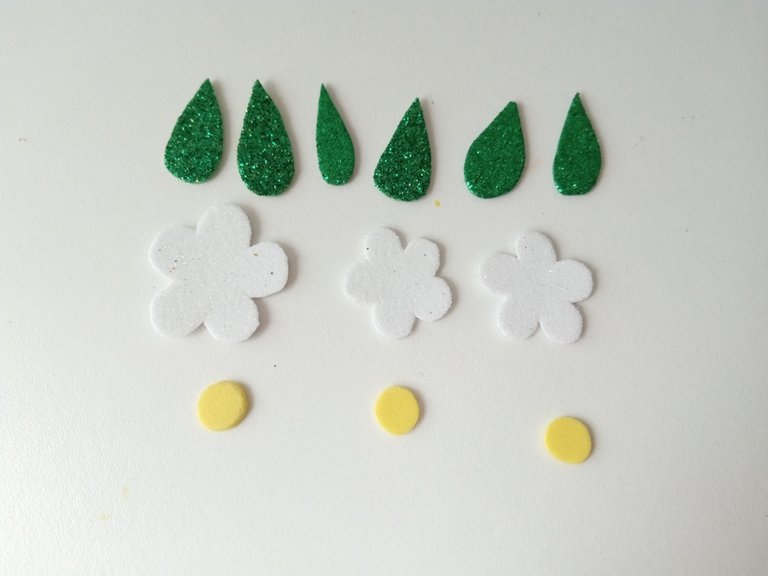
Enseguida comencé a dibujar los patrones de la decoración que en este caso fueron unas cuantas flores y una gallina como protagonista. Luego, transferí los patrones a los colores correspondientes de foami, de la siguiente manera: Para la gallina; cuerpo en foami negro, cabeza en foami blanco, pico en foami naranja y cresta en foami rojo. Para las flores; foami escarchado blanco, centro en foami amarillo y hojas en foami escarchado verde.
- STEP 3:
I immediately began to draw the patterns of the decoration, which in this case were a few flowers and a hen as the protagonist. Then, I transferred the patterns to the corresponding colors of foam, as follows: For the hen; body in black foam, head in white foam, beak in orange foam and crest in red foam. For the flowers; White frosted foam, yellow foam center and green frosted foam leaves.


- PASO 4:
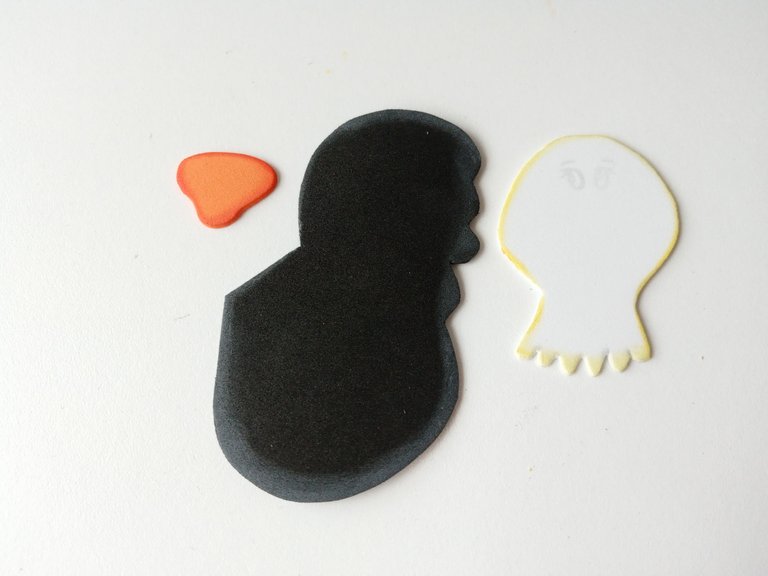
Al tener todas las piezas recortadas, comencé a dar color a los bordes de los foamis lisos; tomé las pinturas y con ayuda de un pañito fui difuminando los bordes. Luego, di detalles a la nariz y ojos con marcador negro, hice puntos blancos y algunos diseños extras en el cuerpo de la gallina y al centro de las flores, puntos naranjas para que hiciera contraste.
- STEP 4:
Al tener todas las piezas recortadas, comencé a dar color a los bordes de los foamis lisos; tomé las pinturas y con ayuda de un pañito fui difuminando los bordes. Luego, di detalles a la nariz y ojos con marcador negro, hice puntos blancos y algunos diseños extras en el cuerpo de la gallina y al centro de las flores, puntos naranjas para que hiciera contraste.

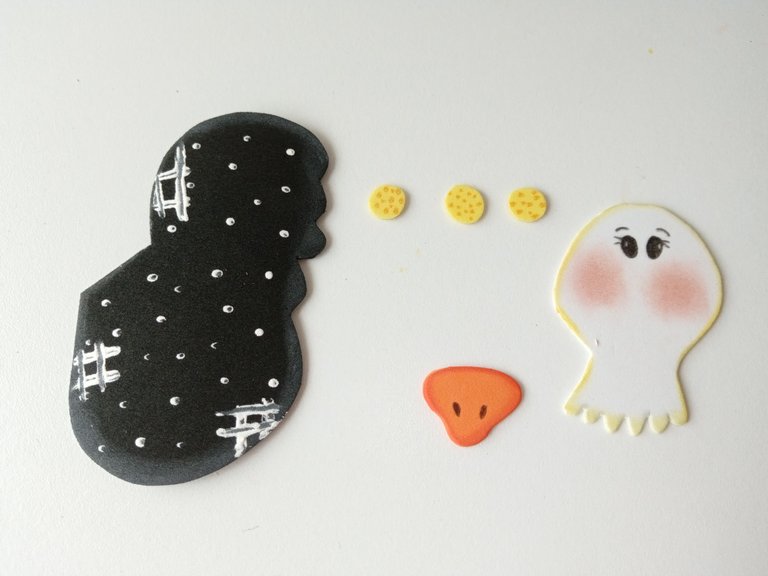

- PASO 5:
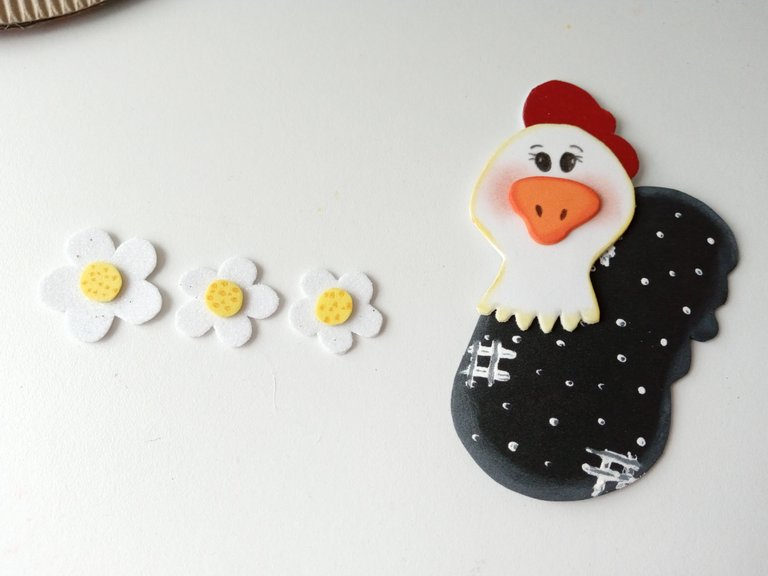
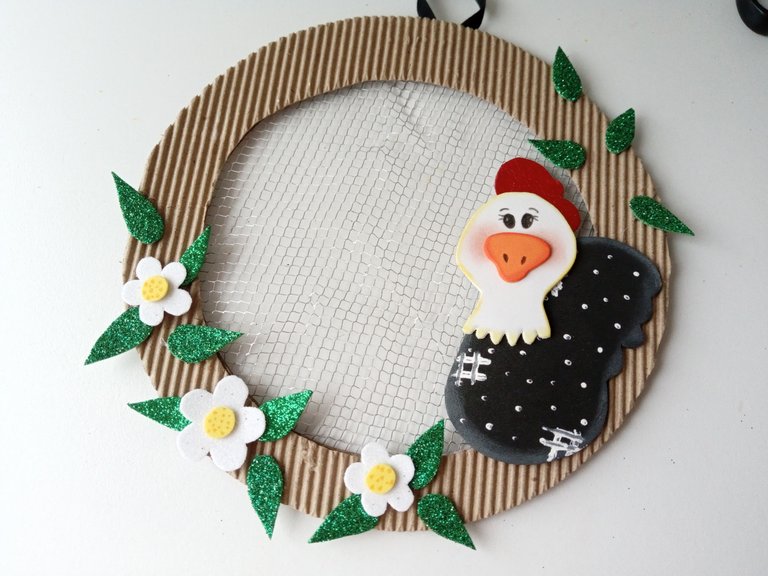
Ya casi para finalizar, comencé a unir las piezas hasta formar la gallina, las flores y luego, las comencé a pegar en el orden deseado a la base. En mi caso, quise pegar la gallina en uno de los laterales, las flores y hojas a los bordes, pero como no me convencía las flores que tenía, recorté unas más para completar.
- STEP 5:
Almost finished, I started to join the pieces together to form the hen and the flowers, and then I started to glue them in the desired order to the base. In my case, I wanted to glue the hen on one of the sides, the flowers and leaves on the edges, but as I wasn't convinced by the flowers I had, I cut out some more to complete them.


- PASO 6:
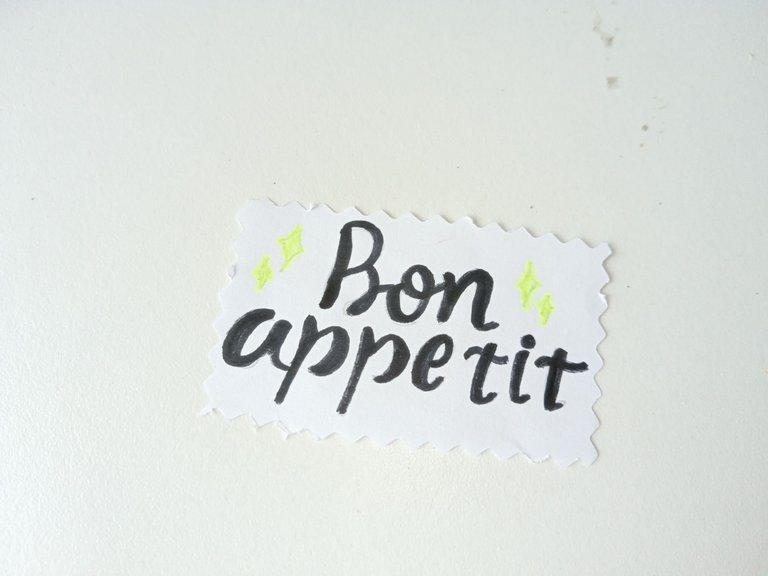
Por último, escribí en una hoja blanca una frase, pegué sobre cartulina escarchada (opcional), pegué al espacio superior vacío junto con el lazo. Además, pinté algunas manchas de color azul por todo el borde que combinaran con el lazo.
- STEP 6:
Finally, I wrote a phrase on a white sheet, glued it on frosted cardboard (optional), glued it to the empty space above along with the bow. I also painted some blue spots around the edge to match the bow.

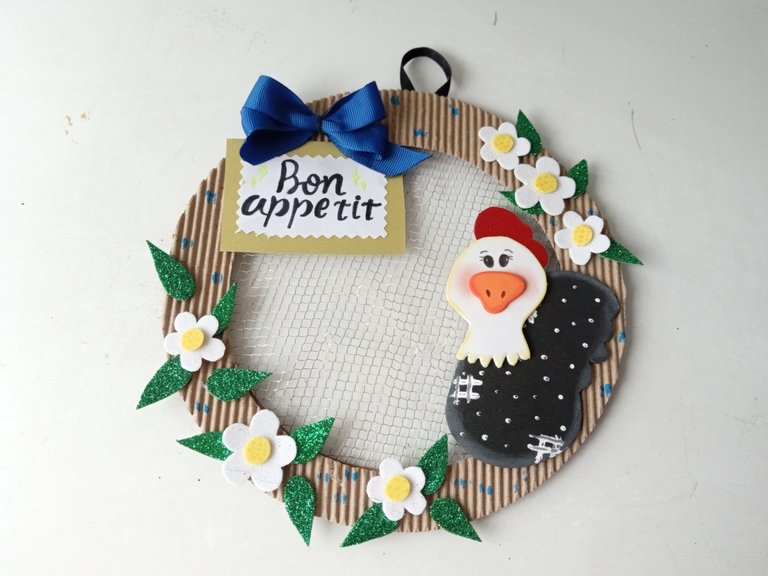

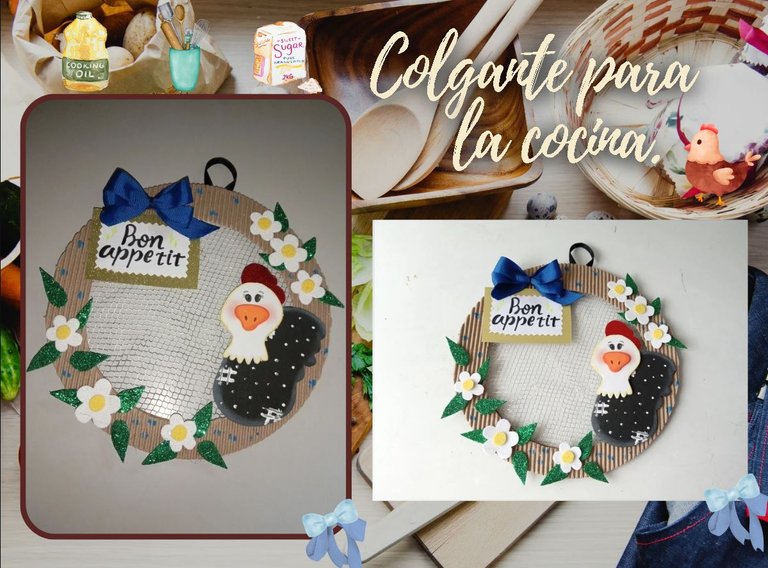
This is how you can make a nice kitchen pendant. Keep in mind that I used quite a lot of materials, but if you want you can reduce this amount, because you don't have to use the metal mesh and instead of using corrugated cardboard you can cover the cardboard base with fabric and thus help yourself a little with other cheaper or easier to get materials. I hope you liked the step by step and are encouraged to make it.
❤️Until the next post.

✨RESULTADO: | ✨RESULT:

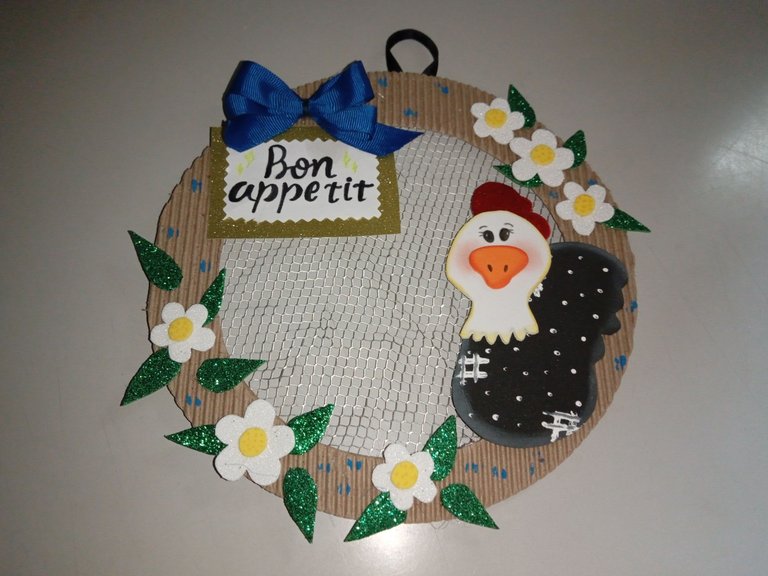


Todas las fotografías son de mi propiedad.
Separador y Fotos editadas en Canva
All photographs are my property.
Photos edited in Canva
Ay está muy bonito, me encanta la carita de la gallina, te quedó linda
Muchas gracias, amiga! Me alegra que te haya gustado mi creación. Saludos ✨
Que preciosura, me encantó, ademas me diste ideas para utilizar material reciclado ♻️ amiga. Está hermoso, me gustaría hacer una guirnalda navideña con el interior del cartón, queda bien parecido a lo que hiciste. Bonito trabajo 🤗
Muchas gracias amiga! Pues fíjate que es una buena idea, deberías intentarlo para navidad 🤭💕
Hermoso colgante Ami. Me encantó. No puedo esperar a ver las cosas hermosas de navidad que seguramente vas a hacer 😍
Te quedó muy lindo! Y lo mejor es que es muy fácil de realizar!
Gracias por compartirlo.
What a beautiful decorative work for the kitchen you give us today Excellent step by step and creative process.
Thank you very much friends! A decoration to bring life to the kitchen.🤭💕
Hermoso mi linda,como todos los trabajos que nos dejas. Gracias por compartir en nuestra comunidad...
!discovery 40
This post was shared and voted inside the discord by the curators team of discovery-it
Join our Community and follow our Curation Trail
Discovery-it is also a Witness, vote for us here
Delegate to us for passive income. Check our 80% fee-back Program
Muchas gracias por el apoyo 😊✨
Muchas gracias por seleccionar mi post y por el apoyo amigos ✨💕
¡Felicidades! Esta publicación obtuvo upvote y fue compartido por @la-colmena, un proyecto de Curación Manual para la comunidad hispana de Hive que cuenta con el respaldo de @curie.
Si te gusta el trabajo que hacemos, te invitamos a darle tu voto a este comentario y a votar como testigo por La Colmena.
Si quieres saber más sobre nuestro proyecto, te invitamos a acompañarnos en nuestro servidor de Discord.
Muchas gracias por el apoyo amigos 💕
Amiga soy como tu que olvida lo que ha publicado y lo que no. ´Por otra parte, tu pendiente para la cocina esta hermoso! 😍
Jaja a veces se olvida, es que uno ha compartido tanto en hive, que ya no se sabe 😄. Muchas gracias bella ✨
Pero que cosita más Cuchi 🥹💓
Aunque que más puedo esperar, si mi amiga siempre está haciendo bellezas 🌷🩷
Ay, mi amiga siempre se bella con esos comentarios. Pues tú no te quedas atrás ami, eres tan talentosa. 💕
Congratulations, your post has been curated by @dsc-r2cornell. You can use the tag #R2cornell. Also, find us on Discord
Felicitaciones, su publicación ha sido votada por @ dsc-r2cornell. Puedes usar el tag #R2cornell. También, nos puedes encontrar en Discord
Muchas gracias por el apoyo, amigos 💕
Es un bello colgante @valenpba y el mensaje es francés es muy gracioso, como si la gallinita nos hablara en francés... 🤣🤣
😄😄 Ay amiga, por eso lo hice, me daba risa imaginar a la gallina hablando francés 🤭
Me alegra que te haya gustado, bella ✨💕
You can make something sweet with recycled materials, and detailed creativity. Thanks for sharing with us.
Totally, what I like to recycle the most for my crafts is cardboard, since we can do so many things with it. I'm glad you liked it. Greetings ✨
Que bello trabajo valen❤️✨
Muchas gracias bella! 💕
Te quedó demasiado precioso mi Valen, me encanta como te quedan las figuras en foami, se nota el amor que le pones a cada creación. Realmente precioso amiga 💕
Esta precioso amiga. Además de curiosito, jejeje.