[Esp/Eng] ✨Bonita tarjeta para el día del padre. // Nice card for Father's Day. ✨
✨¡Hola amigos amantes de la creatividad! Espero que hayan pasado un muy buen comienzo de semana.✨
🔸Sin más que añadir, a continuación los dejo con el paso a paso:
✨¡Hello friends who love creativity! I hope you had a very good start to the week.✨
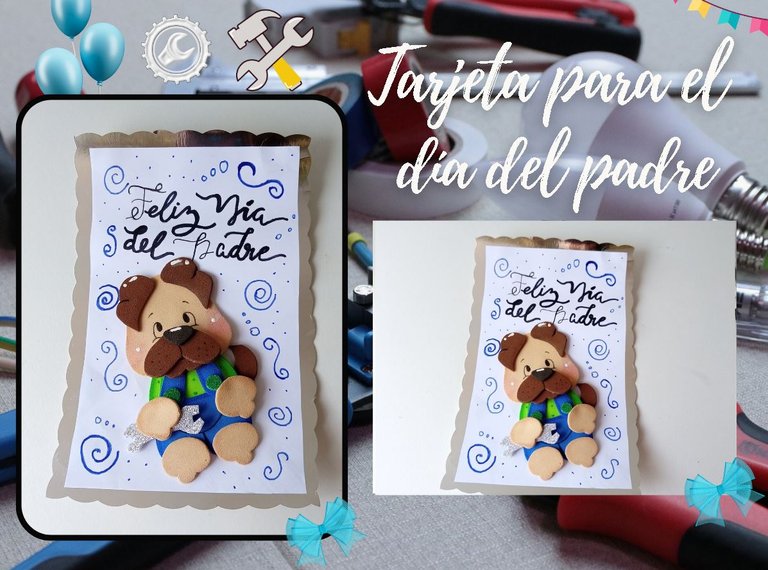
¡Good afternoon friends!I hope you are having a great week. For my part, I am quite happy. On this occasion I share with you the step by step to make a beautiful card for Father's Day. When thinking a little about what I could share with you for this special celebration, I thought of a candy bar, but the truth is I wasn't convinced by the idea I had in mind, so after a while, the idea came to me of making a beautiful and simple card , although this idea can also have a chocolate or candy on the back to give as a gift.
My dad is the one who solves haha, the one who knows how to do a little bit of everything, so it occurred to me to make a fairly robust little dog, very similar to my dad haha, and put some work tools on him.
🔸Without more to add, then I leave you with the step by step:
♥️ESPERO QUE TE GUSTE,
¡Empecemos!
♥️I HOPE YOU LIKE IT,
Let's start!

✂️ MATERIALES | ✂️ MATERIALS
- Foami azul, verde, crema,
marrón y negro. - Foami escarchado verde y plateado.
- Cartulina plateada.
- Pinturas y marcadores.
- Hoja blanca.
- Pegamento.
- Tijeras.
- Regla.
- Lápiz.
- Foami blue, green, cream,
brown and black. - Green and silver frosted foam.
- Silver cardboard.
- Paints and markers.
- White sheet.
- Glue.
- Scissors.
- Ruler.
- Pencil.
PROCEDIMIENTO | PROCESS
- PASO 1:
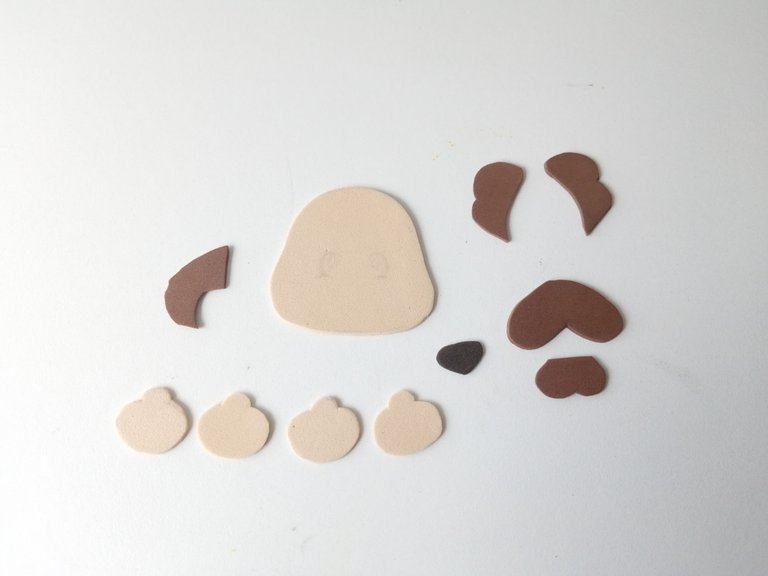
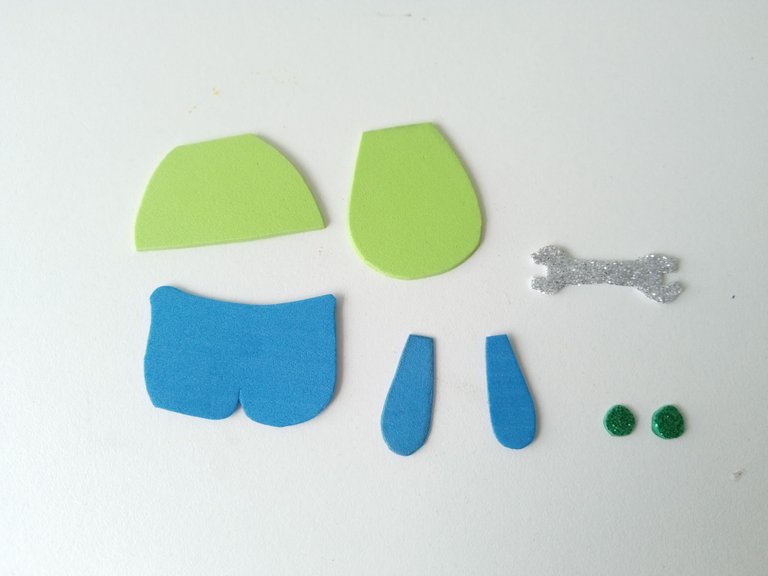
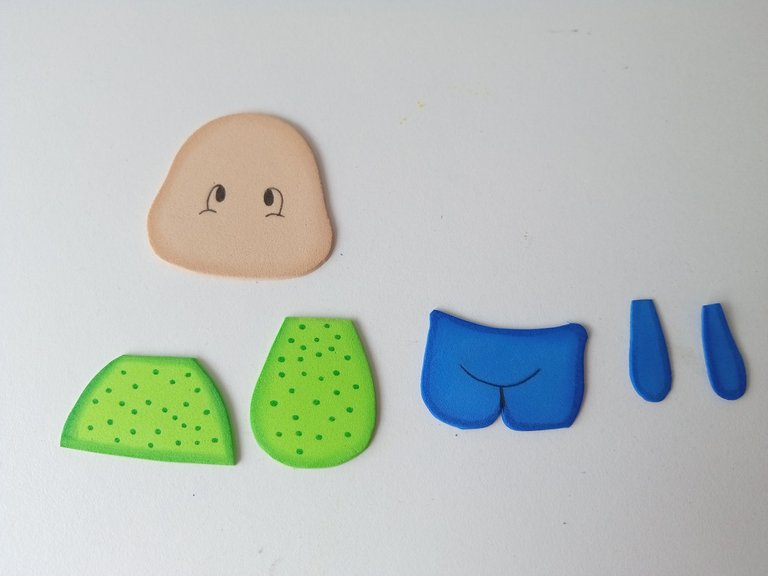
Lo primero que debemos hacer es dibujar el patrón del personaje o criatura que deseamos elaborar en foami. Si buscas un dibujo que te gusta y no consigues el patrón, simplemente debes dibujar cada una de las partes del cuerpo y elementos de manera individual en una hoja blanca y luego, transferir cada una de las piezas a los colores correspondientes de foami, de la siguiente manera: cabeza y patas en color crema, cola, orejas y hocico en color marrón, atuendo en foami verde, overol en foami azul, botones en foami escarchado verde y herramienta en foami escarchado plateado.
- STEP 1:
The first thing we must do is draw the pattern of the character or creature that we want to make in foami. If you are looking for a drawing that you like and you can't find the pattern, you simply have to draw each of the body parts and elements individually on a white sheet and then transfer each of the pieces to the corresponding colors of foam, from the as follows: head and legs in cream color, tail, ears and muzzle in brown, outfit in green foami, overalls in blue foami, buttons in green frosted foam and tool in silver frosted foam.
- PASO 2:
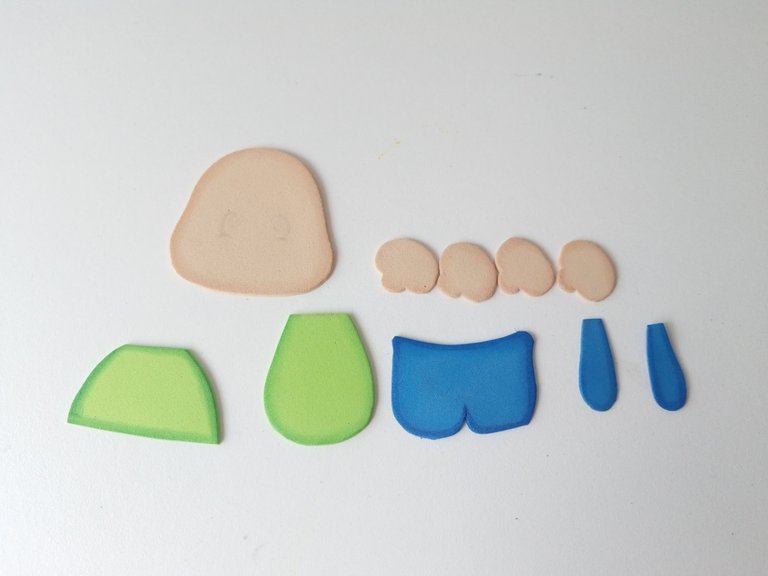
Al tener todas las piezas listas, es momento de comenzar a dar color y sombras, así que, con pinturas de colores similares a cada pieza, tomé un poco con un pañito y froté los bordes de cada pieza. Luego, dibujé detalles con marcador delgado, los ojos, detalles de la ropa y con marcador verde, pinté algunos puntos por toda la camisa.
- STEP 2:
Having all the pieces ready, it is time to start adding color and shadows, so, with paints of similar colors to each piece, I took a little with a cloth and rubbed the edges of each piece. Then, I drew details with a thin marker, the eyes, details of the clothes and with a green marker, I painted some dots all over the corner.
- PASO 3:
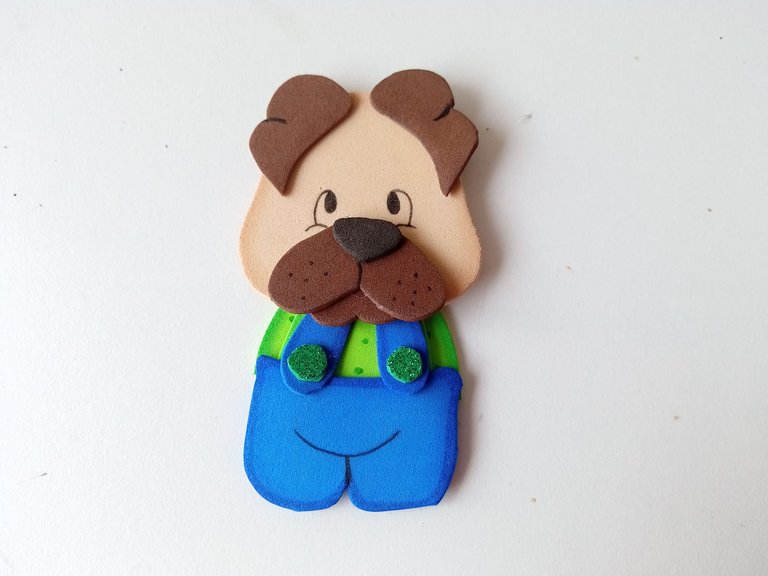
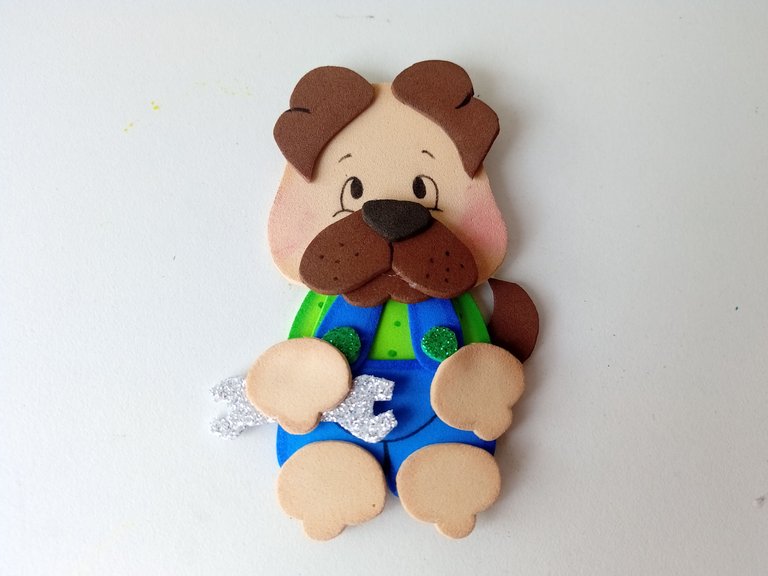
Después, comencé a pegar las piezas, comenzando por la cara y aproveché de dar detalles con marcador al hocico y orejas. Continué pegando las piezas de la ropa, las patas y la herramienta tomada por una de las patas. Por último, di detalles de luz a las orejas, nariz, y mejillas.
- STEP 3:
Then, I started gluing the pieces, starting with the face and taking advantage of adding details to the muzzle and ears with marker. I continued gluing the pieces of clothing, the legs, and the tool taken by one of the legs. Lastly, I gave light details to the ears, nose, and cheeks.
- PASO 4:
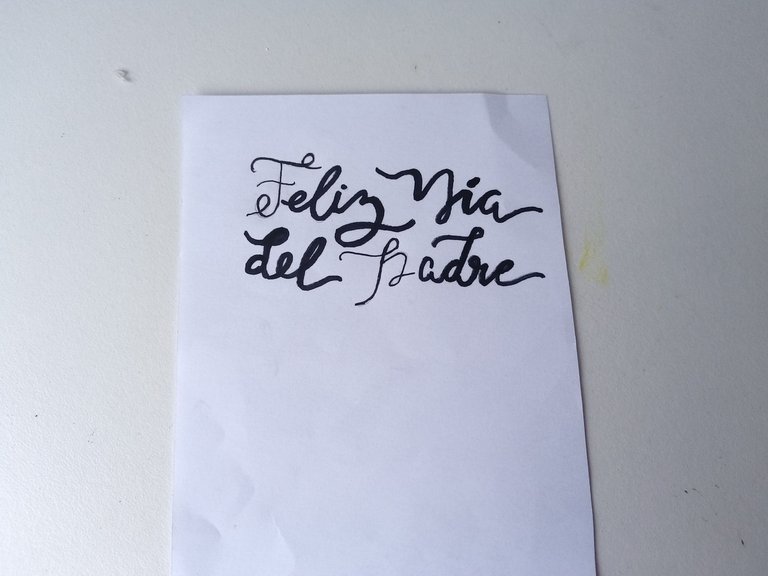
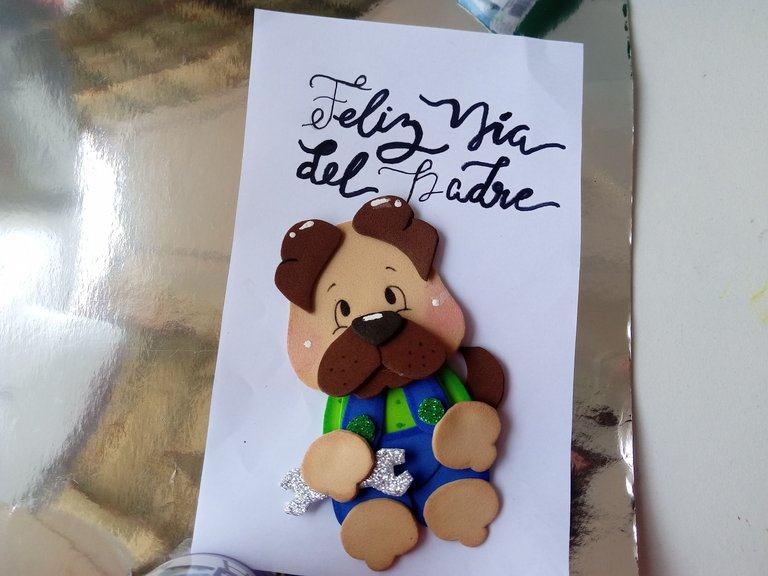
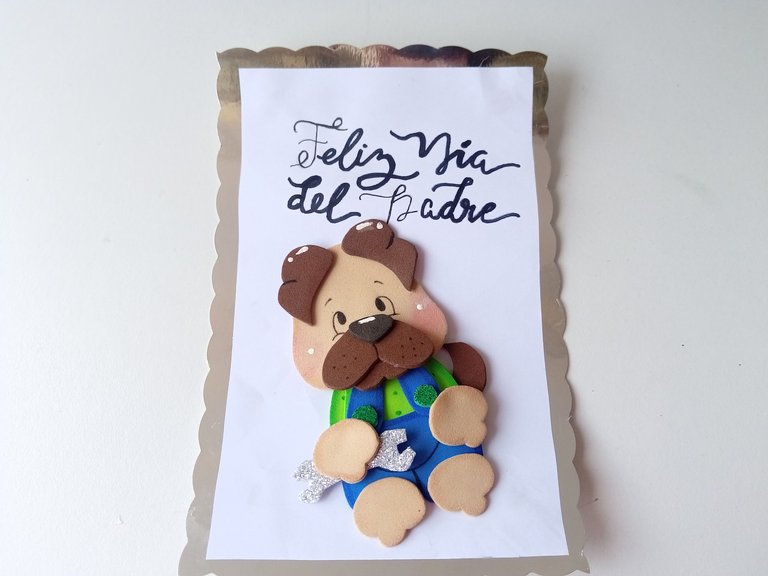
Luego, recorté la hoja blanca de 5 cm x 17 cm, coloqué en forma vertical y en la parte superior escribí “Feliz día del padre” pegué la decoración del perrito más abajo y luego pegué la hoja sobre cartulina plateada.
- STEP 4:
Then, I cut the white sheet to 5 cm x 17 cm, placed it vertically and at the top I wrote “Happy Father's Day”, I glued the puppy decoration below and then I glued the sheet on silver cardstock.
- PASO 5:
Luego, recorté la cartulina con tijeras de diseño, dejando un borde de 1 cm. Finalmente, tomé un marcador azul y dibujé algunas formas desordenadas por todo el fondo de la hoja blanca para rellenar un poco más y que no se viera tan vacío.
- STEP 5:
Then, I cut out the cardboard with designer scissors, leaving a 1cm border. Finally, I took a blue marker and drew some messy shapes all over the background of the white sheet to fill it in a little more and make it not look so empty.
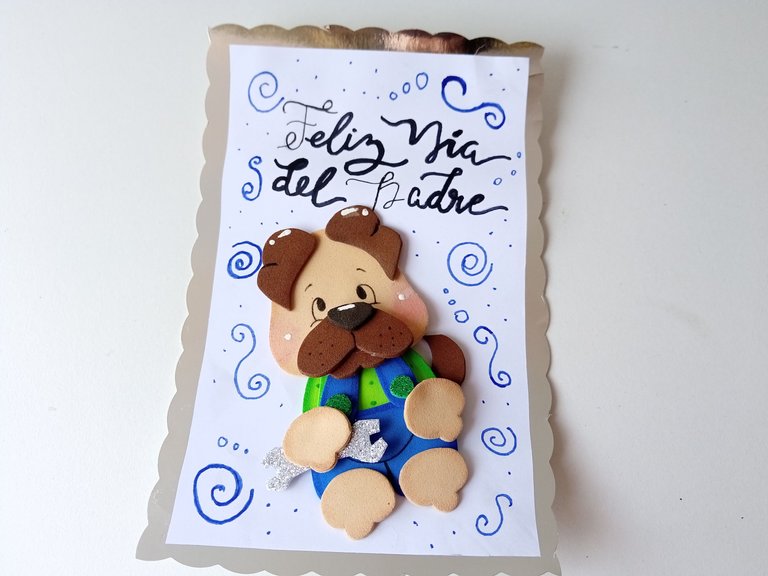
✨¡And ready!✨This is how I created this beautiful card idea for Father's Day. As I said at the beginning, in the back you can make a kind of pocket, where you can put candy or some detail that you liked. I hope you liked the step by step and are encouraged to make it.
❤️Until the next post.
✨RESULTADO: | ✨RESULT:


Todas las fotografías son de mi propiedad.
Separador y Fotos editadas en Canva
All photographs are my property.
Photos edited in Canva
Pero que belleza Vale 😍 me ha encantado está súper cuchi y como siempre estás haciendo un trabajo espectacular, felicidades. 🌟
Gracias mi Dani bella!!! Me alegra mucho que te haya gustado preciosa. Tus palabritas siempre me animan 💕
Te estás pasando, eso es belleza tras belleza🥰🥰🥰
Te quedo ultra mega wow! Me encanto ami✨🩷
Ayy!!! Gracias amiga preciosa de mi corazón , me alegra que te haya gustado esta tarjetita. Nos pusimos de acuerdo casi casi en hacer tarjetas.🤭
Que bello mi Valeeen!!! Me encantó el toque del overol y de la herramienta en la mano jajaja. Precioso 😍
Muchas gracias ami! Jaja cierto? Esa mini herramienta de ternura y risa 🤭
Me alegra que te haya gustado Ami 💕
Congratulations, your post has been upvoted by @dsc-r2cornell, which is the curating account for @R2cornell's Discord Community.
Muchas gracias por el apoyo amigos 💕
Ayy esto quedó muy hermoso y me hizo pensar cuando Olivia le haga la primera tarjeta a papá 🥺❤️
Es verdad, ya quiero ver a Olivia hacer estos detallitos para mamá y papa en su día.🥺🥰🥰
That's a beautiful and creative card that would make any dad smile:)
Muchas gracias! Así es, un bonito detalle para papá en su día.
Me alegra que le haya gustado 💕
Que tarjetita más linda mi Valen 😍 Me encanta lo tierno que te quedan tus diseños, las tarjetitas sin duda son lo tuyo ❤️
Tan bella mi Mary 🤭!! Tu crees? Siempre me esfuerzo mucho en hacer letras bonitas jaja. Me alegra que te haya gustado preciosa💕
The fathers day card is a delight. Lovely way to commemorate the father's.
Así es amigos, un bonito detalle para acompañar un obsequio o una simple tarjeta hecha con amor💕
Un hermoso detalle para el día del padre. Te felicito por tan bello trabajo.
Muchas gracias, amigo! Me alegra que te haya gustado y agradezco tus palabras ✨✨
Que ternura de tarjeta amiga, me encantó mucho como te quedó el diseño del perro🥰✨🤗
Muchas gracias mi Yage! Me alegra mucho que te haya gustado 💕
hermoso y muy significativo, que gran detalle!