I show you how to make the pattern of a casual vest [ESP/ENG]
Hello needleworkmonday friends! I hope this week is off to a productive start for all of you.
We're in mid-gear here, but trying to be as productive as possible.
Hola amigos de needleworkmonday! Espero que está semana desde ya haya comenzado productiva para todos ustedes.
Por aquí estamos a media marcha, pero intentando ser lo más productiva posible.
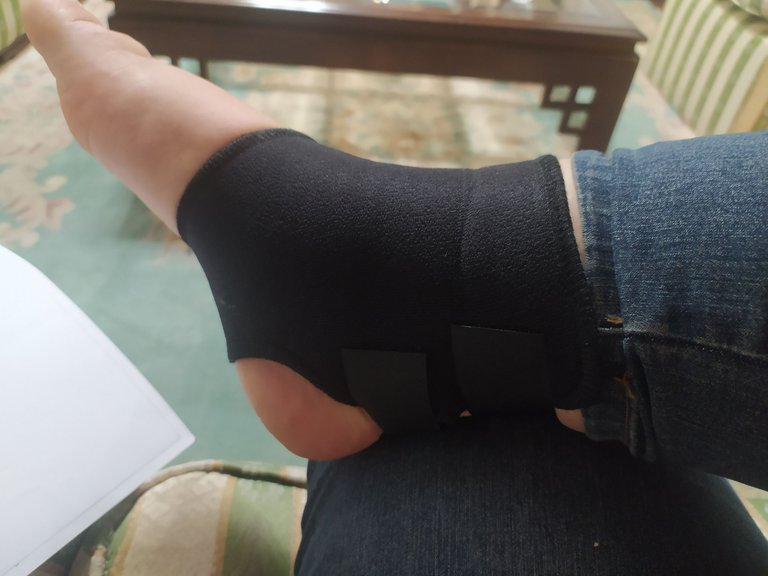
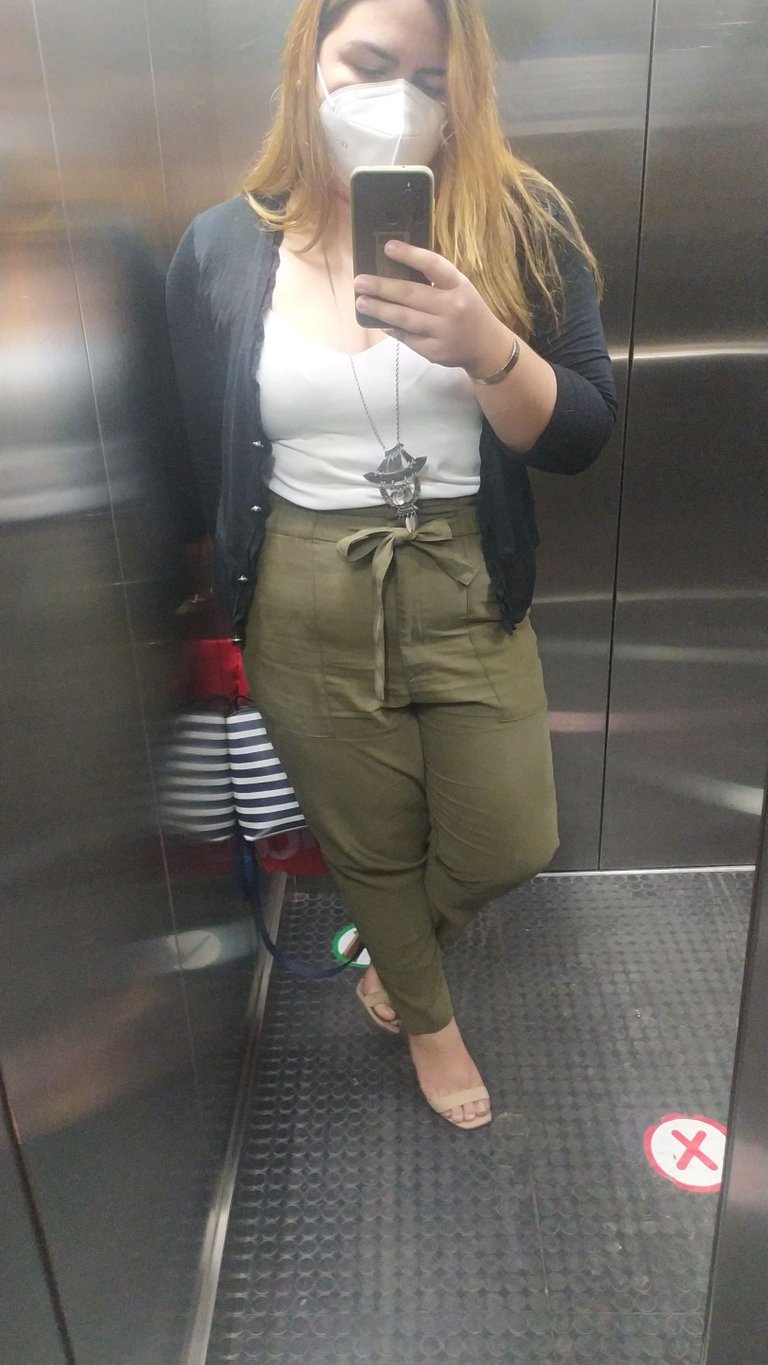
This week I wanted to show you the pattern and step by step to make a casual vest for the pants you see in my photo, but on Friday I bent my ankle and while it goes down a little inflammation forbid the sewing machine for me, because it was also the right foot 🤦🏼♀️
Está semana queria enseñarles el patrón y paso a paso para confeccionar un chaleco casual para el pantalón que ven en mi foto, pero el viernes me doble el tobillo y mientras baja un poco la inflamación prohibida la máquina de coser para mí, porque además fue el pie derecho 🤦🏼♀️
But since every cloud has a silver lining, I thought that showing you the pattern and how I made it in the same post would be too long, so today I'll show you how I made the pattern and next week I hope to show you my vest because I'm crazy to wear it.
Pero como no hay mal que por bien no venga, me puse a pensar que enseñarles el patrón y como lo hice en un mismo post iba a resultar muy largo, así que el día de hoy les mostraré cómo hice el patrón y la semana que viene espero estarles mostrando mi chaleco porque estoy loca por usarlo.
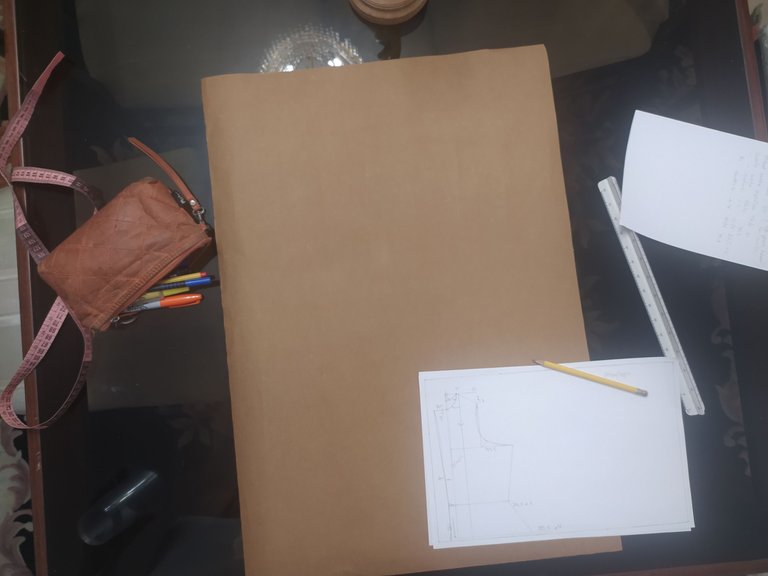
Materials to make the pattern.
- 1 meter of craft paper or paper to make patterns.
- Pencil
- Measuring tape
- Ruler
Materiales para hacer el patrón.
1 metro de papel craft o papel para realizar patrones
Lápiz
Cinta de medir
Regla
If you have experience making patterns you can do it directly on the fabric, as I am still not very good with pattern making I did it on a white sheet and then I did it on my craft paper, because I wanted to be super sure hahaha.
Si tienes experiencia haciendo patrones puedes hacerlo directo en La tela, como yo aún no me desenvuelvo muy bien con el patronaje lo hice en una hoja blanca y luego lo hice en mi papel craft, porque quería estar super segura jajaja
It is important that you have the following measurements:
-Length of waist
-Half back width
-Quarter bust
-Quarter of waist + 3 centimeters
-Quarter of hip + 4 centimeters
Es importante que tengas las siguientes medidas:
-largo de talle
-Mitad de ancho de espalda
-Cuarto de busto
-Cuarto de cintura + 3 centímetros
-Cuarto de cadera + 4 centímetros
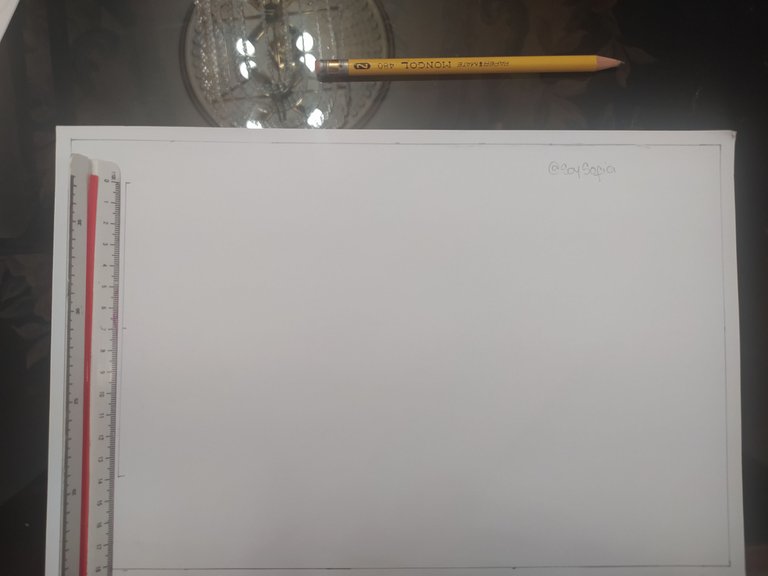
The first thing we will do is to draw the vertical line of the length of the waist, but we will not make it complete, but we will try a line of 48 centimeters if like me you are plump, and about 34 centimeters if you are thin. This will prevent the armhole (the shape of the armpit is not too big).
Lo primero que haremos será trazar la línea vertical del largo del talle, pero no la haremos completa, sino que trataremos una línea de 48 centímetros si como yo eres rellenita, y unos 34 centímetros si eres delgada. Esto lo que va a evitar es que la sisa (la forma de la axila no quede muy grande)
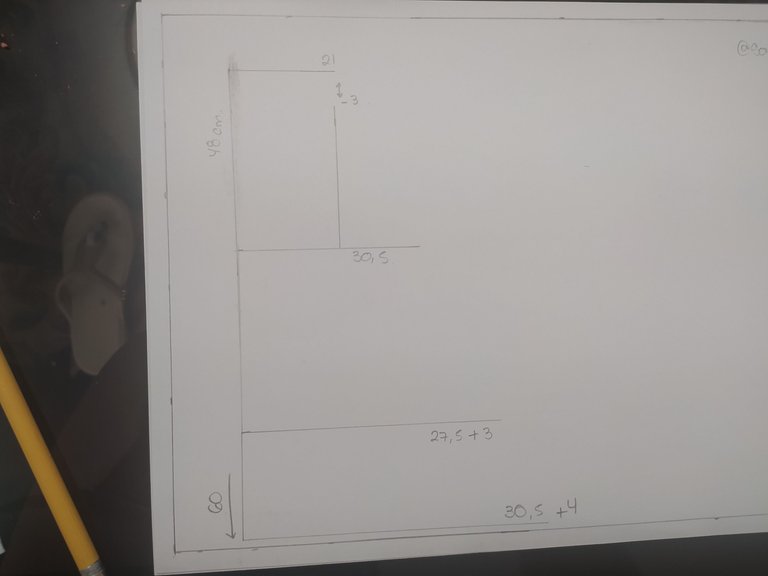
Once the line is drawn, we will draw 3 lines. At the beginning, in the middle and at the end.
The line at the beginning should measure half the width of the back (in my case it was 21 centimeters).
The middle line should measure a quarter of the bust, in my case, it was 30.5 centimeters.
And the last line should measure a quarter of waist plus 3 centimeters, in my case that measured 27.5 +3, that is 30.5 centimeters.
Trazada la línea, vamos a trazar 3 líneas. Al inicio, a la mitad y al final.
La línea del inicio deberá medir la mitad de ancho de espalda (en mi caso fueron 21 centímetros)
La línea de la mitad deberá medir cuarto de busto, en mi caso, fueron 30,5 centímetros.
Y la última de las líneas deberá tener la medida de cuarto de cintura más 3 centímetros, en mi caso esa midió 27,5 +3, es decir 30,5 centímetros.
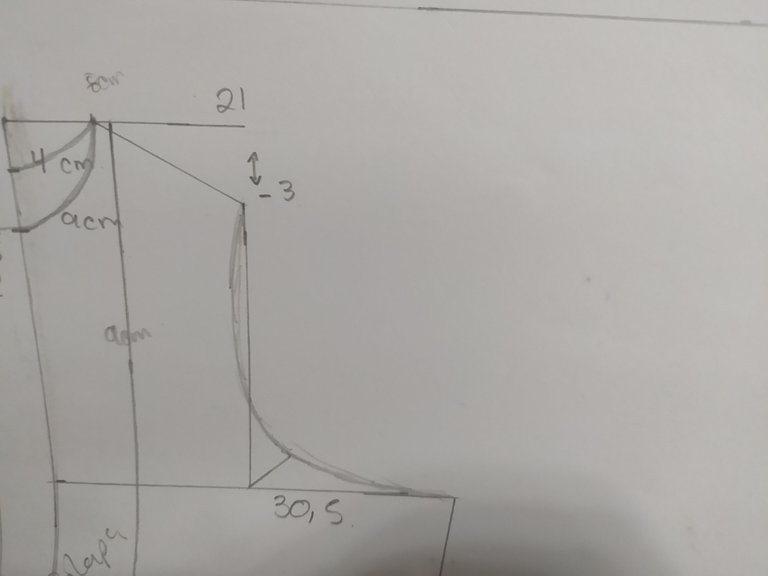
Let's stop at the bust line, and measure 21 centimeters, there we will raise a vertical line until it almost joins the back line, but we will leave 3 centimeters without tracing. (You can guide you in the photo)
In the middle of this vertical line, we will measure one centimeter inwards, that is to say towards the left side, and in the angle that is formed we will make a diagonal line of 2 centimeters. This will allow us to make the curvature of the armhole without having to use special rulers.
Vamos a pararnos en la línea del busto, y vamos a medir 21 centímetros, allí subiremos una línea vertical hasta casi unirla a la línea de la espalda, pero vamos a dejar 3 centímetros sin trazar. (Puedes guiarte en la foto)
En la mitad de esa línea vertical, vamos a medir un centímetro hacía adentro, es decir hacía el lado izquierdo, y en el ángulo que se forma vamos a hacer una línea diagonal de 2 centímetros. Esto nos permitirá hacer la curvatura de la sisa sin tener que usar reglas especiales.
Once the armhole is marked, we will make the shoulder drop. For this we will stand at the beginning of the back width line from the waistline and measure 8 centimeters, from that point we will draw a diagonal line to the opening of 3 centimeters.
Marcada la sisa, haremos la caída del hombro. Para esto vamos a pararnos en el inicio de la línea de ancho de espalda desde el talle y vamos a medir 8 centímetros, desde ese punto vamos a trazar una línea diagonal hasta la abertura que nos quedó de 3 centímetros.
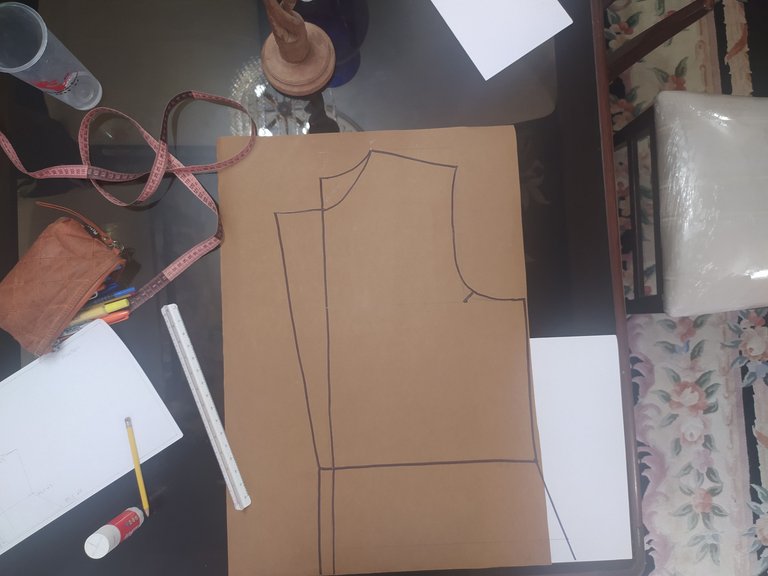
Once this is done, we will make the neckline.
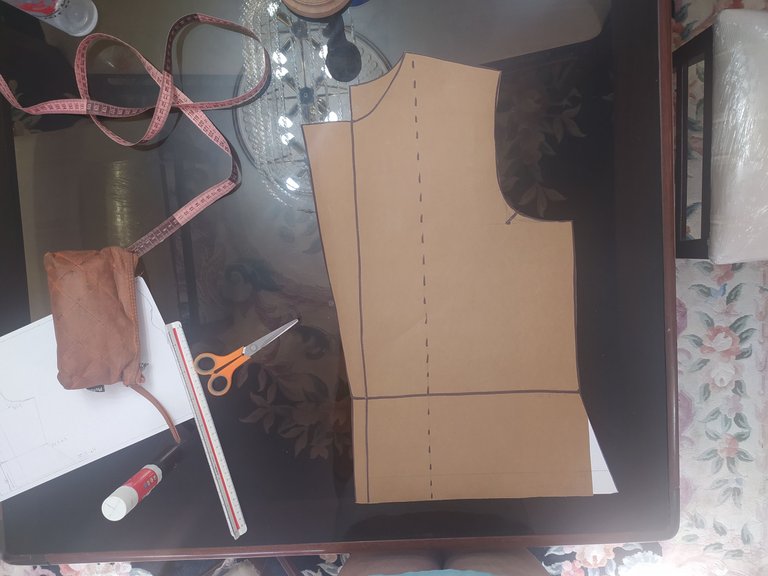
If you notice in the photo there are two curves, because I use the same paper to make the front and back.
To make the back neckline: we measure 4 centimeters on the waist line, and we join drawing a curve from the point that we had marked 8 centimeters to there.
To make the front neckline: measure 9 centimeters on the waistline, and join the point marked on the back width line with it.
Hecho lo anterior, haremos el escote del cuello.
Si te fijas en la foto hay dos curvas, porque uso el mismo papel para hacer delantero y trasero.
Para hacer el escote trasero: medimos 4 centímetros en la línea del talle, y unimos dibujando en curva desde el punto que habíamos marcado 8 centímetros hasta allí.
Para hacer el escote delantero: medimos 9 centímetros en la línea del talle, y unimos el punto marcado en la línea del ancho de espalda con este.
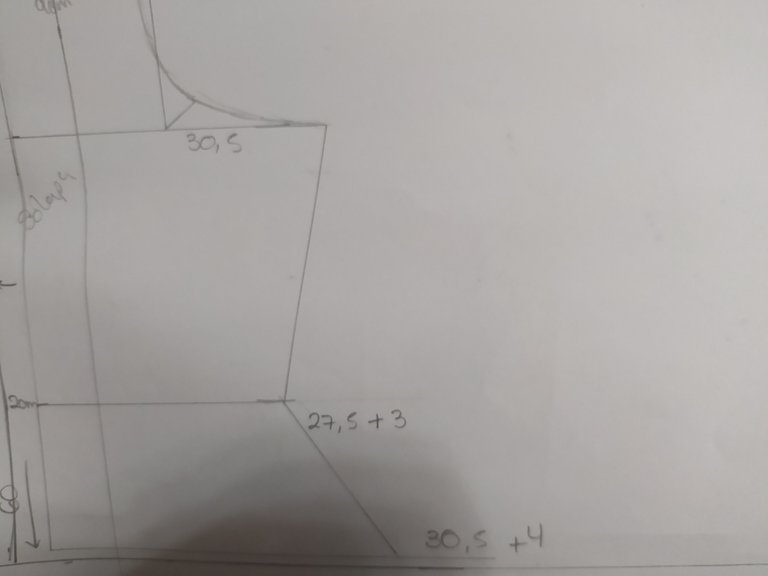
Once we have done the parts that I, at least, consider difficult, we will finish tracing the waist line and we will make the line of the length we want.
When we are at the desired length, we will try the horizontal line of the quarter hip width plus 4 centimeters.
We will join the bust width line with the waist line, and the waist line with the hip line as shown in the picture.
Una vez hicimos las partes que al menos yo, considero difíciles, vamos a terminar de trazar la línea del talle y haremos la línea del largo que queremos.
Cuando estemos en el largo deseado, trataremos la línea horizontal del cuarto de ancho de cadera más 4 centímetros.
Vamos a unir la línea de ancho de pecho con la de cintura, y la de cintura con la de cadera tal como se ve en la foto.
The last thing we will do is the lapel, but this is optional.
To make the lapel, we are going to place ourselves again on the waistline and measure 2 centimeters wide up to the waistline.
At the top, we place ourselves at the neckline and draw a horizontal line to the left of 7 centimeters. We will go down diagonally until we join that line with the 2 centimeters wide line we drew to the waist.
Lo último que haremos será la solapa, pero esto es opcional.
Para hacer la solapa nos vamos a ubicar nuevamente en la línea de talle y vamos a medir 2 centímetros de ancho hasta la línea de la cintura.
En la parte superior, nos ubicamos en el escote de cuello y trazamos una línea horizontal hacía la izquierda de 7 centímetros. Bajaremos en diagonal hasta unir esa línea con la de 2 centímetros de ancho que trazamos hasta la cintura.
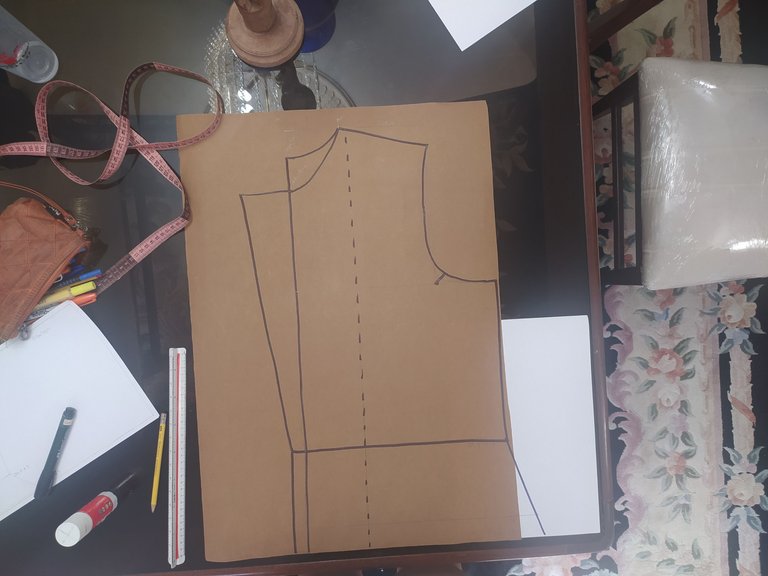
Another detail that you should take into account is that this type of vest should be lined with fabric or at least the lapel. For this, we will measure from the waist line 9 centimeters to the right and we will try a vertical line all over the pattern, this will serve to cut the lining.
Otro detalle que deben tomar en cuenta, es que este tipo de chalecos debería ir forrado en tela o al menos la solapa. Por esto, vamos a medir desde la línea del talle 9 centímetros hacía la derecha y trataremos una línea vertical por todo el patrón, este te servirá para cortar el forro.
In order not to cut the pattern, what I usually do is to fold the paper depending on which part of the pattern I am going to make on the fabric, so if I want to make a vest again with the same pattern, I don't run the risk of losing any part of it.
Para no cortar el patrón, yo lo que suelo hacer es ir doblando el papel dependiendo de que parte del patrón voy a plasmar en la tela, así si quiero volver a hacer un chaleco con el mismo patrón, no corro el riesgo que alguna parte de este se haya perdido.
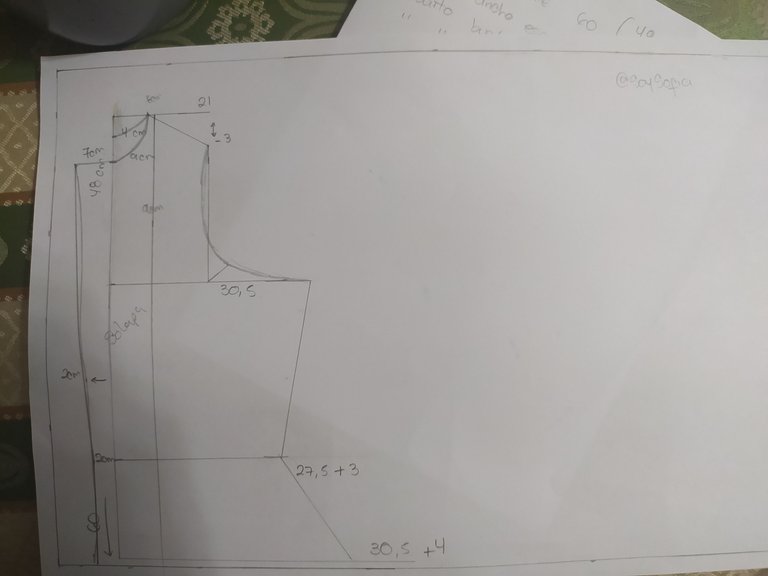
This was the whole step by step to make the vest pattern. I hope this step by step will allow you to make your own vest pattern, and see you next week to make it
Este fue todo el paso a paso para hacer el patrón del chaleco. Espero este paso a paso te permita hacer tu propio patrón de chaleco, y nos vemos la próxima semana para confeccionarlo
Thanks for reading me!
¡Gracias por leerme!

https://twitter.com/SoySofia1993/status/1508630194764099586
The rewards earned on this comment will go directly to the person sharing the post on Twitter as long as they are registered with @poshtoken. Sign up at https://hiveposh.com.
Thanks for taking us through the full details on how to cut a casual vest, of a true, it's always good to first pattern draft our design, so as to avoid mistakes and the likes.
Thanks to you for reading my post. What a pleasure to know that the explanation was clear and simple.
You are welcome, yes it was, thanks.
Sorry to hear you hurt your ankle, hope you recover fast. I loved to read your post as I always stumble about fitting issues with bought pattern and for longer want to draft my own „perfect“ patterns. But to be honest I was discouraged by all the math.
I am very curious if you are satisfied with the fit of your self drafted pattern (looking forward to the finished vest). And it’s encouraging to read your explanation.
Thank you for your message. Having done it first in small version and then making it real size allowed me to get to the result with fewer lines to erase 😂😂 a usual practice I do is that after I finished the pattern I put it on simulating that it is the finished piece to verify that the size and measurements are correct.
I hope you have a speedy healing, that’s no fun.
Thanks for sharing how you create your patterns. I am really looking forward to seeing this vest now!
Thank You @crosheille i hope yo finish it this week and publish ir
You’re welcome! I hope the same for my project lol. We can do it!
Wow beautiful thanks for sharing