How to make my camusacin decorative ruffles [ESP/ENG]
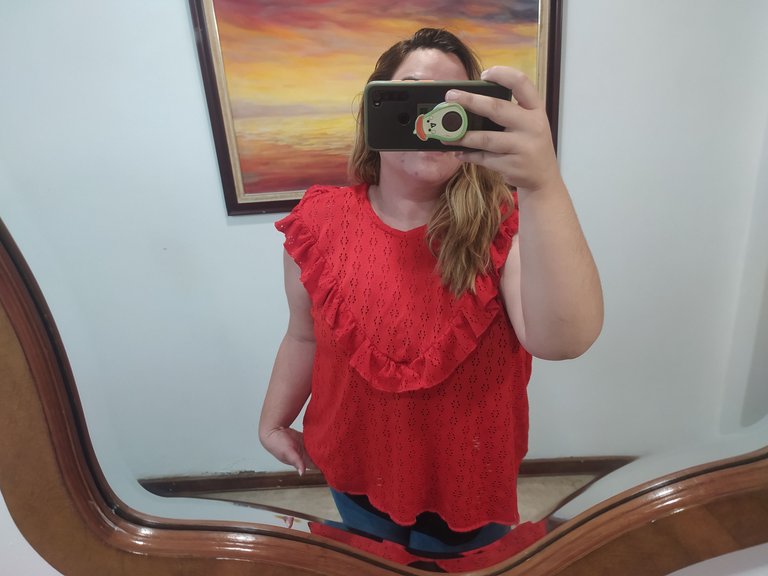
Hello needleworkmonday friends, I'm coming here a little late, running so I don't miss our needle Monday, but last week and this week, although it's just beginning, have been very busy, I presume it's because this week in Venezuela there are holidays for Holy Week or Easter, and many people want to leave everything organized before the holiday.
Hola amigos de needleworkmonday paso por acá un poco tarde, corriendo para que no se me pase nuestro lunes de agujas, pero la semana pasada y está semana, aunque está comenzando, han sido de correderas, presumo que se debe a qué está semana en Venezuela hay días festivos por semana santa o pascuas, y muchos quieren dejar todo organizado antes del feriado.
However, as the desire is stronger than the complications of everyday life, today I want to tell you about my experience sewing this beautiful blouse with decorative V-shaped ruffles.
Sin embargo, como las ganas pueden más que las complicaciones del día a día, hoy les quiero contar mi experiencia cosiendo está hermosa blusa con volantes en forma de V de manera decorativa.
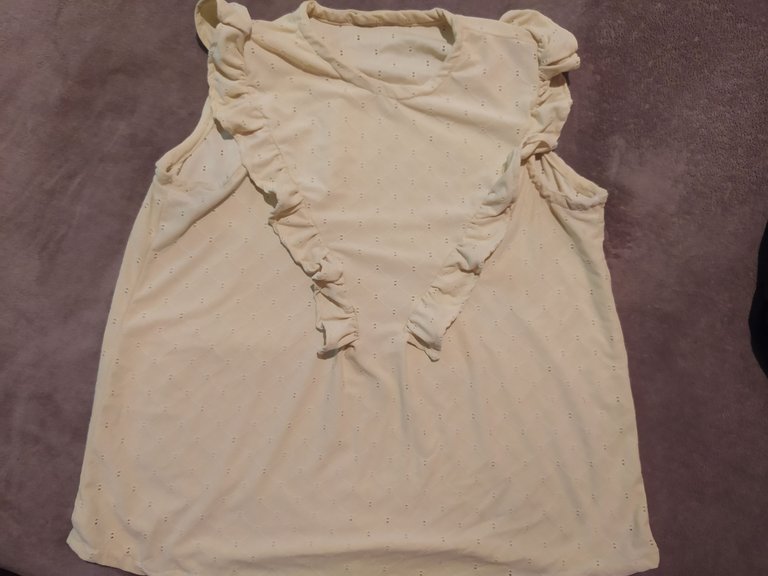
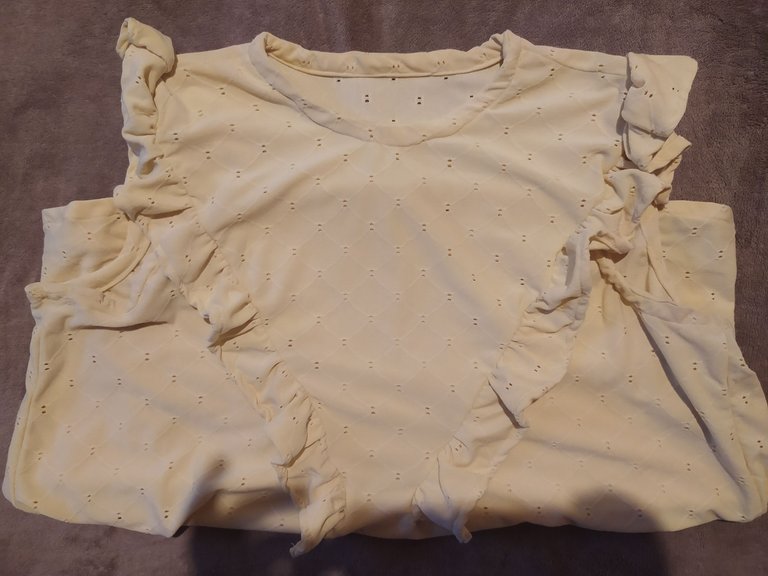
The first thing I have to tell you is that I have made this shirt twice, and both times it has turned out differently. Why did this happen? Very easy!
The first time I made this shirt I decided to use a fresh fabric but with a slightly elastic fabric, at that time I had not yet bought my overlock machine (machine that I will tell you about soon) and being the fabric so elastic I tried to make a hem and it was a little weird, also I did not join the ruffle to the center so they were separated in the middle and although I say that it does not look good many do not even notice it.
Lo primero que debo contarles es que he realizado está camisa 2 veces, y las dos veces me ha quedó diferente. ¿Por qué pasó esto? ¡Muy fácil!
La primera vez que hice está camisa yo decidí usar una tela fresca pero con un tejido un poco elástico, en ese momento aún no había comprado mi máquina overlock (máquina de la que les hablaré próximamente) y al ser el tejido tan elástico intenté hacerle un dobladillo y quedó un poco raro, además no uni el volante al centro así que quedaron separados en el medio y aunque yo digo que no se ve bien muchos ni lo notan.
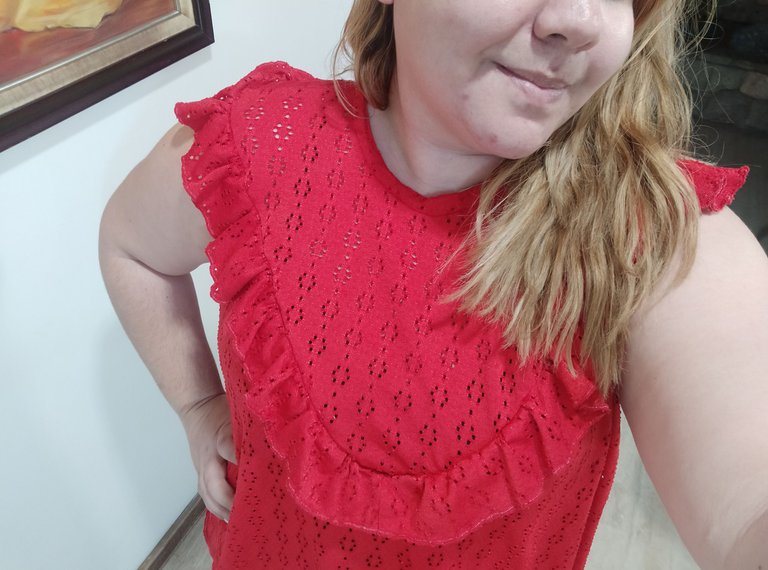
The second time I made the shirt, I bought the same fabric but in red (I think it's one of my favorite colors) but I wanted to try to make it into a dress, the fabric is very fresh and I was sure it would look great.
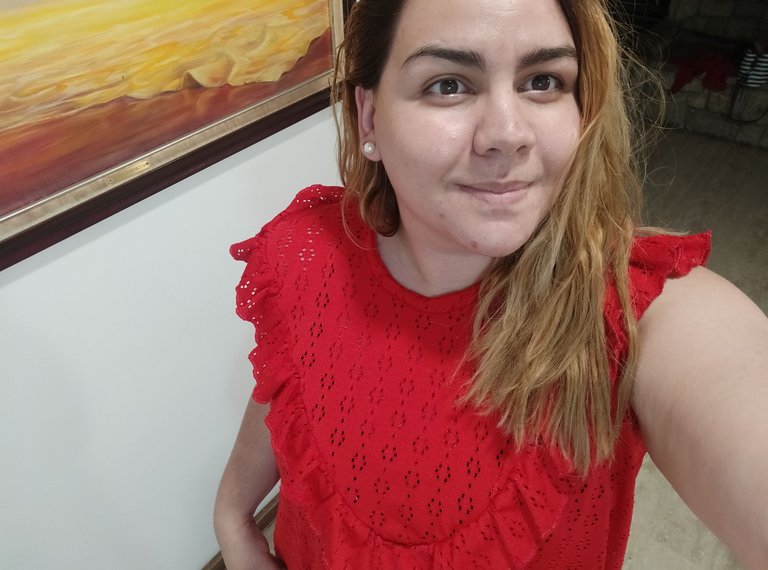
This time I made sure to attach the ruffle to the center to make it look like a V, so in that aspect I think I got a much better finish. However, when I was adjusting the length I mistakenly cut it a little above the hip so I had to make it like a shirt 🥴.
La segunda vez que hice la camisa, compré la misma tela pero en color rojo (creo que es de mis colores favoritos) pero quise intentar hacerla un vestido, la tela es sumamente fresca y de verdad estaba segura que iba a quedar muy bien.
Esta vez me asegure de unir el volante al centro para que parecieran una V, por eso, en ese aspecto considero que me quedo mucho mejor el acabado. Sin embargo, cuando estaba ajustando el largo corte por error un poco más arriba de la cadera así que me tocó hacerla como camisa 🥴
Having done all this beforehand, I think I can tell you in more detail how I made this shirt.
Hecha toda esta antesala creo que puedo contarles con mejor detalle como hice está camisa.
I downloaded the pattern for free from the website of a Spanish blogger who makes beautiful patterns, some paid and some free. You can see here the patterns she has available for free download.
But if you don't have a printer or it's a bit of a hassle to print it out, you can use a basic shirt pattern with the variation that you will have to cut the pattern diagonally from the shoulder line to the center of the breasts.
I printed this pattern, but I checked the measurements and I had to incorporate a few centimeters because my printer did not print in the format that came with the pattern, so if you are more advanced in pattern making you can do it yourself and it will be less work.
El patrón lo descargue gratis en la página de una blogger española que hace patrones bellísimos, algunos pagos y algunos gratuitos. Puedes ver aquí los patrones que tiene disponible para descarga gratuita.
Pero si no tienes impresora o te da un poco de trabajo imprimirlo, puedes utilizar un patrón básico de camisas con la variante que deberás cortar el patrón de forma diagonal desde la línea del hombro al centro de los pechos.
este patrón yo lo imprimí, pero revise las medidas y tuve que incorporar unos centímetros porque mi impresora no imprimia en el formato que venía el patrón, por eso sí estás más avanzada en patronaje puedes hacerlo tú misma y será menos trabajo.
Once you have the pattern, you place the pattern on both the right and back sides on the fold of the fabric.
Una vez que tienes el patron ubicas el patrón tanto de derecho como trasero en el doblez de la tela.
A tip I learned after losing a lot of fabric is to never fold the fabric in half to cut the pattern, fold the width you need, so you can save as much material as possible.
Un consejo que te doy y que aprendí luego de perder mucha tela es que nunca dobles la tela a la mitad para cortar el patrón, dobla el ancho que necesitas, así podrás ahorrar al máximo el material.
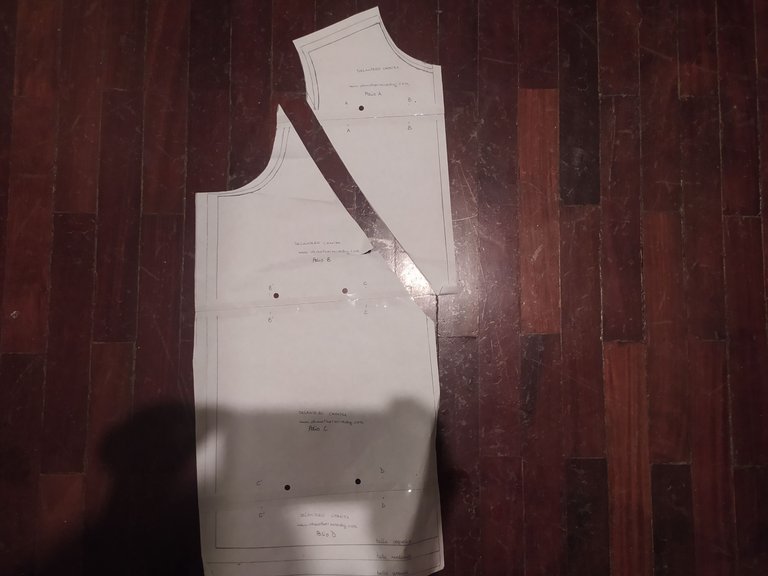
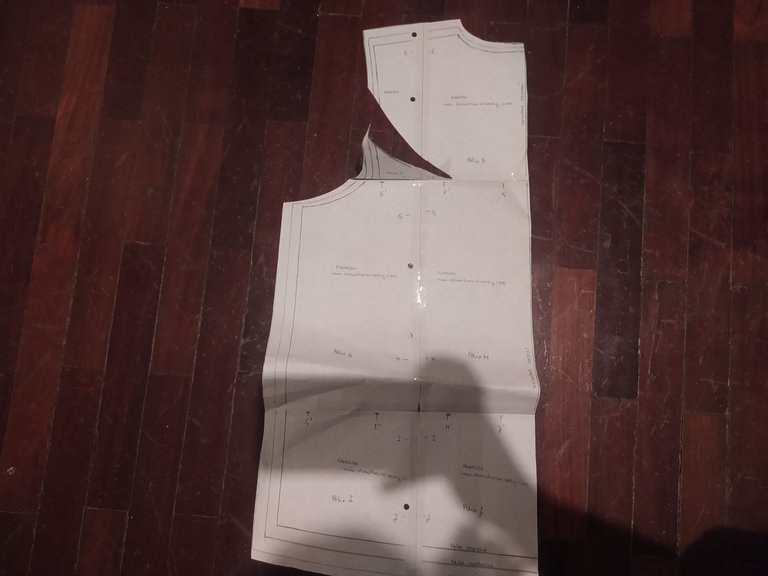
Then you cut the pattern by making the cut from the shoulder line to the center of the breasts as this is where we will sew the ruffle.
Luego cortas el patrón haciendo el corte desde la línea del hombro al centro de los pechos pues ahí coseremos el volante.
You should also cut two strips of about 10 centimeters wide, this can be adapted to your taste. The length of the strip should measure approximately one meter, I recommend that you make it longer and if there is anything left over, it will be lost.
También deberás cortar dos tiras de unos 10centimetros de ancho, esto lo puedes adaptar a tu gusto. De largo la tira deberá medir un metro aproximadamente, yo te recomiendo que la hagas más largas y si sobra nada se pierde.
Before sewing the shirt, let's start with the ruffle.
To make the ruffle you will have to join both pieces diagonally, facing right sides together, then we will hem the whole ruffle or if you have overlock you can make a decorative stitch.
Antes de coser la camisa, vamos a comenzar con el volante.
Para hacer el volante deberás unir ambas piezas en diagonal, enfrentando derecho con derecho, luego haremos un dobladillo en todo el volante o si tienes overlock puedes hacer puntada decorativa.
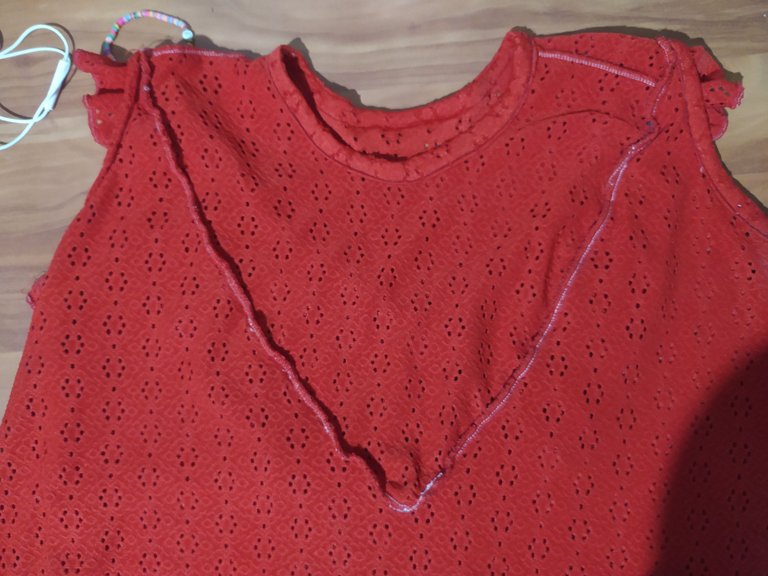
Having done the previous step, let's gather the fabric. This is done immediately with the sewing machine by setting the thread tension to the highest number and the longest pintuck and sew on the wrong side of the hem or decorative stitch.
You can adjust the pucker of the hem by making it more or less puckered.
Hecho el paso anterior, vamos a fruncir la tela. Esto con la máquina de coser se hace de manera inmediata colocando la tensión del hilo en el número más alto y la pintada más larga y coses por el lado contrario al dobladillo o la puntada decorativa.
Puedes ajustar el fruncido del dobladillo haciéndolo más fruncido o menos.
Now that our ruffle is ready, we are going to join the front and back of the shirt by the shoulders, the triangle on the front of the shirt will be sewn later.
Then, we are going to face the right side of the ruffle with the right side of the shirt, making sure that our ruffle has the ruffle facing the outside of the shirt and that it is well centered.
On top of this, we place the front triangle that we have left and sew in the V shape. You can help yourself with pins so that it stays in the place you want.
Listo nuestro volante, vamos a unir el delantero y el trasero de la camisa por los hombros, el triángulo del frente de la camisa lo coseremos más adelante.
Luego, vamos a enfrentar el derecho del volante con el derecho de la camisa, cuidando que nuestro volante quedé con el vuelo hacia la parte externa de la camisa y que nos quede bien centrado.
Encima de esto, colocamos el triángulo frontal que nos quedó y cosemos en la forma de V. Puedes ayudarte con alfileres para que quede en el sitio que deseas.
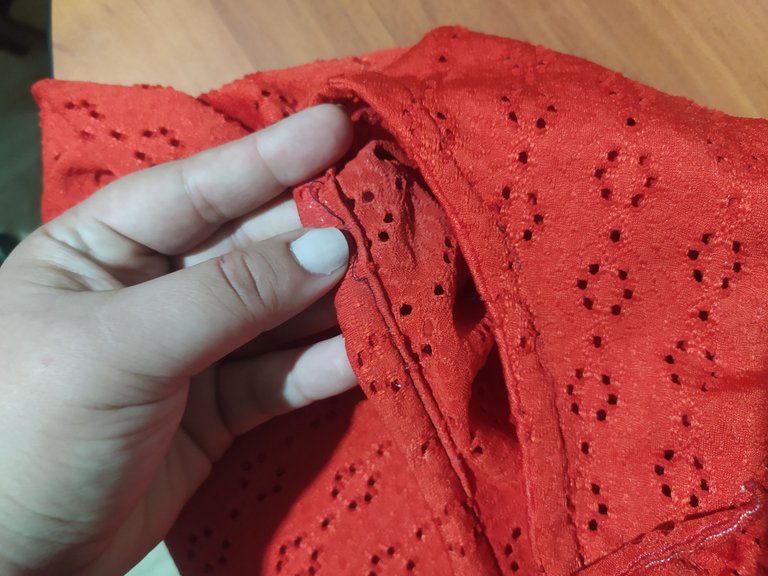
To make the detail of the neck and armpits, we will use bias binding, which are strips of fabric of approximately two centimeters that we sew to the fabric and fold twice inwards so that the threads are hidden.
Para hacer el detalle del cuello y de las axilas, lo haremos con bies o vistas, que son tiras de tela de aproximadamente dos centímetros que cosemos a la tela y doblamos dos veces hacia adentro para que los hilos queden ocultos.
Finally we sew the sides and make the hem of the shirt. I made a decorative border on the red shirt with the overlock, but you can hem it.
Por último cosemos los laterales y hacemos el ruedo de la camisa. Yo a la camisa roja le hice un borde decorativo con la overlock, pero puedes hacerle dobladillo.
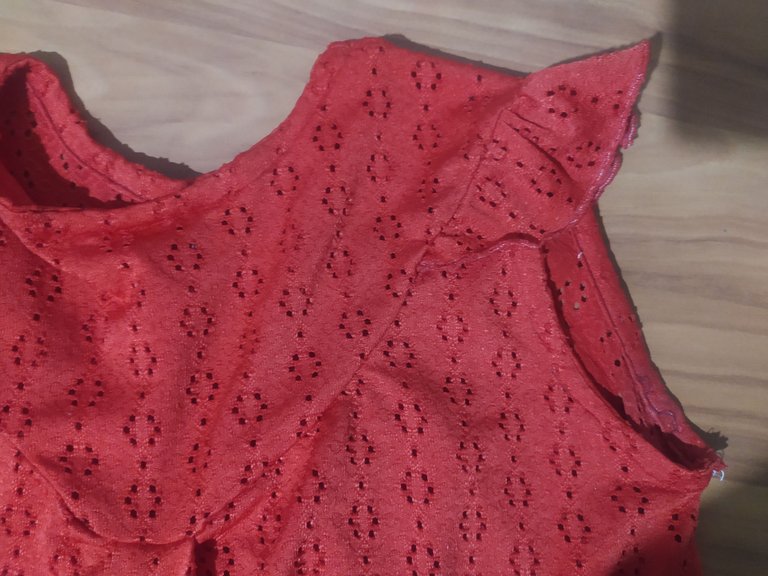
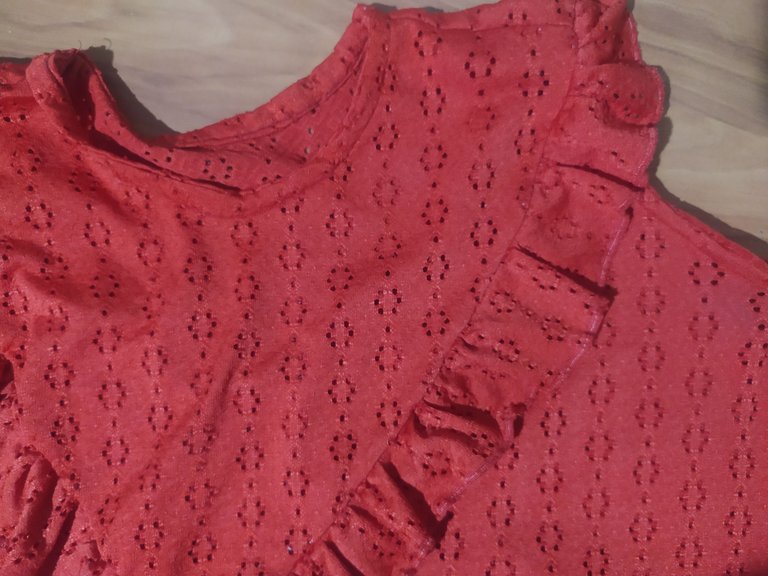
Do not forget to overlock the sides, or in case you do not have this type of machine, you can make a zig zag stitch to all seams, this will prevent the garment from unraveling.
No olvides hacerle costura overlock a los lados, o en caso que no tengas este tipo de máquina, puedes hacer una puntada Zig zag a todas las costuras, esto evitará que se descosa la prenda.
I hope you liked the shirt and that in your case you can make it without as many setbacks as it was in my case 😂.
Espero te haya gustado la camisa y que en tu caso puedas hacerla sin tantos contratiempos como fue en mi caso 😂
See you in a future post
Hasta un proximo post
Encantada con tu trabajo !Muy bien elaborado además de ser muy bello e intenso el color rojo la textura de la tela es realmente muy hermosa. Luce muy bien. Gracias por compartir
Muchas gracias @amores.sf2
Congratulations @soysofia! You have completed the following achievement on the Hive blockchain and have been rewarded with new badge(s):
Your next target is to reach 400 comments.
You can view your badges on your board and compare yourself to others in the Ranking
If you no longer want to receive notifications, reply to this comment with the word
STOPTo support your work, I also upvoted your post!
Check out the last post from @hivebuzz:
Support the HiveBuzz project. Vote for our proposal!
Sin dudas el color rojo te sienta muy bien. Realmente la segunda blusa te quedó mucho mejor que la anterior, es un diseño muy bonito, luce cómoda y fresca. Gracias por compartir el enlace para descargar los patrones.
Me agrada ver tu avance, saludos y bendiciones.
Gracias @kattycrochet el color rojo me hace sentir muy bien 😂😂 tiene un efecto en mi que me alegra, no se a que se deba pero me pasa muchísimo.
Gracias por tu comentario 🤩
Oh sí, este color rojo de la pasión es demasiado bello y te sienta muy bien, gracias por compartir tu trabajo
Gracias 🤩🤩
That's a very lovely shirt @soysofia! Bravo!
Thank you