Adding metal paneling to the workshop walls
With the insulation and electrical installed, its time to cover up everything. The ceiling is done but the sides all need to be covered. We used metal roof paneling that are eight feet tall to cover up the bottom half of the wall. Then we will cover the top half using ladders. But for now we want to get the first level of paneling up. They will overlap by around two feet once both the upper and lower panels are installed.

In a month or so I should have my solar array complete, so this paneling will let us mount electrical panels and other things. The insulation is flammable so we do not want it exposed, the paper on it can ignite so it needs to be protected. That is why we are putting up panels as well. For the looks, protection, insulation properties and it just helps complete the core of the workshop.
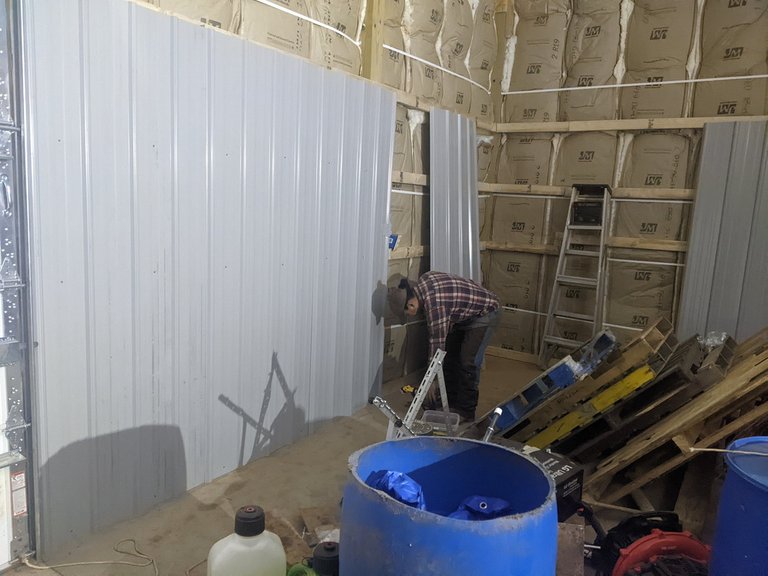
My foreman lays the panels up and screws them into 2x4s that we mounted to the walls of the workshop. We place them every few feet so we can screw the panels in and secure them well to the wall.

We pop out the electrical outlets so we can plug in tools. That seems to take the most time, getting the cuts right and the outlets put through the metal sheeting.

Even though the workshop is not powered yet, all of the wires have been run and its ready for when my friends return to help me finish up the solar side of all of this.

Starting on the walls without any of the heated water lines, we work our way over to the more infrastructure filled areas.

Lots of wall to still do, but we are well on the way.
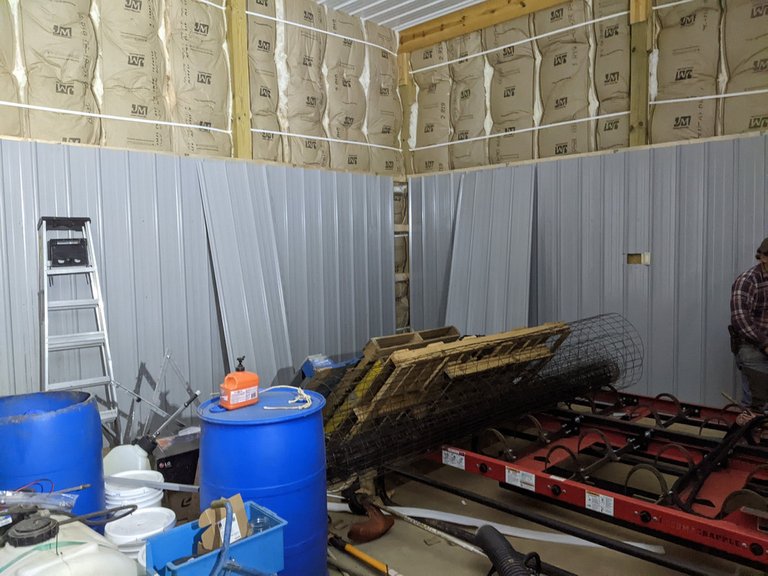
Rounding the corners we wrap one panel in the corner to cover missing panels. Seems to be the best way to handle this issue, otherwise we are cutting little pieces to fit in the corners.
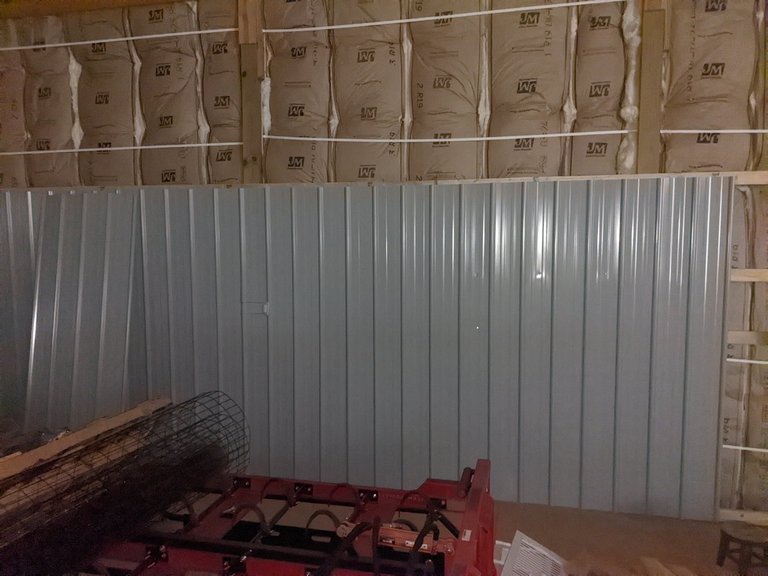
I think the gray panels will look nice, they wont show getting dirty much but still light enough to help bounce more illumination in the room.

We got up to one of the walls where we have some rubberized plywood curing. This is used for the partitions for the chicken and duck home. This stuff will be dry in another week, then we can move it and complete this side of the wall. No worries we can start on the other sides in the mean time.
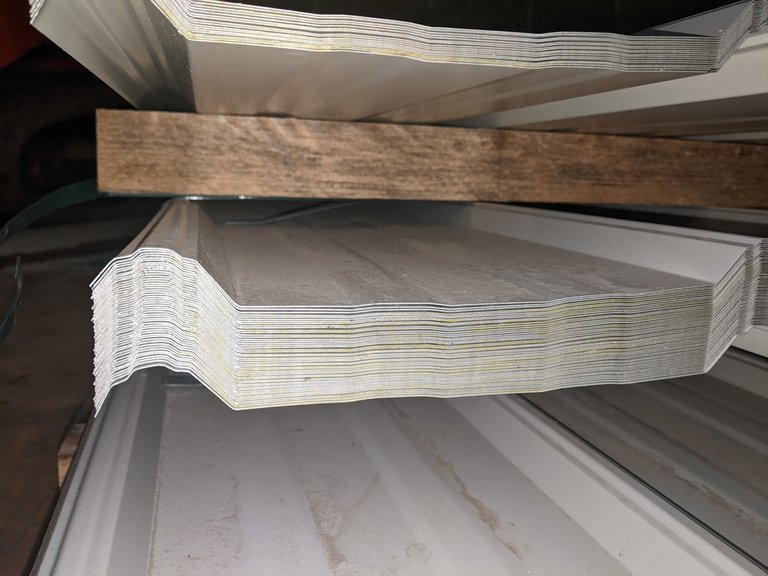
It is amazing how tightly stacked these panels are. It looks like it weighs next to nothing when you pull out three panels but the weight is indeed all there.

Whatever we do not use for the workshop we will save for another project. These are some good panels to have. My barns roof is looking a little worn so it may be worth replacing with these extra panels.
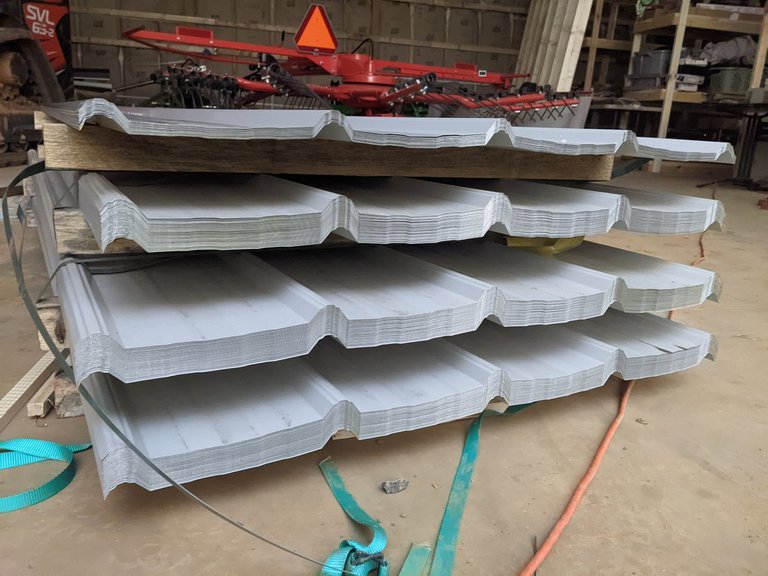
I think we will go through at least half if not three quarters of all of them.
We can move the rest of the panels using the skid steer and the fork attachment.
Wow, that's pretty impressive. What a nice looking pole barn. I'd love to have a pole barn one day, but I don't think it is probably in the cards. If anything I will likely end up moving to a condo and having zero land. Which makes me sad, but as I get older then I don't need to worry about managing it all!
Thanks, it is quite the nice 50x100 workshop.
I feel ya, having help is key to these kind of properties. Luckily my good friend and his wife moved up here to help out.
That's super cool! My friend lives about half an hour away from me, but he has a lot of land, so I don't blame him!
¡Buen trabajo!, parece sencillo, pero trabajar con paneles puede ser un fastidio y más si tienen los bordes filosos
Yeah indeed they can be sharp, we try to wear gloves when handling them.
Love seeing this construction work going on. Where will the solar panels go?
The solar panels have already been setup a few hundred feet away. Just need to finish getting the inverter and charge controller setup.
Once finished it will look great! Good work, @solominer
I think so too, thanks.
Such a pretty work, your is also spacious.
thanks, yeah it is a lot of space.
What’s the insulation you use? Here in New Zealand we use a product called Pink Batts which is a fibreglass product. It’s nasty stuff but even at its most basic it’s got a degree of fire resistance.
There’s a wool version as well but in general, other than a polystyrene based product most insulation in New Zealand has to meet a minimum fire rating.
Plywood walls would have been a great option then you could use the walls to store stuff. That’s what I’ll be doing with my workshop once I redo the aging bracing.
We used blow in for the ceilings, and fiberglass batts for the sides.
I did not want to go with plywood, since it has all that glue in it. May make the workshop smell in the summer.
Fair call. Here in New Zealand we have a non-toxic ply with a natural glue which removes that problem.
Heil to the DIY crew, holy shit that is a lot of work! What did you pay for the panels? I feel like they would be a lot more expensive in Europe.
Yeah man it sure is.. I paid around $25 per panel.
Ah, you sound exhausted. arghs
Nah I pace myself pretty good.
Man, this project has come a long way.
!discovery 41
Sure has, I remember when it was just sticks and frame. And now its all coming together nicely.
Thank you for your witness vote!
Have a !BEER on me!
To Opt-Out of my witness beer program just comment STOP below
View or trade
BEER.Hey @enforcer48, here is a little bit of
BEERfrom @isnochys for you. Enjoy it!Learn how to earn FREE BEER each day by staking your
BEER.Thank you for your witness vote!
Have a !BEER on me!
To Opt-Out of my witness beer program just comment STOP below
View or trade
BEER.Hey @enforcer48, here is a little bit of
BEERfrom @isnochys for you. Enjoy it!Do you want to win SOME BEER together with your friends and draw the
BEERKING.Thank you for your witness vote!
Have a !BEER on me!
To Opt-Out of my witness beer program just comment STOP below
View or trade
BEER.Hey @enforcer48, here is a little bit of
BEERfrom @isnochys for you. Enjoy it!We love your support by voting @detlev.witness on HIVE .
Thank you for your witness vote!
Have a !BEER on me!
To Opt-Out of my witness beer program just comment STOP below
View or trade
BEER.Hey @enforcer48, here is a little bit of
BEERfrom @isnochys for you. Enjoy it!Did you know that <a href='https://dcity.io/cityyou can use BEER at dCity game to buy cards to rule the world.
This post was shared and voted inside the discord by the curators team of discovery-it
Join our Community and follow our Curation Trail
Discovery-it is also a Witness, vote for us here
Delegate to us for passive income. Check our 80% fee-back Program
Love how this slowly gets shape! But I can't hide my excitement to see the final results 😁
Thanks, its come a long way thats for sure.
Will post pictures as I get more of it done.
Looking forward to more updates!
$WINE
The panel looks good :)
thanks, I think so too. I like the grey.
What an extraordinary activity my friends did there. I often do things like this where I live here, And it would be great if we did it ourselves and invited friends around us to do things like this.When I see friends who are doing this activity, of course if we are close I will try to be able to experience friends in doing this.
Good insulation! Very well made wall👍
My first thought was, boy, it will be noisy when working in the shop. But then you explained the fire hazard thing, so metal made sense. But it will be noisy...
Congratulations @solominer! You have completed the following achievement on the Hive blockchain And have been rewarded with New badge(s)
Your next target is to reach 170000 upvotes.
You can view your badges on your board and compare yourself to others in the Ranking
If you no longer want to receive notifications, reply to this comment with the word
STOPHello solominer!
It's nice to let you know that your article won 🥇 place.
Your post is among the best articles voted 7 days ago by the @hive-lu | King Lucoin Curator by nuthman
You and your curator receive 0.1576 Lu (Lucoin) investment token and a 10.15% share of the reward from Daily Report 182. Additionally, you can also receive a unique LUGOLD token for taking 1st place. All you need to do is reblog this report of the day with your winnings.
Buy Lu on the Hive-Engine exchange | World of Lu created by @szejq
STOPor to resume write a wordSTART