Cabecera con material reciclado|Desafío 3 [Esp/Eng]
Decorar y crear son de mis cosas favoritas, es por eso que este Desafío 3, del reto Transforma tu hogar con Home Solutions me vino como anillo al dedo porque además de ser cosas que amo hacer me impulsaron a realizar de una vez por todas algo que he venido posponiendo desde hace mucho tiempo, y es crear una cabecera para mi cama.

La verdad es que perdí la cuenta de la cantidad de veces que busqué ideas en Pinterest, y las veces que dije "esto es lo que haré" y al final no hacía nada, de hecho hace unos meses saqué unas mesitas que no tenía en uso y me dije que con las tablitas de cada mesita podría hacer el espaldar para mi cama.
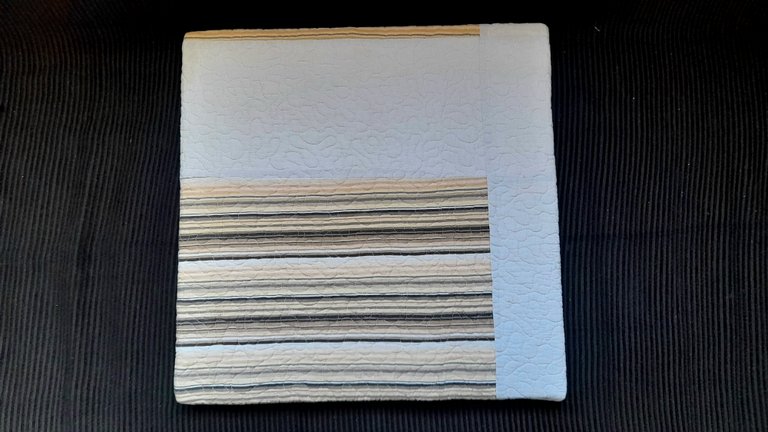
Con eso en mente me paseé por varias ideas, como pintarlas, forrarlas con un edredón de mi antigua cama Queen (ahora tenemos una King), cubrirlas con papel tapiz, en fin, tenía varias opciones y hasta llegué a forrar una con el edredón que les digo, pero no recuerdo por cuál motivo no continúe.
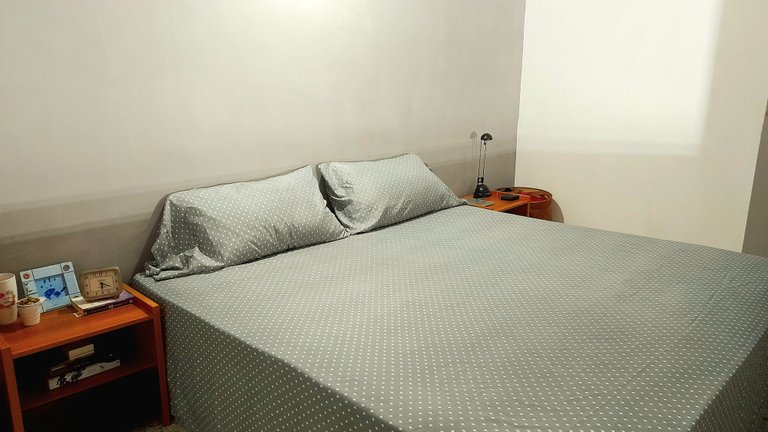
El caso es que con este desafío pensé "ha llegado la hora", y ayer busqué la pieza que tenía lista, solo para darme cuenta que no iba a contrastar para nada, pues con la pared gris ese tono azul claro no llamaba para la atención, claro que quedaba perfecto cuando la pared era marrón, pero ahora no, así que tenía que pensar qué haría, porque sí o sí, esa pared enorme toda gris, necesitaba algo con urgencia.

Así que ayer estuve pensando qué podía hacer, y recordé unas cortinas negras que ya había usado para retapizar mis sillas del comedor, y esas serían la solución perfecta para forrar las tablas, pero ¿adivinen? Siiii, ¡muy simple y sin gracia!, y ustedes ya me conocen, así que comencé a pensar que hacer y como en ese momento estaba conversando con mi amiga @yris89, le comenté mis ideas y ella terminó dándome una mejor y que me convenció.
Yo pensaba en cubrir una tabla completa con la cortina negra y luego la siguiente mirad con el mismo papel tapiz que usé para las gavetas de mi closet y que estoy usando para un gavetero que estoy restaurando, para crear cierta uniformidad en todos los muebles de la habitación, pero mi idea era un poco loca, mitad de papel tapiz, y mitad de la tela negra, entonces Yranna vino al rescate y me sugirió que hiciera una negra y una completa de papel tapiz alternándolas y me pareció genial.
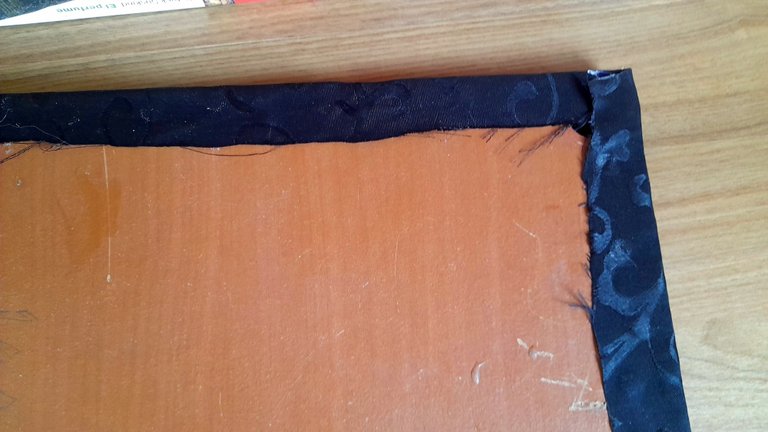
Así que con eso en mente me puse manos a la obra, desarme las mesitas, limpié muy bien las tablas, y como eran 5, pues tres irían cubiertas con la cortina y dos con el papel tapiz, y la verdad fue súper rápido, solo recorté la tela y pegué por el revés los bordea con silicón, sin ser muy prolija, ya que esta parte queda contra la pared y nada de eso se vería.

Para las que llevaban papel tapiz solo usé pega blanca, recorté el papel según las medidas que necesitaba y pegué por el frente y los bordes, y de esta manera ya tenía las cinco cubiertas y listas para pegar, lo que fue otro paso bastante sencillo, ya que usé adhesivo doble faz, solo recorté algunas piezas y las pegué por detrás.
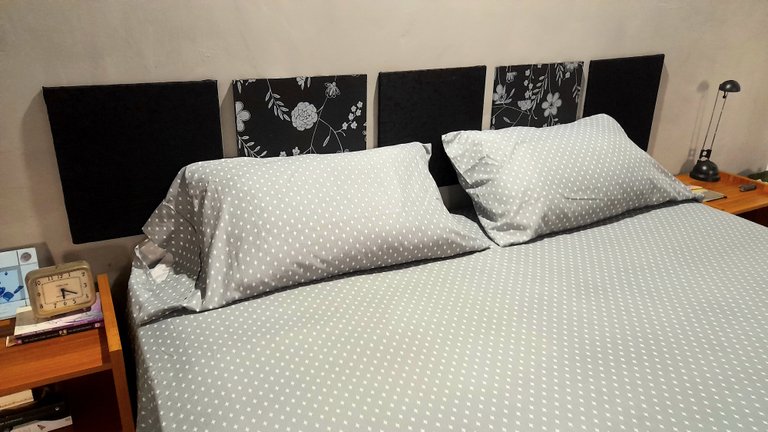
Lo siguiente fue medir donde se colocaría cada una, marcar y pegar, y de esta forma al fin, después de años queriendo hacer este trabajo, ya tengo una cabecera para mi cama que además se ve bastante decorativa y me ayuda a llenar un poco la pared que se veía sin gracia.
Y de esta manera logré culminar el Desafío 3, súper feliz porque solo gasté en el adhesivo, ya que todo lo demás lo tenía en casa y le di un nuevo uso, por otro lado, muy satisfecha por como va quedando el cuarto, ya que todo se ve muy lindo y todo combina entre sí, ya solo falta terminar el gavetero que está en proceso y ver que otros detalles puedo sumar para que esté como quiero.
Por ahora feliz, feliz, por como se ve y porque falta poquito para terminar...

Decorating and creating are some of my favorite things, that's why this Challenge 3, from the challenge Transform your home with Home Solutions came to me like a glove because besides being things that I love to do, they pushed me to do once and for all something that I have been postponing for a long time, and that is to create a headboard for my bed.
The truth is that I lost count of the number of times I looked for ideas on Pinterest, and the times I said "this is what I will do" and in the end I did nothing, in fact a few months ago I took out some tables that I did not have in use and I said to myself that with the boards of each table I could make the backrest for my bed.
With that in mind I went through several ideas, like painting them, lining them with a quilt from my old Queen bed (now we have a King), covering them with wallpaper, in short, I had several options and I even lined one with the quilt I told you about, but I don't remember why I didn't continue.
The thing is that with this challenge I thought "the time has come", and yesterday I looked for the piece I had ready, only to realize that it was not going to contrast at all, because with the gray wall that light blue tone did not call for attention, of course it was perfect when the wall was brown, but not now, so I had to think what I would do, because yes or yes, that huge wall all gray, needed something urgently.
So yesterday I was thinking about what I could do, and I remembered some black curtains that I had already used to reupholster my dining room chairs, and those would be the perfect solution to line the boards, but guess what? Yessssss, too simple and not funny, and you already know me, so I started to think about what to do and as I was talking to my friend @yris89 at the time, I told her my ideas and she ended up giving me a better one that convinced me.
I was thinking of covering a full board with the black curtain and then the next look with the same wallpaper I used for the drawers in my closet and that I am using for a dresser I am restoring, to create some uniformity in all the furniture in the room, but my idea was a little crazy, half wallpaper, and half black fabric, then Yranna came to the rescue and suggested me to do one black and one full of wallpaper alternating them and I thought it was great.
So with that in mind I got down to work, I disassembled the tables, cleaned the boards very well, and as there were 5, three would be covered with the curtain and two with the wallpaper, and the truth was super fast, I just cut the fabric and glued the edges on the back with silicone, without being very neat, since this part is against the wall and none of that would be seen.
For the ones with wallpaper I just used white glue, cut the paper according to the measurements I needed and glued the front and edges, and in this way I had the five covered and ready to glue, which was another fairly simple step, since I used double-sided adhesive, I just cut some pieces and glued them on the back.
The next step was to measure where each one would be placed, mark and glue, and this way at last, after years of wanting to do this job, I have a headboard for my bed that also looks quite decorative and helps me to fill the wall that looked a little bit ungraceful.
And this way I managed to finish Challenge 3, super happy because I only spent on the adhesive, since everything else I had at home and I gave it a new use, on the other hand, very satisfied with how the room is getting, since everything looks very nice and everything combines with each other, I just need to finish the dresser that is in process and see what other details I can add to make it as I want.
For now, happy, happy, for the way it looks and because it's not long to go...

La combinación es perfecta, incluso con las sabanas, se ve precioso, un contraste muy armónico visualmente. Me encanto tu trabajo amiga. Incluso se puede hacer con un cartón resistente. Con el edredón también hubiese sido perfecto. Lo que también me gusta de esta idea es que puedes cambiarle el color fácilmente.
Gracias amiga, me gustó que fue rápido jajaja y que no se ve ya la pared ahi pelada creo que con eso ya no hago más nada en esa pared.
Quedé contenta y como dices le puedo cambiar el color sin mucho rollo.
Wahooo que gran trabajo, felicidades quedó realmente lindo 😍
Gracias amiga
Pero Dios mío no puedo con tanta creatividad, a mí me falta demasiado de esa imaginación jajaja jajaja y por eso termino siempre comprando todo. Quedó hermoso Rosa y sabes que en mi casa a 2 de las camas le falta espaldar, pero tengo cortinas atrás, así que tengo que ver si quizás subiendo las cortinas un poco puedo poner algo, se vería genial. Gracias por esos tips tan provechosos. Saludos y todo va muy bonito.
Gracias Flor! Y mira que fue fácil y entretenido.
Por pinterest hay muchas ideas, incluso pintadas que están geniales.
Tu sabes que a mi me gustan las manualidades bastante entonces aprovechando.
Saludos manita
Pfff no esperaba menos de mi Rosita 🍓!!!!
Espectacular amiii 😍😍😍 admiro tu creatividad y espero que siga floreciendo por que haces maravillas!
Gracias mi amor, este proyecto me gustó mucho porque fue rápido jejej
Te mando abrazos
Que belleza rosa. De verdad que me encanto😍😍😍
Gracias amiga,ando emocionada jaja
Muy original tu creación. Le da mucha elegancia a la cama
Gracias amigo, quedé bien conforme, sobre todo por lo fácil y el ahorro jeje
Amiga felicidades te quedo precioso, me alegra que todos tus esfuerzos han valido la pena, pues tu cuarto se ve genial.
Te cuento que me gusta ese gris con blanco para mi cuarto, lo estoy pensando.
Gracias ami mira usa esa combinación es bien linda y según me dijo @yris89 están en tendencia así que dale que esos son jeje
Jajaja holaaa .
Sii esos colores y combinaciones están de moda...
Además dan amplitud y sensación de armonía en nuestros espacios...
¡ESPECTACULAR Rosita ! Se ve demasiado bonito. Me encantó. Super elegante 👏👏👏
Gracias flaquita ando mona jajaja
Muchas gracias
Wuaooo ami! eso quedó preciosa y lo mejor de todo es que te salió barata esa decoración
Guaoooo q bello te quedó amiga, Dios bendiga tus manos la verdad es q cuando se quiere se puede!!
Amen amiga gracias. Cómo has estado?
Amiga un poco quebrantada de salud, pero pa alante es que brinca el sapo!! Saludos
Menos mal que tu eres bien creativa y la mayoría de las cosas las haces con otras cosas que ya teníamos en la casa y ahorramos.
Quedó muy bonito amor
Sii y menos mal que aquí hay de todo un poco y si no funciona una cosa pruebo otra jaja
Congratulations @rlathulerie! You have completed the following achievement on the Hive blockchain And have been rewarded with New badge(s)
Your next target is to reach 130000 upvotes.
You can view your badges on your board and compare yourself to others in the Ranking
If you no longer want to receive notifications, reply to this comment with the word
STOPCheck out our last posts:
Ami te quedó de revista, tu siempre con tus ideas geniales, yo creo que sí los hubieses comprado no hubiesen Sido tan lindos los paneles, además aquí tienes tu toque personalizado. Se ve bellísima, no es por qué eres mi Ami, pero te destacaste, 🤗🤗🤗
Jejetan bella. Amiga tu le levantas el ánimo a uno. Muchas gracias amiga, tu sabes cuando no hay money uno se pone creativo jaja
Te mando abrazos
te quedo muy bonito todo!
Gracias amiga
¡Amiga, te quedó bello! Es una idea genial para darle una nueva vista a la cama. ¡Me encantó! Un abrazo.
Gracias Auro, ya le hacía falta porque la pared es muy alta y se veía vacía me gusta mucho. Ando viendo qué más invento.
Wowww!!! Esta quedando espectacular 😍 Esa cabecera se ve super linda, me encantó la combinación y la manera en como lo alternaste, divino.
Gracias ami bella me gusto que fue fácil y la verdad bastante rápida más se demoró el seyor José midiendo donde ponerlas jajajaja
Ame el resultado de tu habitación amiga el cambio de color hace que se vea más amplia y esa idea de hacer una cabecera en color negro quedo femonal ameeeee cuanto ingenio!!! Felicidades por tu habitación.
Sabes que yo amaba la combinación de marrón y beige pero en serio esta es mejor,más luz más como de transmitir paz y el negro creo que combina bien,quiero meter un toque de color quizá mostaza no se jeje
Es que los colores claro visualmente hacen que los espacios pese ser pequeños se vean más amplios y que los muebles del dormitorio sean oscuro le dan un toque sofisticado en mi caso mi clóset es oscuro y las paredes blancas ame tu ingenio amiga este reto si me gano 😅 no supe que hacer.
Wow amiga, le diste un cambio total a esta habitación, debes estar muy contenta, el cambio es radical.
Esta idea me encanta, siempre buscas la manera de crear cosas increíbles con pocos materiales, económico y bastante sencillo. Gracias por compartir esta belleza.💕
Amiiiiiii pero que belleza, ahora menos quiero participar jajajaja yo no encuentro que hacer :( te va quedando bello ese cuarto amii😍
Hola amiga bella... Me alegra tanto que tomarás mi idea y la hicieras un hecho.
Déjame decirte que te quedó realmente hermoso el trabajo. Todo tiene armonía y combina perfecto...
Me encanta ver cómo logras todo lo que te propones...
Un abrazo amiga 🤗
Buenas noches, amiga somos 2 en buscar innovaciones en Pinterest y todo llega en el momento correcto.
Que bella decoración seleccionaste,un cuarto de revista, muy acogedor.
Bendiciones.