🌼.•°•Spanish•°•🥕•°•🌼•°•🥕•°•English•°•.🌼
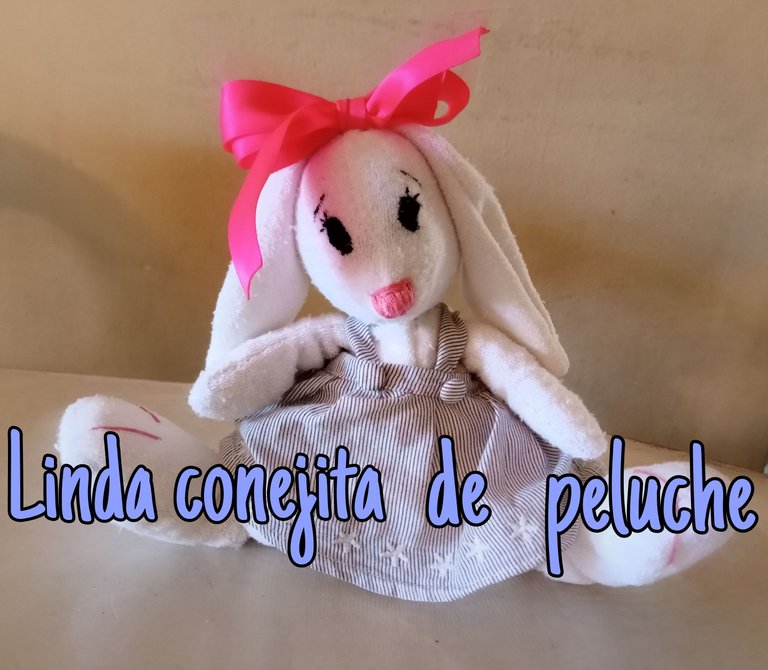
Saludos queridos amigos de needlework que alegría volver a compartir con ustedes en este lindo y creativo espacio. Hoy quiero mostrarles este hermoso trabajo, una coneja de peluche para mi pequeña sobrina.
Se ha convertido en una tradición para mí hacer peluches o muñecas para mis sobrinos y está vez toco el turno de mi sobrina bebé Celeste, escogí hacer una conejita blanca muy tierna como ella.
Siempre que realizo peluches hago mis propios patrones, según como quiero que se vean, pero está vez no sabía muy bien como hacer un cuerpo de peluche que estuviera sentado. Entonces mi suegra amablemente me prestó uno de sus patrones, cabe destacar que ella fue quien me incentivo a hacer peluches y muñecas, ya que hace hermosos peluches navideños.
Greetings dear friends of neddlework what a joy to share with you again in this nice and creative space. Today I want to show you this beautiful work, a stuffed rabbit for my little niece.
It has become a tradition for me to make stuffed animals or dolls for my nieces and nephews and this time it is the turn of my baby niece Celeste, I chose to make a white bunny very cute like her.
Whenever I make stuffed animals I always make my own patterns, depending on how I want them to look, but this time I didn't really know how to make a sitting stuffed animal body. Then my mother-in-law kindly lent me one of her patterns, it is worth mentioning that she was the one who encouraged me to make stuffed animals and dolls, as she makes beautiful Christmas stuffed animals.
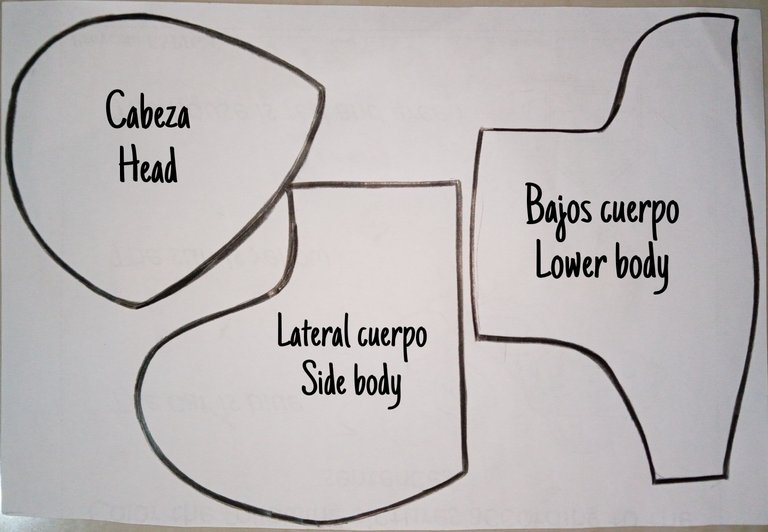
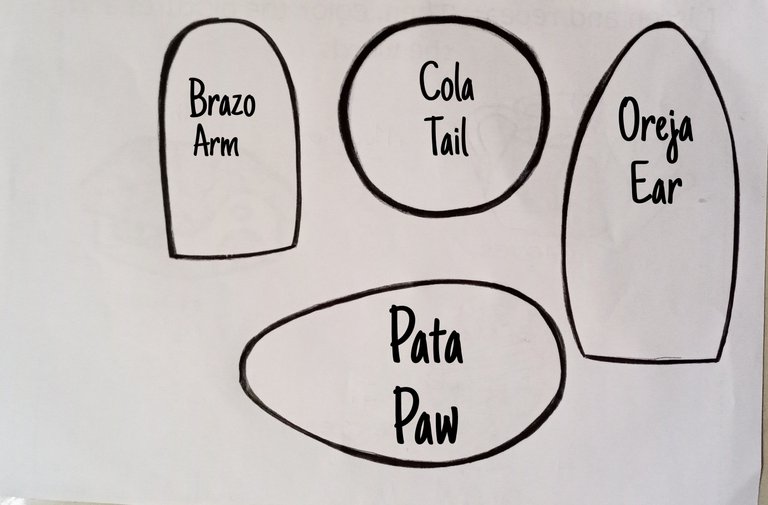
Lo primero que hice fue cortar en la tela todas las piezas del patrón, dos piezas para la cabeza, dos piezas para cada oreja, dos para cada brazo, igualmente para cada pata, dos de cada pieza del cuerpo y por último una pieza de la cola.
The first thing I did was to cut in the fabric all the pieces of the pattern, two pieces for the head, two pieces for each ear, two for each arm, two for each leg, two for each piece of the body and finally one piece for the tail.
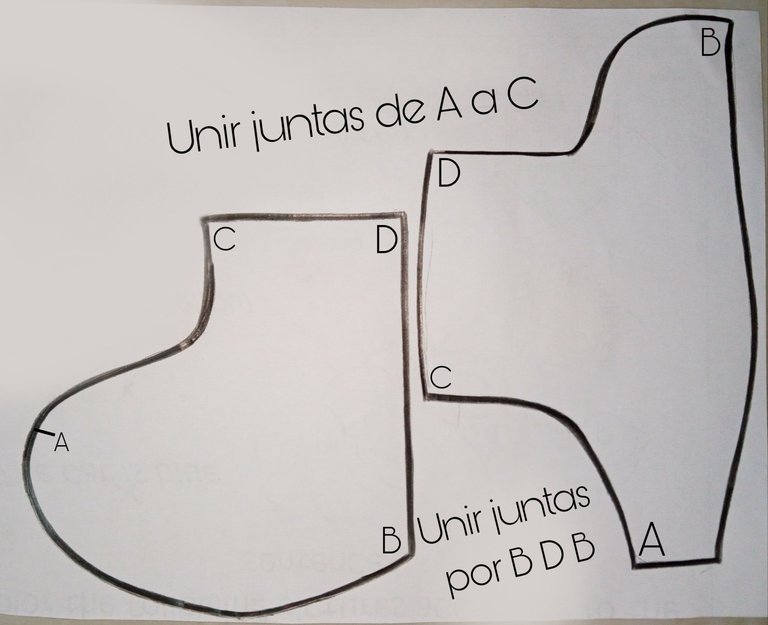
Teniendo todo cortado comencé a hacer el cuerpo y me confundí mucho 😂 pase mucho tiempo tratando de entender como coser y cuadrar estás partes, así que voy a explicarlo muy bien por si deciden hacerlo. Para el cuerpo se deben cortar dos piezas de cada una, es decir, dos bajos cuerpos y dos lateral cuerpo, las cosemos cada una con su par encaradas desde el punto A a B, dejando la pequeña abertura que muestra el patrón
Having everything cut I started to make the body and I got very confused 😂 I spent a lot of time trying to understand how to sew and square these parts, so I'm going to explain it very well in case you decide to do it. For the body you have to cut two pieces of each, that is, two lower body and two side body, we sew them each with their pair facing from point A to B, leaving the small opening shown in the pattern.
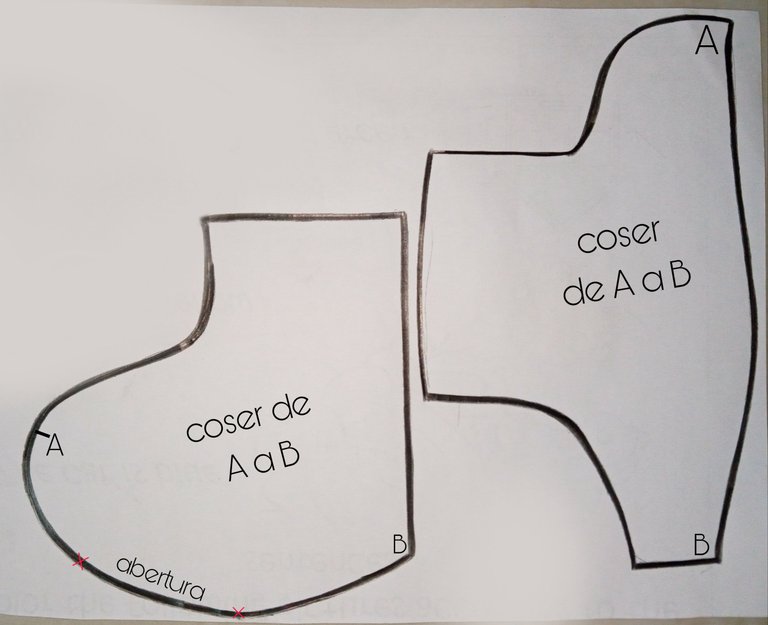
Luego cosemos las piezas de bajos cuerpo y de lateral cuerpo entre si de un lado, haciéndolas cuadrar lo mejor posible desde el punto A a C, y luego del otro lado igual cuadrandolas muy bien por los puntos B, D, B.
Cosido ya el cuerpo podemos rellenarlo por la abertura que dejamos e ir ubicando la cabeza brazos y patas en su lugar.
Then we sew the pieces of the lower body and side body together on one side, making them square as well as possible from point A to C, and then on the other side, squaring them very well from points B, D, B.
Once the body is sewn, we can fill it through the opening we left and place the head, arms and legs in their place.
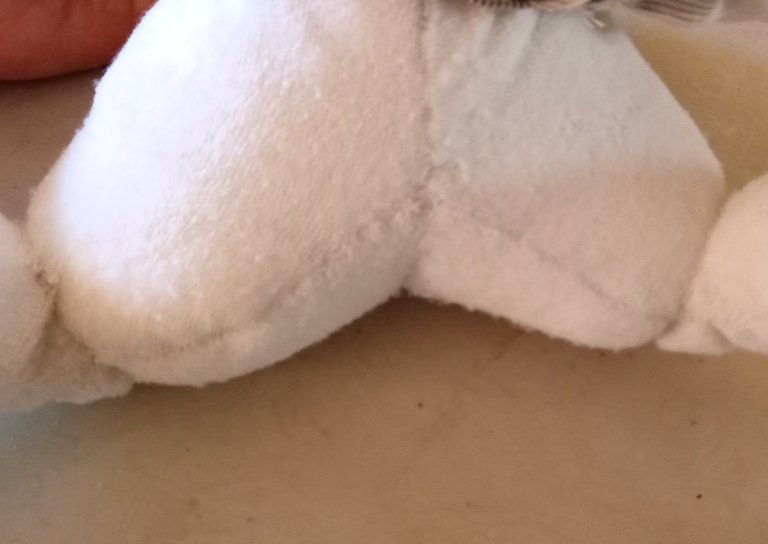
Cuando terminé el cuerpo, las piernas de la conejita estaban más separadas de lo que yo quería, así que ajuste un poco la costura central entre las piernas para cerrarlas más.
When I finished the body, the bunny's legs were farther apart than I wanted, so I adjusted the center seam between the legs a bit to close them more.
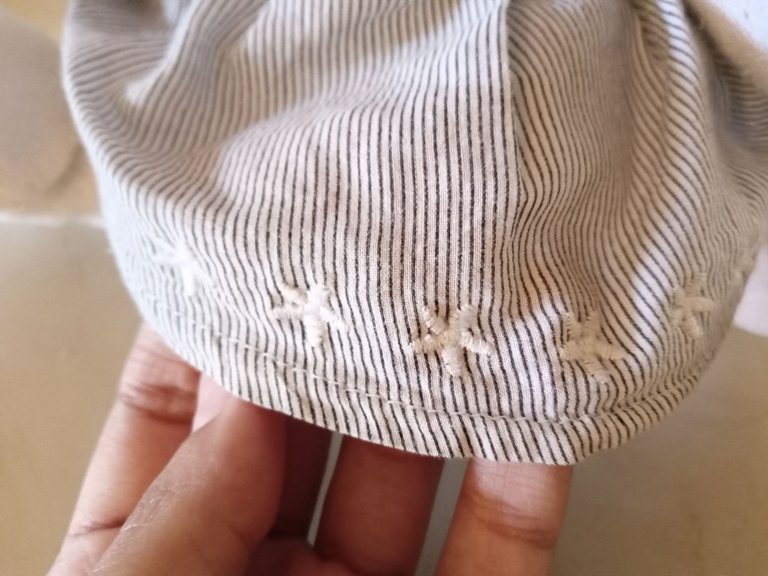
Busque entre mis retazos de tela para hacerle ropa a la coneja y encontré un retazo muy lindo que tenía estrellitas blancas bordadas en el borde de la tela, así que decidí hacerle un vestido.
Corte un rectángulo largo para hacer la falda por el borde donde tenía las estrellitas, hice los pliegues de la falda y le cosi por la cintura un cesgo hecho con la misma tela.
I looked through my scraps of fabric to make clothes for the rabbit and found a very nice piece that had little white stars embroidered on the edge of the fabric, so I decided to make her a dress.
I cut a long rectangle to make the skirt along the edge where I had the little stars, made the pleats of the skirt and sewed a caesgo made with the same fabric around the waist.
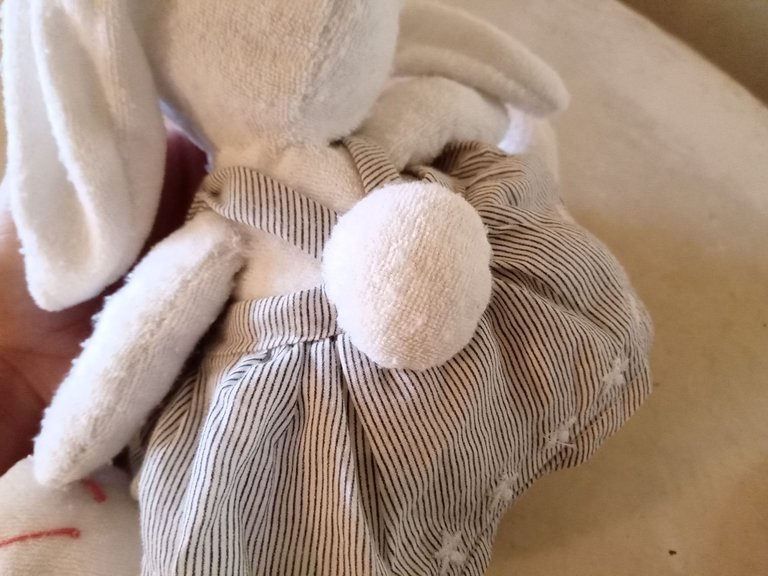
Cosi unos pequeños tirantes para terminar el vestido, desde el pecho de la conejita hasta la espalda, terminando la ropa, cosi la colita por encima de la falda y listo.
I sewed some small straps to finish the dress, from the bunny's chest to the back, finishing the garment, I sewed the tail over the skirt and that's it.
Para hacer los ojos , la nariz y la boca de mi linda conejita me atreví a bordarlos aunque nunca lo había hecho, acostumbro siempre pintarlos pero como la tela era un poco peluda no quedaría bien.
To make the eyes, nose and mouth of my cute bunny I dared to embroider them although I had never done it before, I always use to paint them but as the fabric was a bit hairy it would not look good.
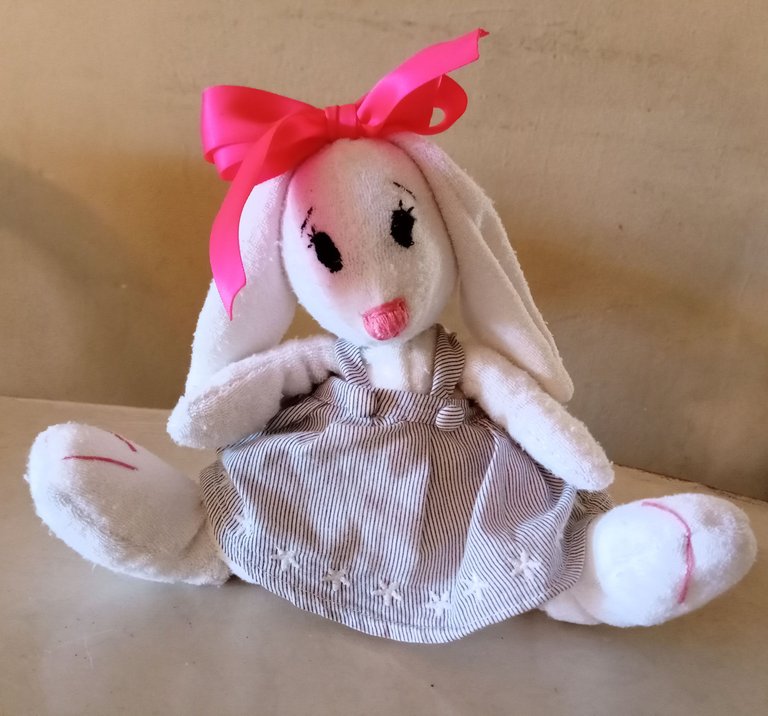
Este fue el resultado final, así quedo la conejita de peluche a la cual le agregué como último toque un lazo de cinta en la cabeza, mi sobrinita estaba muy emocionada cuando se la di, su carita de alegría fue lo más gratificante para mí.
This was the final result, this is how the stuffed bunny turned out, I added a ribbon bow on her head as the last touch, my little niece was very excited when I gave it to her, her happy face was the most gratifying thing for me.
.•°•🥕•°•.🌼•°•.🥕•°•.🌼•°•.🥕•°•.🌼•°•.🥕•°•.
Muchas gracias por leer, hasta la próxima...
Thank you very much for reading, see you next time....
.•°•🥕•°•.🌼•°•.🥕•°•.🌼•°•.🥕•°•.🌼•°•.🥕•°•.
Imágenes de mi propiedad, editadas en/Images of my property, edited in: Picsart
Traducción en/Translation in: https://www.deepl.com/translator-mobile


@pomboadri que belleza de coneja, te felicito excelente trabajo, saludos 🤗
Muchas gracias por tu comentario amiga🥰
Está súper linda. Demasiado tierna. Cada detalle en ella es precioso.
Gracias por compartir.
Awww muchas gracias, me alegra que te gustará, su ternura viene del amor con el que la hice 😉
Así. Ese es el plus que hace que todo sea aún más especial.
Bendiciones
Hola @pomboadri, te quedó muy linda la conejita, te felicito por asumir un nuevo reto al bordar los ojos y la boca, se ven muy bien.
Saludos!
Gracias por tu comentario amiga @belkyscabrera intentándolo es que se aprende 🌼
se ve tan tierna, tiene una mirada cariñosa. gracias por compartir los patrones.
Gracias amiga @carolinacardoza si te animas a hacerla me encantaría ver cómo te queda😉🥰
Hola @pomboadri cómo estás? Veo que te quedó muy linda la coneja, los ojos bordados se ven bien desde aquí 😁 me alegra que te hayas atrevido. Bordar ojos no es tan sencillo, pero hay que atreverse para aprender. Saludos.
Muchas gracias por tus palabras, me alegra saber que el bordado no quedo tan mal jejeje, es un trabajo que requiere técnica...🥰
What a cutie pie bunny! Great choice on embroidering her face, it looks good. I love the dress with the fabric buttons and her bright pink bow. I’m sure you’re niece will love her ~ 😊
Thank you very much, my baby niece really liked it, her little face was full of excitement, so I earned some auntie points with it.😍
You’re welcome!! Yay auntie points are awesome!! 😃😄
Saludos amiga, te quedo muy bonita esa conejita. Seguro que a tu sobrina le gustó 😉
Gracias amiga por supuesto que le gusto jejeje😉
https://twitter.com/1552710570591358976/status/1595536252736004113
The rewards earned on this comment will go directly to the people sharing the post on Twitter as long as they are registered with @poshtoken. Sign up at https://hiveposh.com.