Making Stages of Cute Kitchen Aprons for my Hirls and Myself 🪡👧👯
💐 Hello everyone 💐
In my post I prepared for you today, I will talk about the kitchen apron I prepared for my daughters and myself.
Actually, I did not have an idea of preparing a kitchen apron. My daughters have started helping me prepare meals frequently these days. I also like that they are enthusiastic about preparing food.
I wanted to increase their interest a little more by preparing a kitchen apron for them. At the same time, thanks to the apron, their clothes will not get dirty while preparing food.
We have a lot of fun while preparing food with my girls. I am sure that we will have a more cute team look with a beautiful kitchen apron that I will prepare.
Considering all these, I prepared three aprons. One for me and two for my little girls. Now I would like to show you the construction stages of these aprons that I have prepared.

Actually, I had planned to buy the aprons first. But when I saw the price of children's kitchen aprons, I gave up and decided to prepare it myself.
For this, I had to buy fabric first. After school, I went to a fabric store in the bazaar, where I always shop.
I studied the fabrics for a while and finally liked the texture and colors of the two fabrics. Actually, I had different colors in my mind, but I couldn't find exactly the colors I dreamed of, and these two fabrics were not bad at all. Also, since both of the fabrics I bought were the last piece, they were only 20 liras. I made a very reasonable purchase. My total cost for three kitchen aprons was only 20 TL. If I had bought a ready-made apron, even one apron would have been more expensive than this price.
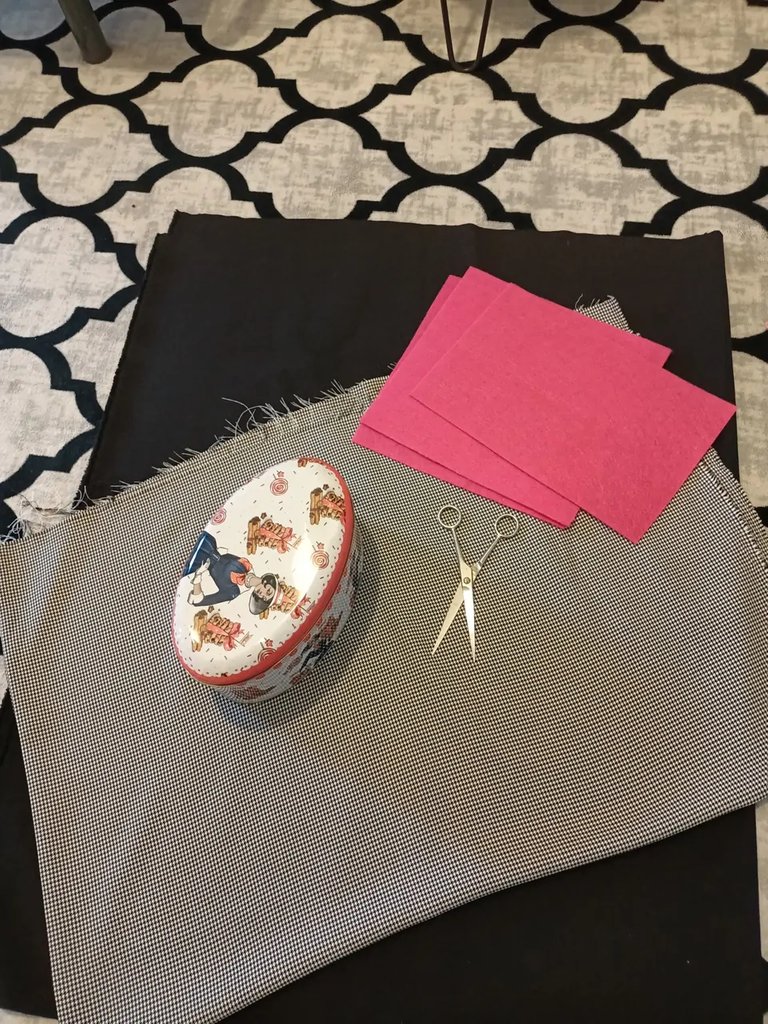
The colors of the fabrics I bought were black and gray tones. I was going to use the pink felt fabric available at home to decorate it.
Now let me show you my fabrics. You can only see the colors, but the texture was also very high quality.
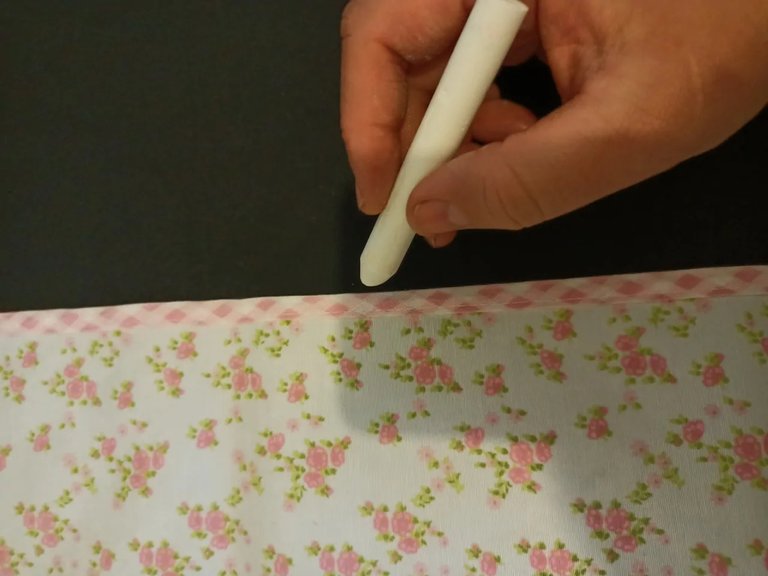
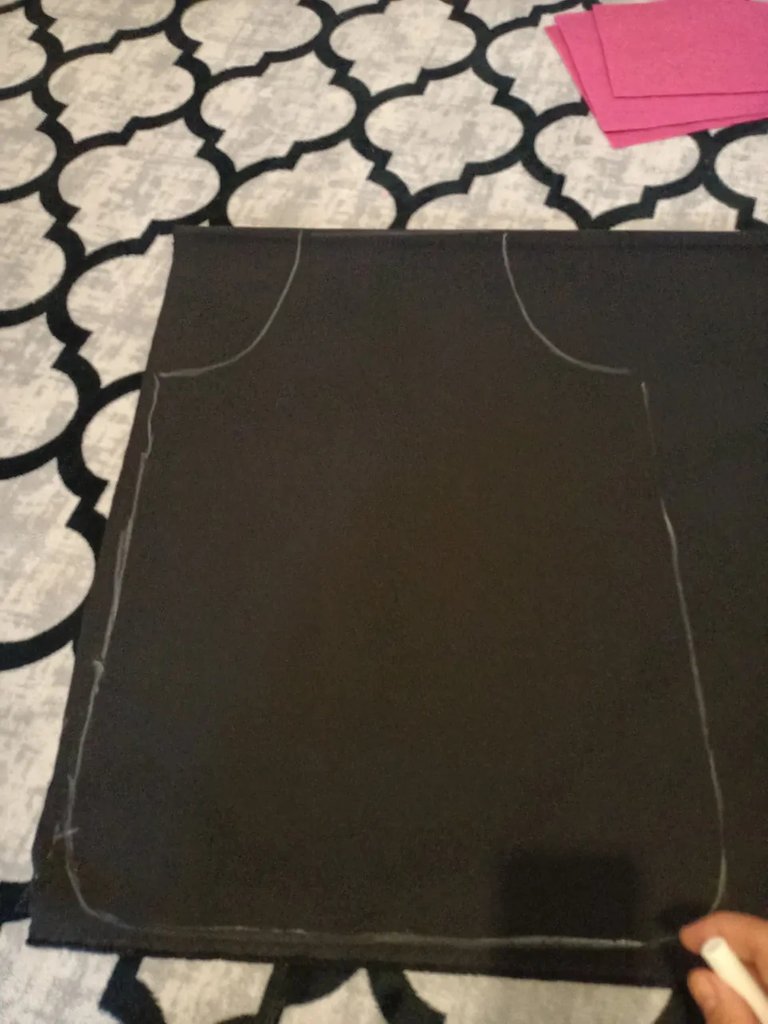
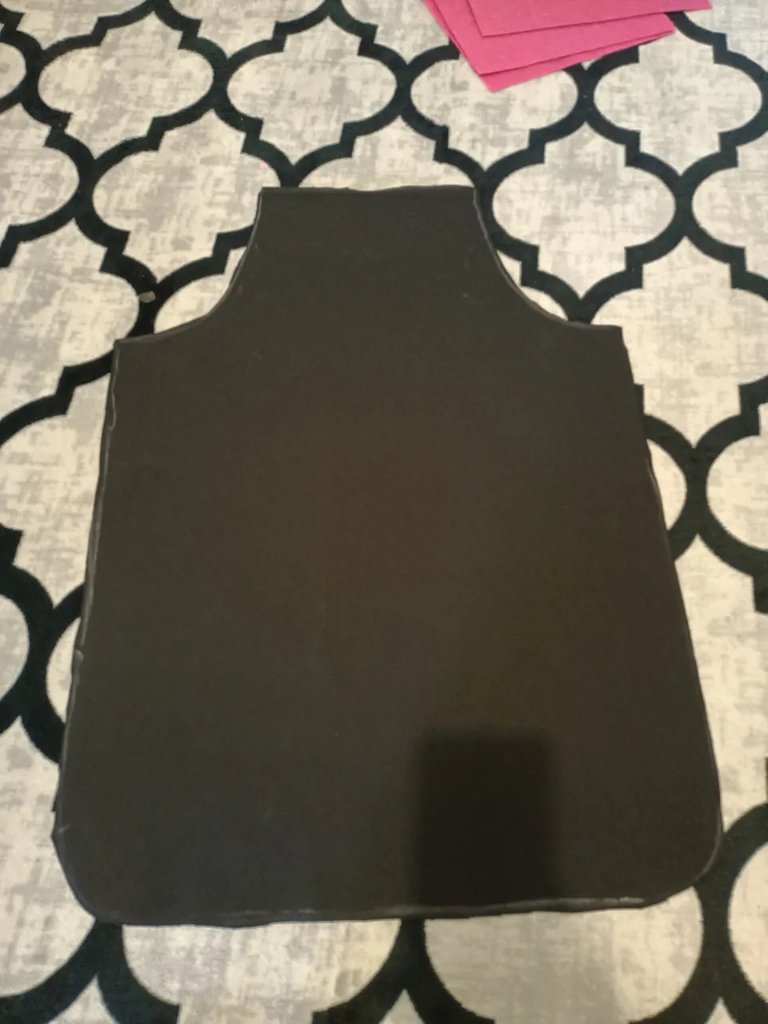
First I had to make the mold of the aprons. I used the kitchen apron at home for this. I laid the kitchen apron on the fabric and removed the pattern in this way. For this, I drew the fabric with chalk and cut it with scissors from the scratched places. It was also very easy to find molds in this way.
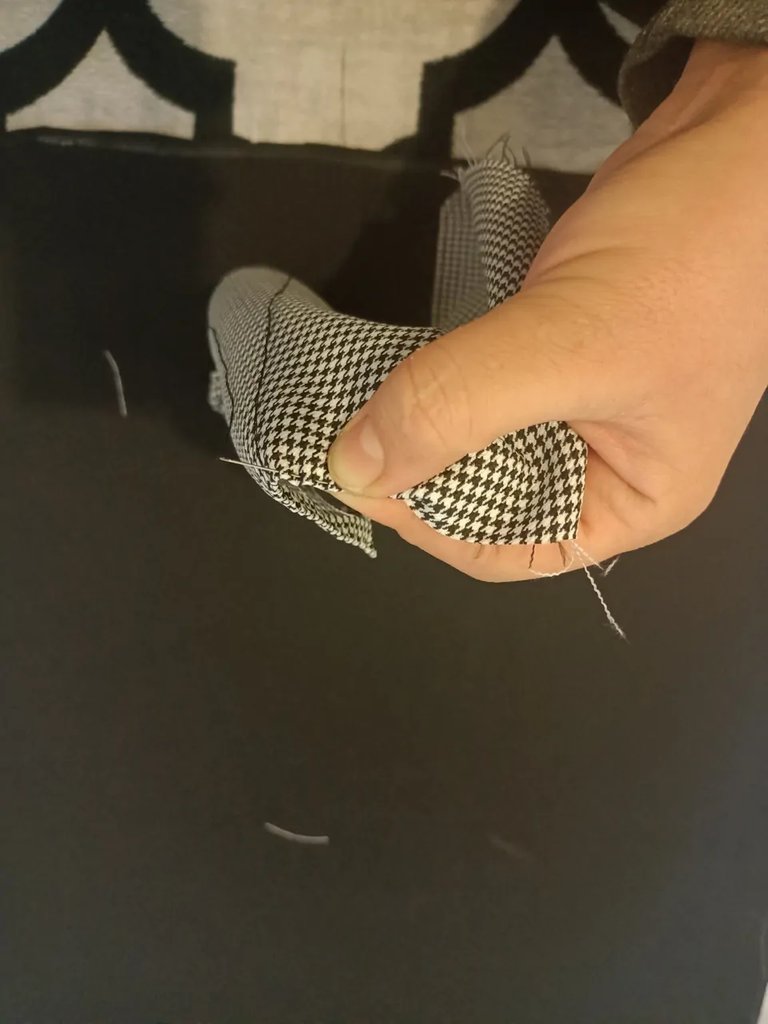
Then I started to prepare the pocket parts of our apron. I cut the pocket part of our kitchen apron and sewed it on the apron fabric by hand. Sorry, I don't know how to use a sewing machine. But with the machine I bought from my mother-in-law, I will learn it soon.
After we sewed the pockets, our apron started to look a little more stylish.
Then I cut the belts for the neck and waist and sewed the belts to the apron by hand.
Our apron was almost finished. Our apron would be ready when we made it in the final decoration process.
I cut a heart-shaped piece of fabric with a pink felt. I sewed the piece I cut to the top of our kitchen apron.

I did all the same steps in the aprons I prepared for my daughters. I didn't have a pattern for their apron and I cut it out with an eye-catching drawing.
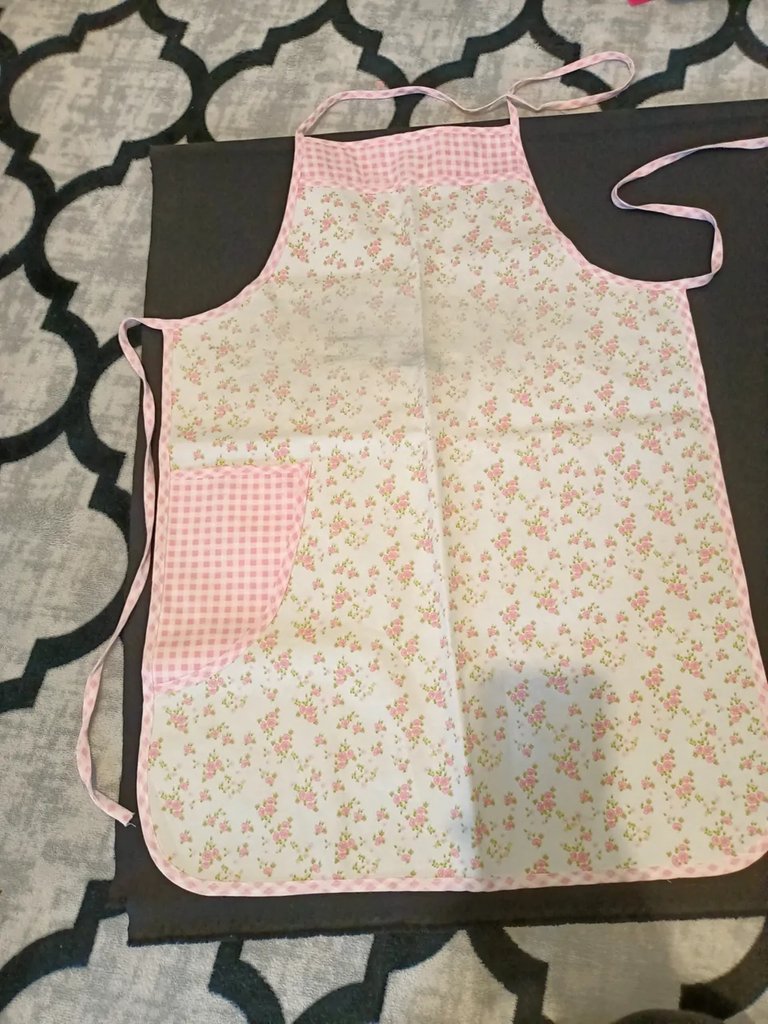
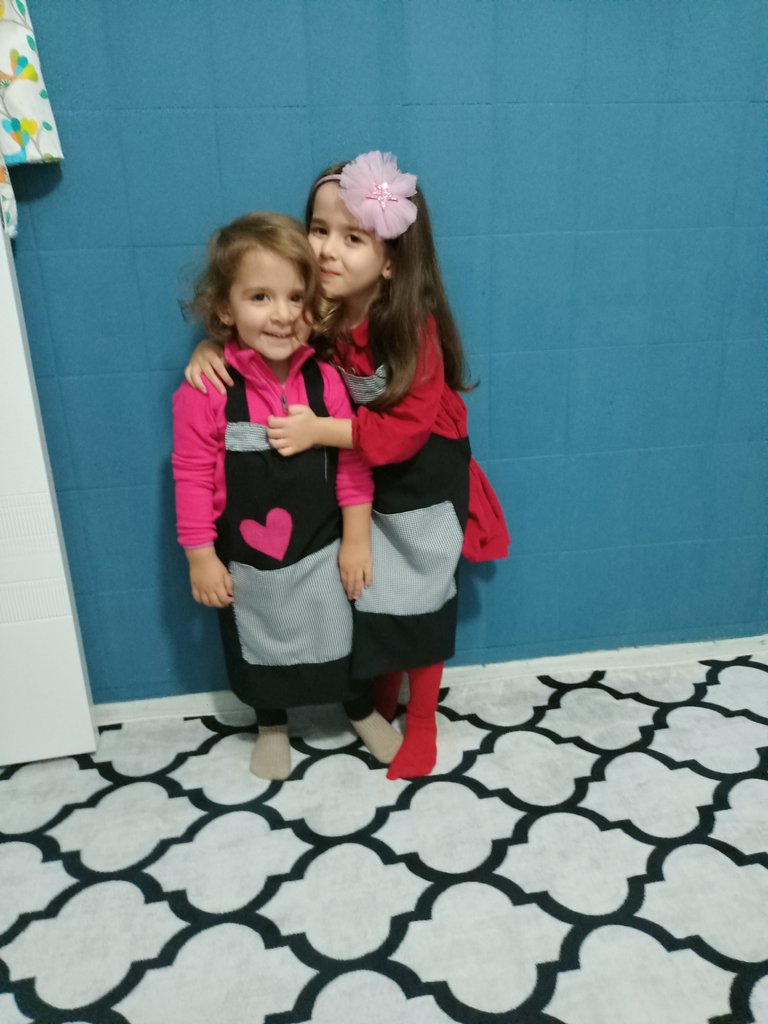
The aprons I prepared were really cute. Fortunately, I decided not to buy it, but to prepare it myself.
Now my girls and I have created a complete team image in the kitchen.
It suits my daughters very well.

TR
💐 Herkese Merhabalar💐
Bugün sizler için hazırladığım postumda kızlarım ve kendim için hazırladığım mutfak önlüğünden bahsedeceğim.
Aslında aklımda mutfak önlüğü hazırlamak gibi bir fikir yoktu. Kızlarım bugünlerde yemek hazırlamama sık sık yardımcı olmaya başladılar. Onların yemek hazırlamak için hevesli olmaları benim de çok hoşuma gidiyor.
Ben de onlara bir mutfak önlüğü hazırlayarak bu ilgilerini biraz daha arttırmak istedim. Aynı zamanda önlük sayesinde yemek hazırlarken kıyafetleri de kirlenmeyecektir.
Kızlarımla yemek hazırlarken oldukça da eğleniyoruz. Hazırlayacağım güzel bir mutfak önlüğü ile daha sevimli bir ekip görüntüsüne kavuşacağımıza da eminim.
Tüm bunları düşünerek üç adet önlük hazırladım. Birisi benim için diğer ikisi de küçük kızlarım için. Şimdi sizlere hazırladığım bu önlüklerin yapım aşamalarını göstermek istiyorum.
Aslında ilk olarak önlükleri satın almayı planlamıştım. Ama çocuk mutfak önlüklerinin fiyatını görünce vazgeçtim ve kendim hazırlamaya karar verdim.
Bunun için önce kumaş satın almalıydım. Okul çıkışı çarşıda her zaman alışveriş yaptığım bir kumaş mağazasına gittim.
Bir süre kumaşları inceledim ve sonunda iki adet kumaşın dokusunu ve renklerini beğendim. Aslında aklımda daha farklı renkler vardı fakat tam olarak hayalimdeki renkleri bulamadım ayrıca bu iki kumaş da hiç fena değildi. Ayrıca aldığım kumaşların ikisi de kalan son parça olduğu için yalnızca 20 liraydı. Oldukça hesaplı bir alış veriş yaptım. Üç mutfak önlüğü için toplam masrafım yalnızca 20 TL oldu. Hazır önlük satın almış olsaydım bir adet önlük bile bu fiyattan daha pahalı olurdu.
Aldığım kumaşların renkleri siyah ve gri tonlarındaydı. Süslemek için de evde bulunan pembe renkteki keçe kumaşı kullanacaktım.
Şimdi sizlere kumaşlarımı göstereyim. Siz yalnızca renklerini görüyorsunuz ama dokusu da oldukça kaliteliydi.
İlk olarak önlüklerin kalıbını çıkartmalıydım. Bunun için evdeki mutfak önlüğünü kullandım. Mutfak önlüğünü kumaşın üzerine serdim ve bu şekilde kalıbı çıkarttım. Bunun için tebeşirle kumaşı çizdim ve çizili yerlerden makas yardımıyla kestim. Bu şekilde kalıp bulmak da çok kolay oldu.
Daha sonra önlüğümüzün cep kısımlarını hazırlamaya başladım. Mutfak önlüğümüzün cep kısmını kestim ve önlük kumaşının üzerine elimle diktim. Maalesef dikiş makinesi kullanmayı bilmiyorum. Ama kayınvaliden aldığım makine ile onu da yakında öğrenceğim.
Ceplerini de diktikten sonra önlüğümüz biraz daha şık görünmeye başladı.
Daha sonra boyun ve bel kısmı için olan kuşakları kestim ve yine kulaklarıda el dikişi ile önlüğe diktim.
Önlüğümüz neredeyse bitmek üzereydi. Son süsleme işleminde yapınca önlüğümüz hazır olacaktı.
Pembe renk bir keçe ile kalp şeklinde kumaş parçası kestim. Kestiğim parçayı Mutfak önlüğümüzün üst kısmına diktim.
Aynı aşamaların tamamını daha sonra kızlarım için hazırladığım önlüklerde de yaptım. Onların önlüğü için elimde bir kalıp yoktu ve göz kararı bir çizimle kestim.
Hazırladığım önlükler gerçekten çok sevimli oldular. İyiki satın almayarak kendim hazırlamaya karar vermişim.
Şimdi kızlarımla mutfakta tam bir ekip görüntüsü oluşturduk.
Kızlarıma da çok yakıştı.
Congratulations @piinaar! You have completed the following achievement on the Hive blockchain and have been rewarded with new badge(s):
Your next target is to reach 4750 upvotes.
You can view your badges on your board and compare yourself to others in the Ranking
If you no longer want to receive notifications, reply to this comment with the word
STOPCheck out the last post from @hivebuzz:
Kızlarımıza yaptığınız bu önlükler çok güzel tabi ama bir tanede eşinize yapmanız gerekiyordu 😂
elde dikiş dikmek zordur ama önlükler çok güzel olmuş, ellerinize sağlık 🙂
Teşekkür ederim. Kayınvalidem den kalma bir makinem var aslında ama bozuk olduğu için ve çok da iyi bilmediğim için mecbur bu şekilde yaptım. İşim biraz uzadı ama sonuçtan memnunum ,🤗