Building a Basic Web Application Using Flask
Flask is a Python micro-framework that is used for the web. It is widely known for its ease of use and scalability, and it is also a more approachable framework for beginning developers. Furthermore, Flask is expandable and doesn't demand a specific directory structure or lengthy boilerplate code to start using it.
In this post, I'll be taking us through the process of creating a basic web application using the Flask framework.
Requirements
- Python 3.3 or Higher. If you don't have that installed on your PC, you can download a version that is suitable for you from the official Python site (Python.org).
- Code Editor. I'll be making use of VScode, but you can use any code editor you prefer.
- Understanding of some basic Python concepts

Installation

After installing Python, we'll need to install a couple of other packages. We'll be doing most of our other installations from the terminal.
Before installing necessary packages, we have to create and navigate to a directory to keep our project.
The name of our directory will be flask_project
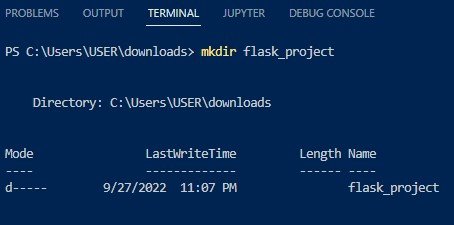
We also need to install two more packages; virtualenv and Flask.
Virtualenv
Virtualenv allows us to separate the dependencies of different projects by creating multiple isolated environments for the projects.
Using virtualenv is not compulsory for all projects, but it is always advisable to make use of it for your projects to prevent complications.
To install virtualenv, we have to navigate to the terminal and run this command;

I have virtualenv installed already, so you don't have to worry if you don't get something like this. As long as you don't get an error message, everything should install properly
After successfully installing virtualenv, we can go ahead to create a virtual environment for our project.
To do this, we run the command virtualenv venv in the terminal;

"venv" is the name of our virtual environment. It is a common convention to name virtual environments as "venv", but it is not always necessary.
To activate our virtual environment from the terminal, run venv\Scripts\activate for windows or source ./venv/bin/activate if you're running the program on a Linux or Mac.

(venv) from the image above shows that we have successfully activated our virtual environment for the project.
Flask
To install flask, all we need to do is run the command pip install flask
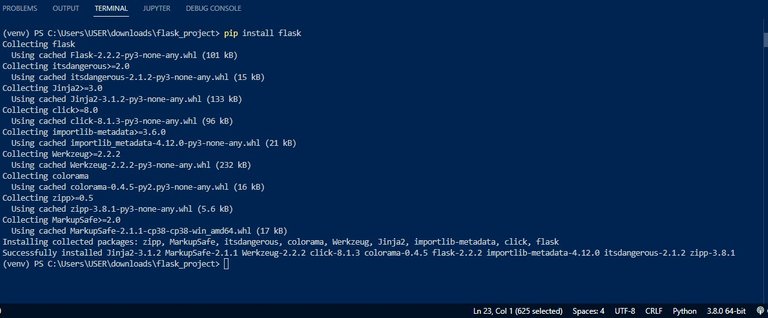
After successfully installing flask, we can go ahead to write some code.
You can make use of any code editor to write your code.

Creating a flask application

The next thing to do after setting up all necessary packages is to create a file where we are going to store our codes.
I'll name my file flask_app.py but you can go ahead to name yours something else if you wish to.
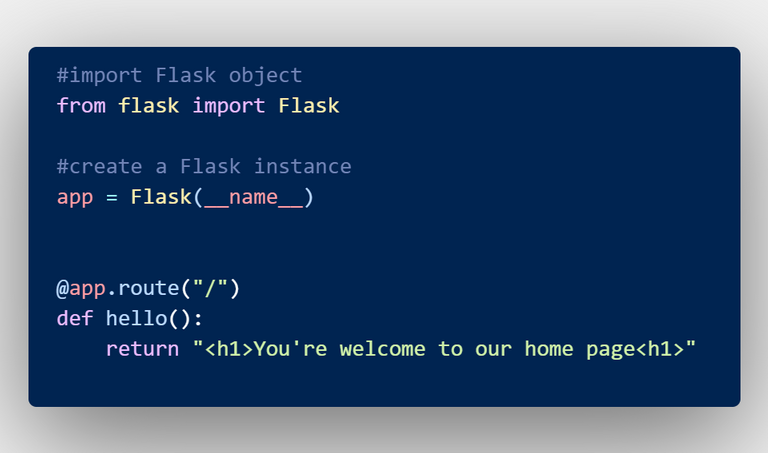
Example of a simple flask application
Now let's go through the code above and examine what's going on.
The first thing we did was to import Flask (an object) from flask (a package). After doing that, we passed in the special variable ____name____ into the Flask constructor. This will be used to identify the application's root path in order to find the necessary resources, such as HTML templates and static files.
____name____ is a special variable in Python that holds the name of the current Python module.
Now that the app instance has been successfully created, we can go ahead to create a route.
Routes are used to navigate the different pages of a website.
We can create a route in flask using a route decorator just like in the code above.
In case you don't understand how decorators operate, here is the link to a post explaining the functions of decorators and how they work; Understanding Python decorators.
The route decorator extends the abilities of our functions, allowing us to write functions that can convert their return values to HTTP responses that can be displayed by web clients.
The value "/" that was passed into @app.route signifies that the hello function will handle all incoming requests for the "/" URL.
"/" is the root URL of our website.
For now, the only thing our function is returning is a string embedded in HTML tags.
After saving our file, we can go ahead and run the script.
We need to set an environment variable from the terminal before running the script.

If we navigate to http://127.0.0.1:5000/ we'll see this:

We can also run our application directly from the script without needing to set environment variables.
To do this, we just need to add a little bit more code to our script.
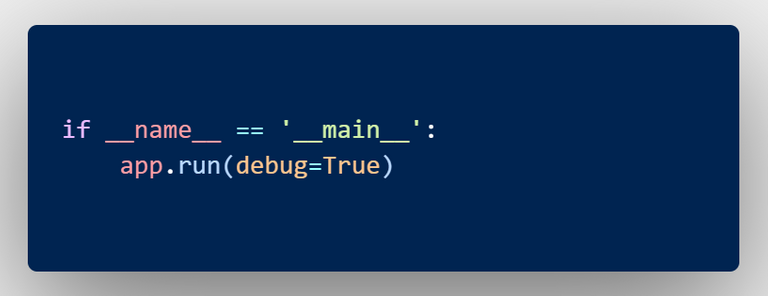
By adding this conditional, we will be able to call our script directly as long as the condition remains true.
Passing "debug=True" will make sure the Flask debugger is running. Flask debugger helps make troubleshooting easier.
It should be noted that the debug mode should only the activated during development and not production.
Now, we can run the script like this.

We can also add variables to our web app. Here is an example on how to do that.

If we run this code and include our name variable in the URL, this should be the result:


Adding more routes

To extend the functionality of our web app, let's add one more route to the script.
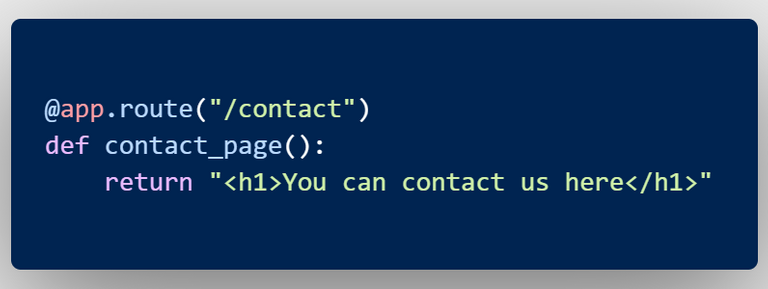
And if we navigate to the "/contact" page on our browser, we should see this;
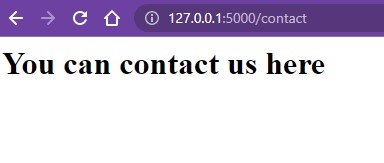
As earlier stated, this is just a basic introduction to Flask. If you're interested in learning more about this Python web framework, here are some resources you can check out;
- Flask Tutorial - Tutorialspoint
- Playlist of Flask Tutorials by Corey Schafer
- Introduction to web development using Flask - GeeksforGeeks
If you enjoyed reading this, here are the links to some of my other articles;
Dear @monioluwa,
May I ask you to review and support the Dev Marketing Proposal (https://peakd.com/me/proposals/232) we presented on Conference Day 1 at HiveFest?
The campaign aims to onboard new application developers to grow our ecosystem. If you missed the presentation, you can watch it on YouTube.
You cast your vote for the proposal on Peakd, Ecency, Hive.blog or using HiveSigner.
Thank you!
Alright. I'll do that now.
Thank you, looking forward to getting your support for the proposal ⏳🙂
Went through the details of the proposal. It's a very interesting project.
Voted already. I hope you get all the needed support for this. Good luck!
Thank you for your support @monioluwa, really appreciate it! 👍
Wow, this is actually very detailed and interesting. I know a bit of python and I have always wondered how flask is used to create a webpage, it's actually quite simple once you have set up the environment. I will research more on this later on, thanks for the awesome tutorial 👍
Thank you very much.
One thing I love about Flask is it's simplicity and the ease of setting things up.
Are you also a web developer?
Yes I am. I am currently learning JavaScript after using python for a while
That's cool.
Learnt some basics of JS too, but it just wasn't my thing and that's why I dumped it.
Are learning solo or you're enrolled in a bootcamp?
I'm doing it solo, making use of freecodecamp and Harvard's computer science course, as well as many other resources on YouTube and the general web
Thanks for your contribution to the STEMsocial community. Feel free to join us on discord to get to know the rest of us!
Please consider delegating to the @stemsocial account (85% of the curation rewards are returned).
You may also include @stemsocial as a beneficiary of the rewards of this post to get a stronger support.
Congratulations @monioluwa! You have completed the following achievement on the Hive blockchain and have been rewarded with new badge(s):
Your next target is to reach 800 comments.
You can view your badges on your board and compare yourself to others in the Ranking
If you no longer want to receive notifications, reply to this comment with the word
STOPCheck out the last post from @hivebuzz:
Support the HiveBuzz project. Vote for our proposal!
I have noooooo idea what any of this means, but popping in to say HI 👋 !LOL
lolztoken.com
It's a little bit funny.
Credit: reddit
@monioluwa, I sent you an $LOLZ on behalf of @consciouscat
Are You Ready for some $FUN? Learn about LOLZ's new FUN tribe!
(2/8)