[Esp-Eng] TUTORIAL + VIDEO Paso a Paso Nudo Plano de Macrame 😁😁😁 TUTORIAL + VIDEO Step by Step Macrame Flat Knot
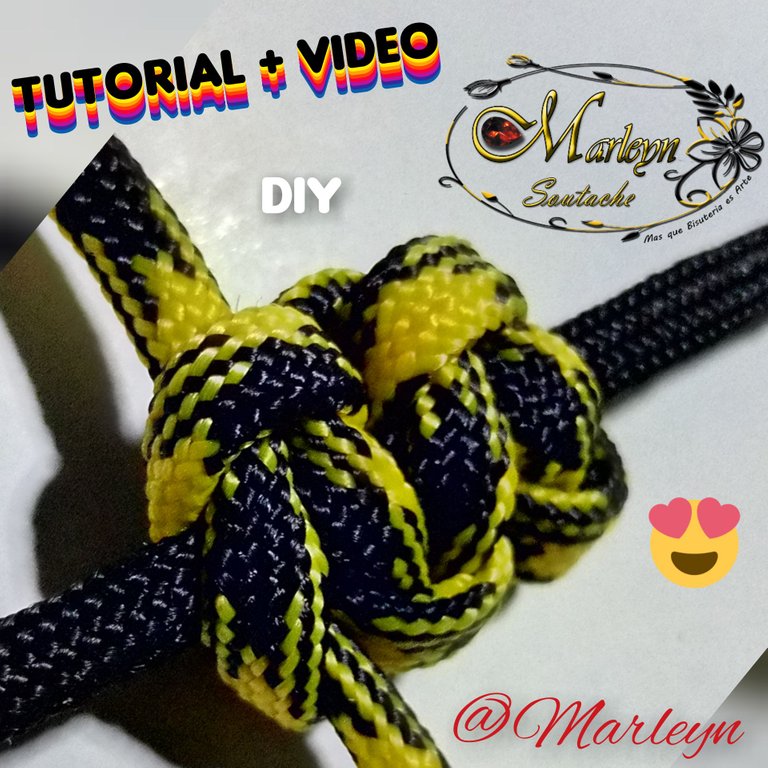
Happy and blessed new day, I wish you are very well, full of a lot of health and well-being, today again I made a simple step-by-step explanatory tutorial with a sequence of images and in addition to this and added A video tutorial at the bottom, today's tutorial is about a flat macrame knot, it is one of the basic and simplest macrame knots and you can do countless things with it, everything will depend on your imagination and your requirements, I really like this knot because from him I have learned to make various bracelets that are really simple and look beautiful, soon I will show you tutorials to make the bracelets for now we must first learn how to make the knot. Try it I'm sure it will be excellent and if not, keep trying, that's how you learn! I heartily wish you are well, you are full of much health, abundance and prosperity! Keep growing, keep shining, may nothing ever turn off your Light 🙏😁

The materials they require are basic, any thread can be used to practice, I use paracord thread which is manageable.
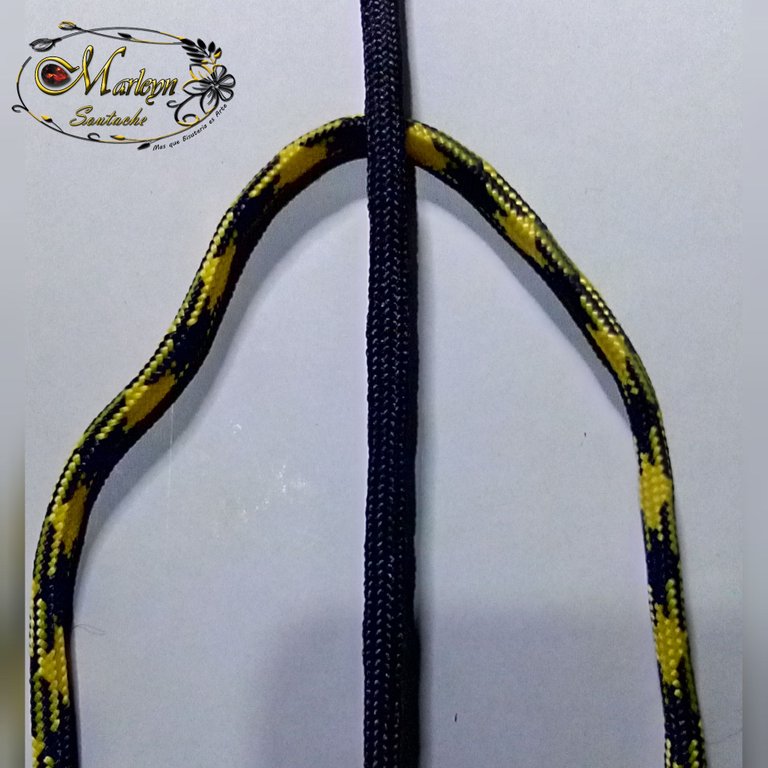
STEP 1: Place the threads as I show you in the image, the central one that for this tutorial uses the black thread will be above, and crossed that in this case is the yellow thread will be below black.
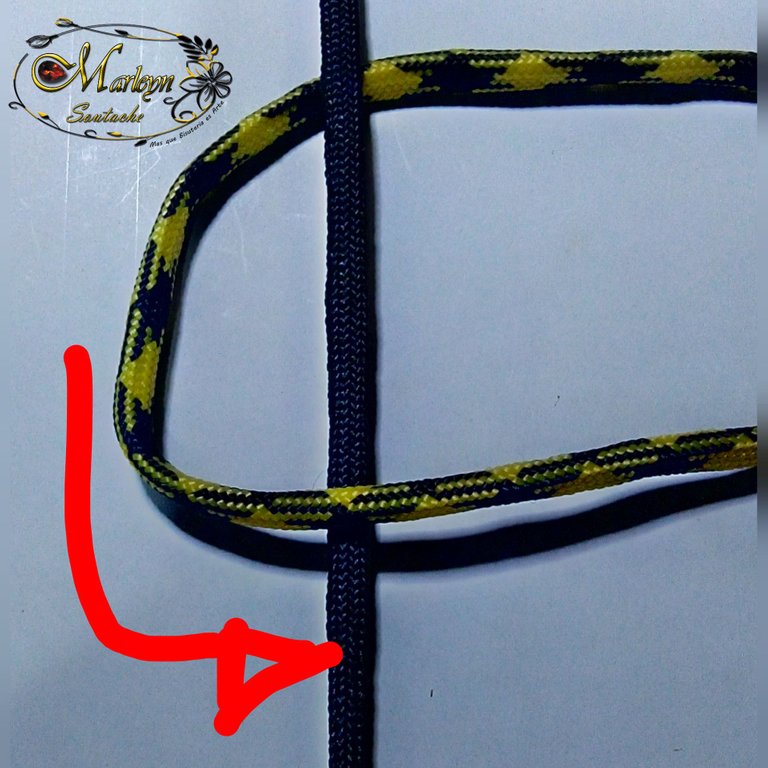
STEP 2: The yellow thread on the left must pass to the right above the black thread, I have marked it with an arrow towards the direction the thread should go for a better understanding.
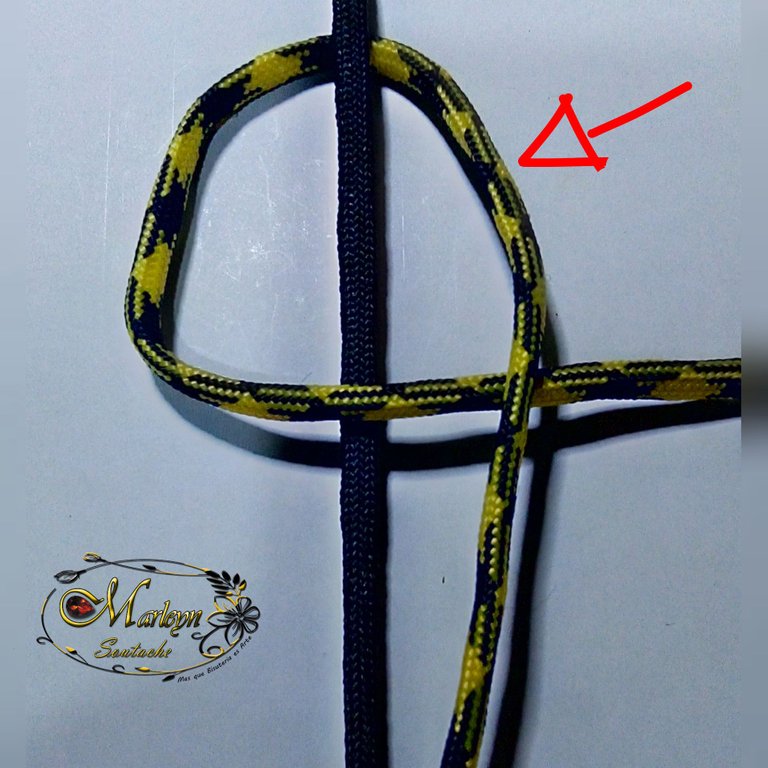
STEP 3: The yellow thread on the right, we place it above the yellow thread that you folded in the previous step.
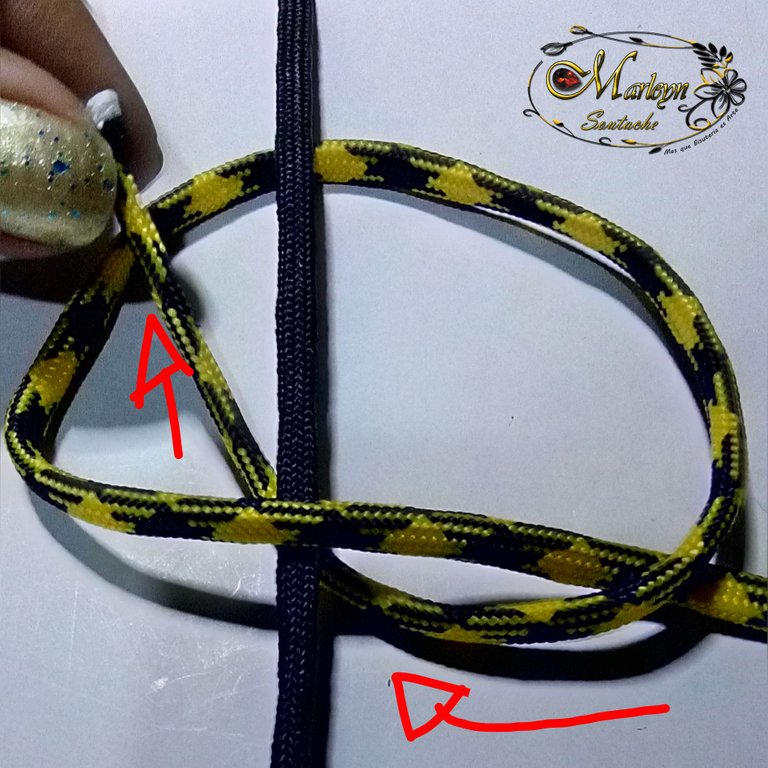
STEP 4: The yellow thread on the right that we moved in the previous step, we pass it to the left below the central black thread. Mark it with several arrows. You can guide yourself by the image or see the video that I will leave at the end of the publication.
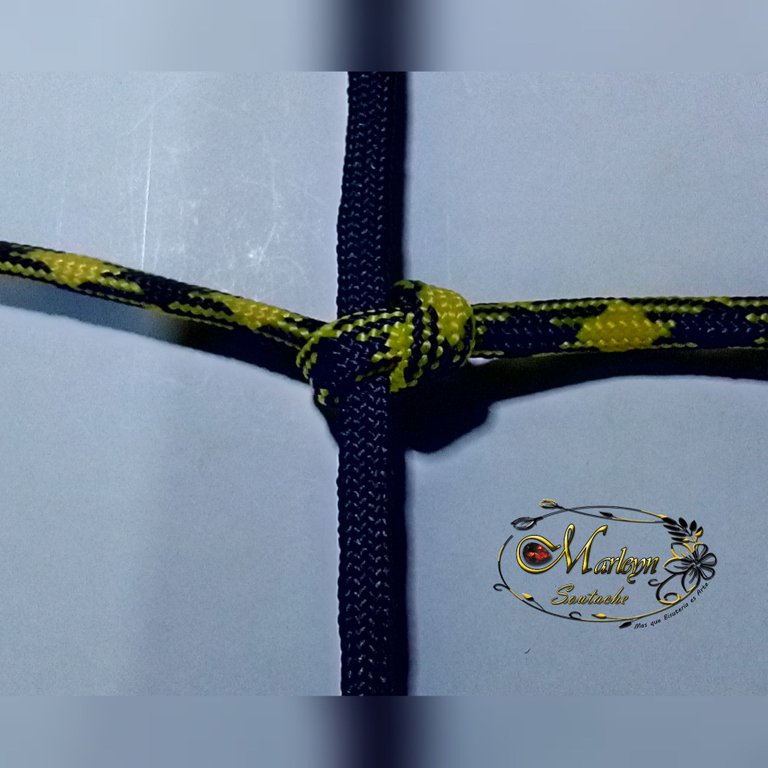
STEP 5: To finish the first knot, you just have to pull the threads to both parts and that's it, in this way we have finished the first knot.
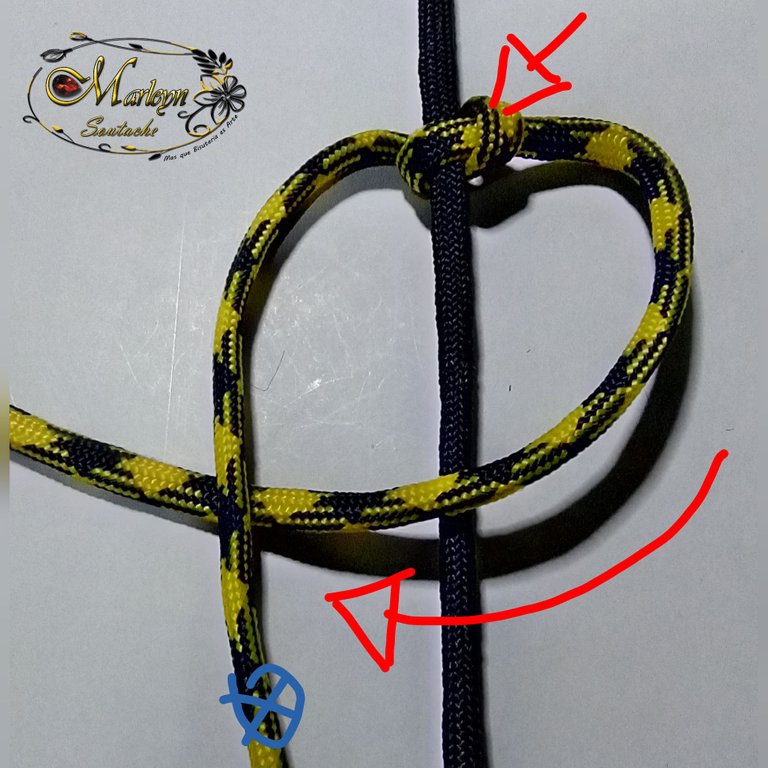
STEP 6: We will carry out the same process as in the previous knot, only this time we will do it from the opposite side, always starting from the part where the thread was up and marked with an arrow, now fold the yellow thread on the right, over the central black thread, and below the yellow thread on the left.
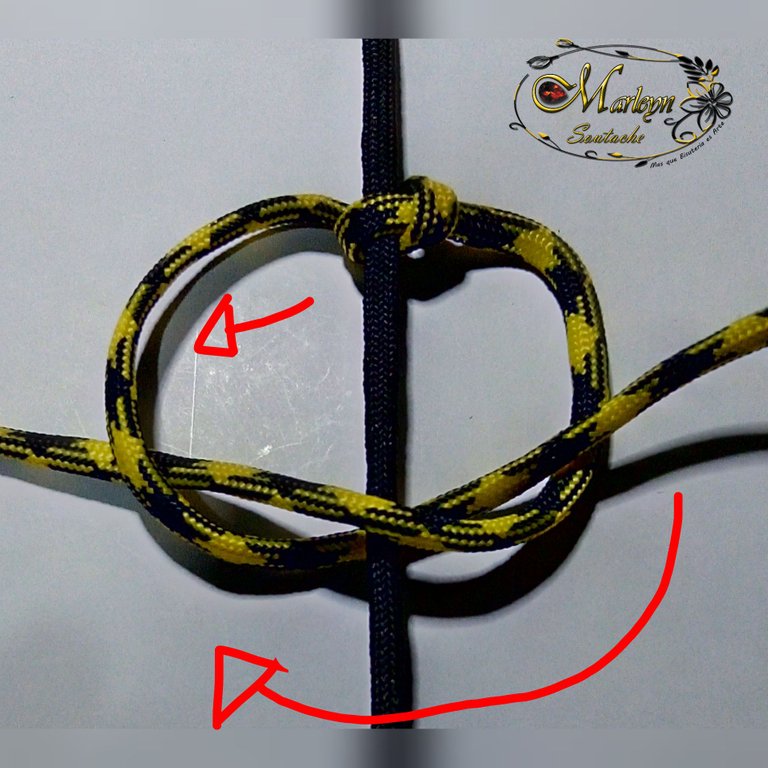
STEP 7: After bending the thread to the right we will pass it under the yellow thread on the left and pull, in this way you finish the second knot, you must follow the same process successively until finish the desired length.
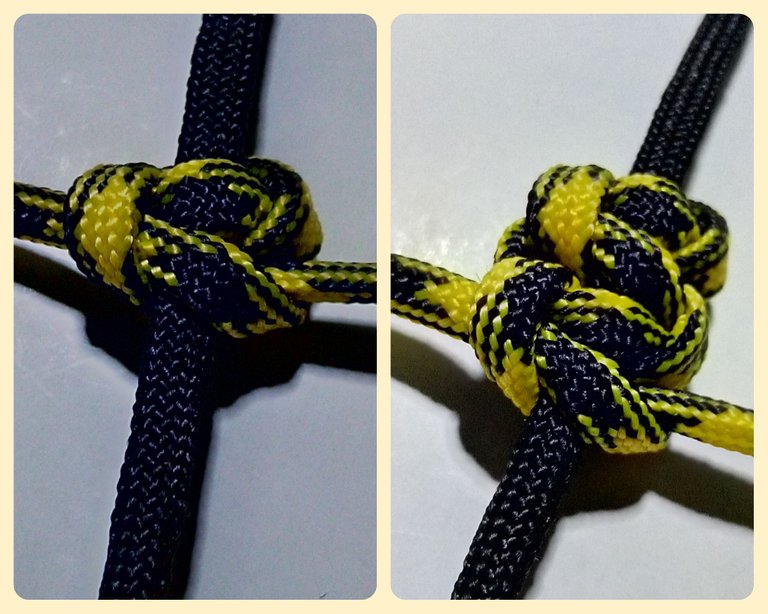
It should look like this! For your better understanding I will leave a video tutorial at the bottom, I hope you like it and you dare to do it, we always learn something new.


Autoría del texto y todas las imágenes: @Marleyn , La edición de las imágenes las realicé yo misma, Por favor no Utilices mis fotos sin mi autorización, edites ni re-publiques mi material ¿Deseas ponerte en contacto conmigo? Escríbeme:
Correo electronico: [email protected]
Discord #Marleyn#7821
Twitter: @marleynleal1
Imstagran: @MarleynSoutache
YouTube: https://youtube.com/c/marleynlealramos
Facebook: @marleynsoutache
Authorship of the text and all the images: @Marleyn, I did the editing of the images myself, Please do not use my photos without my authorization, edit or republish my material Do you want to contact me? Write me:
Email: [email protected]
Discord #Marleyn#7821
Twitter: @marleynleal1
Imstagran: @MarleynSoutache
YouTube: https://youtube.com/c/marleynlealramos
Facebook: @marleynsoutache


https://twitter.com/marleynleal1/status/1444108109924945921
The rewards earned on this comment will go directly to the person sharing the post on Twitter as long as they are registered with @poshtoken. Sign up at https://hiveposh.com.