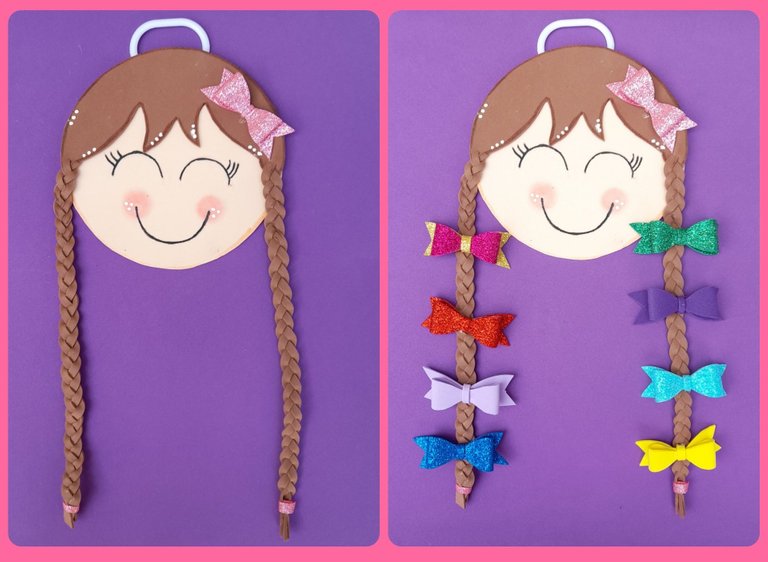
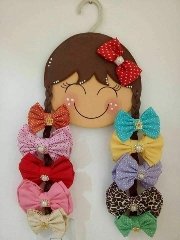
[ESP-ENG] Cómo hacer una muñeca para colocar lazos y moñeras para el cabello.|| How to make a doll to place bows and hair bands. || TUTORIAL
Saludos, amigos de #hivediy. Qué rápido pasó este fin de semana, ya mañana tenemos que reintegrarnos nuevamente a la rutina, últimamente las semanas para mí han sido muy ajetreadas, porque estoy alternando mis estudios con el trabajo, los deberes con mi hija y mis publicaciones diarias. A veces digo que merezco unas vacaciones en una isla en Grecia, ja ja ja. Hoy tenía pensado no hacer nada y pasar el día viendo tv y descansando, pero publicar es una rutina que se ha vuelto adictiva y siempre termino haciendo algo, porque me distrae y actúa como una perfecta distracción. Entonces, hoy a pesar del cansancio, cuando estaba viendo tv, se me vino a la mente que le había dicho a mi sobrina que le iba hacer un dispensador para que guardara sus pinzas y ganchos de pelos. Decidí ponerme manos a las obras y hacerle una muñeca con clinejas para que colocará sus lazos, moñeras y pinzas de cabello. Como fue realmente fácil y rápida de elaborar me dio tiempo de descansar ver tv y mañana sin falta hago entrega a mi sobrina de su muñeca. Aquí les dejo este paso a paso, espero que les guste y lo pongan en práctica.
Greetings, friends of #hivediy. How quickly this weekend passed, and tomorrow we have to return to the routine again, lately the weeks have been very busy for me, because I am alternating my studies with work, homework with my daughter and my daily publications. Sometimes I say that I deserve a vacation on an island in Greece, ha ha ha. Today I had planned to do nothing and spend the day watching TV and resting, but posting is a routine that has become addictive and I always end up doing something, because it distracts me and acts as a perfect distraction. So, today despite the tiredness, when I was watching TV, it came to my mind that she had told my niece that she was going to make her a dispenser so that she could store her tweezers and hair hooks. I decided to get down to her works and make her a doll with clinejas so that she will place her bows, hair bands and hair clips. As it was really easy and quick to make, it gave me time to rest and watch TV and tomorrow without fail I will deliver her doll to my niece. Here she left this step by step, I hope you like it and put it into practice.
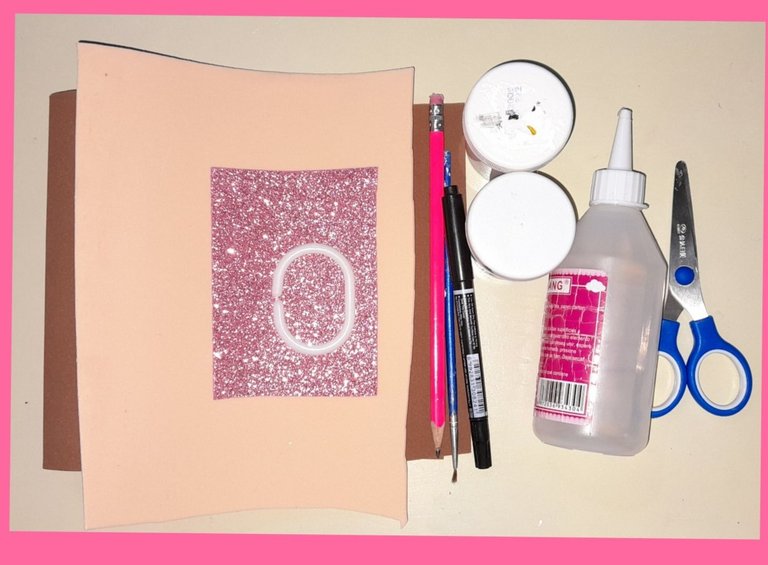
Materiales:
- Foami de los colores marrón, rosado y piel.
- Aro de plástico.
- Pintura al frío blanca y negra.
- Pincel delgado.
- Marcadores de los colores marrón y piel.
- Silicón frío.
- Rubor rosado.
- Lápiz.
- Tijeras.
Materials:
- Foami in the colors brown, pink and leather.
- Plastic ring.
- Black and white cold paint.
- Thin brush.
- Brown and leather color markers.
- Cold sylicon.
- Pink blush
- Pencil.
- Pair of scissors.
Paso a paso:
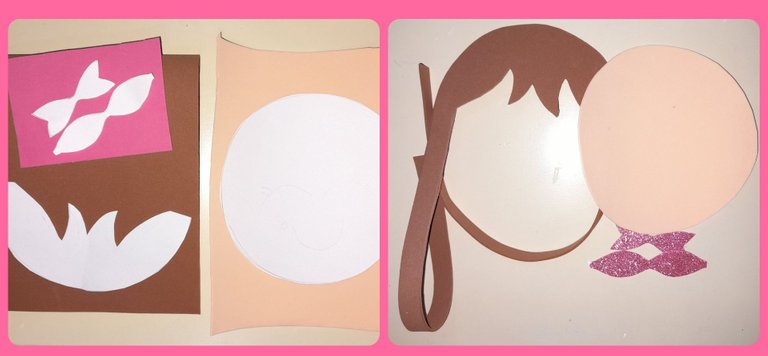
Recortamos el patrón de la muñeca y lo trasladamos al foami ubicandolo en el color que corresponde.Cortamos la cara, el cabello y el lazo.
Step by Step:
We cut out the pattern of the doll and transfer it to the foami placing it in the corresponding color. We cut the face, the hair and the bow.
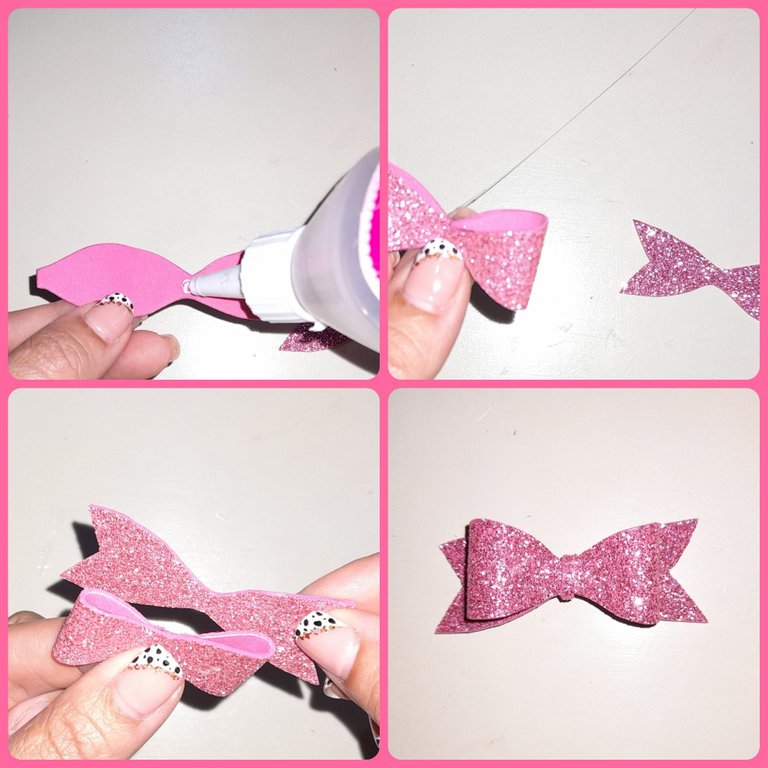
En este paso armaremos el lazo que esta conformado por dos piezas. Tomamos los extremos de la pieza que parece el símbolo del infinito y unimos con el silicón los extremos en el centro, una vez que esté seco lo pegamos a la pieza con forma de lazo y atamos una pequeña tira en el centro del lazo, tal como lo indica la figura.
In this step we will assemble the bow that is made up of two pieces. We take the ends of the piece that looks like the symbol of infinity and join the ends in the center with the silicone, once it is dry we glue it to the bow-shaped piece and tie a small strip in the center of the bow, just like the figure indicates.
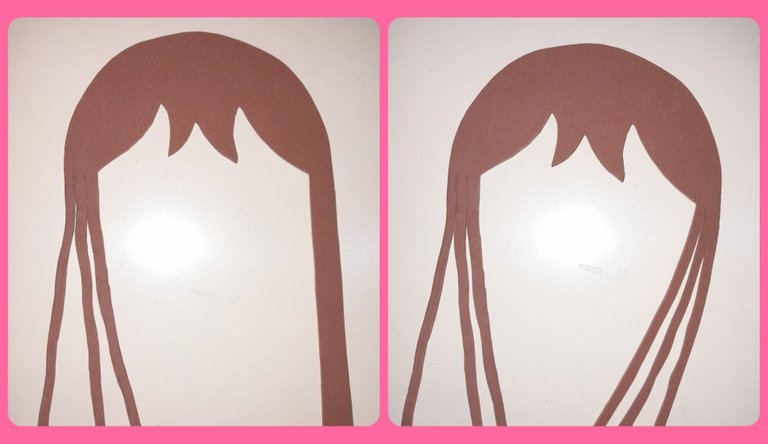
Como esta muñeca lleva dos trenzas en el cabello, cortamos la tira que están a cada lado del cabello en tres tiras delgadas.
Since this doll has two braids in her hair, we cut the strip on each side of the hair into three thin strips.
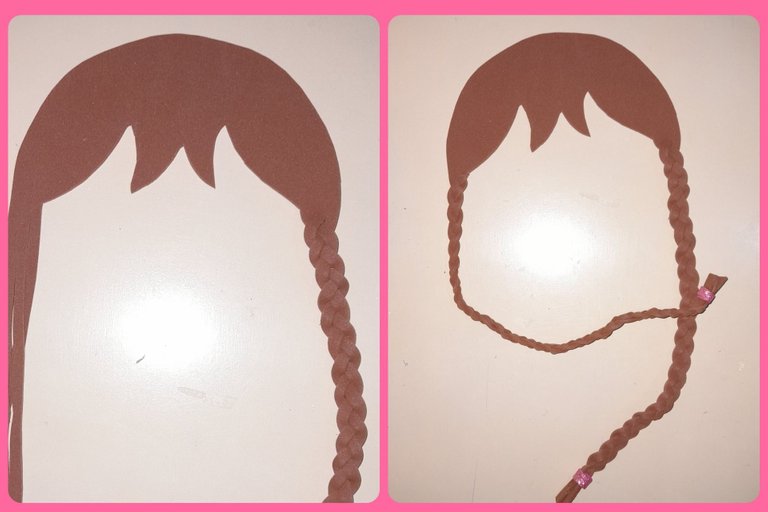
Luego tejemos las clínicas a cada lado del cabello y atamos con una delgada cinta de foami.
Then we weave the clinics on each side of the hair and tie with a thin foami ribbon.
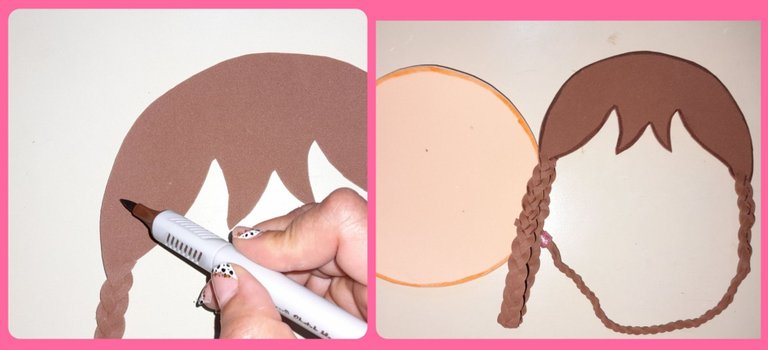
Luego con el marcador marrón y color piel delineamos la orilla de la cara y el cabello.
Then with the brown and skin color marker we outline the edge of the face and hair.
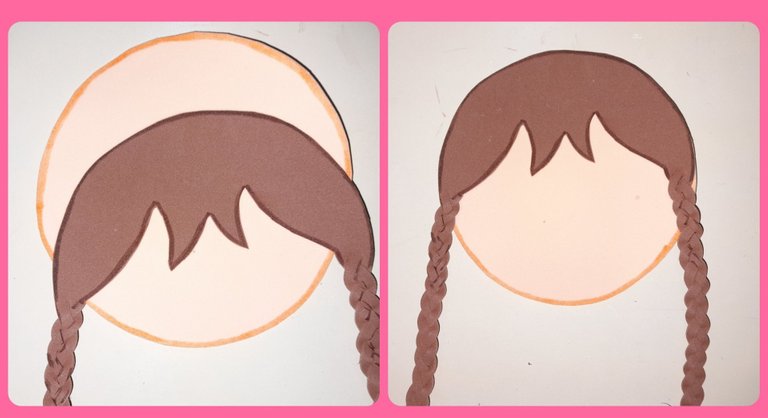
Este paso es el más sencillo se todos porque sólo tenemos que unir con el silicon los cabellos a la cabeza de la muñeca.
This step is the simplest of all because we only have to join the silicone
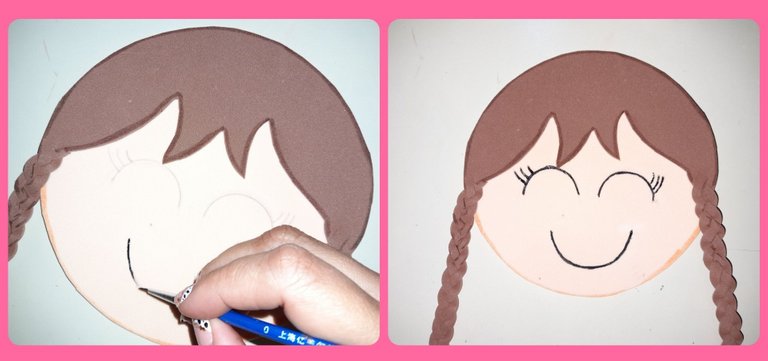
Ahora dibujamos las facciones de la muñeca con el lápiz, luego con el pincel delgado y la pintura negra delineamos los ojos, pestañas y boca.
Now we draw the features of the doll with the pencil, then with the thin brush and the black paint we outline the eyes, eyelashes and mouth.
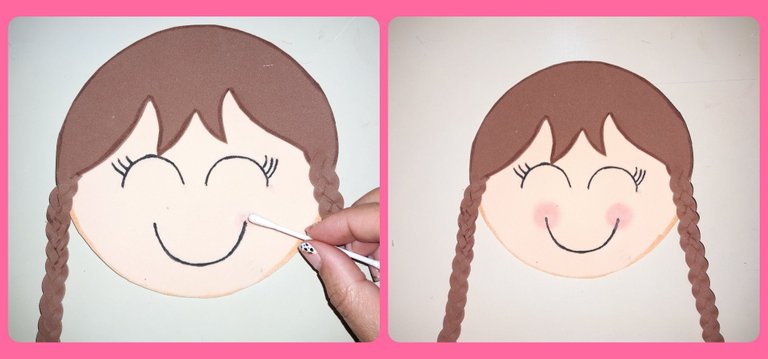
Para dibujar las mejillas utilizamos rubor rosado y con un hisopo vamos difuminando a cada lado de la boca de la muñeca.
To draw the cheeks we use pink blush and with a cotton swab we blur on each side of the doll's mouth.
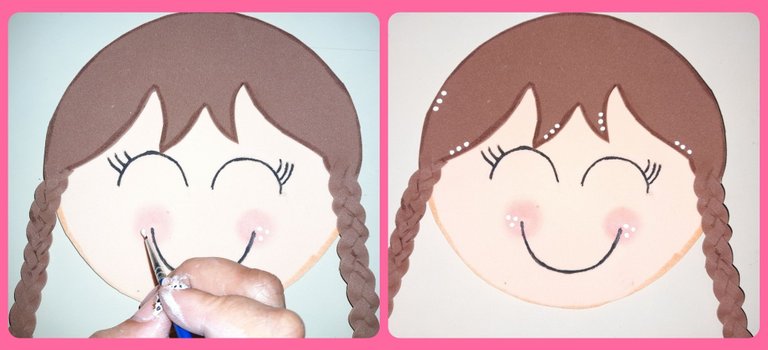
Con la pintura blanca pintamos puntos blancos en las mejillas y el pelo para darle luz a la cara de muñeca.
With the white paint we paint white dots on the cheeks and hair to give light to the doll face.
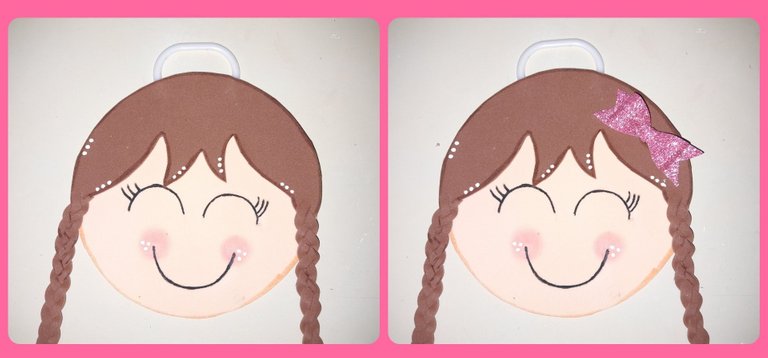
Por último pegamos el aro de plástico detrás de la cabeza de la muñeca y el lazo a un lado del cabello y de esta manera fácil, rápida y sencilla tenemos lista esta linda muñeca para colocar lazos y moñeras para el cabello.
Finally we glue the plastic ring behind the doll's head and the bow to one side of the hair and in this easy, fast and simple way we have this cute doll ready to place bows and hair bands.
-Las fotos son de mi propiedad, tomadas un Samsung A21S,cámara de 48MP.
-Para la traduccion Google Traductor.
-The photos are my property, taken with a Samsung A21S, 48MP camera.
-For Google Translate translation.
Imagen de referencia:

Electronic-terrorism, voice to skull and neuro monitoring on Hive and Steem. You can ignore this, but your going to wish you didnt soon. This is happening whether you believe it or not. https://ecency.com/fyrstikken/@fairandbalanced/i-am-the-only-motherfucker-on-the-internet-pointing-to-a-direct-source-for-voice-to-skull-electronic-terrorism
Congratulations @marciabon! You have completed the following achievement on the Hive blockchain and have been rewarded with new badge(s):
Your next payout target is 4000 HP.
The unit is Hive Power equivalent because post and comment rewards can be split into HP and HBD
You can view your badges on your board and compare yourself to others in the Ranking
If you no longer want to receive notifications, reply to this comment with the word
STOPTo support your work, I also upvoted your post!
Check out the last post from @hivebuzz:
Support the HiveBuzz project. Vote for our proposal!
Thank you for sharing this amazing post on HIVE!
Your content got selected by our fellow curator @rezoanulvibes & you just received a little thank you via an upvote from our non-profit curation initiative!
You will be featured in one of our recurring curation compilations and on our pinterest boards! Both are aiming to offer you a stage to widen your audience within and outside of the DIY scene of hive.
Join the official DIYHub community on HIVE and show us more of your amazing work and feel free to connect with us and other DIYers via our discord server: https://discord.gg/mY5uCfQ !
If you want to support our goal to motivate other DIY/art/music/homesteading/... creators just delegate to us and earn 100% of your curation rewards!
Stay creative & hive on!