Creando una Hermosa Oruga con Materiales Reciclados . / Creating a Beautiful Caterpillar with Recycled Materials.
Hola mi nombre es Maylin Diaz, mi usuario es @mailyn45, llegue a la plataforma por medio de una querida amiga @bayondalways1. La cual me hablo de esta plataforma llamada @hive donde podemos compartir y publicar lo que hacemos con nuestras manos y como a mi me gusta elaborar diversas manualidades, ya que enseño a los niños y a mi hijo en el desarrollando de sus actividades escolares, recordándoles lo importante que es la motricidad fina, gruesa, las texturas y la fluidez de las ideas para crear y darle sentado util a los materiales que muchas veces están sin uso en casa y me siento muy feliz de poder compartir con ustedes mi primera publicación en esta comunidad que nos permite expresar y mostrar nuestras creaciones y compartir el paso a paso de todas nuestras manualidades realizadas.
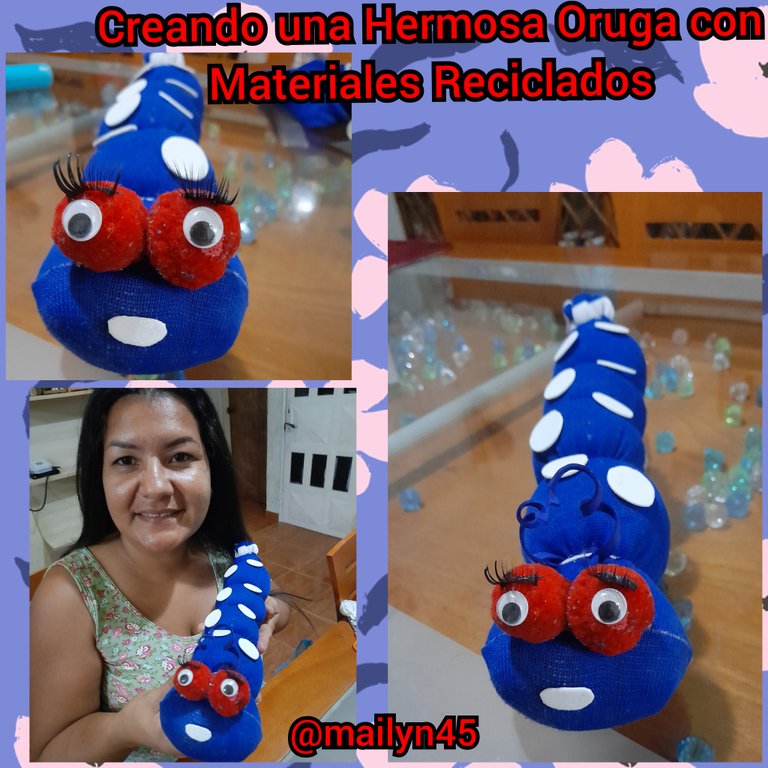
En esta oportunidad deseo compartir con ustedes, la elaboración de una hermosa Oruga.
Utilice los siguientes materiales reciclados que tenia en casa:
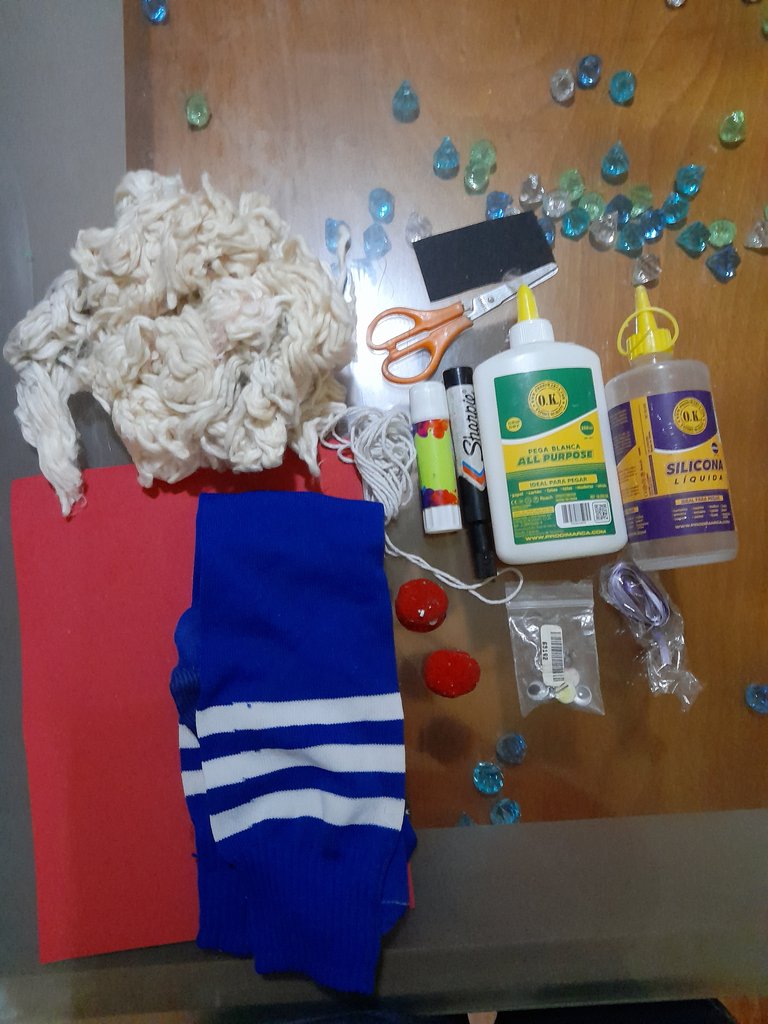
- Calcetín usado
- Relleno mopa
- Hilo blanco
- Tijera
- Regla
- Pegamento blanco
- Goma espuma roja
- OJitos saltarines
- AGuja
- Foami blanco
- Foami azul
- pestaña postiza
Acontinuacion describire los pasos empleados para su elaboración.
Paso 1:
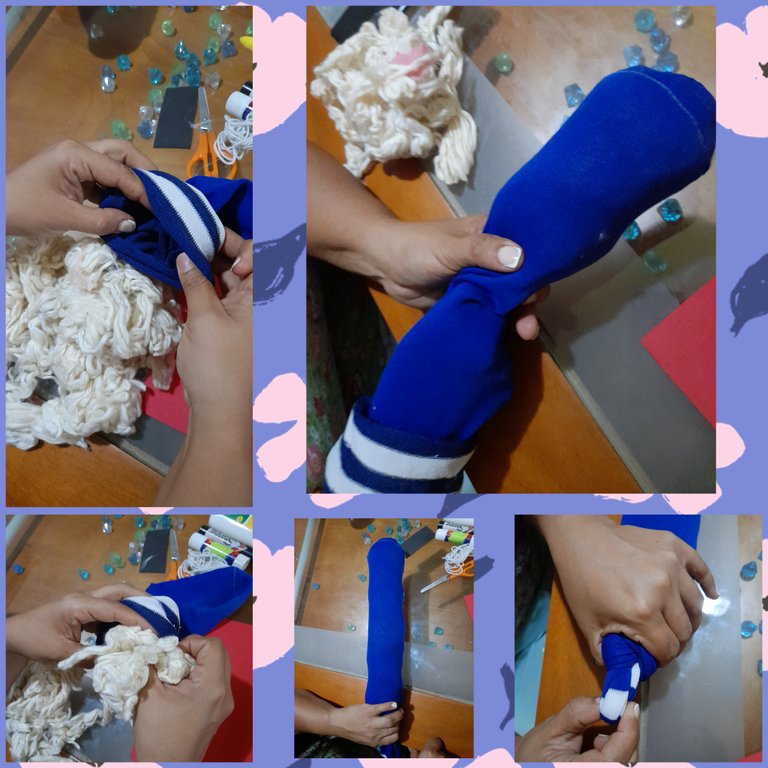
Tome el calcetín y lo rellene con el relleno mopa, una vez lleno lo amarre en la punta final para apretar y asi asegurar que no se saliera el relleno,
Paso 2:
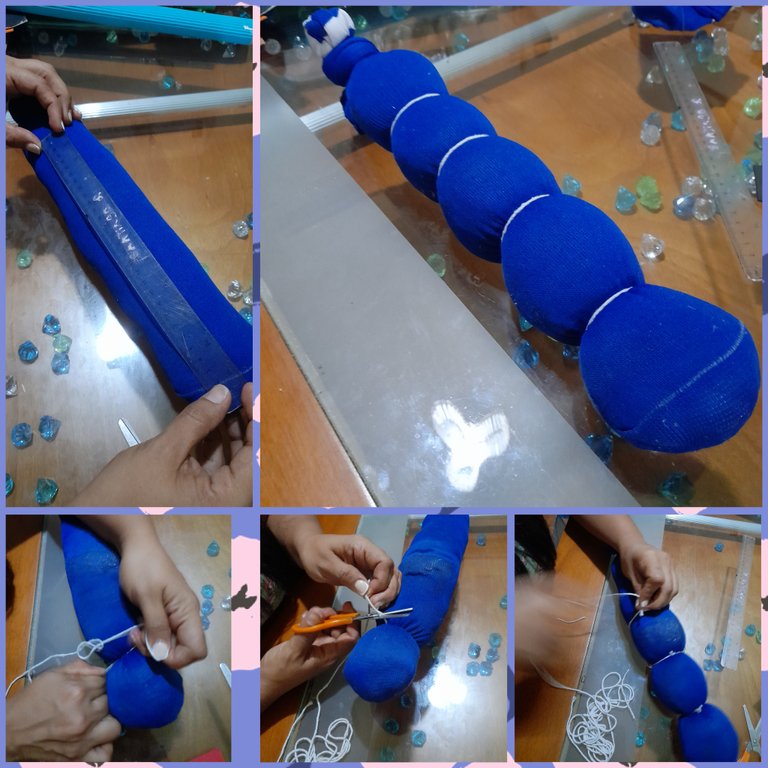
Luego tome una regla y medí su longitud para proceder a dividir por partes iguales de 7cm, cada uno, para así, hacer los amarres respectivos con el hijo blanco y de esa forma sacar el cuerpo, los cuales son los cinco círculos redondos y con la tijera recorte los excedentes del hilo blanco con que amarre.
Paso 3:
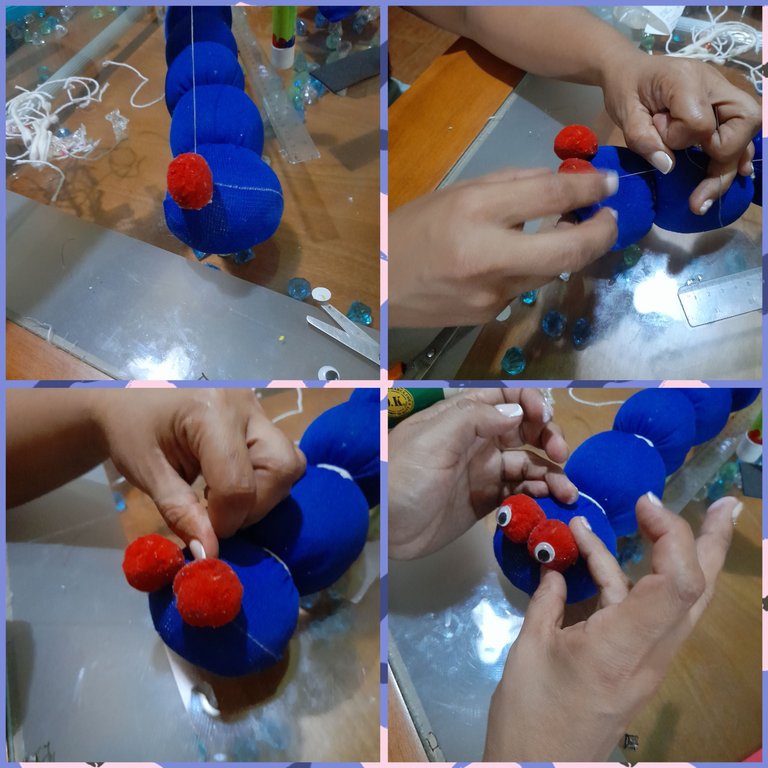
Le coci con la aguja y el hilo la goma espuma roja, sobre su primer circulo que será la cabeza, lo que resalta sus abultados parpados y posterior le pegue los ojitos saltarines con pegamento blanco para darle forma a la cara.
Paso 4:
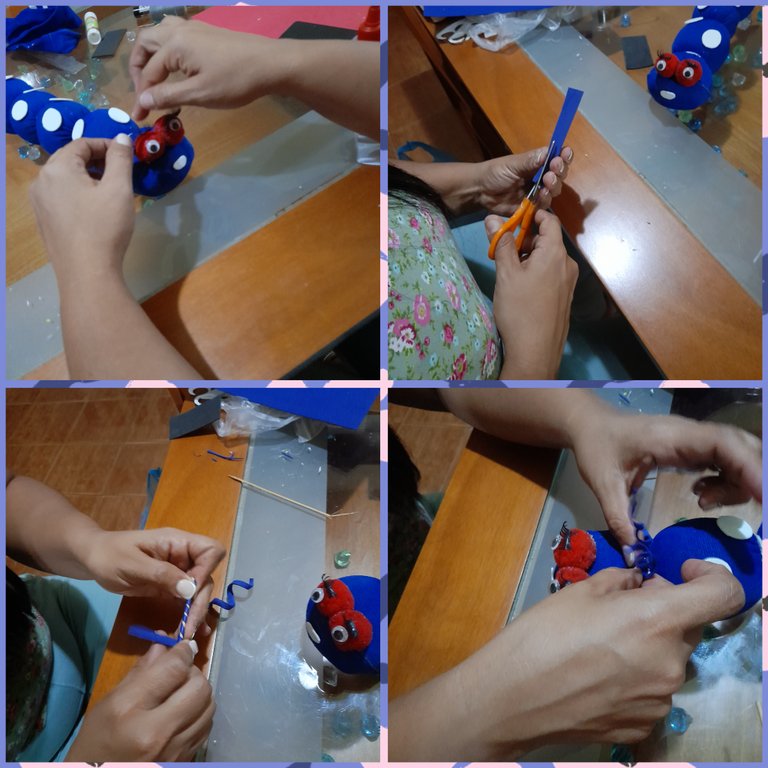
Recorte en foami blanco ocho circulos, los cuales son los lunares de la oruga y se los pegue con pegamento blanco, y con el mismo foami blanco le recorte su nariz y se la pegue, De la misma forma recorte en foami azul dos tiras de 0,5 cm ancho por 7 cm de largo para hacerle sus antenas de resolte, para las cuales tome un palito y lo entorsije para que quedaran onduladas y luego se las pegue. Ya para finalizar le pegue sus pestañas postizas en sus ojos para resaltar su mirada y darle un toque mágico, llamativo y coqueto a la oruga. Esta hermosa manualidad puede ser un hermoso obsequio para cualquier eventualidad que nos puedan invitar.
Cuando hacemos las cosas con amor y de corazon nos queda la satisfacción de un buen trabajo ejecutado para los ojos de los demás, que a muchas personas le agradaría porque no somos lo que tenemos, somos lo que damos de corazon.
Las imagenes me pertenecen, fueron tomadas de mi teléfono Samsung A21
Fueron editadas las fotos en el programa Polish.
traductor: Deepl Traslator.
Englihs

Hello my name is Maylin Diaz, my user is @mailyn45, I came to the platform through a dear friend @bayondalways1. Which told me about this platform called @hive where we can share and publish what we do with our hands and how I like to develop various crafts, as I teach children and my son in developing their school activities, reminding them how important it is fine motor skills, gross, I am very happy to be able to share with you my first publication in this community that allows us to express and show our creations and share the step by step of all our handcrafts.
this opportunity I want to share with you, the elaboration of a beautiful Caterpillar.
I used the following recycled materials that I had at home:

- Used sock
- Mop padding
- White thread
- Scissors
- Ruler
- White glue
- Red foam rubber
- Bouncing eyes
- Needle
- White Foami
- Blue Foami
- False eyelash
I will now describe the steps used for its elaboration.
Step 1:
Take the sock and fill it with the mop filler.
Take the sock and fill it with the mop stuffing, once filled, tie it at the end to tighten it to ensure that the stuffing does not come.

Step 2:
Then take a ruler and measure its length to proceed to divide by equal parts of 7cm, each one, so as to make the respective ties with the white thread and thus remove the body, which are the five round circles and with the scissors cut the excess of the white thread with which I tied.

Step 3:
I sewed with the needle and thread the red foam rubber, on his first circle that will be the head, which highlights his bulging eyelids and then glue the bouncing eyes with white glue to give shape to the face.

Step 4:
Cut out eight circles in white foam, which are the caterpillar's moles, and glue them with white glue, and with the same white foam, cut out its nose and glue it. In the same way, cut out two strips of 0 in blue foam. .5 cm wide by 7 cm long to make your resolute antennas, for which I took a stick and twisted it so that they were wavy and then glued them on. Finally, glue your false eyelashes to your eyes to highlight your look and give the caterpillar a magical, striking and flirtatious touch. This beautiful craft can be a beautiful gift for any eventuality that we may be invited to. When we do things with love and from the heart, we are left with the satisfaction of a good job done in the eyes of others, which many people would like because we are not what we have, we are what we give from the heart.

The images belong to me, they were taken from my Samsung A21 phone.
The photos were edited in the Polish program.
translator: Deepl Traslator.
Saludos amiga .. bienvenida a este mundo maravilloso.. éxitos
well done for bringing your friend on board. Do not forget to show them how it all works so they feel at home and not make too many mistakes.
Also, you can join our discord (check out bi-daily posts) if you want to interact with the community or ask questions.
Well done fren
Thank youssssss... I will support you in every way I can.
You are the best, you are a radiant sunl
Thank you for your support. I am learning the subject.
Thank you for your support. I am learning the subject.
Gracias amiga
Gracias amiga por tus buenos deseos.
Gracias amiga.. Amen amen aqui vamos.
Gracias amiga. Aqui vamos animada.
The lashes are just an adorable addition😄. This reminds me of the clothe babies I made as a kid.
You did a great job.
!diy
Thank you, the eyelashes are a flirty touch.
You are welcome
You can query your personal balance by
!DIYSTATS!DIY
!discovery 30
This post was shared and voted inside the discord by the curators team of discovery-it
Join our Community and follow our Curation Trail
Discovery-it is also a Witness, vote for us here
Delegate to us for passive income. Check our 80% fee-back Program
You can query your personal balance by
!DIYSTATSWelcome to the community and to hive dear Mailyn Diaz. Great caterpillar craft. Thank you for sharing. We hope to see more of you.
PS, we have a monthly contest we run. One is currently on going now.
Check the pinned post. 😉
Te quedo hermoso felicidades
Gracias amiga, muy practica de hacer.
I like the fact that this is a recycle project but it looks amazing
That last you added oh it just Upgrades the status of the caterpillar and makes it lovely
Thank you for the support and motivation, when we do things from the heart, we give a lot of love.
The caterpillar is colourful and beautiful. Nice work.
Thank you for your support and encouragement.
You're welcome.