GARDEN HOSE ROLLER
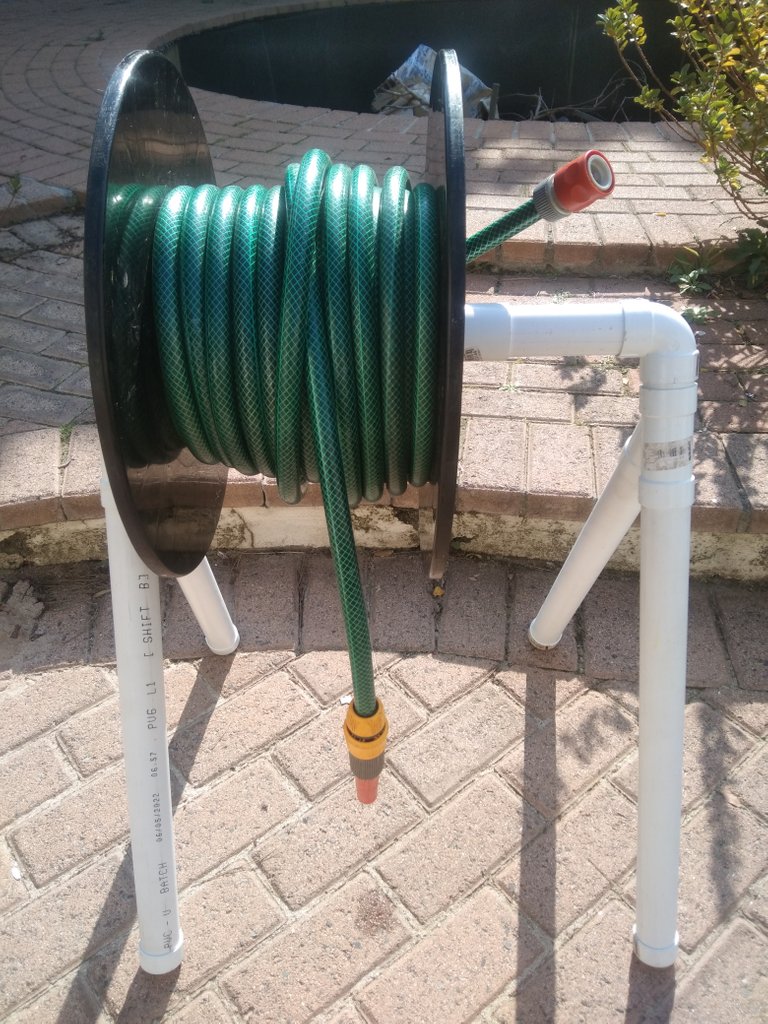
Today I'm going to show you how I made my garden hose roller. Our hose was always just left in a bundle next to the tap my mother asked me to try and make something to have it sit neatly instead of bunched up on the floor so I came up with this garden hose roller and she seemed to be very pleased with it.
THINGS YOU WILL NEED
3 m of 40 mm PVC piping
100 grit sandpaper
PVC welding glue
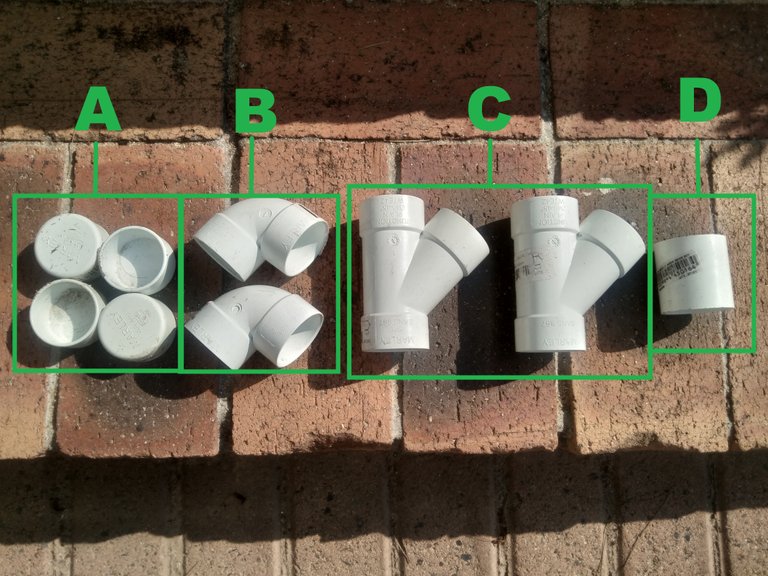
4X end stops (A)
2X 90° bends (B)
2X 2 way spliters (C)
1X joiner (D)
(Use sandpaper and lightly sand the inside of each joint and bend.)
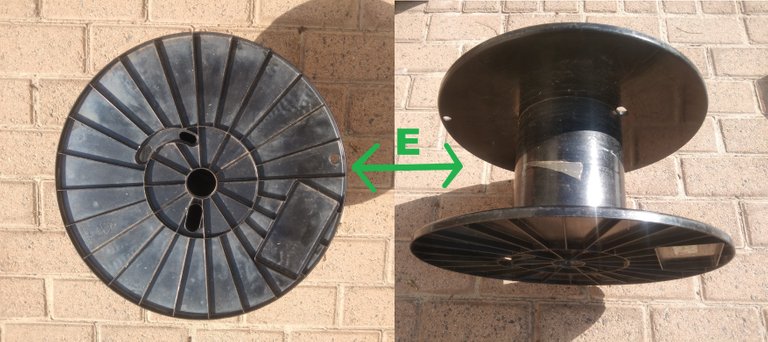
1X empty plastic wire roller (E) (I obtained one from my local hardware store)
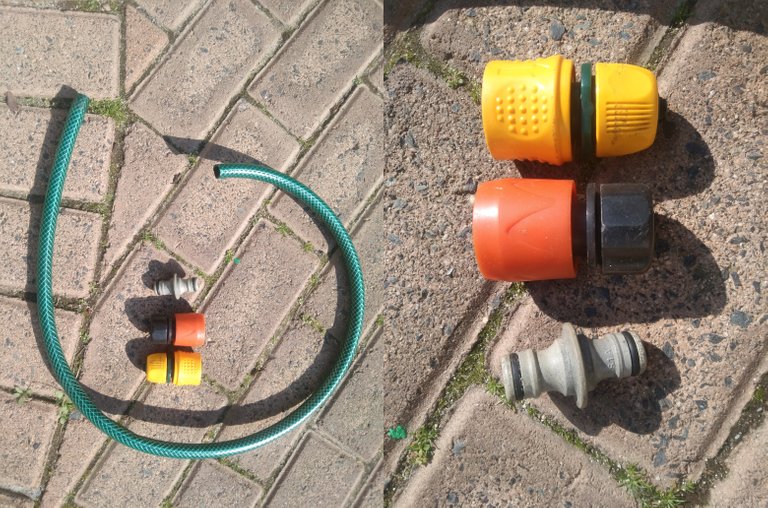
1 m hose pipe
2X female hose fittings
1X double male fitting
Step-By-Step Instructions
Step 1 Preparation
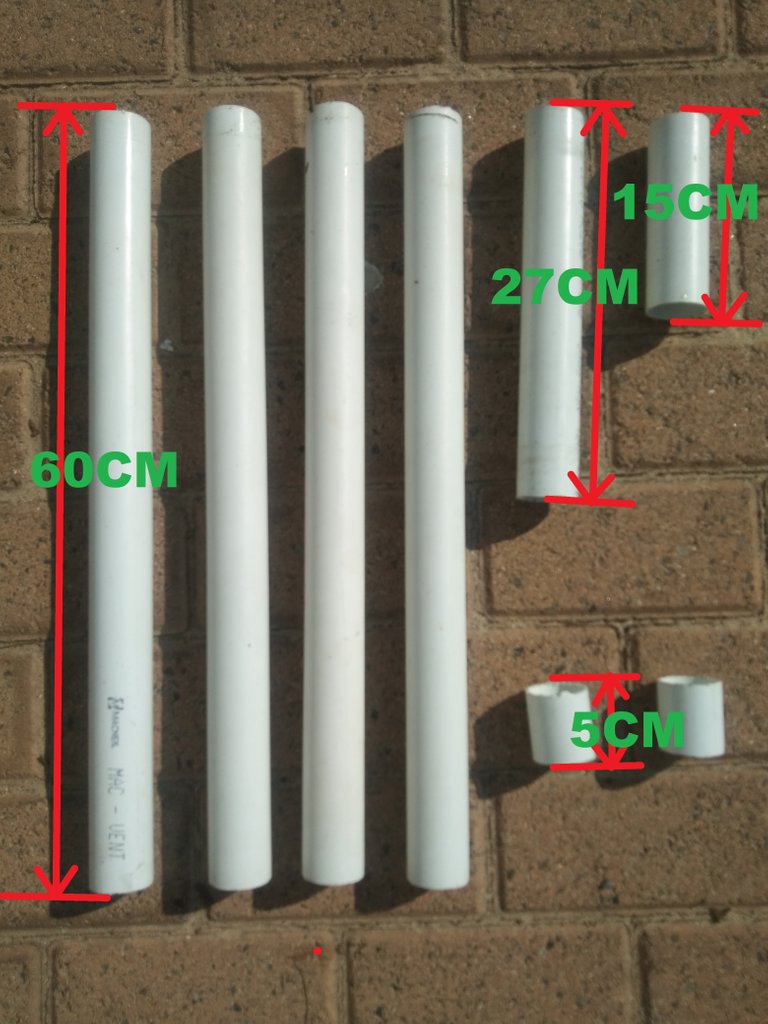
Cut your 40 mm PVC pipe into
4X 60 cm
1X 27cm (length my change depending on your wire roll)
1X 15cm
2X 5cm
Once you have cut all of these sizes take a piece of sandpaper and lightly sand a 1 cm wide ring on each end of the pipes this will ensure a strong bond when using the PVC glue.
Step 2 Legs
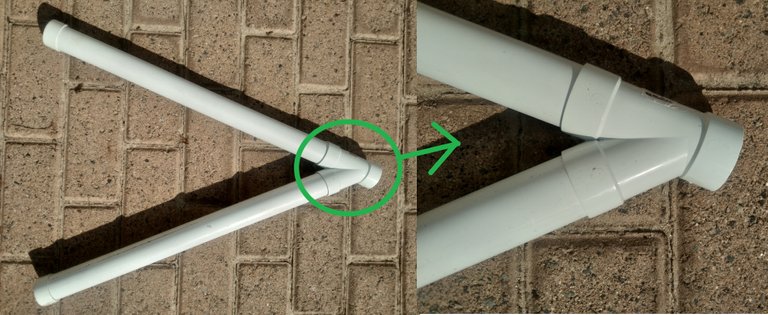
Take two 60cm pipes and two end stops and one 2-way splitter.
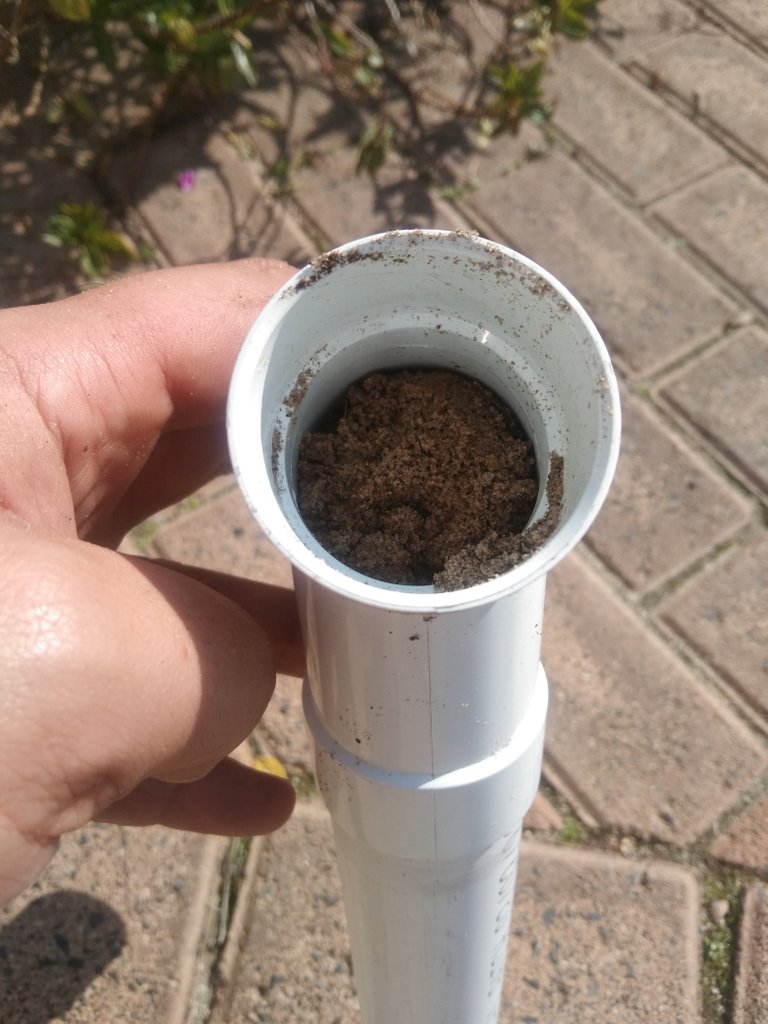
place a end stop on the bottom of each 60cm pipe. Then place the other side of the 60 mm pipe into the 2-way splitter as shown in the picture. Then put on the PVC glue where you sanded and stick it all together. After gluing fill legs with sand to give them some weight. Do this step twice.
Step 3 Roller Holder
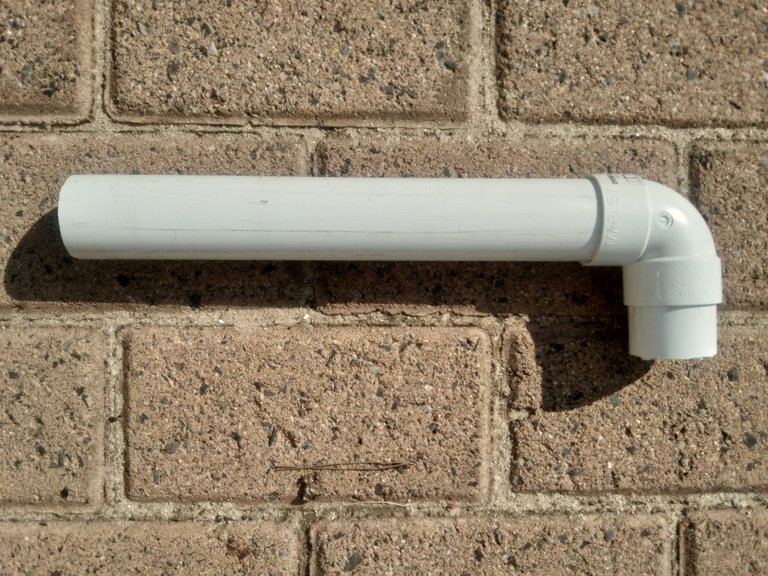
Take one 90° bend and one 5 cm pipe and one 27 cm pipe.
place the 27 cm and the 5 cm pipes in either end of the 90 degree bend as shown in the picture then glue and stick together.
Step 4 Spacer
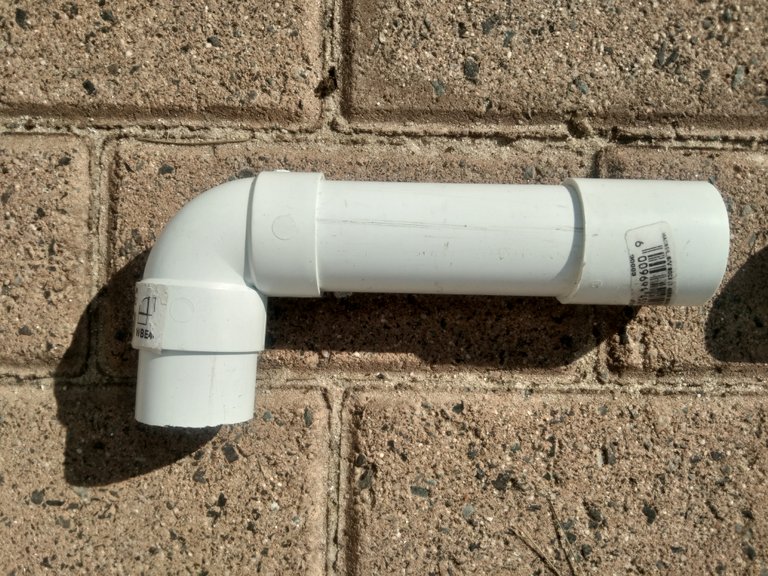
Take the 15 cm pipe and one 5cm pipe and one 90° bend and the joiner.
Place the 15 cm and 5 cm pipe on either end of the 90 degree bend then place the joiner on the other end of the 15 cm pipe as shown in the picture then glue and stick them together.
Step 5 Completing The Two Halves
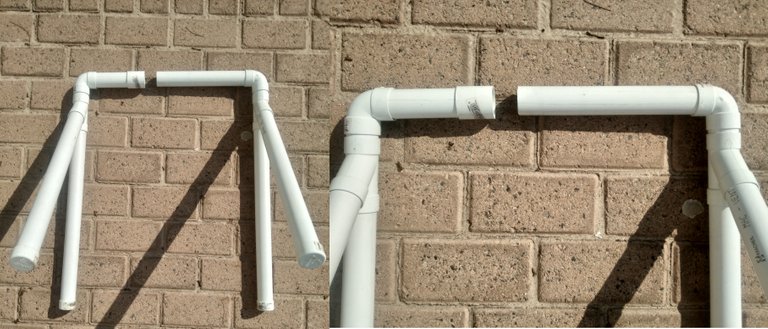
First half take your spacer and one leg and join them together at the 5cm pipe.
Second half take the roller holder and one leg and join them at the 5 cm pipe.
Please make sure that they are at the proper angle before gluing and sticking together as shown in the picture.
Step 6 Preparing The Roller
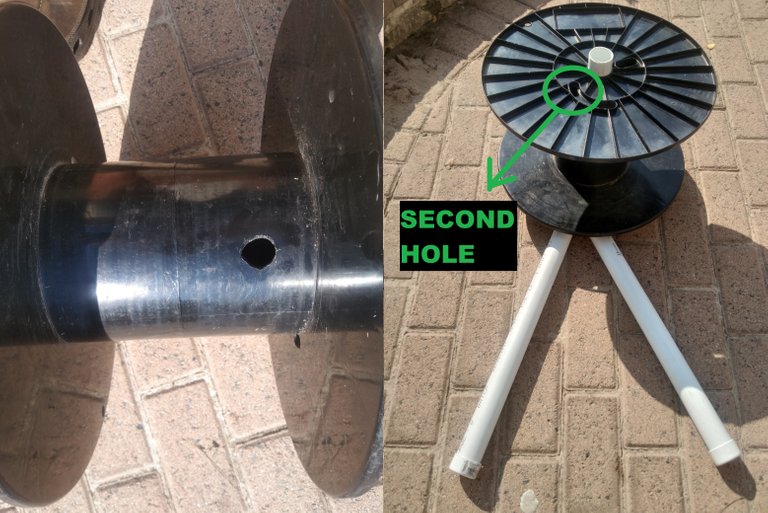
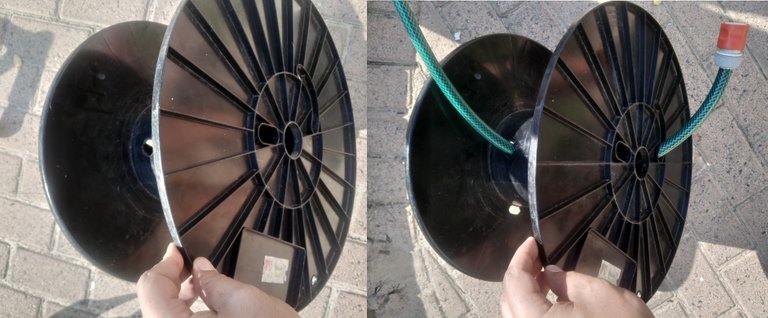
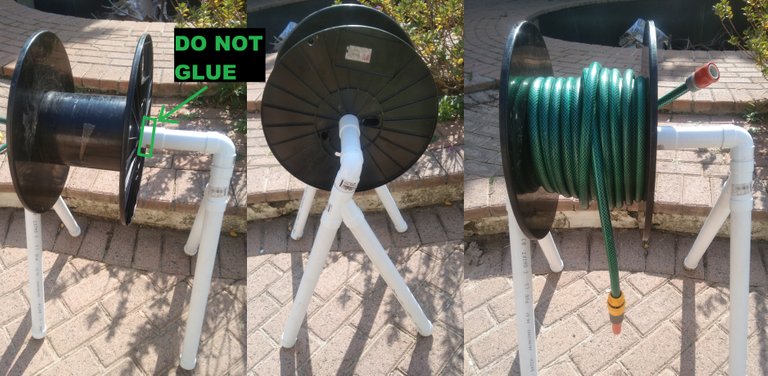
Drill a hole on one end of the inner cylinder the same size as your hose pipe then drill a hole on the opposite end of the roller. Then thread one end of your main garden hose through the two holes and place a female fitting on the end. the holes and which way to thread the hose will be shown in the pictures below.
Step 7 adding the roller and joining the two halves
Take your wire roller and place it onto the 27 cm pipe. Then take the other half with the spacer and attach it to the 27 cm pipe there should be a little bit of play so the roller can roll smoothly. Do not glue these two pieces together drill a hole straight through and bolt them so you can remove roller if Maintenance is ever necessary.
Step 8 Tap To Hose Connector
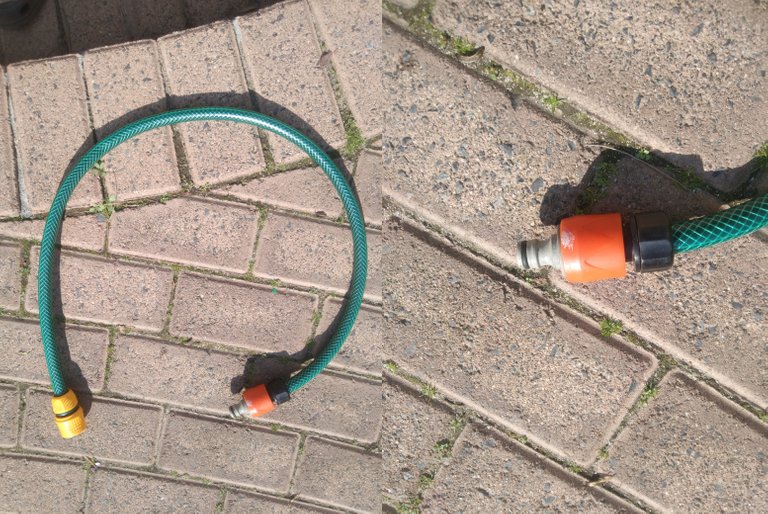
You'll take your 1 m piece of hose pipe attach a female fitting to each end then take the double male fitting and attach it to one of the female fittings.
This connector will allow you to connect your tap to your hose pipe once you have pulled your hose out to a suitable length.
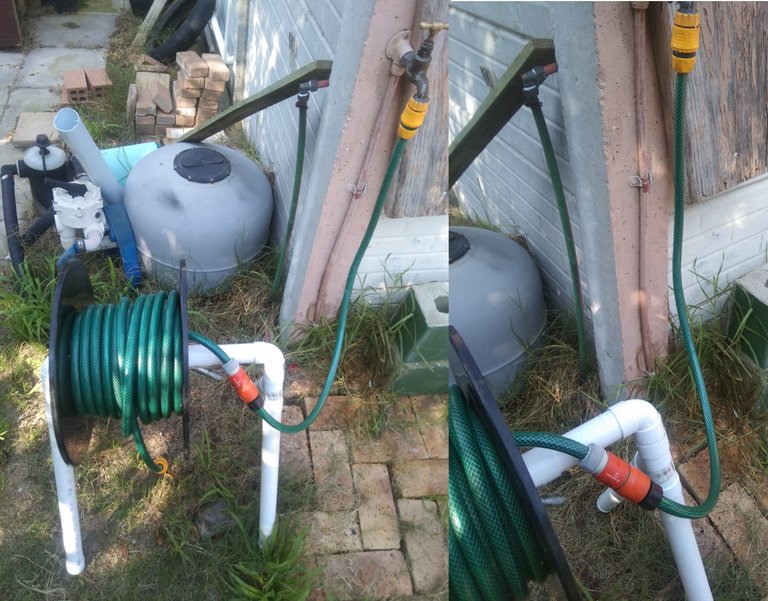
OK that is how you make the garden hose roller. Hope this will help someone out there that had the same problem of keeping their garden hose neat and tidy.
And I wish you all a wonderful day further.
Great design! I think I have just enough bits and pieces to make one for our garden.
thank u and glad to hear that my design will help u out😁
This is so cool! Nice work, buddy.
Thanks a lot
Welcome :))
Very cool. Right up @zakludick's alley!
Thank you
Muy util tu proyecto... gracias por compartir.
🎆🎇🎉🎊🌧️💐✨🌾🌱🌹🌙🌿🍃🥀⚡🌺☘️🍀🌈🌷⭐🪴🌵🌸🌟💮🌴🌳💫☀️💮☔🌲🌳🌍🌌🌠☄️🏵️🐝🌻🌼🍄🐞🦋💙☕💜🍍🎆🎇🎉🎊
gracias por tu voto me alegro que te sea de utilidad😁👍
Well done on this tutorial! Very well laid out step by step instructions!
I am so glad to see you posting often!
Thank u zak it took longer than I thought to edit the images but it was worth it
Que gran idea, de verdad es genial porque recoger la manguera luego de regar las plantas es un problema. Me encantó
Gracias por compartir tus conocimientos 👍👍
me alegro que te guste tanto y gracias por tu voto positivo😎👍
Congratulations @loadreaper! You have completed the following achievement on the Hive blockchain and have been rewarded with new badge(s):
Your next target is to reach 400 upvotes.
You can view your badges on your board and compare yourself to others in the Ranking
If you no longer want to receive notifications, reply to this comment with the word
STOPCheck out the last post from @hivebuzz:
Support the HiveBuzz project. Vote for our proposal!