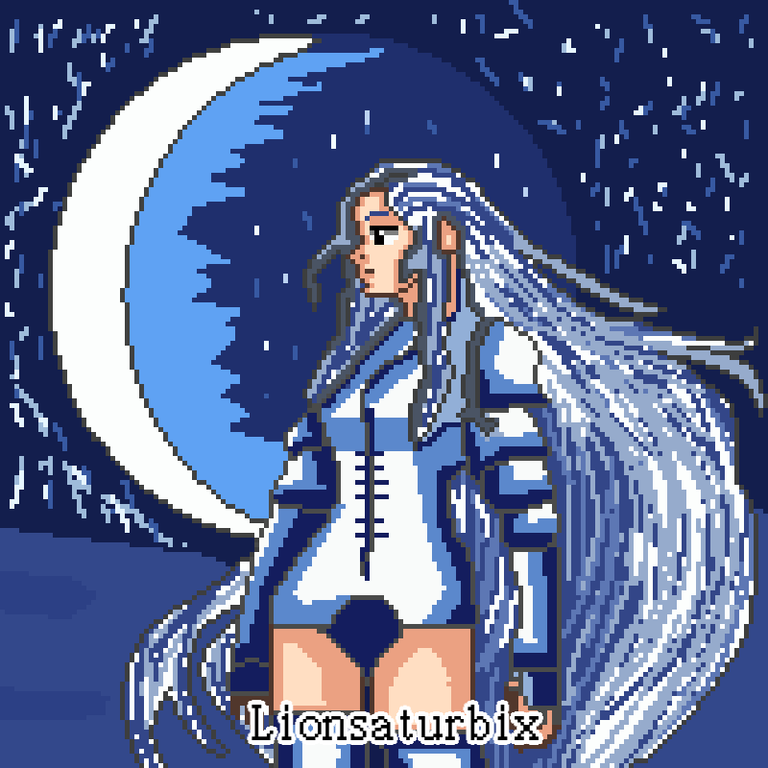
Fan Art of light healer in pixel art style with moonscape / Holozing / (ENG/ESP)
Greetings friends, art lovers and artists, you are all welcome to my publication.
Today I share with you one of my pixel art style drawings of the curator of the light under the redundancy of the moon, where in this drawing I have been implementing a pixelated hair style a little more retro and make it a much more pixelated style as in other drawings of this style.
Next, I will be showing you the process of creating this Fan Art of one of the curators of the future video game Holozing.
! [Spanish version]
Saludos amigos, amantes del arte y artistas, sean todos bienvenidos a mi publicación.
El día de hoy les comparto uno de mis dibujos al estilo pixel art de la curadora de la luz bajo la luz valga la redundancia de la luna, donde en este dibujo he estado implementando un estilo de cabello pixelado un poco más retro y hacerlo un estilo mucho más pixelado como en otros dibujos de este estilo.
A continuación, les estaré mostrando el proceso de creación de este Fan Art de uno de los curadores del futuro videojuego Holozing.

 |  |
|---|
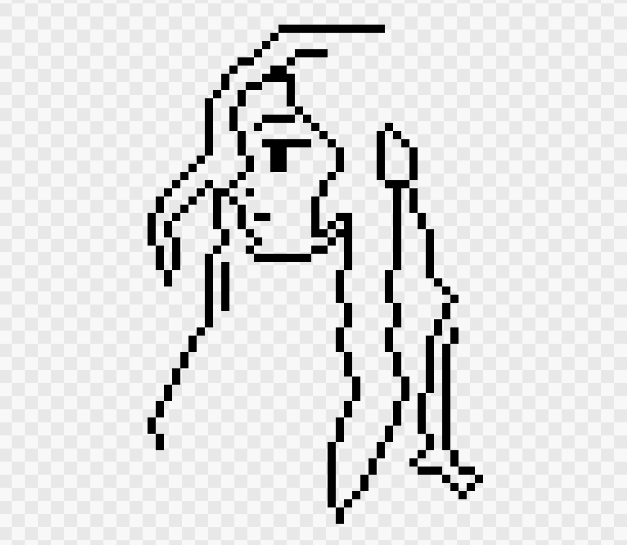
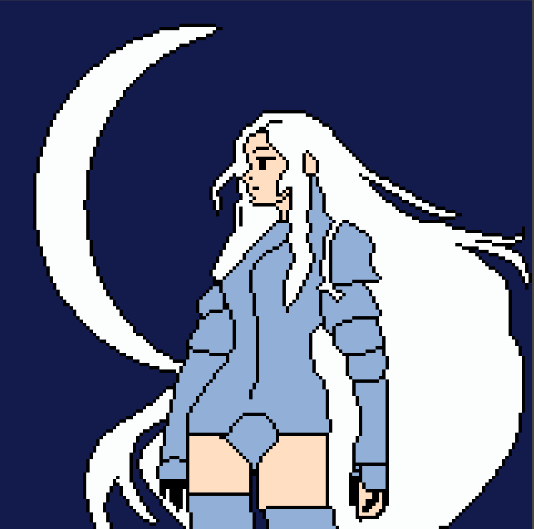
For this drawing, first I was creating the silhouette of my person in a meticulous way pixel by pixel, this work canvas has a size of 800 pixels wide by 800 pixels high, the size of my brush in pixel art style is 5 and I was creating little by little each of the structures of this drawing, and while I was in this process, I adjusted some pixels that I noticed that they were not in the right place, and as the position of this is in profile, I wanted to adjust a little the perspective of it.
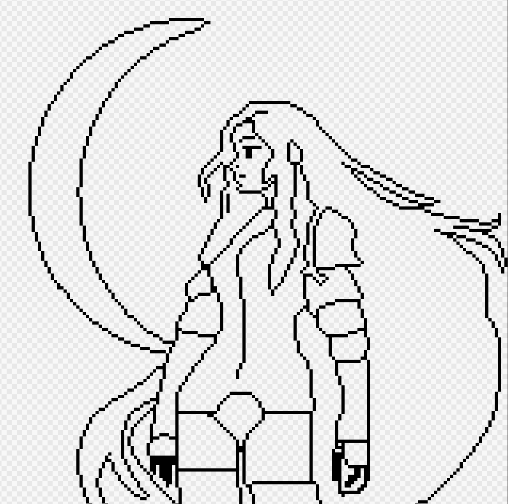
To give a little volume to the hair, I wanted to place some pixels in different directions following the style of a wavy hair in some parts like the right side of the face, it covers a part of it, so then I was making these pixels until I had completely the silhouette of my character, and as I wanted something to stand out with this character, I added a moon in the background to highlight with its beauty.
! [Spanish version]
Para este dibujo, primero fui creando la silueta de mi persona de manera minuciosa de pixel por pixel, este lienzo de trabajo tiene un tamaño de 800 píxeles de ancho por 800 píxeles de alto, el tamaño de mi pincel en estilo pixel art es de 5 y fui creando poco a poco cada una de las estructuras de este dibujo, y mientras estaba en este proceso, ajustaba algunos píxeles que notaba que no quedaran en el lugar indicado, y como la posición de este es de perfil, quise ajustar un poco la perspectiva del mismo.
Para darle un poco de volumen al cabello, quise colocar algunos píxeles en diferentes direcciones siguiendo el estilo de un cabello ondulado en algunas partes como el lado derecho del rostro, el mismo le cubre una parte del mismo, así que seguidamente fui realizando estos píxeles hasta tener completamente la silueta de mi personaje, y como quería que algo resaltara con este personaje, le agregue una luna de fondo para que resaltara con su belleza.
 |  |
|---|
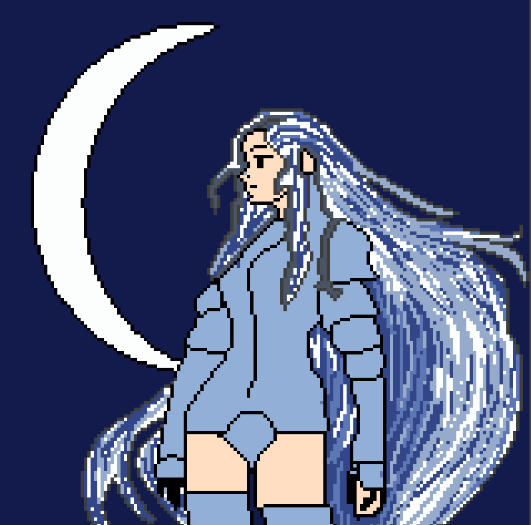
Then, it was time to give the flat colors, so as a base I used white for the hair and the moon, a light flesh color for the skin, a navy blue for the background color and light blue for the color of the suit, although I will modify them in the process depending on the colors of the shadows and depths that I will add along the way.
Once added the flat colors, I will start giving the hair a little more volume, adding strands of pixelated hair of different shades to create a striking effect to the hair, using similar colors to those of the base, but a little darker, in this way in the future steps, I must change those flat colors or add some extra details to avoid that some colors are mixed and the drawing is lost.
In order not to leave the pixels that are at the edge of the black hair part, I used a tone of white a little darker, almost close to gray in order to create a difference of all the hair color in my drawing.
! [Spanish version]Posteriormente, llego el momento de darle los colores planos, así que de base use el color blanco para el cabello y la luna, un color de carne claro para la piel, un azul marino para color del fondo y azul claro para el color del traje, aunque estos los iré modificando en el proceso dependiendo de los colores de las sombras y profundidades que vaya agregando en el camino.
Una vez agregado los colores planos, comerse a darle al cabello un poco más de volumen, agregando hebras del cabello pixelado de diferentes tonalidades para crear un efecto llamativo al cabello, usando colores similares a los de la base, pero un poco más oscuros, de esta manera en los futuros pasos, debo cambiar esos colores planos o agregar algunos detalles extras para evitar que algunos colores se mezclen y se pierda el dibujo.
Para no dejar los píxeles que se encuentran al borde de la parte del cabello de color negro, use un tono de blanco un poco más oscuro, casi cercano al gris para poder crear una diferencia de todo el color del cabello en mi dibujo.
 |  |
|---|
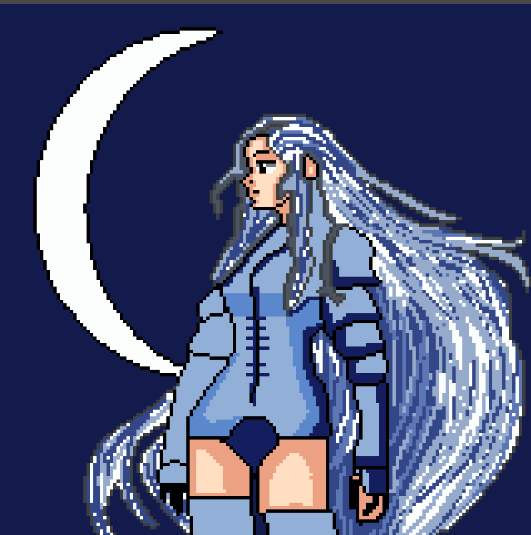
When I finished working with the hair, my next step was to use some darker colors to create some depths and shadows in their respective places, so I continued working with the suit, first I used darker tones for the parts where there is a lot of shadow, additionally I used a lighter tone to create a small gradient.
Next, I changed the base color of the suit from blue to white, since this character has a white suit, this way the depths that I added before can be better appreciated.
! [Spanish version]
Al terminar de trabajar con el cabello, mi siguiente paso fue usar algunos colores un poco más oscuros la base para poder crear unas profundidades y sombreados en sus respectivos lugares, así que continúe trabajando con el traje, primero use tonos más oscuros para las partes donde hay mucha sombra, adicionalmente sé un tono más claro para crear un pequeño degradado.
Seguidamente, le cambié el color base del traje de azul a blanco, ya que este personaje posee un traje blanco, de esta forma se aprecia mejor las profundidades que le agregue anteriormente.
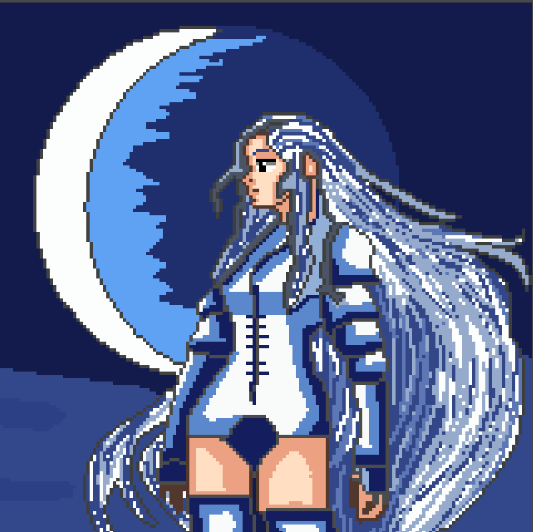
To finish, I used a darker color than the suit to eliminate the missing black pixels, then I started to work on the background to make a striking landscape of this character, I placed some pixels in the air as if it were snow and in this way I could make my drawing of the day.
The reference image is at the bottom of this text, thank you very much for having come this far in my publication, I hope you like it, until next time.
! [Spanish version]
Para finalizar, use un color más oscuro al del traje para poder eliminar los píxeles de color negro que faltaban, después comencé a trabajar en el fondo para hacer un paisaje llamativo de este personaje, coloque algunos píxeles en el aire como si se tratase de nieve y de esta manera pude realizar mi dibujo del día.
La imagen de referencia se encuentra en la parte inferior de este texto, muchas gracias por haber llegado hasta aquí en mi publicación, espero les sea de su agrado, hasta la próxima.


Discord
LionSaturBix#7545
Los separadores son de mi autoría, las imágenes tienen su fuente, las capturas fueron realizadas en mi perfil de jugador en mi ordenador, las ediciones del GIF son creados por mí.
The separators are of my authorship, the images have their source, the screenshots were made in my player profile on my computer, the GIF edits are created by me.
Programas que utilicé para crear mi diseño es este:
This is the program I used to create my design:
Gif y portada cortesía de Canva
Gif and cover courtesy of Canva
Traducido por Deepl
Herramienta de dibujo, tableta digitalizadora Huion 420 black
Drawing tool, digitizing tablet Huion 420 black
Dibujo realizado en MediBan Paint Pro
Drawing made in MediBan Paint Pro