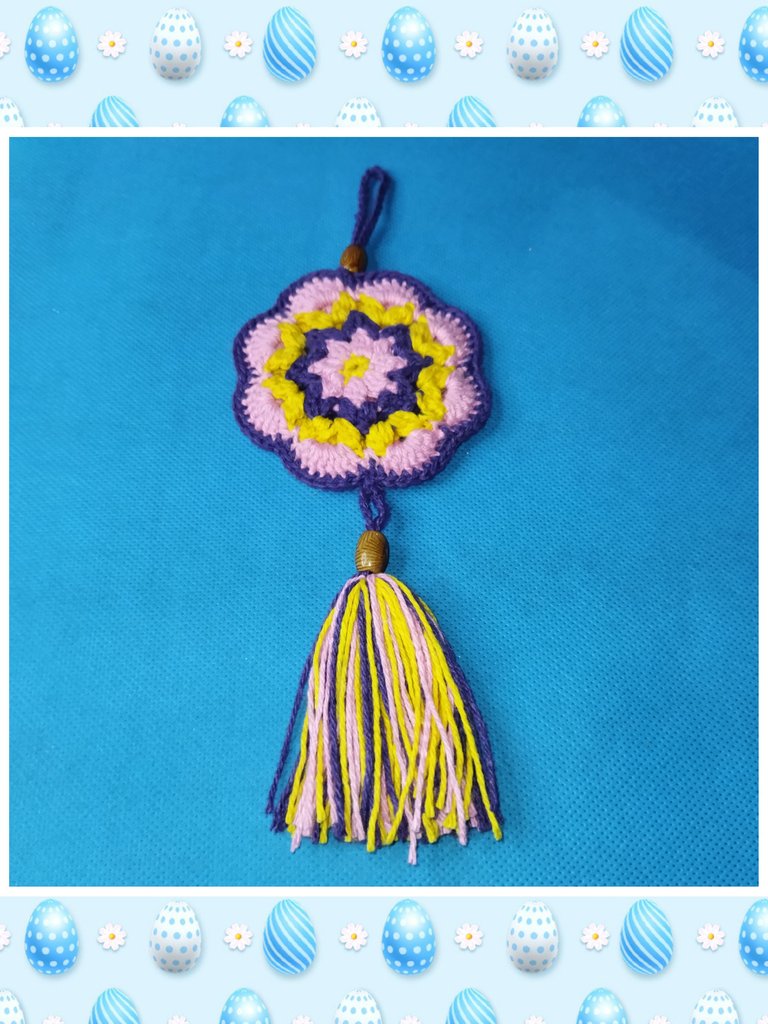
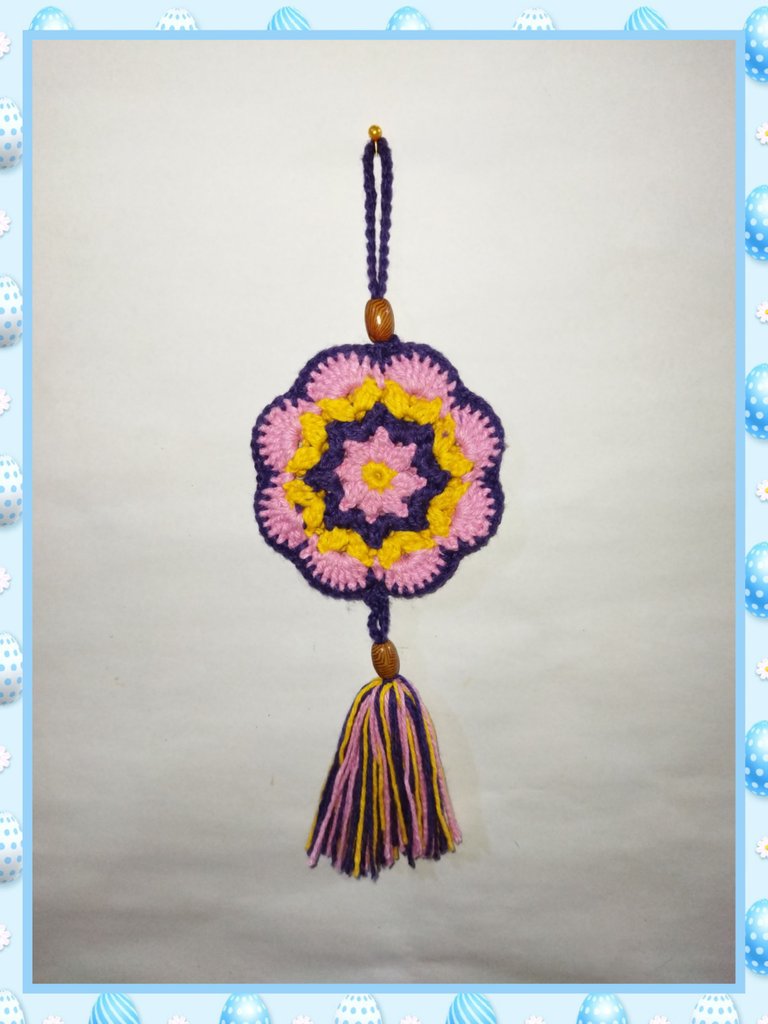
[ESP-ENG] Colgante Primavera a Crochet // Crochet Spring Pendant
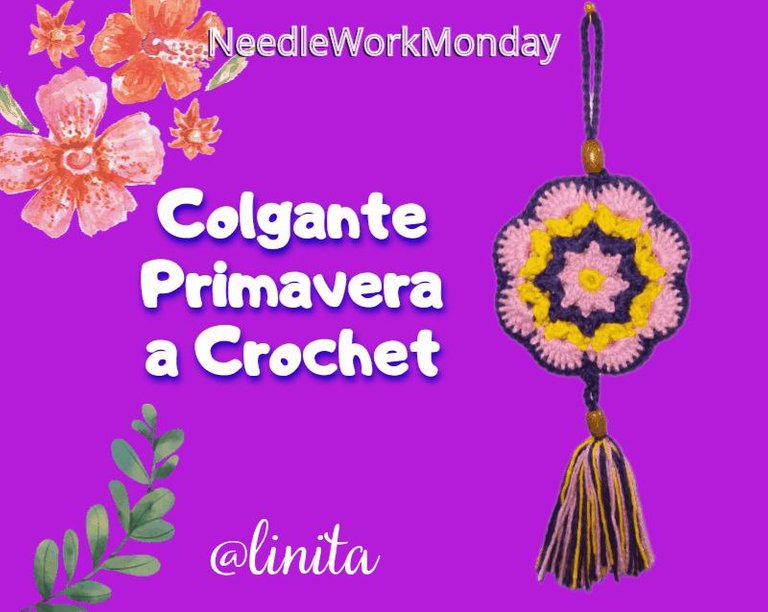
Hola, hola, amigos amantes de las agujas. Yo nuevamente por aquí haciendo acto de presencia con este nuevo proyecto, muy fácil y rápido de hacer. Cuando estaba en el proceso, no dejaba de pesar la forma de darle utilidad y se me vinieron muchas ideas a la mente. Entre esas ideas están ser utilizado como un adorno para colocarlo en los retrovisores de los carros y rociar el ambientador que muchas personas usan para aromatizar su vehículo.
Otras de las ideas es, colocarlo en los cierres de bolsos de viaje, maletas y carteras, como identificador de tus pertenencias. Me parece una ida genial. Me ha sucedido en varias oportunidades que he salido de viaje y entre la cantidad de bolsos y maletas pierdes de vista el tuyo.
También podemos usarlos de adorno para nuestras cortinas, manteles. En fin, si te gusta, también puedes pensar que uso vas a darle.
Hello, hello, needle-loving friends. Me here again making an appearance with this new project, very easy and quick to do. When I was in the process, I kept thinking about how to make it useful and many ideas came to mind. Among those ideas are being used as an ornament to place it on the rear-view mirrors of cars and spraying the air freshener that many people use to scent their vehicle. Other ideas is to place it in the closures of travel bags, suitcases and wallets, as an identifier for your belongings. Sounds like a great ride to me. It has happened to me on several occasions that I have gone on a trip and among the number of bags and suitcases you lose sight of yours. We can also use them as decoration for our curtains, tablecloths. Anyway, if you like it, you can also think about what use you are going to give it.

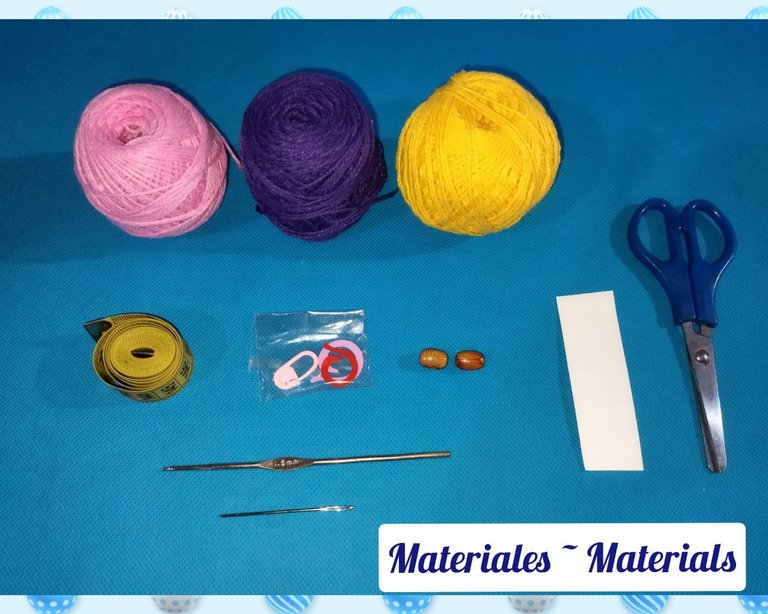
Para la elaboración de este bello colgante primavera vamos a necesitar:
- 3 Rollos de hilo pabilos de colores diferentes, los que más te gusten. En mi caso utilicé Rosado, Morado y Amarillo porque me encanta el contraste de estos tres colores. Tu puedes elegir los que desees.
- Aguja de crochet Nº 0 ó 1,6 mm
- Aguja punta roma
- Cuentas de bisutería
- 1 trozo de cartulina o cartón de 7 cm de largo
- Tijera
- Marcador para tejido
To make this beautiful spring pendant we will need:
- 3 Rolls of thread wicks of different colors, the ones you like the most. In my case I used Pink, Purple and Yellow because I love the contrast of these three colors. You can choose the ones you want.
- Crochet hook No. 0 or 1.6 mm
- Blunt tip needle
- Costume jewelry beads
- 1 piece of cardboard or cardboard 7 cm long
- Scissor
- Fabric marker

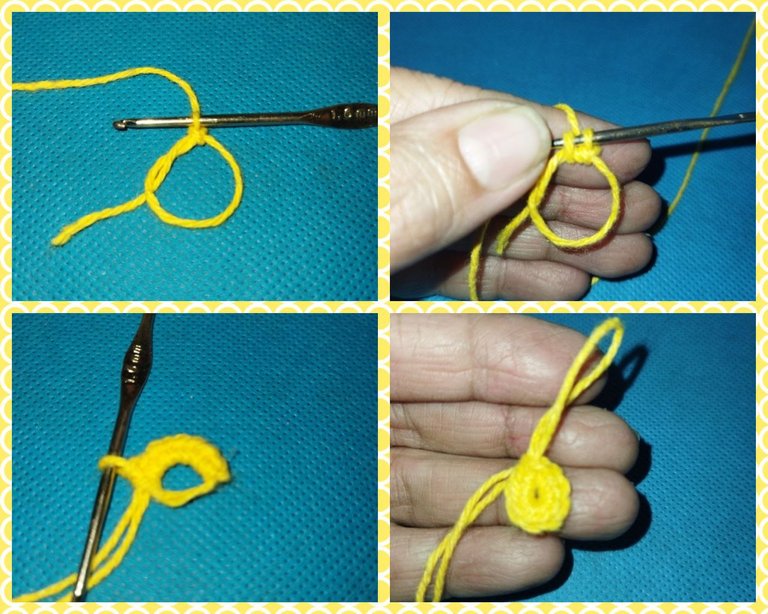
Empezamos realizando un anillo mágico con el color de hilo deseado, yo comencé con el amarillo. En él tejeremos 8 puntos bajos y unimos hasta formar la anilla para comenzar la labor.
Luego cerramos con un punto deslizado.
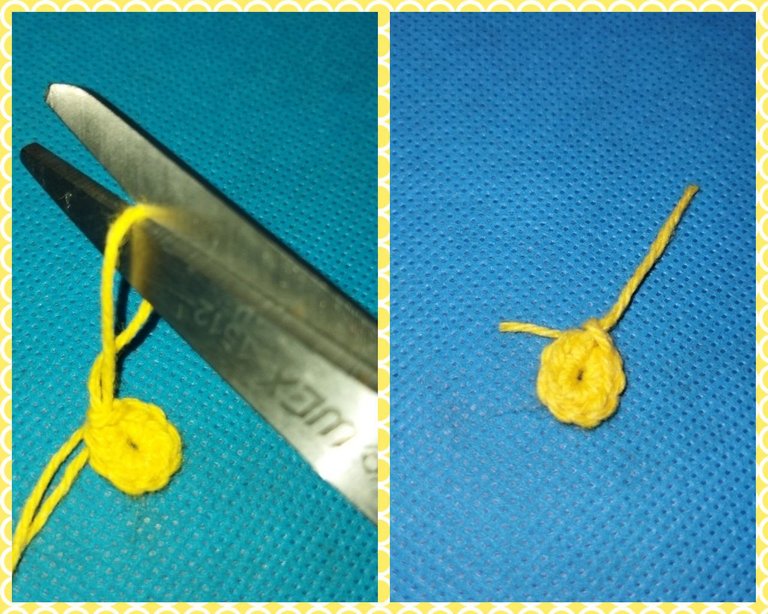
Halamos un poco de hilo y cortamos para comenzar la siguiente vuelta.
We started by making a magic ring with the desired thread color, I started with yellow. In it we will knit 8 single crochet and join until we form the ring to begin the work.
Then we close with a slip stitch.
We pull a little yarn and cut to start the next round.
Comenzamos la segunda vuelta con un hilo de diferente color. Yo utilicé el hilo rosado.
Introducimos la aguja en el primer punto bajo y realizamos una cadena de dos puntos para simular un punto alto sin cerrar. En ese mismo punto formamos dos puntos altos mas sin cerrar. Luego los cerramos los tres para formar el punto de piña.
Realizamos tres cadenas y en el siguiente punto bajo realizamos una piña más. Así sucesivamente hasta formar 8 piñas realizadas en cada punto bajo de la vuelta anterior. Rematamos con un punto deslizado y halamos el hilo y cortamos.
We start the second round with a different colored yarn. I used the pink thread.
We introduce the needle in the first single crochet and make a chain of two stitches to simulate a double crochet without closing. At that same point we form two more high points without closing. Then we close the three to form the pineapple stitch.
We make three chains and in the next single crochet we make one more pineapple. So on until you form 8 pineapples made in each single crochet of the previous round. We finish with a slip stitch and pull the thread and cut.
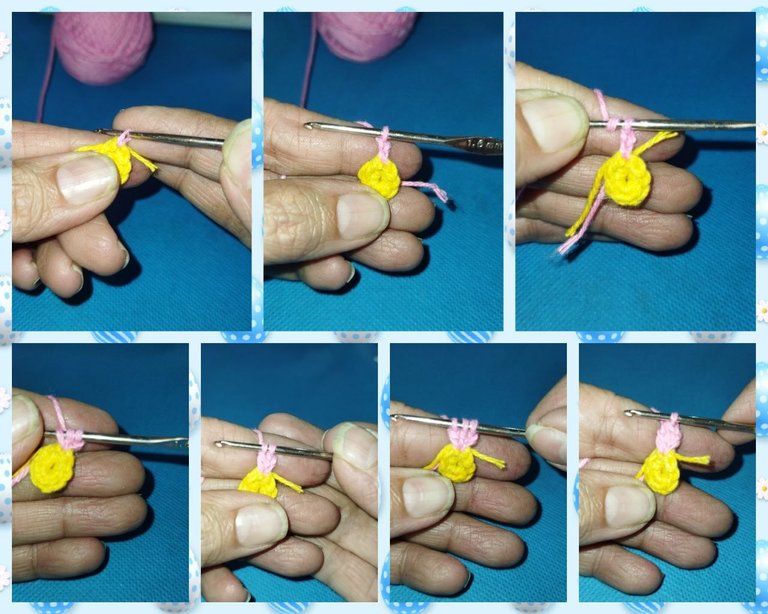
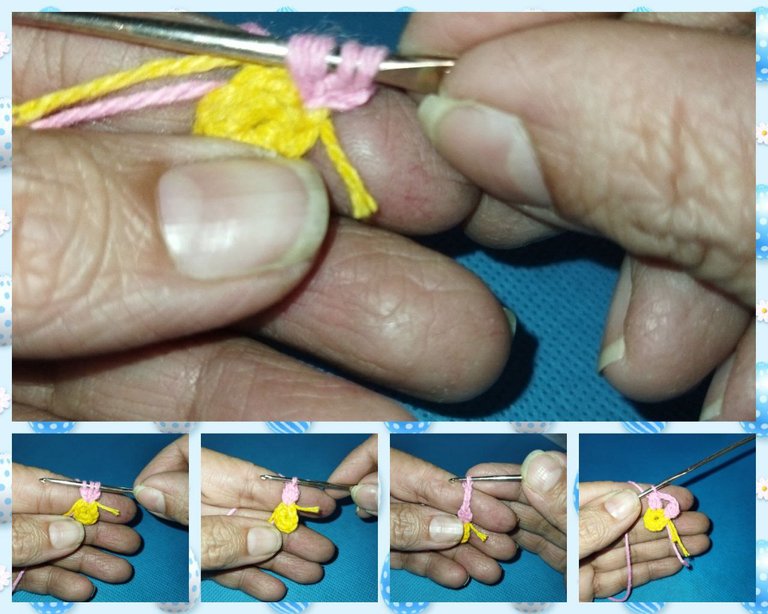
En la tercera vuelta, seleccionamos un hilo de otro color, utilicé el color morado. En esta vuelta vamos a trabajar en los arcos que se formaron entre las piñas. Tomamos la hebra de hilo y realizamos dos cadenas y un punto alto que cerramos juntos. Realizamos tres cadenas y en el mismo arco tejemos dos puntos altos para formar una piña con dos puntos altos.
Ahora realizamos la misma operación el próximo arco, sin realizar cadenas de separación de un arco a otro. Así continuamos hasta terminar la vuelta con un punto deslizante.
On the third round, we select a different color thread, I used purple. On this round we are going to work on the arches that were formed between the pineapples. We take the strand of yarn and make two chains and a double crochet that we close together. We make three chains and in the same arch we weave two double crochets to form a pineapple with two double crochets.
Now we perform the same operation on the next arch, without making separation chains from one arch to another. We continue like this until we finish the round with a slip stitch.
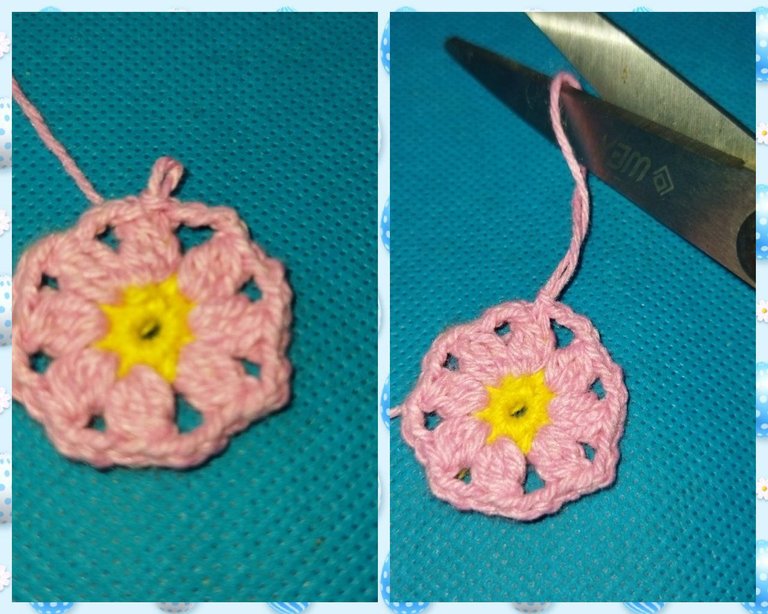
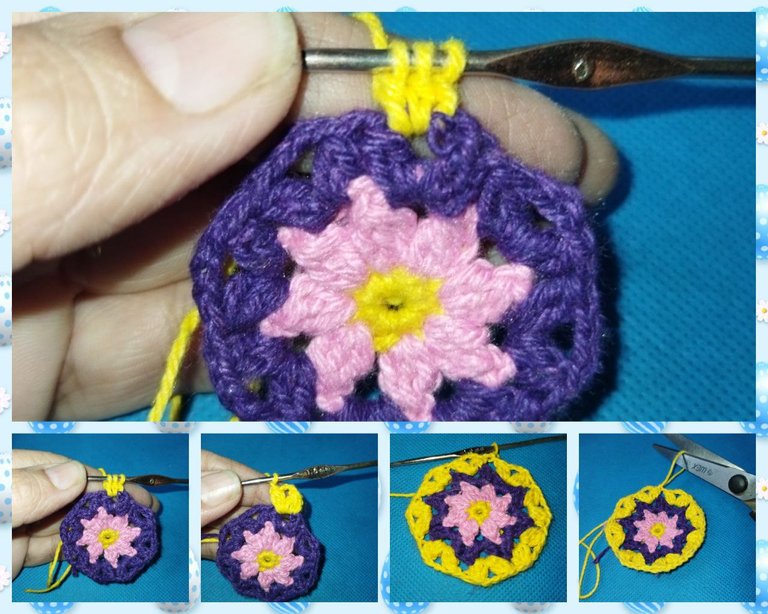
Ya en la cuarta vuelta, vamos a trabajar, al igual que la tercera vuelta con el color que iniciamos, en este caso el amarillo, con puntos altos en los arcos que se formaron con la separación de cada piña. pero realizaremos una piña con tres puntos altos.
Para comenzar las piñas en el arco siguiente, realizaremos una cadena de separación.
Already in the fourth round, we are going to work, like the third round with the color that we started, in this case yellow, with high points in the arches that were formed with the separation of each pineapple. but we will make a pineapple with three double crochet.
To start the pineapples in the next arch, we will make a separating chain.
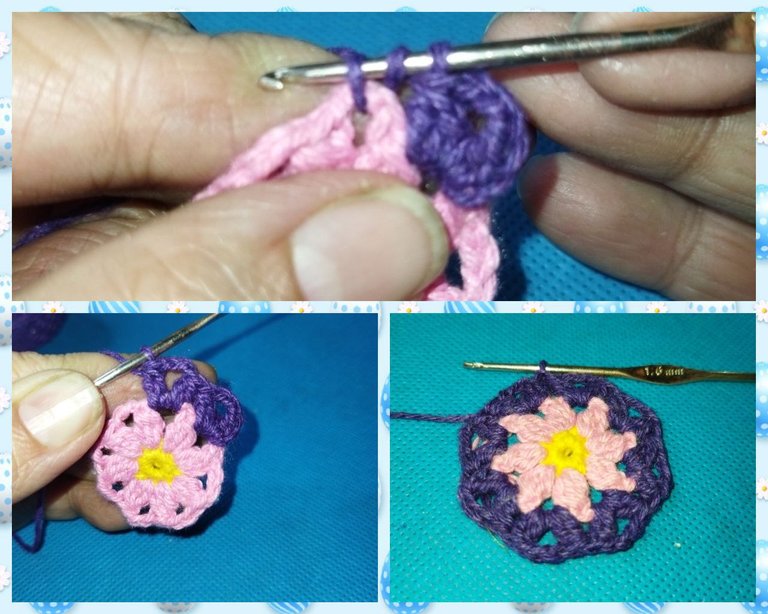
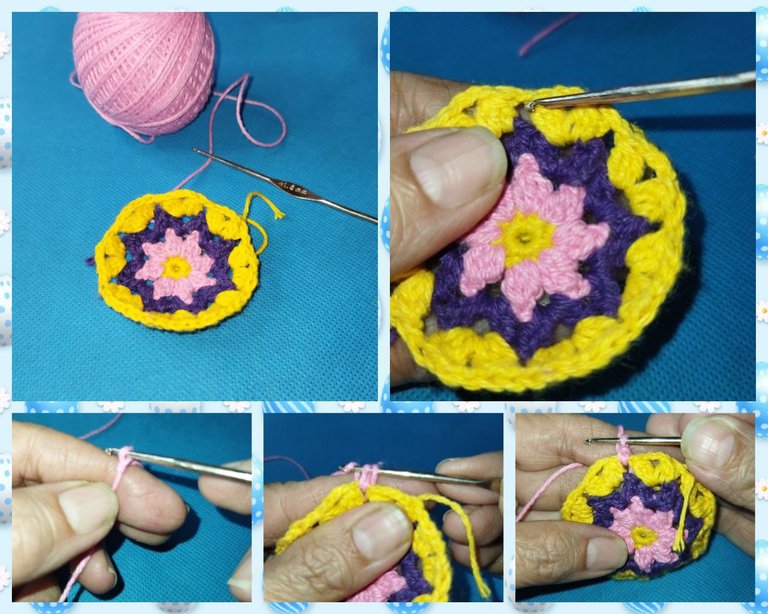
En la quinta vuelta realizaremos un abanico con ocho puntos altos y utilizamos el color de hilo de la segunda vuelta. Comenzamos tomando una hebra de hilo en la primera cadena de la vuelta anterior y realizamos un punto bajo. Ahora comenzamos a realizar el abanico en el arco con 8 puntos altos y cerramos en la cadena siguiente con un punto bajo. Trabajamos de igual manera los siguientes arcos para formar ocho abanicos en total. Cerramos con un punto deslizado y cortamos el hilo.
Para realizar este colgante necesitamos dos piezas iguales. Así que una vez realizada la primera pieza, procedemos a realizar la segunda.
On the fifth round we will make a fan with eight double crochets and we will use the thread color of the second round. We start by taking a strand of yarn in the first chain of the previous round and we make a single crochet. Now we begin to make the fan in the arch with 8 double crochet and we close in the next chain with a single crochet. We work the following arches in the same way to form eight fans in total. We close with a slip stitch and cut the thread.
To make this pendant we need two equal pieces. So once the first piece is done, we proceed to make the second.
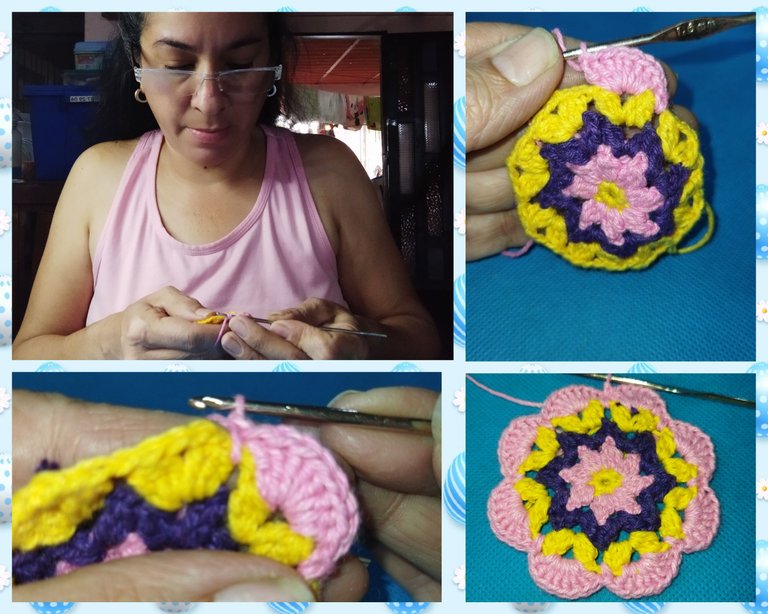
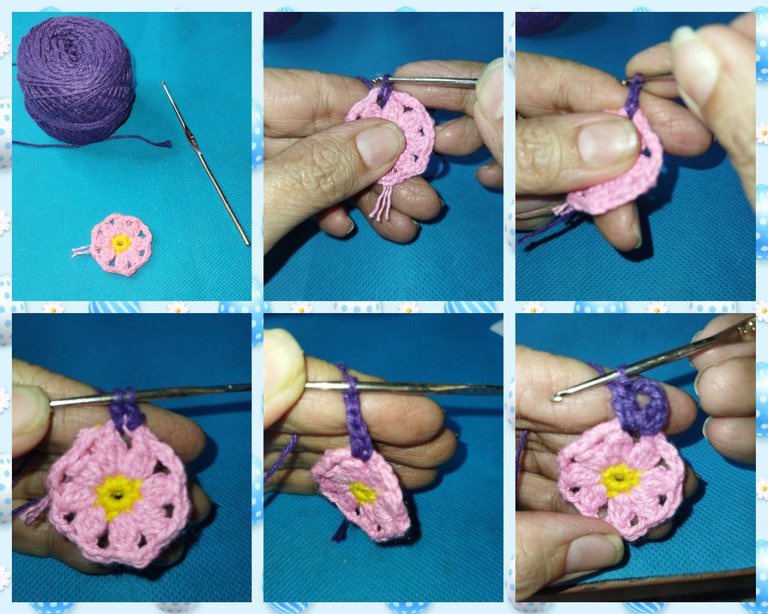
Una vez que tenemos las dos piezas, unimos de manera que queden revés con revés y sujetamos con los alfileres de costura.
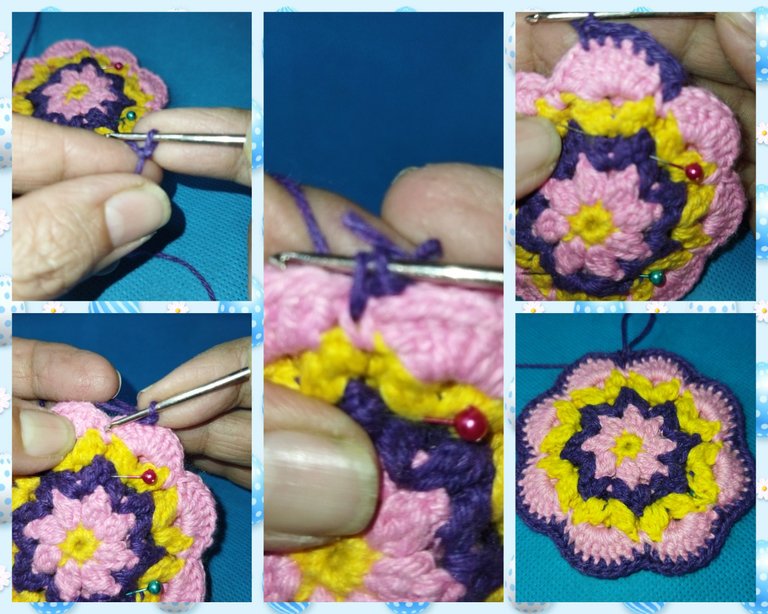
Comenzamos a unir las piezas realizando puntos bajos en cada punto de la vuelta anterior con hilo morado. Así hasta terminar la vuelta con un total de 72 puntos bajos.
Cerramos con un punto deslizado y realizamos una cadeneta de 20 puntos que cerraremos en el mismo punto de cierre de la vuelta, para formar el colgadero.
Ya tenemos formada la pieza principal de nuestro colgante. Ahora realizaremos los detalles para darle el toque final.
Once we have the two pieces, we join so that they are inside out and fasten with the sewing pins.
We begin to join the pieces by making single crochet in each stitch of the previous row with purple thread. So until the end of the round with a total of 72 single crochet.
We have already formed the main piece of our pendant. Now we will make the details to give it the final touch.
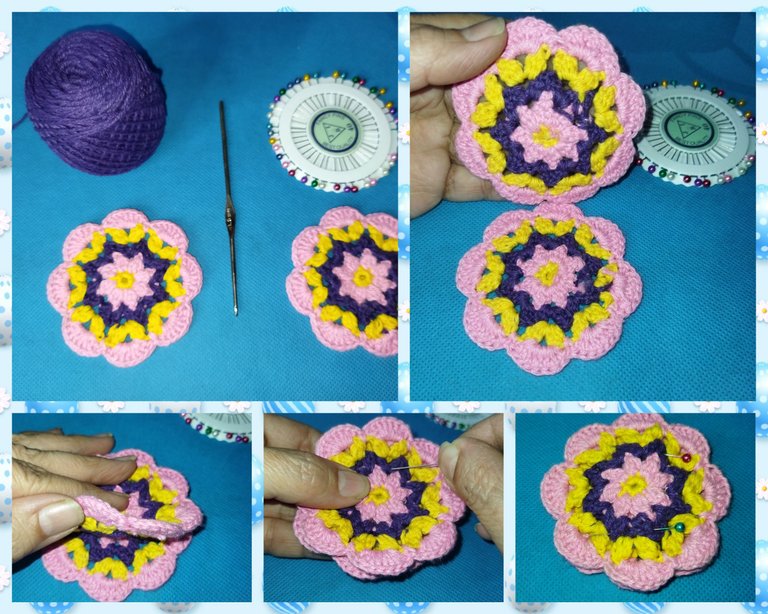
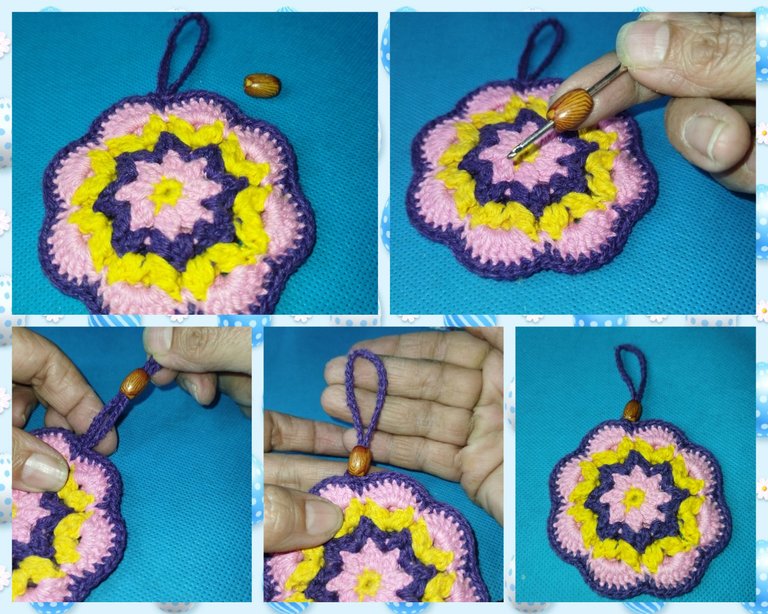
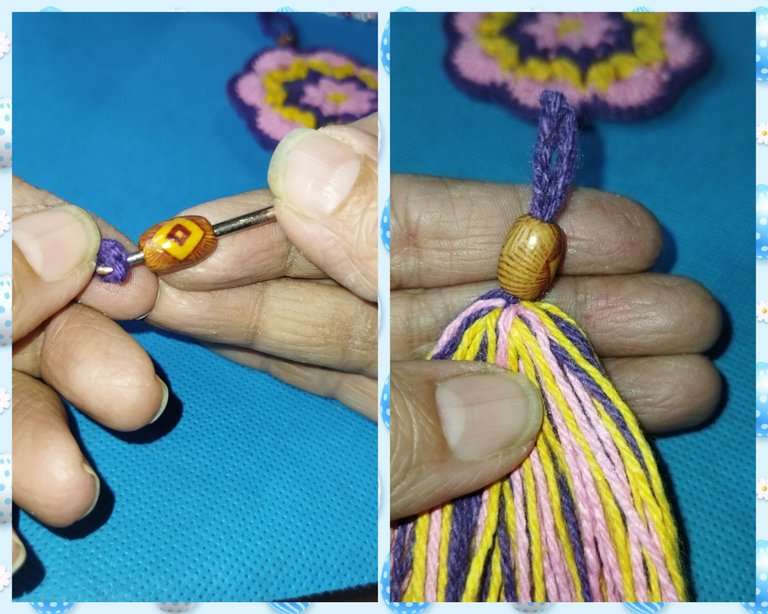
Adornamos el colgadero con una cuenta. Con la misma aguja de tejer introducimos la cadena por el hoyo de la cuenta y llevamos hasta el final.
We decorate the hanger with a bead. With the same knitting needle we introduce the chain through the hole of the account and we carry it to the end.
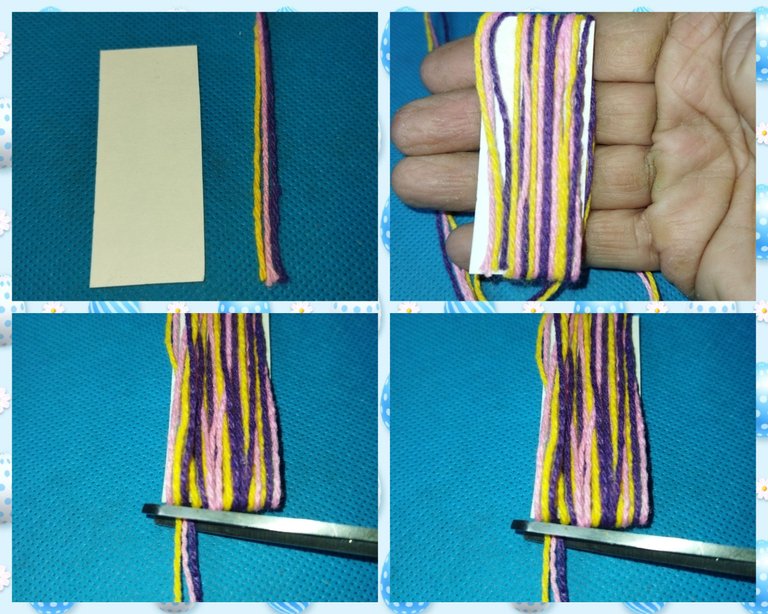
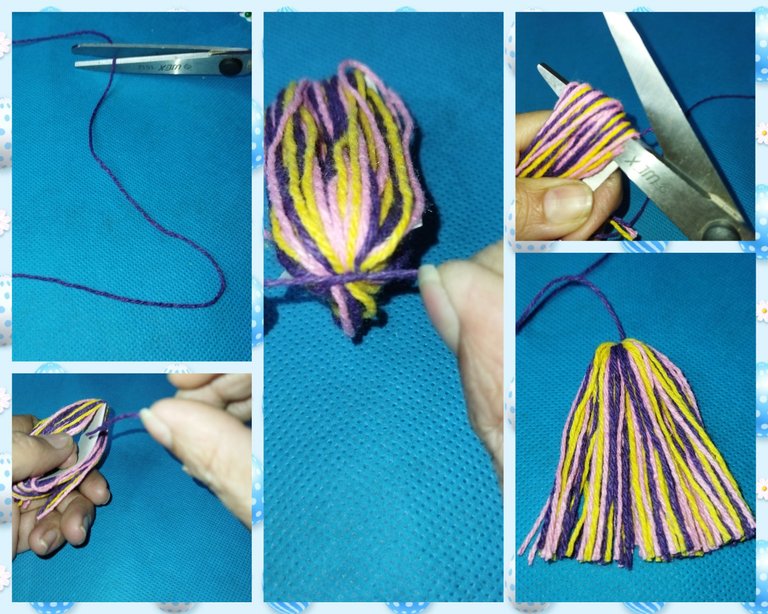
Ahora realizamos una borla, con los hilos que utilizamos para el tejido. En un cartón de 7 cm de largo, enrollamos los tres colores de hilos hasta dar 20 vueltas alrededor del cartón. Cotamos y con el hilo con el que terminamos la vuelta de la flor, realizamos un amarre bien fuerte en uno de los extremos de la borla. Cortamos con una tijera en la parte posterior, retiramos el cartón.
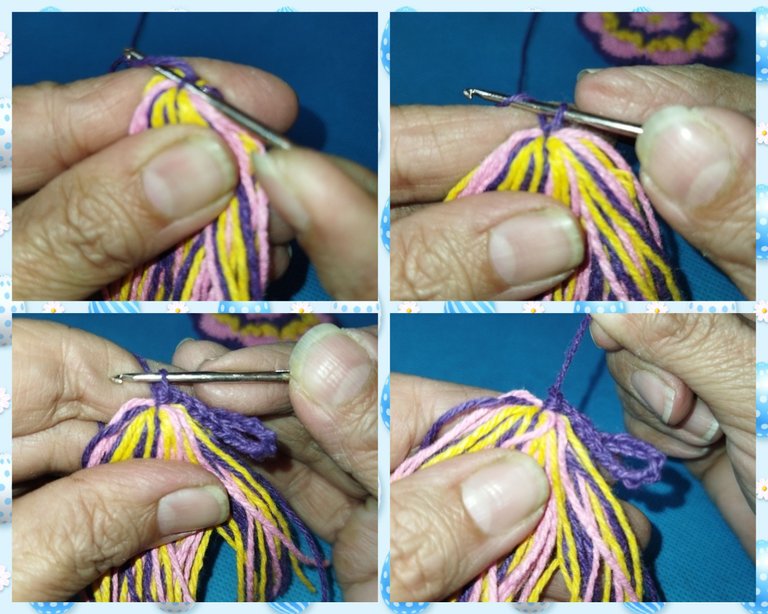
Luego tenemos una cadeneta de 14 puntos y enlazamos en la unión de la cadena.
Now we make a tassel, with the threads we use for weaving. In a 7 cm long cardboard, we wind the three colors of threads until we make 20 turns around the cardboard. We cut and with the thread with which we finished the turn of the flower, we made a very strong tie at one of the ends of the tassel. We cut with scissors on the back, remove the cardboard.
Then we have a chain of 14 stitches and we link at the join of the chain.
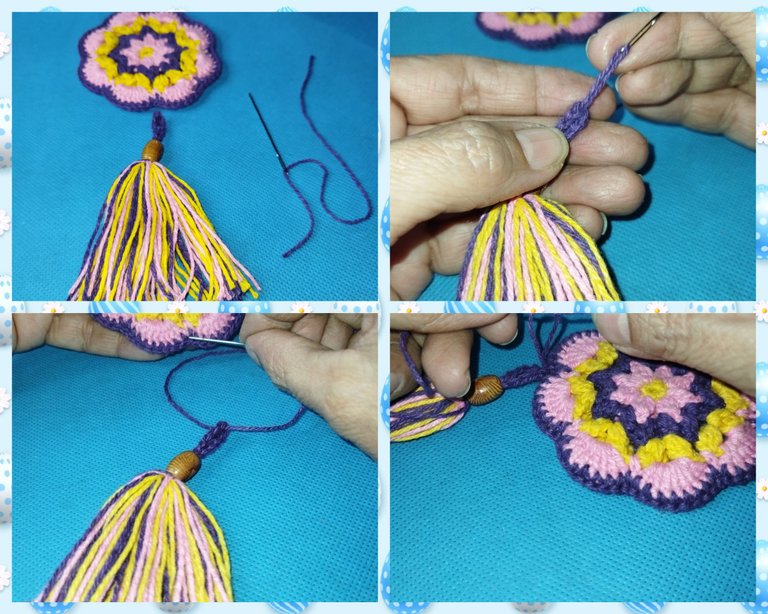
Colocamos la cuenta para adornar y con una hebra de hilo unimos a la flor del colgante.
We place the account to decorate and with a strand of thread we join the flower of the pendant.
Este es el resultado final. Un colgante hermoso. Si tienes algunas ideas para darle uso, me puedes dejar tu opinión e los comentarios. Nos vemos en la próxima,
This is the final result. A beautiful pendant. If you have some ideas to use it, you can leave me your opinion in the comments. See you next time,
Todas las fotos son de mi autoría, tomadas con mi teléfono POCO M3
Utilicé https://translate.google.com para la traducción
Para la edición de la portada y las fotos Canva y Picsart

Utilicé https://translate.google.com para la traducción
Para la edición de la portada y las fotos Canva y Picsart

Hola @linita me siento feliz al ver tu proyecto completo. Además de verte tan entretenida y concentrada en el tejido.
Los detalles del proceso están muy bien explicados al igual que las imágenes. Me gusta para usar en las maletas y bolsos, no es muy común ver un adorno tejido colgando en ellas. Excelente idea.
Gracias por elegir #needleworkmonday para contagiarnos de tu emoción al tejer. Eres bienvenida. Ya te veré como a mi amiga Vilma. Saludos. 🥳🐝🙋
Hi @linita I am happy to see your completed project. Also to see you so entertained and focused on knitting.
The details of the process are very well explained as are the pictures. I like it for use on suitcases and bags, it's not very common to see a woven ornament hanging on them. Excellent idea.
Thank you for choosing #needleworkmonday to infect us with your knitting excitement. You are most welcome. I'll see you as my friend Vilma, knitting while we chat. Greetings. 🥳🐝🙋
Hola @creacioneslelys , me encanta esa imagen de Vilma, jejejeje, La verdad es que si, se necesita mucha concentración para tejer, bueno ademas que también te entretiene porque tienes que estar al pendiente de no saltarte ningún punto. Lo que se me complica un poco es explicar el paso a paso para que las otras personas que nos leen puedan realizarlos, por ello trato siempre de tomar las fotos los más explícitas posible por si no me comprenden.
Te agradecemos el empeño. Yo lo entendí perfectamente. Saludos 😉
Such a beautiful Spring Pendant you've made, it' look so attractive and the colour combinations are just nothing short of excellence.
Thanks for taking us through the process of the making.
Greetings.
Hi @vickoly, I'm glad you liked it. One of the things that makes this piece most attractive is the variety of colors. Thanks for comment.
You're welcome, and that's good to know, keep up the good work, I love forward to seeing more masters from you.
Para hacer algo así realmente hay que ser un amante de las agujas! muy buen trabajo, excelente elaboración y muy buena tu publicación @linita
Hola @marytp20, la verdad es que si me gusta tejer. Es una actividad que relaja la mente y creo que todas las que tomamos en nuestras manos una aguja, a parte de crear cosas hermosas, también conseguimos paz. Te invito a probarla.
Hola @linita, es un proyecto muy bonito el que nos compartes el día de hoy. Es muy parecido a la temática de las mándalas, por su combinación de colores, me encanta la idea de usarlos en las carreras.
Gracias por compartir tu creación con nosotros.
Saludos.
Hola @kattycrochet siempre me han fascinado las cosas coloridas. Mis hijas se burlan de mi por ello, pero la diversidad de colores en algunos objetos es grandioso. Siempre que puedo combinar colores lo hago. Las mandalas son preciosas y son ideales para aplicar y combinar colores. Gracias por comentar. Saludos.
Wow, you did a perfect job and I love the work. thanks for sharing.
Grear crochet you made
Thanks you 😊
Congratulations @linita! You have completed the following achievement on the Hive blockchain and have been rewarded with new badge(s):
Your next target is to reach 250 posts.
You can view your badges on your board and compare yourself to others in the Ranking
If you no longer want to receive notifications, reply to this comment with the word
STOPTo support your work, I also upvoted your post!
https://twitter.com/obo2004/status/1515370560871567361
The rewards earned on this comment will go directly to the person sharing the post on Twitter as long as they are registered with @poshtoken. Sign up at https://hiveposh.com.
Wonderful tutorial @linita! I like the pendant very much!
Thank you very much. I'm glad you liked it. Greetings.