[ENG-ESP] MULTICOLOR CROCHET DOILY
WELCOME TO MY BLOG
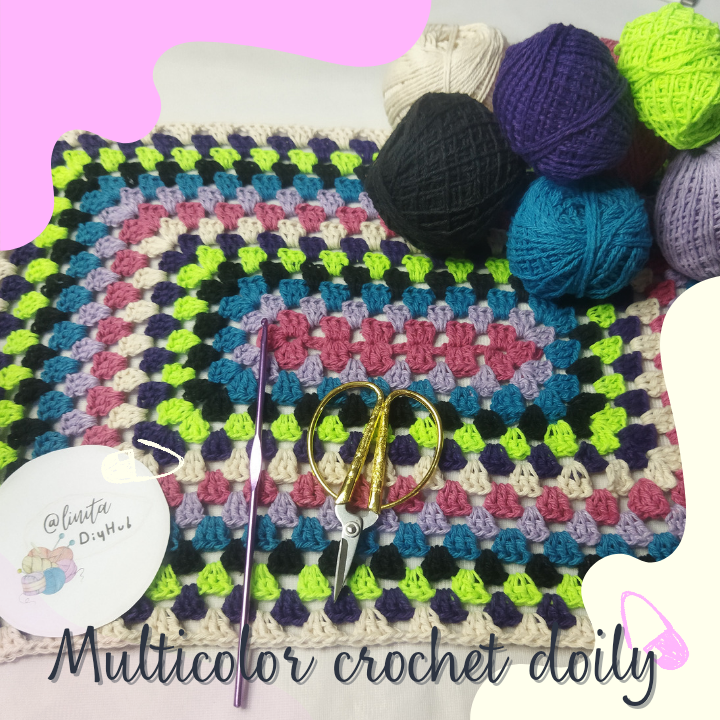
Hellooooo, hellooooooo! Greetings my dear DiyHub creatives. I think I got the fever for knitting, hehehehe, now I see needs everywhere, I need a tablecloth, I need gloves, hats, rugs, I even want a coat, the bad thing is that some are projects that require somewhat expensive threads to have a quality garment. But hey, not everything is bad and since you have to cover yourself as much as you can, I'll start with what I can do with what I have at my disposal.
Today's tutorial is about a mat that I need to use as an anti-slip mat for the kitchen. Whenever I am going to make salads, blend, or knead, I need to place a cloth or something under the bowl to immobilize it, and here is the solution. This mat will be used exclusively for my kitchen, but not only could I use it for this, we can also make it for other uses and make it in any combination you like. And since in my case, I only have a few threads of each color, I decided to make it multicolored. I hope you like it. Without further ado, let's get started.
BIENVENIDOS A MI BLOG
¡Holaaaa, holaaaaa! Saludos mis estimados creativos de DiyHub. Creo que me dio la fiebre por tejer, jejejeje, ahora veo necesidades por todos lados, necesito un mantel, necesito uno guantes, gorros, tapetes, hasta un abrigo quiero, lo malo es que algunos son proyectos que requieren hilos algo costosos para tener una prenda de calidad. Pero bueno, no todo es malo y como hay que abrigarse hasta donde alcance a cobija empezaré por aquel que puedo hacer con lo que tengo a disposición.
El tutorial de hoy se trata de un tapete que necesito para usar como anti resbalante para la cocina. Siempre que voy a hacer ensaladas, a batir, a amasar, necesito colocar debajo del bol una paño o algo que lo inmovilice, u he aquí la solución. Este tapete será de uso exclusivo para mi cocina, pero no solo podría usarlo para esto, también podemos realizarlo para otros usos y hacerlo de la combinación que te guste. Y como en mi caso, solo tengo pocos hilos de cada color decidí hacerlo multicolor. Espero te guste. Sin más, comencemos.
MATERIALS
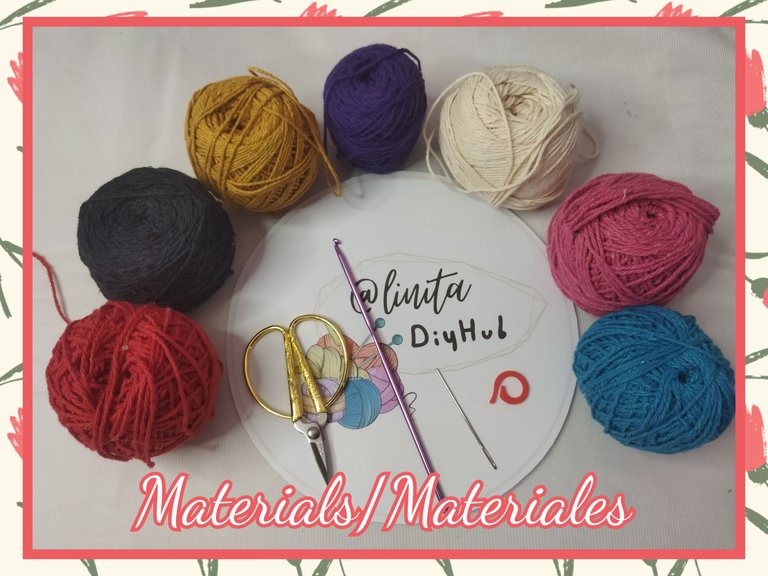
- Cotton or wick threads (fuchsia, lilac, turquoise blue, black, green, purple, bone)
- 3.5 mm knitting needles
- Wool needle
- Scissors
MATERIALES
- Hilos de algodón o pabilo (fucsia, lila, azul turquesa, negro, verde, morado, hueso)
- Agujas para tejer de 3,5 mm
- Aguja lanera
- Tijera
STEP BY STEP // PASO A PASO
LAP Nº 1
To make this mat we must know four basic crochet stitches, which are: slip stitch, chain stitch, double stitch and slip stitch.
We start using fuchsia thread, making a chain of 24 stitches. 20 stitches that will be the base of the mat and the remaining 4 stitches, which will replace the first double crochet of the next round.
VUELTA Nº 1
Para realizar este tapete debemos conocer cuatro puntos básicos de crochet que son: punto corredizo, punto cadena, punto alto y punto deslizado.
Comenzamos usando e hilo color fucsia, realizando una cadena de 24 puntos. 20 puntos que será la base del tapete y los 4 puntos restantes, que sustituirá al primer punto alto de la siguiente vuelta.

LAP Nº 2
We count 4 stitches in the chain and right at that point we make the first double crochet. Then in the next chain we make another double crochet, to complete 3 double crochets in series.
VUELTA Nº 2
Contamos 4 puntos en la cadena y justo en ese punto realizamos el primer punto alto. Luego en la cadena siguiente realizamos otro punto alto, para completar 3 puntos altos en serie.
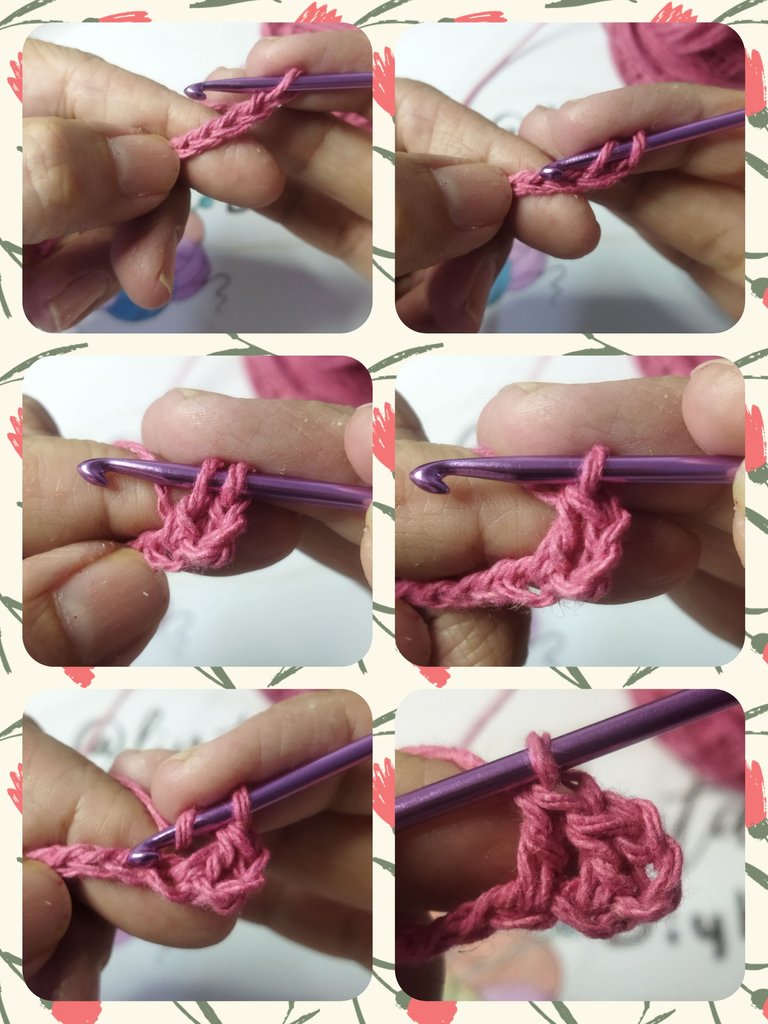
We make two chain stitches and make three double crochets in the same previous chain stitch. Again we make two chain stitches and at the same point we make three more double crochets. With this series we begin by making what will be the corners of the mat, which will be rectangular in shape.
Realizamos dos puntos cadena y realizamos tres puntos altos en el mismo punto cadena anterior. Nuevamente realizamos dos puntos cadenas y en el mismo punto realizamos tres puntos altos más. Con esta serie comenzamos realizando lo que serán las esquinas del tapete, que quedará de forma rectangular.
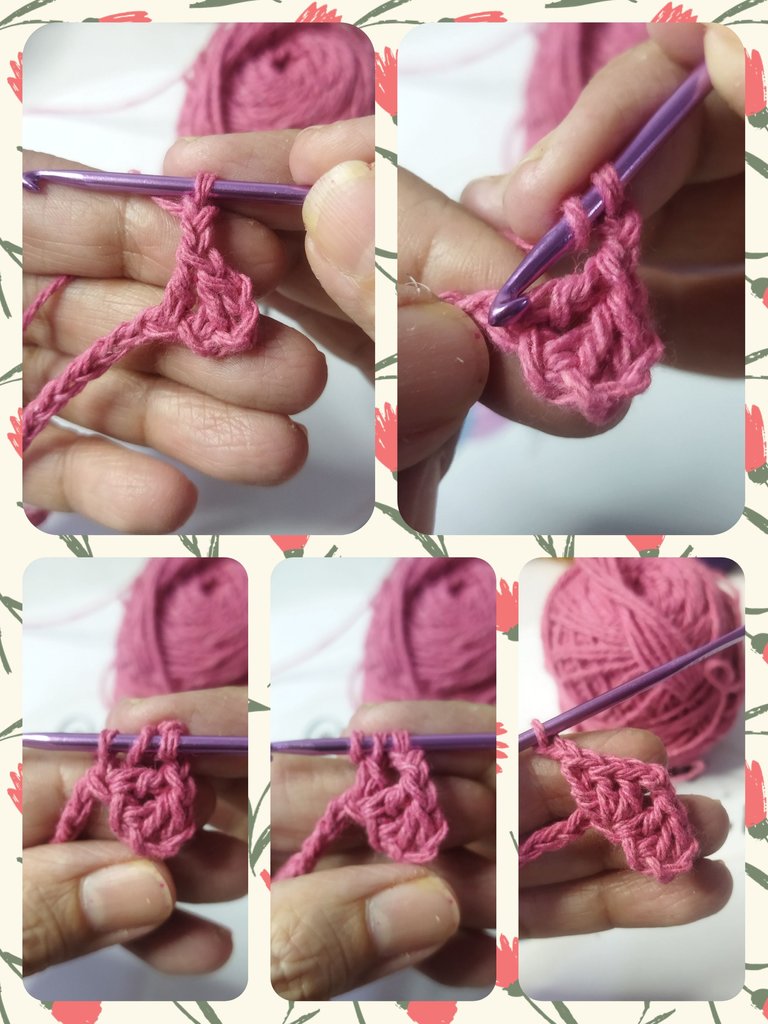
We pick up a chain, count 4 stitches of the base chain and insert the needle into that point and make 3 double crochets.
Levantamos una cadena, contamos 4 puntos de la cadena base e insertamos la aguja en ese punto y realizamos 3 puntos altos.
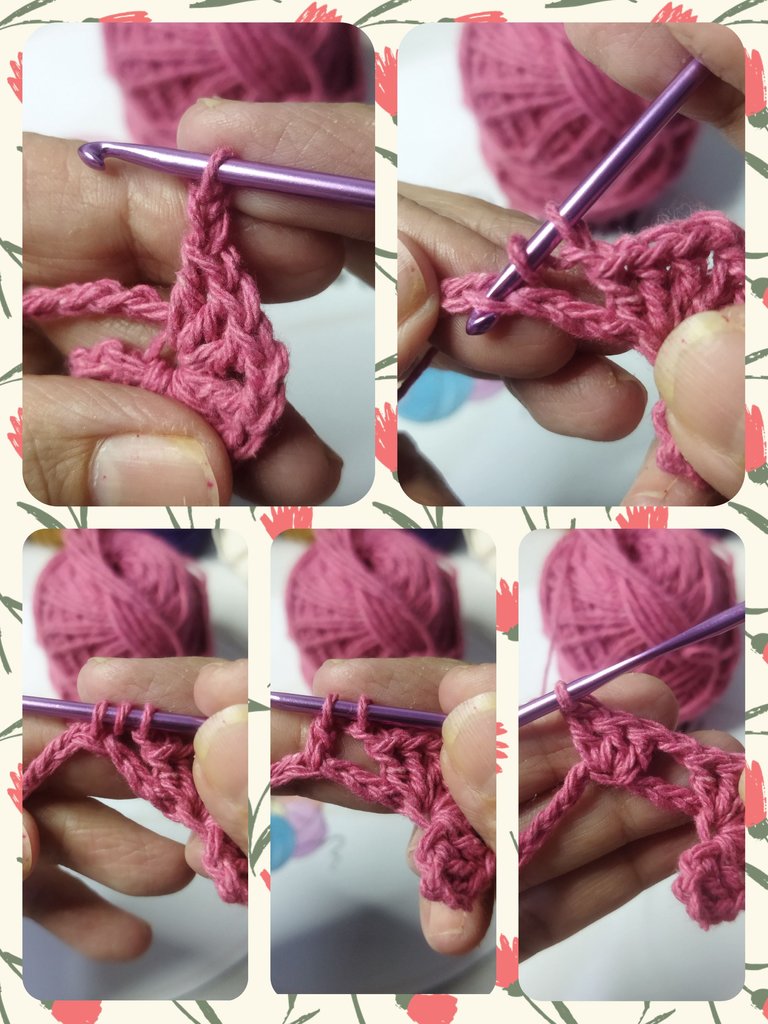
We repeat the previous process 3 more times to obtain 5 series of 3 double crochets, until we reach the last link of the base chain.
Repetimos el proceso anterior 3 veces más para obtener 5 series de 3 puntos altos, hasta llegar al útimo eslabón de la cadena base.
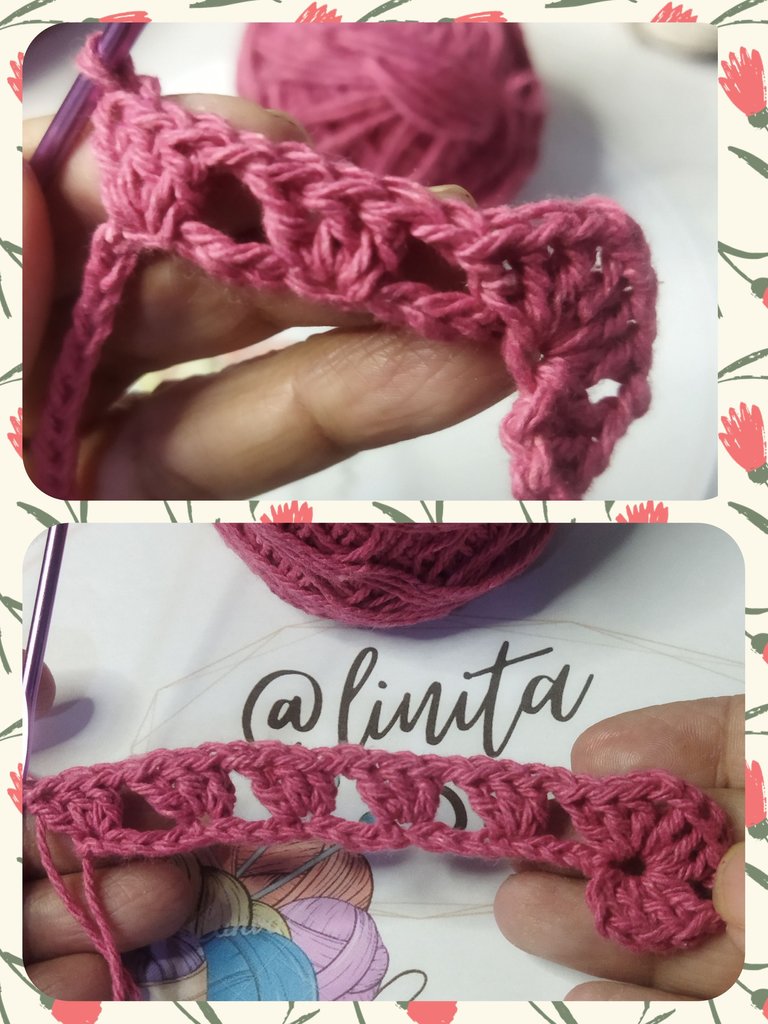
We make two chain stitches and at the same point we are going to make two more series of three double crochets and two chains separating the series to complete what will be another corner of the mat.
Hacemos dos puntos cadenas y en el mismo punto vamos a realizar dos series más de tres puntos altos y dos cadenas de separación entre serie para completar lo que será otra esquina del tapete.
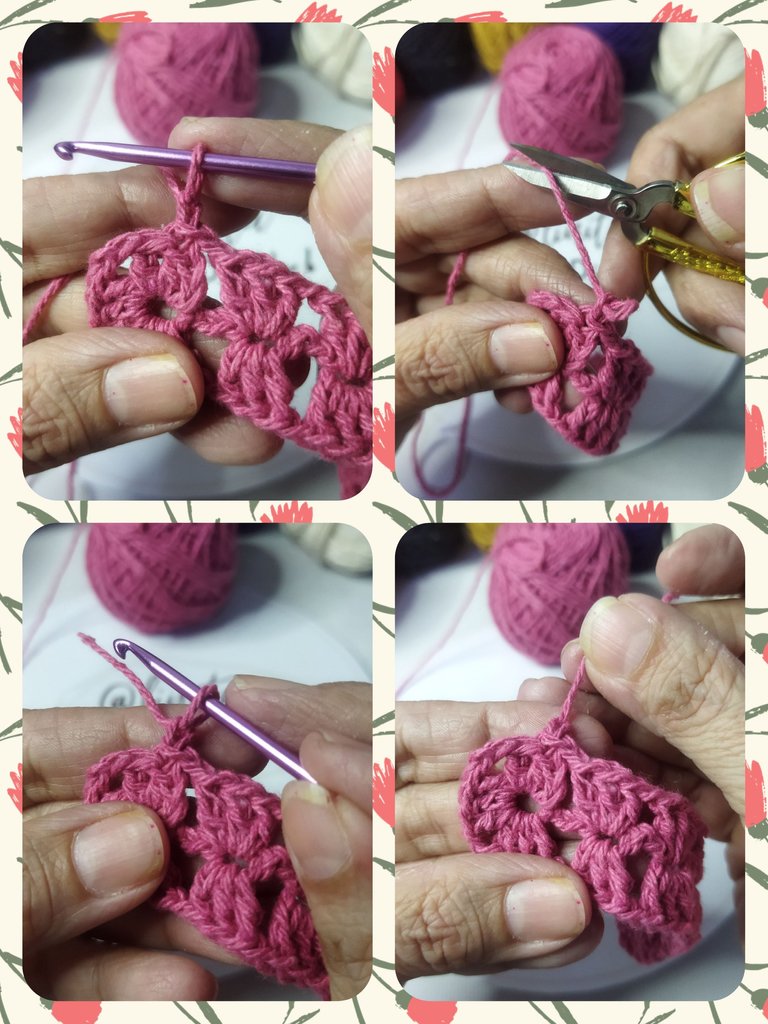
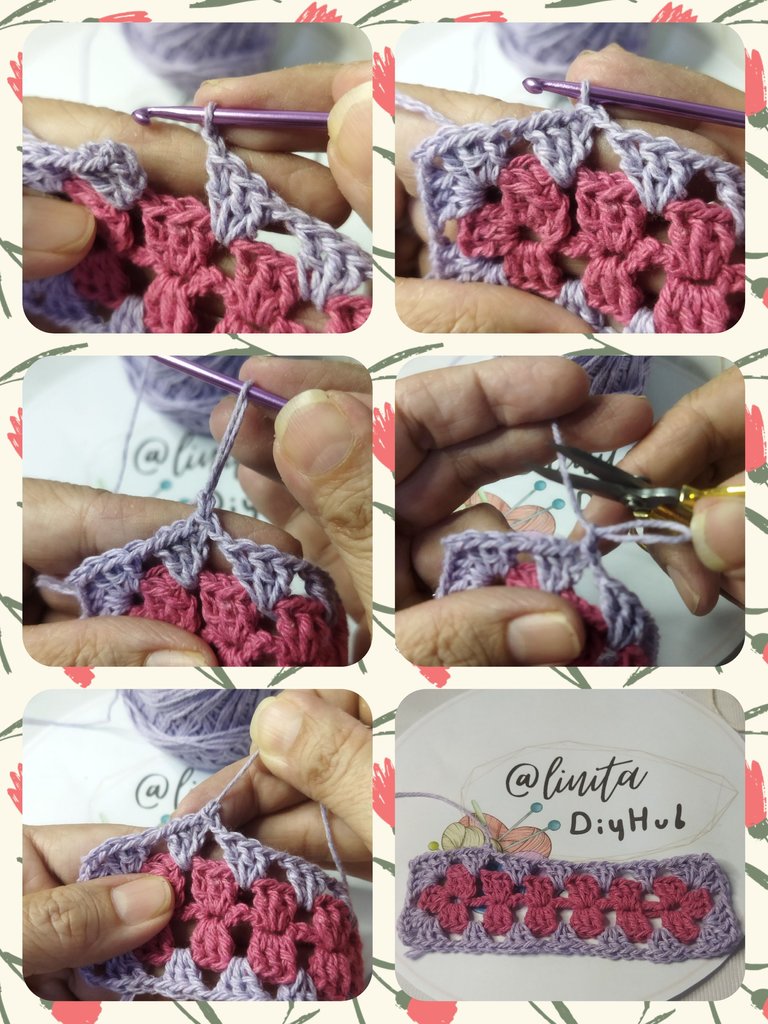
Now what we are going to do is make a separating chain stitch and where we made the series of double crochets from the previous round, in that same point we are going to make 3 double crochets, a separating chain and three double crochets in the next one and so on. until the end of the lap.
Ahora lo que vamos a hacer será realizar un punto cadena de separación y donde realizamos la serie de puntos altos de la vuelta anterior, en ese mismo punto vamos a hacer 3 puntos altos, una cadena de separación y tres puntos altos en el siguiente y así hasta finalizar la vuelta.
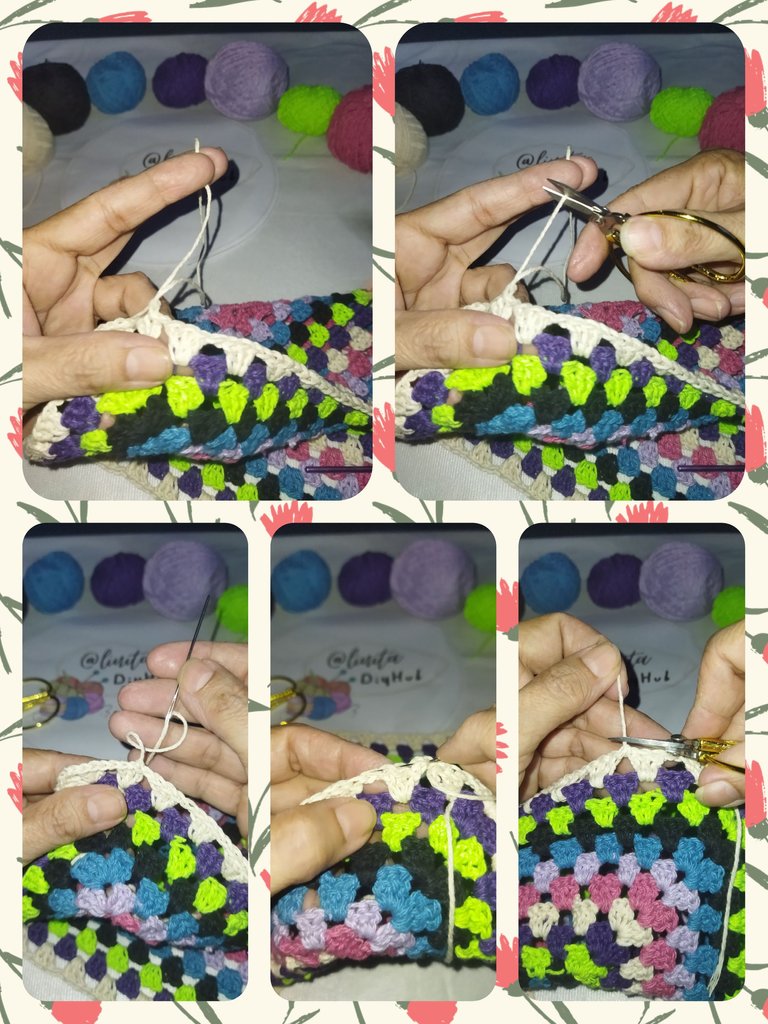
We close with a slip stitch, pick up a chain, cut the thread and pull to secure the fabric. We hide the remaining thread between the fabric with the wool needle.
NOTE: If you are going to work with the same thread, it is not necessary to cut, we follow the continuity of the fabric.
Cerramos con un punto deslizado, levantamos una cadena, cortamos el hilo y halamos para asegurar el tejido. El hilo restante lo escondemos entre el tejido con la aguja lanera.
NOTA: Si vas a trabajar con el mismo hilo no es necesario cortar, seguimos la continuidad del tejido.
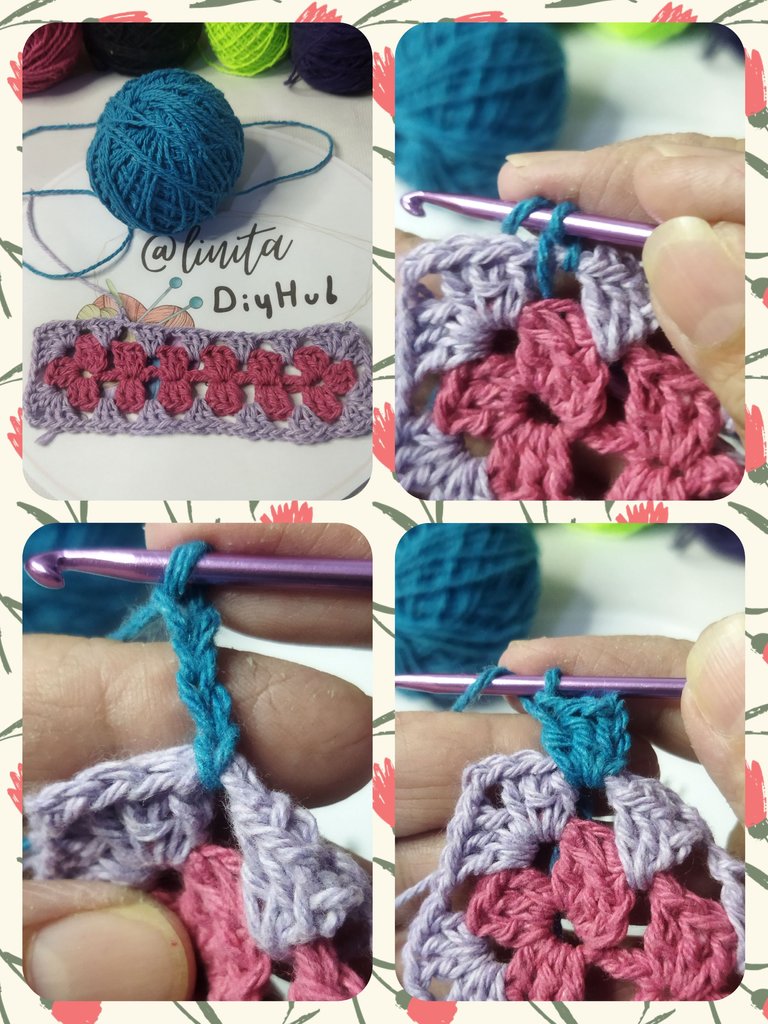
LAP Nº 3
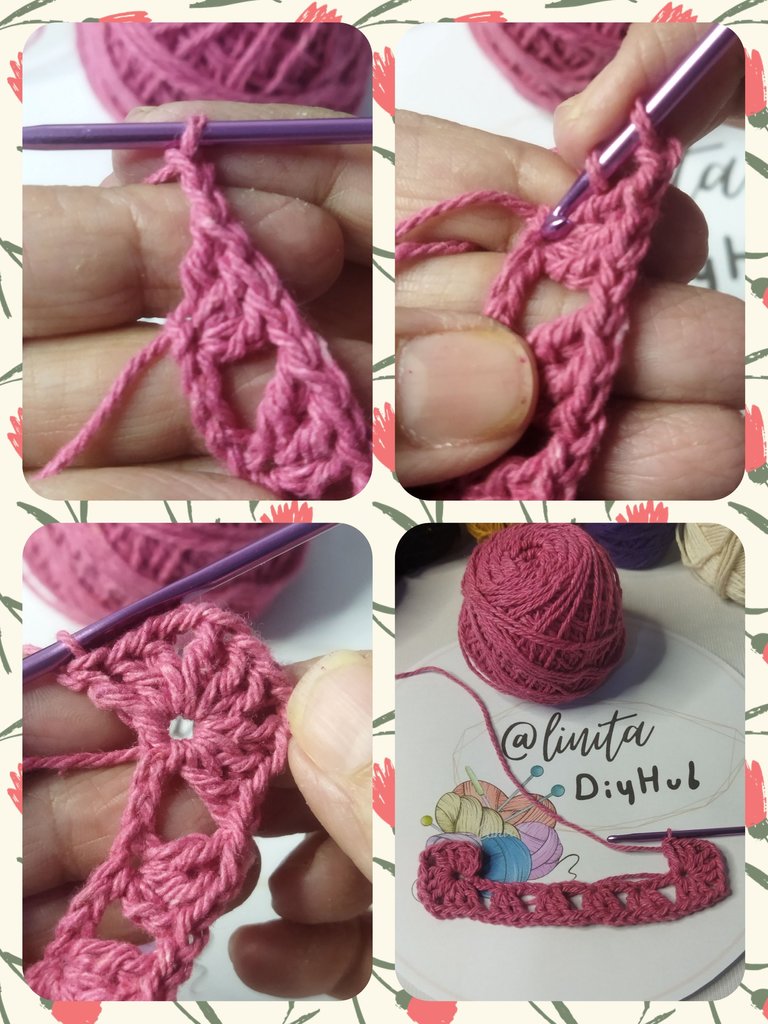
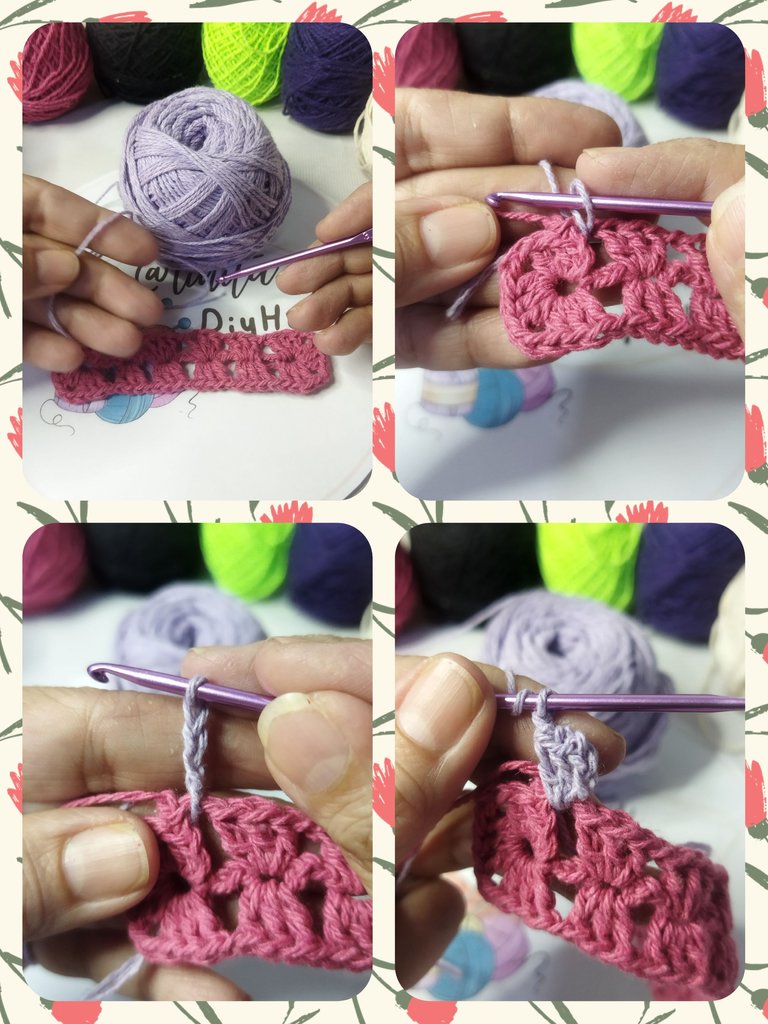
In this round we make the change to the lilac thread. We take the yarn and start working in the space between the last series of double crochets and the corner one. We make a slipped stitch and lift 3 chains to replace the first double crochet. Next we make two more double crochets in the same space.
VUELTA Nº 3
En esta vuelta realizamos el cambio al hilo color lila. Tomamos la hebra y empezamos a trabajar en el espacio que está entre a última serie de puntos altos y el de esquina. Realizamos un punto deslizado y levantamos 3 cadenas en sustitución del primer punto alto. Seguidamente realizamos dos puntos altos más en el mismo espacio.
We make a separation chain stitch and work in the separation space of the previous round. At this point we are going to make the corner of the mat and we are going to work three double crochets, two chain stitches and again three double crochets, in the same space.
We make a chain stitch and work the next corner that consists of three double crochets, two chain stitches and three double crochets again, in the same space.
- Realizamos un punto cadena de separación y trabajamos en el espacio de separación de a vuelta anterior. En este punto vamos a realizar la esquina del tapete y vamos a trabajar tres puntos altos, dos puntos cadenas y nuevamente tres puntos altos, en el mismo espacio.
- Realizamos un punto cadenas y trabajamos la siguiente esquina que consiste en tres puntos altos, dos puntos cadena y nuevamente tres puntos altos, en el mismo espacio.
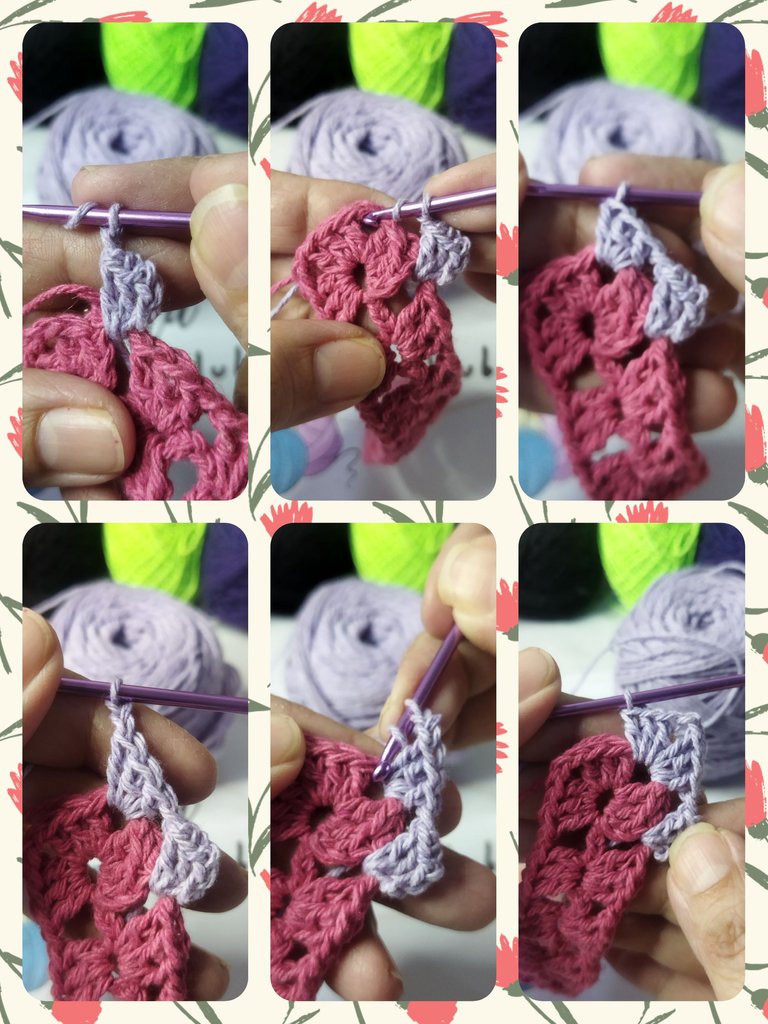
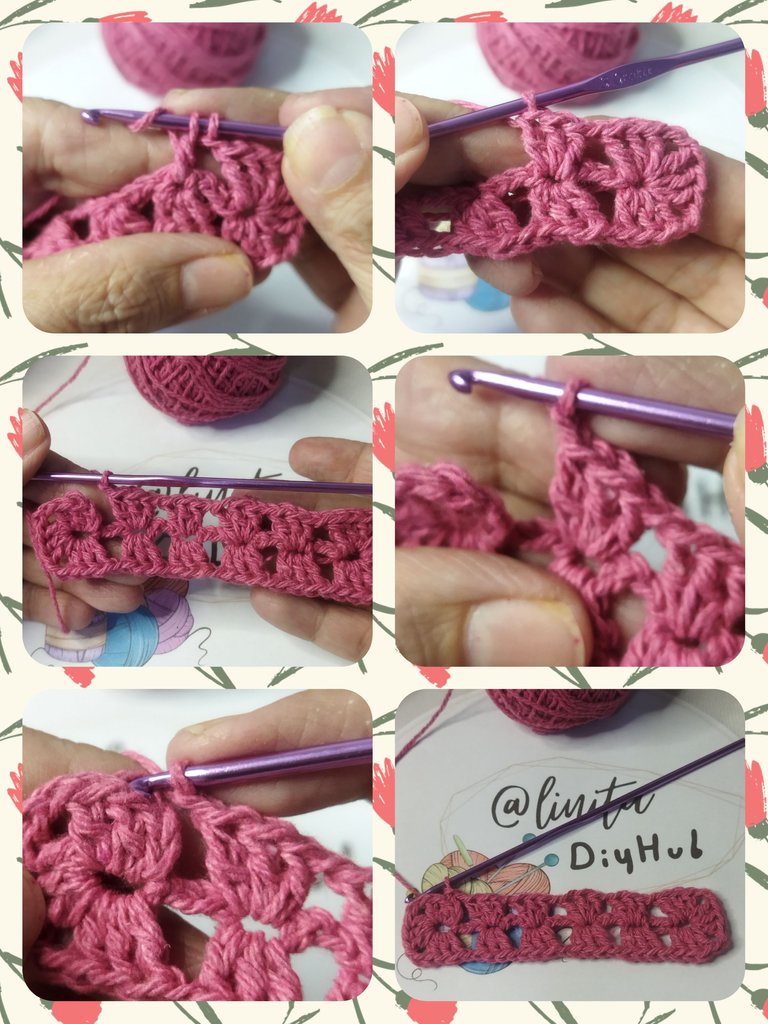
We continue knitting with the same stitches until finishing the round. Remembering that when we go to work in the corners, we must make three double crochets, two chains and then three double crochets.
The rest of the round is three double crochets, one chain stitch separating and three double crochets in the next space of the previous round.
Continuamos el tejido con los mismos puntos hasta finalizar a vuelta. Recordando que cuando vayamos a trabajar en las esquinas, debemos hacer tres puntos altos, dos cadenas y seguidamente tres puntos altos.
El resto de a vuelta es de tres puntos altos un punto cadena de separación y tres untos altos en el siguiente espacio de la vuelta anterior.
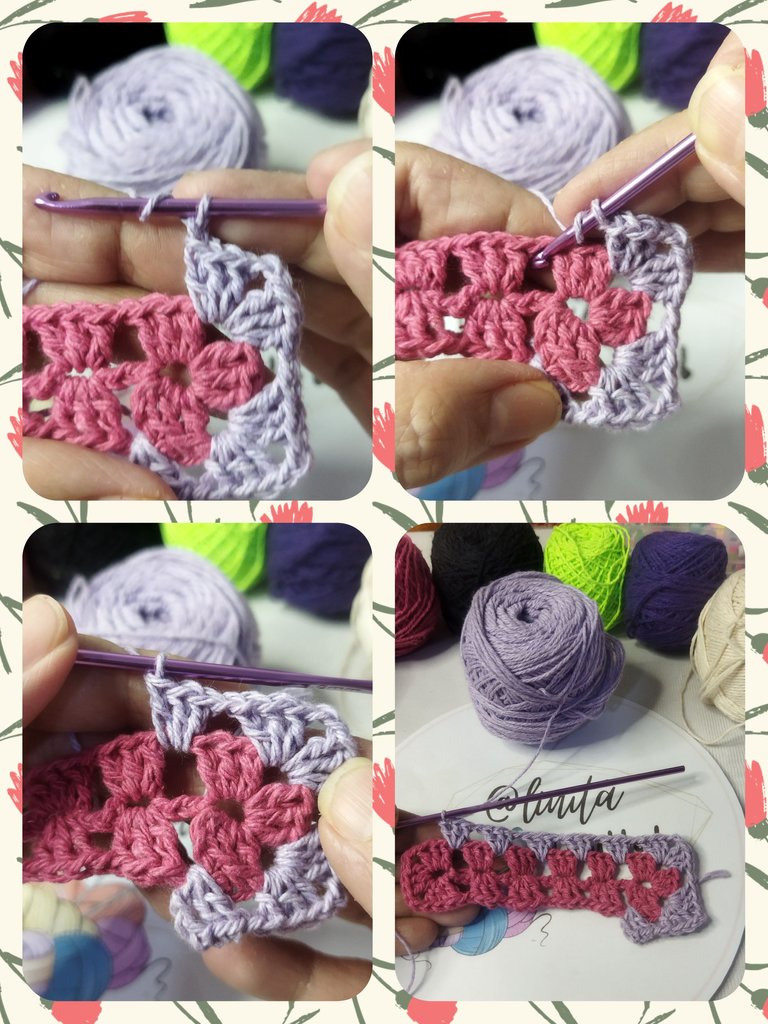
We close with a slip stitch, pick up a chain, cut the thread and pull to secure the fabric. We hide the remaining thread between the fabric with the wool needle.
Cerramos con un punto deslizado, levantamos una cadena, cortamos el hilo y halamos para asegurar el tejido. El hilo restante lo escondemos entre el tejido con la aguja lanera.
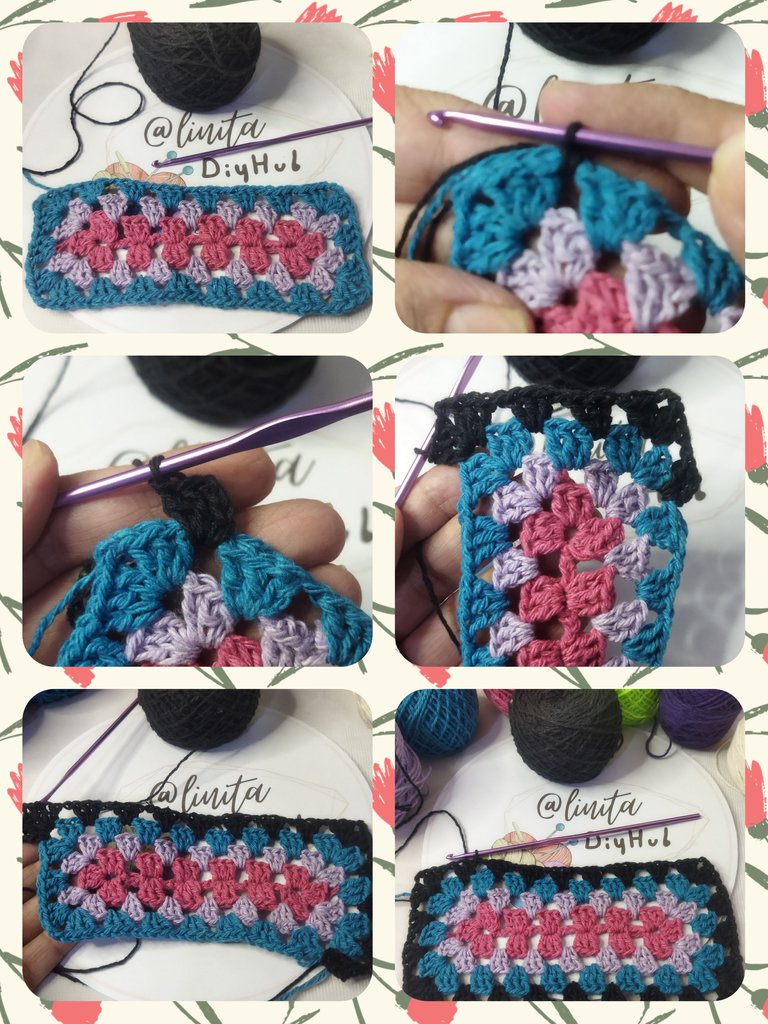
LAP Nº 4
We changed the thread again, this time for turquoise blue. We take the strand of thread and in the space before the closing of the row we make a slipped stitch. We lift three chains and make two double crochets.
VUELTA Nº 4
Realizamos nuevamente cambio de hilo, esta vez por el azul turquesa. Tomamos la hebra de hilo y en el espacio anterior al del cierre de la vuelta realizamos un punto deslizado. Levantamos tres cadenas y realizamos dos puntos altos.
We lift a chain and in the next space we make the corner, which consists of three double crochets, two chains and again three double crochets.
We separate with a chain stitch and in the next space we make three double crochets and another chain.
We continue with the other corner in the same way as the previous one, three double crochets, two chains and three double crochets.
We continue knitting the same as the previous round, three double crochets and a chain in the next space and so on until completing the round.
Levantamos una cadena y en el siguiente espacio realizamos la esquina, que consta de tres puntos altos, dos cadenas y nuevamente tres puntos altos.
Separamos con un punto cadena y en el siguiente espacio realizamos tres puntos altos y otra cadena.
Continuamos con la otra esquina de la misma forma que la anterior, tres puntos altos, dos cadenas y tres puntos altos.
Continuamos el tejidos igual a la vuelta anterior,tres puntos altos y una cadena en el espacio siguiente y así sucesivamente hasta culminar la vuelta.
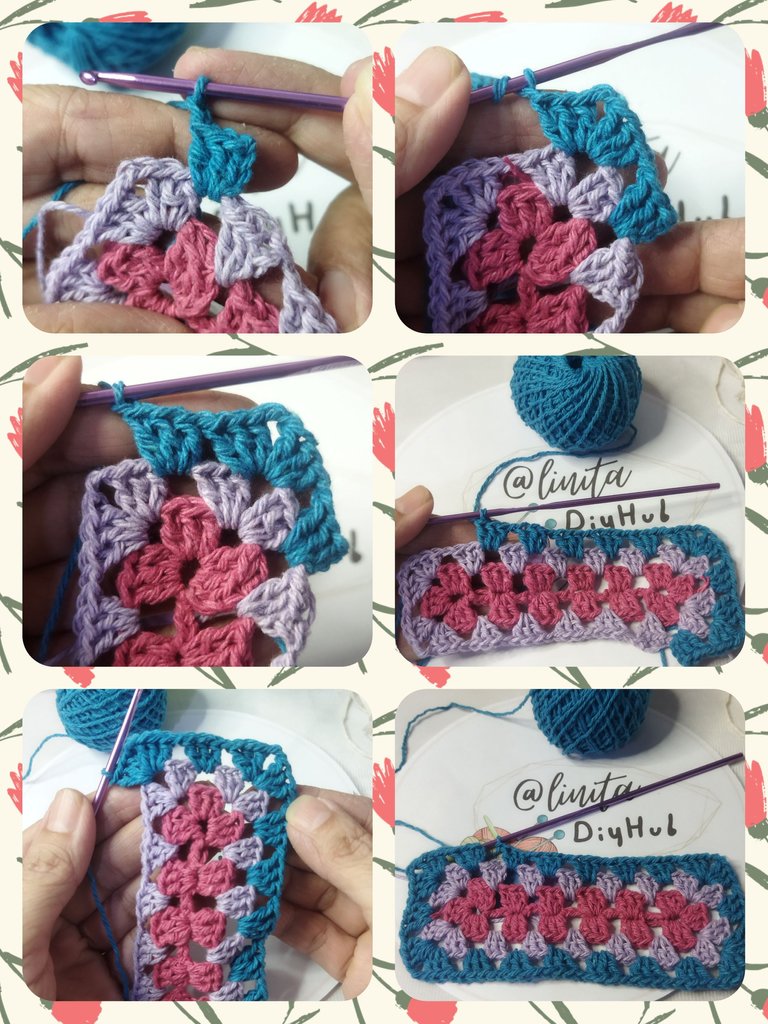
We close with a slip stitch, pick up a chain, cut the thread and pull to secure the fabric. We hide the remaining thread between the fabric with the wool needle.
Cerramos con un punto deslizado, levantamos una cadena, cortamos el hilo y halamos para asegurar el tejido. El hilo restante lo escondemos entre el tejido con la aguja lanera.
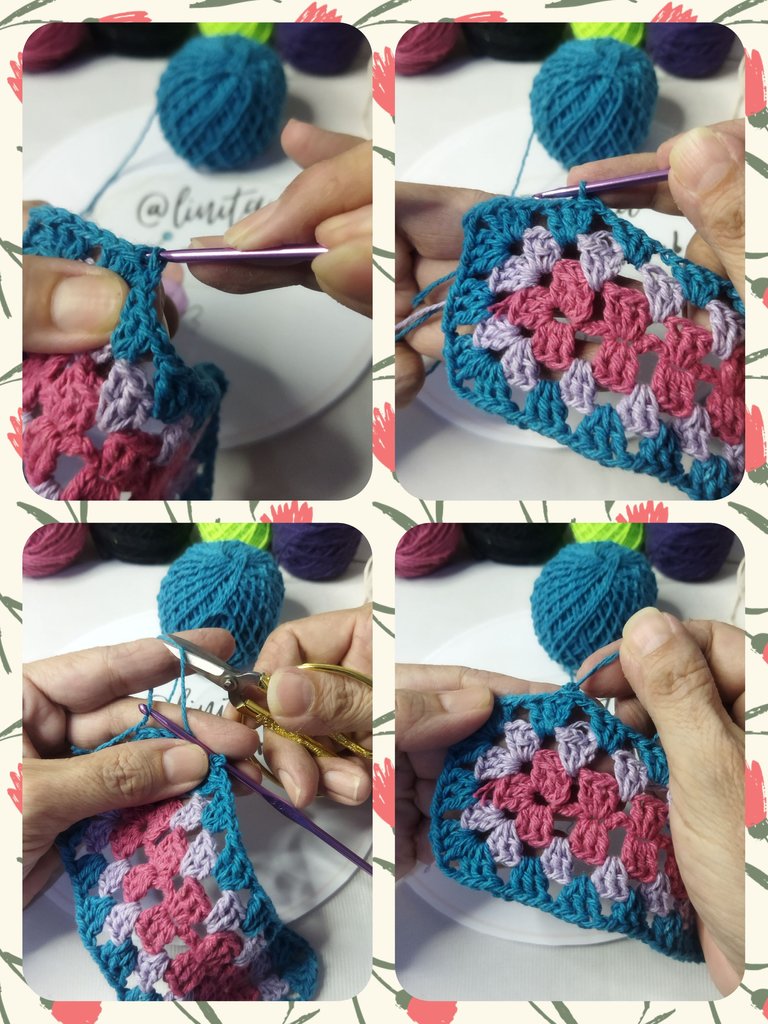
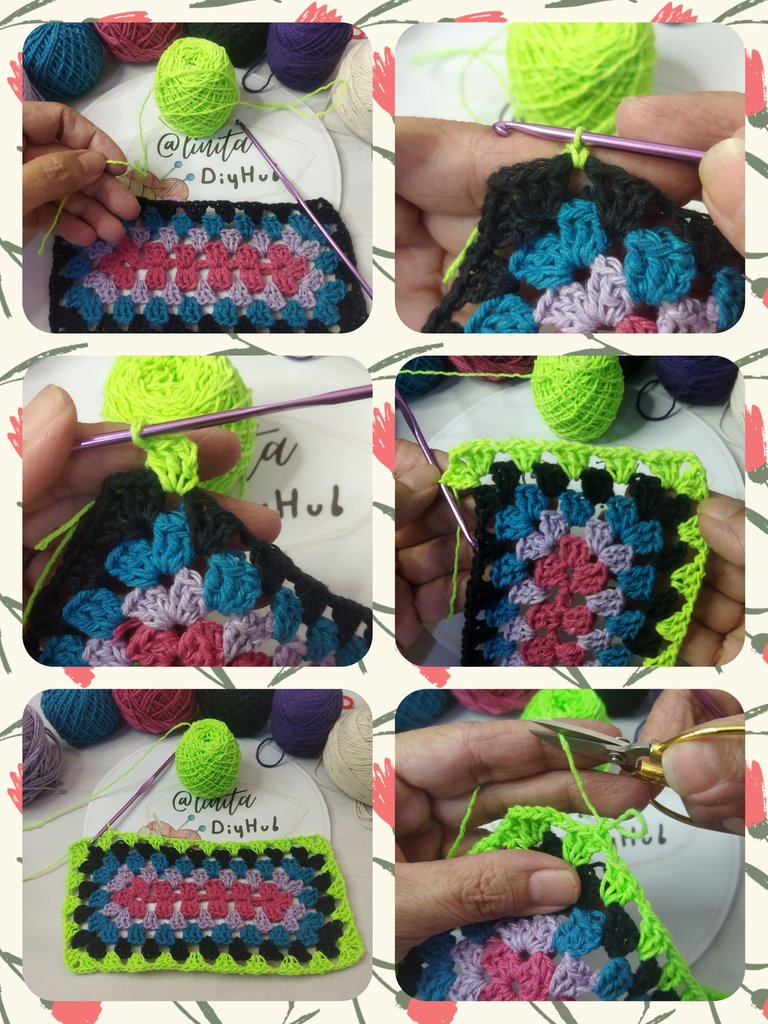
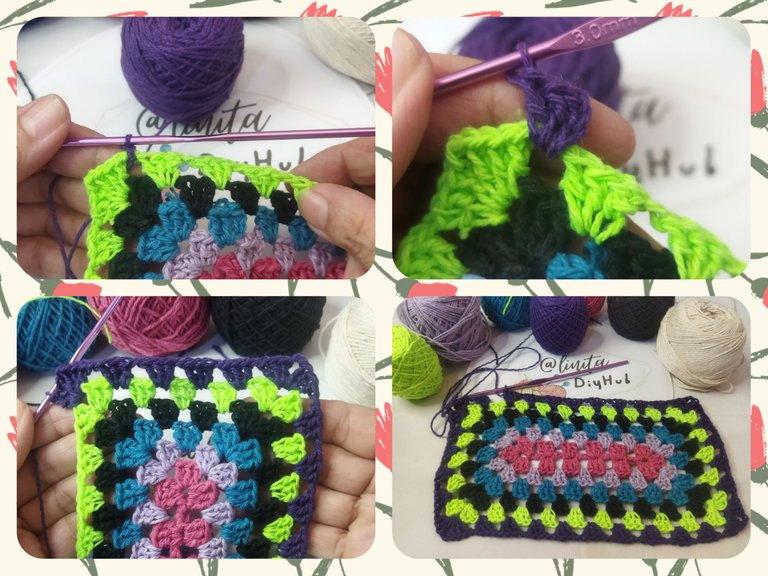
LAP Nº 5, 6, 7 y 8
These turns consist of the same previous process, what differentiates them from each other is the change that we will make in the threads. On round 5, we will use black thread; on round 6, the green thread; on round 7, the purple thread; and on round 8 the off-white thread.
VUELTA Nº 5, 6, 7 y 8
Estas vueltas consisten en el mismo proceso anterior, lo que las diferencia una de las otras es el cambio que haremos en los hilos. En la vuelta 5, usaremos hilo negro; en la vuelta 6, el hilo verde; en la vuelta 7, el hilo morado; y en la vuelta 8 el hilo blanco hueso.
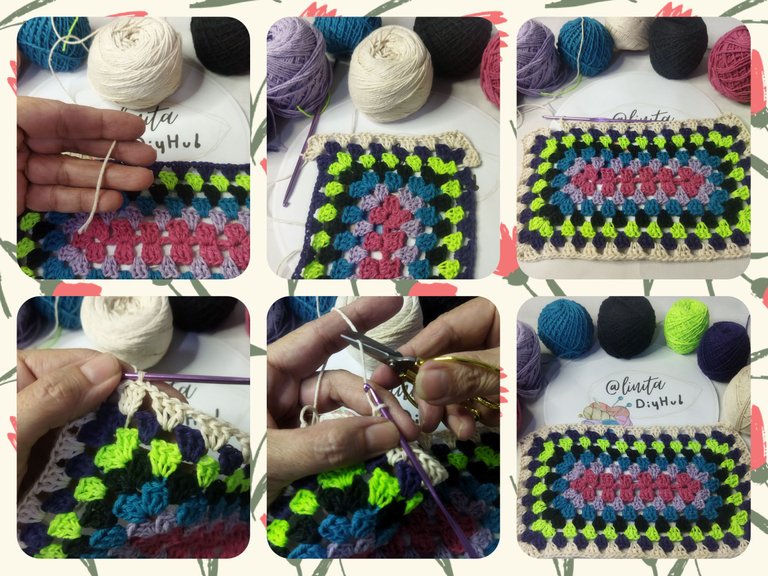
LAP Nº 9, 10, 11, 12, 13, 14 y 15
Until round No. 8, the fabric measures 12 cm, which means that it is still too small for my requirement. So what we will do is make 7 more rounds repeating each color of thread in the same order from round No. 1 to No. 8.
VUELTA Nº 9, 10, 11, 12, 13, 14 y 15
Hasta la vuelta Nº 8 el tejido tiene una medida de 12 cm, lo que significa que aun es muy pequeño para mi requerimiento. Entonces lo que haremos será realizar 7 vueltas más repitiendo cada color de hilo en el mismo orden desde la vuelta Nº 1 hasta la Nº 8.
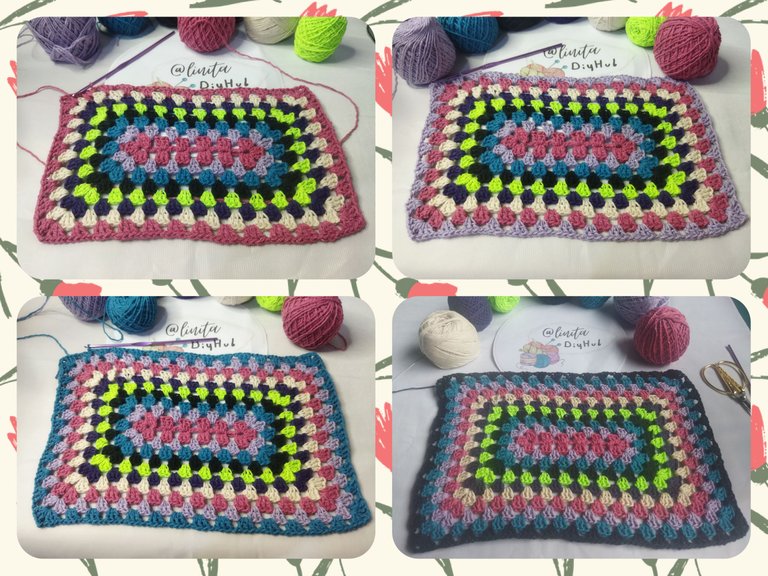
Already on round No. 15, the mat measures 24 x 35 cm, which is the ideal size I need. So all that remains is to finish off the fabric, making a slipped stitch in the first stitch of the row. We cut the thread and with the wool needle we hide the excess.
Ya en la vuelta Nº 15 el tapete tiene una medida de 24 x 35 cm, que es la medida idea que necesito. Así que solo queda rematar el tejido, realizando un punto deslizado en el primer punto de la vuelta. Cortamos el hilo y son la aguja lanera escondemos el sobrante.
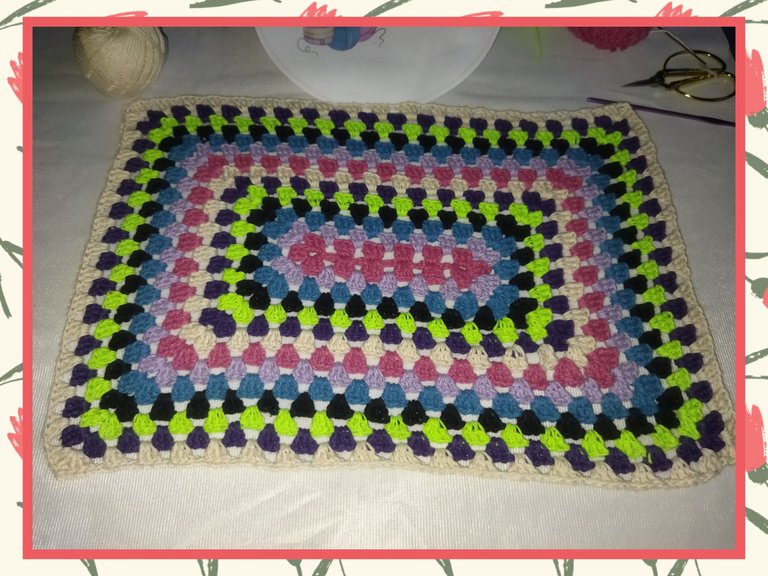
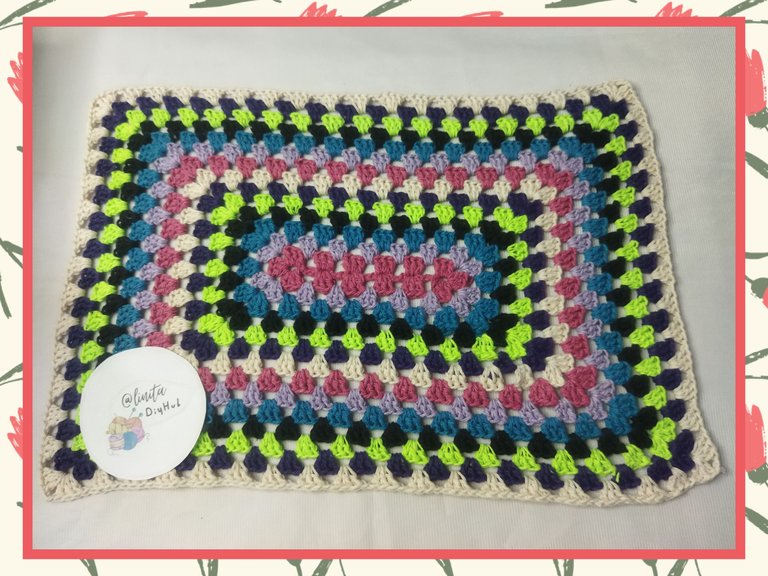
With leftover threads I was able to knit this colorful mat to prevent my containers from moving when I cook, but you can use it as you wish and use the colors you like. I hope you like it. See you next time.
Con sobrante de hilos pude tejer este tapete colorido para evitar que mis envases se muevan cuando cocino, pero tu puedes darle el uso que requieras y utilizar los colores que te apetezcan. Espero te guste. Nos vemos en la próxima.
That is a lovely and colorful little mat. Would be useful tool.
Bello. Está muy lindo este tejido y la combinación de colores se ve muy bien, me gusta como resalta el verde fluorescente entre todos los demás.
Que siga la fiebre, yo ando contagiada también, me dio por tejer accesorios para el hogar.
que lindo y muy bueno para decorar!
how cute and great for decorating!
Me alegro que te haya gustado. Gracias.
I love your creation, how you show the love and passion and dedication you have to make the different fabrics, apart from that I like the beautiful combination of colors, wonderful.
Thank you very much, I'm glad you liked it.