Nice pencil organizer with phone holder. // Elaboracion de un organizador de lápices con soporte para teléfono.
(Edited)
✨Bienvenidos. // Welcome. ✨
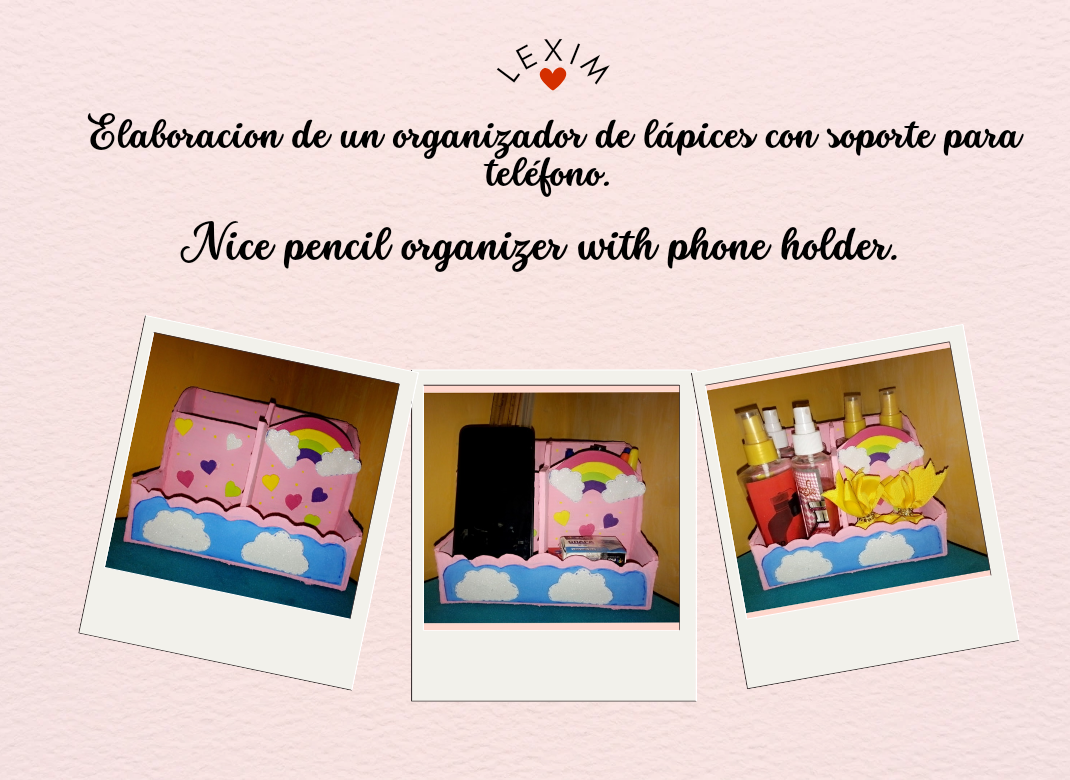
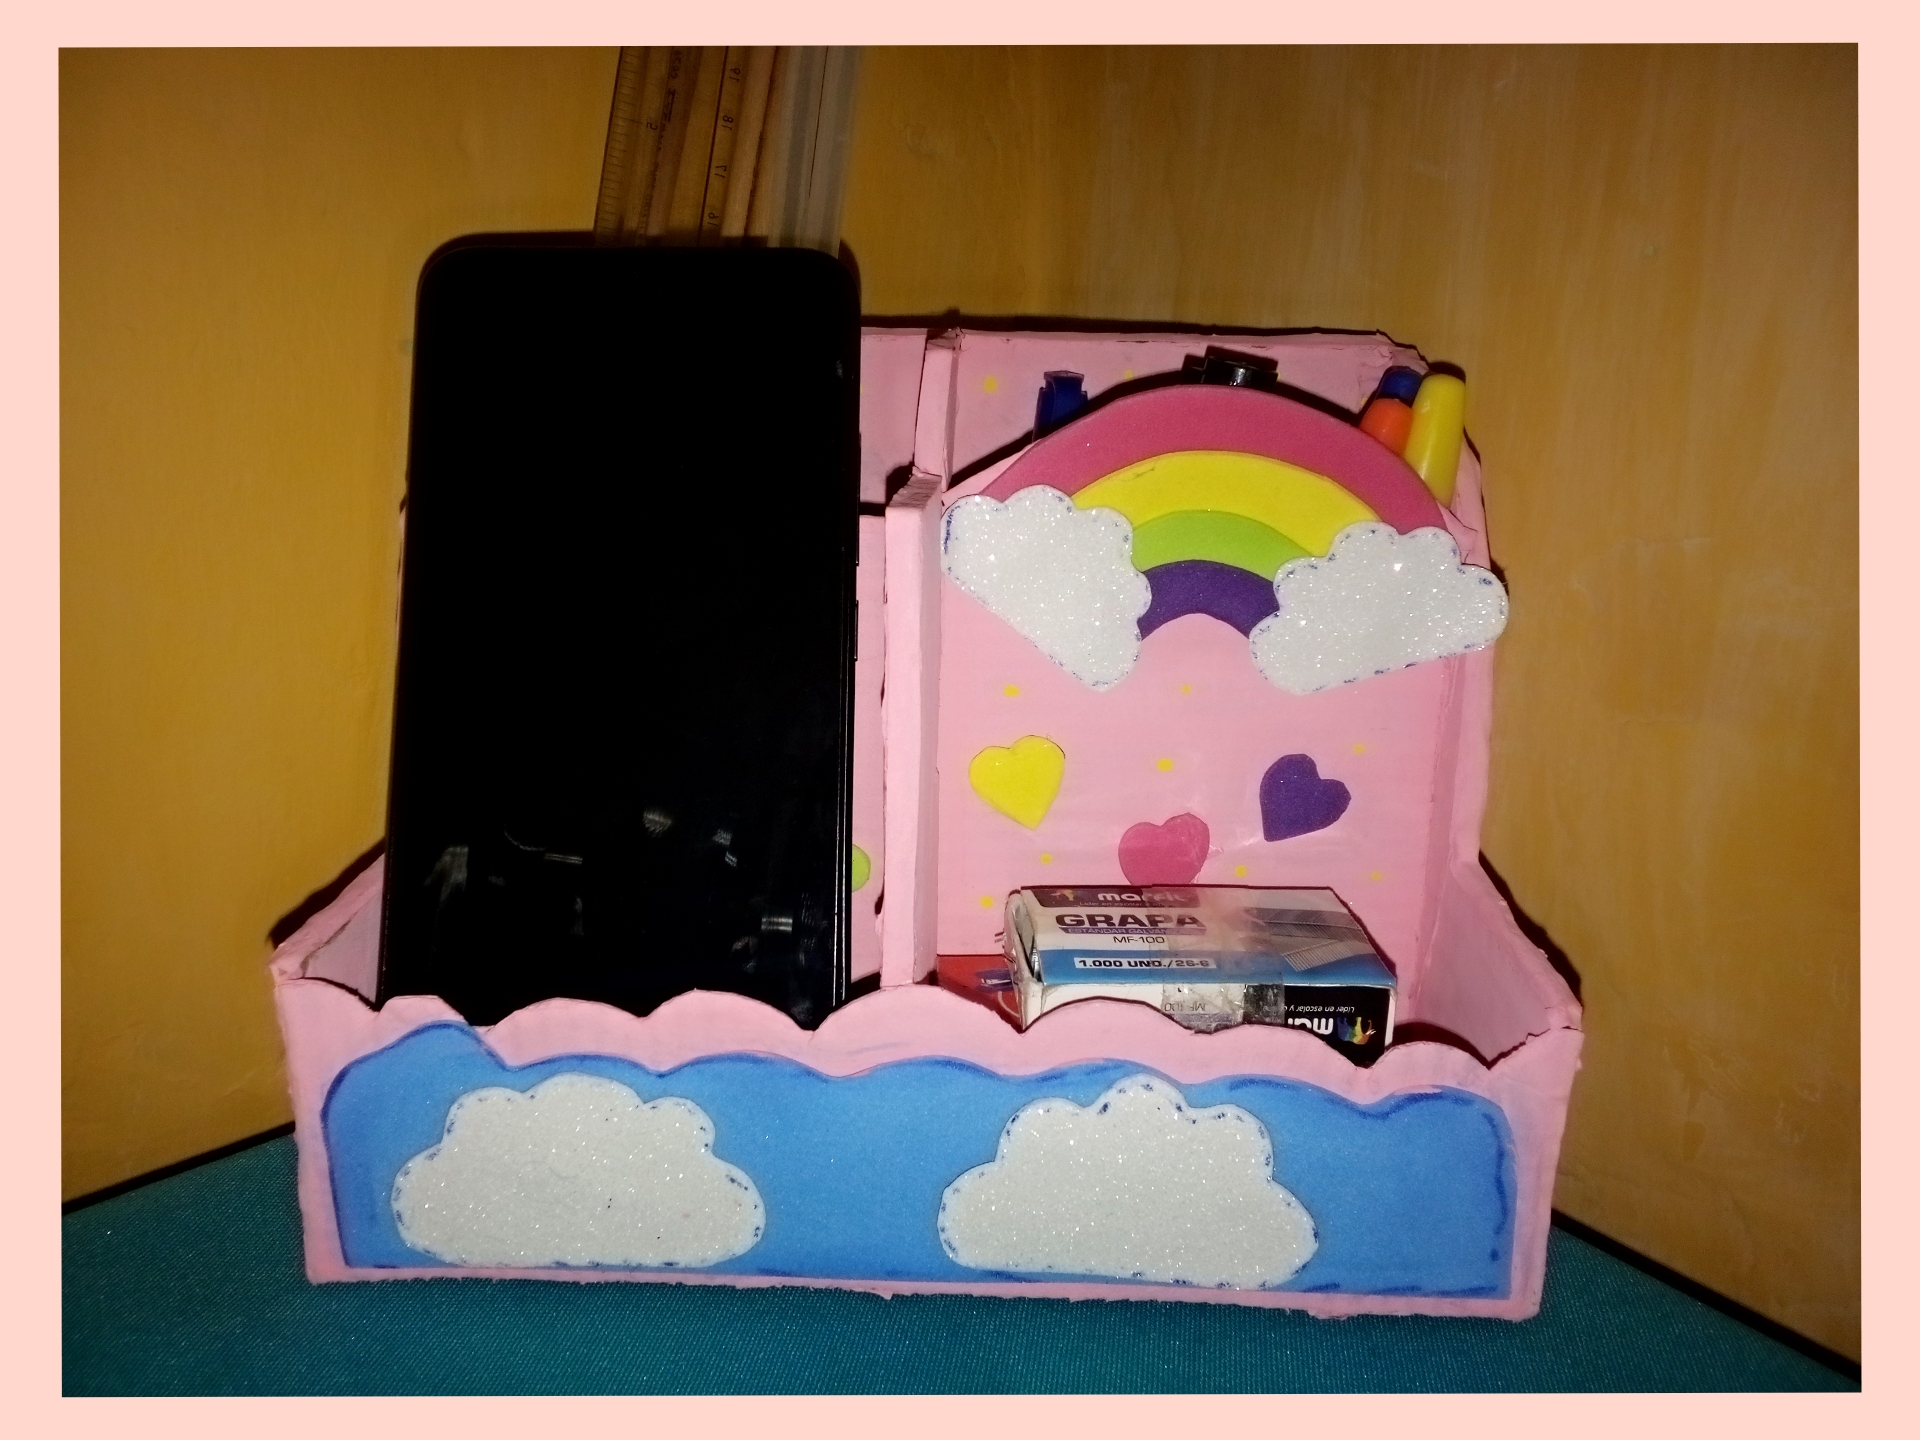
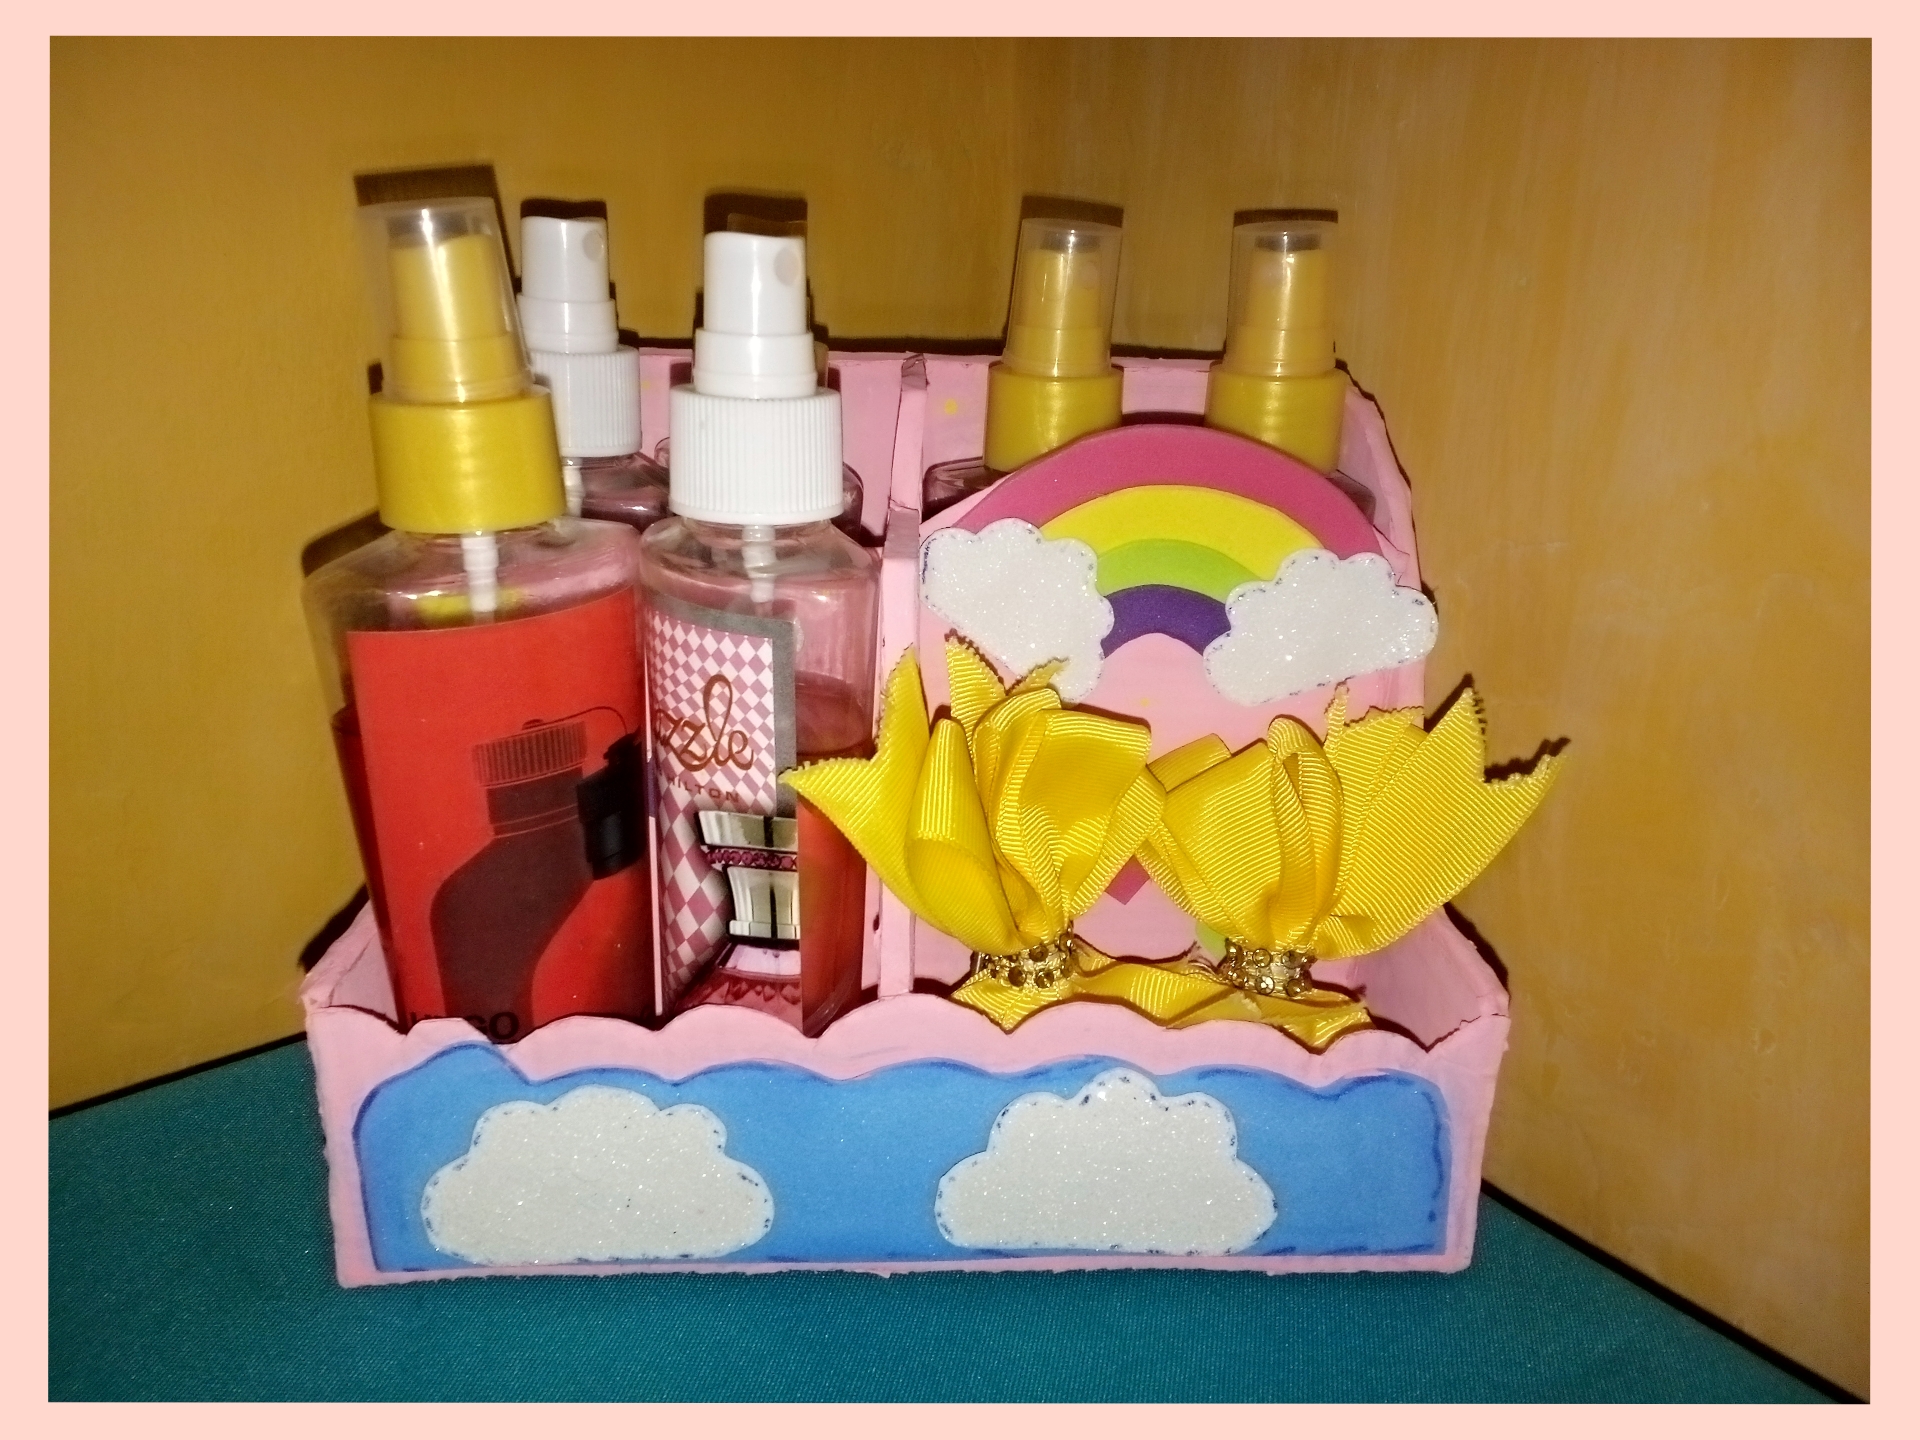
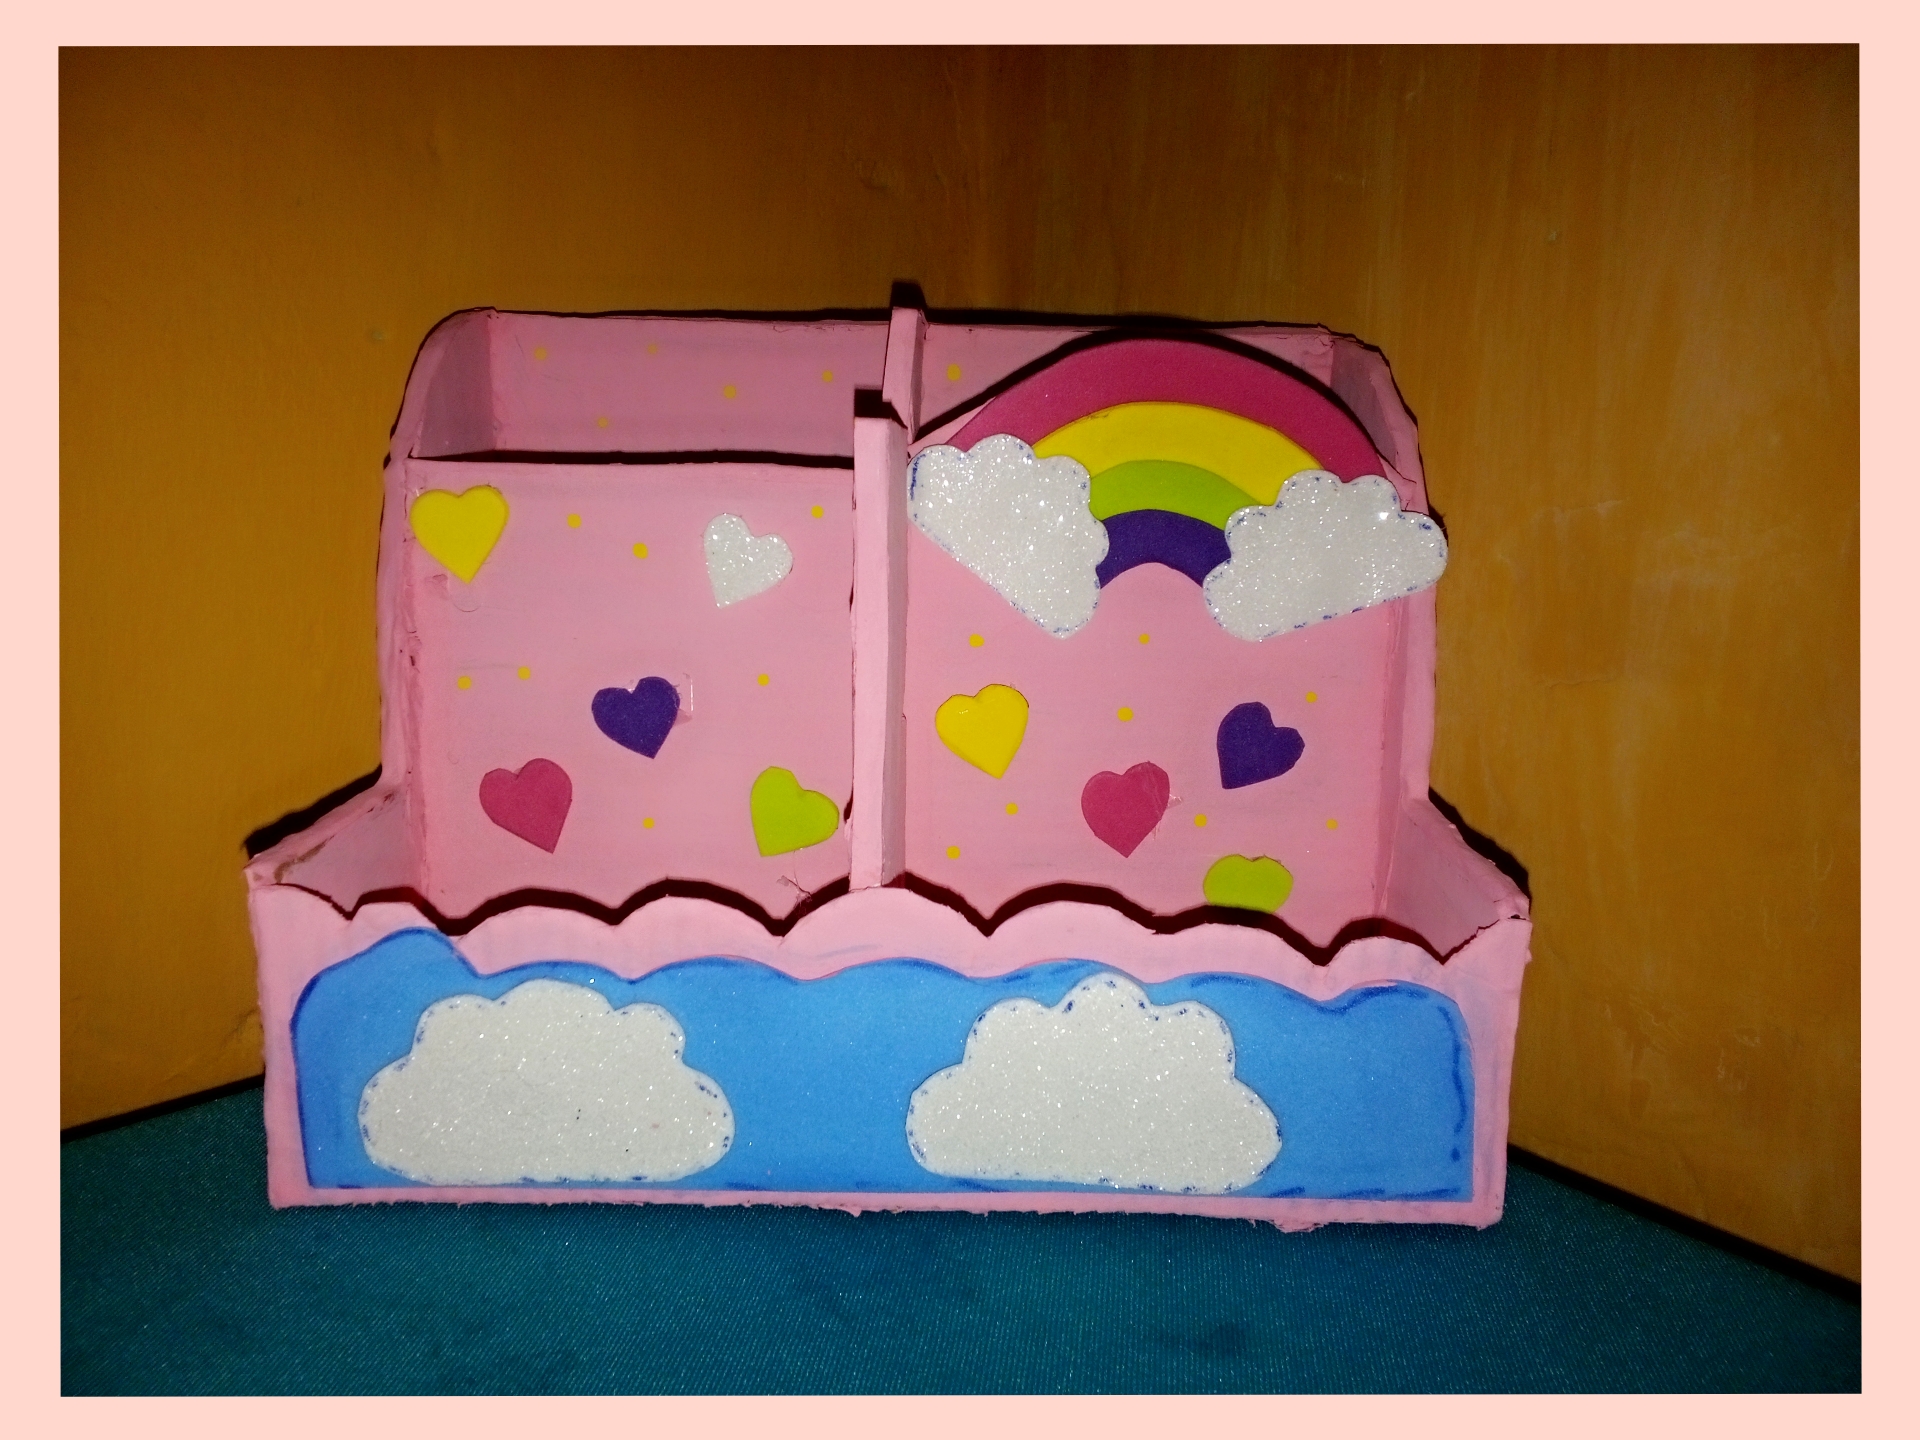
Hello everyone dear colleagues a pleasure to greet you. Today I want to share with you one of my creative activities that I like to do with much love for you a step by step of a pencil organizer with phone holder my niece asked me to make her something to place her phone for her class activities and together with that to place her pencils and this is how her organizer looked like. This ideal is perfect for other things like storing perfume, brushes, pigtails and rings also because of its color we can use it for children's birthdays, centerpiece to a gift that variety we can make with this organizer I hope you like it here I leave its elaboration.
Hola a todos queridos compañeros un gusto en saludarlos. Hoy les quiero compartir una de mis actividades creativas que me gusta hacer con mucho cariño para ustedes un paso a paso de un organizador de portalapices con soporte para teléfono mi sobrina me pidió que le hisiera algo para colocar su teléfono para su actividades de clases y juntos a eso colocar su lapices y así fue cómo lucio su organizador. Está ideal es perfecta para otras cosas como guardar perfume, cepillos, coletas y anillos también por su color lo podemos usar para cumpleaños infantiles, centro de mesa hasta un obsequio que variedad podemos realizar con este organizador espero que les guste aca les dejo su elaboración.

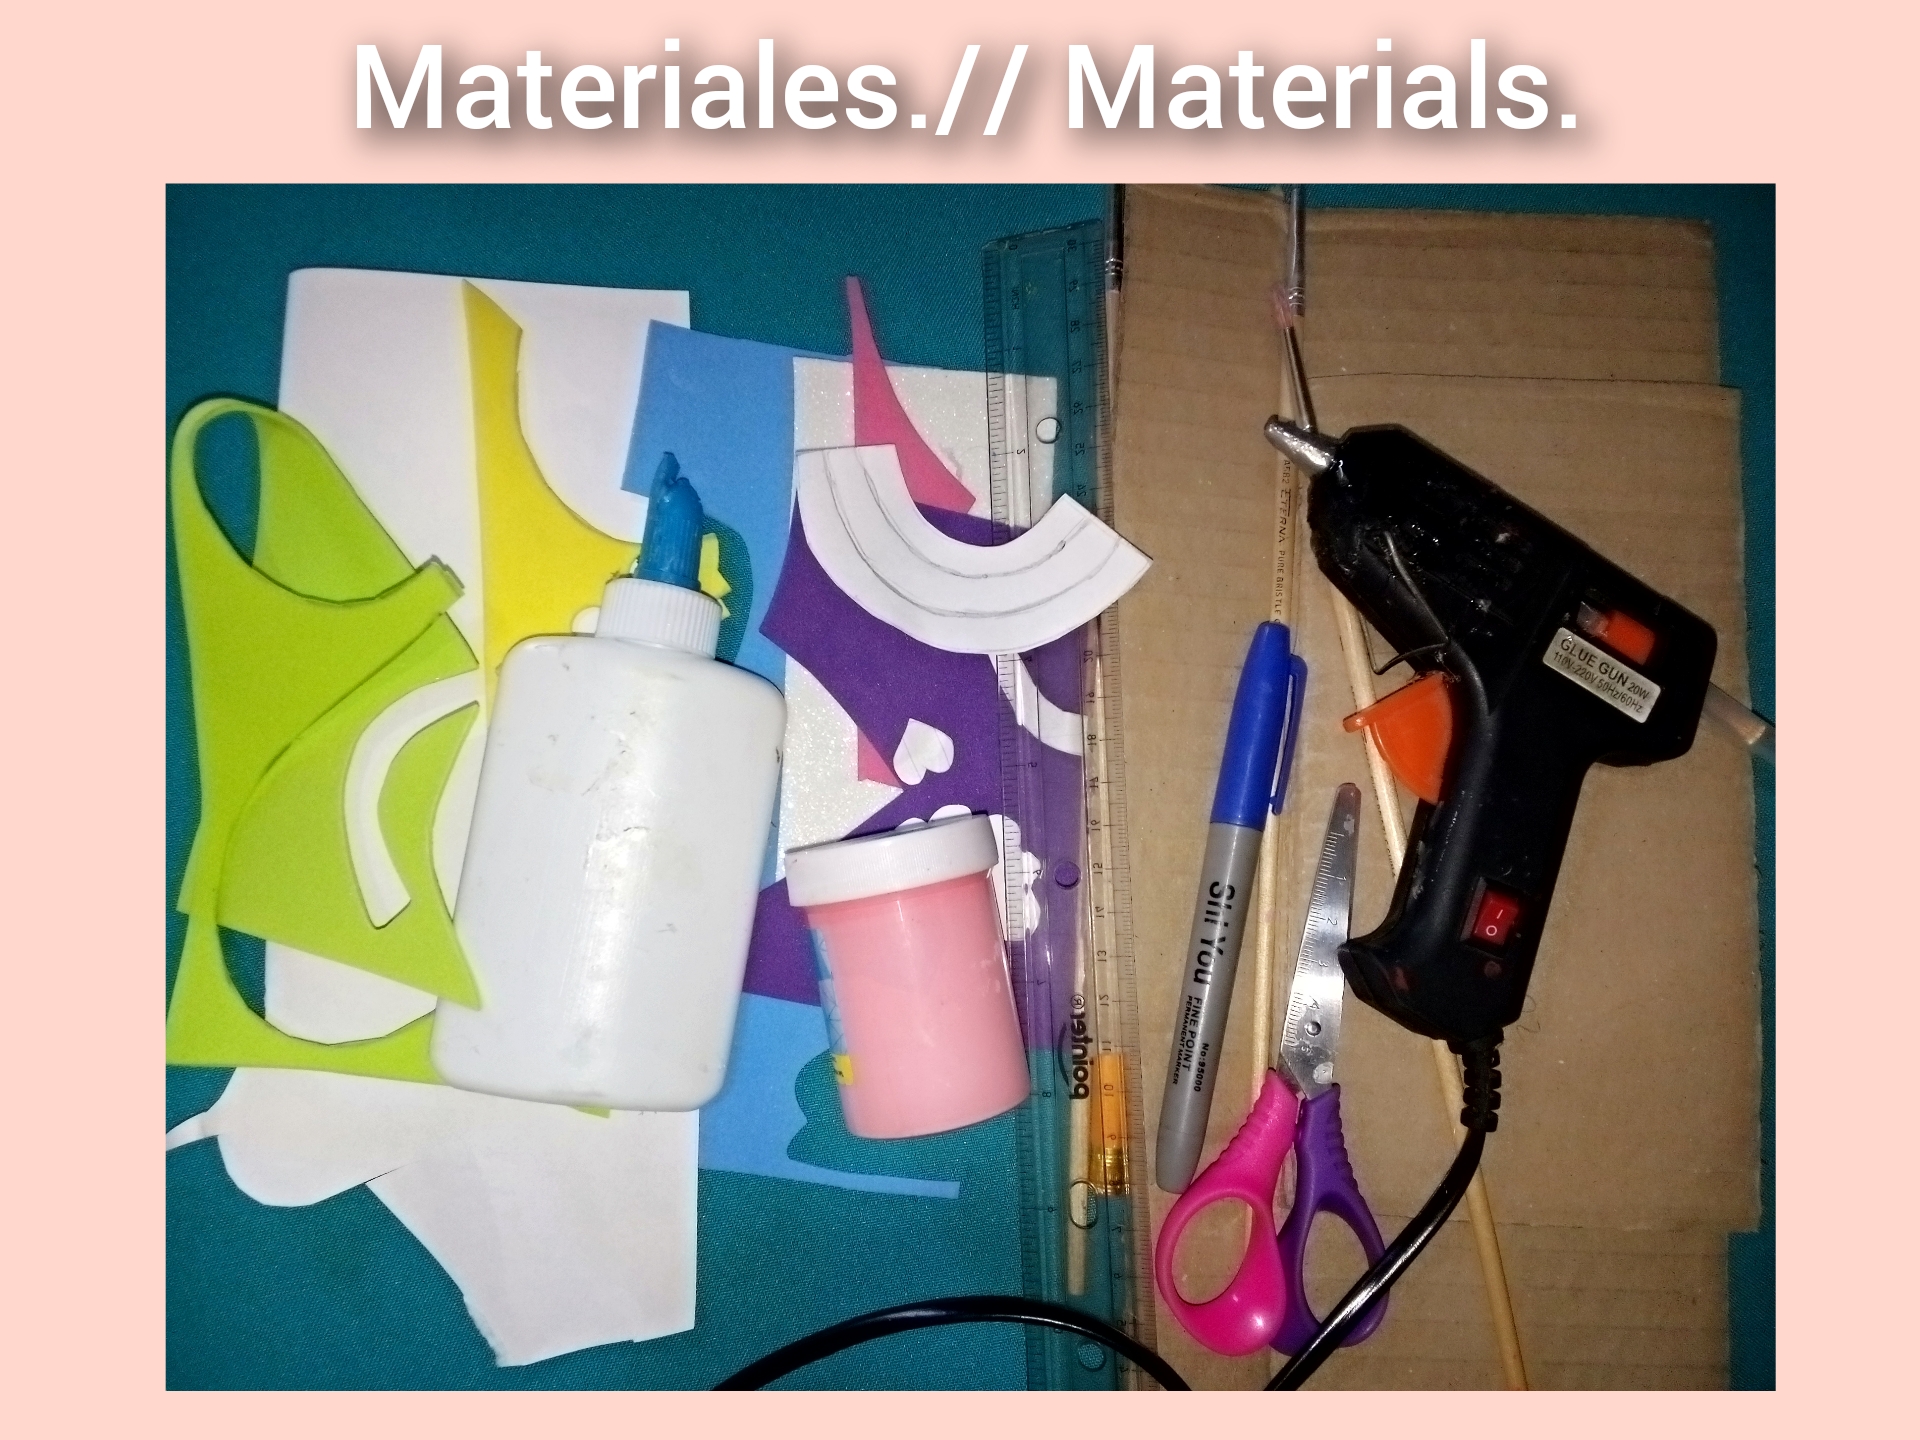
Materials.
Materiales.

- Cardboard.
- Assorted eva rubber.
- Pencil.
- Ruler.
- Stencil.
- Blue felt-tip pen.
- Scissors.
- Glue.
- Silicone gun.
- Acrylic paint.
- White sheet or cardboard.
- Cartón.
- Goma Eva surtidos.
- Lápiz.
- Regla.
- Plantilla.
- Rotulador azul.
- Tijera.
- Pegamento.
- Pistola de silicón.
- Pintura acrílica.
- Hoja blanca o cartulina.

Step by step.
Paso a paso.

Paso 1. // Step 1.
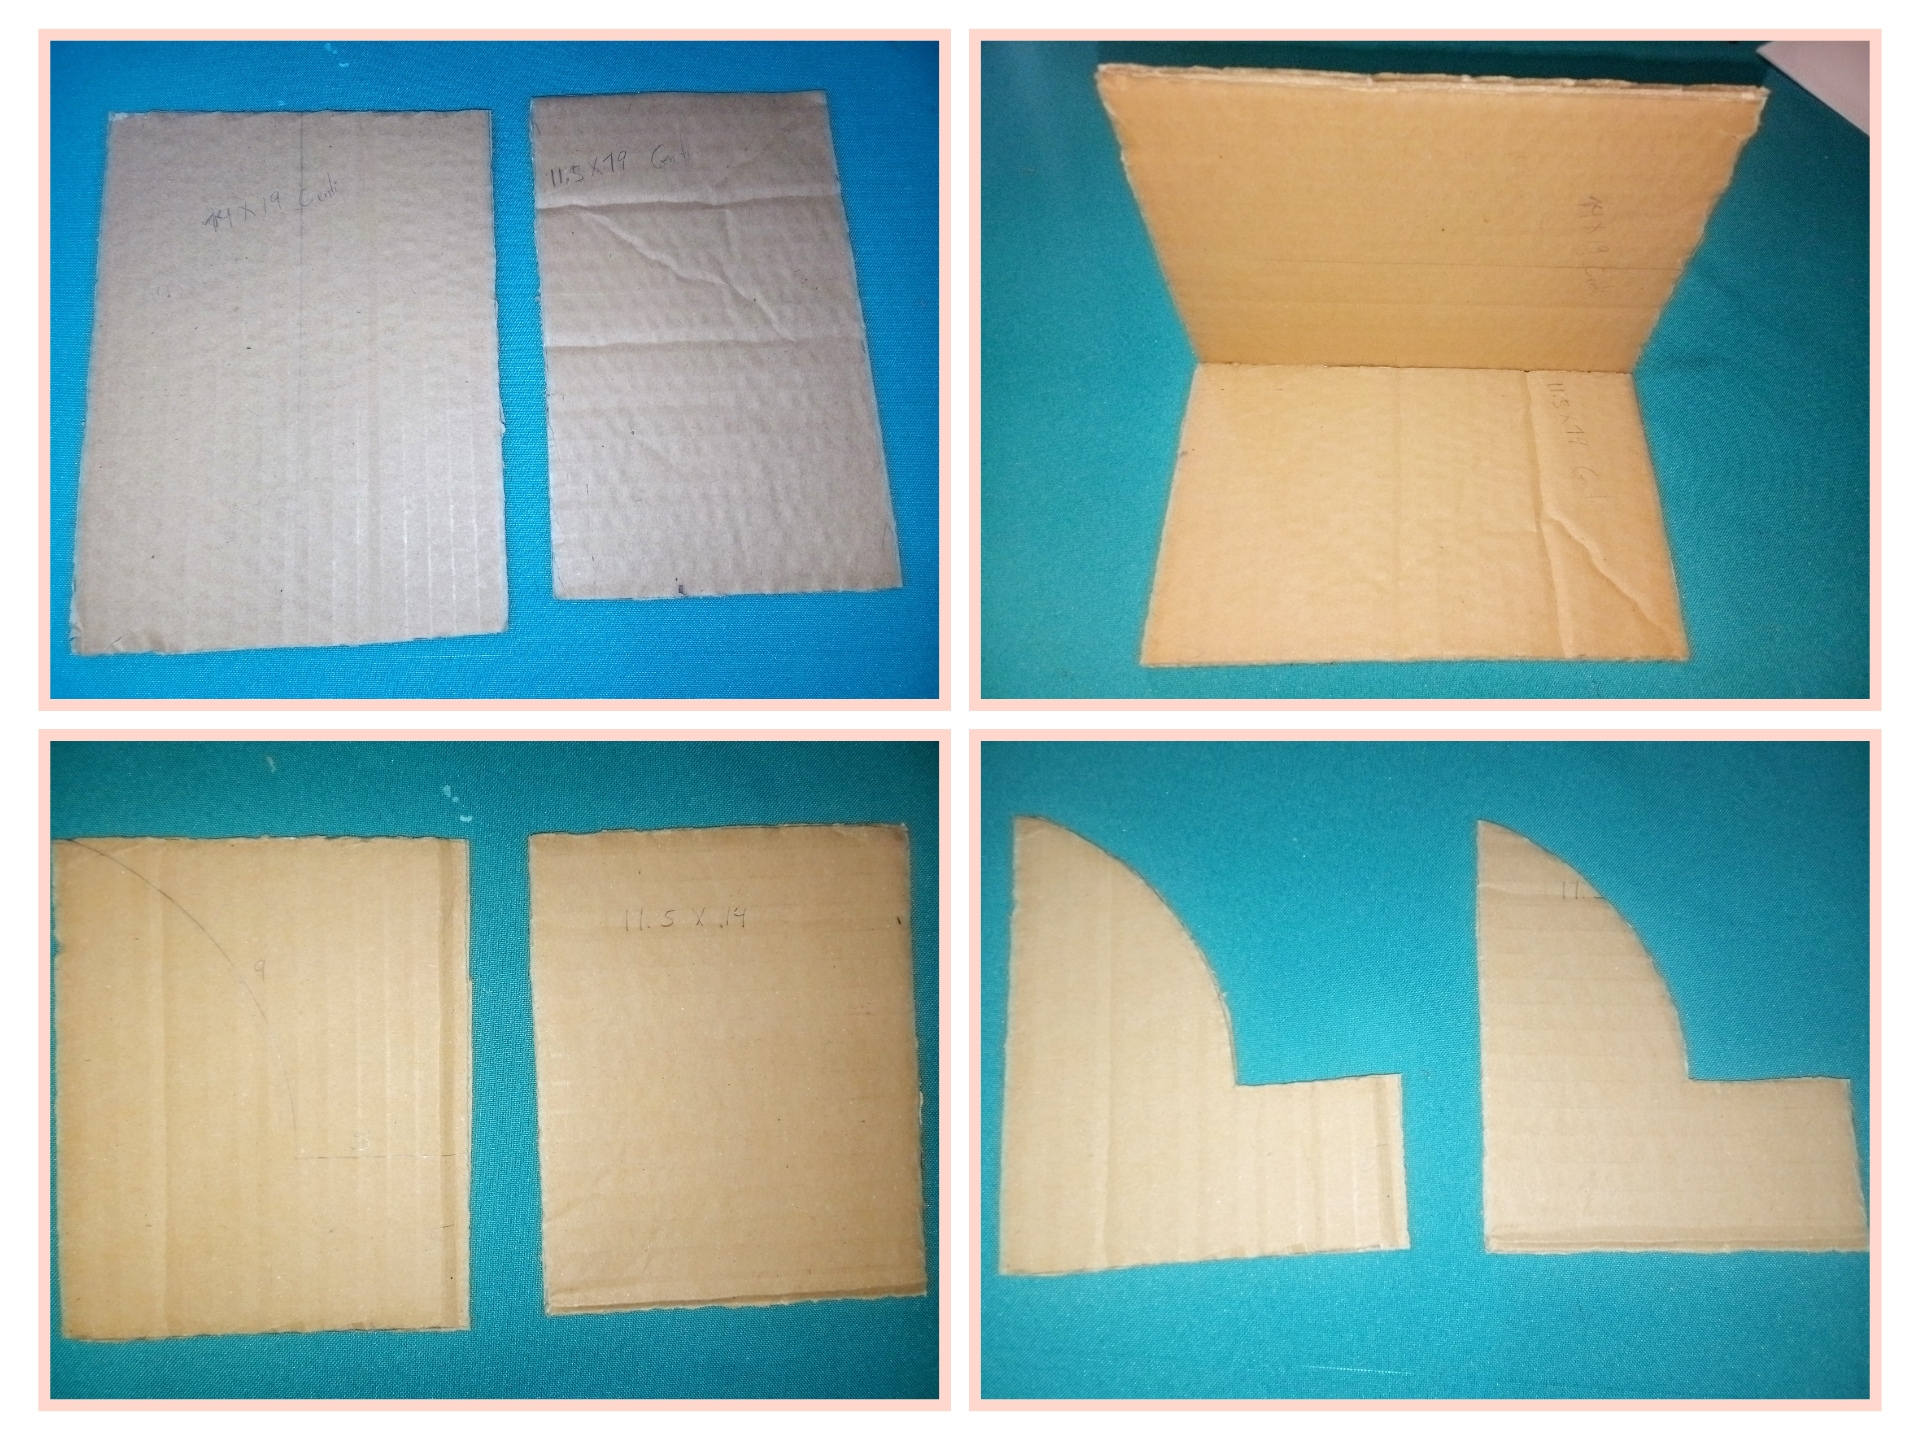
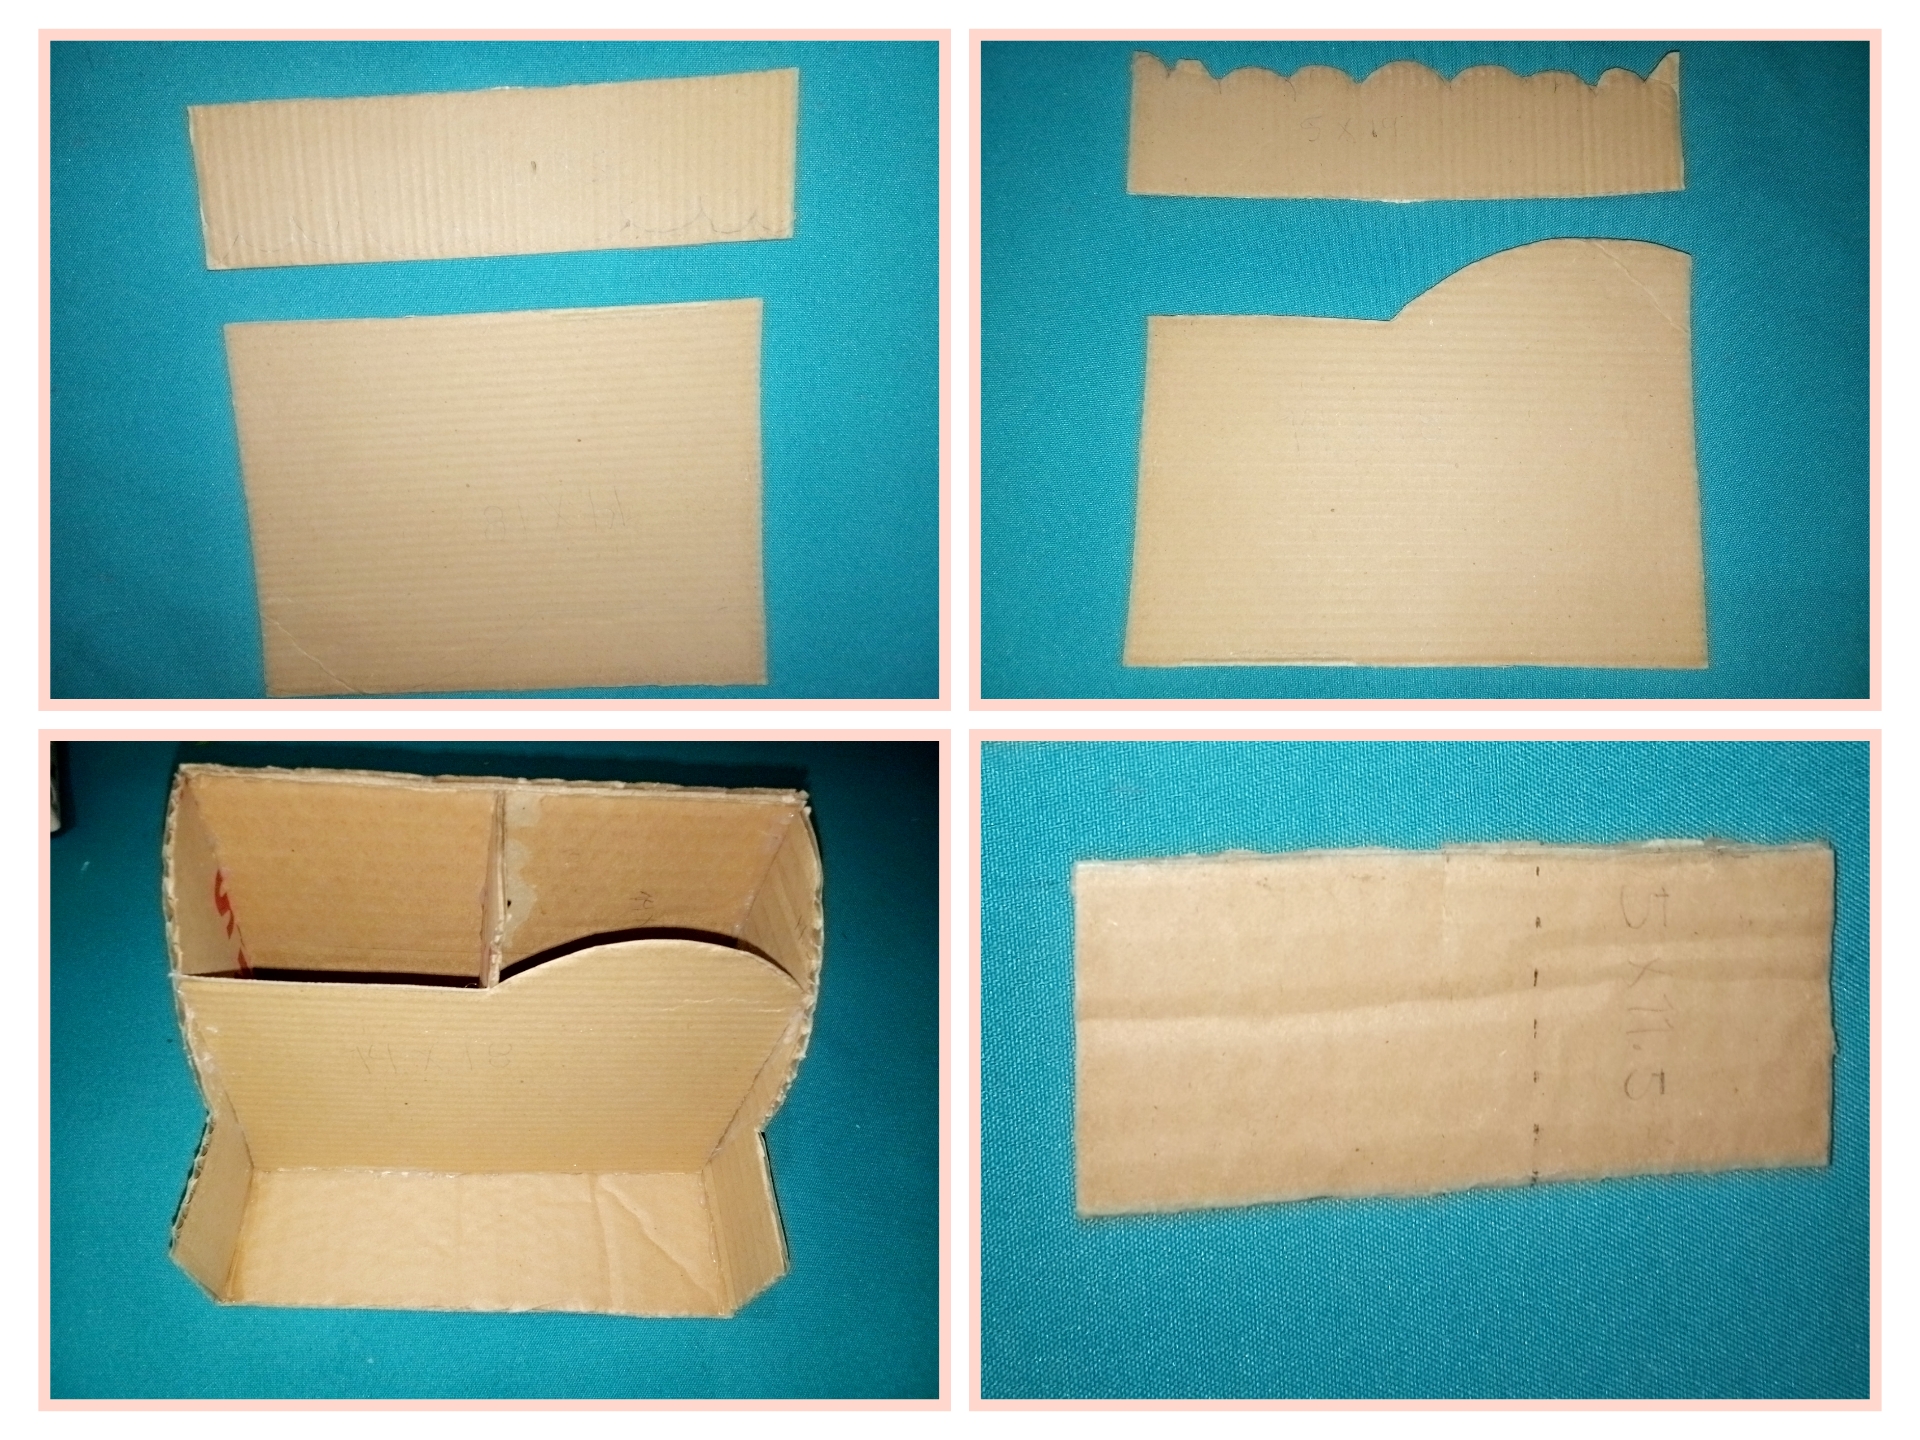
Take the cardboard and make the measures of 14x 19 centimeters, and the other of 11.5x 19 centimeters and cut these pieces and glue the two leaving the small measure for the base. Now cut two pieces of cardboard measuring 11.5x 14 centimeters for the sides and draw the model that we see in image number four of this photo. The arch is approximately 5 centimeters and the square that we see below is 5x5 centimeters.
Coge el cartón y realiza las medidas de 14x 19 centímetros, y el otro de 11.5x 19 centímetros ya cortado estás piezas pega las dos dejando la medida pequeño para la base. Ahora corta dos cartones de 11.5x 14 centímetros para los laterales y dibuja el modelo que vemos en la imagen número cuatro de esta foto el arco es aproximadamente de 5 centímetros igualmente y el cuadrado que vemos abajo de 5x5 centímetros.
Paso 2. // Step 2
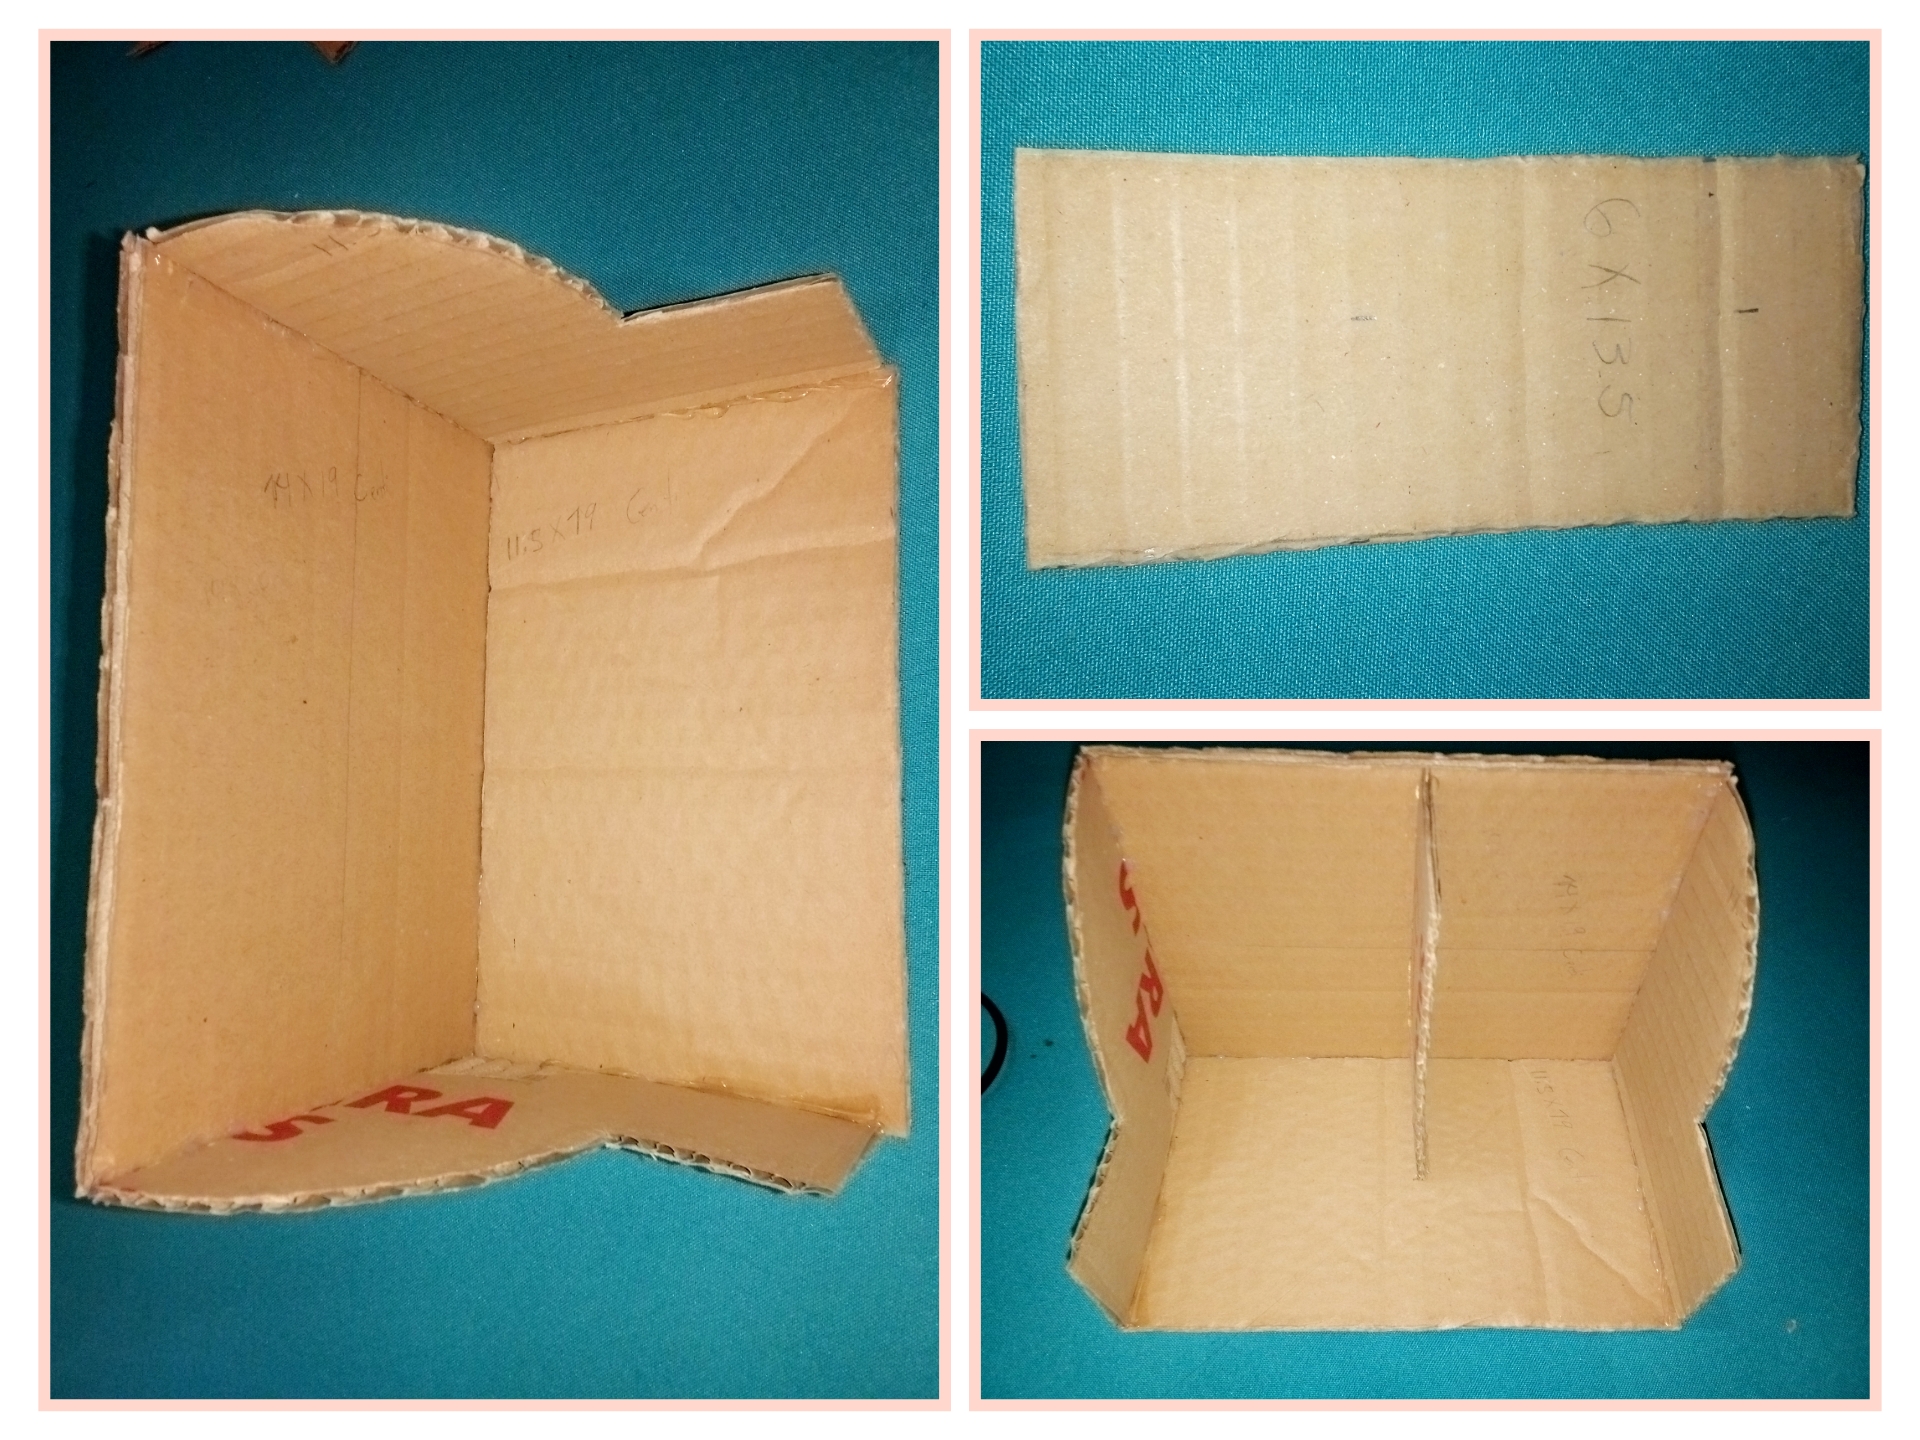
Glue the sides with hot silicone to make a division, cut another 6 x 13.5 centimeter cardboard and glue it in the center of the organizer, little by little it will take shape, it is super easy.
Pega con silicón caliente los laterales para hacer una división, corta otro cartón de 6 x 13.5 centímetros y pega en el centro del organizador poco a poco ira cogiendo, forma es súper fácil.
Paso 3. // Step 3.
Next step, make and cut two pieces of cardboard, one of 5 x 19.5 centimeters and draw a little mountain on the surface and on another one of 14 x 18 centimeters make an arc and a subtraction line so you can see how it would look like in image two of this step. Glue with hot silicone to the organizer and make a division with a cardboard of 5 x 11.5 centimeters.
Próximo paso, realiza y corta dos cartones unos de 5x 19.5 centímetros y dibuja en la superficie unas montañita y en otro de 14 x 18 centímetros hazle un arco y una línea resta así ves como quedaría en la imagen dos de este paso. Pega con silicón caliente al organizador y hazle una división con un cartón de 5 x 11.5 centímetros.
Paso 4. // Step 4.
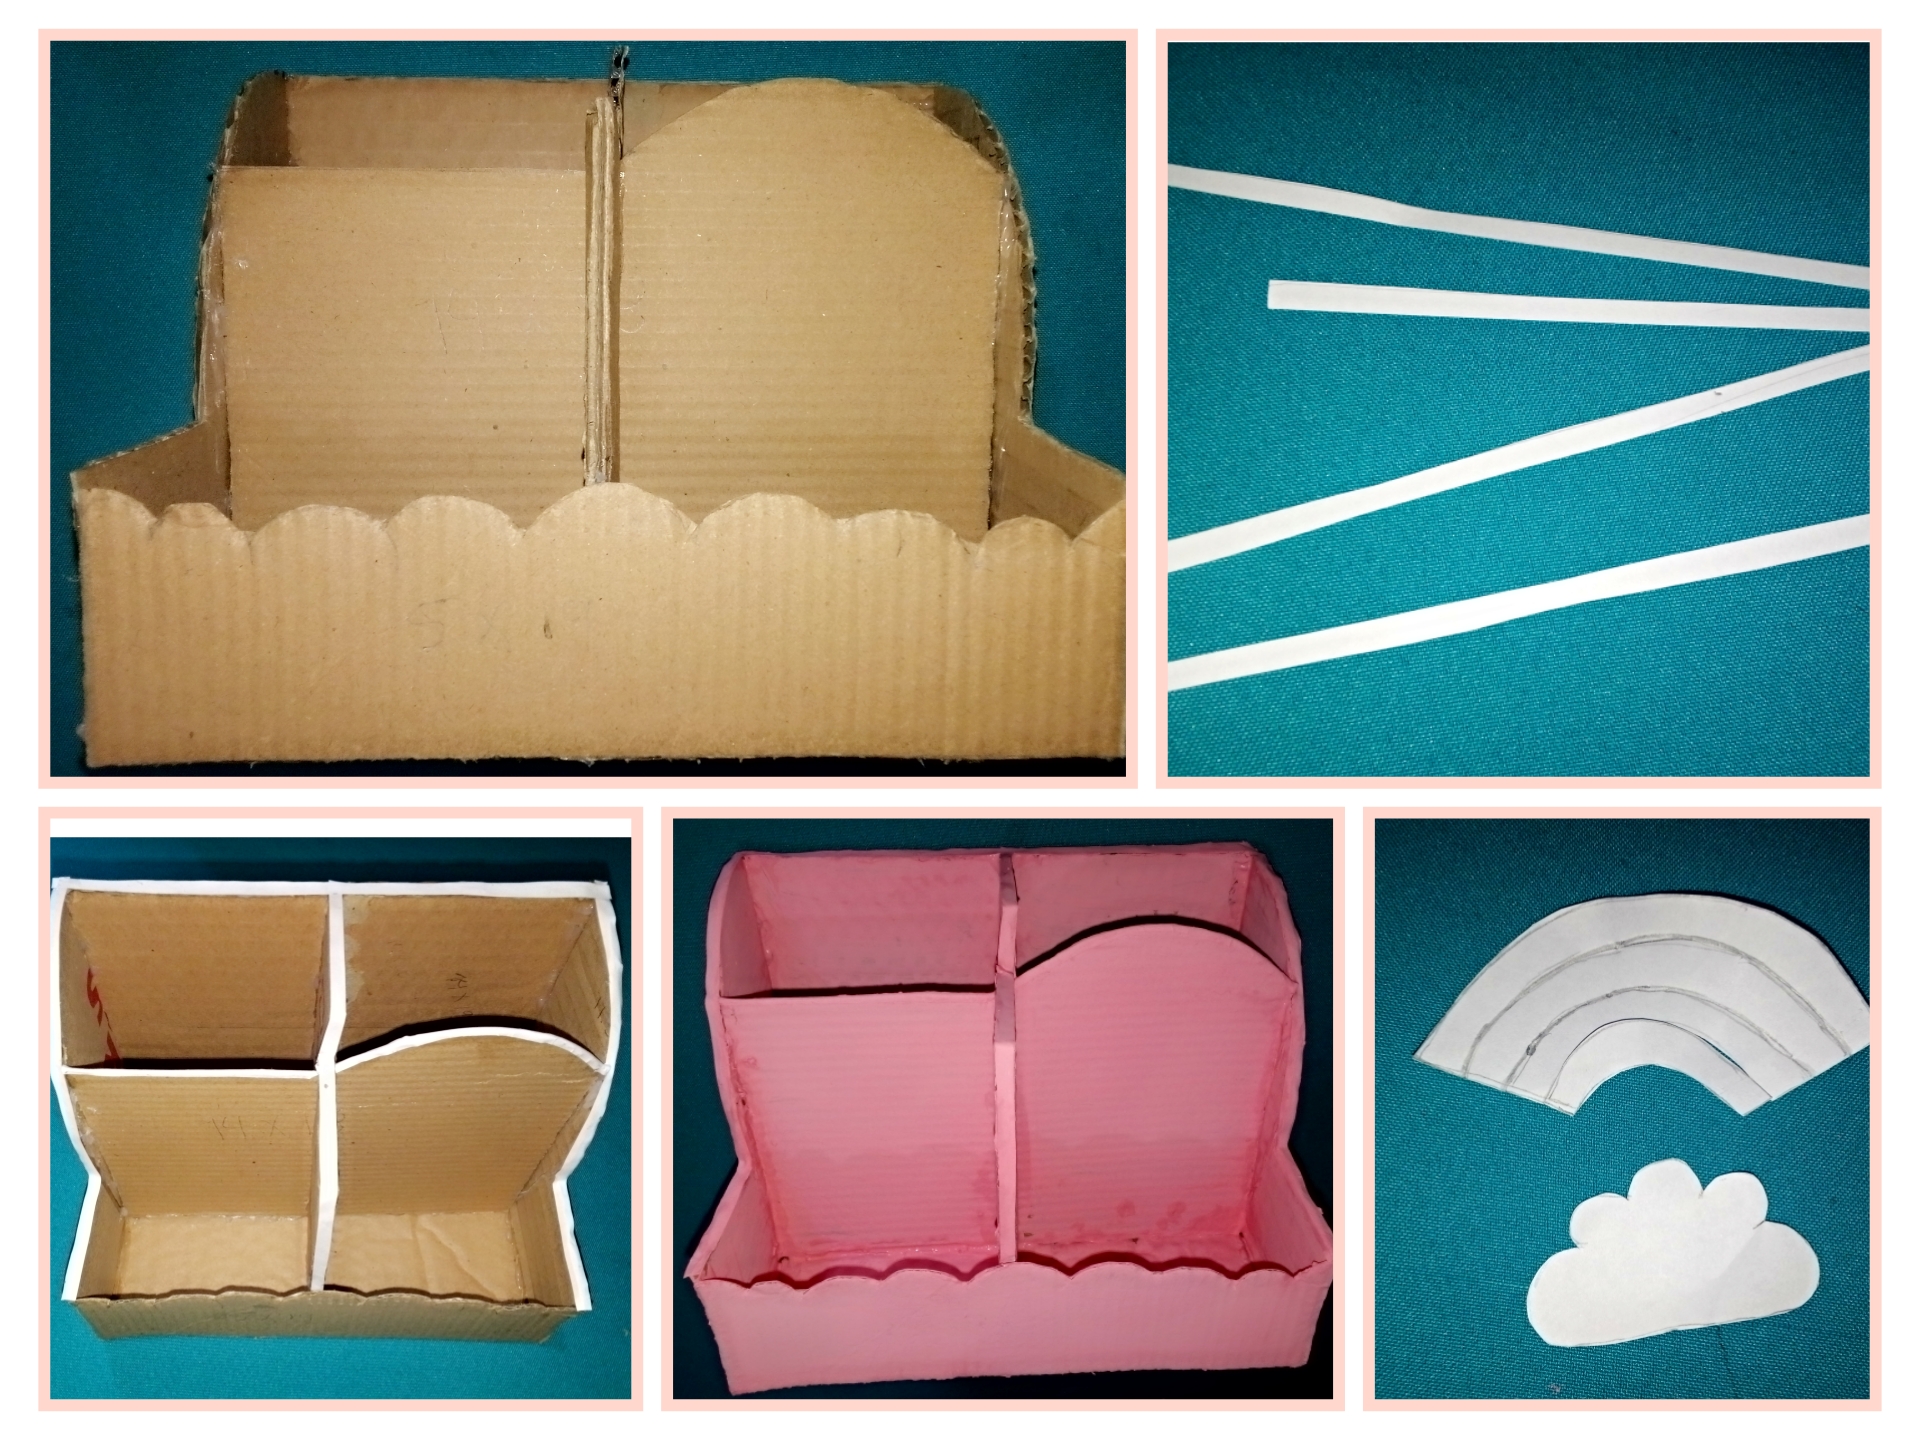
Next step, glue the pieces mentioned above and cover with white sheets or cardboard the holes of the organizer to give a better finish. With the template of a rainbow, a cloud and a heart draw on the eva rubber of the corresponding color. Paint the organizer with acrylic paint in any color.
Siguiente paso, pega las piezas mencionada anteriormente y tapa con hojas blancas o cartulina los orificios del organizador para dar un mejor acabado. Con la plantilla de un arco iris, nube y un corazón dibuja en la goma Eva del color correspondiente igual quedara muy lindo. Pinta con pintura acrílica el organizador de cualquier color.
Paso 5. // Step 5.
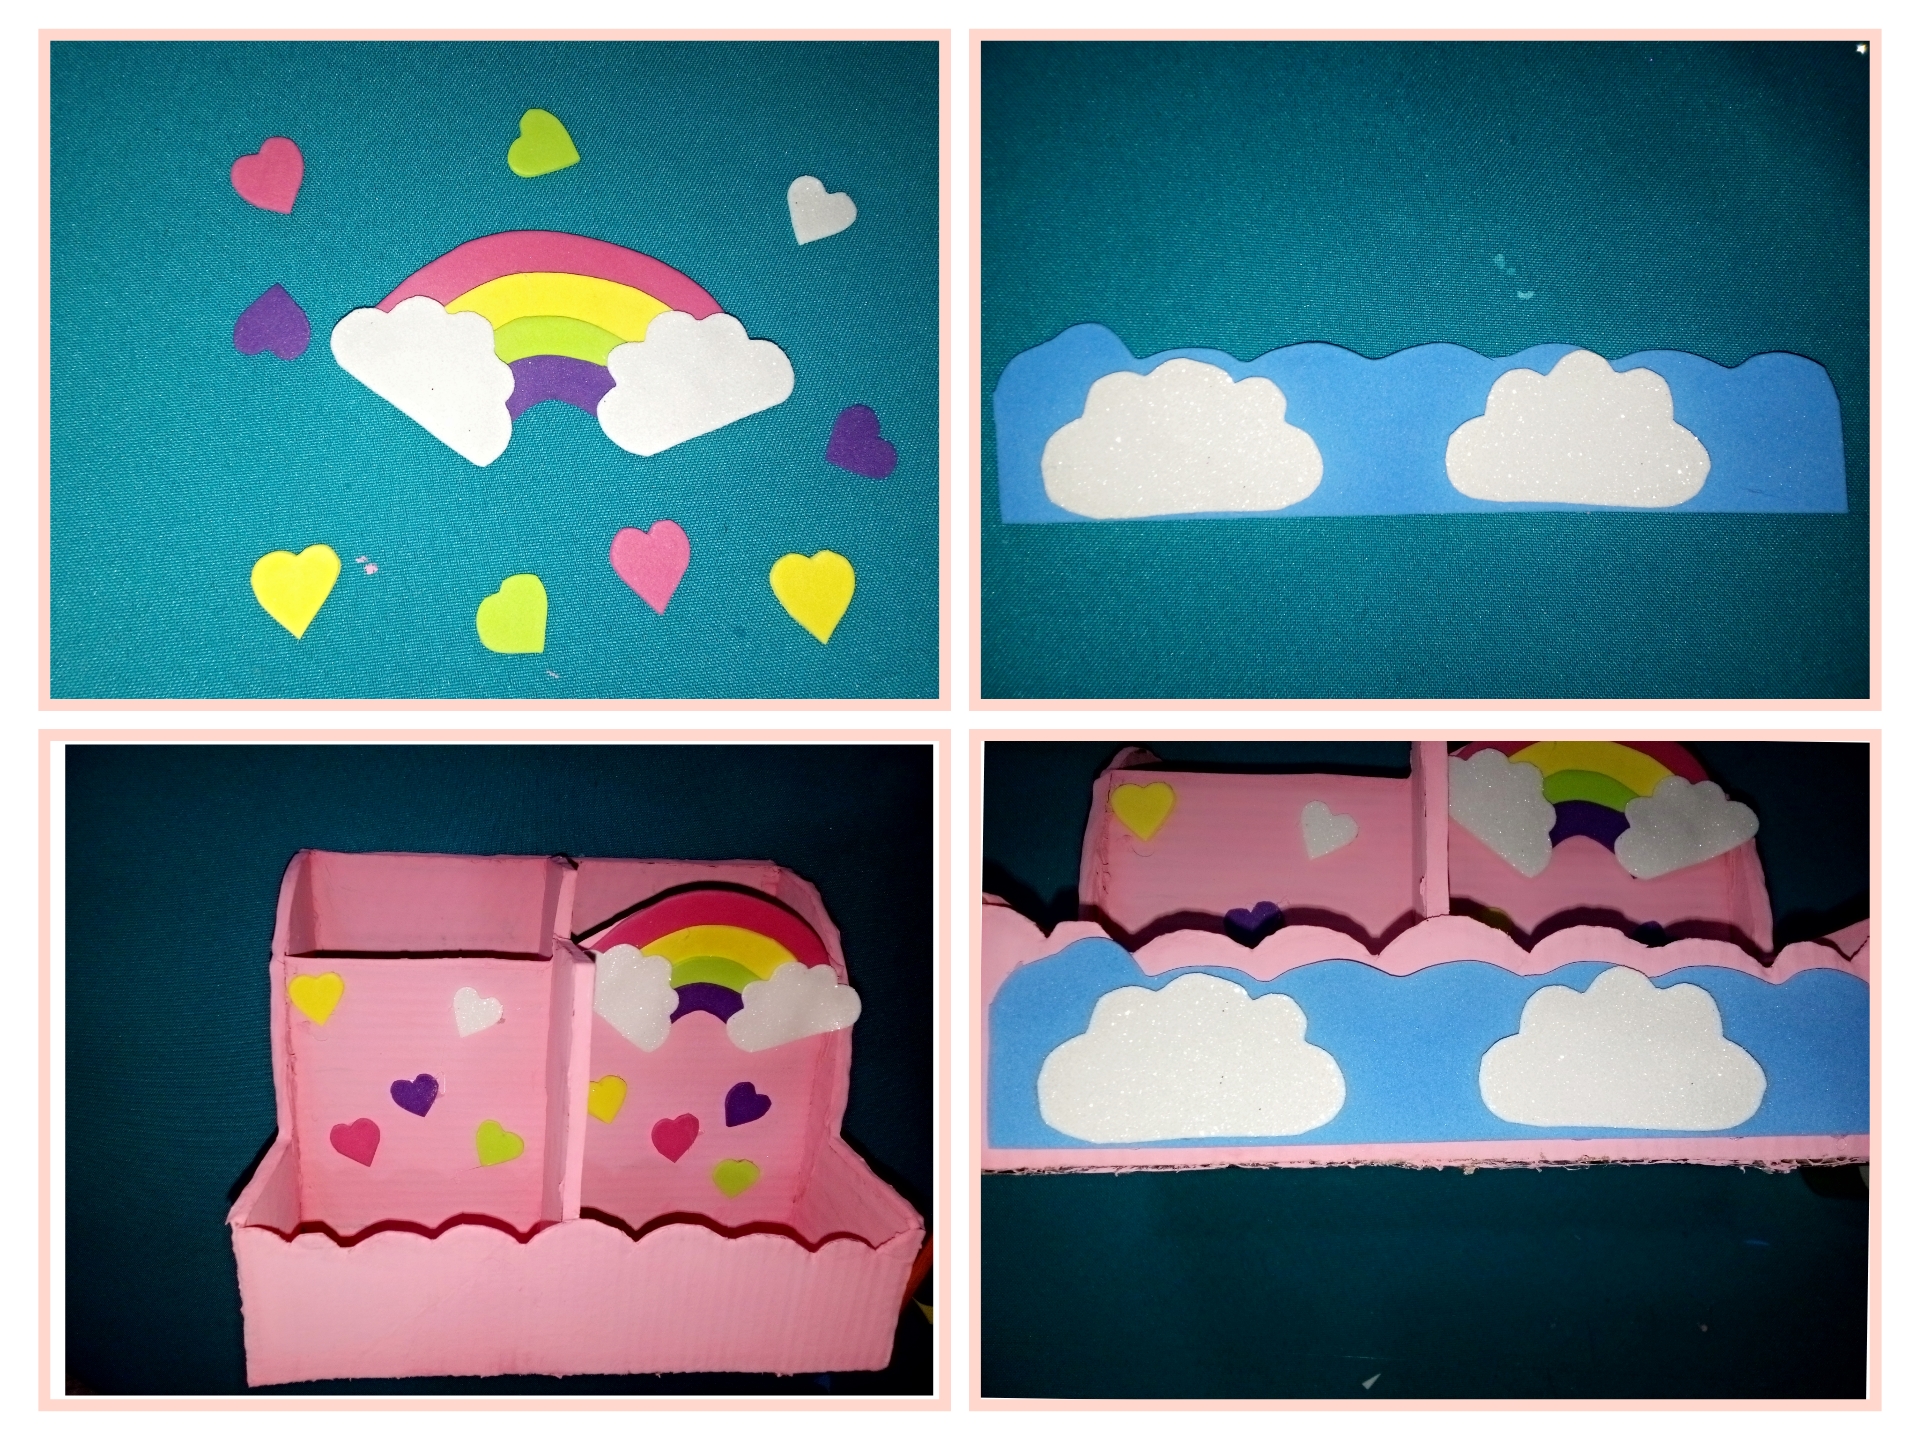
Last step, now the rainbow, the clouds and the colors are ready, glue and decorate the organizer with a seleste background and outline with a blue marker and a cloud on the front and finally make yellow dots, let dry and the organizer is finished.
Último paso, ya falta poco ya dibujado el arco iris, las nubes y los colores pega y decora el organizador con un fondo seleste y delinea con un rotulador azul y una nube en la parte del frente y por último haz punticos amarillos deja secar y el organizador estará terminado.

✨Final result. // Resultado final.✨

Gracias por visitar.
Todas las fotos y el contenido son originales que hago diariamente para mi blog. Para La traducción uso deepl los marcos y separadores es usado de canva .📷🖼️🤗
Thank you for visiting.
All photos and content are originals that I make daily for my blog. For translation I use deepl the frames and separators are used from canva .📷🖼️🤗


184
0
0.281 PAL
I'm just seeing talent eveywhere in the community, this so nice and well done. Good to see you gain my audience, you are doing so well
Hi @mayorkeys thank you for your words it's what I like to do and I try to do it well in the community I have a happy day.
This is so beautiful, you have a good Talent just a decorations for children, well done
Thank you for your time, I am glad you liked my elaboration.
¡Enhorabuena!
✅ Has hecho un buen trabajo, por lo cual tu publicación ha sido valorada y ha recibido el apoyo de parte de CHESS BROTHERS ♔ 💪
♟ Te invitamos a usar nuestra etiqueta #chessbrothers y a que aprendas más sobre nosotros.
♟♟ También puedes contactarnos en nuestro servidor de Discord y promocionar allí tus publicaciones.
♟♟♟ Considera unirte a nuestro trail de curación para que trabajemos en equipo y recibas recompensas automáticamente.
♞♟ Echa un vistazo a nuestra cuenta @chessbrotherspro para que te informes sobre el proceso de curación llevado a diario por nuestro equipo.
🥇 Si quieres obtener ganancias con tu delegacion de HP y apoyar a nuestro proyecto, te invitamos a unirte al plan Master Investor. Aquí puedes aprender cómo hacerlo.
Cordialmente
El equipo de CHESS BROTHERS
Gracias @chessbrotherspro por el apoyo. Claro le hechare un vistazo saludos.!!
that looks beautiful, thanks for sharing.
Thank you very much.