Elaboration of an organizer basket made of cardboard. // Elaboración de una cesta organizadora de cartón.
✨Bienvenidos. // Welcome. ✨
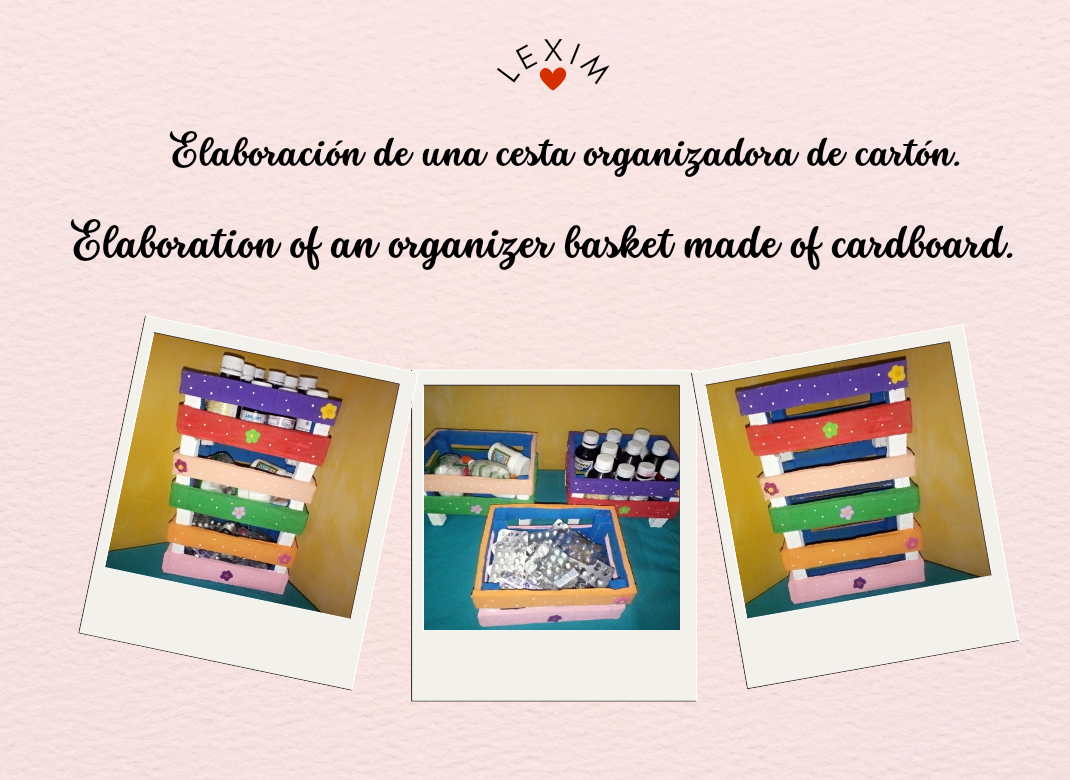
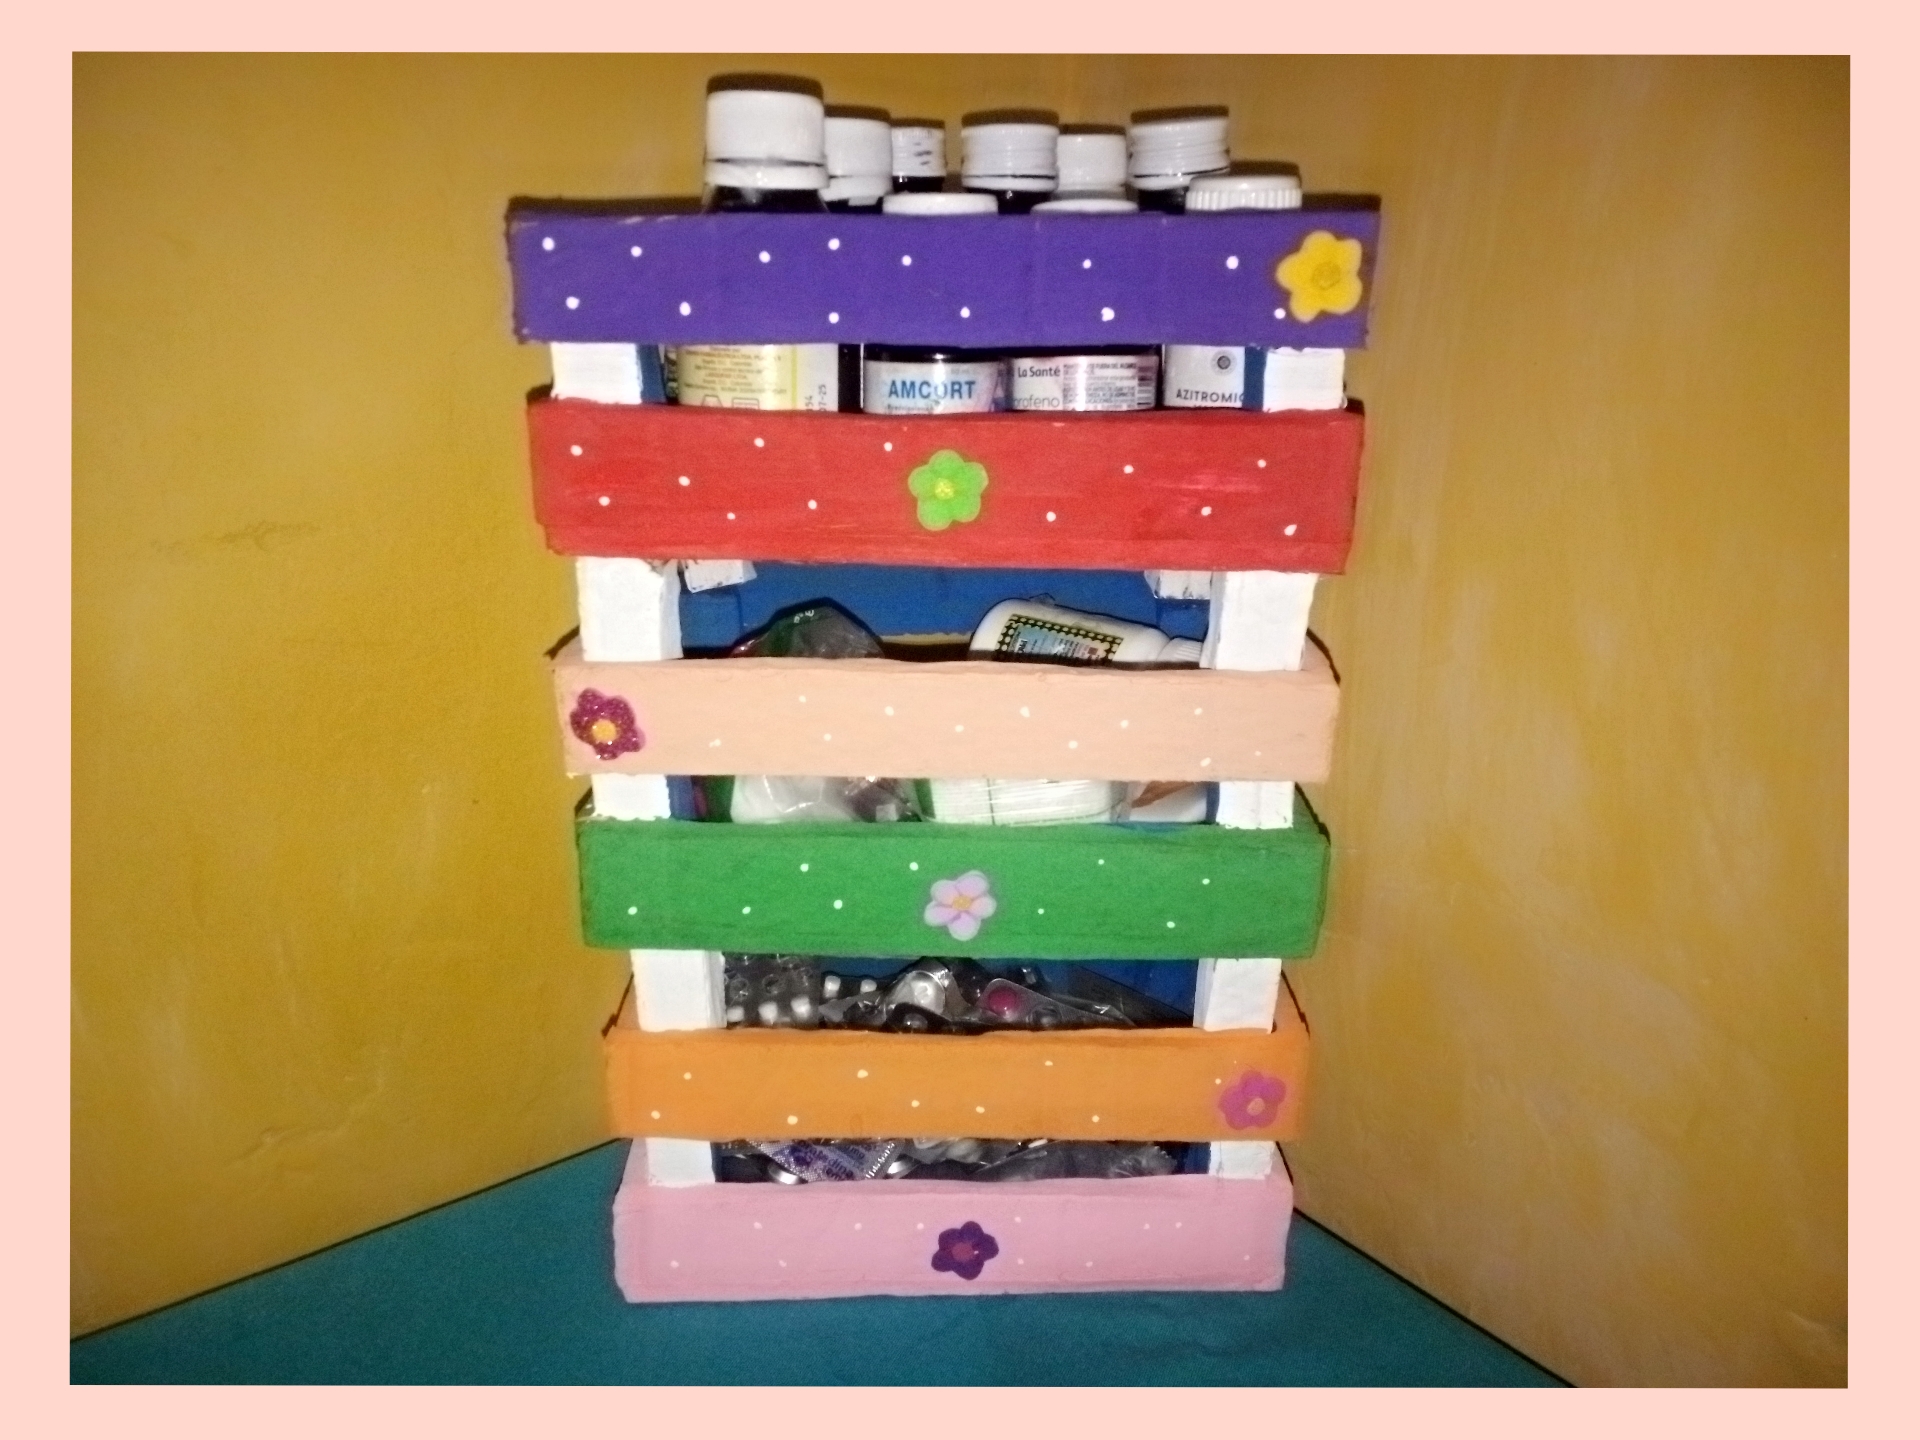
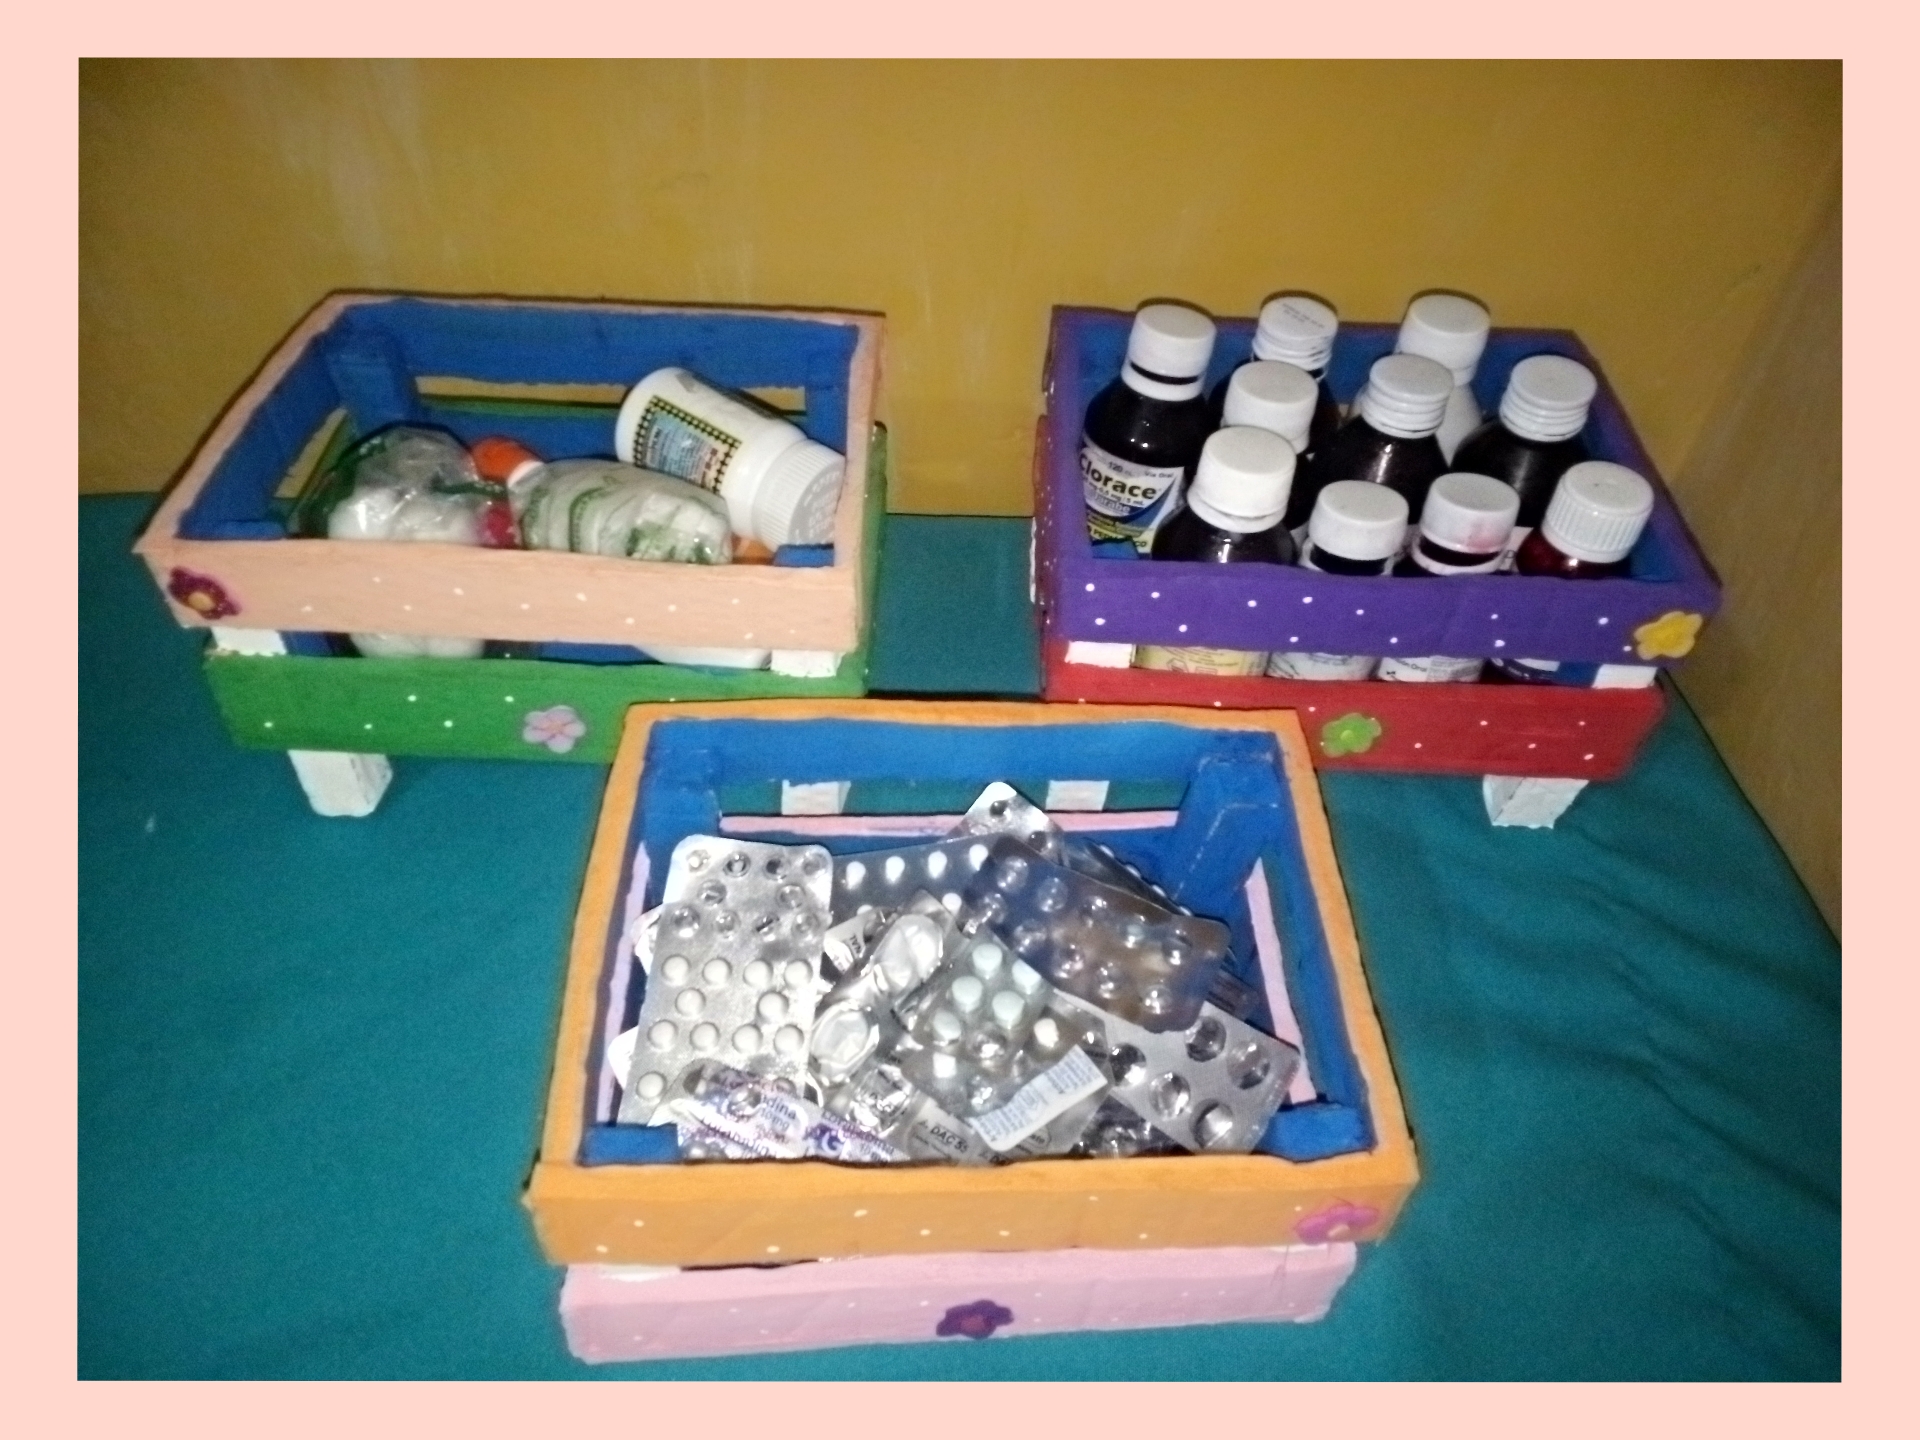
Hello everyone dear colleagues a pleasure to greet you happy weekend. Today I want to share with you one of my creative activities that I like to do with much affection for you a step by step of an organizer basket made of cardboard I like this organizer because it has three compartments where we can store everything in one place has enough space to store things like in this case medicines, craft materials, clothes and vegetables or whatever we choose is something that everyone should have in our home here I leave its elaboration.
Hola a todos queridos compañeros un gusto en saludarlos feliz fin de semana. Hoy les quiero compartir una de mis actividades creativas que me gusta hacer con mucho cariño para ustedes un paso a paso de una cesta organizadora hecha de cartón me gusta esta organizadora porque tiene tres compartimos en dónde podemos guardar todo en un solo lugar cuenta con suficiente espacio para guardar cosas como en este caso medicamentos, materiales de manualidades, ropa y verduras o lo que elijamos es algo que todos debemos tener en nuestro hogar acá les dejo su elaboración.

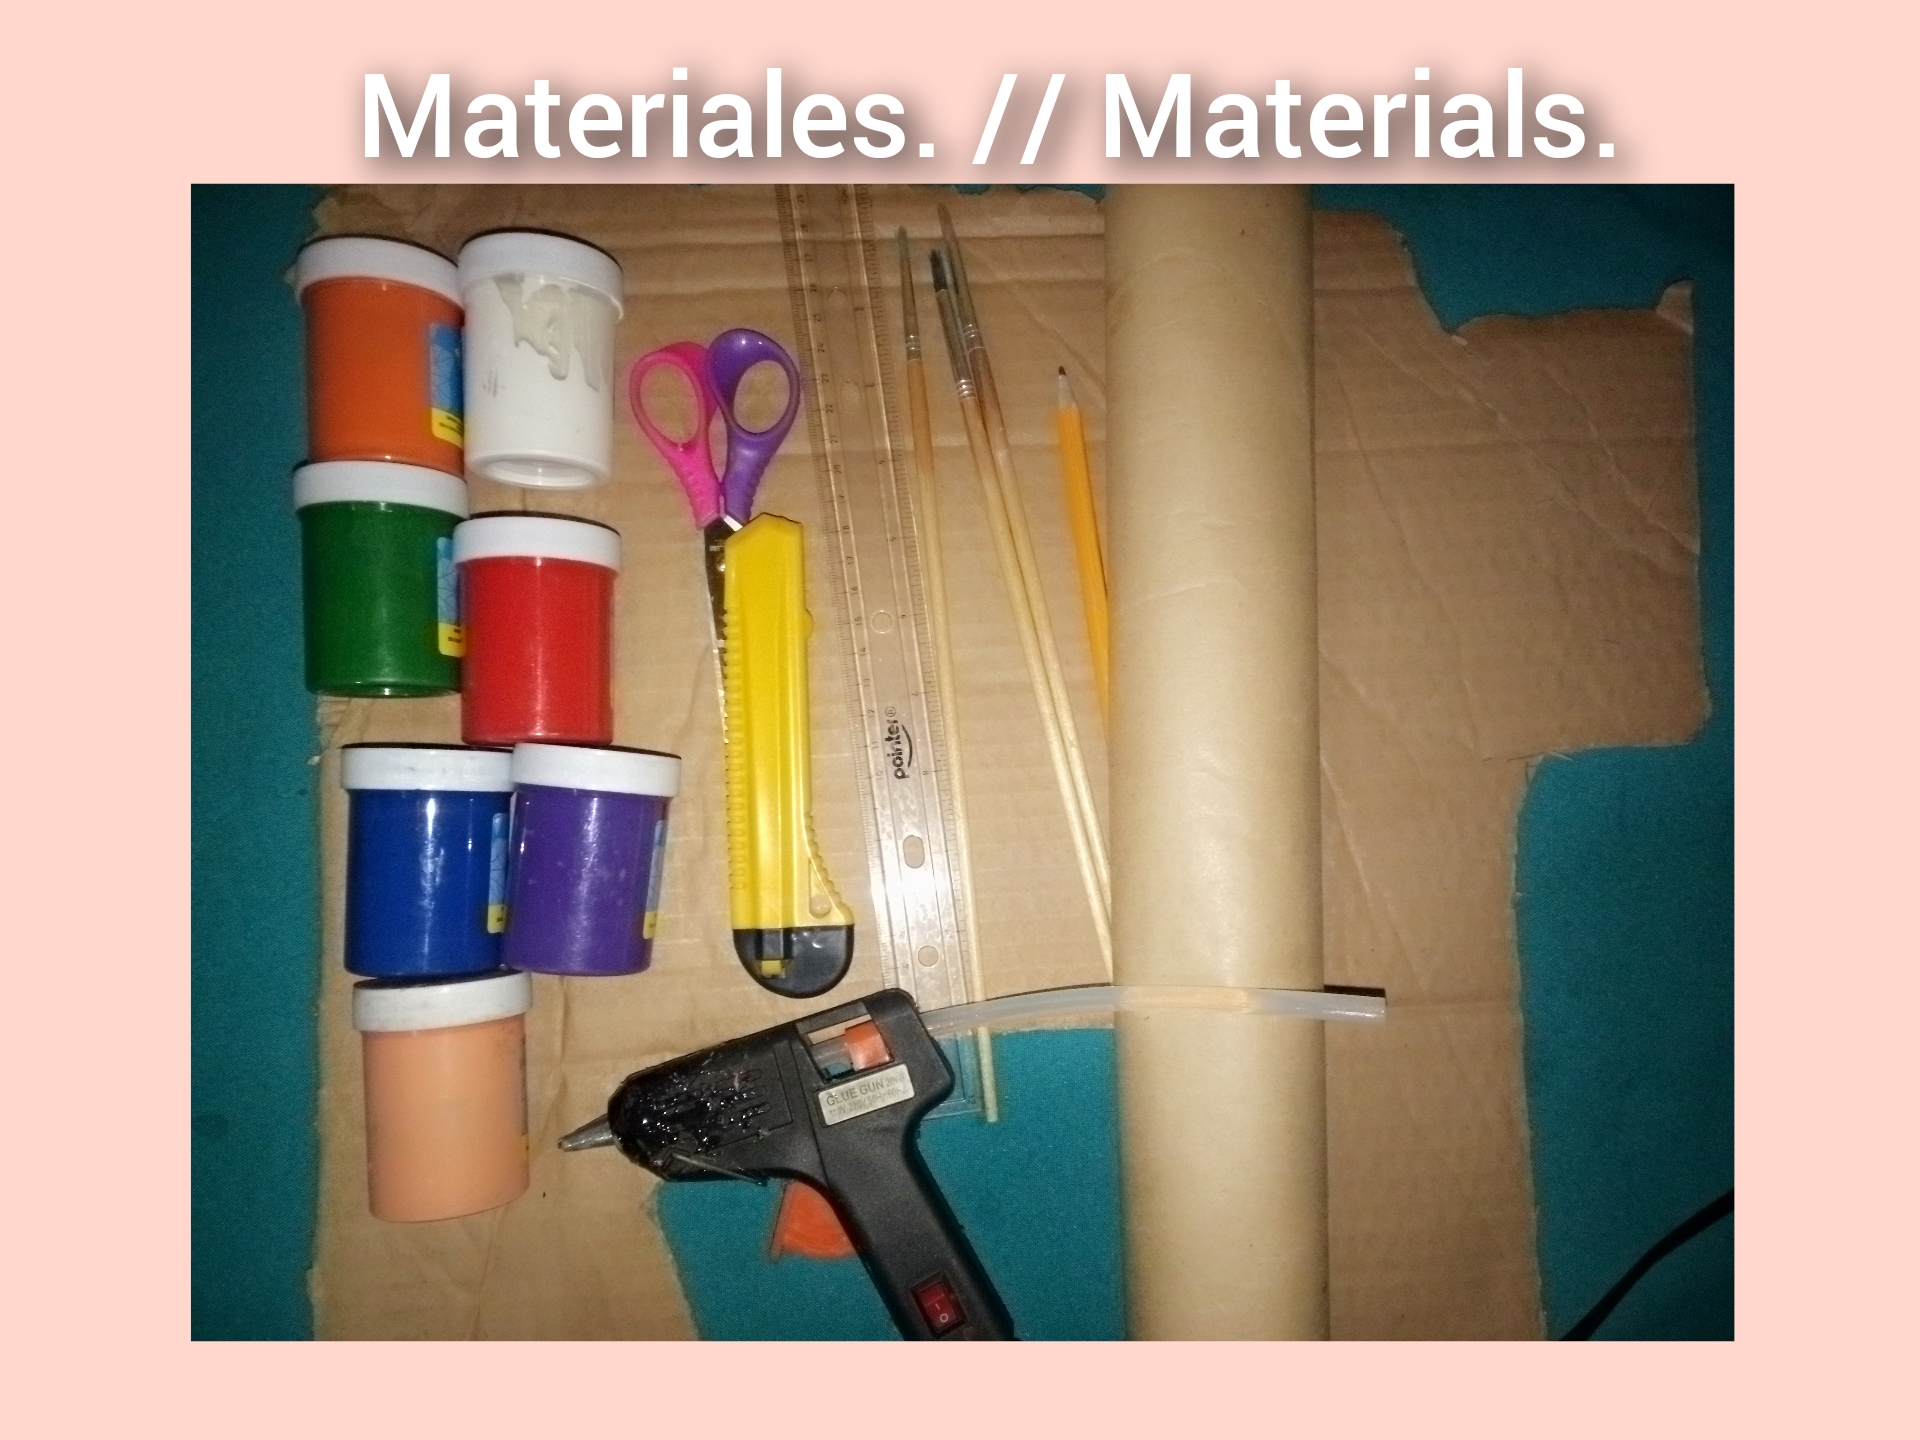
Materials.
Materiales.

- Cardboard
- Paints
- Pencil
- Ruler
- Cutter
- Scissors
- Paintbrushes
- Kraft paper
- Silicone gun
- Cartones
- Pinturas
- Lápiz
- Regla
- Cúter
- Tijera
- Pinceles
- Papel kraft
- Pistola de silicón

Step by step.
Paso a paso.

Paso 1. // Step 1.
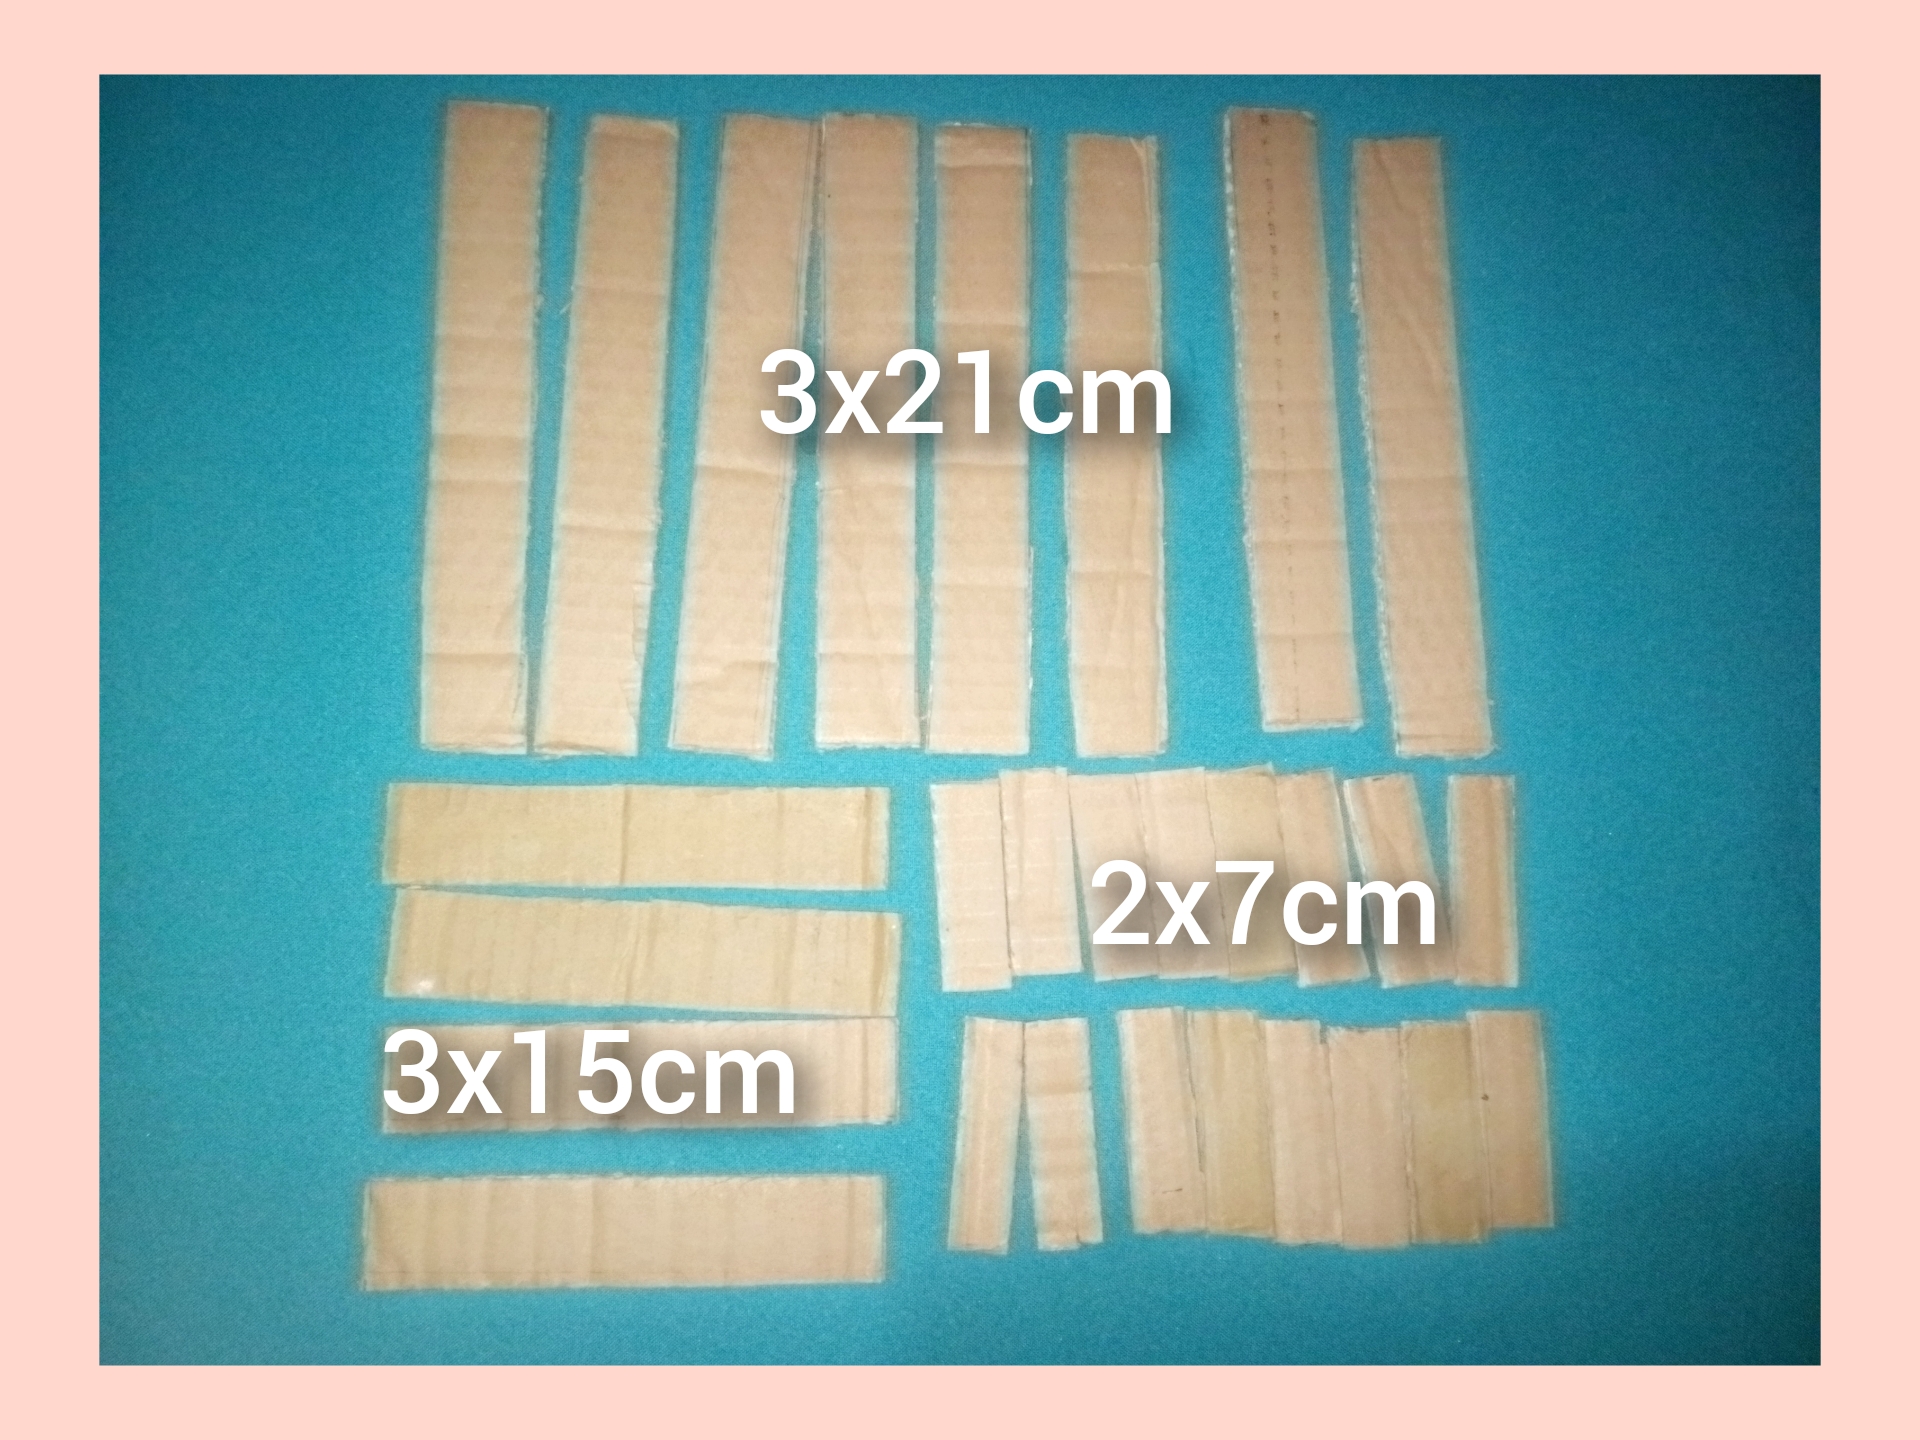
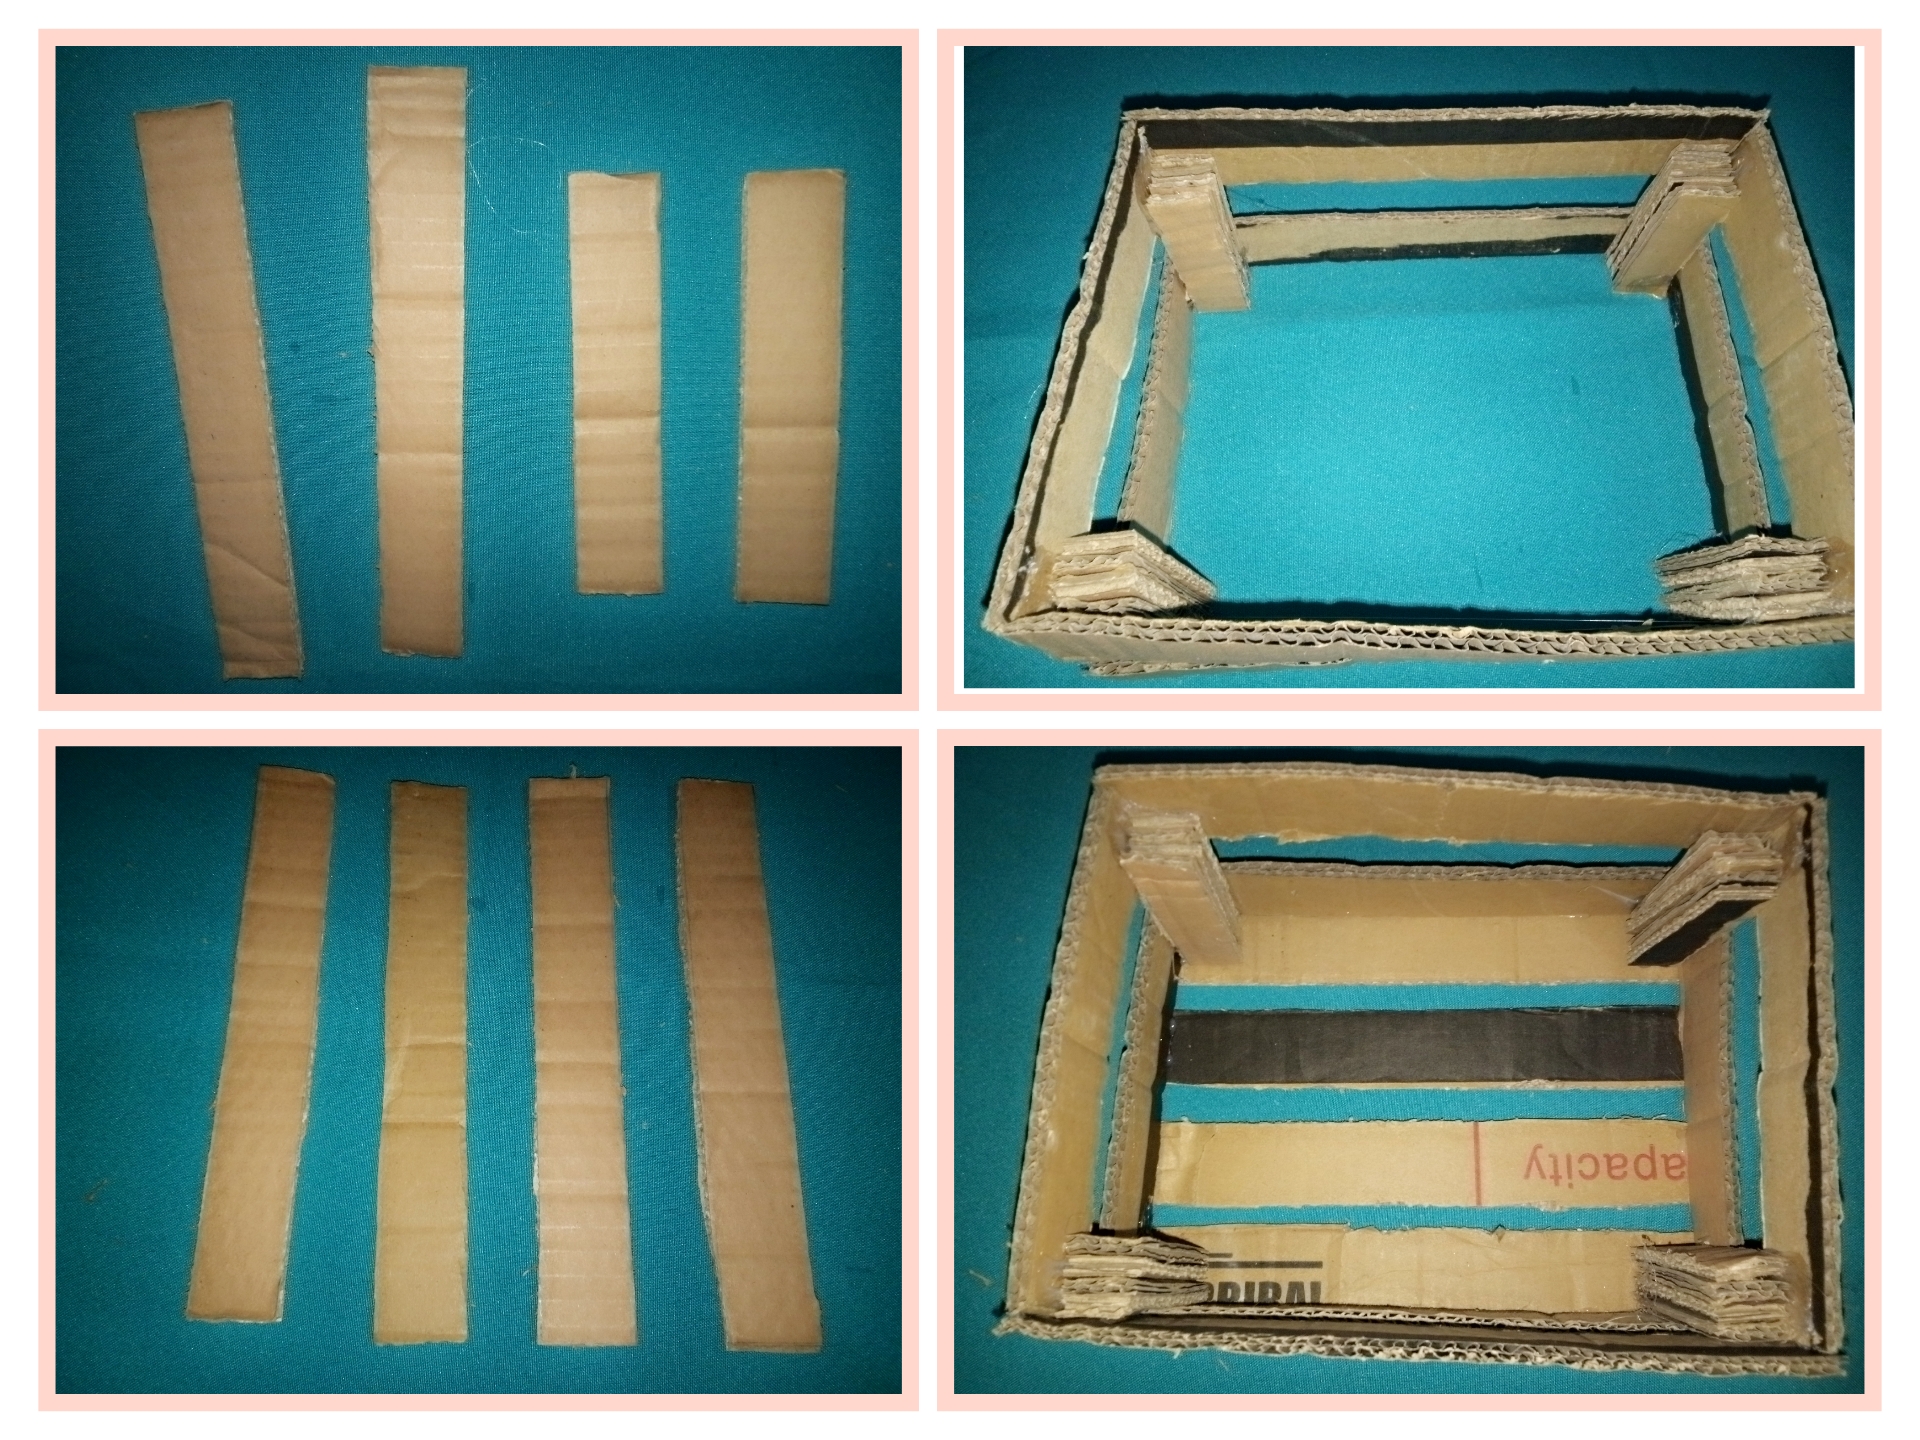
To start making the basket organizer take the cardboard and cut with the cutter the following measures for a short basket:
- 8 pieces of cardboard 3x 21 centimeters.
- 4 pieces of cardboard 3x 15 centimeters.
- 16 pieces of cardboard 2x7 centimeters.
The total number of pieces for the three boxes will be:
- Widths 24 of 3x15 cm
- Sides 12 of 3x15 cm
- Legs 48 of 2x 7 cm.
Para comenzar hacer la cesta organizadora coje el cartón y corta con el cúter las siguientes medidas para una cesta corta:
- 8 piezas de carton de 3x 21 centímetros.
- 4 piezas de cartón de 3x 15 centímetros.
- 16 piezas cartón de 2x7 centímetros.
El número total de piezas de las tres cajas será:
- Anchos 24 de 3x15 cm
- Laterales 12 de 3x15 cm
- Patas 48 de 2x 7 cm.
Paso 2. // Step 2
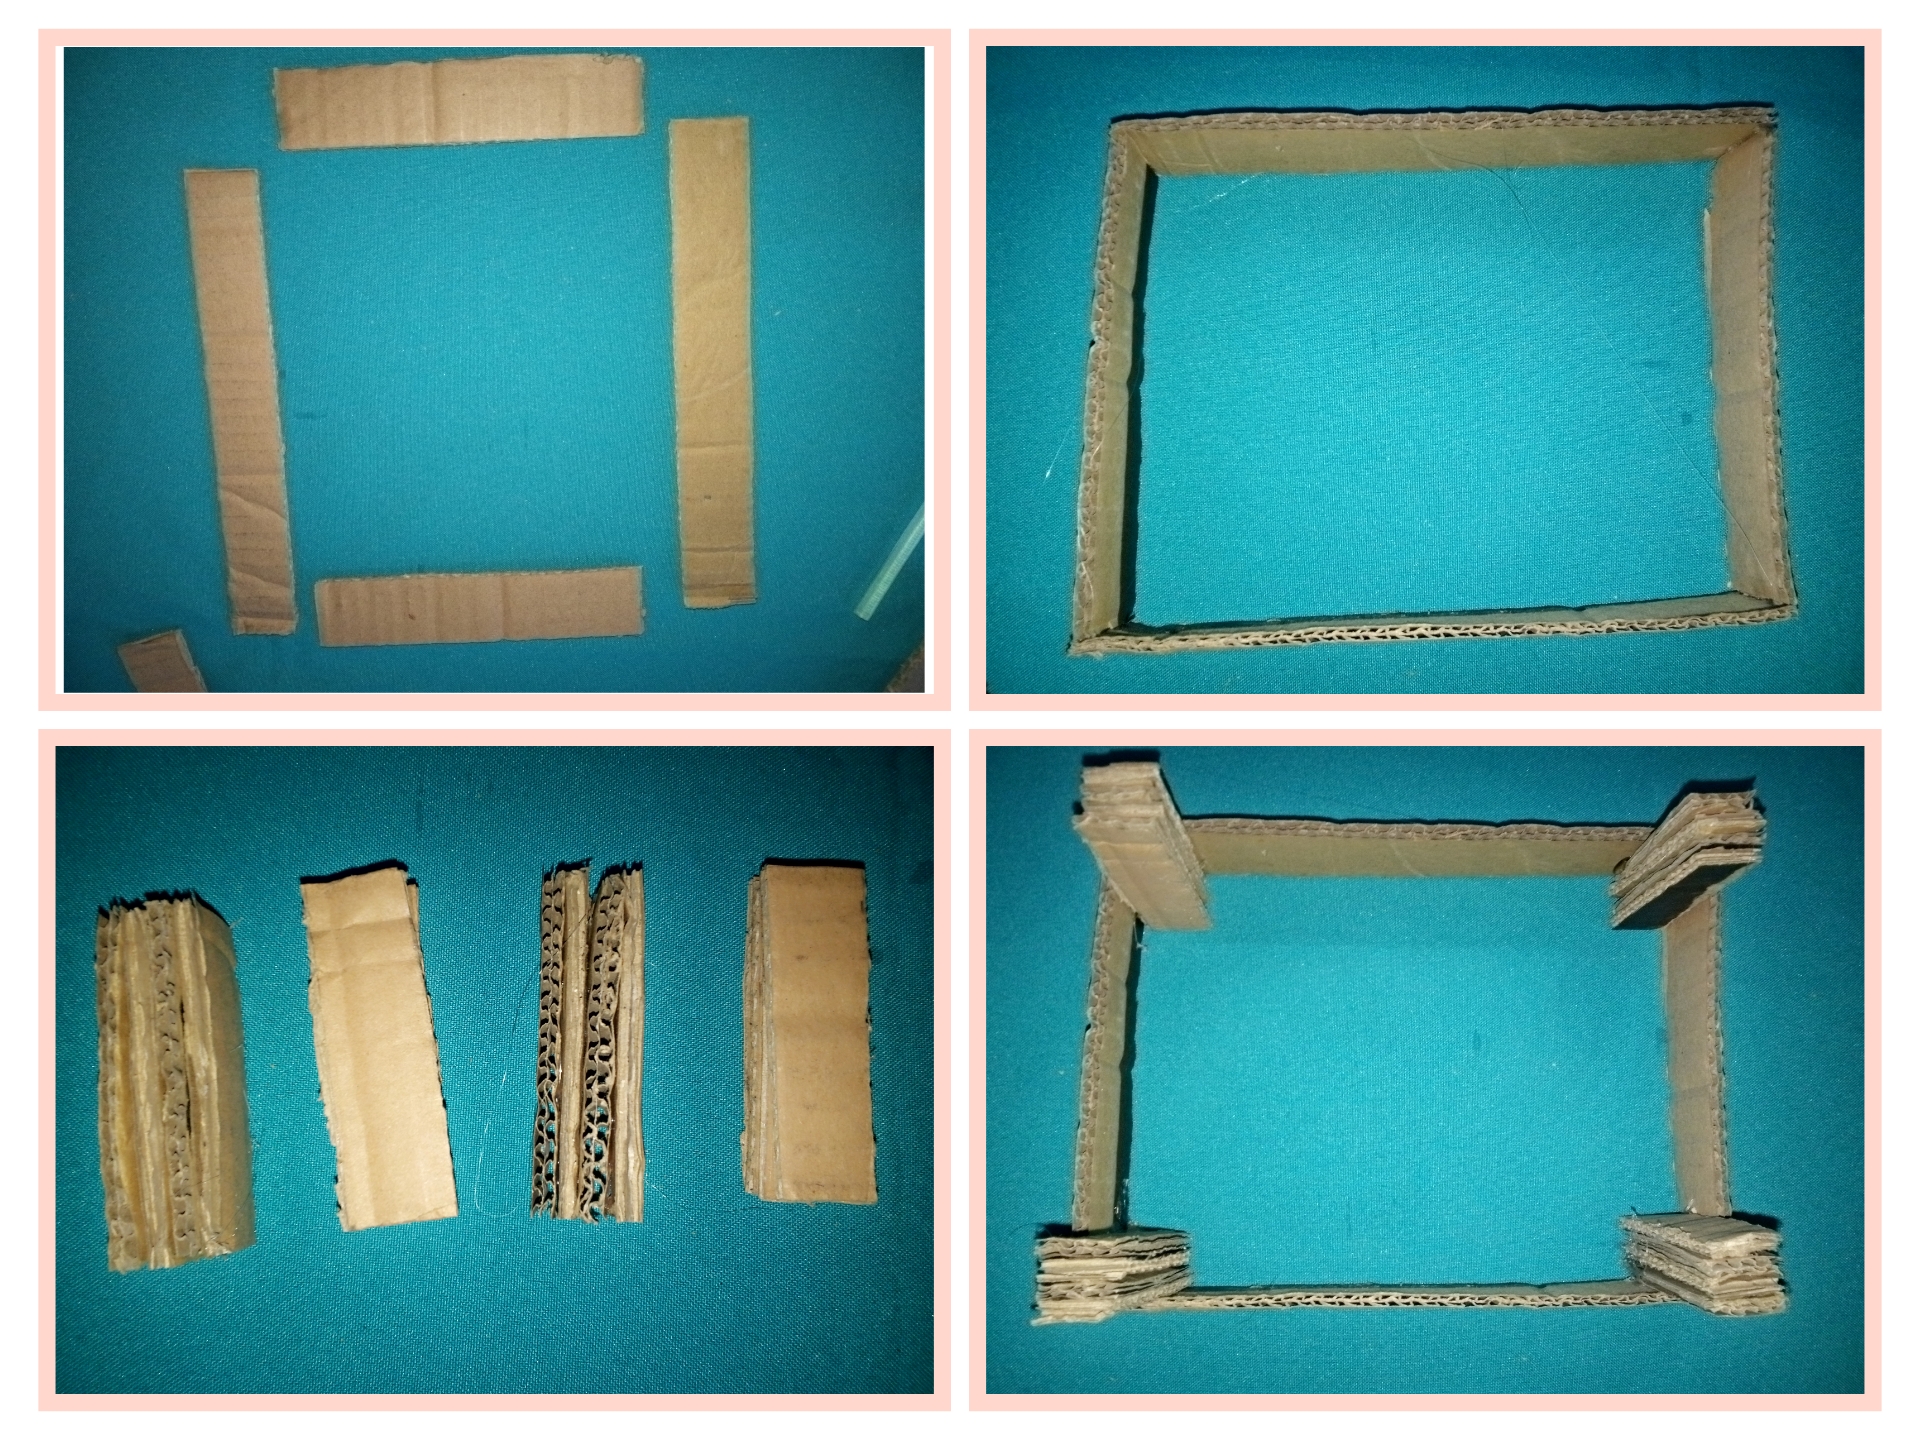
Once the above mentioned measurements of the three boxes have been made, we glue with silicone two wide pieces and two side pieces. Then take the smaller measurements for the legs and glue four pieces together to make it thicker and we will do it with all the pieces of that size. Each box has four legs and we glue with hot silicone.
Una vez hecha las medidas mencionadas de las tres cajas pegamos con silicón dos piezas de ancho y dos piezas laterales. Después toma las medidas más pequeñas para las patas y pega cuatro piezas juntas para que quede más gruesa y haremos con todas las piezas de esa medida. Cada caja lleva cuatro patas y pegamos con silicón caliente .
Paso 3. // Step 3.
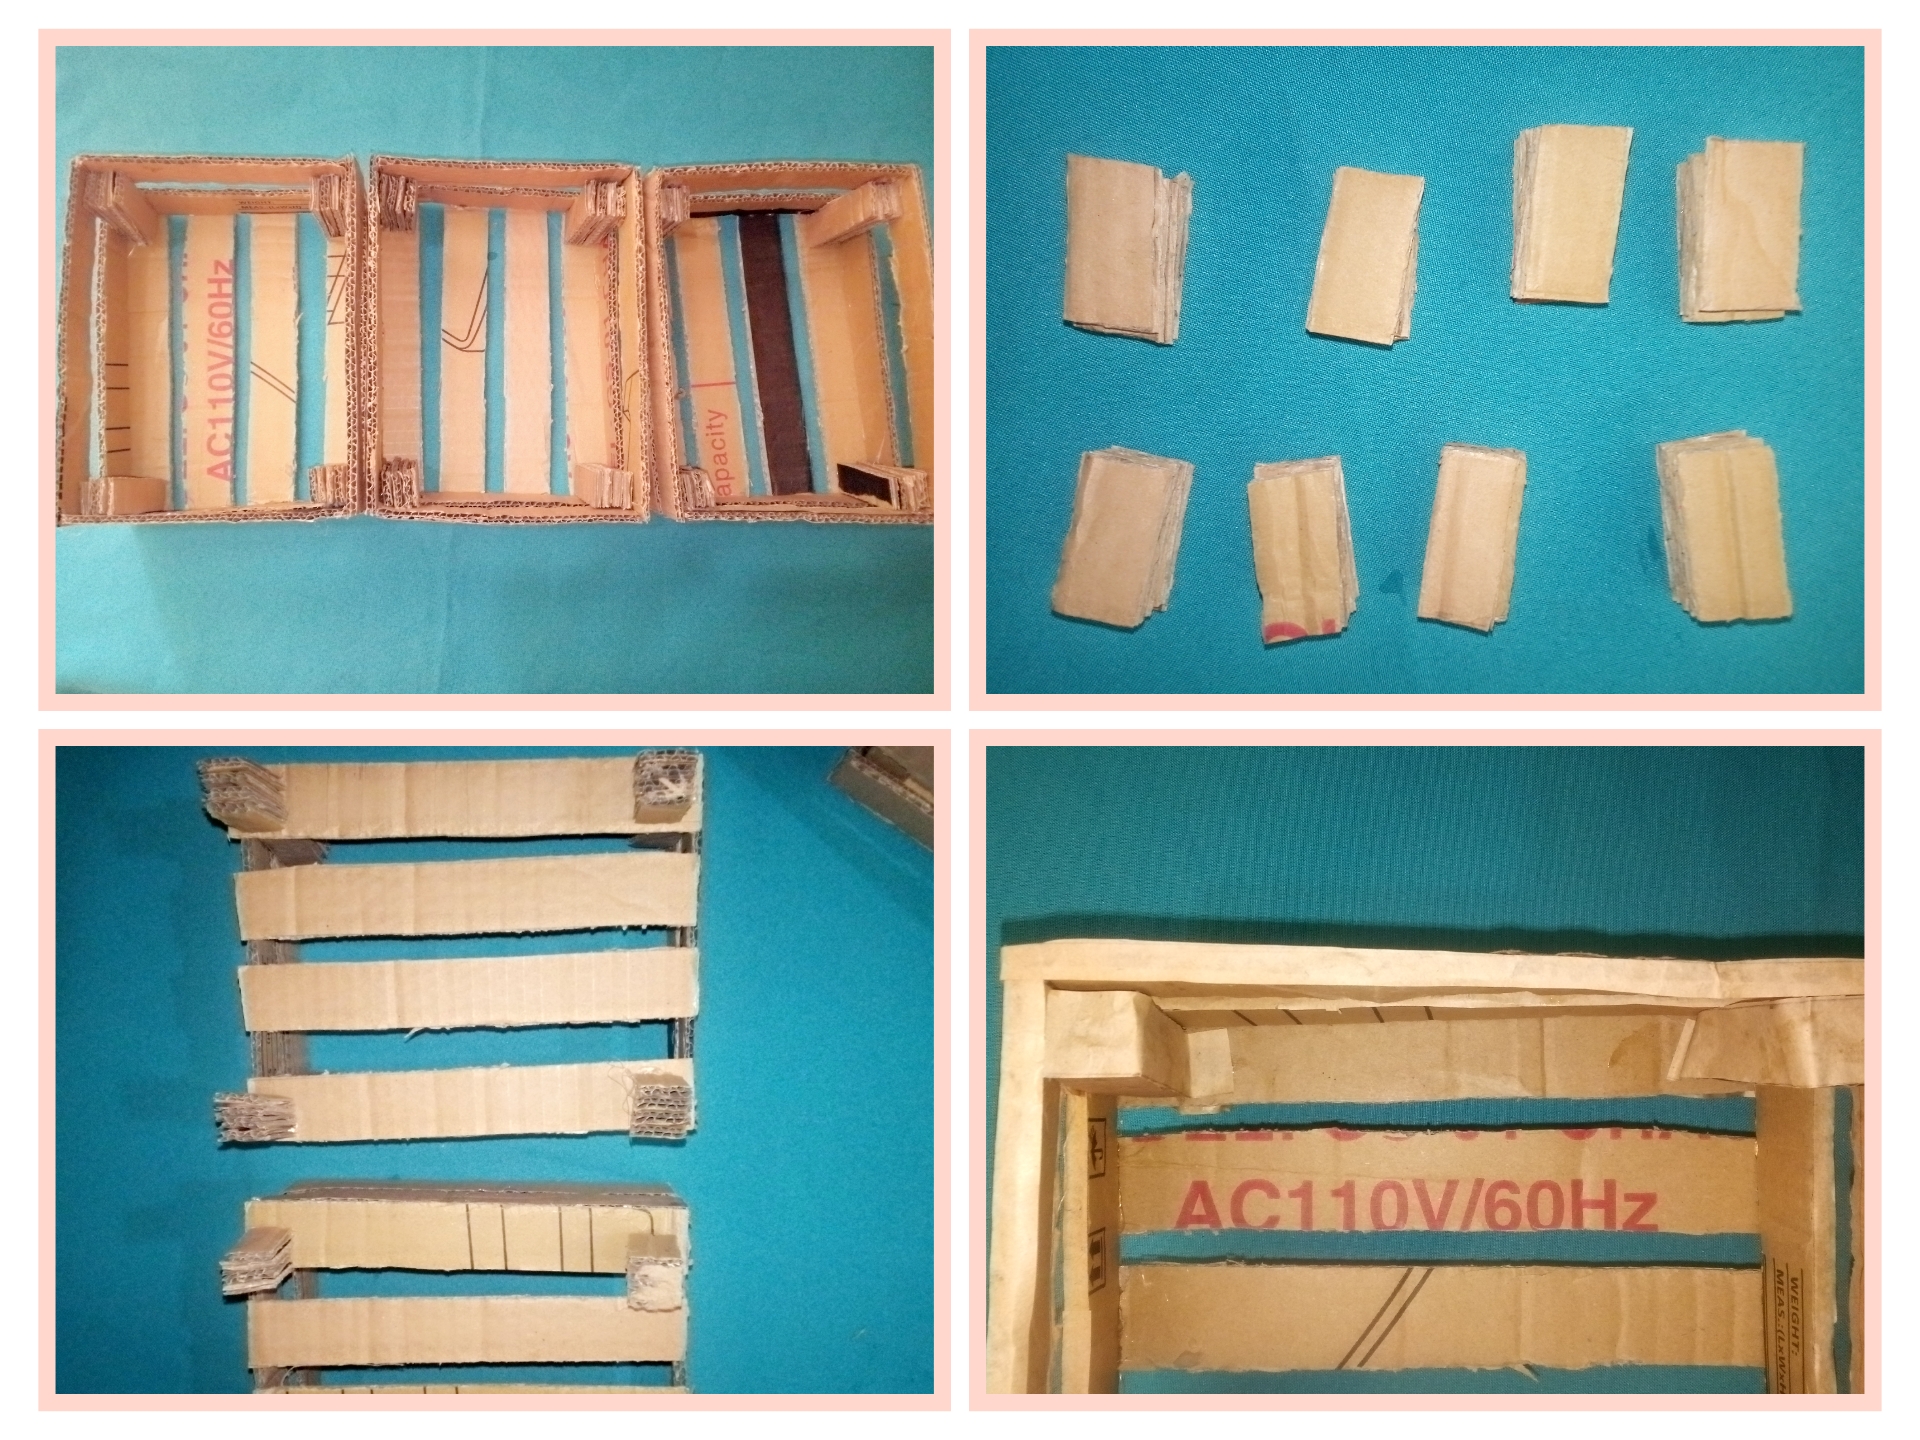
We continue, leave 1 centimeter of space and glue again two wide pieces and two side pieces, leaving a space on top to fit the other boxes for the base, we glue four more wide pieces and thus we complete a box.
Continuamos, dejamos 1 centímetro de espacio y volvemos a pegar dos piezas anchas y dos piezas laterales, dejando un espacio en la parte superior para encajar las otras cajas para la base, pegamos cuatro piezas anchas más y así completamos una caja.
Paso 4. // Step 4.
Make two more boxes in the same way, glue the legs on the bottom and cover the holes and the legs of the boxes with Kraft paper.
Haz dos cajas más del mismo modo pegamos las patas en la parte de abajo y con el papel Kraft tapa los orificios y las patas de las cajas.
Paso 5. // Step 5.
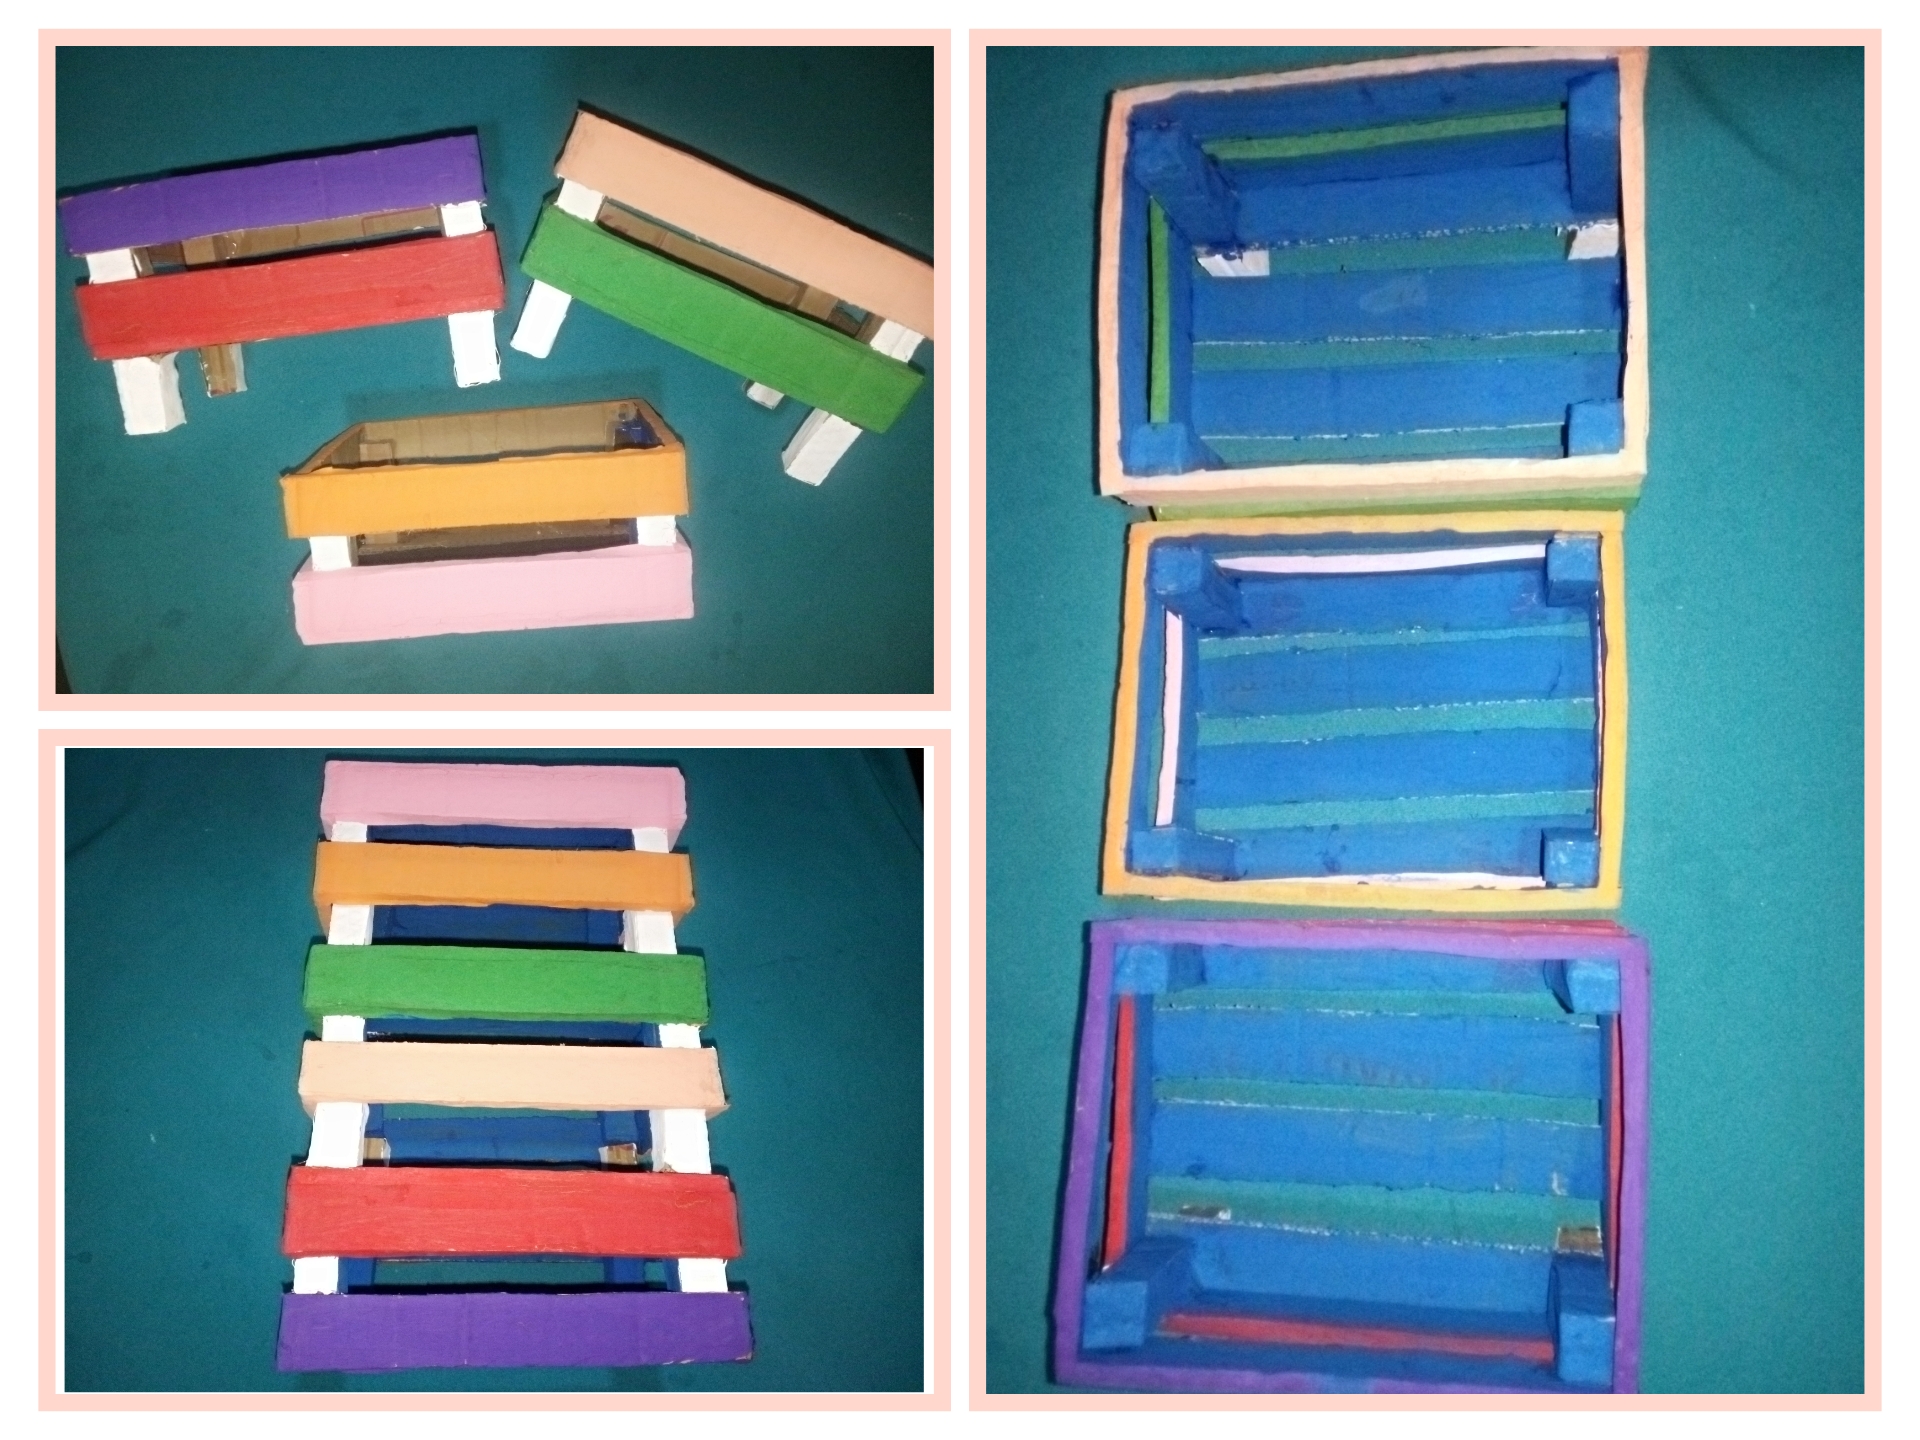
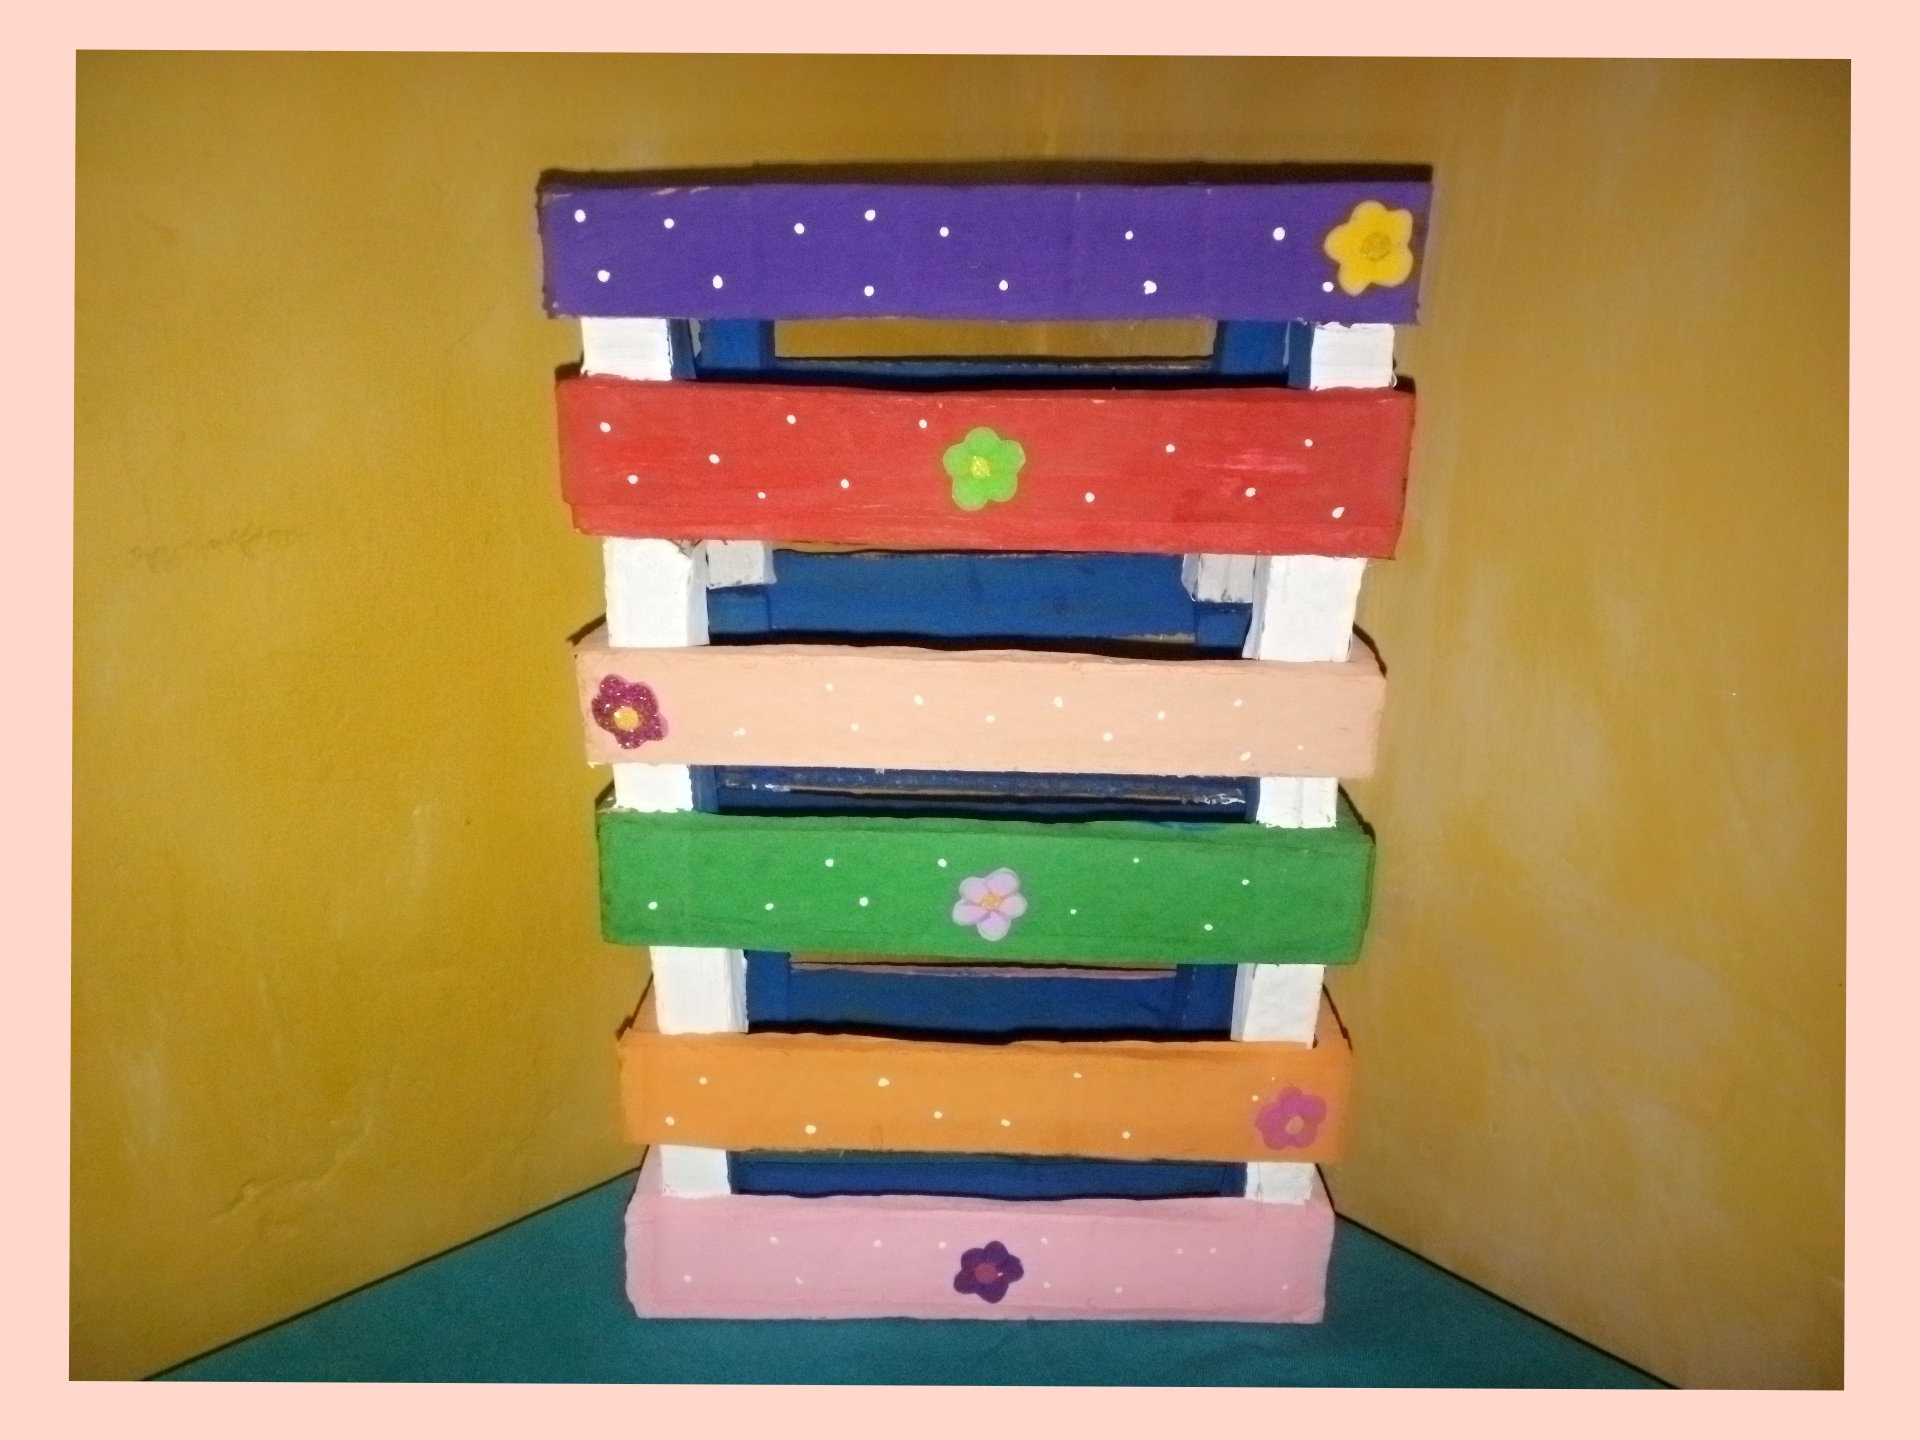
We paint it as we want, I painted it colorful I like it a lot and inside I painted in one color the legs in white to highlight and finally I decorated with an old flower and some white dots that I made with the tip of the pencil let it dry and organize our things.
Lo pintamos como queramos yo lo pinte de colores me gusta mucho y por dentro pinte de un color las patas de blanco para resaltar y por último decore con una viejas florecita y unos punticos blanco que hize con la punta del lápiz deja secar y organizamos nuestras cosas.

✨Final result. // Resultado final.✨

Gracias por visitar.
Todas las fotos y el contenido son originales que hago diariamente para mi blog. Para La traducción uso deepl los marcos y separadores es usado de canva .📷🖼️🤗
Thank you for visiting.
All photos and content are originals that I make daily for my blog. For translation I use deepl the frames and separators are used from canva .📷🖼️🤗


0
0
0.000
!DIY
!discovery 30
Thanks @stevenson7 happy day.
💙
This post was shared and voted inside the discord by the curators team of discovery-it
Join our Community and follow our Curation Trail
Discovery-it is also a Witness, vote for us here
Delegate to us for passive income. Check our 80% fee-back Program
Thanks for the support @discovery-it have a happy weekend.
organizer basket are a must have. This one looks even lovely. Nicely done.
Greetings @diyhub glad you liked the organizer basket yes it is very colorful and very practical to use at home thanks for commenting and for the support 🤗 happy and blessed day!!!!
You can query your personal balance by
!DIYSTATSCongratulations, your post has been curated by @dsc-r2cornell. You can use the tag #R2cornell. Also, find us on Discord
Felicitaciones, su publicación ha sido votada por @ dsc-r2cornell. Puedes usar el tag #R2cornell. También, nos puedes encontrar en Discord
Gracias por el apoyo!! 🤗
Que bonita te quedó esa cesta, me gusta la idea. Quedaría todo bien organizado y muy lindo 🤩
Si claro queda todo organizado amiga gracias por pasar poraqui.