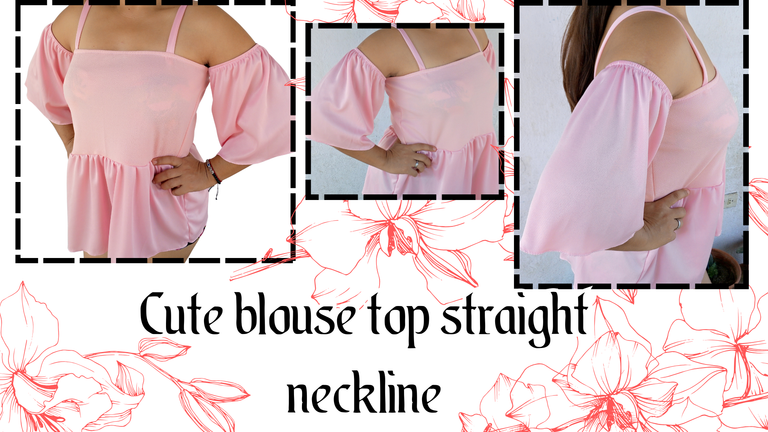
Tutorial for making a straight neckline top with sleeves (ENG/ESP)
Hello dear community, happy weekend to all of you, I hope you enjoy good health, which after all is the fundamental pillar to achieve what we want.
For my part, this week has been full of small inconveniences, with the power cuts in my country, which produces a delay in the projects we have proposed for a specific day.
Fortunately, between yesterday afternoon and evening, and part of today, when there was light, I was able to dedicate some time to sewing, I also took the opportunity to wash the clothes I had accumulated.
I wanted to make another project that I have in mind, for the contest of the month in the community, which was not possible for this day, so between comings and goings of the light, I decided to de-stress a little making cutting and sewing to share with you, it is a nice blouse, top straight neckline, with sleeves, straps and ruffle, at the bottom of the blouse.
I hope you like it, and you will be motivated to see how I made it.
The pictures you will see below, were taken with my phone model TECNO SPARK GO 2024.
Hola querida comunidad, feliz fin de semana para todos, espero que gocen de buena salud, lo que a fin de cuentas es el pilar fundamental para poder lograr lo que queremos.
Por mi parte, esta semana, ha estado llena de unos pequeños inconvenientes, con los cortes de electricidad en mi país, lo que produce un atraso en los proyectos que tenemos propuestos para un día específico.
Por fortuna, entre la tarde y noche de ayer, y parte del día de hoy, que hubo luz, pude dedicarme un poco a la costura, también aproveche para lavar la ropa que tenía acumulada.
Quería hacer otro proyecto que tengo en mente, para el concurso del mes en la comunidad, que no me fue posible para este día, así que entre idas y vueltas de la luz, decidí desestresarme un poco haciendo corte y costura para compartir con ustedes, se trata de una linda blusa, top escote recto, con mangas, tirantes y volado, en la parte baja de la blusa.
Espero les guste, y se motiven a ver como la hice.
Las fotografías que verán a continuación, fueron tomadas con mi teléfono modelo TECNO SPARK GO 2024.

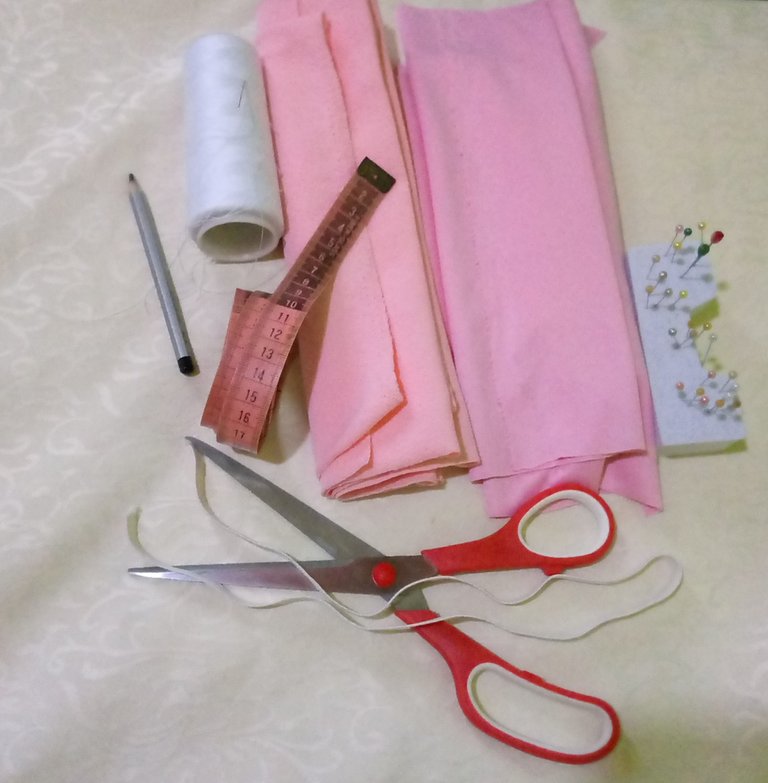
Materials:
- Pink fabrics of 2 shades and 2 textures.
- Thread
- Tape measure
- Scissors
- Elastic
- Pencil
- Needle, pins
- Household sewing machine
Los materiales:
- Telas color rosado de 2 tonalidades y 2 texturas
- Hilo
- Cinta métrica
- Tijera
- Elástico
- Lápiz
- Aguja, alfileres
- Máquina de coser doméstica
 |  |  |
|---|
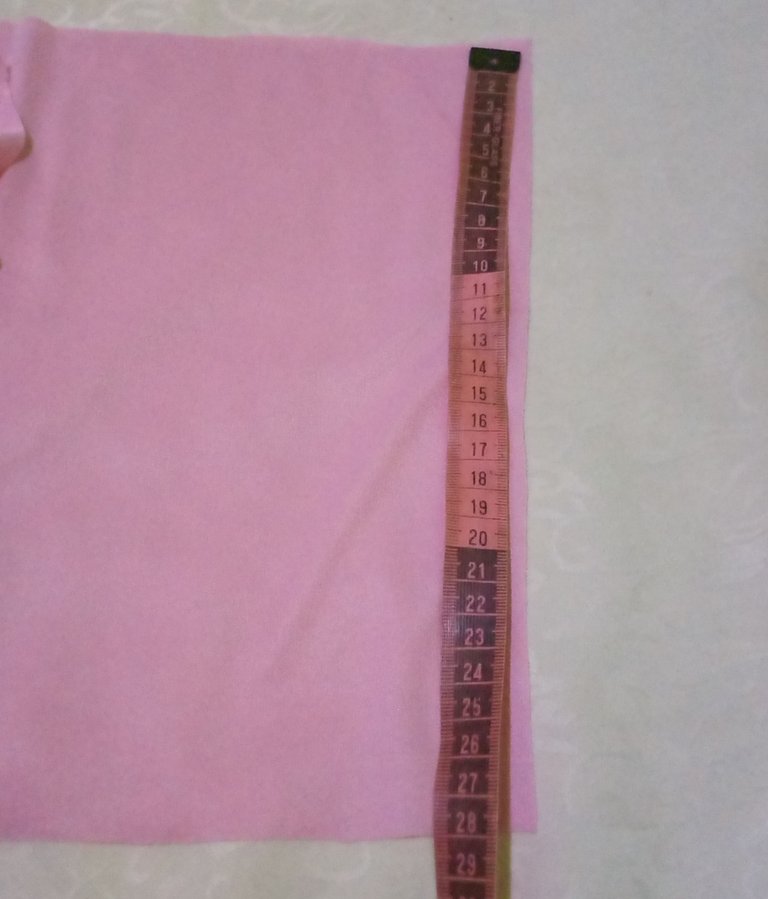
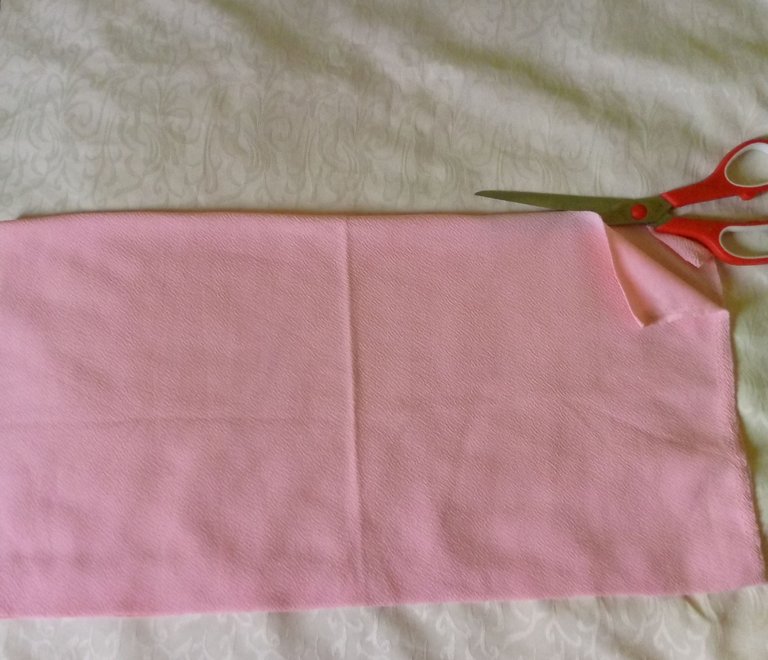
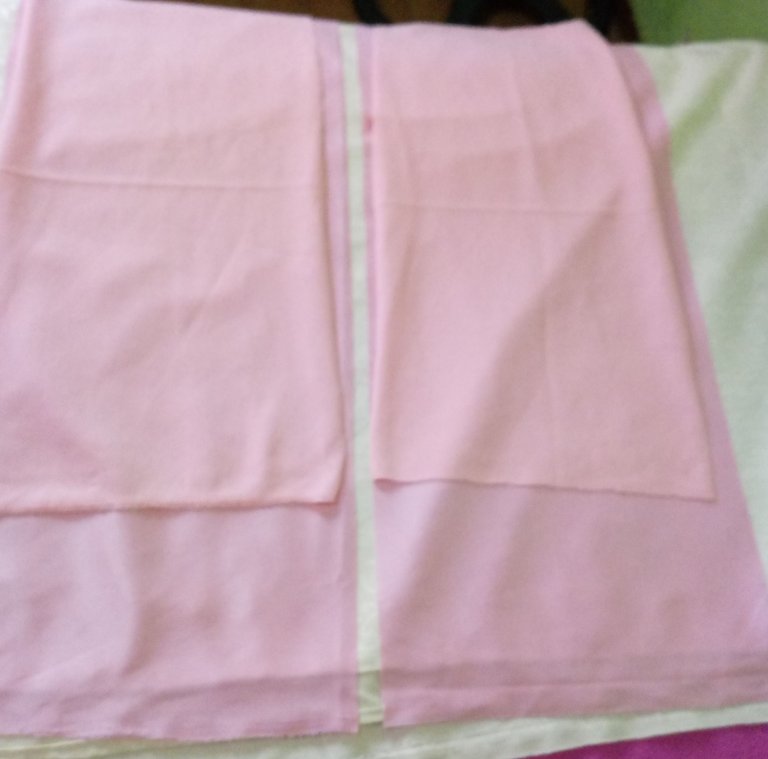
The first step is to take all the measurements of each of the pieces that will form the blouse, then cut each of the pieces.
The blouse consists of 8 pieces, classified in 2 upper pieces, rectangular, front and back, of 50 cm X 27 cm minus 1 cm for seam allowance, for all the measures.
2 Rectangles for the 2 lower pieces that will form the piece with ruffle, measures, 74 cm X 27 cm.
2 Rectangles for the sleeves of 60 cm X 28 cm.
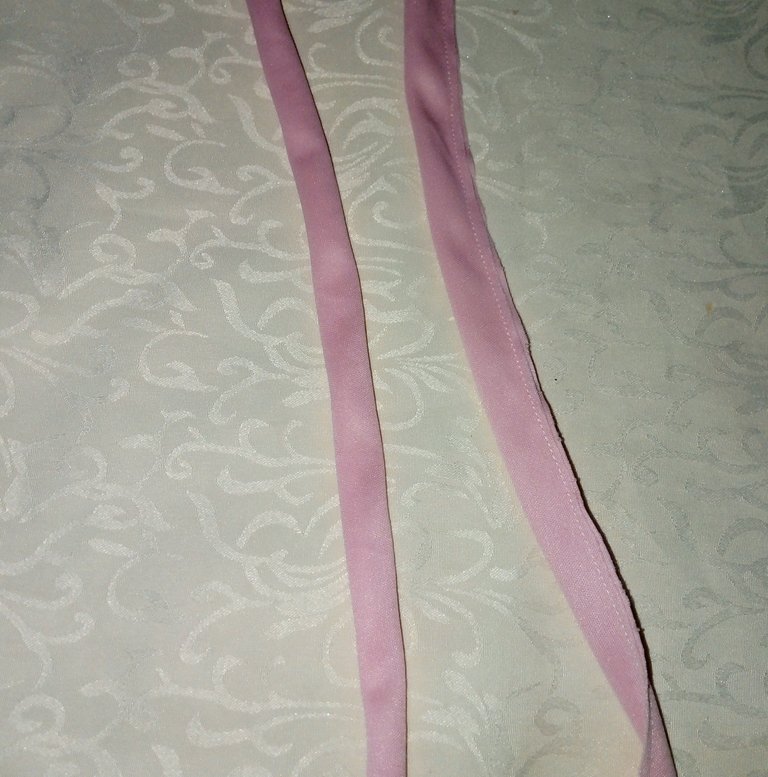
2 suspenders of 38 cm X 4 cm. Total 8 pieces.
El primer paso es sacar todas las medidas de cada una de las piezas que formaran la blusa, después cortar cada una de las piezas.
La blusa consta de 8 piezas, clasificadas en 2 piezas superiores, rectangulares, delantera y trasera, de 50 cm X 27 cm menos 1 cm para margen de costura, para todas las medidas.
2 Rectángulos para las 2 piezas inferiores que formaran la pieza con volado, medidas, 74 cm X 27 cm.
2 Rectángulos para las mangas de 60 cm X 28 cm.
2 Tirantes de 38 cm X 4 cm. Total 8 piezas.
 |  |  |
|---|
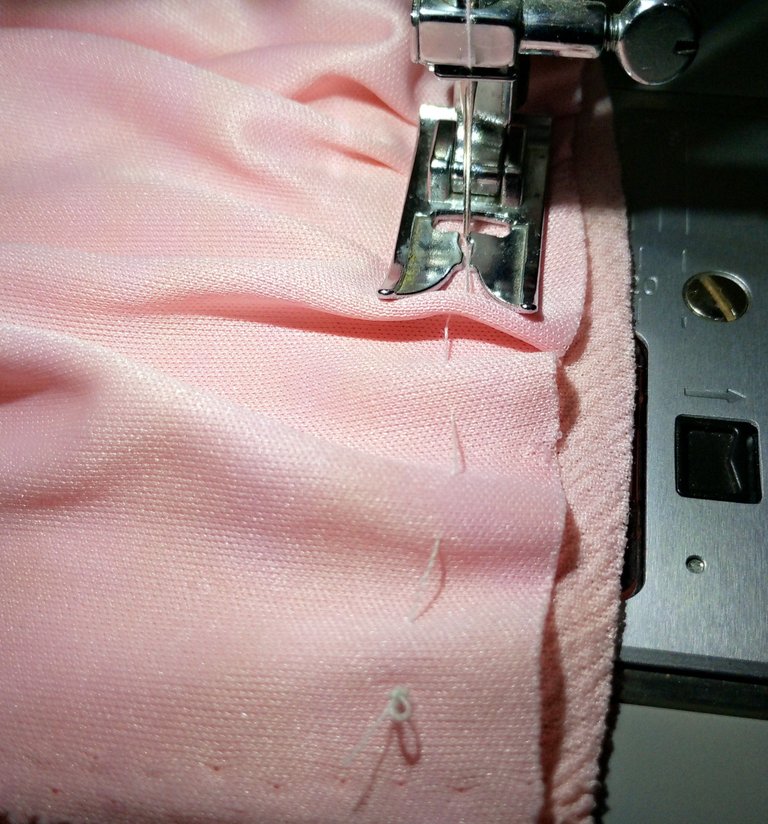
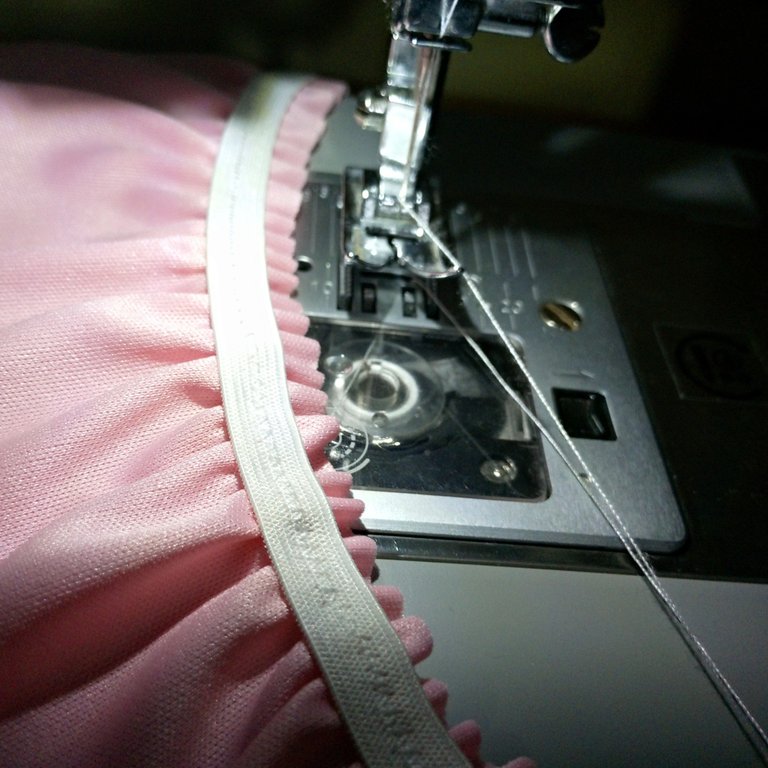
We continue, and we will begin to make the top pieces, with the 4 main pieces, we will take 2 longer pieces and we will gather them with stitches with a needle by hand with 1 to 2 cm distance between stitches, after we have the piece gives the fabric softer and with better drape, we will stick it to the firmer fabric with pins only on the sides and we will sew it to a seam allowance of 1 cm, for the gathering we will sew carefully bringing the gathering as close as possible to what we want to achieve; however, the gathering when it reaches the machine always tends to change with the machine's seam allowance, so here we are going to be cautious.
We sew both pieces, and reserve to advance other pieces, which would be the sleeves.
Continuamos, y vamos a comenzar a hacer las piezas superiores, con las 4 piezas principales, tomaremos 2 piezas más largas y las vamos a fruncir con puntadas con una aguja a mano de 1 a 2 cm de distancia entre puntadas, después que tengamos la pieza da la tela más suave y con mejor caída, vamos a pegarla a la tela más firme con alfileres solo en los laterales y la vamos a coser a un margen de costura de 1 cm, para el fruncido vamos a ir cosiendo con cuidado llevando el fruncido lo más cerca a lo que queremos lograr; sin embargo, el fruncido cuando llega a la máquina siempre tiende a cambiar con la corrida de la costura de la máquina, así que aquí vamos a ser cautelosos.
Cosemos ambas piezas, y reservamos para adelantar otras piezas, que serían las mangas.
 |  |
|---|---|
 |  |
Previously, I indicated the measurements of these pieces for the sleeves, here we are going to sew the elastic, which we are going to stretch from end to end and sew, the measurements of the elastic will depend on the thickness of the arm so that it does not hang and look bad, but we will always measure the elastic to the middle of the fabric and the rest is stretched, making a first seam on the wrong side, then we turn it right side out and sew stretching the fabric together with the elastic.
Anteriormente, les indiqué las medidas de estas piezas para las mangas, aquí vamos a coser el elástico, que vamos a estirar de extremos a extremos y cosemos, las medidas del elástico va a depender del grueso del brazo para que no quede colgando y de un mal aspecto, pero siempre vamos a medir el elástico a la mitad de la tela y el resto se estira, haciendo una primera costura por el lado del revés, luego le damos la vuelta por el derecho y cosemos estirando la tela junto con el elástico.
 |  |  |
|---|
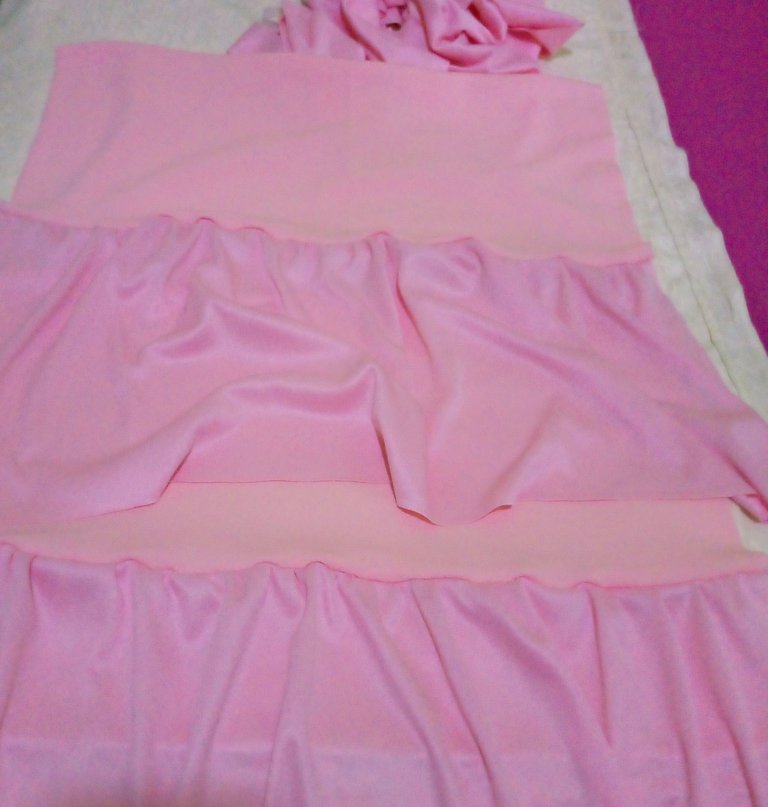
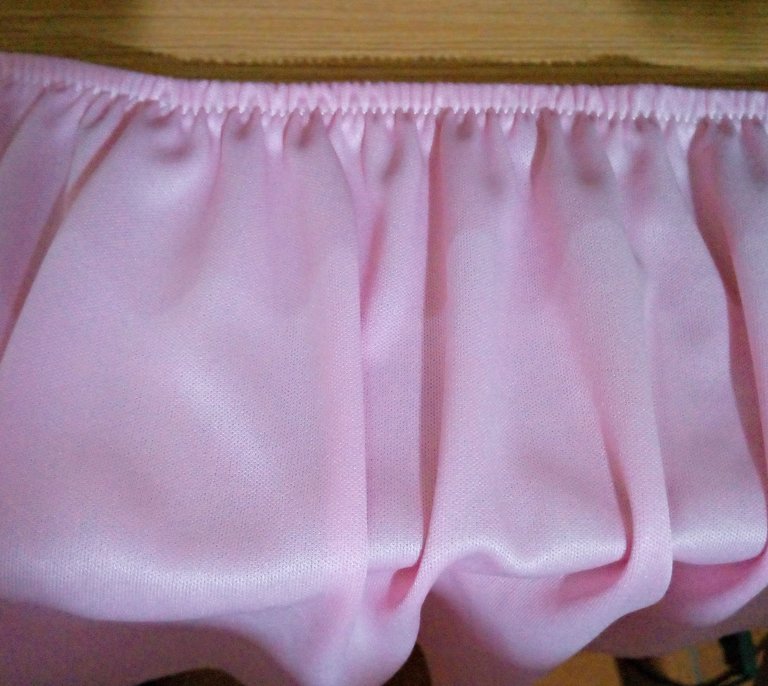
And the result for the sleeve is beautiful, here we can see how the sleeves are ready with the elastic, but before closing the sleeves with sewing, we are going to make the hems of the sleeves and the blouse.
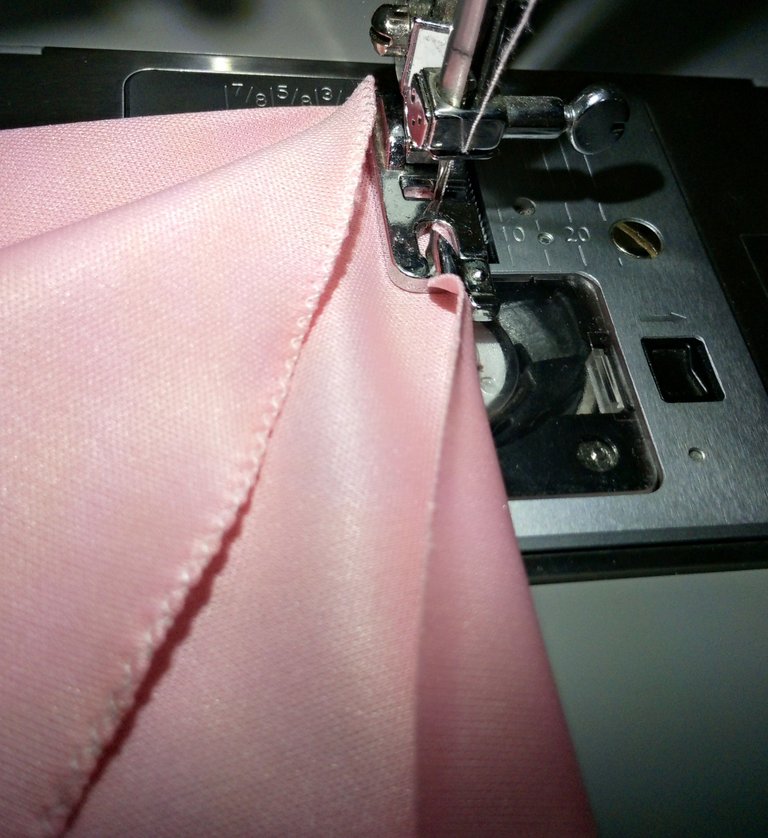
I really enjoyed this step, because I started to use a piece that I had with me for a while, but because I didn't know how to use it I hadn't used it, and as the desire to learn motivates us, I started to watch videos on the web, and to practice, until I managed to master the technique to make beautiful ruffles with this tool.
Y el resultado para la manga es hermoso, aquí podemos ver como están listas las mangas con el elástico, pero antes de cerrar las mangas con costura, vamos a hacer los ruedos de las mangas y de la blusa.
Este paso lo disfruté muchísimo, ya que empecé a utilizar una pieza, que tenía un tiempo conmigo, pero que por no saber utilizarla no la había estrenado, y como las ganas de aprender nos motiva, comencé a ver videos por la web, y a practicar, hasta que logre dominar la técnica para hacer ruedos hermosos con esta herramienta.
 |  |
|---|---|
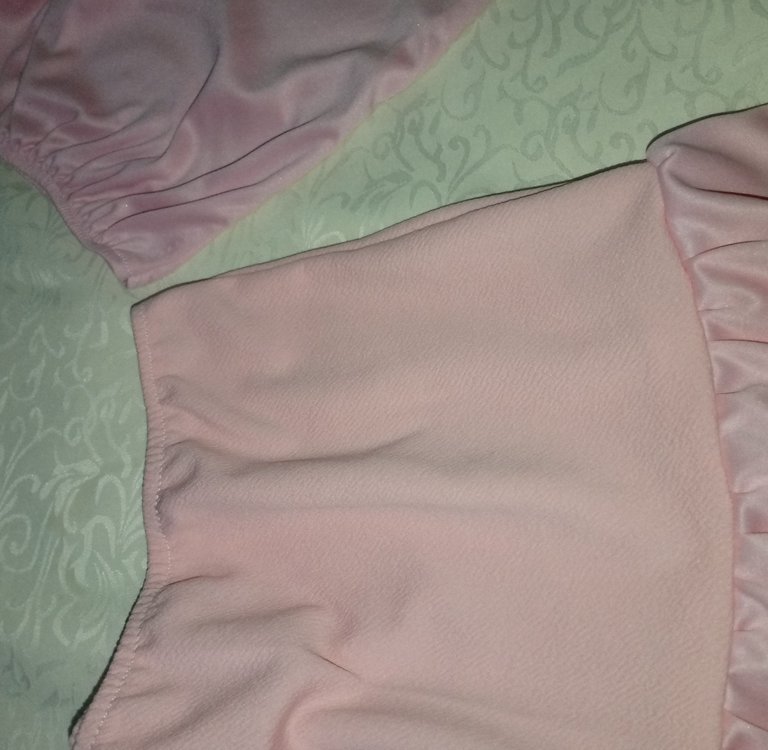 |  |
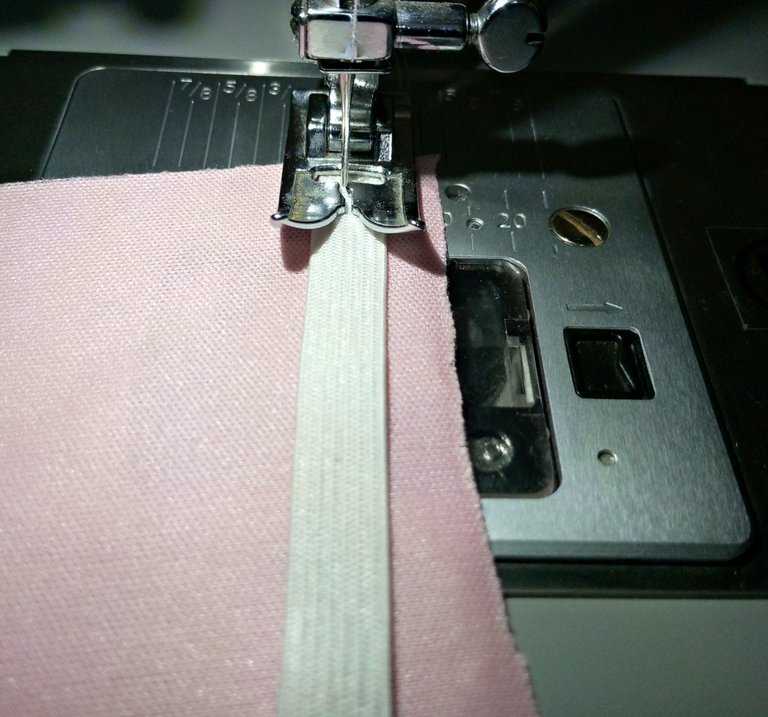
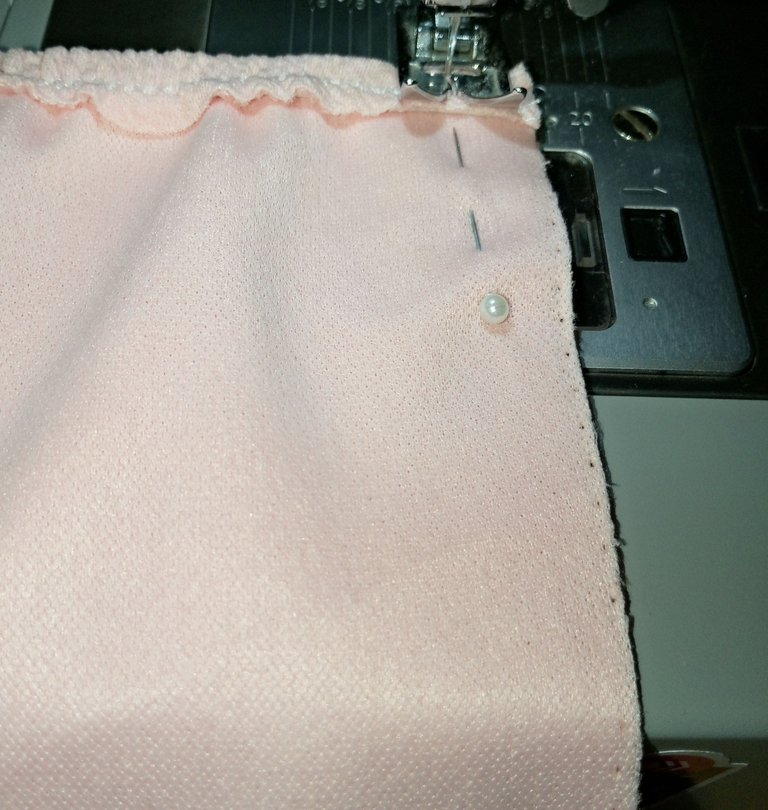
What follows is that after we have sewn the hems, either with this technique, or with the technique that you best master, we will place an elastic to the top of the top, front and back, so that it is not wide and is consistent with the style of the sleeves, this elastic we will measure half of the fabric of the top top, then we will sew with the technique we used to sew the elastic sleeves.
Then we are going to join the pieces and we are going to sew the sides of the blouse top, with the straight seam and reinforce with zigzag or overlock stitching, if you have those seams in your machine, if you don't have it just leave it with the straight seam.
The result will be like a skirt, which will change when the sleeves are attached.
Before sewing the sleeves to the blouse, we are going to close them with a straight seam, then we sew them, placing them on the sides, level with the seams, then we sew 1 cm centered between seams.
Lo que sigue es que luego que hayamos cosido los ruedos, sea con esta técnica, o con la técnica que ustedes mejor dominen, vamos a colocarle, un elástico a la parte superior del top, delantero y trasero, para que no quede ancho y sea acorde al estilo de las mangas, este elástico lo vamos a medir a la mitad de la tela del top superior, luego lo vamos a coser con la técnica que utilizamos para coser el elástico de las mangas.
Después vamos a unir las piezas y vamos a coser los costados de la blusa top, con la costura recta y reforzamos con costura de zigzag u Overlock, si tienes esas costuras en tu máquina, de no tenerla solo la dejas con la costura recta.
El resultado será como ver una falda, que cambiara cuando le coloquemos las mangas.
Antes de coser las mangas a la blusa, las vamos a cerrar con costura recta, después las cosemos, colocándolas en los costados, niveladas con las costuras, luego cosemos a 1 cm centrado entre costuras.
 |  |
|---|
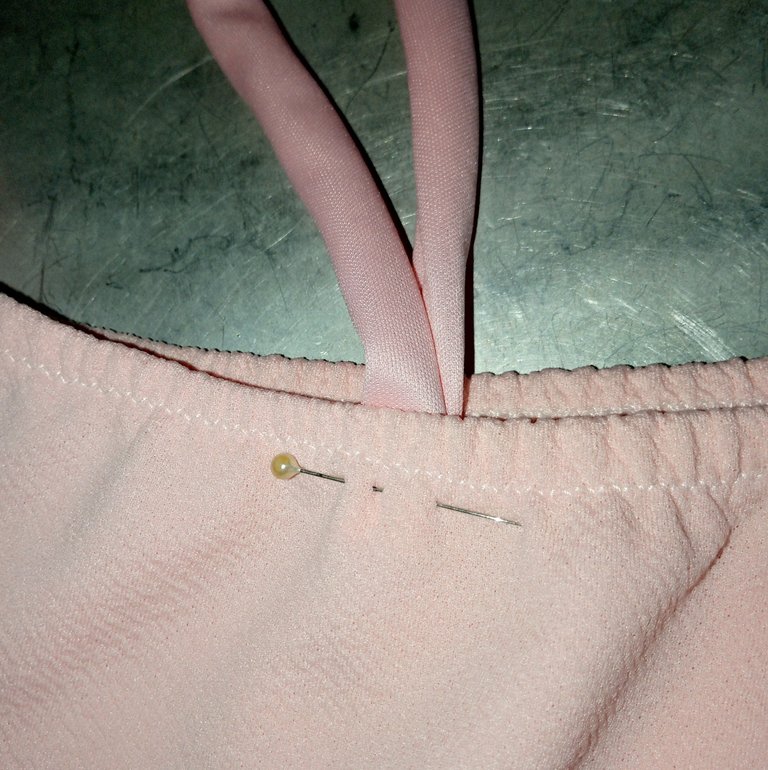
After sewing the sleeves, the only thing left to do is to sew the shoulder straps, which we will sew at 10 cm from the armhole seam to the center.
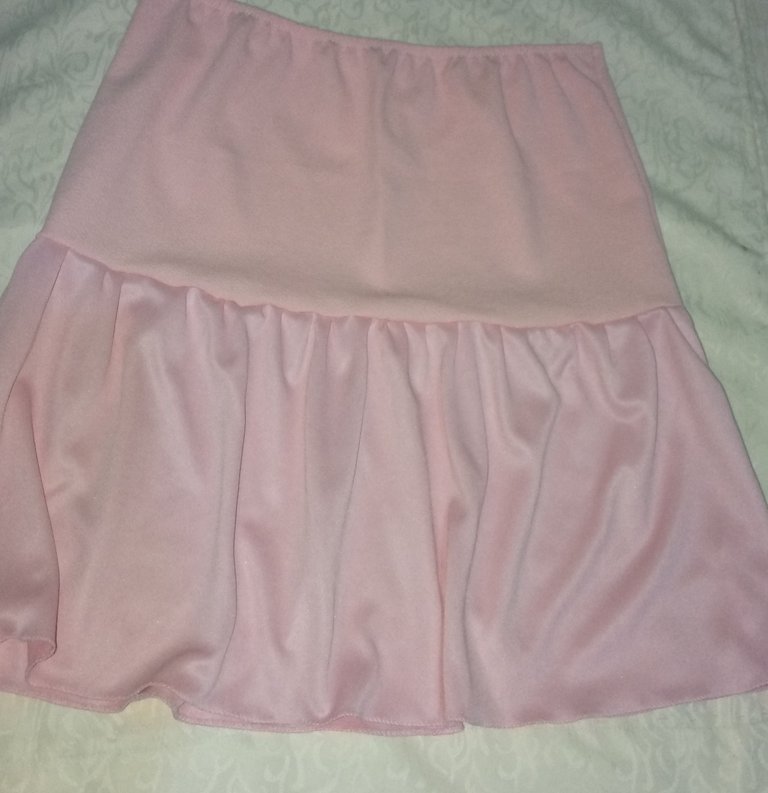
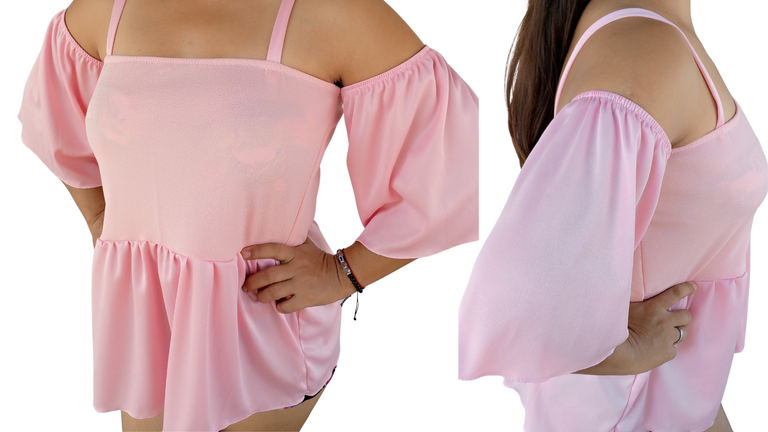
And it is here, where we can conclude, the cutting and sewing of this beautiful blouse top, pink color that I loved, I hope you also liked it.
With much affection I wish you always be well.
Despues de coser las mangas, solo faltaría coser los tirantes, los mismos los vamos a coser a 10 cm, desde la costura de la sisa al centro.
Y es aquí, donde podemos concluir, el corte y confección, de esta hermosa blusa top, color rosado que me encanto, espero que a ustedes también les haya gustado.
Con mucho cariño deseo que siempre estén bien.
social networks / redes sociales

Traductor Deepl
Translated Deepl
Ediciones Canva
Editions Canva


Hey!, what a great job, the final result is beautiful and the photographic presentation of your post is exemplary. I'm glad the power outages don't stop you and you keep working and doing useful things, it's a great remedy to combat that discomfort. Thanks so much for sharing it on DIYHub Community, it's great to read you...
I have picked this post on behalf of the @OurPick project! Check out our Reading Suggestions posts!
Please consider voting for our Liotes HIVE Witness. Thank you!
Thank you very much @jesuslnrs 😊!!! It is an honor, I am very happy for this encouraging message.
Me gusta lo sencilla que es!, sobre todo para estos días de calor que hay...
Gracias por compartir!
Gracias querida! me alegra que te haya gustado.
Saludos amiga, que hermoso top, me gusta el detalle de las mangas, es la prenda perfecta para la temporada de calor.
Feliz fin de semana!
Saludos amiga, feliz fin de semana.
Y Sí, es una prenda adecuada para la temporada de calor tanto por el diseño como la tela, que es bastante fresca, además es muy fácil de confeccionar.🤗🌸
Hey, what a great job, the final result is beautiful and the photographic presentation of your post is exemplary. Thank you very much.
Thank you for your support @diyhub
Quedó bien bonito y me gusta mucho ese color
También adoro este color, me alegra que te haya gustado, feliz fin de semana, gracias por la visita.
Es una prenda muy bonita, se está haciendo usted bastante hábil con la confección y costura, le felicito.
¡Qué lindo!! Muchas gracias por el elogio, querido @soltecno te deseo Feliz y Bendecida noche.
está muy lindo, genial como quedo!
it's very nice, great how it turned out!
Gracias querida, me alegra que te haya gustado.🙂