drawing a beautiful squirrel / new drawing technique for making fur / (ENG/ESP)

Saludos para todos mis queridos amigos, sean bienvenidos a mi publicación.
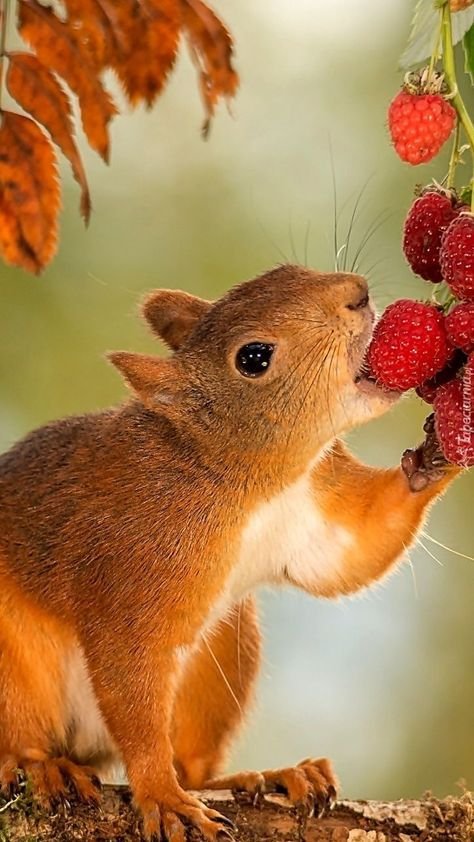
Hoy les vengo a presentar un dibujo que he realizado de una hermosa ardilla comiendo unas moras, este dibujo fue inspirado de un parque que visite no hace mucho, puesto que había muchas, las observe detalladamente y me inspire a realizar una, así que busque una imagen de referencia por internet.
Aquí podemos observar, una nueva técnica que he aprendido para poder realizar el pelaje de este hermoso animal, así como también se puede utilizar la misma técnica para otros tipos de animales, también aprendí a hacer un poco mejor la corteza del árbol, por lo que he intentado de buscar la forma de que se vea lo más parecida a nuestra imagen de referencia o mejorarla, estoy muy satisfecha con los resultados.
Las fotografías que verán a continuación, fueron tomadas con mi teléfono modelo Alcatel_5044R.
A continuación, les presentaré el proceso de elaboración que implemente para realizar este dibujo.
Greetings to all my dear friends, welcome to my publication.
Today I come to present a drawing that I have made of a beautiful squirrel eating some blackberries, this drawing was inspired by a park that I visited not long ago, since there were many, I observed them in detail and I was inspired to make one, so I looked for a reference image on the internet.
Here we can see a new technique that I have learned to make the fur of this beautiful animal, as well as the same technique can be used for other types of animals, I also learned to do a little better the bark of the tree, so I tried to find a way to make it look as similar to our reference image or improve it, I am very satisfied with the results.
The pictures you will see below were taken with my Alcatel_5044R model phone.
Next, I will show you the elaboration process that I implemented to make this drawing.


Paso 1
PRIMERAS LÍNEAS
Para realizar este dibujo trace cinco líneas verticales para calcular la forma y la posición de la ardilla en mi dibujo, de esta manera logre hacer toda la figura de la ardilla.
Después de haber realizado toda la figura de este hermoso animal, con la ayuda del borrador, elimine las líneas verticales que use como guía y luego de esto corregí algunos detalles y delinee la figura.
Al haber terminado de eliminar las líneas no deseadas, realice la rama del árbol donde ella está parada, a partir de allí para embellecer mi dibujo, se me ocurrió agregarle una cola y algunos otros detalles que más adelante iremos agregando, ya que en la imagen de referencia no la poseía

Step 1.
FIRST LINES
To make this drawing I drew five vertical lines to calculate the shape and position of the squirrel in my drawing, in this way I managed to make the whole figure of the squirrel.
After having made the whole figure of this beautiful animal, with the help of the eraser, I eliminated the vertical lines that I used as a guide and after that I corrected some details and outlined the figure.
When I finished eliminating the unwanted lines, I made the branch of the tree where she is standing, from there to embellish my drawing, it occurred to me to add a tail and some other details that we will add later, since in the reference image I didn't have it.


PASO 2
OTRAS FIGURAS Y PRIMERA CAPA DE COLOR
Siguiendo la imagen de referencia dibujé las moras y unas hojas que estaban ubicadas cerca de la cola de la ardilla, teniendo listo estos pasos, empecé agregarle la primera capa de color utilizando el color anaranjado, rellenando todo el cuerpo de la ardilla, punto por punto para crear un efecto de pelaje.
Para poder hacer este tipo de pelaje, debemos utilizar nuestro creyó y realizar trazos dependiendo en qué posición se encuentre el animal, también hay algunas partes en blanco donde no rellene con el color naranja, ya que es parte del pelaje de esta hermosa ardilla.

STEP 2.
OTHER FIGURES AND FIRST LAYER OF COLOR.
Following the reference image I drew the blackberries and some leaves that were located near the squirrel's tail, having these steps ready, I started to add the first layer of color using the orange color, filling all the body of the squirrel, point by point to create a fur effect.
In order to make this type of fur, we must use our crayon and make strokes depending on what position the animal is in, there are also some parts in white where I did not fill with the orange color, since it is part of the fur of this beautiful squirrel.


PASO 3
Culminando con el primer trazado del color anaranjado, aplique un trazado marrón oscuro sobre este, luego agregue el anaranjado nuevamente sobre las dos capas anteriormente nombradas, que fueron, primero el color anaranjado y luego el marrón oscuro, por último para sellar estos colores aplique ocre quemado sobre todo el pelaje, excepto los espacios reservados en blanco.

STEP 3
Finishing with the first stroke of the orange color, apply a dark brown stroke over it, then add the orange again over the two layers previously mentioned, which were, first the orange color and then the dark brown, finally to seal these colors apply burnt ocher over the whole coat, except for the spaces reserved in white.


PASO 4
CULMINANDO EL COLOREADO DE LA ARDILLA
Después de haber culminado con el coloreado de todo el cuerpo de la ardilla, con el uso del color marrón oscuro y blanco pinte las garras, después el ojo lo pinte con el color negro intenso dejando algunas pequeñas sombras en blanco.
Para los labios utilice los colores carne y marrón, primero aplique una capa del color carne y sobre esta unos suaves toques de marrón, culminando con el coloreado de la ardilla, comencé a colorear el árbol con los colores marrón oscuro, marrón claro y blanco.
Sobre las ramas del árbol, realice algunos espacios para agregar el color marrón oscuro, del resto del árbol lo coloree con el color marrón claro y sobre estos aplique un poco de tonos blancos, de esta forma poder hacer el efecto de la corteza de este árbol lo más parecido a uno real.

STEP 4
FINISHING THE COLORING OF THE SQUIRREL.
After having finished with the coloring of the whole body of the squirrel, with the use of the dark brown and white color paint the claws, then paint the eye with the intense black color leaving some small shadows in white.
For the lips I used the colors flesh and brown, first I applied a layer of the flesh color and on this a few soft touches of brown, culminating with the coloring of the squirrel, I began to color the tree with the colors dark brown, light brown and white.
On the branches of the tree, I made some spaces to add the dark brown color, the rest of the tree I colored with the light brown color and on these I applied some white tones, in this way to make the effect of the bark of this tree as close as possible to a real one.


PASO 5
LAS MORAS
Como técnica para colorear las moras antes de utilizar los colores, elimine todas las líneas oscuras del lápiz con el que dibuje la forma de este fruto, así también hice con el resto del dibujo, elimine todo el resto del grafito para no oscurecer de manera desagradable el dibujo.
Volviendo con el color de las moras con el uso del color rojo, empecé a hacer muchos círculos pequeños hasta hacer el dibujo de una mora, ya que sabemos que dicha fruta tiene pequeños bultos, y crear un efecto de volumen, sobre este color rojo aplique anaranjado para iluminar el color.

PASO 5
THE BLACKBERRIES
As a technique to color the blackberries before using the colors, I eliminated all the dark lines of the pencil with which I drew the shape of this fruit, I also did with the rest of the drawing, I eliminated all the rest of the graphite in order not to darken in an unpleasant way the drawing.
Returning to the color of the blackberries with the use of the red color, I began to make many small circles until I made the drawing of a blackberry, since we know that this fruit has small lumps, and create an effect of volume, on this red color I applied orange to illuminate the color.


PASO 6
FINALIZANDO TODO EL DIBUJO
Para finalizar coloreé las hojas con el color verde amarillo, verde pasto y algunos destellos blancos sobre las hojas, en las anteriores fotografías podrán notar cerca de la cola, que había dibujado unas hojas, las mismas elimine para darle más vida al dibujo, realizando un árbol de un araguaney en el fondo de este dibujo como un efecto extra de mi parte, así como algunas lianas y moras que están colgando en la rama del árbol, donde está posando la ardilla.
Estos dibujos extras fueron inspiración al momento de culminar con este dibujo, en vista de que note que le faltaba algo, me pareció una buena idea agregarle estos efectos extras.

STEP 6
FINALIZING THE WHOLE DRAWING.
To finish I colored the leaves with yellow green, grass green and some white sparkles on the leaves, in the previous pictures you can notice near the tail, that I had drawn some leaves, I eliminated them to give more life to the drawing, making an araguaney tree in the background of this drawing as an extra effect of my part, as well as some lianas and blackberries that are hanging on the branch of the tree, where the squirrel is posing.
These extra drawings were inspiration at the moment of finishing this drawing, since I noticed that something was missing, I thought it was a good idea to add these extra effects.


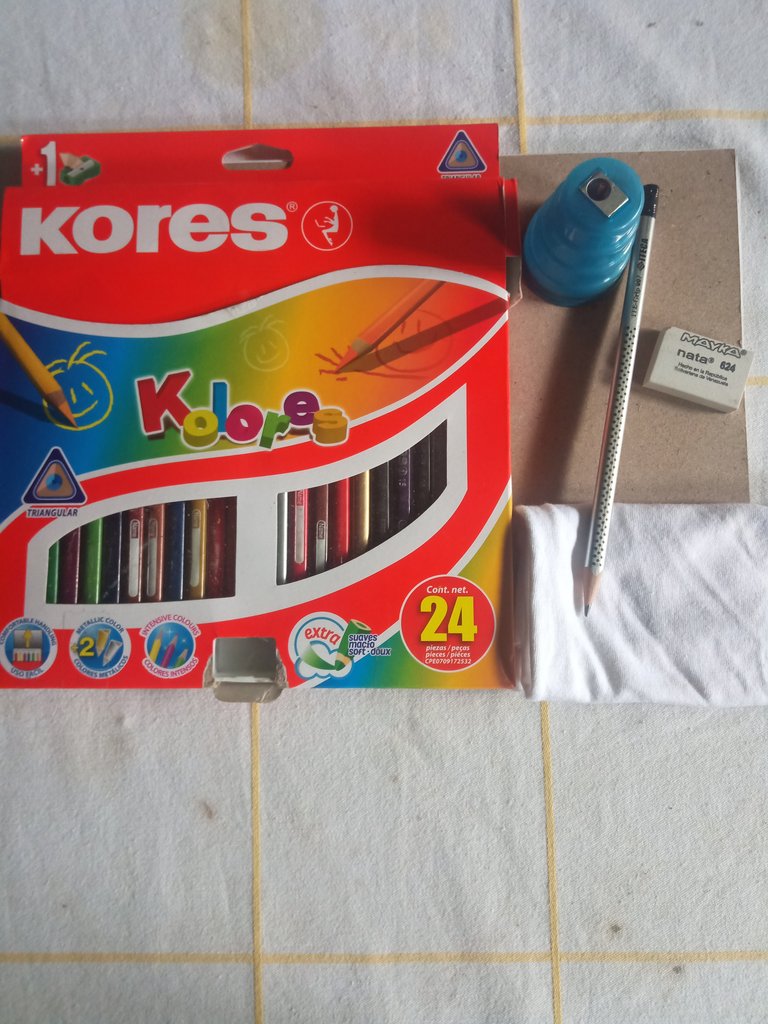


MATERIALES
BLOCK DE DIBUJO.
BORRADOR.
SACAPUNTAS.
LAPIZ DE DIBUJO.
Los colores que use para mi dibujo son los siguientes:
ROJO.
ANARANJADO.
VERDE.
VERDE AMARILLO.
AMARILLO.
MARRÓN OSCURO.
MARRÓN CLARO.
NEGRO.
BLANCO.
OCRE QUEMADO.
La imagen que utilice en referencia posee su fuente, puesto que es una imagen sacada de Pinterest, de donde estoy sacando todas las imágenes que uso para realizar mis dibujos.
Así culmino mi publicación amigos, espero que te haya gustado y hayas aprendido algo nuevo el día de hoy.
Nos veremos en otra publicación basada en el hermoso mundo del arte del dibujo.

MATERIALS.
SKETCH PAD
DRAFT
TIPPING
DRAWING PENCIL.
The colors I used for my drawing are the following:
RED.
ORANGE.
GREEN.
YELLOW GREEN.
YELLOW.
DARK BROWN.
LIGHT BROWN.
BLACK.
WHITE.
BURNED OCHRE.
The image I used in reference has its source, since it is an image taken from Pinterest, where I am getting all the images I use to make my drawings.
So I end my publication friends, I hope you liked it and have learned something new today.
See you in another publication based on the beautiful world of the art of drawing.

social networks / redes sociales
Traductor Deepl
Translated Deepl
Ediciones Canva
Editions Canva

Congratulations @lauracraft! You have completed the following achievement on the Hive blockchain and have been rewarded with new badge(s):
Your next target is to reach 90 posts.
You can view your badges on your board and compare yourself to others in the Ranking
If you no longer want to receive notifications, reply to this comment with the word
STOPTo support your work, I also upvoted your post!
Check out the last post from @hivebuzz:
Support the HiveBuzz project. Vote for our proposal!
Que lindo dibujo amiga!, las ardillas son muy lindas🤗
Gracias!!! me alegro que te haya gustado mi dibujo.
Congratulations @lauracraft!
You raised your level and are now a Minnow!
Check out the last post from @hivebuzz:
Support the HiveBuzz project. Vote for our proposal!
Thank you for sharing this amazing post on HIVE!
Your content got selected by our fellow curator @priyanarc & you just received a little thank you via an upvote from our non-profit curation initiative!
You will be featured in one of our recurring curation compilations and on our pinterest boards! Both are aiming to offer you a stage to widen your audience within and outside of the DIY scene of hive.
Join the official DIYHub community on HIVE and show us more of your amazing work and feel free to connect with us and other DIYers via our discord server: https://discord.gg/mY5uCfQ !
If you want to support our goal to motivate other DIY/art/music/homesteading/... creators just delegate to us and earn 100% of your curation rewards!
Stay creative & hive on!
It's so adorable I love the red squirrels we have but the big gray ones create havoc in my garden, the lil devils. Really cute @lauracraft