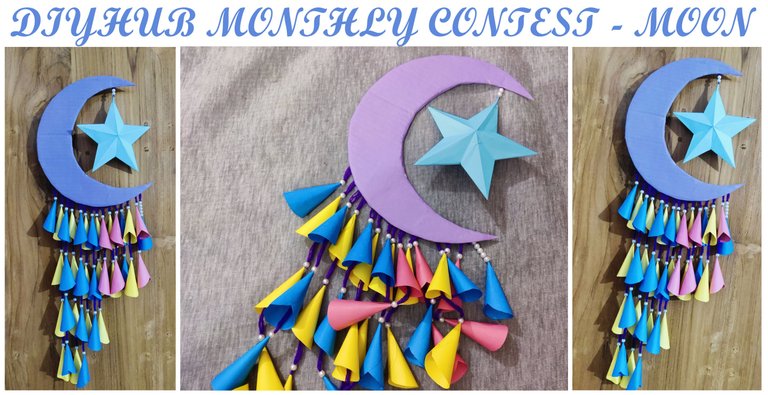
Moon with 3D Star and Flowers - Paperwork.
Hi,👋
I'm back with a new post where I'll show a origami paper moon with 3d stars and flowers that looks good and can be a part of the room decoration. And I'm joining DIYHUB MONTHLY CONTEST (February2023) - MOON with this entry.

I followed most part of this DIY idea from different YouTube videos and I don't credit myself for the original idea although I changed a big thing from the original idea.
Let's see how I made this origami paper moon.
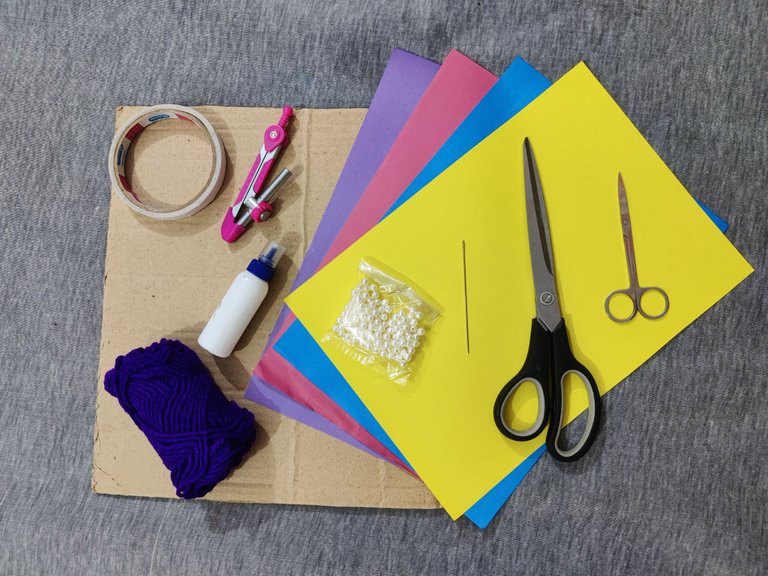
Equipment's:

I used some color papers (5 colors to be precise), scissor, glue, compass, cardboard, needle-thread, beads and pencil.
Steps to follow:
I followed a total of 3 steps to finish this up. 1. The cardboard, 2. The Flowers, 3. The Star.
I'm going to show the cardboard step first and then the other parts.
.jpg)
At first, I used the compass and pencil and I drew a moon shape on the cardboard. I needed to draw multiple parts of circles and then I got a moon shape.
.jpg)
Then I started cutting the cardboard as I only needed the moon.
.jpg)
After cutting the moon, now its time to wrap a paper around it and I used a color paper to attach it on one side of the moon as I the other side will be on backstage and don't need that much attention.
.jpg) | .jpg) |
|---|
Then I used the glue on all over the moon on one side and then I attached it on the color paper.
.jpg)
I cut the paper then according to the moon shape although I cut it into a bigger size as it needed to be wrapped around.
.jpg)
And I got the moon ready.
Now its time I work on some tiny flowers. The idea that I worked on the flowers, I already showed a similar work before that you may see from here. But let me show the process in this post again in case that post is ignored or unnoticed.
.jpg) | .jpg) |
|---|
.jpg)
I took a A4 size paper and I folded it into 4 parts. Then I drew 3 circle on it. And when I cut the circle, I got 12 cutting circle shaped papers as it was folded in 4 parts.
.jpg) | .jpg) |
|---|
Now I glued a part of the circle shape with another part like above and I got the flower. Then I did the same thing and I got a lot of flowers like this in different colors.
.jpg)
Now its time to attach the flowers with some beads on a thread.
.jpg)
First I took a flower and then a bead and then I maintained a specific distance and did it again with another flower and another bead and I kept doing it with other colors as well.
.jpg)
And I got all these flowers that I attached on the moon later.
.jpg)
I attached them on the back side of the moon using a tape as you can see above.
.jpg)
And it looks like this from the front. I tried to attach the flowers on the moon maintaining a sequence like you can see above but its on you how you want it to be.
So that's the end of the flowers part. Now I wished to attach a star as well as we can't think of the moon without stars. This is the final part and then comes the finishing.
.jpg)
I took another A4 sized color paper and I folded it in half as I needed it in 2 parts.
.jpg) | .jpg) |
|---|
.jpg)
Then I cropped the paper in half and then I needed a square shape and I cut them into square as you may see above.
Now the process gets a little hard as its about doing some folding.
.jpg)
At first I folded it into half, yes just into a half and nothing more.
.jpg) | .jpg) |
|---|
Then I folded that part as you can see above and I did two folding there from two different sides.
.jpg)
And then I took the other lower part of the paper which was not folded yet and I folded it in a way so the lower corner gets to the center of the two folds as you can see above. The lower corner should be on the center otherwise it will not be worked.
.jpg)
Then I folded back the part that I just folded above on the center.
.jpg)
Then I folded the other part in a way so both sides comes to the same point like above.
.jpg) | .jpg) |
|---|
Then from the middle, I folded them backwards and then I cut the extra part that was seen from that line you can see above.
.jpg)
After the cut, this was what I had on my hand.

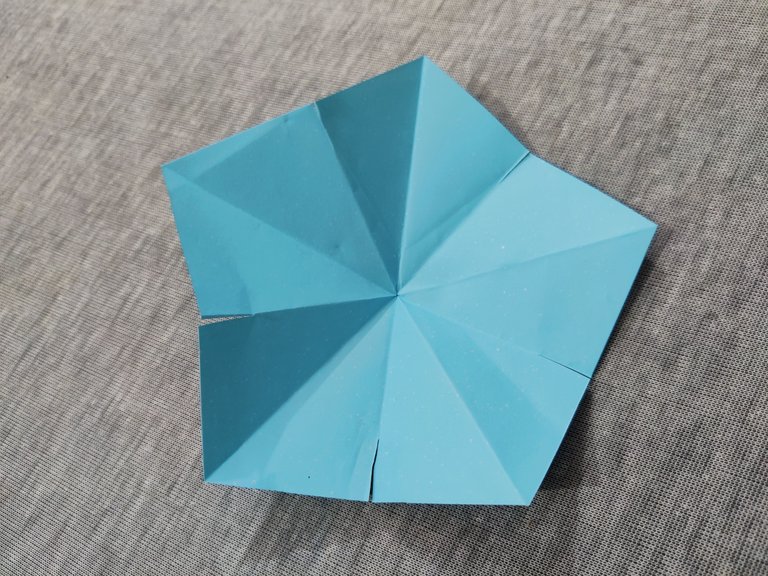
I unfolded it and I got this after all the folding and then I cut some parts as you can see above.
.jpg)
Then I folded from the cutting points and I turned the paper and I simply gave it the star shape.
.jpg)
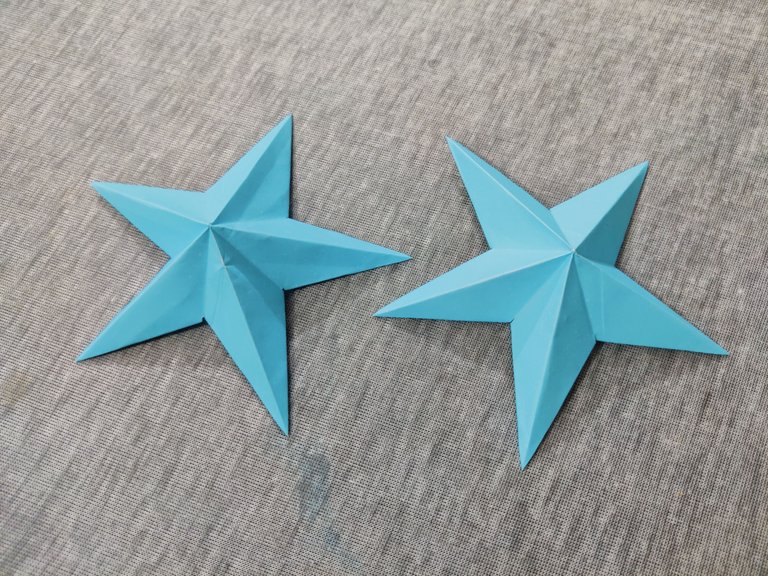
It already looks like a 3D star but I needed to do a little more work as it's going to be hanging so I don't want it to show its backstage look if it turns somehow.

And I needed another star for that. I made it in the same way with the same size.
.jpg) | .jpg) |
|---|
Now I just glued one star with another and I got a real 3D star that has a shadow as well. Cool, ain't it?
.jpg)
Then I attached small thread on one part of the star so I can attach it with the moon.
.jpg)
Then I attached it with the moon like above and I used two beads in the thread of the star as well just above the star.
And yes my work is done already.
.jpg) | .jpg) |
|---|
I attached some small pieces of cardboards on the back of the moon and then I attached the whole thing on my main door right beside the looking glass and it looks really good.
.jpg)
And see where it actually stays. That's the flower that I worked on for the previous months contest of Diyhub and that flower still stays there. They actually look good together on the same side of the room.
So this is the end of this post. I may show more of my paperwork later and soon.
No more today, I'll talk more later with another craft soon.
BYE BYE.
Wow nice job and thanks for teaching us and showing us the real step of the contest... Keep it up
Thanks for commenting. I tried my best with this post.
Yes, you've really tried and it's so nice... Keep it up
Congratulations @ladychef! You have completed the following achievement on the Hive blockchain And have been rewarded with New badge(s)
Your next target is to reach 3250 upvotes.
You can view your badges on your board and compare yourself to others in the Ranking
If you no longer want to receive notifications, reply to this comment with the word
STOPCheck out our last posts:
Yay! 🤗
Your content has been boosted with Ecency Points, by @ladychef.
Use Ecency daily to boost your growth on platform!
Support Ecency
Vote for new Proposal
Delegate HP and earn more
Thank you for sharing this post in the DIYHUB Community!
Your content got selected by our fellow curator ashikstd & you just received a little thank you upvote from us for your great work! Your post will be featured in one of our recurring compilations which are aiming to offer you a stage to widen your audience within the DIY scene of Hive. Stay creative & HIVE ON!
Please vote for our hive witness <3
Thanks a lot.
It looks really beautiful on you, great job. I loved how you made the star.
Good luck in the contest.✨
The process of making the star was really hard as you can see. Thanks for commenting.
Cute!!! 😍
Thanks.
Beautiful 🥰🥰
Thanks a lot.
You are highly welcome 😁
@tipu curate 6
Upvoted 👌 (Mana: 0/55) Liquid rewards.
Thank you. 🥰
❤❤❤❤❤❤
🥰🥰