iPhone X | Screen Replacement: My first customer

Hola chicos, ¿Que tal?
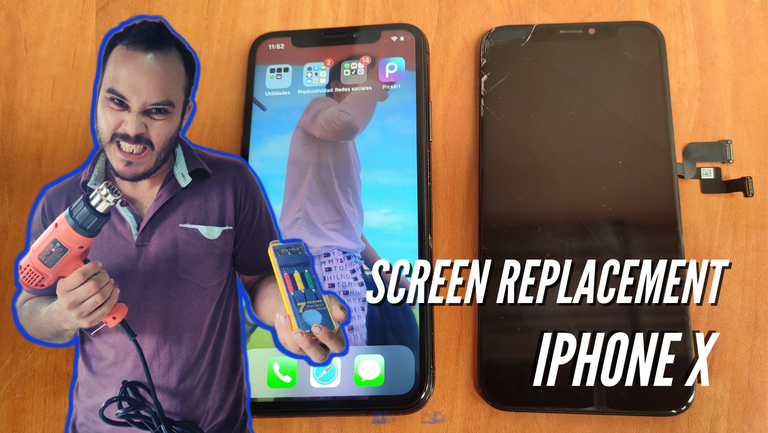
Hace unos días les hablé sobre un curso de reparación de teléfonos celulares que hice y bueno estoy bastante emoción ya que hice mi primer trabajo y quiero compartirlo con ustedes.
Esta es la primera vez que cambio una pantalla y enta ocasión fue a un IPhone X, la verdad grabé el video de todo el proceso, sin pausas y costó bastante editarlo, ya que tardé una hora y media cambiando esta pantalla.
Mi demora se basó en que es la primera vez que lo hago, también me faltan algunas herramientas para hacer el proceso más rápido y estaba bastante nervioso ya que me daba miedo partir la pantalla nueva o dañar alguna pieza y luego tendría que pagarlo.
Hey guys, what's up?
A few days ago I told you about a mobile phone repair course I did and well I'm pretty excited because I did my first job and I want to share it with you.
This is the first time I change a screen and this time it was an IPhone X, the truth is that I recorded the video of the whole process, without pauses and it took me an hour and a half to edit it, because it took me an hour and a half to change this screen.
My delay was based on the fact that it is the first time I do it, I also lack some tools to make the process faster and I was quite nervous because I was afraid of breaking the new screen or damaging any part and then I would have to pay for it.

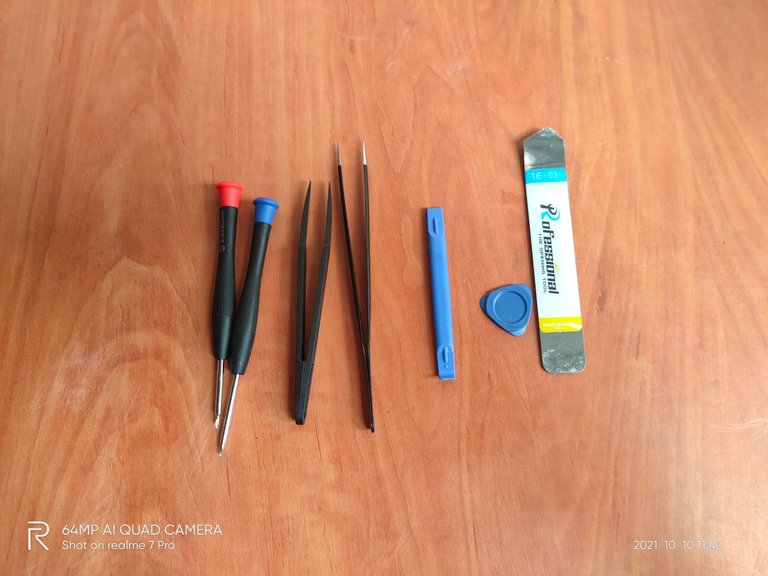
Para este trabajo utilicé las siguientes herramientas:
-Pistola de Calor a velocidad baja.
-Destornillador de estrella
-Destornillador de Estría
-Espatula de metal
-Espatula de plástico
-Bucela o pinza
-Barra Imantada
-Lupa con luz
Lo primero que hago es pasar la pistola de calor a velocidad baja, por la orilla del teléfono para así poder despegar la pantalla. Luego quito los dos tornillos que este teléfono trae en la parte donde está la ranura para cargarlo.
Un tips importante es: ayudarse con la barra imantada, está servirá de guía para colocar los tornillos justo donde van. Ya que sacaremos varios y no todos son del mismo tamaño y podríamos confundirlos.
For this work I used the tools:
-Heat Gun on low speed.
-Phillips screwdriver
-Phillips screwdriver
-Metal spatula
-Plastic spatula
-Tweezers or tweezers
-Magnetic bar
-Magnifying glass with light
The first thing I do is to pass the heat gun at low speed, along the edge of the phone in order to be able to peel off the screen. Then I remove the two screws that this phone comes with in the part where the charging slot is.
An important tip is: help yourself with the bar magnet, it will serve as a guide to place the screws just where they go. We will remove several screws and not all of them are the same size and we could confuse them.

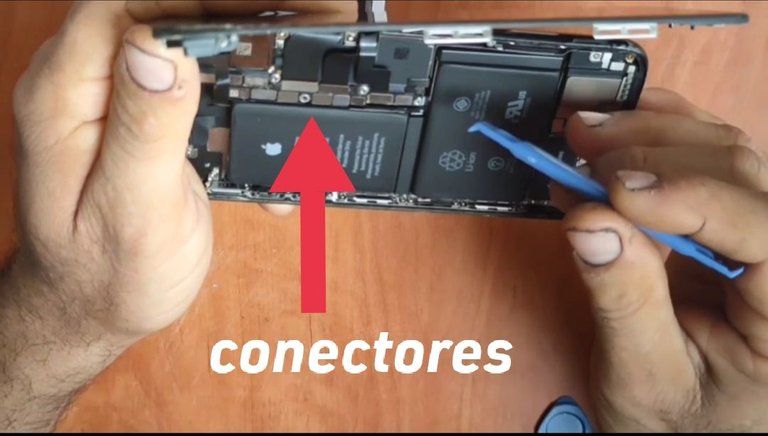
En este video también les muestro como despego los conectores y que siempre, sea cual sea el teléfono al que le estemos cambiando una pantalla, debemos empezar por despegar o desconectar el de la batería para evitar algún cortocircuito.
El conector que dio bastante trabajo fue el de la pantalla. Una vez despegado todos los conectores se pone la nueva pantalla, conectando los nuevos y sellando con la placa la cual atornillamos. También antes debemos sacar de la pantalla vieja el sensor de face ID, para conectarlo a la nueva.
Este trabajo amerita bastante calma y paciencia, créanme que necesita mucha paciencia y tener cuidado de no perder ningún tornillo o dañar alguna pieza.
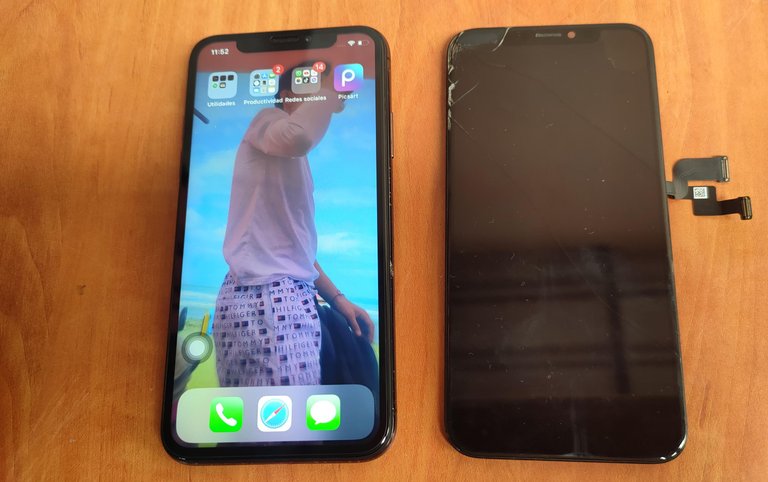
El resultado final me llenó de satisfacción. Este tipo de trabajos cuesta en mano de obra el valor de la pantalla, al chico con pantalla y todo le cobraban $120, en mi caso, el me dio la pantalla nueva y solo le cobre $20, ya que era mi primera vez y es un compañero de trabajo.
Espero puedan apreciar el trabajo realizado.
In this video I also show you how to detach the connectors and that always, whatever the phone we are changing the screen, we must start by detaching or disconnecting the battery connector to avoid a short circuit.
The connector that took a lot of work was the screen connector. Once all the connectors have been removed, we put the new screen on, connect the new ones and seal it with the plate, which we screw on. We also have to remove the face ID sensor from the old screen to connect it to the new one.
This job requires a lot of calm and patience, believe me it needs a lot of patience and be careful not to lose any screws or damage any part.
The final result filled me with satisfaction. This type of work costs in labor the value of the screen, the guy with screen and everything was charged $120, in my case, he gave me the new screen and I only charged him $20, since it was my first time and he is a colleague.
I hope you can appreciate the work done.

PD: Disculpen mis manos, están manchadas por mi trabajo con la mecánica.
PS: Excuse my hands, they are stained by my work with the mechanics.

Imágenes y video de mi propiedad, portada editada en canva. Música de fondo del video libre de copyright de aquí
Images and video of my property, cover edited in canva. Background music from the copyright free video from here.
▶️ 3Speak
Que fabuloso que estés haciendo este tipo de curso que es tan útil desde muchos puntos de vista. Excelente tutorial y documentación de la técnica. En buena hora, amigo @josuemonterola . Un abrazo de vuelta! 🤗
Hola señora Mary, de hecho ya terminé el curso pero ahora lo estoy poniendo en práctica e igual si tengo dudas repaso las clases y así voy poco a poco. Saludos
Congratulations @josuemonterola! You have completed the following achievement on the Hive blockchain and have been rewarded with new badge(s) :
Your next target is to reach 9000 upvotes.
You can view your badges on your board and compare yourself to others in the Ranking
If you no longer want to receive notifications, reply to this comment with the word
STOPhttps://twitter.com/HctorJosu9/status/1450102538129354755
The rewards earned on this comment will go directly to the person sharing the post on Twitter as long as they are registered with @poshtoken. Sign up at https://hiveposh.com.
Excelente que hagas estos cursos para que te capacites e incursiones en otras areas.
Un abrazo.
Muchas gracias, si,es bueno aprender cosas nuevas.
Me encanto este video, esto hace que cualquier persona que envié su equipo a servicio técnico, comprenda un poco el proceso que va a suceder con su equipo al momento de cambiar la pantalla. En mi caso, genera mas confianza saber lo que va a suceder.
Es así, también el gran trabajo y responsabilidad que está en manos del técnico. Cualquier apuro o despiste podría causar un gran daño. Por otra parte también queda justificado el precio que se cobra por el trabajo, ya que algunos clientes lo ven caro, pero no imaginan todo lo que conlleva.