Practical exercise: Creating portrait starting from a painting brooch
Arte Digital | Digital Art
Greetings dear community, welcome once again to a new art process. While I was browsing instagram I saw a reel where they created portraits from a paint brush without guidelines or face structure, it caught my attention and I wanted to try it, I thought it would be difficult, I was inspired by the art of the beautiful Laura H. Rubin I love the realism with which she makes her portraits and I have always admired it since my beginnings. Come with me to see the creation process...
¡Espero te guste! | I hope you like!
Presentación del diseño | Desing presentación
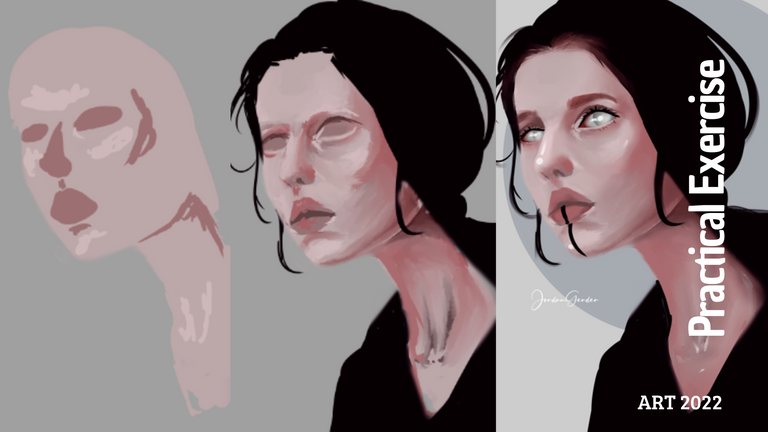
Materiales | Materials
- Mini laptop
- Tableta Huion H950P
- Programa Adobe Photoshop 2019
- Mini laptop
- Huion H950P tablet
- Adobe Photoshop 2019 program
❍﹏﹏﹏﹏﹏﹏﹏﹏﹏﹏﹏﹏﹏﹏﹏﹏﹏❍
Proceso | Process
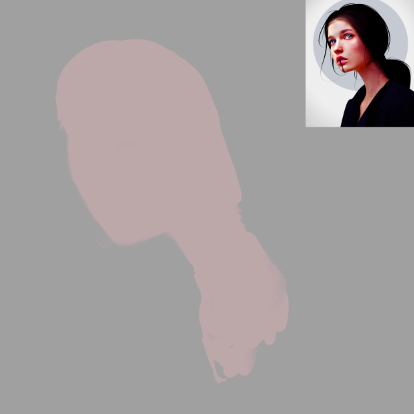
No habra boceto esta vez simplemente agregue una pintura base sobre mi lienzo digital guiandome de la forma del rostro del arte original en el cual me inspiro:
There will be no sketch this time, I just add a base paint on my digital canvas guiding me from the shape of the face of the original art in which I am inspired:
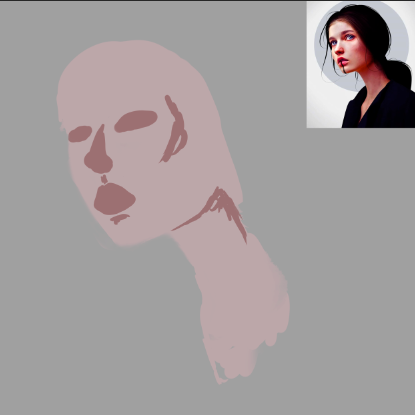
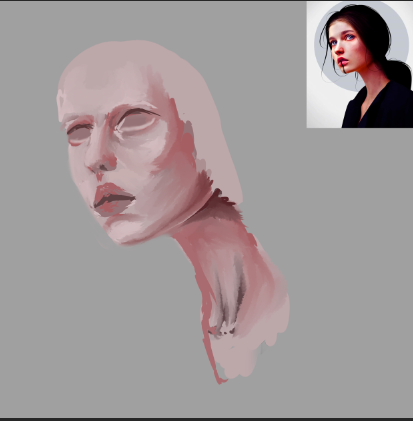
En este paso selecionamos los colores de la piel, un tono principal que funcionara como base, partiendo de este un tono medio y adicional a este uno oscuro para las sombras, y un color mas claro para las zonas altas o donde por ley debe ser mas claro el color:
In this step we select the colors of the skin, a main tone that will work as a base, starting from this a medium tone and additional to this one dark for the shadows, and a lighter color for the high areas or where by law it must be more clear color:
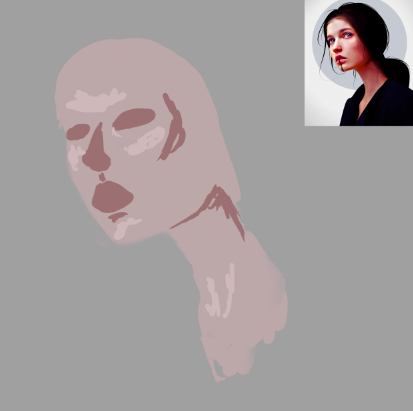
En este paso lo que hice fui mezclar todos los tonos de color que agregue anteriormente, para este paso use la herramienta dedo funciono perfecto para mezclar los colores agregados anteriormente, fui dando forma y detellando la forma de los bordes de ojos y labios:
In this step, what I did was mix all the color tones that I added previously, for this step I used the finger tool, it worked perfectly to mix the colors added previously, I was shaping and detailing the shape of the edges of the eyes and lips:
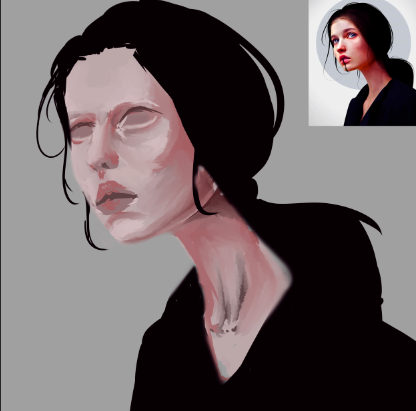
Agregue so forma de cabello plano en esta ocasion no use el pincel de cerdas porque queria que fuera plano como el arte original, agregue sus ojos quise hacerlos blancos esto no iba enfocado en realizar ojos mas bien en creacion de la forma del rostro:
I added her flat hair shape this time I did not use the bristle brush because I wanted it to be flat like the original art, I added her eyes I wanted to make them white this was not focused on making eyes but rather on creating the shape of the face:
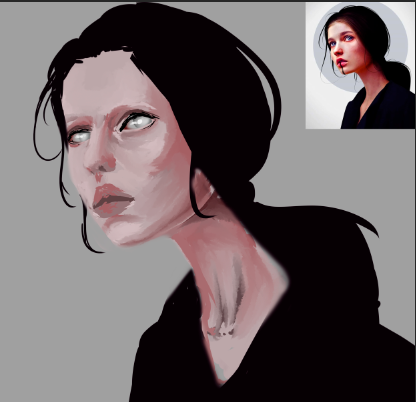
Nos enfocamos en algunos detalles y asi fue como obtuve el resultado final:
We focused on some details and this is how I got the final result:
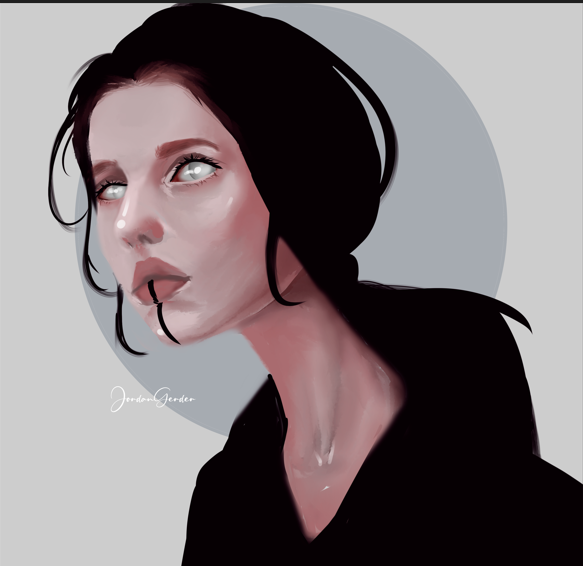
Obtuvimos un resultado increible disfrute mucho del proceso de creacion. Espero les haya gustado lo he elaborado con cariño para todos los espectadores que visitan esta publicacion, nos vemos en la próxima 😍
We got an incredible result, I really enjoyed the creation process. I hope you liked it, I have elaborated it with love for all the viewers who visit this publication, see you in the next one 😍
Practice inspired by the art of Laura H. Rubin
¿Cómo pintar la piel en Photoshop? (piel difusa) | How to paint skin in Photoshop? (fuzzy skin)

Presentación del diseño | Desing presentación

Materiales | Materials
- Mini laptop
- Tableta Huion H950P
- Programa Adobe Photoshop 2019
- Mini laptop
- Huion H950P tablet
- Adobe Photoshop 2019 program
Proceso | Process
There will be no sketch this time, I just add a base paint on my digital canvas guiding me from the shape of the face of the original art in which I am inspired:

In this step we select the colors of the skin, a main tone that will work as a base, starting from this a medium tone and additional to this one dark for the shadows, and a lighter color for the high areas or where by law it must be more clear color:


In this step, what I did was mix all the color tones that I added previously, for this step I used the finger tool, it worked perfectly to mix the colors added previously, I was shaping and detailing the shape of the edges of the eyes and lips:

I added her flat hair shape this time I did not use the bristle brush because I wanted it to be flat like the original art, I added her eyes I wanted to make them white this was not focused on making eyes but rather on creating the shape of the face:


We focused on some details and this is how I got the final result:

We got an incredible result, I really enjoyed the creation process. I hope you liked it, I have elaborated it with love for all the viewers who visit this publication, see you in the next one 😍
Practice inspired by the art of Laura H. Rubin
¿Cómo pintar la piel en Photoshop? (piel difusa) | How to paint skin in Photoshop? (fuzzy skin)

Su post ha sido valorado por @goya
Muchas gracias❤️
Thank you so much @ewkaw 😘
I haven't seen that one, looks really good!
Thank so much😊