[En/Es] My proposal for the Ragnarok logo - Mi propuesta para el logo de Ragnarok || How did I do it? - ¿Como lo hice?
[English Version]
Hi Hive! I'm back at last, after a week of writing long paragraphs of tasks, I have left them for a moment to relax a little bit writing a new post, and while I was looking at other posts I saw the contest for the creation of a logo for the video game Ragnarok, I wanted to participate to try something new to the moments I want to edit, since I usually do very minimalist things and today I wanted to do something not too far from that, but quite different considering what I always do, I hope you like the procedure and even more my proposal.
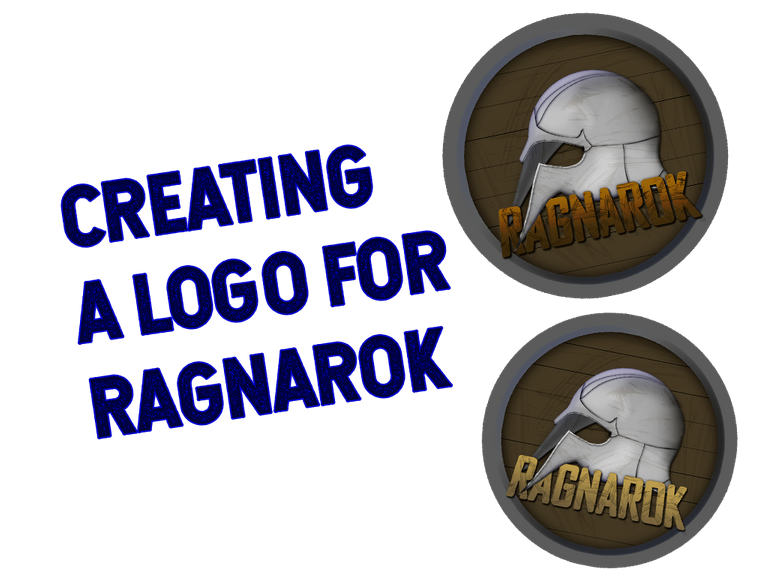
Edited by the author
Stage 1: The background
At first I researched more about the game of course, I had already realized that it would be something similar to the Norse mythology when I saw the name "Ragnarok", so I decided to look for things of this mythology, I found weapons, characters and symbols that defined it but at the end of all it seemed to me more representative would be a helmet. Photoshop open, a 1000x1000 canvas and a list of my favorite songs playing, I was ready to start, just placing a big circle in the middle giving the first step to my creation.
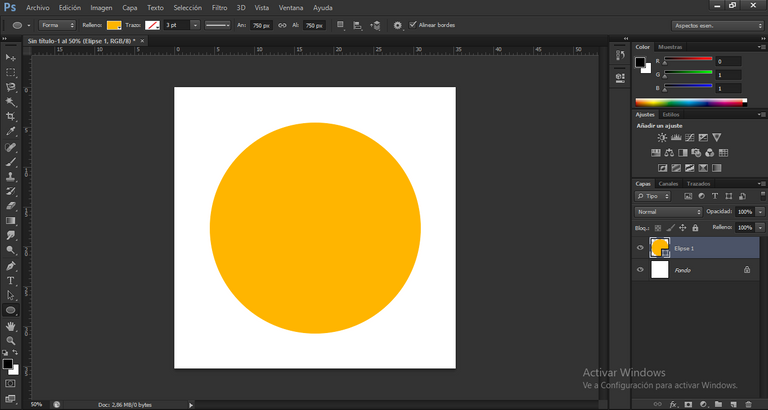
Following the huge mustard-colored ellipse, I wanted to give the background a dark tone to make the content itself more striking, but I also wanted to give a touch of "power" to the image and it was here when it occurred to me to make some rays behind the logo, but how would I make those rays? I had this doubt and I thought a bit until I decided to make lines of 3 px with the mouse, moving my hand as if I was nervous to give shape to the rays.
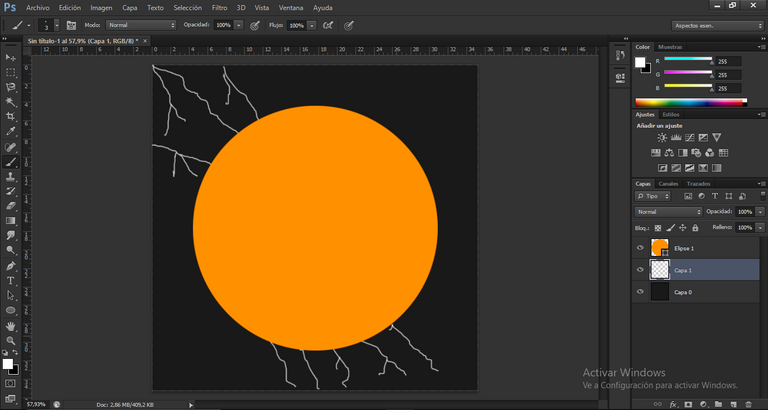
But then, I was supposed to simulate a dark and powerful environment similar to mythology, here the ideas were varied, from making the logo with a coin style or carved in wood, I opted to make something like a coin. The circle that before was orange (or mustard, the truth I don't know) I turned it brown, I also duplicated it and changed the color of the copy to a lighter color, after this I had to try to give a relief to the circle that was on the outside, giving it an effect similar to 3D, to the other circle I did the same but trying to make the relief look inward instead of looking like a mountain, something that was difficult to do. Besides, I gave the rays in the background a blue glow to make it look like a ray.
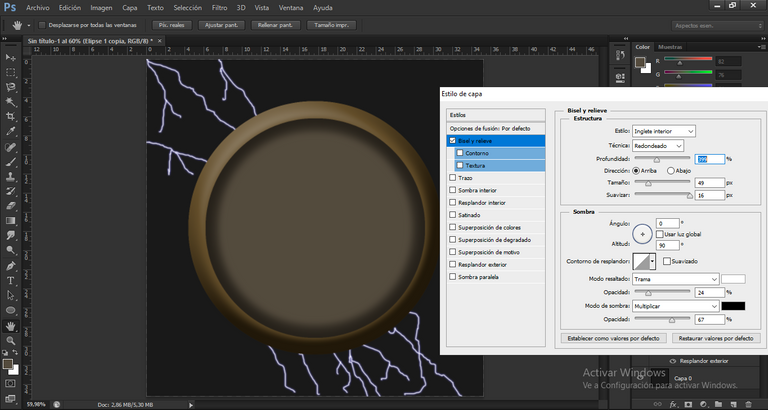
By this time I was stuck in a problem, and I wanted to give the circle a reflection as if it was polished, but the ideas were few, I ended up making a small blue glow around the circle applying a clipping mask, so I think it is the reflection of the rays, the idea did not please me but I ended up leaving that glow for a long time trying to find a positive side.
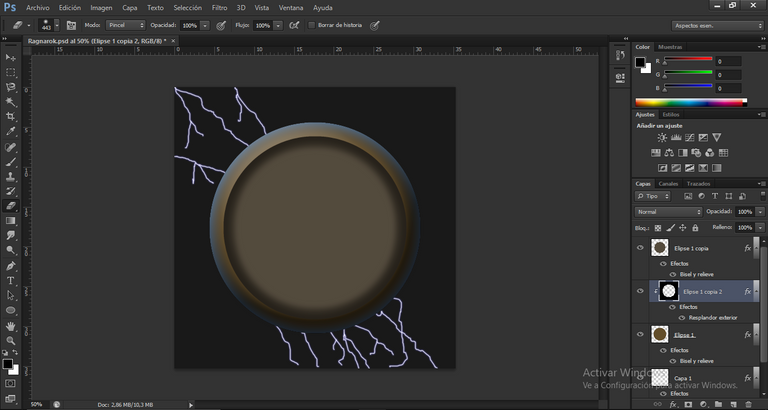
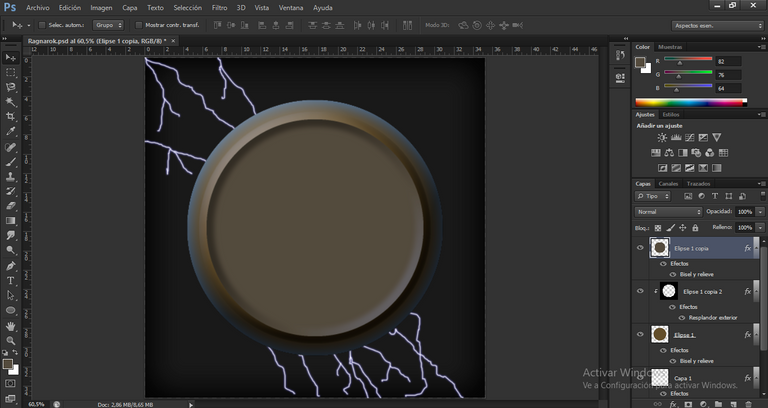
In order to give it more depth, I changed the effect to relief, since I was in an option that softened the edges more.
Stage 2: Representative object
Nordic mythology must be something rough, right? Since what is always related to rough/hard (at least with me) are marks, strong scratches that remain in an object or person, so I added some scratches to "the coin" that I had made. After this I had already passed to the second stage, the stage of making the objects that represent the game itself, as I said before, I opted for a helmet because it was very representative, but I could not just copy and paste the image of a helmet, I wanted to make the drawing of a helmet based on a real helmet that I saw on the internet, how would I do it? Here begins the process, with those little figures that look like a walrus.
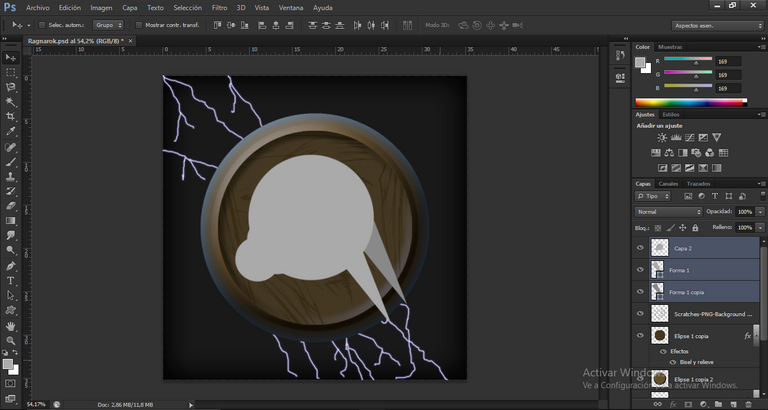
Using the free transform tool and deforming the triangles that I had put there, I managed to make the first part of the hull, I don't know what exactly that part of the hull is called but I managed to do it well, I continued with the circles, which I erased and painted little by little until I gave it the shape you see on the screen. The "visor" was the most complicated part to form because it had to have a perfect size, ended up being very large spaces which I did until in a lucky shot I managed to give the ideal size.
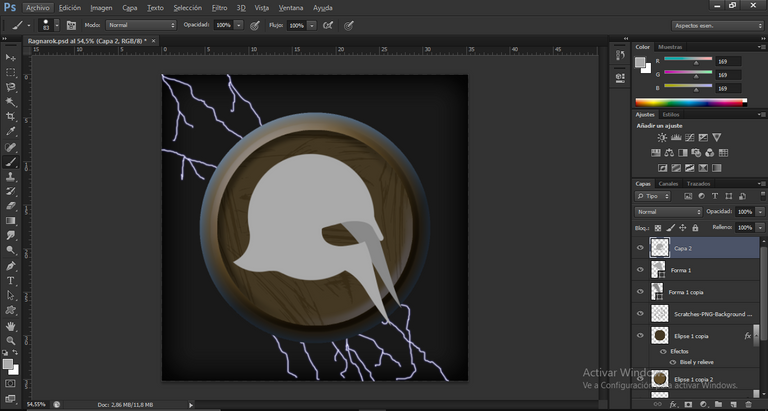
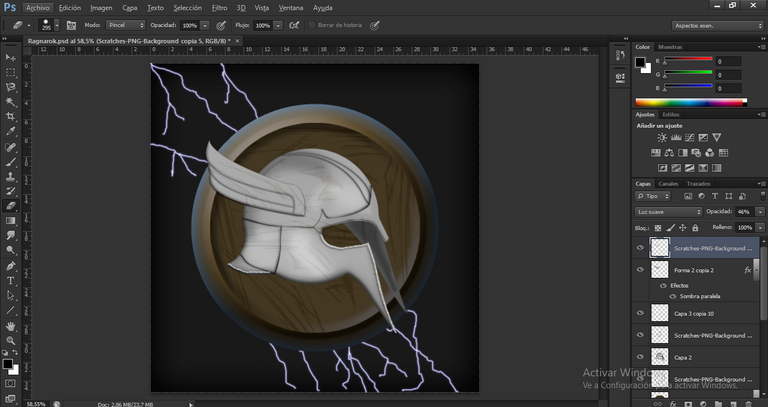
The next thing was to give it depth, with a small relief effect and coloring between dark and light tones on the hull, I also made a kind of wings that I made myself, once based on the hull that I had already mentioned, but I simplified it too much so I eliminated it at the end. Another thing was to give detail to the hull, making lines around it that would end up being the best detail.
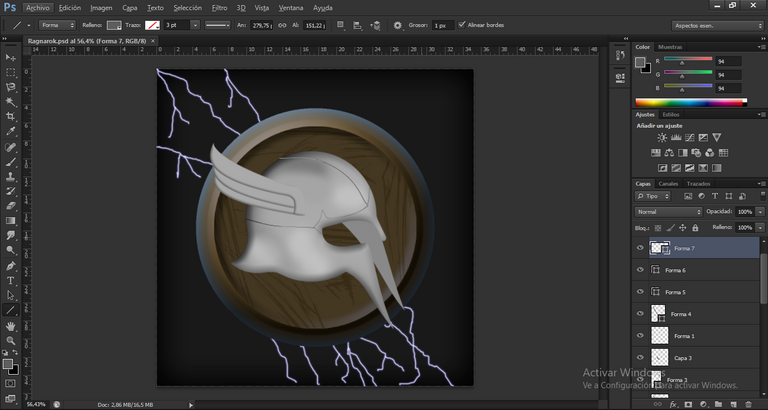
To finish with the hull, I gave a shading to the lines that I had already drawn, I gave the same effect of scratches that has the coin in the background and also a series of points in the front part of the hull with another shading, only details that contributed a lot.
Stage 3: Text
It was time for the final stage, I had to choose a good font and effects that would combine with it to finish this logo, between this time of thinking I realized that actually that brown tone was horrible, so I changed the color of the largest circle to a gray. After doing that I made the decision to use the Agency FB font, but there was also another problem and that was that I didn't know what effect to give to the text, I experimented for a while until I came up with the following effect:
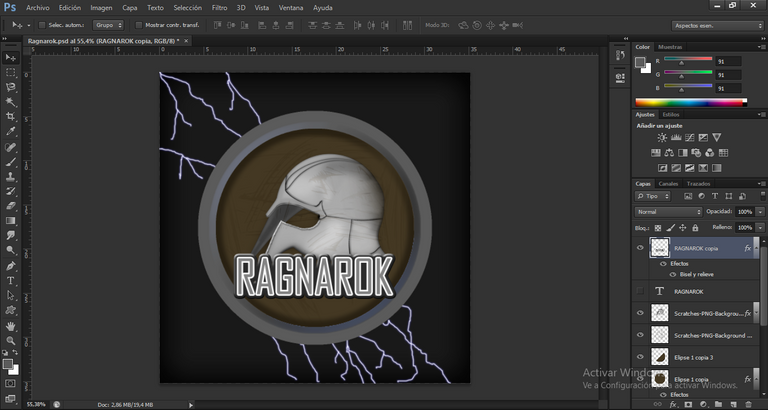
Obviously I realized how ugly it was, so I changed that effect for one that looked more aggressive, I changed it by a gradient that went from dark yellow to light yellow, I added a parallel shadow and to finish the effect of the scratches once again. Another thing is that at the end I ended up making some lines to the brown color of the coin in the background, so that it stopped being a coin and look more like wooden boards, I thought it could look more like a table that is giving support to the hull, ending up with 2 results, both in my opinion very good so it was difficult to choose.
Final results
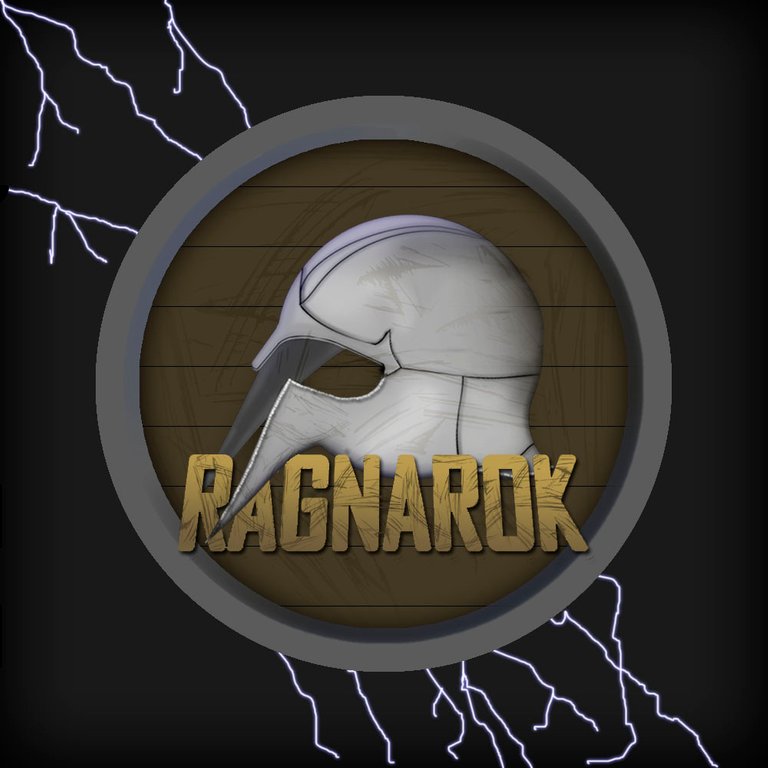
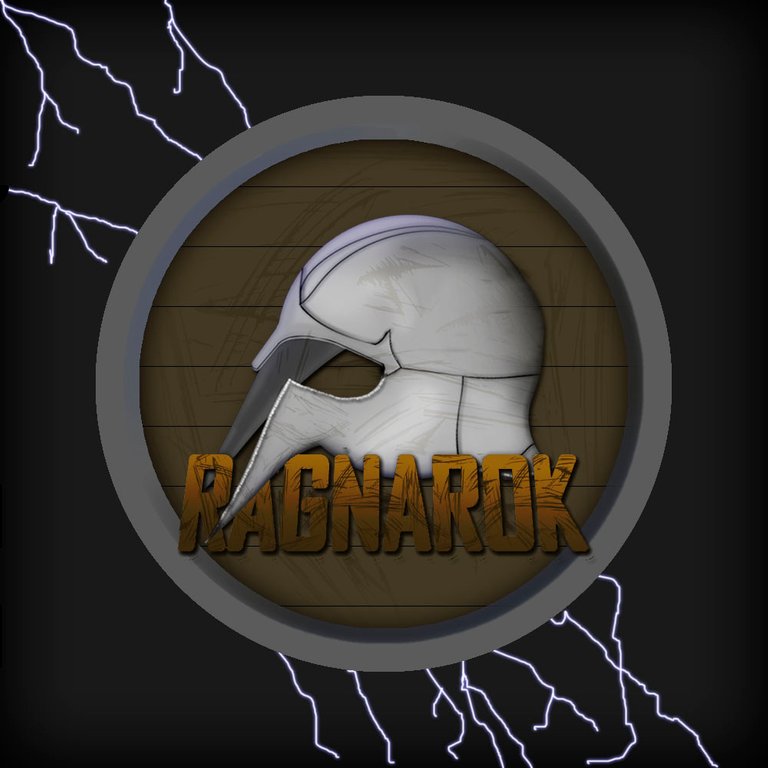
I hope you liked this logo just as I liked to experiment for the first time with "realistic" things like the helmet, I wish good luck to the participants of the contest, I always like to participate in this kind of contests because I really like this editing and creating, I wish you all a happy night, see you next time!

[Versión En Español]
¡Hola Hive! He vuelto al fin, luego de una semana de escribir largos párrafos de tareas, he salido de ellas por un momento para relajarme un poco escribiendo un nuevo post, y en eso de estar viendo otros post vi el concurso para la creación de un logotipo para el videojuego Ragnarok, he querido participar para intentar algo nuevo a los momentos que quiero editar, ya que normalmente hago cosas muy minimalistas y hoy quise hacer algo no muy lejano a eso, pero bastante diferente teniendo en cuenta lo que siempre hago, espero les guste el procedimiento y mas aun mi propuesta.

Editado por el autor
Etapa 1: El fondo
Al principio investigue mas acerca del juego claro, ya me había dado cuenta de que seria algo parecido de la mitología nórdica al ver el nombre "Ragnarok", así que decidí buscar cosas de esta mitología, he encontrado armas, personajes y símbolos que lo definían pero al final de todo me parecía mas representativo seria un casco. Photoshop abierto, un lienzo de 1000x1000 y una lista de mis canciones favoritas reproduciéndose, ya estaba listo para empezar, solo colocando un gran circulo en el medio dando así el primer paso a mi creación.

Seguido del inmenso elipse color mostaza, quise darle al fondo un tono oscuro para hacer mas llamativo el contenido en si, pero también quería darle un toque de "poder" a la imagen y fue aquí cuando se me ocurrió hacer unos rayos detrás del logo ¿pero como haría esos rayos? Me hice esa duda y pensé un poco hasta que opte por hacer líneas de 3 px con el mouse, moviendo mi mano como si estuviera nervioso para así darle forma a los rayos.

Pero entonces, se supone que tenia que simular un ambiente oscuro y poderoso parecido al de la mitología, aquí las ideas fueron variadas, desde hacer el logo con estilo de moneda o tallado en madera, opte por hacer algo parecido a una moneda. El circulo que antes era color naranja (o mostaza, la verdad no se) lo volví marrón tirando a un dorado sucio, también lo duplique y le cambie el color a la copia a un color un poco mas claro, seguido de esto debía intentar darle un relieve al circulo que estaba al exterior, dándole así un efecto parecido al 3D, al otro circulo le hice lo mismo pero intentando hacer que el relieve se viera hacia adentro en vez que se vea como montaña, algo que me fue difícil de hacer. Aparte a los rayos del fondo le di un resplandor exterior color azul para que se viera como un rayo.

Para este momento me habia vuelto a estancar en un problema, y era que queria darle al circulo un reflejo como si fuera pulido, pero las ideas eran pocas, termine haciendo un pequeño resplandor azul alrededor del circulo aplicando una mascara de recorte, para así pensar que es el reflejo de los rayos, la idea no me agrado pero termine dejando ese resplandor por bastante tiempo intentando buscarle un lado positivo.


En busca de darle mas profundidad, cambie el efecto a relieve, ya que estaba en una opción que suavizaba mas los bordes
Etapa 2: Objeto representativo
La mitologia nordica debe ser algo rudo ¿no? Ya que siempre lo que se relaciona con rudo/duro (por lo menos conmigo) son marcas, rayones fuertes que se quedan en un objeto o persona, por lo cual le añadí unos rayones a "la moneda" que había hecho. Luego de esto ya había pasado a la segunda etapa, la etapa de hacer los objetos que representaran al juego en si, como dije antes, opte por un casco ya que era muy representativo, pero no podía simplemente copiar y pegar la imagen de un casco, quería hacer el dibujo de un casco basado en un casco real que vi en internet, ¿Cómo lo haría? Aquí empieza el proceso, con esas figuritas que parecen una morsa.

Usando la herramienta del transformado libre y deformando los triangulos que habia puesto alli, logra hacer la primera parte del casco, no se como se llama exactamente esa parte del casco pero me salio bien hacerlo, segui con los circulos, los cuales borre y pinte poco a poco hasta darle la forma que ven en pantalla. El "visor" fue la parte mas complicada de formar debido a que tenia que tener un tamaño perfecto, terminaban siendo espacios muy grandes lo que yo hacia hasta que en un tiro de suerte logre darle el tamaño ideal.

Lo que le seguia era darle profundidad, con un pequeño efecto de relieve y coloreando entre tonalidades oscuras y claras sobre el casco, hice también una clase de alas que yo mismo hice, una vez basándome en el casco que ya había mencionado, pero lo simplifique mucho así que lo elimine al final. Otra cosa era darle detalle al casco, haciendo líneas alrededor del mismo que terminarían siendo el mejor detalle.

Para terminar con el casco, le di un sombreado a las líneas que ya había trazado, le di el mismo efecto de rayones que tiene la moneda del fondo y también una serie de puntos en la parte de al frente del casco con otro sombreado mas, solo detalles que aportaron mucho.

Etapa 3: Texto
Llego el momento de la etapa final, debía escoger una buena fuente de letras y efectos que combinaran con esta misma para poder terminar este logo, entre este tiempo de pensar me di cuenta que en realidad esa tonalidad marron era horrible, asi que cambie el color del circulo mas grande a un gris. Luego de hacer eso tome la decision de usar la fuente Agency FB, pero habia tambien otro problema y era que no sabia que efecto darle al texto, experimente un rato hasta llegar incluso al siguiente efecto:

Obviamente me di cuenta de lo feo que era, así que cambie ese efecto por uno que se viera mas agresivo, lo cambie por un degradado que iba desde amarillo oscuro a amarillo claro, le agregue una sombra paralela y para finalizar el efecto de los rayones una vez mas. Otra cosa es que al final termine haciendo unas líneas al color marrón de la moneda del fondo, para que dejase de ser una moneda y parezcan mas bien tablas de madera, pensé que podría parecer mas bien una mesa que este dando soporte al casco, terminando así con 2 resultados, ambos a mi parecer muy buenos así que me fue difícil de elegir
Resultados finales


Espero les haya gustado este logo justo como a mi me gusto experimentar por primera vez con cosas "realistas" como el casco, les deseo mucha suerte a los participantes del concurso, siempre me gusta participar en este tipo de concursos ya que me gusta mucho esto de editar y crear, les deseo una feliz noche a todos ¡Hasta la próxima!

0
0
0.000
https://twitter.com/therealjazzn/status/1490523047597678594
The rewards earned on this comment will go directly to the person sharing the post on Twitter as long as they are registered with @poshtoken. Sign up at https://hiveposh.com.
Congratulations @jazzn! You have completed the following achievement on the Hive blockchain and have been rewarded with new badge(s):
Your next target is to reach 60 posts.
You can view your badges on your board and compare yourself to others in the Ranking
If you no longer want to receive notifications, reply to this comment with the word
STOPTo support your work, I also upvoted your post!
Check out the last post from @hivebuzz:
Support the HiveBuzz project. Vote for our proposal!