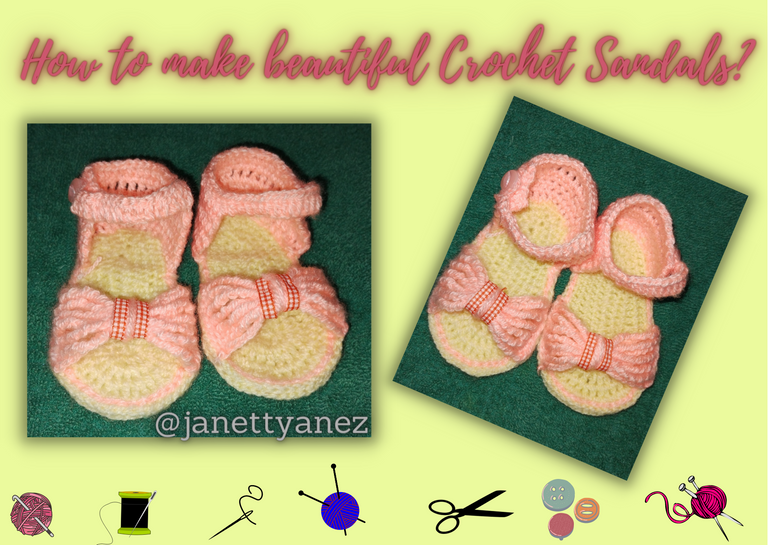
¿Cómo hacer unas hermosas sandalias en Crochet? [ESP-ENG]

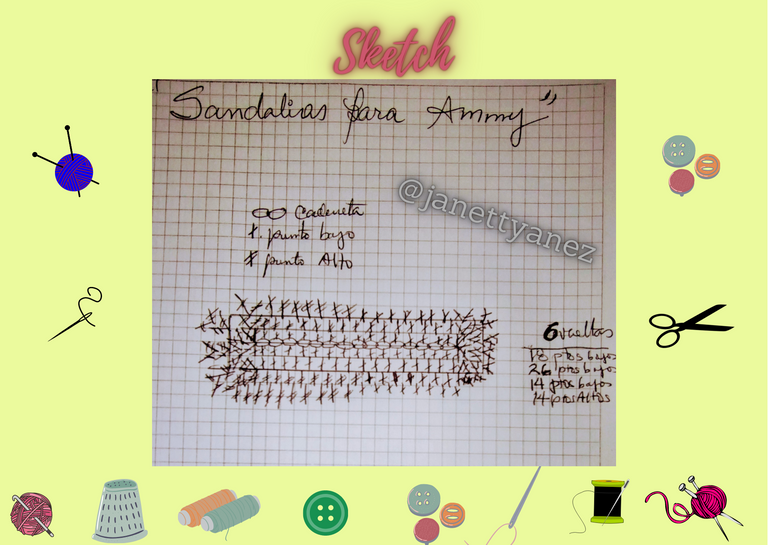
Mas adelante una vez que les presente los materiales necesario le muestro un croquis elaborado por mi, con la finalidad de que les sirva de guia para realizarlas.
The manufacturing process is quite simple, because once the sole of the sandals has been made, the upper part is very easy to make.
Later on, once I present you the necessary materials, I will show you a sketch made by me, so that you can use it as a guide to make them.
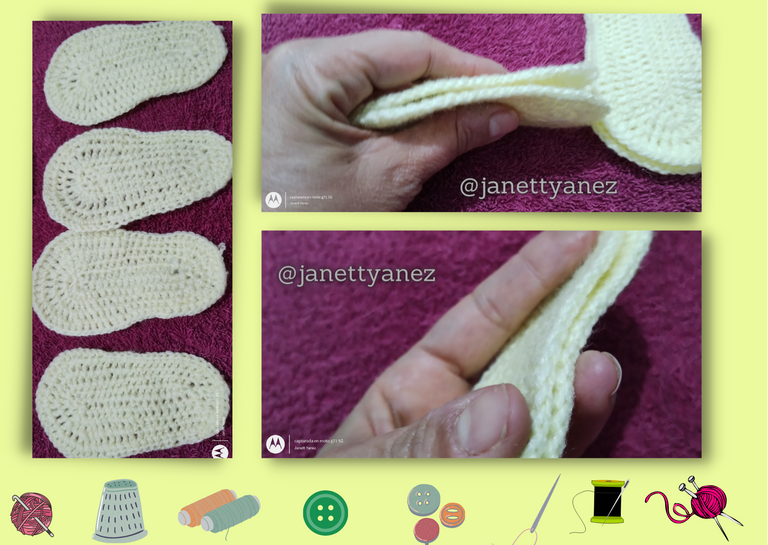
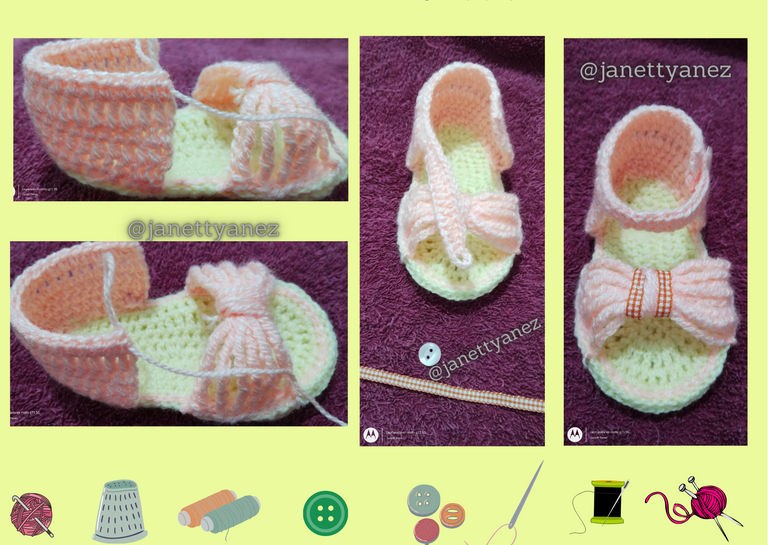
La primera vuela se hace con puntos bajos simples, uno en cada cadeneta, excepto en las puntas donde se realizan dos puntos bajos en cada orificio de la cadeneta, quedandoles 18 puntos bajos por cada lado.
To begin with, the sole of the sandal is made with 15 chain stitches.
The first flight is made with single single single crochet, one on each chain stitch, except at the ends where two single crochet stitches are made in each hole of the chain stitch, leaving you with 18 single crochet stitches on each side.
Esto se repite para la segunda vuelta, pero en la tercera iniciamos la forma de la planta del pie, haciendo 8 puntos bajos simples inmediatamente despues de las esquinas donde mantenemos el aumento, e inmediatamente despues del punto 8 que queda a mitad de la suela, se hacen puntos altos , manteniendo los aumentos en la punta de la sandalia.
En total se daran 6 vueltas .
A total of 6 rounds will be knitted.
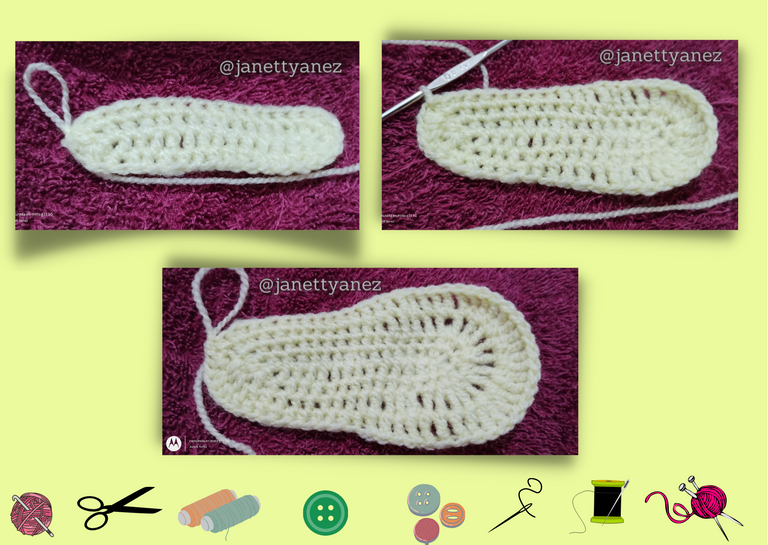
Una vez terminada la suela se cierra con un punto deslizado.
Se van a tejer 4 suelas iguales, porque se utilizaran dos suelas para cada pie.
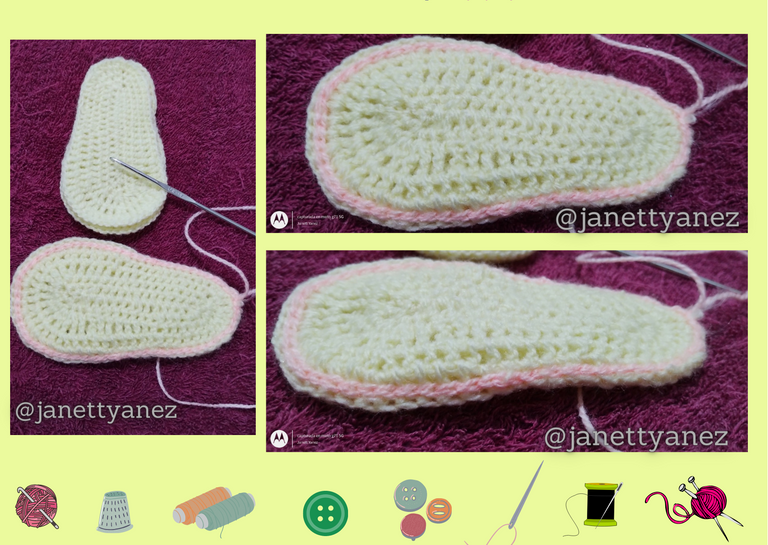
Una vez finalizada se unen las dos suelas.
Once the sole is finished, it is closed with a slip stitch.
You are going to knit 4 equal soles, because you will use two soles for each foot.
Once finished, the two soles are joined together.
To join the soles together, you can do it as I did with the contrasting thread or with the same colour, it depends on your taste.
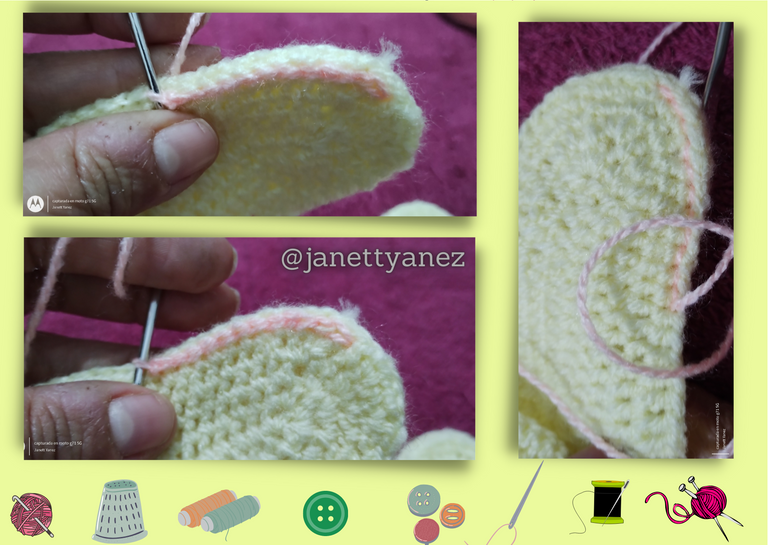
Para el momento de la unión tienen que realizar el punto manteniendo ambas suelas unidas y que queden totalmente lisas.
At the moment of joining, the stitch has to be made while keeping both soles together and completely smooth.
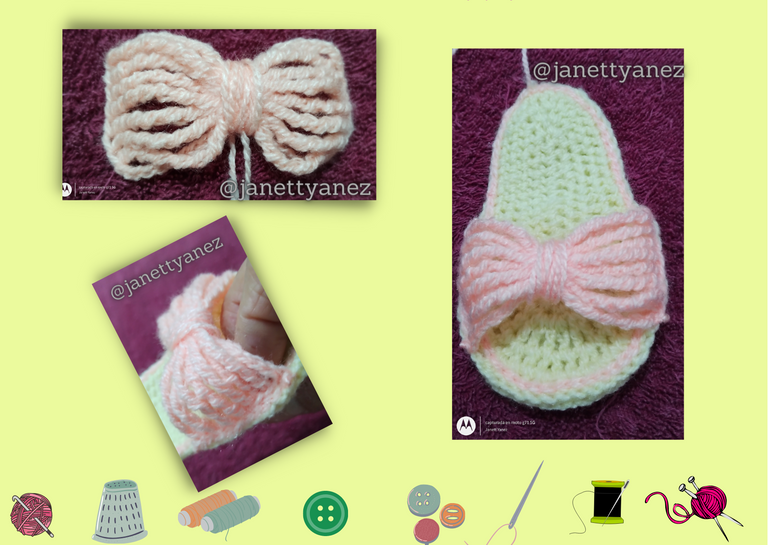
En este proyecto elegí un lazo elaborado con punto alto de 6 lazadas, iniciando con una cadeneta de 9 puntos y luego se realizan 8 puntos altos de 6 lazadas y luego se cierra con una cadeneta de 9 puntos otra vez.
Esto se repite para ambos lados del lazo y una vez finalizado se presiona y se da vuelta con el hilo que se esta tejiendo, para que quede tal como se muestra en la imagne a continuación.
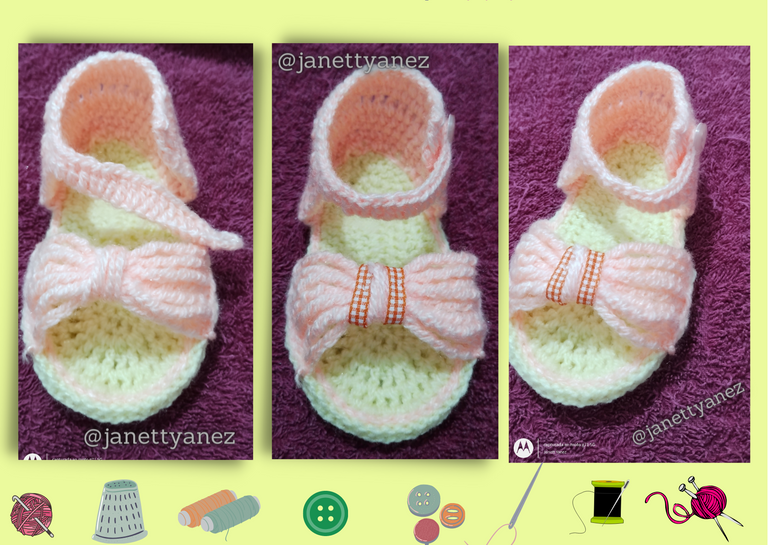
Luego este lazo se teje a la suela dejando 13 puntos desde la mitad de la parte delantera de la suela hasta los bordes, pero tambien le puede servir de guia colocar su dedo indice en la parte delantera para imaginar la posición de los dedos.
Once the sole is finished, the front part of the sandal is made.
In this project I chose an elaborate loop with 6 loop high stitch, starting with a 9 stitch chain stitch and then 8 6 loop high stitches are cast on and then closed with a 9 stitch chain stitch again.
This is repeated for both sides of the loop and once finished press and turn with the yarn being knitted, so that it looks as shown in the imagne below.
Then this loop is knitted to the sole leaving 13 stitches from the middle of the front of the sole to the edges, but you can also use your index finger on the front as a guide to imagine the position of the toes.
Se realizan 4 vueltas de puntos bajos y luego 3 vueltas de punto altos.
En la última de teje una cadeneta de 26 puntos para realizar el broche para cerrar la sandalia que tendrá en su extremo el orificio que nos servirá para el botón.
Se tejen puntos altos a 18 cadenetas, dejando libre 8 para el cierre donde se coloca el botón.
Knit 4 rows of single crochet and then 3 rows of double crochet.
In the last row, knit a chain of 26 stitches to make the clasp to close the sandal, which will have a hole at the end that will be used for the button.
Knit 18 chain stitches, leaving 8 stitches free for the fastening where the button will be placed.
Finally, the button and the decorative ribbon are attached to the front of the sandal.
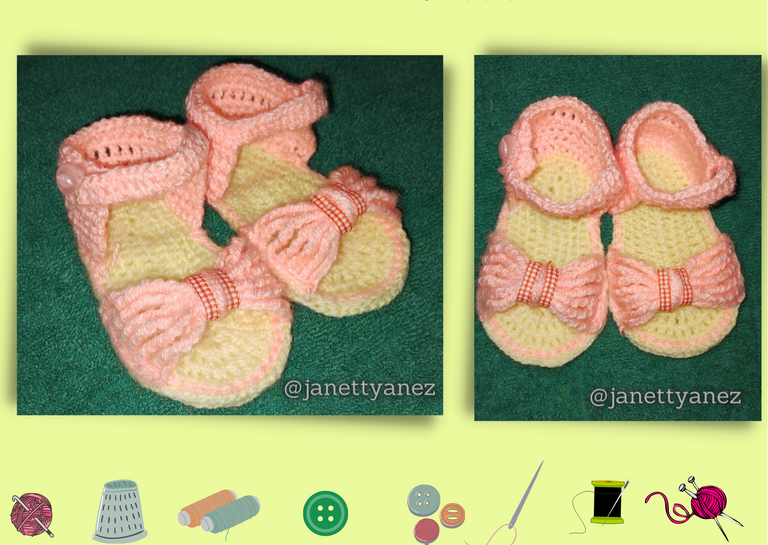
The final result of my project is shown below:
All the images used are my own and were taken with my Motorola G71 phone and the collages were made with the Canva application.
https://twitter.com/JANETTYANEZ/status/1519531282530803713
The rewards earned on this comment will go directly to the person sharing the post on Twitter as long as they are registered with @poshtoken. Sign up at https://hiveposh.com.
Excelente trabajo amiga
Gracias amigo @odanmedina por tu visita y comentario🤗
Wow, these is lovely crocheted sandals, and will like my daughter to wear this. Thanks for sharing.
Thanks for comment🤗
Hola querida amiga @janettyanez buen día
Que hermoso trabajo; Felicitaciones tienes un hermoso don en las manos
Aprecio que compartas los materiales y su creación
Que disfrutes de un hermoso día
Gracias mi querido amigo @jlufer por tu encantador comentario🤗
Gracias por promocionar tu excelente contenido en nuestro servidor de Discord, te invitamos a echarle un vistazo a nuestro canal de tweeter para que te enteres cómo ganar Tokens!! !PIZZA !PGM !LUV
BUY AND STAKE THE PGM TO SEND TOKENS!
Discord
Support the curation account @ pgm-curator with a delegation 10 HP - 50 HP - 100 HP - 500 HP - 1000 HP
Get potential votes from @ pgm-curator by paying in PGM, here is a guide
I'm a bot, if you want a hand ask @ zottone444
@celf.support(5/10) gave you LUV. H-E tools | discord | community | <><
HiveBuzz.me NFT for Peace
PIZZA Holders sent $PIZZA tips in this post's comments:
@celf.support(5/10) tipped @janettyanez (x1)
You can now send $PIZZA tips in Discord via tip.cc!
Those little sandals are so cute. They will be more beautiful when worn. Good evening!
They are for a 3 month old baby 🤣
Thank you for your visit and comment👍
You're welcome (^_^)
Que cosita tan linda, felicidades por tu talento.
Gracias amiga @afrikablr por tu visita y comentario🤗
Que hermosura de sandalias amiga @janettyanez se ven super lindas yo quiero unas así 🙄😮😮
Si tejes en crochet puedes intentar hacerlas con las instrucciones amiga @bleuclair .
Gracias por tu visita y comentario🤗
Excellent job, wow these shoes looks so gorgeous, you did an amazing job with the knitting.
Thank you for your comment 🤗
You're welcome 🤗
Todo se ve tan lindo y la explicaste muy bien con cada detalle. te felicito
Reblog your posting