Chocoflan en la hornilla, un pastel con una cremosidad y dulzura inigualable. (ESP/ENG)
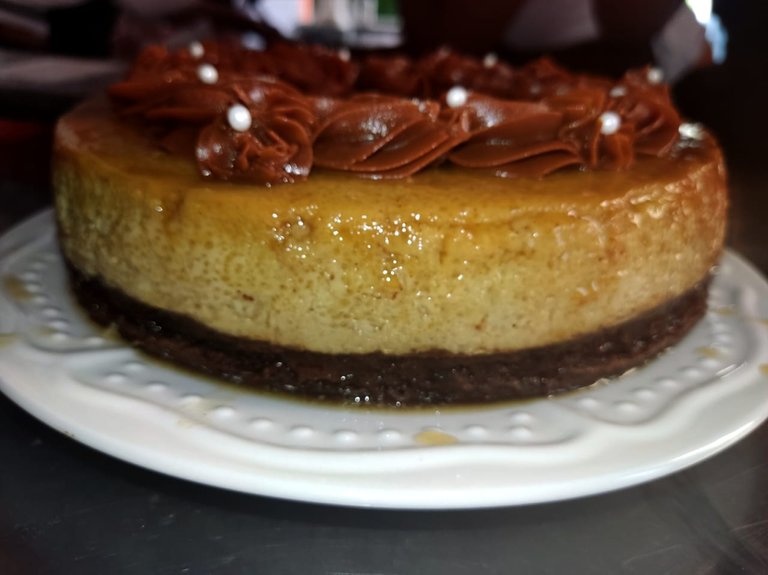
Me parece que la torta imposible es el complemento perfecto, torta y quesillo que más pedir en un postre, y esa fue mi clase de la semana pasada en mis estudios de maestro pastelero, y para mí fue espectacular la combinación de este pastel con el dulce de leche, además de que la cocinamos en la estufa y estuvo lista más rápida que en el horno, además súper suave y esponjosa el baño de María mantuvo en todo momento la humedad en la torta de chocolate, y me parece una opción muy factible, porque muchos se limitan a no realizar algunos postres por no tener horno, bueno está es una excelente opción, que en lo personal me encantó. El quesillo cremoso y dulce, además, de un pastel de chocolate esponjoso y húmedo, ni siquiera se le formó una capa crujiente arriba y además subió uniformemente.
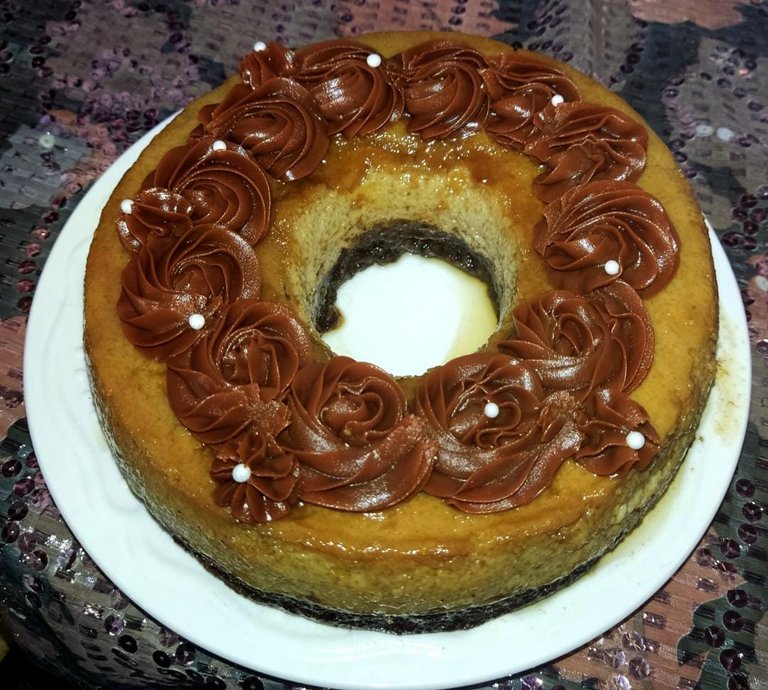
Desde hace un tiempo vengo observando que está en tendencia realizar este tipo de torta, en esos moldes que parecen un volcán y me intriga a bastante como lo hacían, y es que no entre el agua del baño de María tapamos con papel de aluminio el hueco que trae el molde en el medio y listo. Desmoldarla fue súper fácil, y se prepara con pocos ingredientes les aseguro que muchos los tenemos en casa. Les cuento que en el curso los ingredientes los llevamos entre las estudiantes y al final de la clase la preparación final la repartimos entre las 12 participantes, así que siempre guardo lo mío para compartirlo en casa, y en esta oportunidad a mi esposo realmente le encantó. Así que vamos con esta receta para que lo intenten en casa.

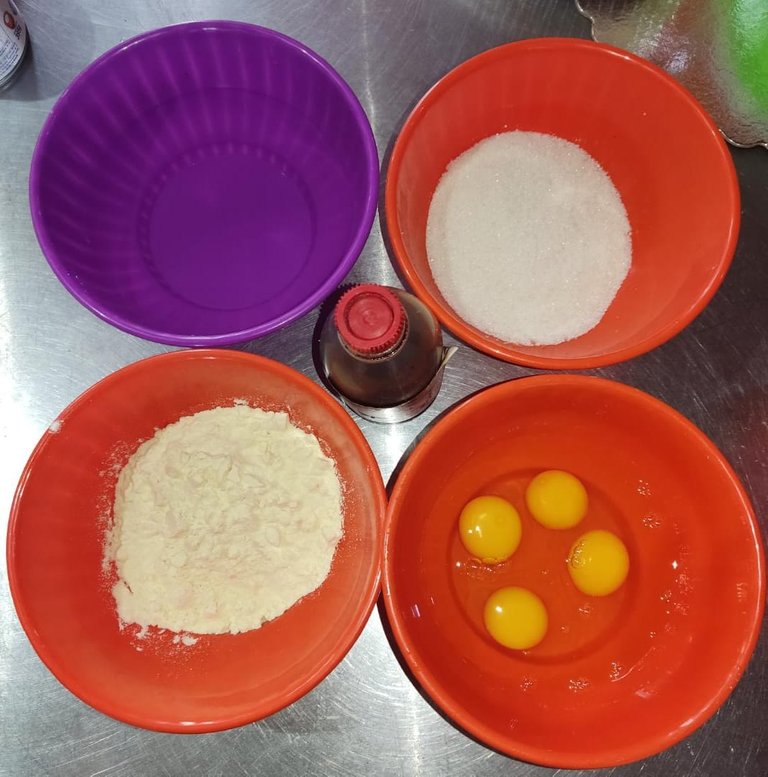
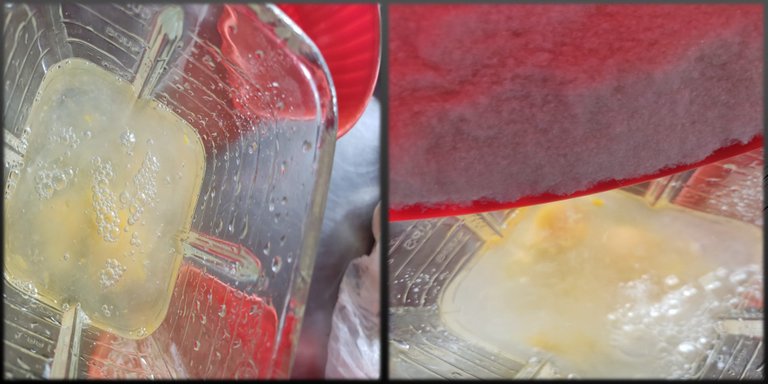
En la licuadora, colocamos todos los ingredientes mezclamos hasta integrar bien todos los ingredientes y Reservamos. Dejamos reposar para que baje la espuma y nos quede más cremoso.
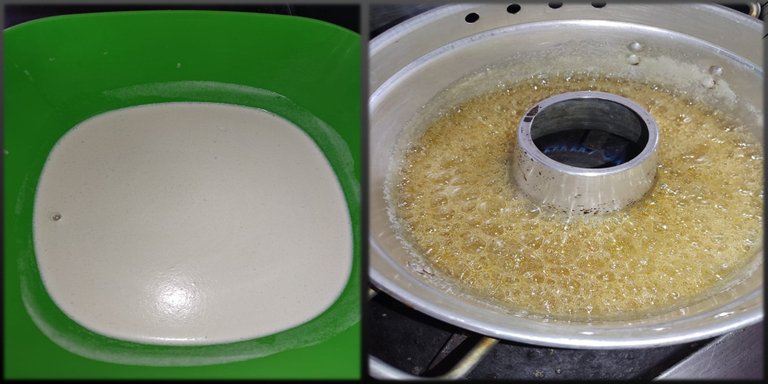
A continuación, llevamos a fuego medio, un molde de 24 cm en este caso utilizamos uno tipo volcán con tapa, pero también podemos utilizar uno redondo o una quesillera. con el azúcar y el agua, y dejamos cocinar hasta que tome un color ámbar hacer esto con mucha precaución porque el caramelo alcanza altas temperaturas, además puede quemarse rápidamente, yo prefiero hacerlo directamente en donde realizare la torta para no manipularlo mucho. Retiramos el molde del fuego y dejamos enfriar y reservamos.


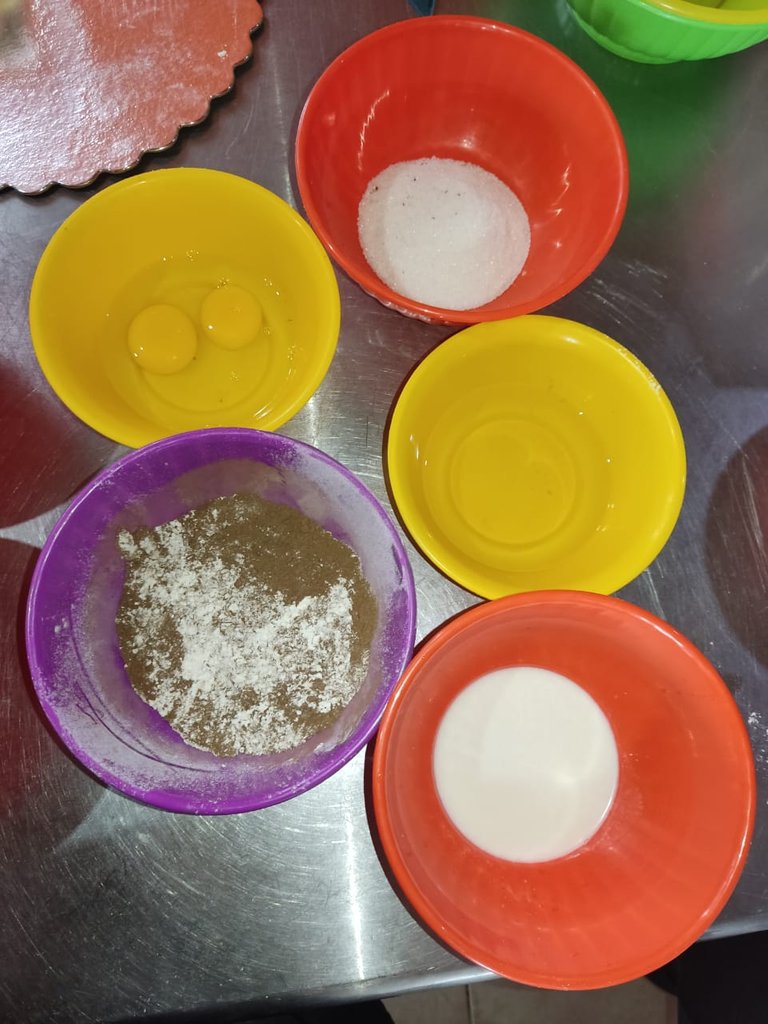

Previamente precalentamos nuestro horno a 180ºC, y tendremos nuestro molde de 24cm, con el caramelo ya listo y frio. Agregaremos los huevos con el azúcar hasta formar un punto de letra, en ese momento incorporaremos el aceite y la leche, luego incorporamos los ingredientes secos previamente cernidos de forma envolvente.
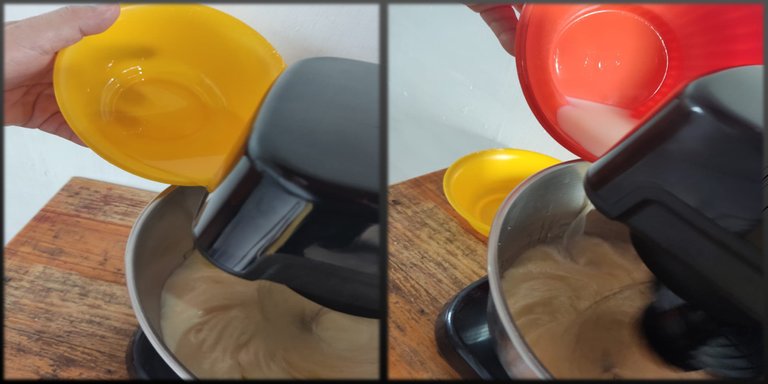
Por último, agregamos la vainilla, verificamos que nuestra mezcla no tenga grumos y la agregamos en nuestro molde con caramelo de manera que quede en el fondo de nuestro molde.
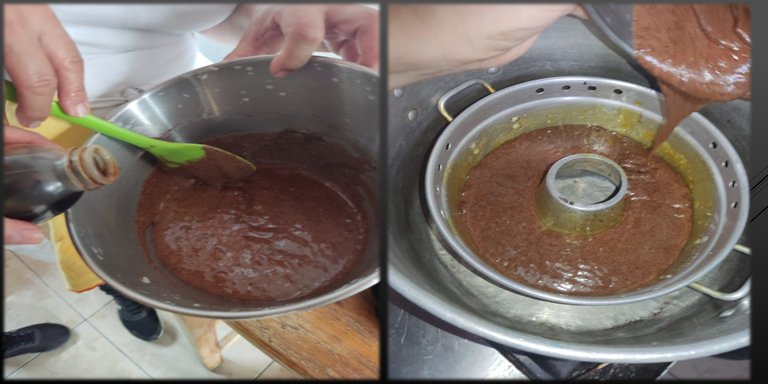
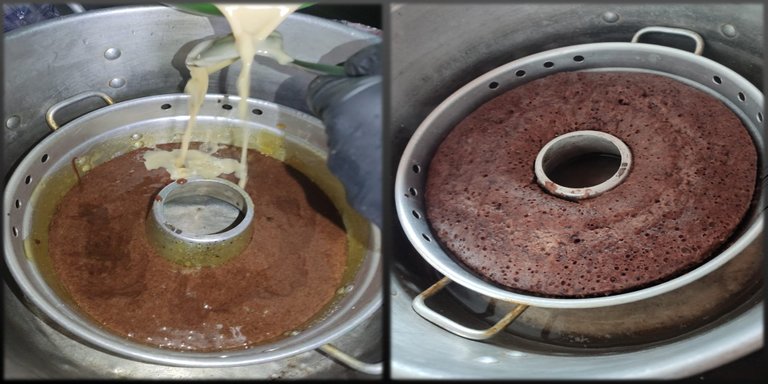
Ahora, con ayuda de una cucharilla agregaremos la mezcla de quesillo que realizamos previamente, poco a poco de manera continua, seguidamente, tapamos nuestro molde y llevamos a la estufa en una olla más grande a baño de María por aproximadamente 40 minutos. se revisa como las otras tortas, introduciendo un palito y que este salga limpio. Además, que cuando esta lista se desprende de los lados.
Desmoldamos frio, si es de un día para otro mejor, ahora con ayuda de una manga y una boquilla decoramos nuestra torta.
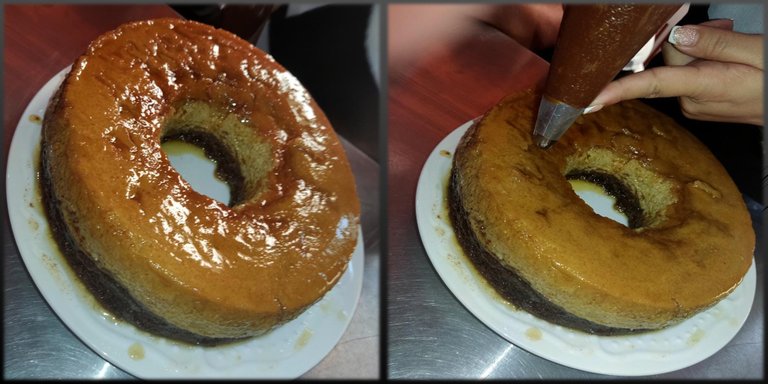
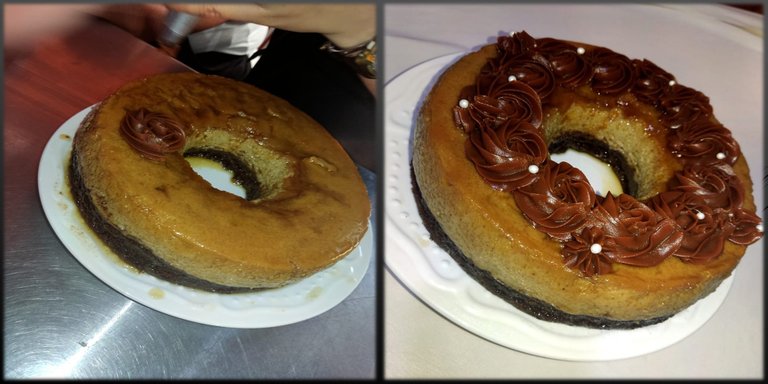
En este caso realizamos rosetas, tengamos en cuenta que cuando vamos a decorar con arequipe debemos asegurarnos que sea repostero, y de buena consistencia para que tome mejor forma. Esto también nos será de mucha ayuda para disimular las imperfecciones de la torta obviamente es opcional.


Todas las imágenes son de mi propiedad, tomadas con la cámara de mi teléfono Poco X3 Pro y otras están publicadas en mis Instagram personal Valeria.sweet.and.cake. Traducido con https://www.deepl.com/es/translator


Desde hace un tiempo vengo observando que está en tendencia realizar este tipo de torta, en esos moldes que parecen un volcán y me intriga a bastante como lo hacían, y es que no entre el agua del baño de María tapamos con papel de aluminio el hueco que trae el molde en el medio y listo. Desmoldarla fue súper fácil, y se prepara con pocos ingredientes les aseguro que muchos los tenemos en casa. Les cuento que en el curso los ingredientes los llevamos entre las estudiantes y al final de la clase la preparación final la repartimos entre las 12 participantes, así que siempre guardo lo mío para compartirlo en casa, y en esta oportunidad a mi esposo realmente le encantó. Así que vamos con esta receta para que lo intenten en casa.


**Flan**
| Cantidad | Ingrediente | |
|---|---|---|
| 1 taza | leche en polvo | |
| 2 taza | Agua | |
| 4 | Huevos | |
| 1 taza | Azúcar | |
| 1 Cucharadita | Vainilla |
Caramelo
| Cantidad | Ingrediente | |
|---|---|---|
| 60 mililitros | Agua | |
| 250 gramos | Azúcar |

Paso a paso
En la licuadora, colocamos todos los ingredientes mezclamos hasta integrar bien todos los ingredientes y Reservamos. Dejamos reposar para que baje la espuma y nos quede más cremoso.

A continuación, llevamos a fuego medio, un molde de 24 cm en este caso utilizamos uno tipo volcán con tapa, pero también podemos utilizar uno redondo o una quesillera. con el azúcar y el agua, y dejamos cocinar hasta que tome un color ámbar hacer esto con mucha precaución porque el caramelo alcanza altas temperaturas, además puede quemarse rápidamente, yo prefiero hacerlo directamente en donde realizare la torta para no manipularlo mucho. Retiramos el molde del fuego y dejamos enfriar y reservamos.


Ponqué de Chocolate

| Cantidad | Ingrediente | |
|---|---|---|
| 90 gramos | Harina de trigo leudante | |
| 125 gramos | Azúcar | |
| 2 | Huevos | |
| 1 Cucharadita | Vainilla | |
| 100 mililitros | Aceite | |
| 1/4 taza | leche | |
| 25 gramos | Cacao |

Paso a paso

Previamente precalentamos nuestro horno a 180ºC, y tendremos nuestro molde de 24cm, con el caramelo ya listo y frio. Agregaremos los huevos con el azúcar hasta formar un punto de letra, en ese momento incorporaremos el aceite y la leche, luego incorporamos los ingredientes secos previamente cernidos de forma envolvente.

Por último, agregamos la vainilla, verificamos que nuestra mezcla no tenga grumos y la agregamos en nuestro molde con caramelo de manera que quede en el fondo de nuestro molde.

Ahora, con ayuda de una cucharilla agregaremos la mezcla de quesillo que realizamos previamente, poco a poco de manera continua, seguidamente, tapamos nuestro molde y llevamos a la estufa en una olla más grande a baño de María por aproximadamente 40 minutos. se revisa como las otras tortas, introduciendo un palito y que este salga limpio. Además, que cuando esta lista se desprende de los lados.

Desmoldamos frio, si es de un día para otro mejor, ahora con ayuda de una manga y una boquilla decoramos nuestra torta.

En este caso realizamos rosetas, tengamos en cuenta que cuando vamos a decorar con arequipe debemos asegurarnos que sea repostero, y de buena consistencia para que tome mejor forma. Esto también nos será de mucha ayuda para disimular las imperfecciones de la torta obviamente es opcional.


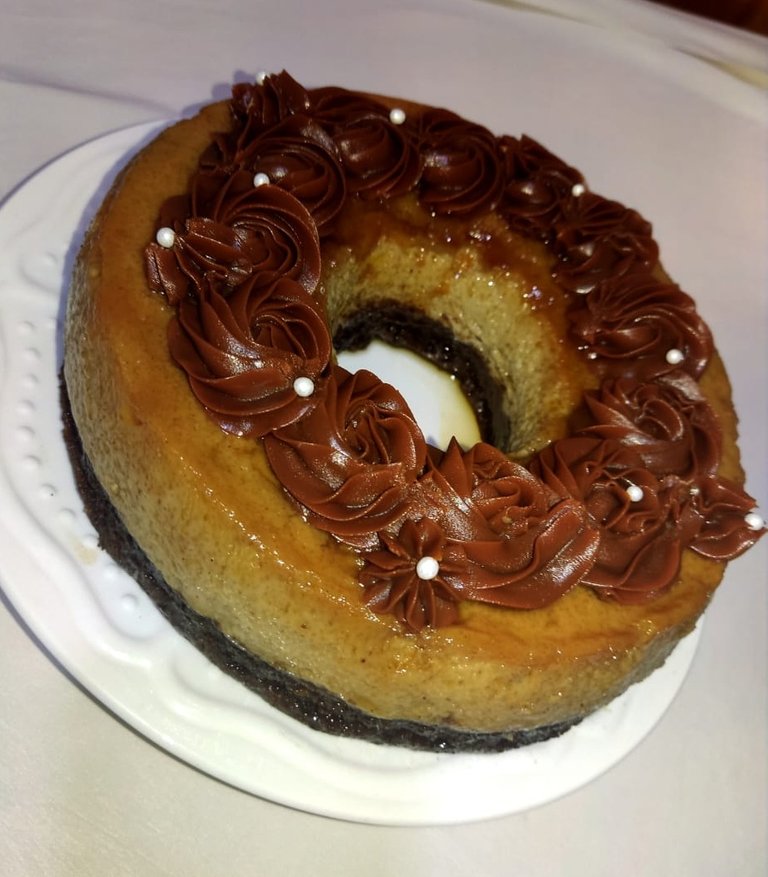
El resultado final


English
It seems to me that the impossible cake is the perfect complement, cake and quesillo what more to ask for in a dessert, and that was my class last week in my studies of master pastry chef, and for me it was spectacular the combination of this cake with dulce de leche, plus we cooked it on the stove and it was ready faster than in the oven, The bain marie kept the moisture in the chocolate cake at all times, and it seems to me a very feasible option, because many people limit themselves to not bake some desserts because they don't have an oven, well this is an excellent option, and I personally loved it. The creamy and sweet quesillo, in addition to a spongy and moist chocolate cake, it did not even form a crunchy layer on top and also rose evenly.

For some time now I have been observing that it has been a trend to make this type of cake, in those molds that look like a volcano and it intrigues me a lot how they did it, and it is that the water from the water bath does not enter, we cover with aluminum foil the hole that brings the mold in the middle and that's it. Unmold it was super easy, and it is prepared with few ingredients, I assure you that many of us have them at home. I tell you that in the course we take the ingredients among the students and at the end of the class we share the final preparation among the 12 participants, so I always keep mine to share it at home, and this time my husband really loved it. So let's go with this recipe for you to try at home.


In the blender, place all the ingredients, mix until all the ingredients are well integrated and set aside. Let stand to reduce the foam and make it creamier.

Next, we take to medium heat, a 24 cm mold, in this case we use a volcano type with lid, but we can also use a round one or a cheese mold. with the sugar and water, and let it cook until it takes an amber color, do this with great caution because the caramel reaches high temperatures, it can also burn quickly, I prefer to do it directly where I will make the cake so as not to manipulate it too much. Remove the mold from the fire and let it cool and set aside.


Previously we preheat our oven to 180ºC, and we will have our 24cm mold, with the caramel already ready and cold. We will add the eggs with the sugar until we form a point of letter, at that moment we will incorporate the oil and the milk, then we incorporate the dry ingredients previously sifted in an enveloping way.

Finally, we add the vanilla, check that our mixture has no lumps and add it in our mold with caramel so that it is at the bottom of our mold.

Now, with the help of a spoon we will add the cheese mixture that we made previously, little by little in a continuous way, then, we cover our mold and take it to the stove in a larger pan in a bain-marie for approximately 40 minutes. It is checked like the other cakes, introducing a stick and that it comes out clean. Also, when it is ready, it comes out from the sides.

Unmold cold, if it is overnight better, now with the help of a sleeve and a nozzle decorate our cake.

In this case we make rosettes, keep in mind that when we are going to decorate with arequipe we must make sure it is confectionery, and of good consistency so that it takes better shape. This will also be very helpful to hide the imperfections of the cake, obviously it is optional.


All images are my own, taken with my Poco X3 Pro phone camera and others are posted on my personal Instagram Valeria.sweet.and.cake. Translated with https://www.deepl.com/es/translator


For some time now I have been observing that it has been a trend to make this type of cake, in those molds that look like a volcano and it intrigues me a lot how they did it, and it is that the water from the water bath does not enter, we cover with aluminum foil the hole that brings the mold in the middle and that's it. Unmold it was super easy, and it is prepared with few ingredients, I assure you that many of us have them at home. I tell you that in the course we take the ingredients among the students and at the end of the class we share the final preparation among the 12 participants, so I always keep mine to share it at home, and this time my husband really loved it. So let's go with this recipe for you to try at home.


**Quesillo or flan**
| Quantity | Ingredient | |
|---|---|---|
| 1 cup | powdered milk | |
| 2 cup | Water | |
| 4 | Eggs | |
| 1 cup | Sugar | |
| 1 teaspoon | Vanilla |
Caramel
| Quantity | Ingredient | |
|---|---|---|
| 60 milliliters | Water | |
| 250 grams | Sugar |

Step by step
In the blender, place all the ingredients, mix until all the ingredients are well integrated and set aside. Let stand to reduce the foam and make it creamier.

Next, we take to medium heat, a 24 cm mold, in this case we use a volcano type with lid, but we can also use a round one or a cheese mold. with the sugar and water, and let it cook until it takes an amber color, do this with great caution because the caramel reaches high temperatures, it can also burn quickly, I prefer to do it directly where I will make the cake so as not to manipulate it too much. Remove the mold from the fire and let it cool and set aside.


** Chocolate Ponqué **

| Quantity | Ingredient | ||
|---|---|---|---|
| 90 grams | Leavening wheat flour | ||
| 125 grams | Sugar | ||
| 2 | Eggs | ||
| 1 teaspoonful | Vanilla | ||
| 100 milliliters | oil | ||
| 1/4 cup | milk | ||
| 25 grams | Cocoa |

Step by step

Previously we preheat our oven to 180ºC, and we will have our 24cm mold, with the caramel already ready and cold. We will add the eggs with the sugar until we form a point of letter, at that moment we will incorporate the oil and the milk, then we incorporate the dry ingredients previously sifted in an enveloping way.

Finally, we add the vanilla, check that our mixture has no lumps and add it in our mold with caramel so that it is at the bottom of our mold.

Now, with the help of a spoon we will add the cheese mixture that we made previously, little by little in a continuous way, then, we cover our mold and take it to the stove in a larger pan in a bain-marie for approximately 40 minutes. It is checked like the other cakes, introducing a stick and that it comes out clean. Also, when it is ready, it comes out from the sides.

Unmold cold, if it is overnight better, now with the help of a sleeve and a nozzle decorate our cake.

In this case we make rosettes, keep in mind that when we are going to decorate with arequipe we must make sure it is confectionery, and of good consistency so that it takes better shape. This will also be very helpful to hide the imperfections of the cake, obviously it is optional.


The final result


0
0
0.000
https://twitter.com/847986936/status/1587924688898265088
https://twitter.com/1423889954275569665/status/1587962521121595392
The rewards earned on this comment will go directly to the people( @derppunk ) sharing the post on Twitter as long as they are registered with @poshtoken. Sign up at https://hiveposh.com.
Gracias por el apoyo!!!😄
Gracias por el apoyo!!😚
Siempre a su orden amiga 🤗🤗🤗☕❣️
Ohhh, that is so good! Your recipes are really yummy. Thanks for bringing your good recipe, sharing with us!☺️
Thank you, I love that you like it, I always try to make them look good and taste delicious.Cheers!!!!😊
Que practica esta receta, me encanta. Voy hacerla este fin de semana, gracias por compartir 😊
¡Si es rápida de hacer y súper deliciosa!! seguro te va gustar mucho! es sorprendente el resultado final. Saludos 😊
Hola @irenebarreto, que delicia de torta, me encanta el chocolate, es difícil resistirse a un postre, siempre me había preguntado como hacían para usar esos moldes y que la mezcla no se derrame, gracias por explicar ese pequeño detalle.
Bendiciones!
Hola!! Yo también tuve esa duda por mucho tiempo, es increíble ese tipo de moldes, además de que vienen con tapa, a mí me encanto. Gracias por pasar por aquí y comentar.😊
Thanks for sharing this cooking experience and I hope one day I can do it
I really loved it and the final result, besides being delicious, is amazing. If you make it I'm sure you will love it.😊
Join the foodie fun! We've given you a FOODIE boost. Come check it out at @foodiesunite for the latest community updates. Spread your gastronomic delights on and claim your tokens.
Gracias por el apoyo!! ☺️
Looks yummy!!!I will try this at home.Thank for sharing this with us.