Build an Igloo
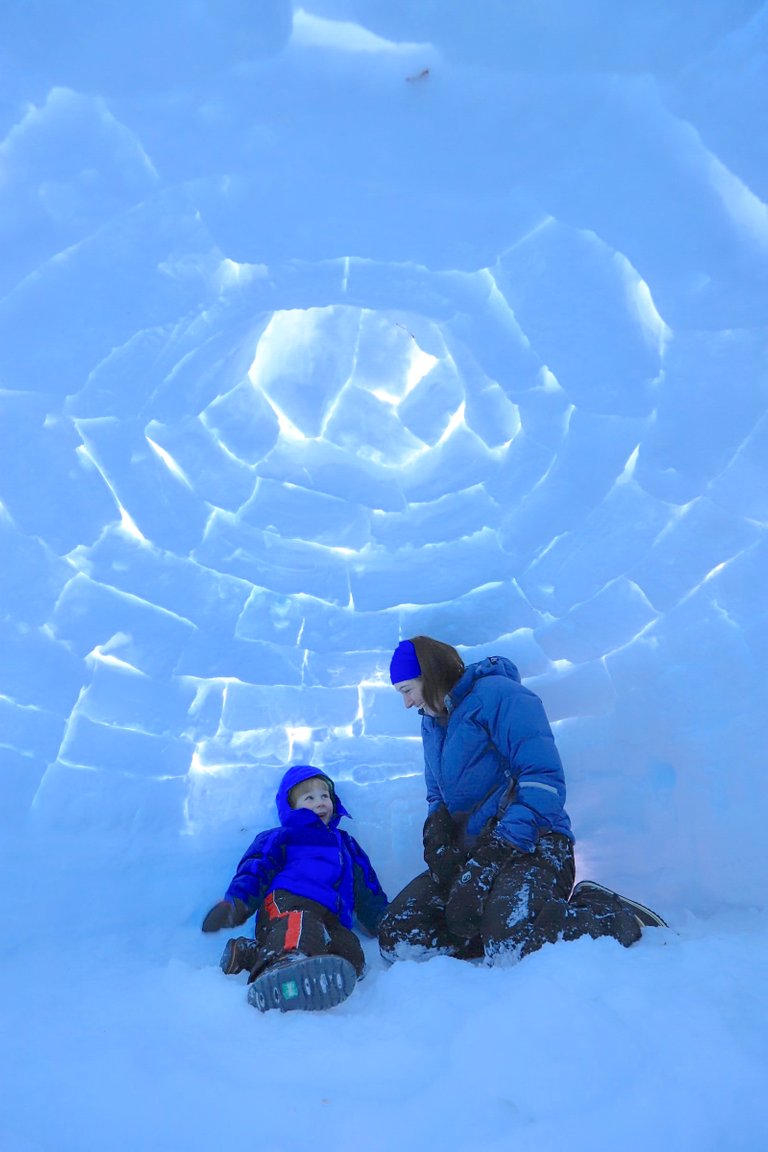
One of the perks of when we lived in the frozen North is we could make an igloo in our backyard! This was a super fun project and made a great cubby house for the kids that converted into a cozy Canadian whisky bar at night! This had an extra level of novelty for us as Australians, and was something we wanted to try if we had the chance to while we were based in Northern BC in Canada.
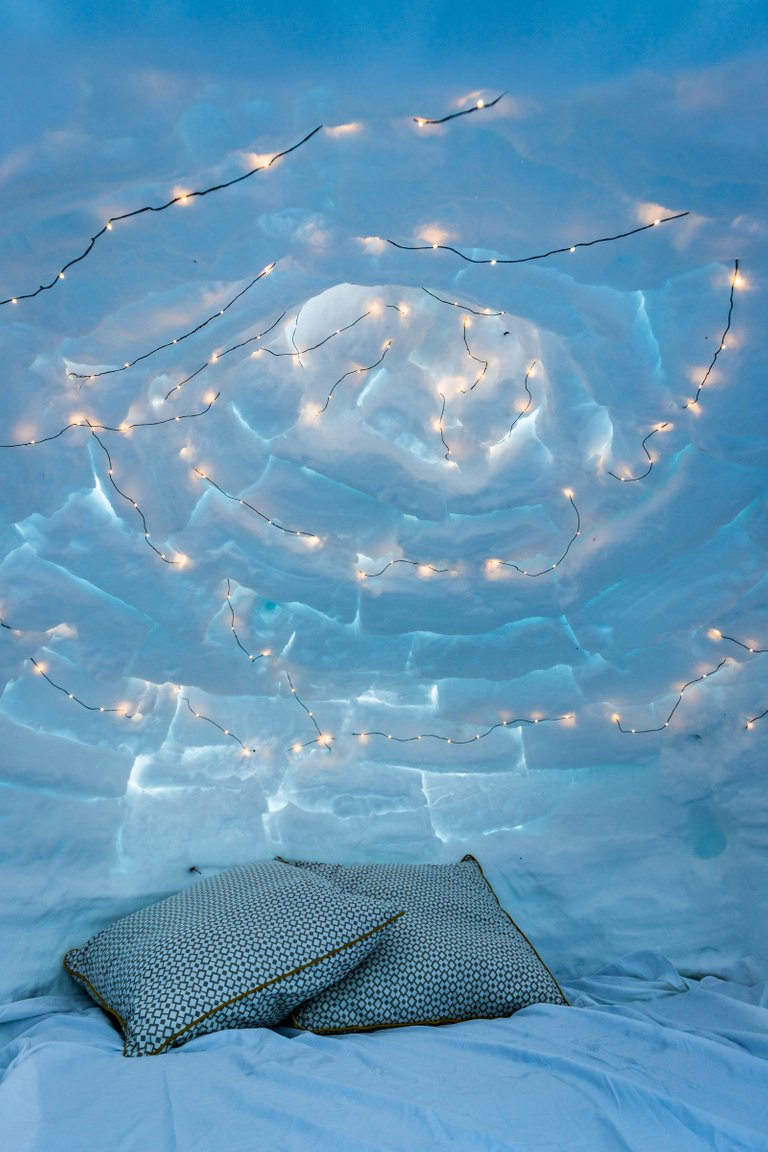
I thought it would be nice to share a few of the casual construction photos along with the title shot so that people could see how it was done. This was our first attempt at an igloo, so it’s far from perfect! Including the entrance arch it took about 6 hours of quite physical work for two people to construct (along with 20 minutes of watching you-tube videos of how to build igloos). Igloos can be dangerous, and this post is not to be taken as an instruction set, rather it’s simply a description of how we built our igloo.
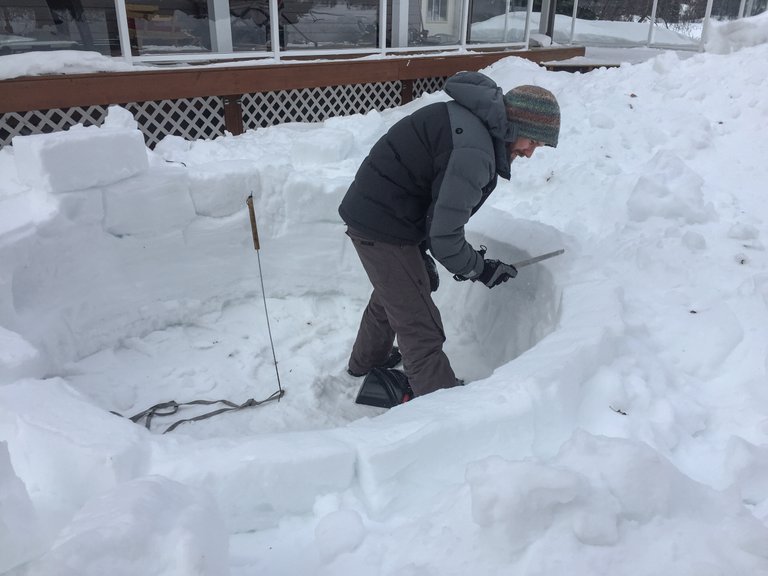
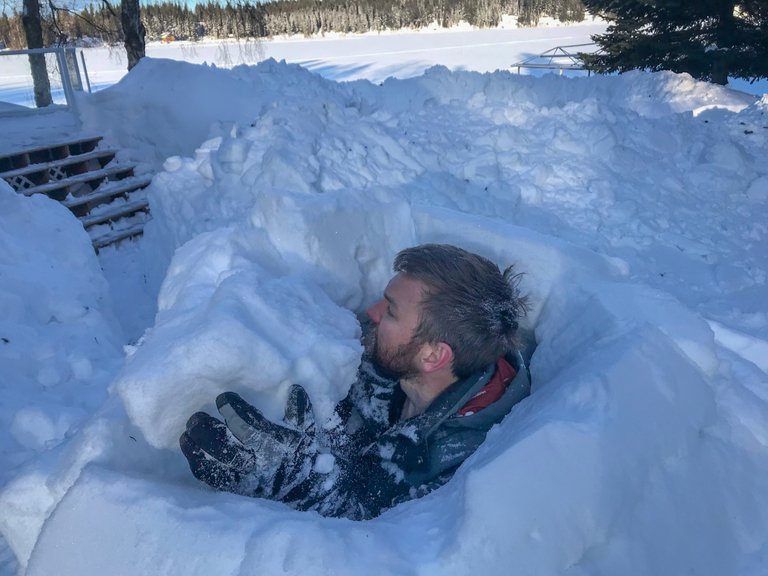
To start we dug the snowbank down in a circle. To state the obvious a circle is a constant radius from the centre point, for an igloo it is very important that it's perfect. We tried to achieve this using a long BBQ fork stuck into the ground with a rock climbing sling pinned at the bottom between the prongs (you could just as easily use a piece of household rope). We then could use the sling to mark the circumference of the circle. In this case we went for an igloo of a diameter of about 2m (or 6ft 6 in) as we wanted it to be large enough to sleep in and not too claustrophobic. This also defines the height of the dome as you are effectually building a half sphere. The larger the igloo the more work it is to construct. This is related to the square of the radius, so every time you double the diameter it’s 4 times the work! Once you have dug your cylinder down through to the bottom of the snowbank you then need to start a snow block quarry nearby. This is where a second person speeds things up significantly as it’s very difficult to get out of the igloo easily once you start building it until it’s completed. The blocks can be cut with a small saw or breadknife.
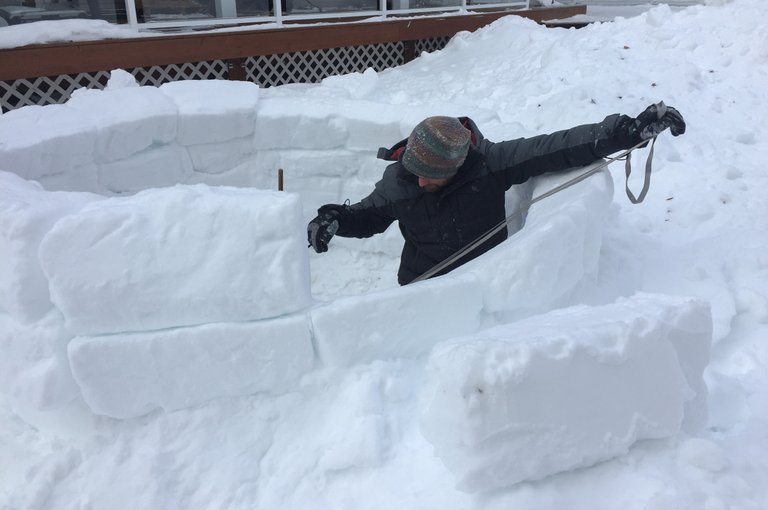
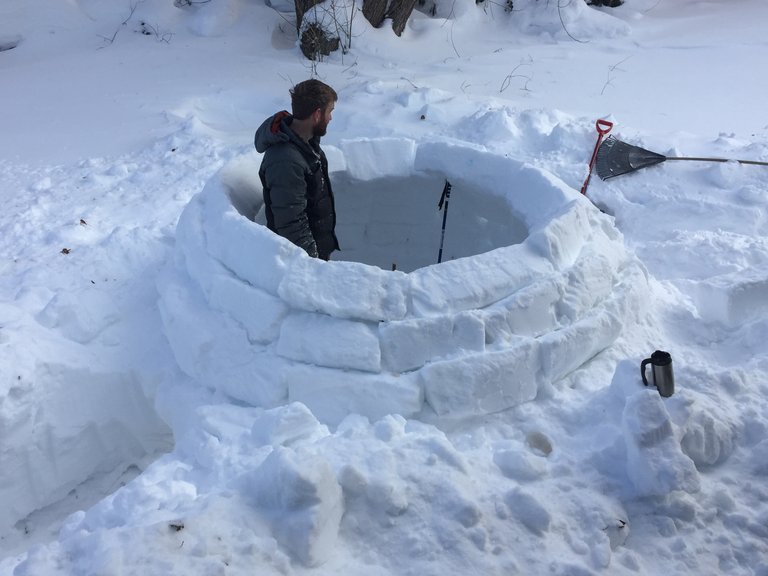
It is critical to understand that the dome shape of the igloo provides its strength. So special care must be taken to build as close as possible to a perfect dome. The key to achieving this was using the sling that is fastened to the centre point in the middle of the floor. This allows us to measure that the outside of each block is equidistant from the center point of the imaginary sphere. We also used the sling to obtain the correct angle to carve the top layer of blocks as you can see me doing above. If you keep to these measurements then as the igloo gets higher the blocks naturally begin to come in towards the centre as more of the length of sling is taken in an upwards direction rather than an outwards direction.
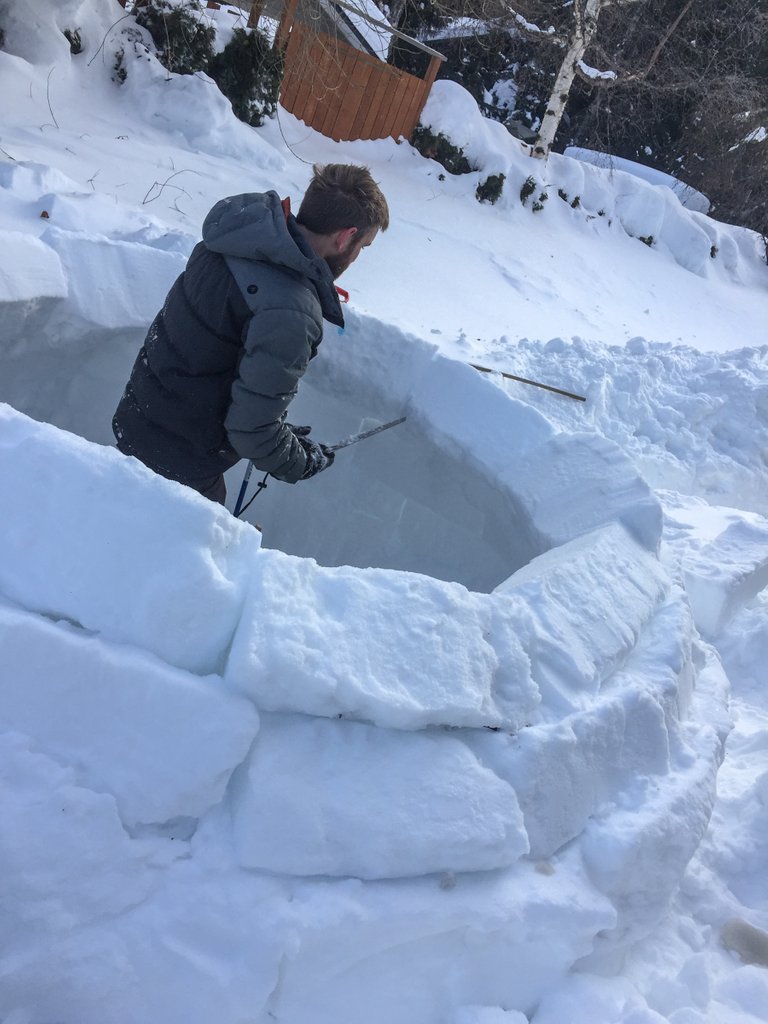
The snow quality in the quarry is very important. It needs to be firm snow that you can carve into blocks. To find this you need to scrape away the softer top layer of snow from the snow bank. One way to figure out the right depth is to step on the snow and find the level your feet sink down into the snowbank. You can then remove all of the top layer to that level. In our case the snow bank was a little over 1m (or 3 feet) deep and this involved removing the top 1/3 of the snowbank. The bottom 2/3 of the snowbank was then carved into large blocks weighting about 10kg (22lb). One needs to make sure the snow is not too faceted otherwise it will not provide sufficient strength or bond together properly. Anyone who has done a mountain avalanche course or has spent time in the mountains digging avalanche test pits would understand what faceted snow layers look like. People have died in igloo collapses built using the wrong type of snow; it is very important to get this right and know your snow.
As the igloo gets closer to the top the angles of the blocks get steeper and the new blocks will no longer self support until the next block is in place. To overcome this you need to find a way to prop the last block up while you’re placing the next block. We used the extendable hiking poles seen in the photo above so we could adjust the height of the pole to support the block at different levels.
The final few blocks are the hardest and most awkward. After several hours of laying blocks your arms are starting to get very tired, and the 10kg blocks of snow your holding above your head begin to feel like 30kg blocks. We found that we had to start custom carving the final few blocks into a slightly curved shape to get them to fit neatly. The last capping block I held sideways with my hands through the roof and then lowered it slowly while squatting back into the igloo. Our dome shape went a bit wonky at the top as a result of these final blocks. Like anything I am sure the more times you build one the neater you would get at this.
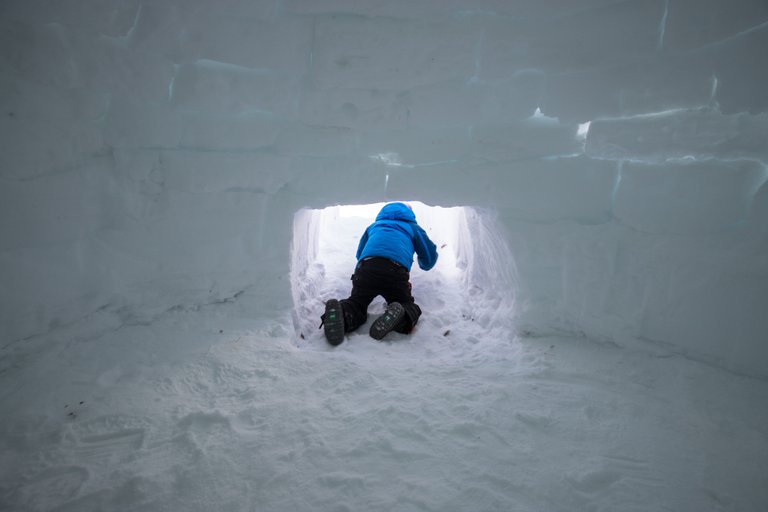
Once the dome is complete; you can now dig the entrance! This is important to do as late as possible as the dome is not structurally strong or fully self supporting until it’s complete. Digging the entrance too early risks collapsing the partially built dome above it. If you’re building an igloo alone you need to pre-cut all the blocks and stack them at reachable distances around the igloo to overcome this issue of being stuck inside until you have most of the dome complete. To make the entrance we dug through the snow-pack below one side of the igloo taking care not to make it too large to avoid any structural issues. If you keep below the natural snow pack level rather than cut though the brick dome itself you can avoid having to construct a complicated structurally reinforcing entrance arch.
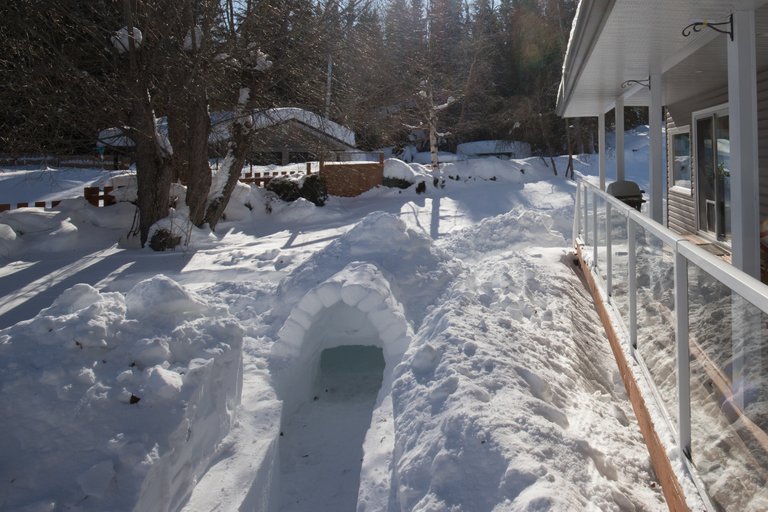
Following this we dug an entrance path leading to our back steps and cut some longer blocks to build a non-structural entrance arch that simply joined to the front of the dome. The entrance arch helps to keep the wind and snow out of the igloo. One of the final steps was to cover the outside of the igloo with powder snow. This acts as mortar of sorts and fills any holes where wind might draft though. Once you start using the igloo the heat from being inside creates a melt freeze cycle in these small holes where the hot air escapes and the loose snow essentially fuses the blocks together into a continuous dome.
We installed the fairy lights you see in the first photo by just mortaring them into the roof with some snow. We then finished off the igloo by laying a reflective thermal blanket down on the floor to stop radiant heat loss into the ground, followed by three camping mats side by side on top of that, and finally some bedding to cover the floor and the entrance. With a few people in there it was comfortably 25 deg C above the ambient temperature outside (-20C or -4F outside and +5C or +41F inside). We even ran a small electric heater into the igloo and for shorter periods of a couple of hours we could keep it at +15C (59F) inside without any structural damage. It’s the entrapped oxygen in the snow which acts as an insulator and gives igloos their amazing thermal insulation capacity. In contrast houses or domes made from cut blocks of lake or glacial ice are very poor insulators and very cold to sleep in (although they do make photogenic ice bars at ski resorts).
So there you have it. Our first attempt at building an igloo ! I was hoping to get some shots of the northern lights over the igloo, but the space weather was not obliging !
If you would like to learn a little bit more about my background in photography you can read the interview @photofeed did with me here
Robert Downie
Love Life, Love Photography
All images in this post were taken by and remain the Copyright of Robert Downie - http://www.robertdowniephotography.com
Me encanto tu publicacion
Thanks
Impressive igloo, well done! The thumbnail photo looks like a blooming flower to me. :)
Thanks
it is perfect. in my hometown, we don't have snow so I really want to touch to snow to feel this cool.
Thanks
I need more opportunities to build igloos!
I'd love to do something like this with my kids and I'll keep this blog in mind for reference
Should be lots of opportunities in Melbourne.
ha
ha
ha
I'll make one out of compostable take away coffee cups
lol ; that would make a cool post