Cajas en forma de creyones gigantes: tuto (ESP-ENG)

¡Hola hivers!💜
Espero que se encuentren bien y felices, queridos crafters. Este fin de semana tuve un taller de lettering y siempre me gusta encontrar nuevas formas de entregarle su kit de materiales a cada participante. Esta vez tenía unos colores o crayones hechos en cartulina, lo suficientemente grandes para que pudieran contener: un lápiz de grafito, un marcador punta cónica, un lapicero de gel y una goma. Así que busqué inspiración en pinterest y me lancé a hacer un molde con las medidas específicas para lo que contendría. Les cuento del proceso:

MATERIALES
Papel blanco
Cartulina escolar (es una cartulina más endeble, use color azul, rosa y lila)
Lápiz
Tijera
Marcador permanente color negro
Marcadores de pintura acrílica (use blanco, lila, rosa y azul)
Silicone liquido
PASO A PASO

PASO 1
Lo primero fue armar el molde. Este está formado por un cuerpo rectangular y una punta triangular. La parte rectangular la hice de 18,5 cm de largo por 4 cm de ancho. La punta fue de 4 cm de alto por 4 cm de ancho. Le puse solapas para pegamento de 1 cm. Hice este molde en papel blanco y lo recorte para poder pasarlo a la cartulina.
 |  |
|---|
PASO 2
Con el molde listo, lo puse encima de la cartulina y me dediqué a transferirlo en cada una de las cartulinas. De las que tenían salieron 14 crayones. Una vez todos marcados los recorte con ayuda de una tijera.
 |  |
|---|
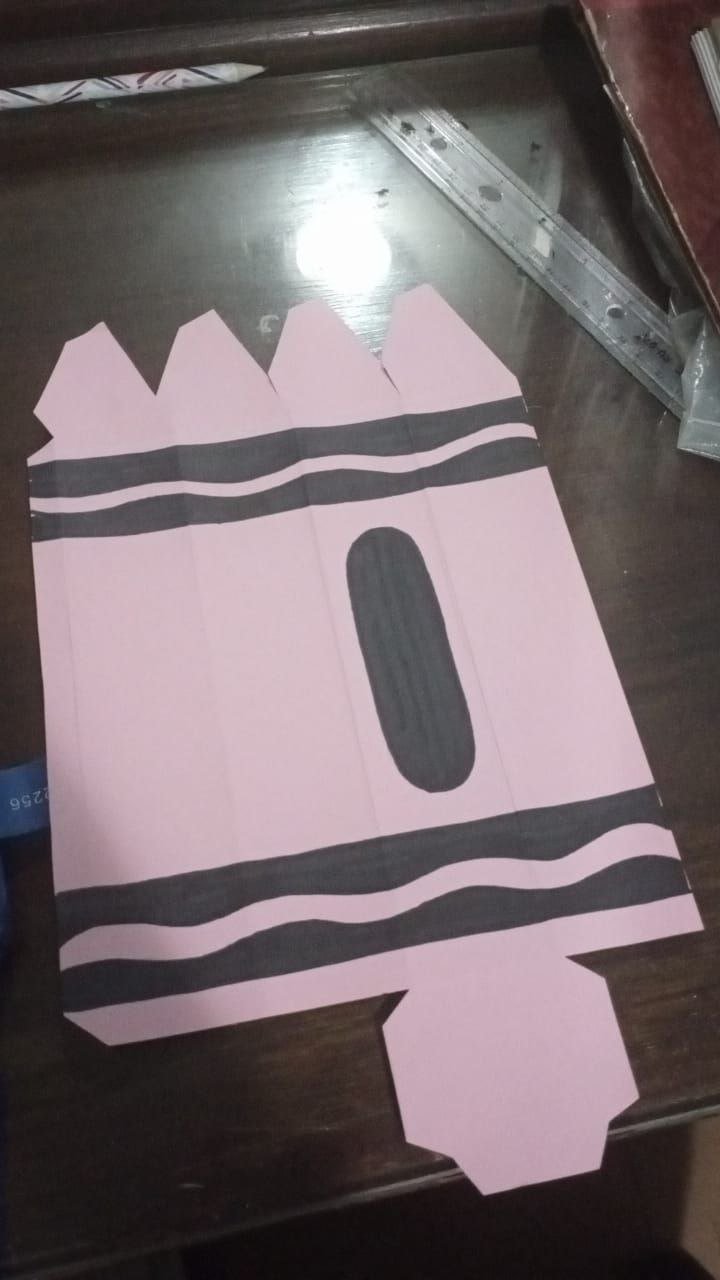
PASO 3
Con los moldes listos en cartulina, ya recortados, toca hacerle los detalles de los crayones. Dibuje con un lápiz las bandas en la parte rectangular, una en cada extremo, y dos óvalos. Luego los remarque con marcador permanente negro tal como hacen en los creyones.
Al principio iba a ser un solo óvalo, pero necesitaba una idea de como rifar cada kit de manera sorpresa así que a cada kit le puse una palabra que estaba dibujada en lettering en los sobres que entregó con las hojas de trabajo. Por eso, un óvalo con el nombre de mi marca “Poética” y en el otro la palabra, que fueron más que todo sentimientos y emociones.
 |  |
|---|
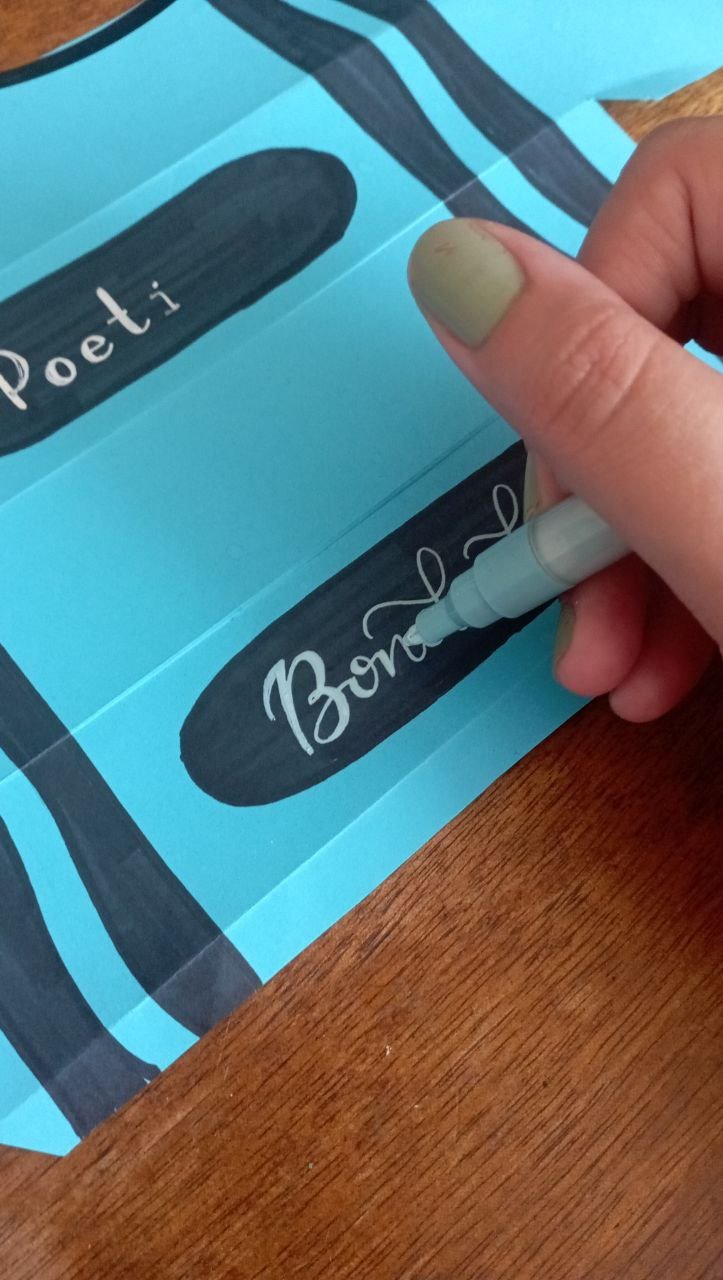
PASO 4
Ahora tocaba dibujar los óvalos, cada uno con el nombre de mi emprendimiento “Poética” y el otro con la palabra "Poética". Para “Poética” use marcador de pintura acrílica blanco y para las palabras use los colores dependiendo del fondo. Para la cartulina rosa, use el marcador de pintura acrílica rosa, para el azul use azul y para el lila use lila.
 |  |
|---|
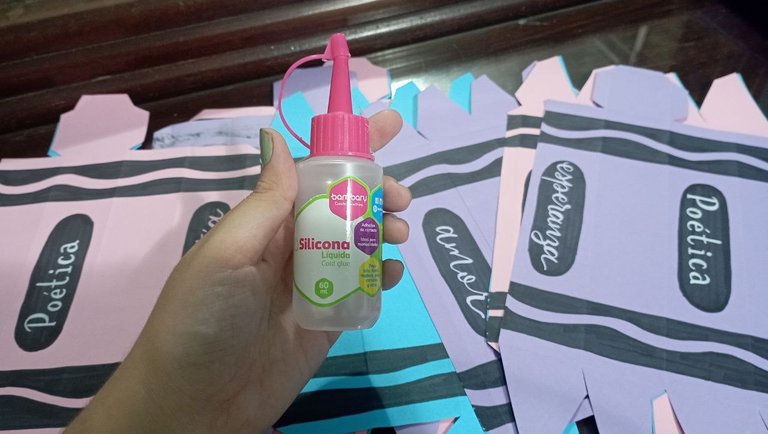
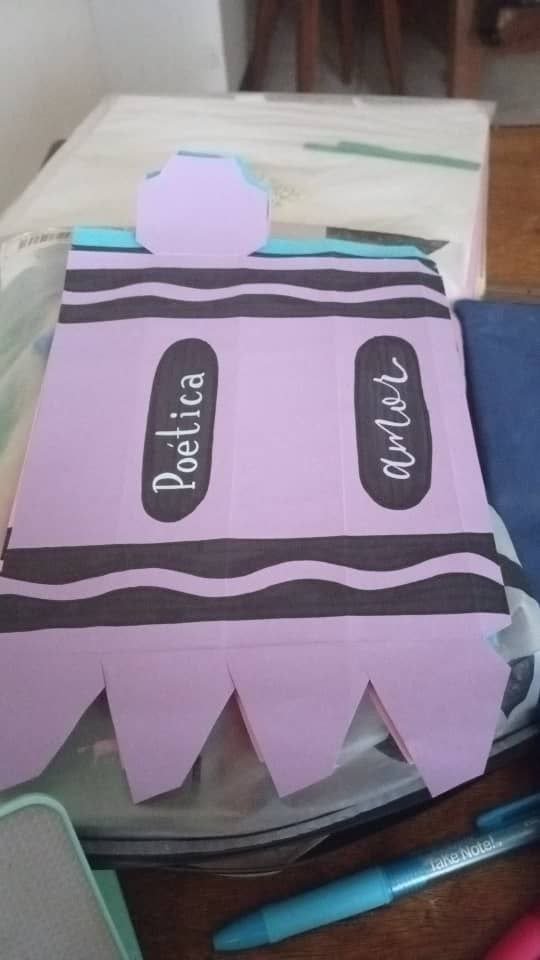
PASO 5
Toco armar los cotillones. Con ayuda de una regla marque las líneas de doblez de cada molde. Luego use el silicone líquido para pegarlos. Espere a que secaran para poder rellenarlos.

PASO 6
¡Crayones gigantes listos!
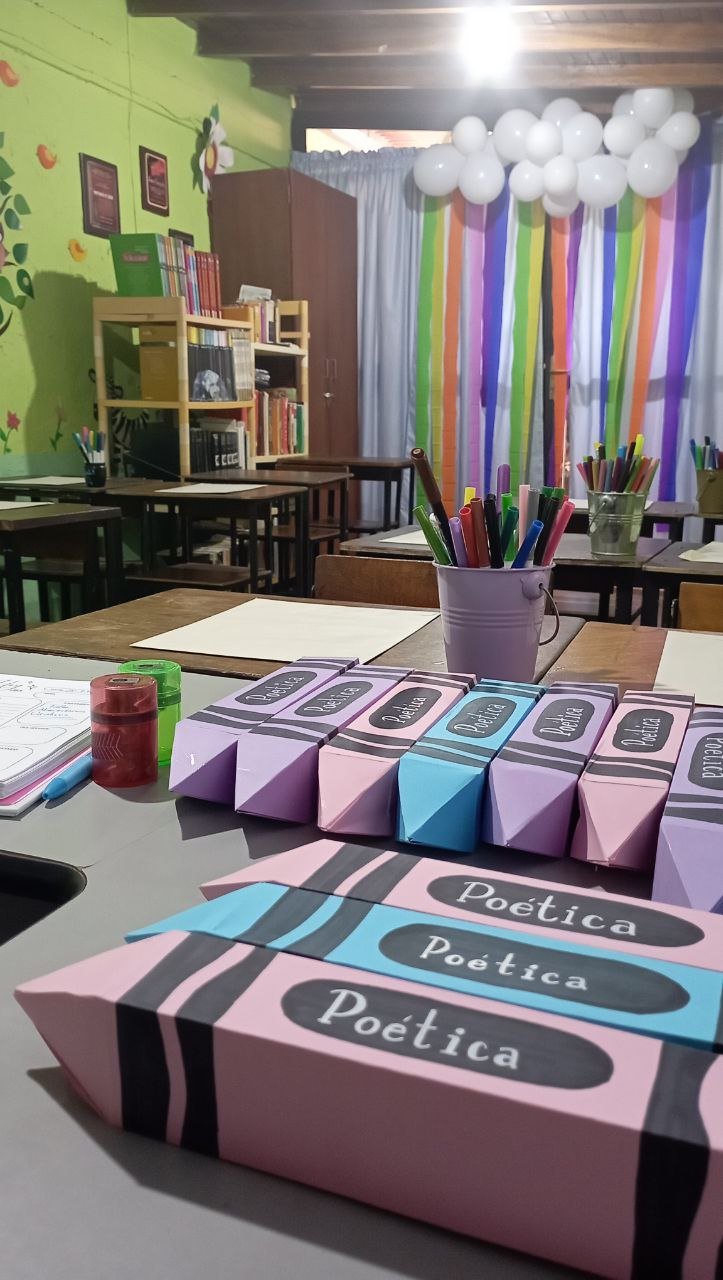
Rellene los crayones con cada kit de trabajo y debo decir que los participantes los amaron. Fue divertido hacerlos y me da una gran satisfacción ver las caras de todos al recibirlos. Fue una excelente idea y creo que será un molde que repetire.
Gracias por leerme
Con cariño, G.

Hi hivers! 💜
I hope you are well and happy, dear crafters. This weekend I had a lettering workshop and I always like to find new ways to give each participant their kit of materials. This time I had some colors or crayons made on cardstock, big enough to hold: a graphite pencil, a tapered tip marker, a gel pen and an eraser. So I looked for inspiration on pinterest and set about making a mold with the specific measurements for what it would hold. I tell you about the process:
MATERIALS
White paper
School cardboard (it is a flimsier cardboard, use blue, pink and lilac)
Pencil
Scissors
Black permanent marker
Acrylic paint markers (use white, purple, pink and blue)
Liquid silicone
STEP BY STEP
STEP 1
The first step was to assemble the mold. It consists of a rectangular body and a triangular tip. I made the rectangular part 18.5 cm long by 4 cm wide. The tip was 4 cm high by 4 cm wide. I put 1 cm glue flaps. I made this mold on white paper and cut it out so I could transfer it to cardboard.
| |
|---|
STEP 2
With the mold ready, I put it on top of the cardboard and transferred it to each of the cards. I got 14 crayons out of the ones I had. Once all the crayons were marked, I cut them out with the help of a scissors.
| |
|---|
STEP 3
With the molds ready on cardboard, already cut out, it is time to make the details of the crayons. Draw with a pencil the bands in the rectangular part, one at each end, and two ovals. Then outline them with black permanent marker as they do on the crayons.
At first it was going to be a single oval, but I needed an idea of how to raffle each kit in a surprise way so I put a word on each kit that was drawn in lettering on the envelopes that came with the worksheets. So, one oval with the name of my brand “Poética” and on the other the word, which were mostly feelings and emotions.
| |
|---|
STEP 4
Now it was time to draw the ovals, each one with the name of my project “Poética” and the other with the word “Poética”. For “Poetics” I used white acrylic paint marker and for the words I used the colors depending on the background. For the pink cardboard, use the pink acrylic paint marker, for the blue use blue and for the lilac use lilac.
| |
|---|
STEP 5
It's time to assemble the cotillions. With the help of a ruler mark the folding lines of each mold. Then use the liquid silicone to glue them. Wait for them to dry before filling them.
STEP 6
Giant crayons ready!
I filled the crayons with each kit and I must say that the participants loved them. It was fun to make them and it gives me great satisfaction to see everyone's faces when they received them. It was an excellent idea and I think it will be a mold I will repeat.
Thank you for reading me
With love, G..
FUENTE
Fotos: tomadas por mi desde mi redmi 10
Traducción: Deepl
SOURCE
Photos: taken by me from my redmi 10
Translation: Deepl

Wonderful job quite creative to deliver materials to the course attendees. Thank you for giving us your creative process
Thank you for the kind words and comment💜
Me encanta, que trabajo tan creativo,. para entregar los materiales en el curso.
Gracias por dejarnos tu bello paso a paso.
!discovery 40
Gracias a ti por leerme💜
This post was shared and voted inside the discord by the curators team of discovery-it
Join our Community and follow our Curation Trail
Discovery-it is also a Witness, vote for us here
Delegate to us for passive income. Check our 80% fee-back Program
Excelente trabajo gracias por compartir
Gracias a ti por leerme💜
👍
Estan geniales y muy originales, me encantaron los colores pasteles, es una bonita caja para entregar los materiales 😍 me encantaria recibir los materiales con esa presentacion jeje
Gracias💜💜 me hubiera gustado hacer de muchisimos mas colores
Recuerdo una vez que había hecho algunas cosas de estas cuando era pequeño con mi madre, hacíamos hasta gandolas y en su momento hicimos uno de Cars cuando la película apenas se había estrenado en cines, incluso en Wall-e, que nostálgico
Escrito por lionsaturbix / Written by lionsaturbix
¡¡¡Buen trabajo!!! Gracias por publicar tu excelente contenido en Hive Diy.
Ohh, esa idea de cars me ha gustado mucho, lo tomare en cuenta para la proxima! Gracias💜
Están excelentes estas cajas, me encanta que podemos realizarla en todos los colores, simplemente preciosas
https://x.com/hivediy47901/status/1815856702786527676
Gracias💜 sí, hasta si se imprimen se pueden hacer como si fueran lápices
Congratulations @geneleori! You have completed the following achievement on the Hive blockchain And have been rewarded with New badge(s)
Your next target is to reach 400 comments.
You can view your badges on your board and compare yourself to others in the Ranking
If you no longer want to receive notifications, reply to this comment with the word
STOP