Step-by-step tutorial: Open cut crease using black, pink and silver
(Edited)
💞HOLA QUERIDOS HIVERS💞
💞HELLO DEAR HIVERS💞
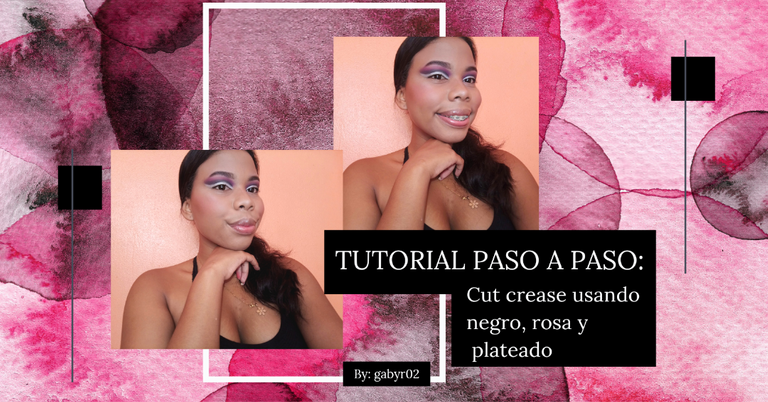
Desde mi adolescencia, tengo la creencia de que usar colores fuertes no era lo mio, siempre he pensado que hay personas a las que les luce perfectamente ese tipo de looks y por algún motivo, yo no era una de ellas... Pero al final del día, creo que todo se trataba más sobre mi inseguridad, y no tanto sobre si de verdad se me veían o no bien esos colores. El día de hoy decidí romper un poco esta creencia insegura haciendo un estilo de maquillaje un poco diferente al que estoy acostumbrada y usando colores que que rara vez uso juntos. Así que aquí te dejo mi tutorial paso a paso de un cut crease abierto, usando negro, rosa y plateado, espero que lo disfrutes:
Since I was a teenager, I had the belief that wearing strong colors was not my thing, I have always thought that there are people who look great in that kind of looks and for some reason, I wasn't one of them.... But at the end of the day, I think it was more about my insecurity, and not so much about whether or not I really looked good in those colors. Today I decided to break this insecure belief a little bit by doing a little bit different makeup style than I'm used to and using colors that I rarely wear together. So here is my step by step tutorial of an open cut crease, using black, pink and silver, I hope you enjoy it:
Paso a paso | Step by step
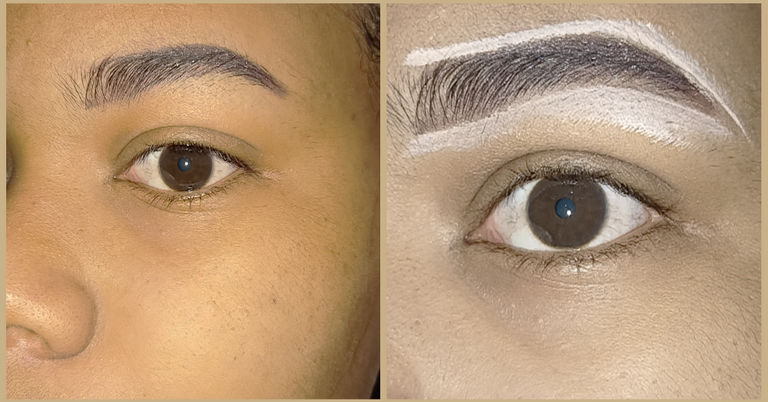
Todos mis tutoriales inician maquillando mis cejas, corrigiendolas y aplicando corrector claro en mi párpado, así que eso es lo que haremos está vez también. En otras ocasiones también sello el corrector con mi polvo o una sombra similar a mi tono de piel. Pero en esta oportunidad lo deje sin sellar para conseguir una mayor pigmentación del negro.
All my tutorials start by doing my eyebrows, correcting them and applying light concealer on my eyelid, so that's what we'll do this time as well. On other occasions I also seal the concealer with my powder or a shade similar to my skin tone. But this time I left it unsealed to get more pigmentation from the black

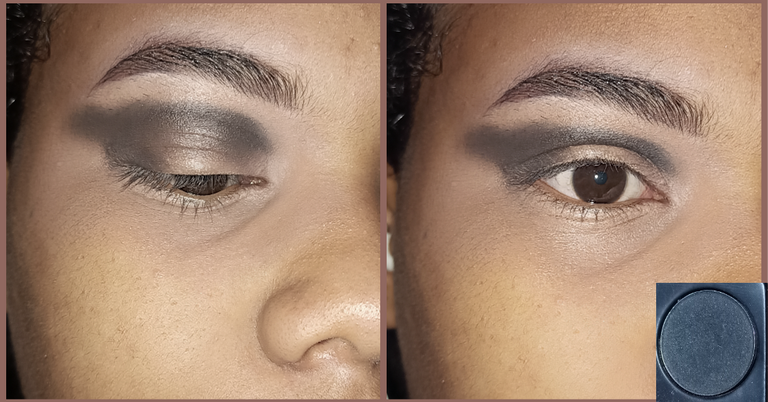
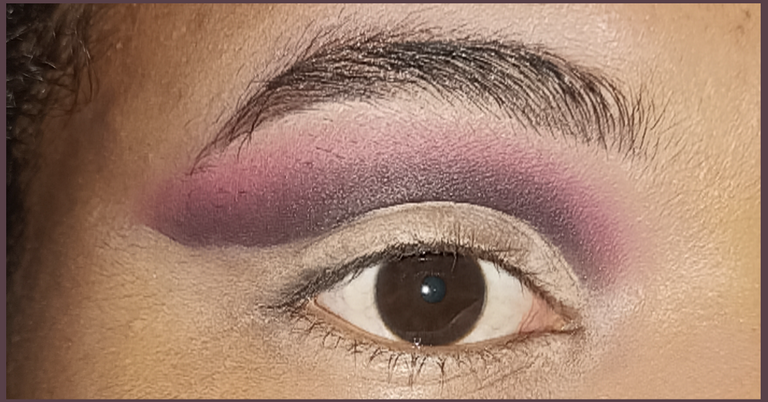
Una vez tenemos nuestro párpado listo, procedemos a aplicar el negro, a toquecitos, respetando el espacio del lagrimal, hasta la comisura externa del ojo, y luego con la sombra restante trataremos de hacer una pequeña cola. Esto no debe ser perfecto, así que no te frustres, solo mira mi foto y veras como poco a poco va tomando forma.
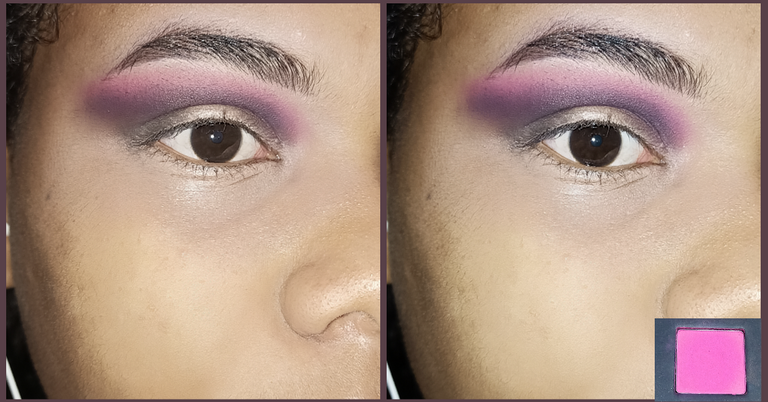
Ahora que ya aplicamos nuestro negro, lo difuminaremos usando un rosado fuerte, la idea es que se note pero sin ser oscuro. Usaremos movimientos circulares y seguirá la forma del negro.
Once we have our eyelid ready, we proceed to apply the black, by dabbing, respecting the space of the tear trough, up to the outer corner of the eye, and then with the remaining shadow we will try to make a small tail. This should not be perfect, so don't get frustrated, just look at my photo and you will see how little by little it takes shape. Now that we have applied our black, we will blend it using a strong pink, the idea is that it is noticeable but without being dark. We will use circular movements and follow the shape of the black.
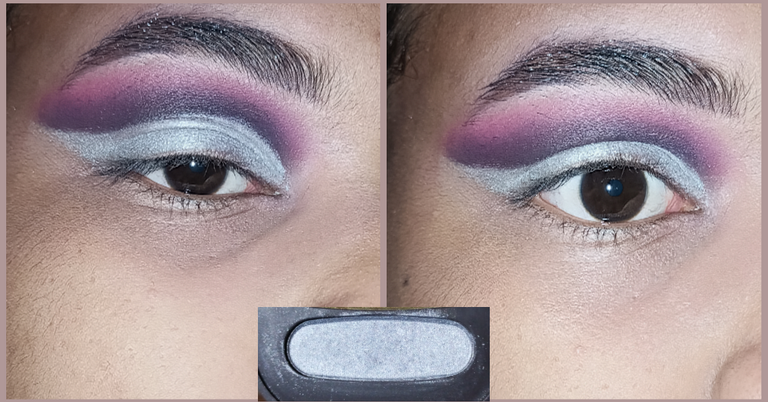
¿Recuerdas cuando te dije que le daríamos forma al negro después? ... Pues llegó el momento, con ayuda de nuestro corrector, un pincel plano y mucha paciencia, haremos el corte de cuenca, comenzando desde el lagrimal y hasta donde terminan el rosado y el negro. Luego aplicaremos el plateado por toda esa zona. Y listo
Do you remember when I told you that we would shape the black afterwards? Well, the time has come, with the help of our concealer, a flat brush and a lot of patience, we will do the basin cut, starting from the tear trough and up to where the pink and black end. Then we will apply the silver all over that area. And that's it
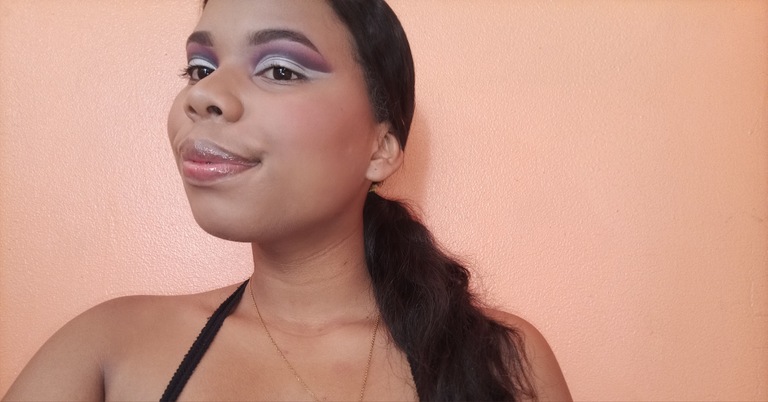
Ya solo queda maquillar tu rostro (eso es a tu estilo) y queda de tu parte si usar pestañas o solo rimel. En mi caso solo dejé rimel porque me asustaba dañar este maquillaje con pestañas pues todavía no le agarro la vuelta a la cosa (es una forma bonita de decir que no me las sé pegar🤭)
Now all that's left is to make up your face (that's up to your style) and it's up to you whether to use eyelashes or just mascara. In my case I only used mascara because I was afraid of damaging this makeup with eyelashes because I still can't get the hang of it (it's a nice way of saying that I don't know how to stick them on🤭).
Fotos finales | Final photos
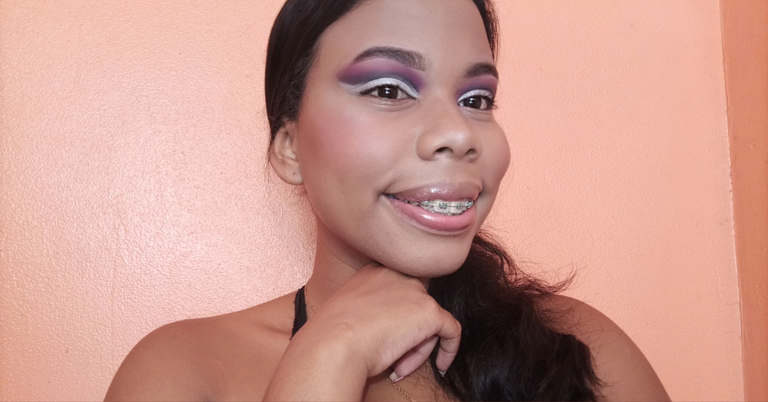
Y bueno, está fue mi propuesta para un maquillaje un poco más dramático del que estoy acostumbrada. Cómo podrán notar está técnica no está ni cerca de ser perfecta, pero lo más importante es atreverse e ir aprendiendo en el camino. Se que para muchos este será un estilo de lo más natural pero para mí ya se excede 🤷🏽. Es cuestión de gustos. Espero que les haya gustado y los inspire a probar cosas nuevas. Si tienes alguna sugerencia, siempre es bienvenida. Y si llegaste hasta aquí:
And well, this was my proposal for a little more dramatic makeup than I'm used to. As you may notice this technique is not even close to being perfect, but the most important thing is to dare and learn along the way. I know that for many this will be a very natural style but for me it's over the top 🤷🏽. It's a matter of taste. I hope you liked it and it inspires you to try new things. If you have any suggestions, they're always welcome. And if you made it this far:
Gracias por leerme y hasta un próximo post
Thanks for reading and see you in a future post
Traducción: Deepl. // Traslation: Deepl.

30
0
0.002 PAL
0 comments