[ESP//ING] Step by step tutorial: semi cut crease in purple and pink
💕Hola mi linda comunidad 💕
💕Hello my beautiful community 💕
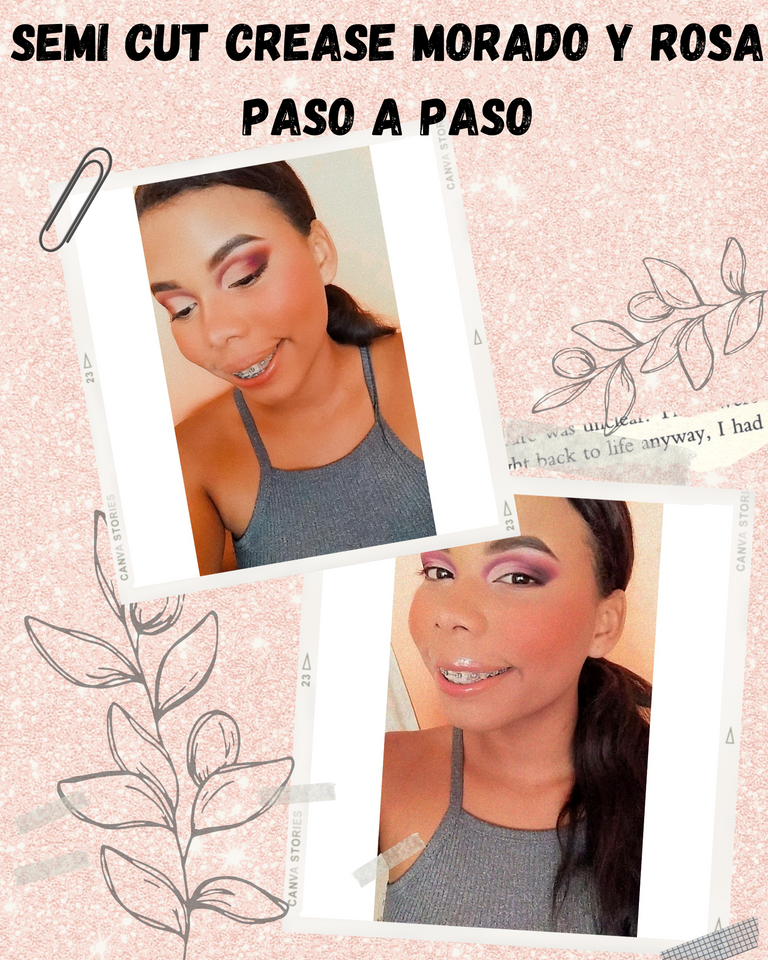
Ever since I started doing makeup, I've been afraid of the color purple, the few times I tried to use it in the past, I ended up making a total mess. But with time and a lot of practice I've managed to improve my way of working with colors (purple included) and although I'm not an expert yet, this makeup has turned out to be one of my favorite looks especially for its vivacity. So today I bring you a step by step tutorial of a semi cut crease using the colors pink and purple. Here we go:

PASO A PASO | STEP BY STEP

Siempre inicio mis maquillajes haciendo las cejas, pero como todas las cejas son muy diferentes y dependen del estilo de cada persona, no me quedaré explicandolo (si deseas saber cómo hago mis cejas déjalo en mis comentarios y te haré el tutorial lo más pronto posible). Ahora bien, una vez que hemos realizado y corregido nuestra cejas, aprovecharemos y colocaremos el corrector más claro que tengamos en todo nuestro párpado, lo difuminaremos con una brochita o una esponja y sellaremos con una sombra que se parezca a nuestro tono de piel.
I always start my makeups doing the eyebrows, but as all eyebrows are very different and depend on the style of each person, I will not stay explaining it (if you want to know how I do my eyebrows leave it in my comments and I will do the tutorial as soon as possible). Now, once we have done and corrected our eyebrows, we will take advantage and place the lightest concealer we have on our eyelid, we will blend it with a brush or a sponge and seal with a shadow that resembles our skin tone.
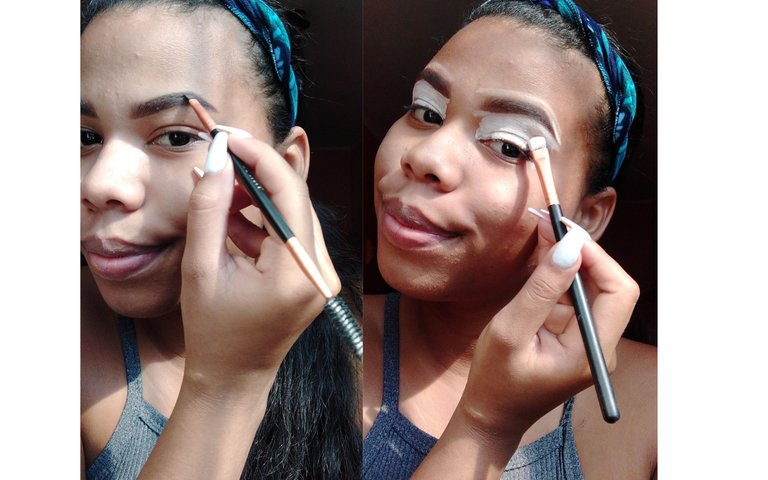


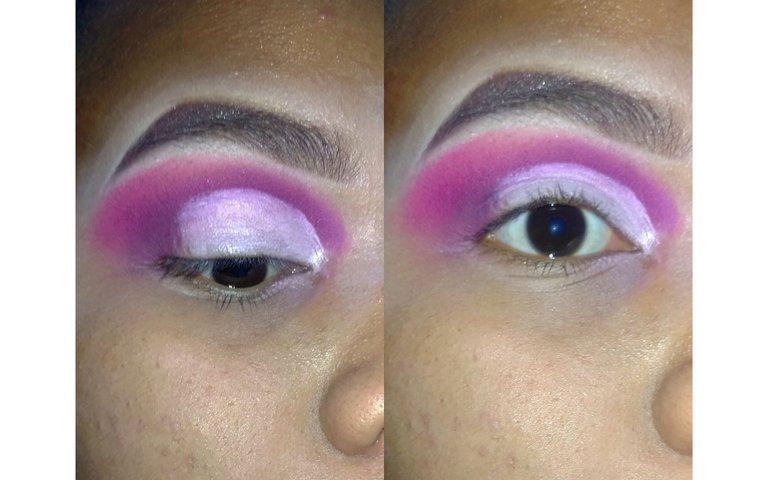
Ya que hemos sellado nuestro corrector comenzaremos aplicar una sombra rosada por toda nuestra cuenca haciendo movimientos circulares y tratando de llegar desde la parte exterior del ojo hacia la parte interna. La dirección es como la de un limpiaparabrisas, la idea es abarcar todo el párpado.
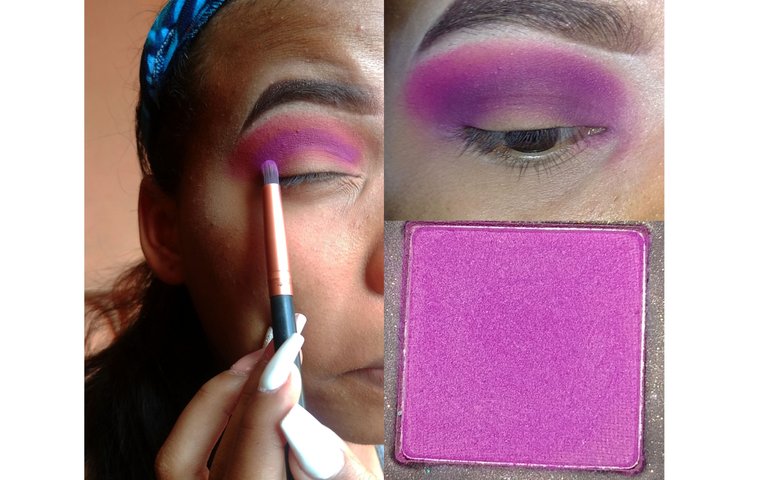
Cuando consideres que tienes suficientemente difuminado la sombra rosada, colocaremos el morado. Truco útil: para darle intensidad primero coloco el morado punteando sin difuminar para saturar el color, ya luego si difumino con paciencia.
Nota: el morado debes darle de la misma dirección que el rosado pero con una brocha más pequeña para que puedan verse los dos colores.
Once we have sealed our concealer we will start applying a pink shadow all over our eye socket making circular movements and trying to reach from the outer part of the eye towards the inner part. The direction is like a windshield wiper, the idea is to cover the entire eyelid. When you consider that you have sufficiently blurred the pink shadow, apply the purple. Useful trick: to give it intensity, first I apply the purple without smudging to saturate the color, then I smudge it with patience. Note: the purple should be applied in the same direction as the pink but with a smaller brush so that both colors can be seen.
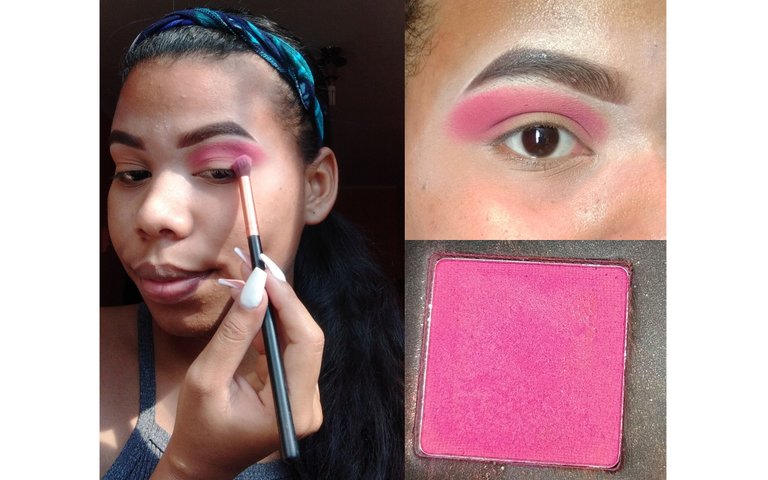

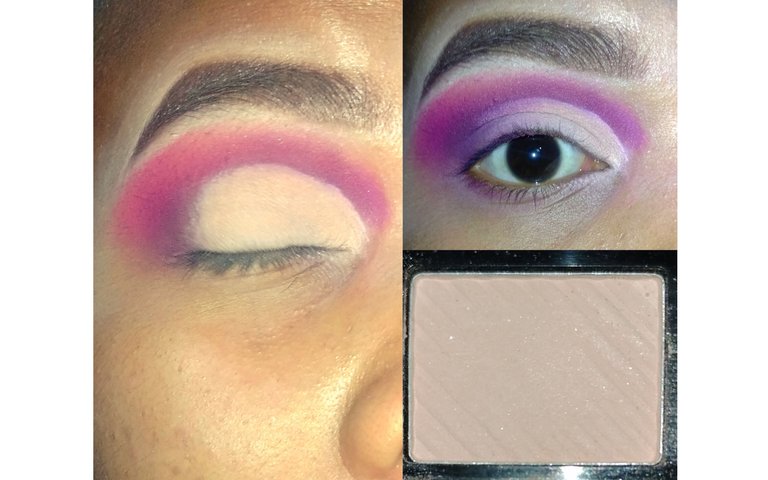
Ahora haremos el corte de cuenca desde nuestro lagrimal hasta la mitad de nuestro ojo, esto usando una brocha plana y nuestro corrector claro, si quieres puedes limpiar la zona con un poco de desmaquillante para que tengas un mejor resultado, aquí debes tomarte todo el tiempo que necesites, la idea es que quede lo más preciso posible.
Luego sobre nuestro corrector sin sellar colocaremos una rosa pálido, como la que te muestro en la foto de abajo. Para colocarla hazlo a toquecitos con tu dedo para que logres una mayor intensidad.
Now we will make the socket cut from our tear trough to the middle of our eye, this using a flat brush and our clear concealer, if you want you can clean the area with a little makeup remover so you have a better result, here you should take all the time you need, the idea is that it is as accurate as possible. Then over our unsealed concealer we will place a pale pink, like the one I show you in the picture below. To apply it, dab it with your finger to achieve a greater intensity.

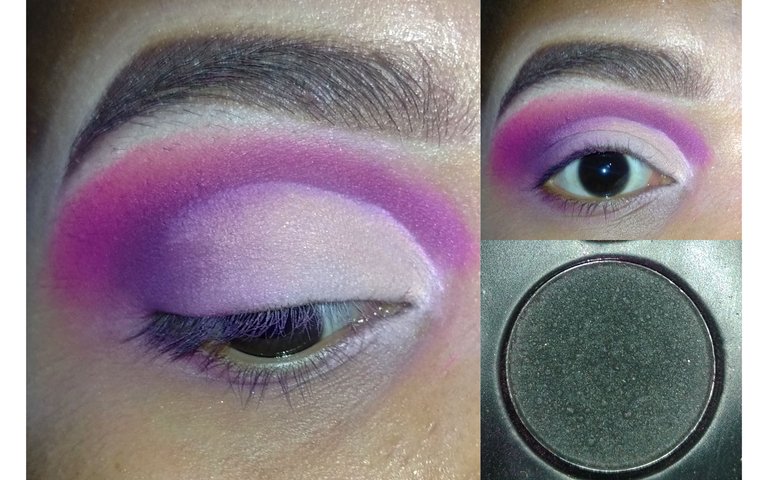
Ya solo nos queda difuminar, para esto usaremos un poco de nuestra sombra morada unida con un poco de sombra negra (si tienes una sombre morada muy oscura también puedes usarla) y haremos movimientos circulares en el medio del morado y el rosa palido. Trataremos de lograr que todo se vea homogéneo, es decir, que no se vea un corte entre el rosa palido y el morado, con un poco de paciencia te aseguro que puedes conseguirlo.
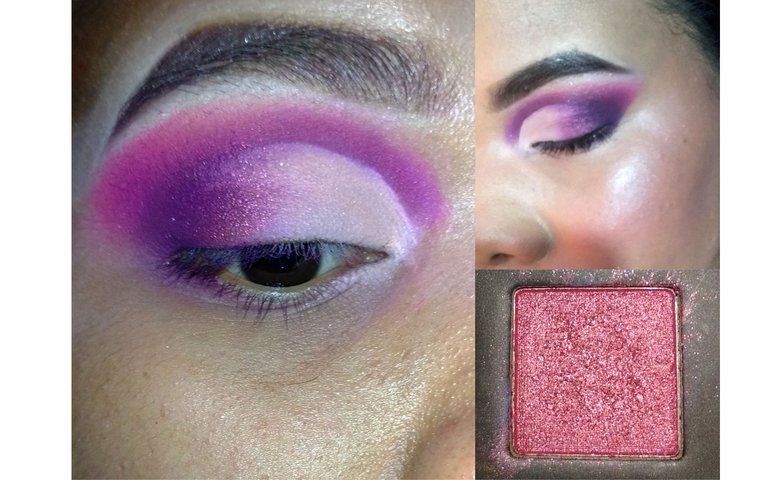
Oficialmente lo último que nos queda es colocar un rosado metalizado, entre el rosa y el morado, esto para darle un poquito de luz, y en caso de que tú difuminado no sea perfecto (como el mío) cubrir un poco la diferencia entre cortes. Ya solo queda de tu parte si deseas colocarte rímel o pestañas y listo un maquillaje lleno de vida y color, sin perder la delicadeza.
Now we just need to blend, for this we will use a bit of our purple shadow joined with a bit of black shadow (if you have a very dark purple shadow you can also use it) and we will make circular movements in the middle of the purple and the pale pink. We will try to make everything look homogeneous, that is to say, that there is no cut between the pale pink and the purple, with a little patience I assure you that you can get it. Officially the last thing left is to place a metallic pink, between the pink and the purple, this to give a little bit of light, and in case your blending is not perfect (like mine) to cover a little bit the difference between cuts. Now it's up to you if you want to apply mascara or eyelashes and you have a makeup full of life and color, without losing the delicacy.

FINAL PHOTOS WITHOUT FILTER / FINAL PHOTOS WITH FILTER
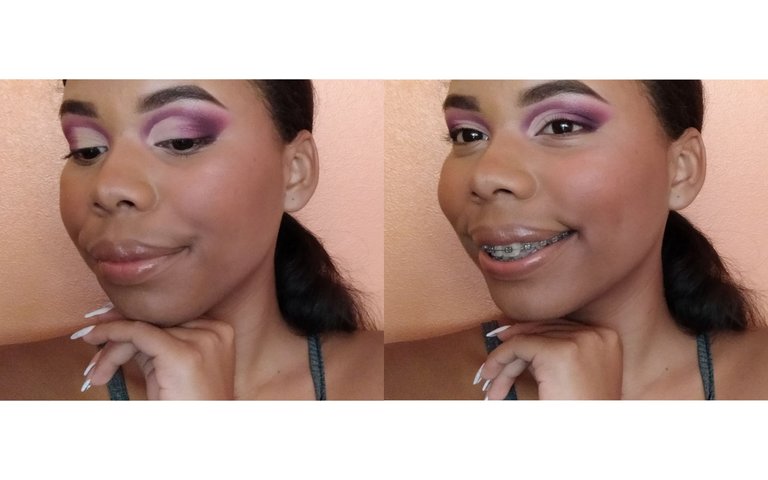
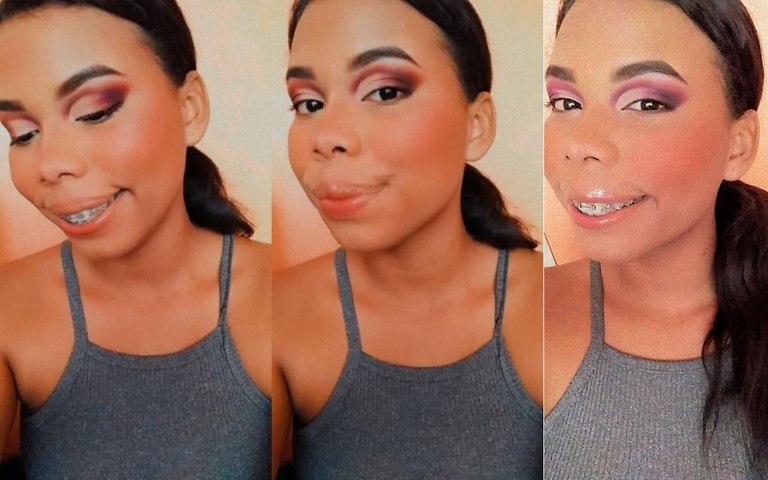

Y bueno, ¿Que les pareció mi idea del día de hoy?. Realmente me siento complacida con ella, pues como les dije al inicio le tengo casi miedo a usar el morado en un maquillaje, y siento que hoy logré mi cometido. Hace un look con color, para salir de mi confiable marrón y dorado, pero tratando de tener un acabado delicado y bonito, pero fácil de hacer y de usar; espero que te haya gustado el resultado tanto como a mi. Si llegaste hasta aquí:
So, what did you think of my idea for today? I'm really pleased with it, because as I said at the beginning I'm almost afraid to use purple in a makeup, and I feel that today I achieved my goal. It makes a look with color, to get out of my reliable brown and gold, but trying to have a delicate and pretty finish, but easy to do and use; I hope you liked the result as much as I did. If you made it this far:

Gracias por leerme y hasta un próximo post
Thanks for reading and see you in a future post

Traducción: Deepl. // Traslation: Deepl.


Me encanto tu maquillaje, quedo bastante llamativo y lindo. ¡Te felicito!
Gracias por tu lindo comentario y gracias por leerme😍 De verdad le puse mucho cariño así que me alegra que te haya gustado💕