[ESP// ING] Step by step tutorial: Semi cut crease Blue and brown
💕Hola mi linda comunidad 💕
💕Hello my beautiful community 💕
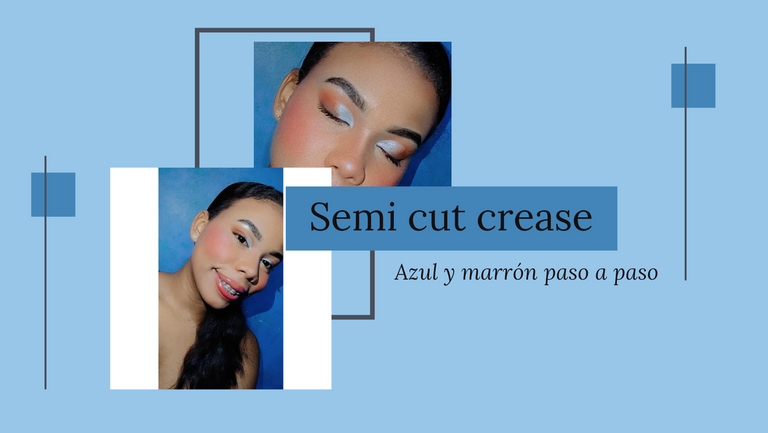
Today I decided to bring you this semi cut crease using the colors blue and brown, to show you how easy it can be to give life to a basic look without dying in the attempt and without looking like a clown, which to be honest is my biggest fear when doing my makeup.

PASO A PASO | STEP BY STEP
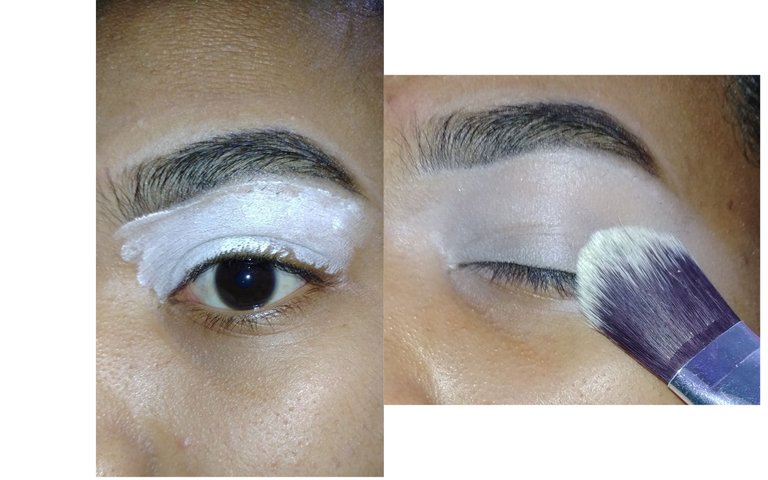
Como siempre iniciaremos haciendo las cejas algo que como siempre dicho es dependiendo del estilo de cada persona por lo que rara vez me enfrasco en ello (si deseas saber cómo hago mis cejas déjalo en mis comentarios y te haré el tutorial lo más pronto posible). Ahora bien, una vez que hemos realizado nuestra cejas colocaremos el corrector más claro que tengamos en todo nuestro párpado, lo difuminaremos con una brochita o una esponja y sellaremos con una sombra que se parezca a nuestro tono de piel
As always we will start doing the eyebrows something that as always said is depending on the style of each person so I rarely get involved in it (if you want to know how I do my eyebrows leave it in my comments and I will do the tutorial as soon as possible). Now, once we have done our eyebrows we will place the lightest concealer we have on our eyelid, we will blend it with a brush or a sponge and we will seal with a shadow that looks like our skin tone.
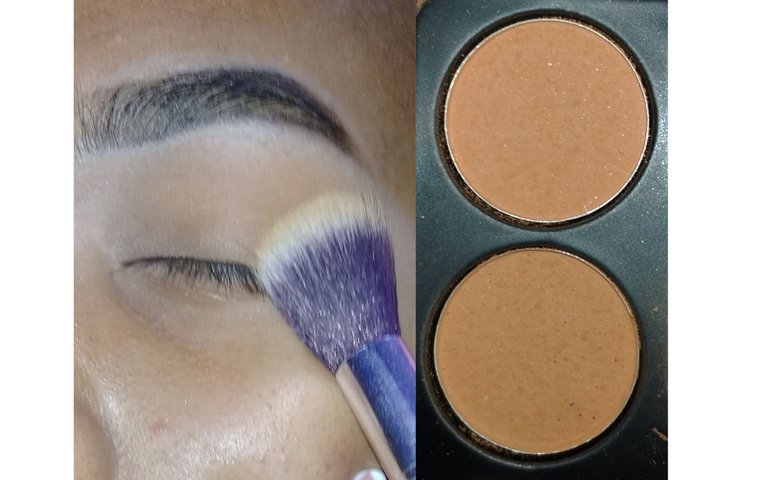
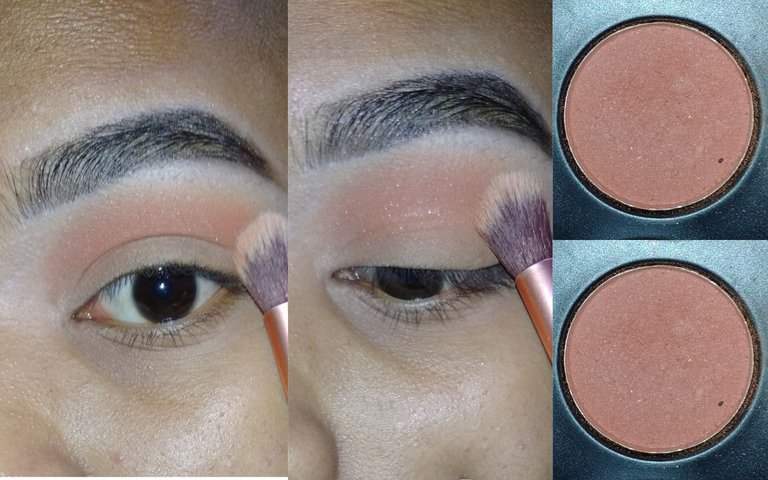
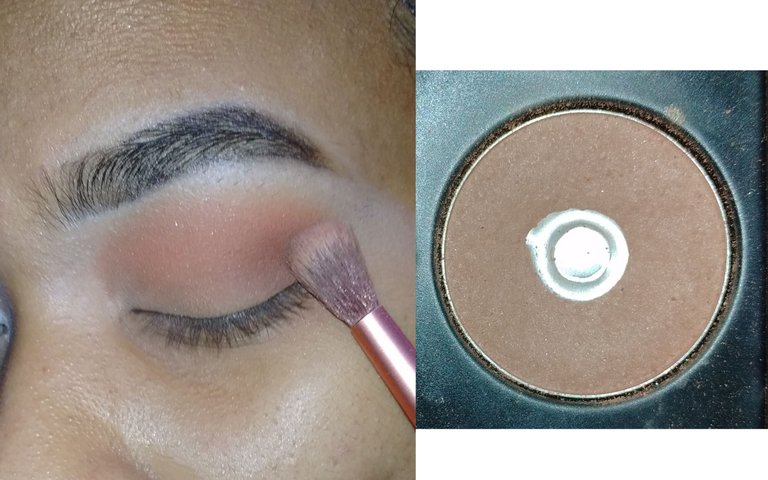
Ya que hemos hallado nuestro corrector comenzaremos aplicar una sombra marrón rojiza por toda nuestra cuenca haciendo movimientos circulares y tratando de llegar desde la parte exterior del ojo hacia la parte interna.
Cuando consideres que tienes suficientemente difuminado la sombra marrón rojiza, coloca un tono marrón mucho más oscuro en la parte exterior del ojo, para darle un poco más de profundidad, en mi caso el tono marrón más oscuro no se puede apreciar muy bien por el tono de mi piel, aún así aquí te dejo las fotos.
Once we have found our concealer we will start applying a reddish brown shadow all over our eye socket making circular movements and trying to reach from the outer part of the eye towards the inner part.When you consider that you have sufficiently blurred the reddish brown shadow, place a much darker brown tone on the outer part of the eye, to give it a little more depth, in my case the darker brown tone can not be appreciated very well by the tone of my skin, even so here I leave the photos.
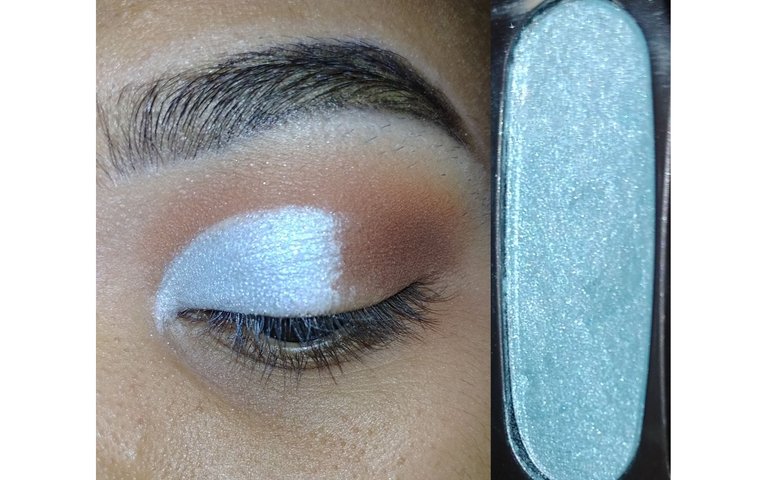
Haremos ahora un corte de cuenca desde nuestro lagrimal hasta la mitad de nuestro ojo aproximadamente donde está nuestro iris, esto usando una brocha plana y nuestro corrector claro, aquí tómate todo el tiempo que necesites La idea es que quede lo más uniforme posible. Luego sobre nuestro corrector sin sellar colocaremos la sombra azul está debe ser clara y satinada de ser posible colócala a toquecitos con tu dedo para que logres una mayor intensidad.
Now we will make a socket cut from our tear trough to the middle of our eye approximately where our iris is, this using a flat brush and our clear concealer, here take all the time you need, the idea is to make it as uniform as possible. Then over our unsealed concealer we will place the blue shadow, it should be light and satin if possible, dab it with your finger to achieve a greater intensity.

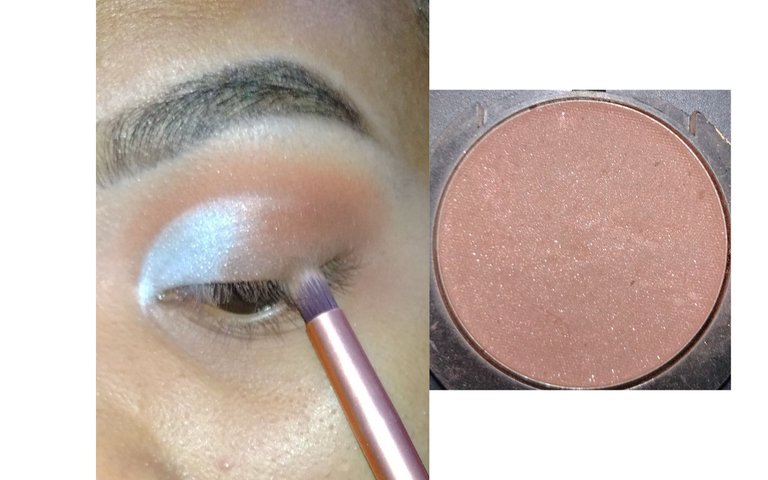
Ahora solo nos queda difuminar, para esto usaremos un poco de nuestra sombra marrón rojiza y haremos movimientos circulares en el medio del marrón más oscuro y el azul, La idea es que todos se vea homogéneo, es decir, que no se vea un corte entre el azul y el marrón oscuro, con un poco de paciencia te aseguro que puedes conseguirlo.
Oficialmente por último coloca el marrón más oscuro que tengas, incluso más oscuro que el que habías colocado en la uva externa del ojo y colócalo en la línea de las pestañas hasta dónde comienza el azul ,esto le dará mucha más profundidad a tu mirada. Ya solo queda de tu parte si deseas colocarte rímel o pestañas y listo un maquillaje precioso y súper delicado.
Now we just need to blend, for this we will use a little of our reddish brown shadow and make circular movements in the middle of the darkest brown and the blue, the idea is that everyone looks homogeneous, that is, that there is no cut between the blue and the dark brown, with a little patience I assure you that you can get it.Finally, officially place the darkest brown you have, even darker than the one you had placed on the outer corner of the eye and place it on the lash line up to where the blue begins, this will give much more depth to your look. Now it's up to you to apply mascara or eyelashes and you have a beautiful and super delicate makeup.
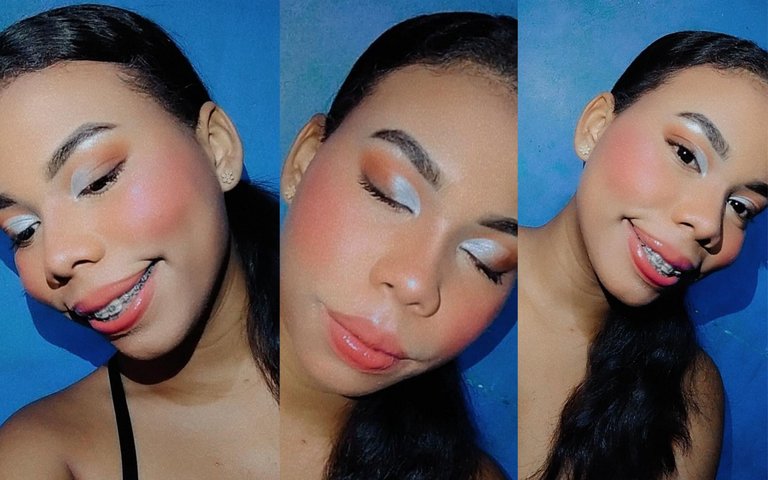
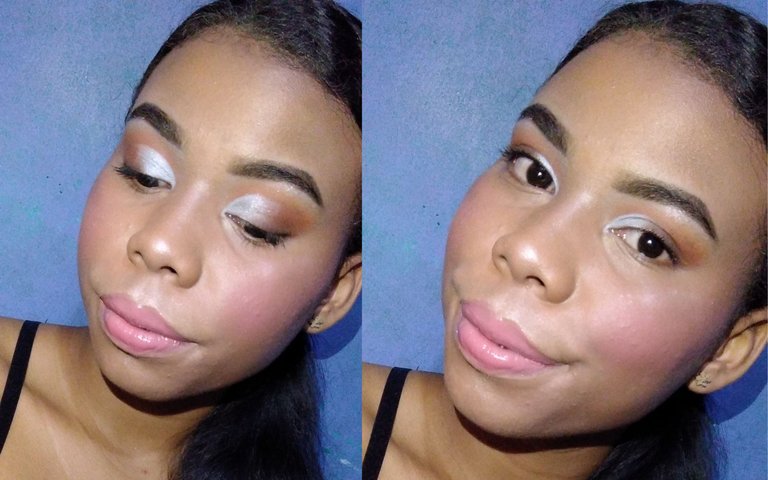
FINAL PHOTOS WITHOUT FILTER / FINAL PHOTOS WITH FILTER
Sin más que agregar espero que les haya gustado mi idea del día de hoy, con este tutorial buscaba enseñarles lo fácil que es darle vida a un maquillaje clásico y aún así no verte extravagante en el proceso, soy partidaria del estilo natural, pero siempre hace falta salirse un poco de la rutina y agregarle un poco de color.
Without further ado, I hope you liked my idea for today, with this tutorial I wanted to show you how easy it is to give life to a classic makeup and still not look extravagant in the process, I am a supporter of the natural style, but it is always necessary to get out of the routine and add a little color.
Gracias por leerme y hasta un próximo post
Thanks for reading and see you in a future post
Traducción: Deepl. // Traslation: Deepl.