Dibujo de youtuber Elrubius a color | Drawing of youtuber Elrubius in color [ESP-ENG]
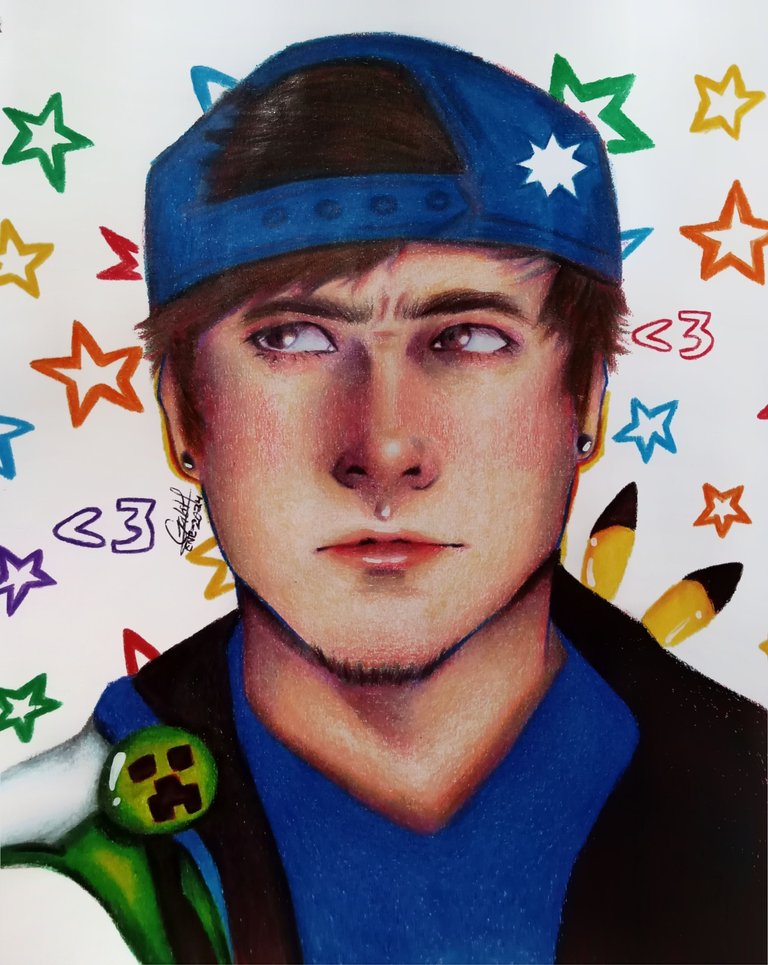
Hola mis amigos creativos en hive! Espero se encuentren muy bien el día de hoy, les traigo el proceso de este dibujo que termine hace poco de el youtuber español Elrubius y el cual fue una práctica en la cual quería probar el mezclar varios colores para poder obtener ciertos colores ya que últimamente he sentido que no manejo muy bien la combinación de colores ya que aún me quedan varios colores que son diferentes tonos de los colores principales entonces quise usarlos y probar el ir combinándolos poco a poco para obtener los tonos que quería para este dibujo. Así que sin más que decir, espero les guste y los invito a leerme! ❤️✨
Hello my creative friends at hive! I hope you are very well today, I bring you the process of this drawing that I finished recently from the Spanish youtuber Elrubius and which was a practice in which I wanted to try mixing several colors to obtain certain colors because lately I have felt that I do not handle very well the combination of colors since I still have several colors that are different shades of the main colors so I wanted to use them and try to combine them little by little to get the tones I wanted for this drawing. So without more to say, I hope you like it and I invite you to read me! ❤️✨
- Lo que utilice para realizar el dibujo en tradicional en una hoja tipo cartulina tamaño 35 x 28 cm, un lápiz de grafito 2 HB y un borrador (corté mi borrador haciendo que las esquinas quedarán en punta así será más fácil borrar espacios pequeños), mis colores y un corrector líquido blanco.
- What I used to make the drawing in traditional on a cardboard type sheet size 35 x 28 cm, a graphite pencil 2 HB and an eraser (I cut my eraser making the corners to be pointed so it will be easier to erase small spaces), my colors and a liquid paper (correction pen).

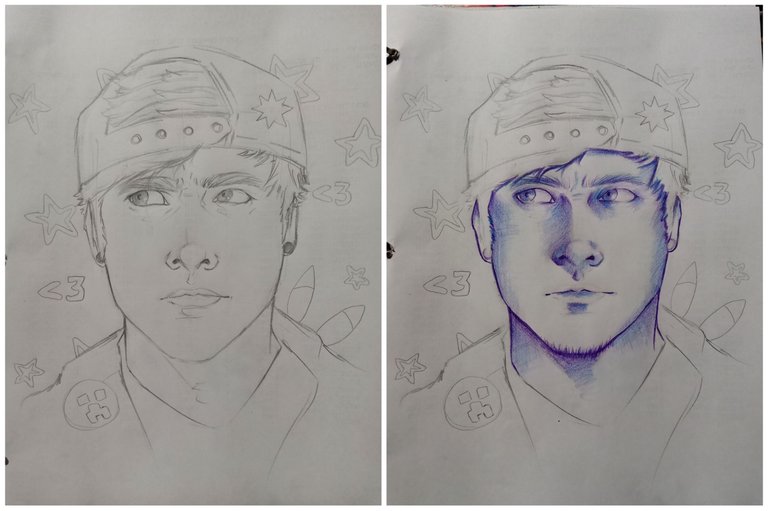
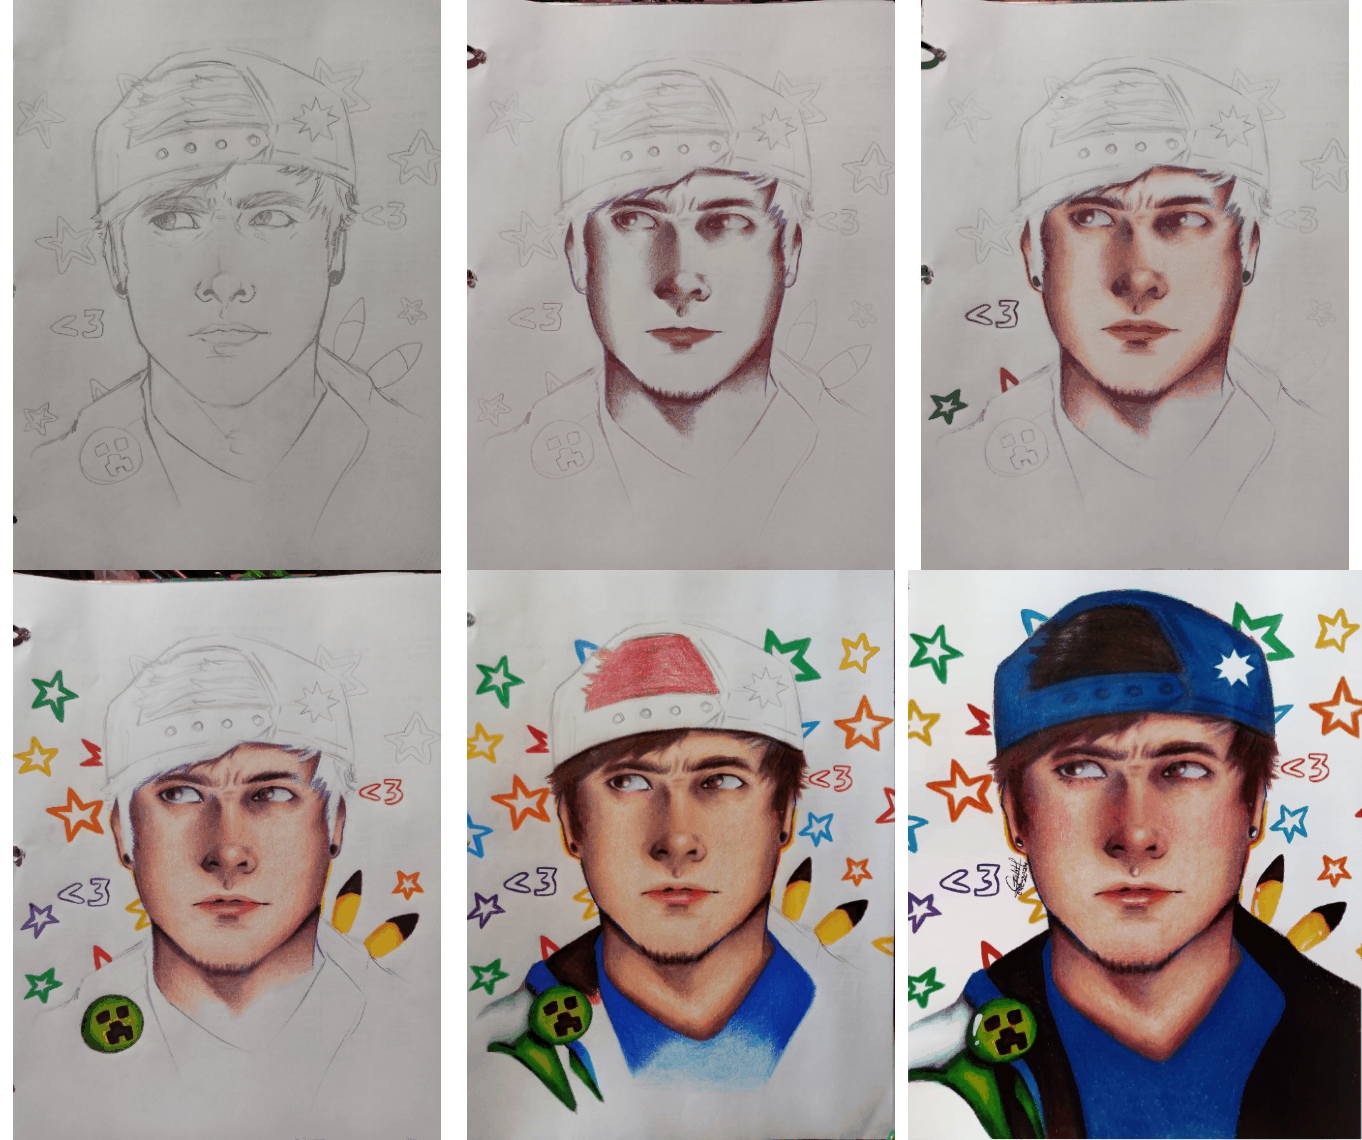
Comence haciendo el boceto del dibujo el cual tome como referencia una imagen de Elrubius que conseguí en Pinterest y luego de tener el boceto listo borre las líneas más marcadas para no ensuciar el dibujo, al borrar todas las líneas fuertes de lápiz comencé a usar mis colores y tome el morado como color principal para delinear las partes más oscuras de su rostro y darle forma, asimismo usé el morado para hacer sombras en las partes menos iluminadas de su rostro y luego con un color azul acentúe esas sombras moradas.
I started making the sketch of the drawing which I took as a reference an image of Elrubius that I got in Pinterest and after having the sketch ready I erased the most marked lines to not dirty the drawing, after erasing all the strong pencil lines I started to use my colors and I took purple as the main color to outline the darkest parts of his face and give it shape, I also used purple to make shadows in the less illuminated parts of his face and then with a blue color I accentuated those purple shadows.
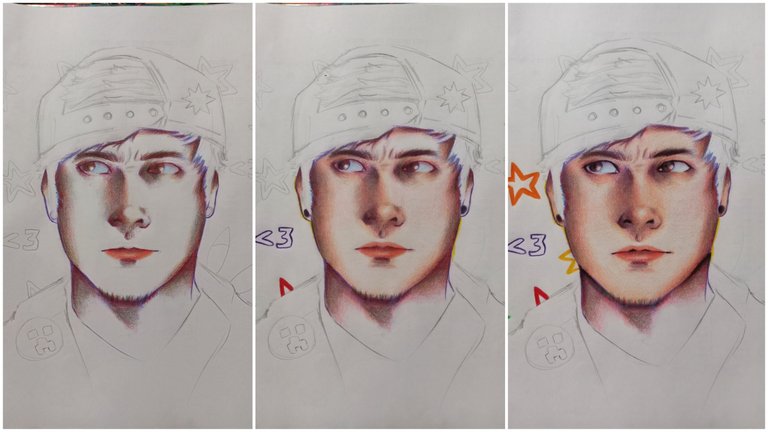
Comencé a mezclar varios colores como el rojo, el verde, el azul y el amarillo para poder ir creando los tonos marrones de las sombras en su rostro así como también para las zonas más oscuras de su rostro, mezcle naranja, rojo y rosado para pintar sus labios y dejé un espacio pequeño en blanco para hacer los brillos en ellos, continue mezclando los colores ahora usando un color durazno con un poco de naranja para obtener la transición de las sombras a su tono de piel. Empecé a pintar algunas de las estrellas en el fondo y luego continuaba pintando la piel, con la misma mezcla de colores con las cuales pude lograr el tono marrón hice sus cejas y el color de sus ojos y con color negro fui delineando sus ojos, los orificios de su nariz, sus zarcillos e hice algunos otros detalles.
I started mixing several colors like red, green, blue and yellow to create the brown tones of the shadows on his face as well as for the darker areas of his face, I mixed orange, red and pink to paint his lips and left a small white space to make the glosses on them, continue mixing the colors now using a peach color with a little orange to get the transition of the shadows to his skin tone. I started to paint some of the stars in the background and then continued painting the skin, with the same mix of colors with which I could achieve the brown tone I did his eyebrows and the color of his eyes and with black color I was outlining his eyes, the holes of his nose, his tendrils and did some other details.
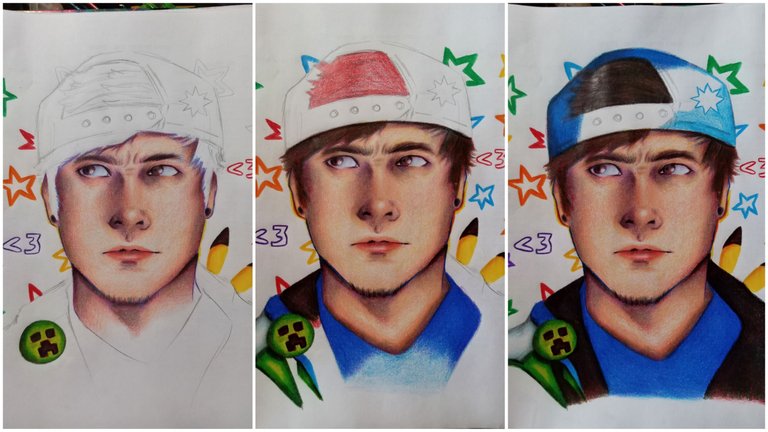
Continue pintando la piel y parte del fondo y al tener listo todo el coloreado de la piel comencé a pintar su ropa, su gorra y su cabello. Mezclando rojo y verde obtuve un tono oscuro el cual mezcle con un poco de naranja para darle el tono de un marrón y ésta mezcla la utilice para pintar su cabello y parte de su chaqueta y usé un poco de color negro para dar sombras y detalles. Mezclando azul y morado fui haciendo varias capas para tener un tono de azul oscuro que tuviera un poco de color morado en el y ésta mezcla la use también para la gorra y para hacer las sombras solo usé un poco de color rojo.
I continued painting the skin and part of the background and when I had all the skin coloring done I started painting his clothes, his cap and his hair. Mixing red and green I got a dark tone which I mixed with a little orange to give it the tone of a brown and this mixture I used to paint his hair and part of his jacket and I used a little black color to give shadows and details. Mixing blue and purple I made several layers to have a dark blue tone with a little bit of purple in it and this mixture was also used for the cap and to make the shadows I only used a little bit of red color.

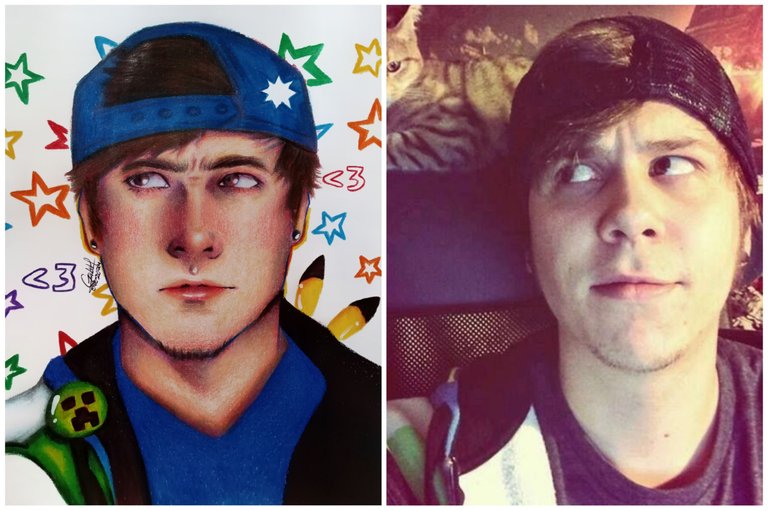
Este es el resultado del dibujo, terminé de pintar su ropa y su gorra los cuales me tarde un poco ya que eran varias capas entre el azul y el morado hasta obtener un tono uniforme del color que quería y al igual que con la ropa, la gorra y el cabello la piel fue un proceso pintarla ya que debía pintar suavemente para que los colores se pudieran mezclar bien, a pesar de que es un poco tardío el proceso de pintar de esta manera la verdad es que me divertí porque pude aprender a como mezclar los colores mejor y obtener ciertos tonos así como el marrón que es uno de los colores que me queda muy poco y por ello hice la práctica ya que quería ver cuántos colores necesitaba para poder lograr ese tono de marrón y si pude lograrlo y ya se que para mis próximos dibujos debo emplear esos colores para obtener ese tono de marron. Me gustó mucho esta práctica y es una de esas prácticas en las cuales puedes relajarte e ir pintando a tu ritmo poco a poco. ❤️✨
This is the result of the drawing, I finished painting his clothes and his cap which took me a little while since there were several layers between blue and purple until I got a uniform tone of the color I wanted and as with the clothes, the cap and the hair the skin was a process to paint since I had to paint it smoothly so the colors could mix well, although it is a little late the process of painting in this way the truth is that I had fun because I could learn how to mix the colors better and get certain tones and brown is one of the colors that I have very little left and so I did the practice because I wanted to see how many colors I needed to achieve that shade of brown and if I could achieve it and I know that for my next drawings I must use those colors to get that shade of brown. I really liked this practice and it is one of those practices in which you can relax and go painting at your own pace little by little. ❤️✨

Espero que les haya gustado y gracias por apoyarme siempre! Nos vemos pronto y sigan creando.❤️
I hope you liked it and thanks for always supporting me! See you soon and keep creating! ❤️
Realicé la traducción en
https://www.deepl.com/es/translator
Todas las imágenes son de mi autoría | All the photos are my property
Imágenes editadas con PicsArt y Snapseed | Images edited with PicsArt and Snapseed
