Cojines primavera (forro). [ESP - ENG]
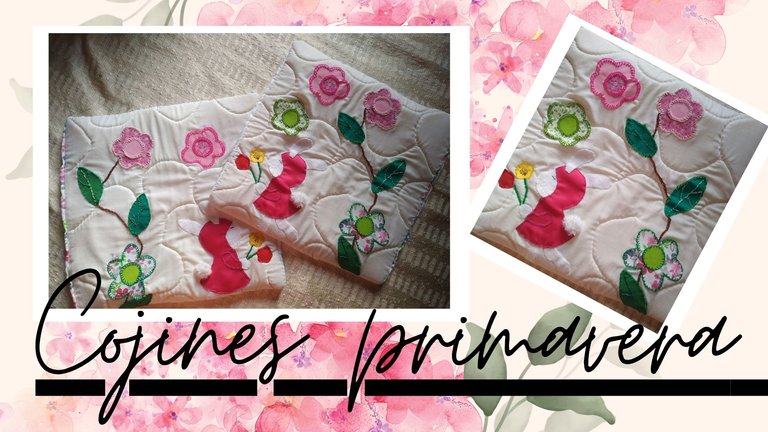
Hola mis queridos amigos de Hive, feliz martes para todos. El día de hoy quiero compartir con ustedes un proyecto que aún está en proceso y se trata de un juego de cama co pie de cama y para elaborarlo comencé con los cojines.
Les comparto el paso a paso del mismo.
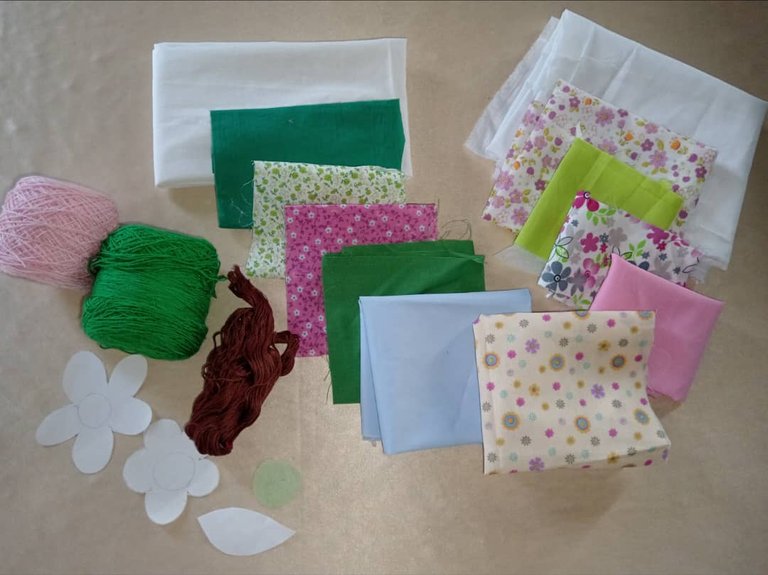
- Telas rígidas de diferentes colores.
- Hilo o cedalina.
- Aguja y tijeras.
- Guata.
- Moldes de las flores.
- Entretela.
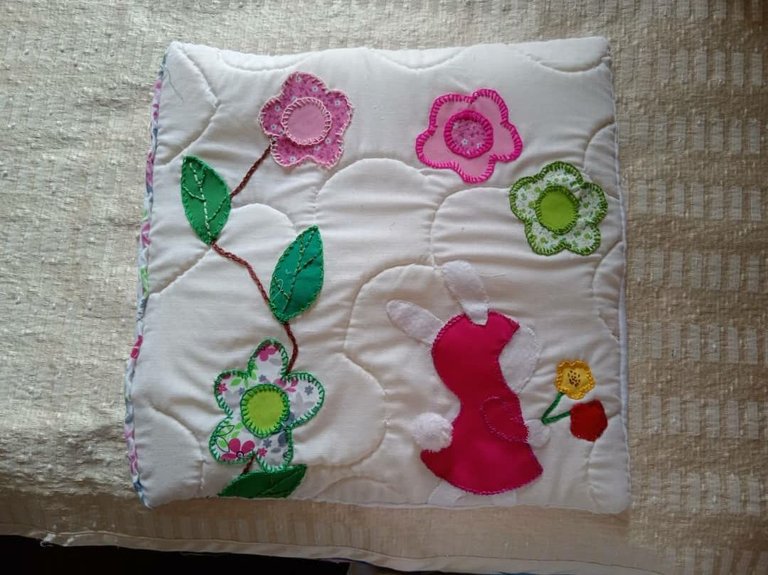
Vamos a utilizar la tela rígida para hacer las flores, así que las cortamos con ayuda de nuestros moldes en forma de flores. También cortamos en el molde de la pequeña conejita.

Luego colocamos la entretela y le pasamos nuestra mejor aliada, la plancha para que quede más rígidos para poder pasarle costura tipo festón.
Para hacer el cojin cuyas medidas son de 40 por 40 utilicé tela rígida en este caso utilice tela de sábanas percatex blanco y guata.
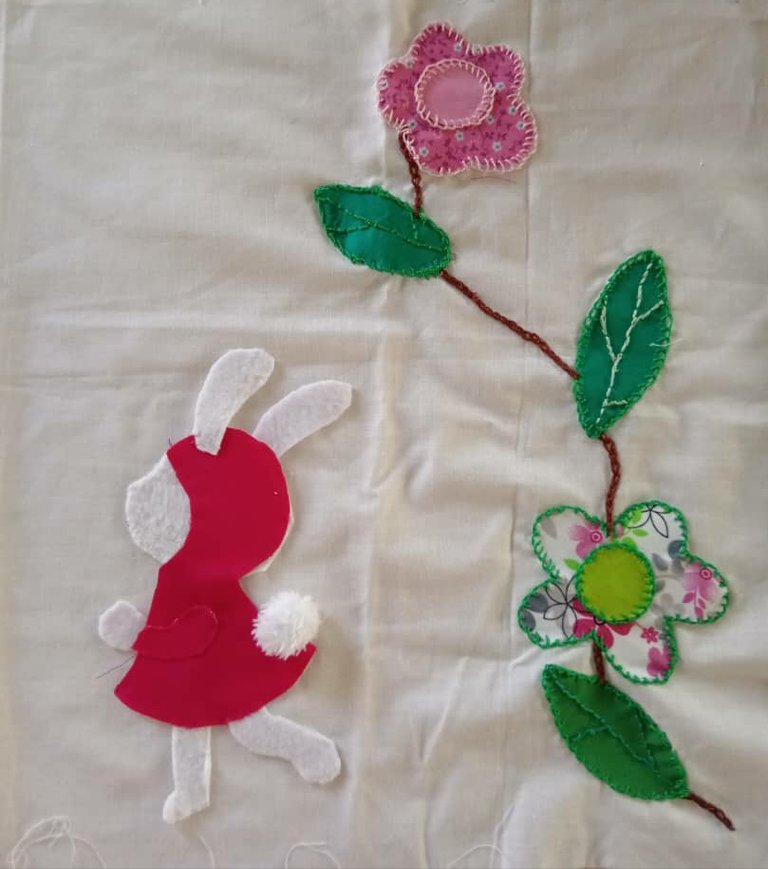
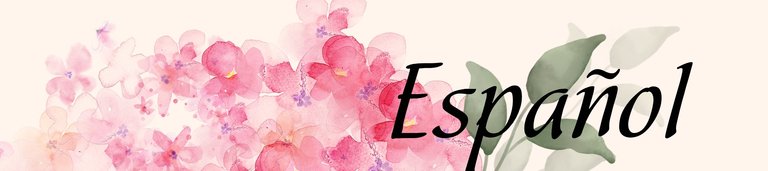
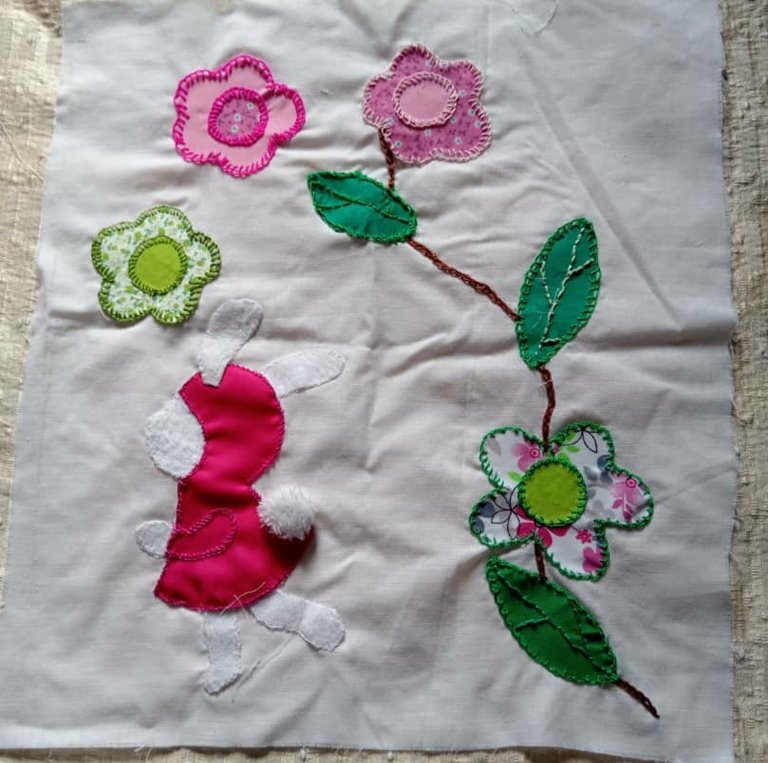
Cuando tengamos las piezas listas, se procede a unir todos las partes de las flores y la de la coneja ( en esta figura primero se unió al vestido las piernas y las manos y por último en la cabeza las orejitas) cada figura se comienza a coser con la puntada tipo festón, también se puede hacer con puntada escondida.
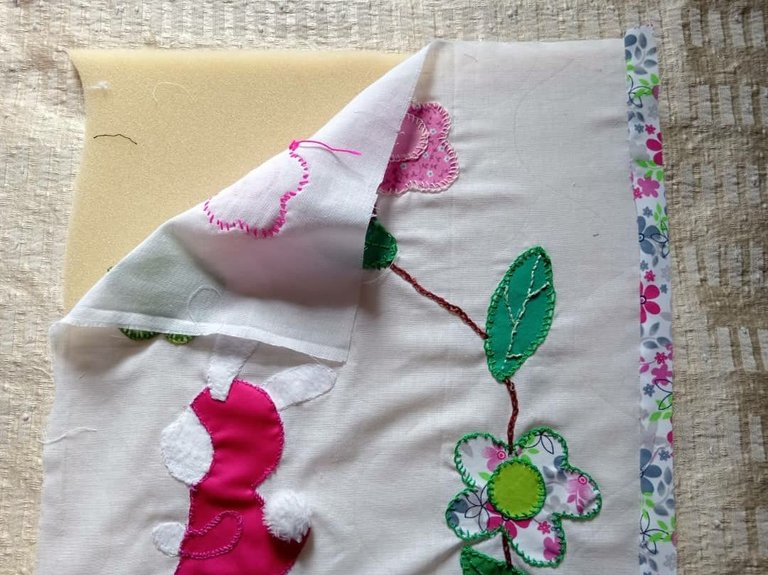
Después de que las figuras están ya, en la parte delantera del cojín. Se coloca la guata y se empieza a acolchar con diferentes líneas.
Luego le coloca en la parte de atrás un forro para tapar todas las costuras.

Para la parte posterior, mido dos partes una más grande de 30 CM y la otra de 25 CM.
Se pasa costura en todo el contorno del cuadrado del cojin y damos vuelta.
Colocamos el forro que acabamos de hacer en el cojín y queda perfecto.

Aún queda trabajo por hacer para el camino de cama, y espero pronto subirles el paso a paso re ello. Hasta aquí mi publicación del día de hoy, espero les haya gustado.
Qué tengan una hermosa y productiva semana, les deseo un feliz día y noche.
Hello my dear friends of Hive, happy Tuesday to all of you. Today I want to share with you a project that is still in process and it is a bed set with a bed base and to make it I started with the cushions.
I share with you the step by step of it.
- Rigid fabrics of different colors.
- Thread or cedaline.
- Needle and scissors.
- Wadding.
- Flower molds.
- Interlining.
We are going to use the stiff fabric to make the flowers, so we cut them with the help of our flower-shaped molds. We also cut in the mold of the little bunny.
Then we place the interlining and pass it our best ally, the iron to make it more rigid to be able to pass it scallop stitching.
To make the cushion whose measures are 40 by 40 I used rigid fabric in this case I used white percatex sheet fabric and wadding.
When we have the pieces ready, we proceed to join all the parts of the flowers and the rabbit (in this figure first joined the legs and hands to the dress and finally the ears on the head) each figure begins to sew with the scallop stitch, it can also be done with hidden stitch.
After the figures are already, on the front of the cushion. Put the wadding and start quilting with different lines.
Then put a lining on the back to cover all the seams.
For the back, I measure two parts, one larger 30 CM and the other 25 CM.
Stitch all the way around the cushion square and turn it over.
We place the lining we just made on the cushion and it is perfect.
There is still some work to be done for the bed path, and I hope to upload the step by step for it soon. So much for today's post, I hope you liked it.
Have a beautiful and productive week, I wish you a happy day and night.

Fotos tomadas de mi teléfono Xiaomi Redmi Note 6 Pro y mi teléfono Honor X8A|| Photos taken from my Xiaomi Redmi Note 6 Pro phone and my Honor X8A phonr.
Fuente del editor de imágenes || Image editor source
Joining the flower part was really nice and creative. How you used brown to join them was really a great choice
The result is nice, I like it
Que diseño tan tierno 😍 me encantó 😊 felicitaciones por tan lindo trabajo, se nota que le pusiste mucho empeño para que quedara así de lindo.
Tienes mucha creatividad y amor para hacer tus diseños, te quedo demasiado delicado y tierno.
Wow que hermosos, te felicito por cada detalle creado
What a cute patch! Congratulation