[ESP/EN] Pan de jamón: una receta venezolana llena de tradición y sabor | Ham bread: a Venezuelan recipe full of tradition and flavor
Desde que empecé a tener uso de razón, al iniciar el último mes del año, papá y mamá tenían por costumbre frecuentar la panadería del señor Felipe, un ciudadano portugués que construyó una excelente reputación por ofrecer exquisitos productos de primera calidad, destacando ampliamente el pan de jamón.
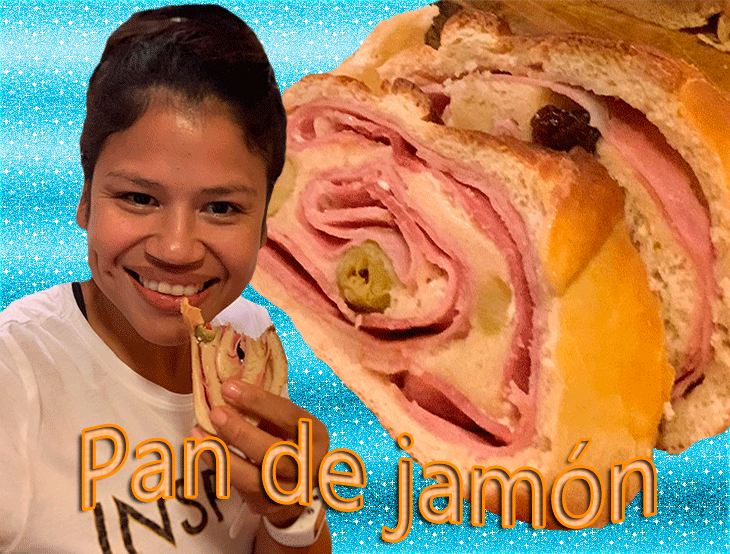
Se decía y doy fe de ello que, en toda la ciudad no había una panadería que ofreciera un pan tan sabroso con este. ¡Wao! Estoy tecleando esta anécdota y mi boca no para de salivar imaginando un suculento trozo de ese añorado pan de jamón. Aunque mamá y papá se dedicaron a la preparación y venta de comidas, nunca se atrevieron a preparar este rico pan.
Ahora bien, no es fortuito que mis ascendientes nos acostumbraran a esta tradición gastronómica decembrina; mis abuelos manifestaban que una de las cosas que más les encantaba de navidad, era porque podían comer hallacas y pan de jamón en cantidad. Ellos tampoco aprendieron a hacerlo, mejor dicho, en mi familia no hubo panaderos ni algún personaje que se atreviera a empaparse las manos de harina de trigo y mezclar masa para preparar pan de jamón.
Qué es el pan de jamón
Su origen se remonta en la Caracas del siglo XX, específicamente en 1905, cuando Lucas Gustavo Ramella lo creó en el vientre de la panadería Ramella, ubicada en la histórica esquina Marcos Parra y Solís, hoy en día su punto de referencia más popular viene a ser la estación del metro El Silencio. Los registros documentales señalan que comenzó siendo un pan cuyo único relleno era jamón, versión que cambió con la creatividad culinaria y preferencia de la población. Así que el actual pan de jamón es una versión ultra mejorada de la receta Ramella.
Habiendo ido a 1905 para entrevistarme con la comadrona de la panadería Ramella y conocer tópicos históricos sobre la famosa receta navideña, es momento de regresar al siglo XXI y aterrizar en Foodies Bee Hive para hacer un relato foto descriptivo de mi experiencia sobre la elaboración del pan de jamón típico venezolano. Te aseguro que habrás invertido bien tus valiosos minutos en leer este post. Sígueme...

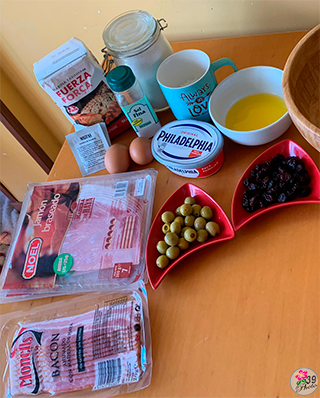
- 750 gramos de harina de trigo panadero o todo uso,
- 650 gramos de jamón ahumado (utilicé jamón braseado),
- 350 gramos de tocineta,
- 15 gramos de levadura instantánea,
- Queso crema Philadelphia,
- 250 gramos de mantequilla sin sal o manteca de cochino,
- 45 gramos de pasas,
- Aceitunas al gusto,
- Sal al gusto,
- 150 ml de agua potable o leche líquida,
- 170 gramos de azúcar refinada.

Como vimos anteriormente, la preparación del pan de jamón es la combinación de una variedad de gustos y preferencias por sabores; también, dependerá de los recursos disponibles, aunque recomiendo encarecidamente no escatimar en la compra de ingredientes de la mejor calidad para garantizar un producto final apetecible.
Uno de los principales trucos es una adecuada mezcla y sobado de la masa, es importante para garantizar el sabor típico y dulzón de este pan navideño.
Paso 1.
Entibiar 35 ml de agua, echarlo en una taza o envase y añadir la levadura con una cucharada de azúcar refinada. Tapar y esperar de 10 a 15 minutos que fermente.
Paso 2.
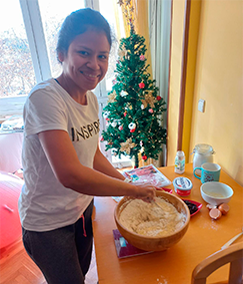
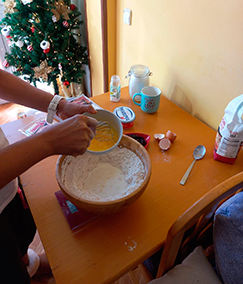
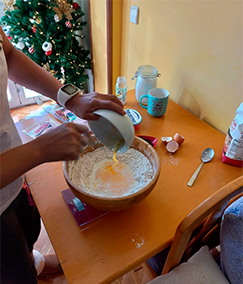
En un bol se agrega la cantidad de harina a utilizar, se abre un pequeño hoyo en el medio y comienza a añadir los ingredientes: huevos (clara y yema), azúcar y mantequilla derretida.
|
|
|
Se comienza a mezclar cuidadosamente los ingredientes; se incorpora la levadura y continúa mezclando hasta conseguir una masa homogénea.
Paso 3.
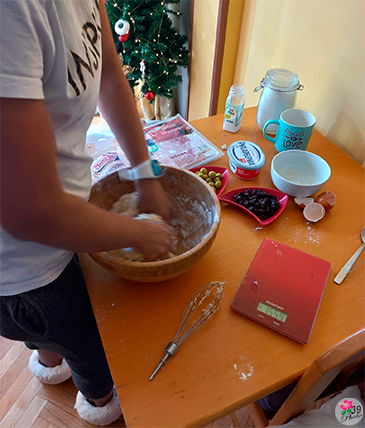
Llegará el momento que la mezcla tome una consistencia fuerte con textura y color característico, es momento de continuar mezclando sin parar e ir despegando la masa y residuos de toda la superficie del bol.
|
|
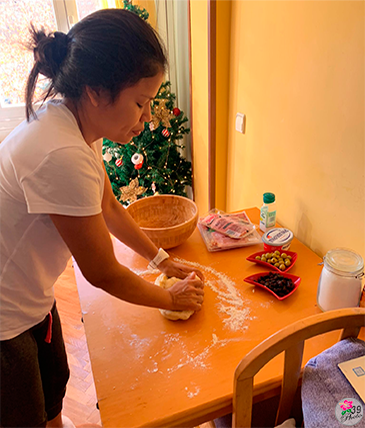
Una vez que haya cumplido con lo anterior, notará que la mezcla pasó a convertirse en una suave y compactada masa homogénea, entonces debe enharinar la superficie de la mesa o donde disponga tenderla para llevar la masa. Sobe la masa durante 15 minutos aproximadamente.
Paso 4.
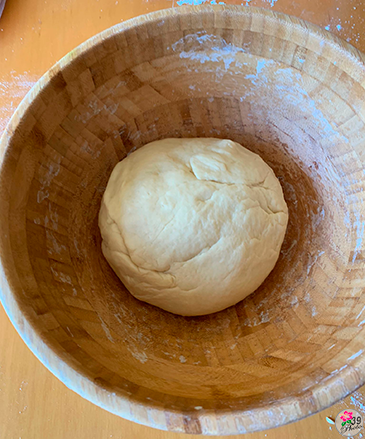
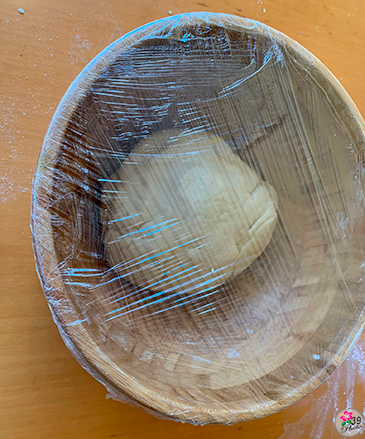
Recoja la masa en forma de bola y llévela nuevamente al bol. Asegúrese de enharinar antes el interior del recipiente para evitar que la masa se adhiera una vez que comience a levantar.
|
|
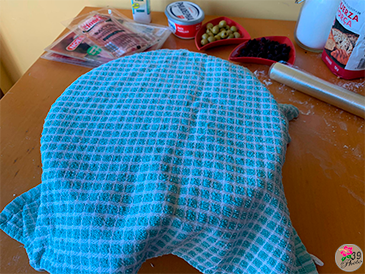
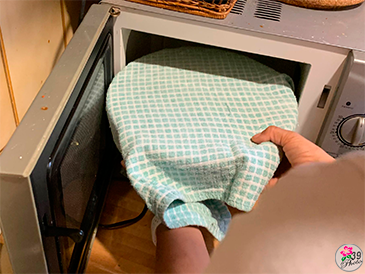
Posteriormente, cubra con paños de cocina y lleve a un lugar donde esté cálido y libre de corriente de brisa. En mi caso me vi obligada a precalentar el microondas y tapar durante 45 minutos.
|
|
La temperatura madrileña se encuentra muy baja y el ambiente frío no es compatible con la levadura porque contrarresta el efecto del fermentado en la masa.
Paso 5.
Gracias a la técnica del precalentado del microondas y su hermética tapa, se logró obtener un excelente resultado con la levadura, la masa levantó formidablemente.
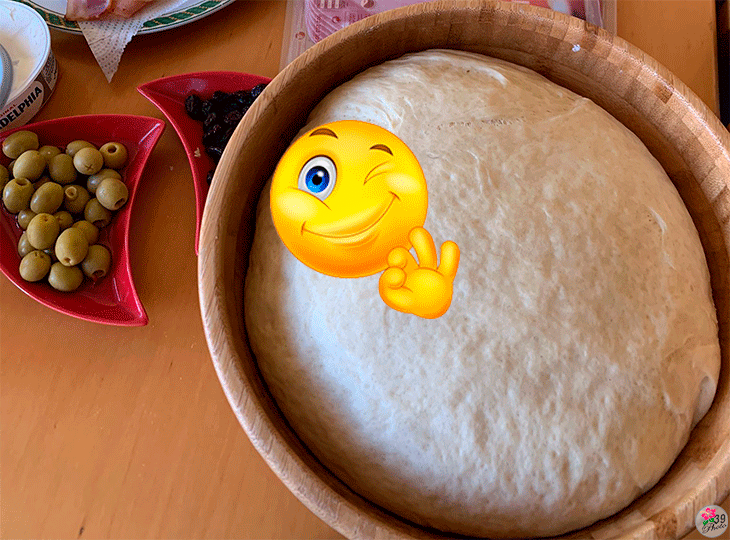
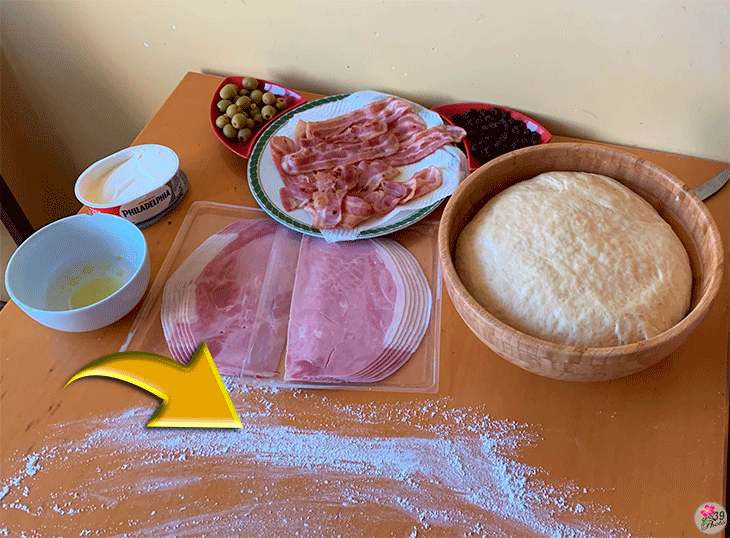
Es momento de enharinar la superficie donde se procederá a estirar la masa para comenzar a rellenar los futuros panes.
Paso 6.
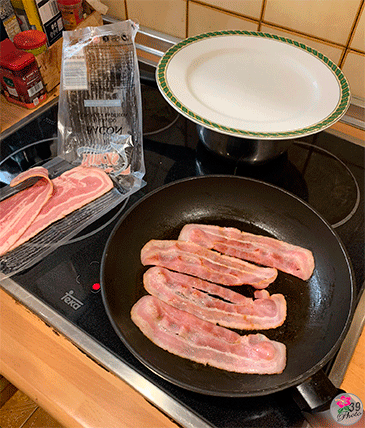
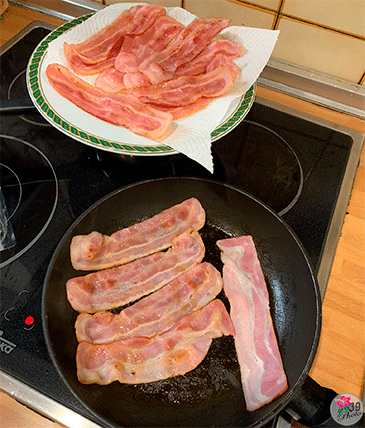
Caliente una sartén y sofría un poco las tocinetas. Después de haberlas sofrito, recoja la grasa líquida para que la añada sobre la masa estirada. Esto le proporciona un sabor más concentrado al pan.
|
|
Paso 7.
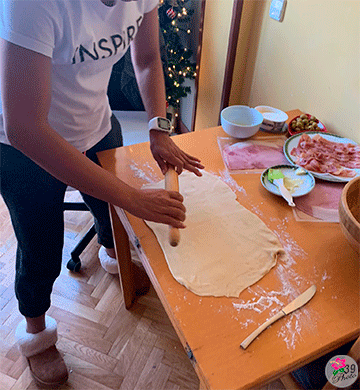
Divida la bola de masa en tres trozos con tamaño proporcionalmente iguales. Use un rodillo de madera y polvoréelo de harina para estirar la masa que deberá dejar a 3 ml de grueso.
Cree una figura rectangular y corte las imperfecciones de los bordes para que tenga un mejor manejo espacial y estético de la masa. Si nota que el rodillo está reteniendo masa y no desliza bien, limpie y vuelva a enharinar.
Paso 8.
Previo engrase con el aceite de tocineta, comience a colocar el jamón cubriendo toda la superficie, excepto los bordes porque se requieren para sellar el pan una vez que sea envuelto.
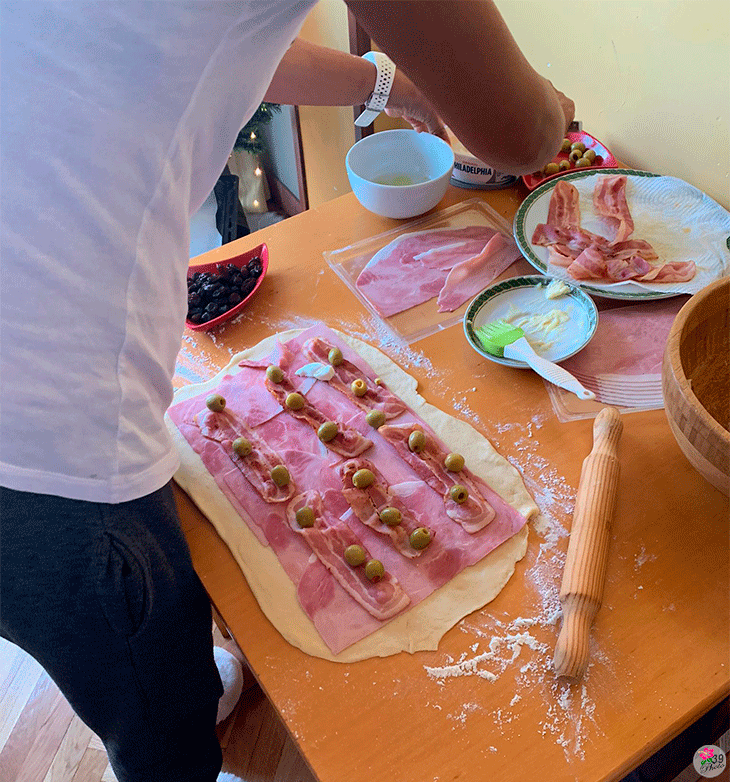
Vaya colocando dos líneas de tocinetas o más encima del jamón y queso crema al gusto.
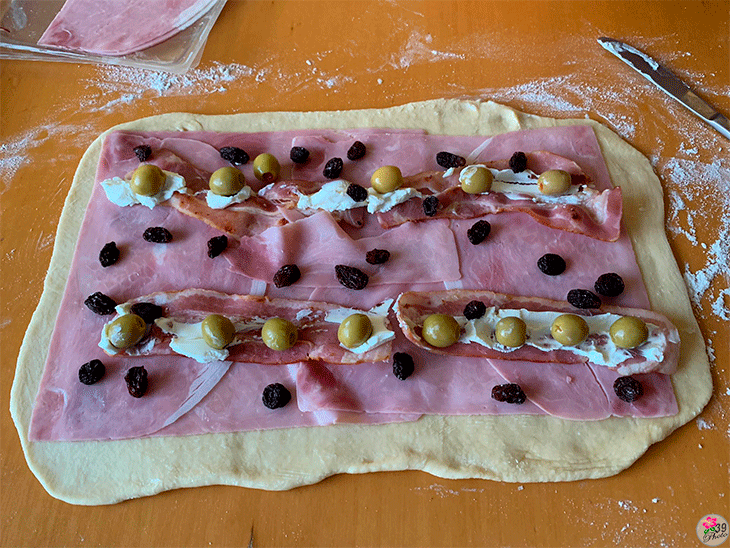
En el caso de las aceitunas y pasas, dependerá de su preferencia; así que coloque la cantidad que desee usted y los comensales.
Paso 9.
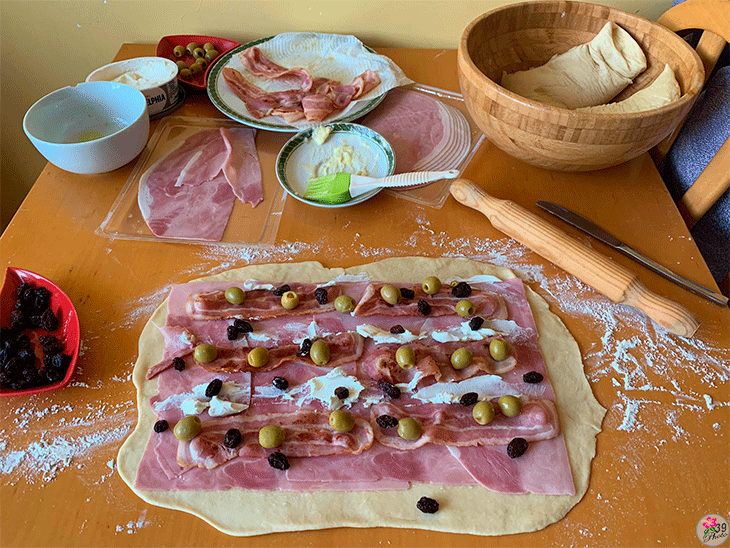
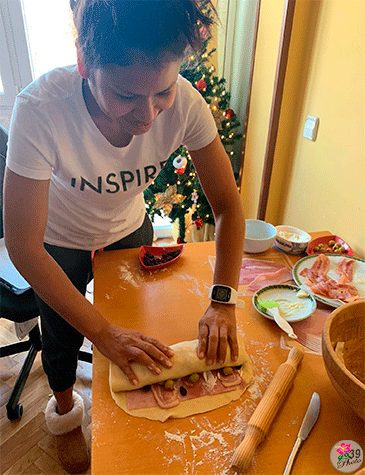
Cuando el relleno esté completo, retire el excedente de los bordes, deje aproximadamente 1 centímetro y proceda a envolver para luego sellar el pan.
 |
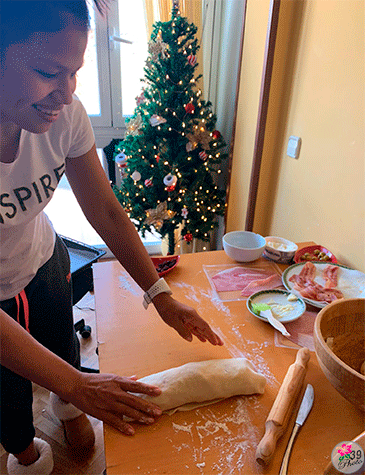 |
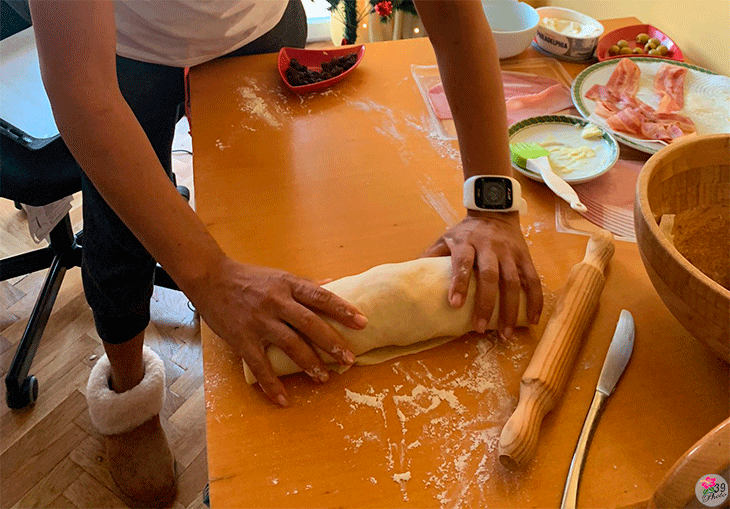
En la medida que se va enrollando el pan, se proporciona suaves golpecitos para ir ajustando el relleno y evitar que quede lleno de aire y se abombe.
Paso 10.
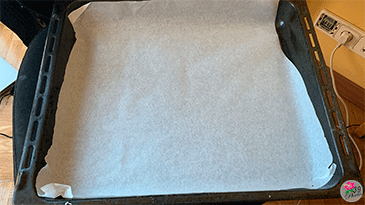
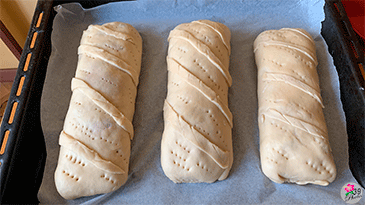
Luego de enrollar los panes, se decoran y se colocan en la bandeja sobre papel vegetal; se tapan y dejan en reposo por 40 minutos antes de llevar al horno.
 |
 |
Paso 11.
El horno se gradúa a 230 ºC y después de 5 minutos encendido, se introduce la bandeja para proceder con el horneado. Durante 45 minutos los panes se mantendrán en el horno.
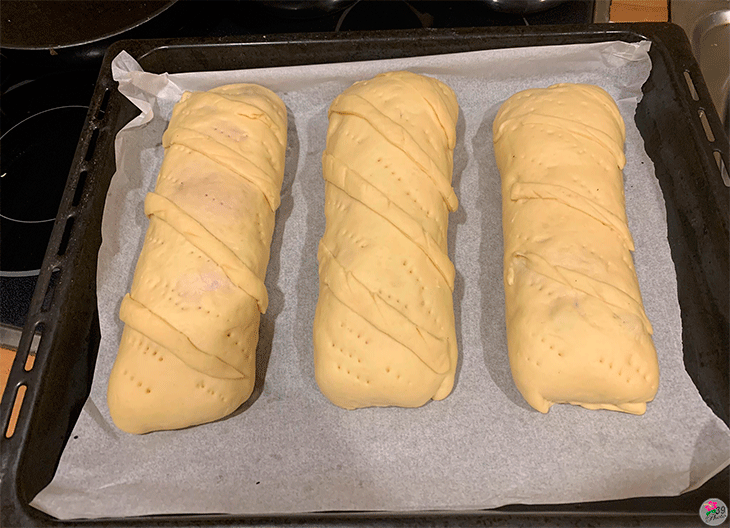
Al minuto 40, extraiga los panes y pincele la parte superior con la yema de un huevo y una cucharadita de azúcar, luego vuelva la bandeja al horno y deje cocinar el tiempo restante.
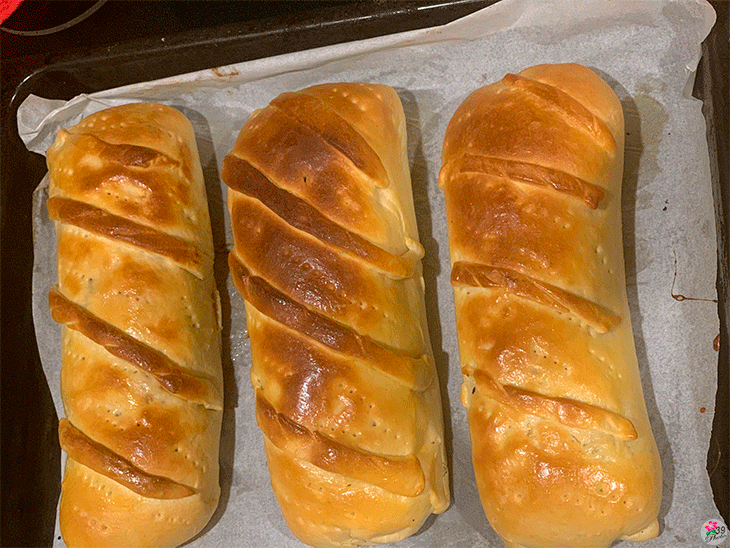
Esto proporciona un aspecto brillante al pan por el gratinado. Al minuto 45 saque los panes del horno y deje reposar a temperatura ambiente.

 |
|
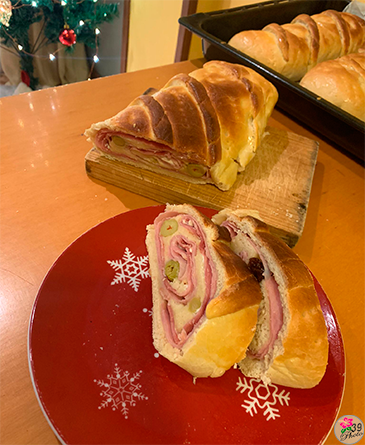
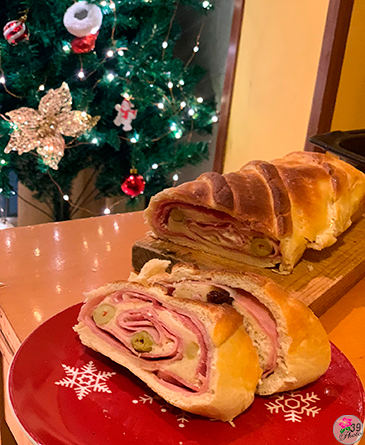
Como se puede observar, el pan ha quedado con suficiente relleno y su capa envolvente tiene un espesor moderado; respecto al sabor, es otro nivel, quedó exquisito. 😋
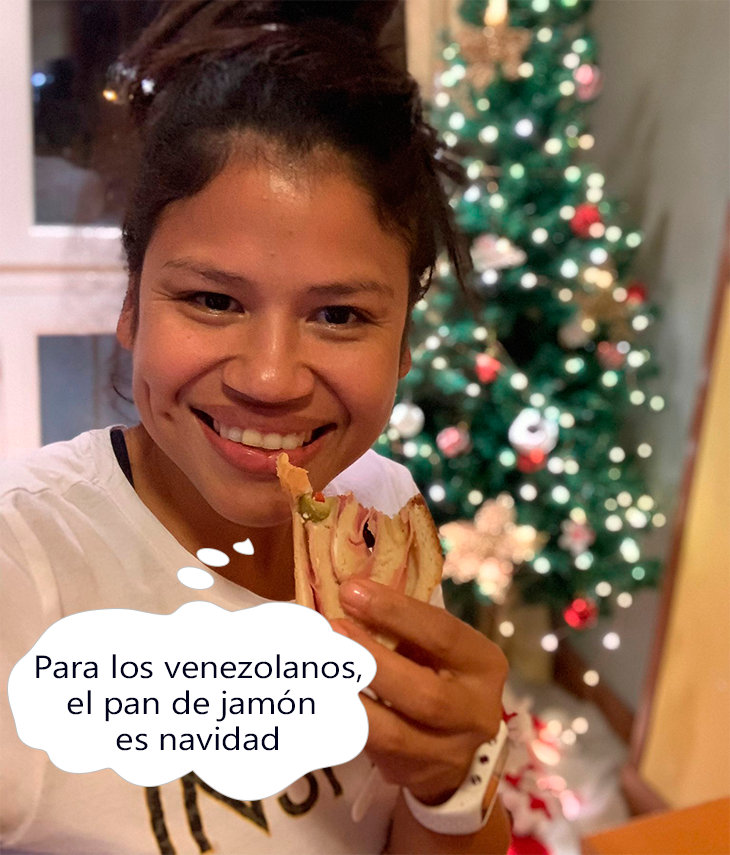


Ever since I could remember, at the beginning of the last month of the year, my mom and dad used to go to the bakery of Mr. Felipe, a Portuguese citizen who built an excellent reputation for offering exquisite products of the highest quality, especially ham bread.
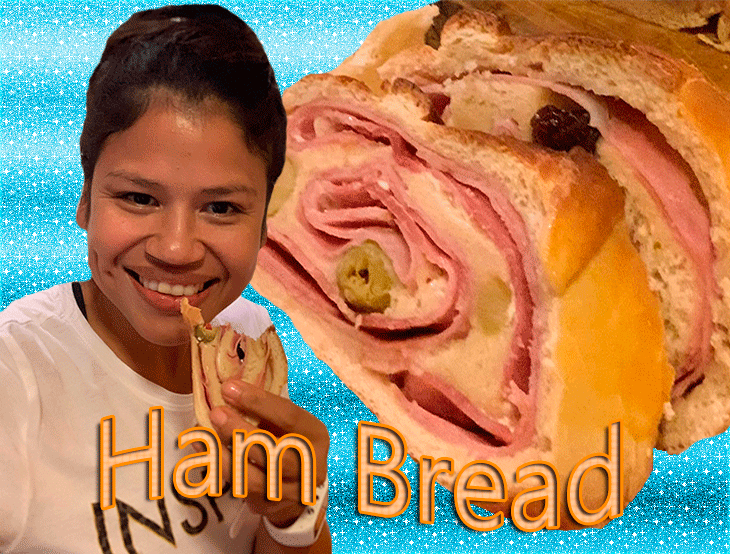
It was said, and I can attest to this, that there was no bakery in the whole city that offered such tasty bread with this one. Wao! I am typing this anecdote and my mouth does not stop salivating imagining a succulent piece of that longed-for ham bread. Although mom and dad were dedicated to the preparation and sale of food, they never dared to prepare this delicious bread.
Now, it is not fortuitous that my ancestors got us used to this gastronomic tradition of Christmas; my grandparents used to say that one of the things they loved most about Christmas was that they could eat hallacas and ham bread in quantity. They did not learn to do it either, or rather, in my family there were no bakers or any character who dared to soak their hands in wheat flour and mix dough to prepare ham bread.
What is ham bread?
Its origin dates back to the Caracas of the 20th century, specifically in 1905, when Lucas Gustavo Ramella created it in the womb of the Ramella bakery, located in the historic corner of Marcos Parra and Solis, today its most popular reference point is the El Silencio subway station. Documentary records indicate that it began as a bread whose only filling was ham, a version that changed with the culinary creativity and preference of the population. So the current ham bread is an ultra-improved version of the Ramella recipe.
Having gone back to 1905 to interview the midwife of the Ramella bakery and learn historical facts about the famous Christmas recipe, it's time to return to the 21st century and land on Foodies Bee Hive for a photo-descriptive account of my experience in making typical Venezuelan ham bread. I assure you that you will have well invested your valuable minutes reading this post. Follow me.


- 750 grams of baker's or all-purpose wheat flour,
- 650 grams of smoked ham (I used braised ham),
- 350 grams of bacon,
- 15 grams of instant yeast,
- Philadelphia cream cheese,
- 250 grams unsalted butter or lard,
- 45 grams of raisins,
- Olives to taste,
- Salt to taste,
- 150 ml drinking water or liquid milk,
- 170 grams of refined sugar.


As we saw earlier, the preparation of ham bread is the combination of a variety of tastes and flavor preferences; also, it will depend on the available resources, although I strongly recommend not skimping on the purchase of the best quality ingredients to ensure an appetizing final product.
One of the main tricks is a proper mixing and kneading of the dough, it is important to guarantee the typical and sweet taste of this Christmas bread.
Step 1.
Warm 35 ml of water, pour it in a cup or container and add the yeast with a tablespoon of refined sugar. Cover and wait 10 to 15 minutes for it to ferment.
Step 2.
In a bowl add the amount of flour to be used, make a small hole in the middle and start adding the ingredients: eggs (white and yolk), sugar and melted butter.

|

|

|
Start mixing the ingredients carefully; incorporate the yeast and continue mixing until a homogeneous dough is obtained.
Step 3.
When the mixture takes on a strong consistency with a characteristic texture and color, it is time to continue mixing without stopping and remove the dough and residues from the entire surface of the bowl.

|

|
Once you have done this, you will notice that the mixture has turned into a soft and compacted homogeneous dough, then you must flour the surface of the table or where you want to spread it to take the dough. Let the dough stand for approximately 15 minutes.
Step 4.
Gather the dough into a ball and return it to the bowl. Be sure to flour the inside of the bowl first to prevent the dough from sticking once it begins to rise.

|

|
Subsequently, cover with kitchen towels and take to a place where it is warm and free of breeze current. In my case I was forced to preheat the microwave and cover for 45 minutes.

|

|
The temperature in Madrid is very low and the cold environment is not compatible with the yeast because it counteracts the effect of the fermentation in the dough.
Step 5.
Thanks to the microwave preheating technique and its airtight lid, it was possible to obtain an excellent result with the yeast, the dough rose formidably.

It is time to flour the surface where the dough will be stretched to begin to fill the future loaves.

Step 6.
Heat a frying pan and sauté the bacon a little. After sautéing them, collect the liquid fat to be added on top of the stretched dough. This gives the bread a more concentrated flavor.

|

|
Step 7.

Divide the dough ball into three pieces of proportionally equal size. Use a wooden rolling pin and dust it with flour to roll out the dough to a thickness of 3 ml.
Create a rectangular shape and cut off any imperfections at the edges for better spatial and aesthetic handling of the dough. If you notice that the rolling pin catches the dough and does not glide well, clean it and re-flour it.
Step 8.
.Previously grease with the bacon oil, begin to place the ham covering the entire surface, except the edges because they are required to seal the bread once it is wrapped.

Place two lines of bacon or more on top of the ham and cream cheese to taste.

In the case of olives and raisins, it will depend on your preference; so place the amount you and your guests want.

Step 9.
When the filling is complete, remove the excess from the edges, leave about 1 centimeter and proceed to wrap and then seal the bread.
 |
 |

As the bread is being rolled, gently tap it to adjust the filling and prevent it from becoming full of air and bulging.
Step 10.
.After rolling the loaves, decorate them and place them on the tray on parchment paper; cover them and let them rest for 40 minutes before taking them to the oven.
 |
 |
Step 11.
The oven is set at 230 ºC and after 5 minutes turned on, the tray is inserted to proceed with the baking. For 45 minutes the breads will remain in the oven.

At the 40th minute, remove the loaves and brush the top with the yolk of one egg and a teaspoon of sugar, then return the pan to the oven and cook for the remaining time.

This gives the bread a shiny appearance due to the gratin. After 45 minutes remove the loaves from the oven and let them rest at room temperature.

 |

|
As you can see, the bread has enough filling and its enveloping layer has a moderate thickness; regarding the taste, it is another level, it was exquisite. 😋
Translated with www.DeepL.com/Translator (free version)
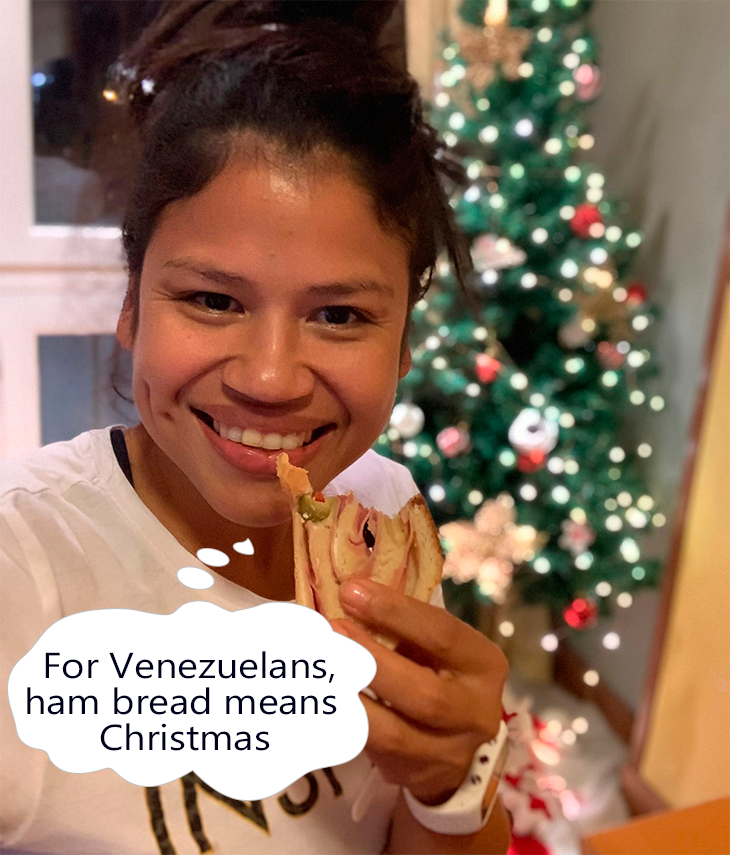
📷 Sobre las imágenes | About the images 📷
Las imágenes son propiedad de la autora, tomadas con dispositivo smartphone, marca Appel, modelo iPhone X.
The images are property of the author, taken with smartphone device, Appel brand, model iPhone X.
Hi flores39,
Join the Curie Discord community to learn more.
Thank you for supporting my content. I value your healing.
Huele a navidad 😁
Navidad sin pan de jamón no es navidad
Hola @lisrl26. Un placer contar con tu visita y lindo comentario. Así es:
Al menos para los venezolanos y quienes se acostumbraron a probar este exquisito alimento de tradición navideña.
Gracias por tu oportuna opinión. Saludo
Congratulations, your post has been upvoted by @dsc-r2cornell, which is the curating account for @R2cornell's Discord Community.
Enhorabuena, su "post" ha sido "up-voted" por @dsc-r2cornell, que es la "cuenta curating" de la Comunidad de la Discordia de @R2cornell.
Gracias por el valioso apoyo