(ESP - ING) Linda y sencilla Pulsera para niñas /Cute and simple Bracelet for girls
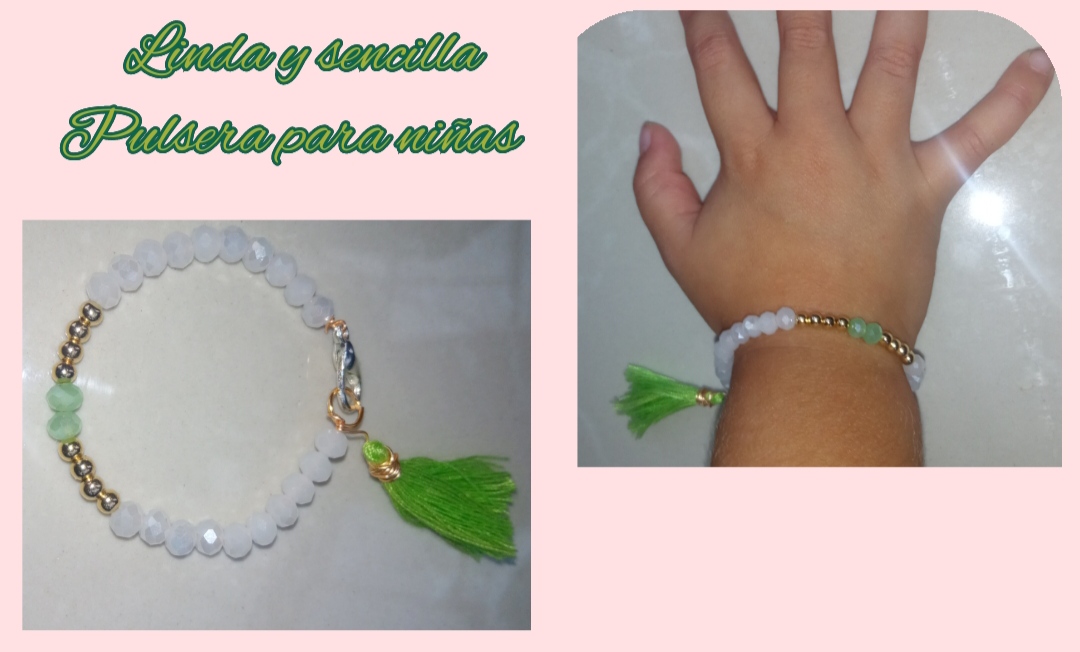
Saludos Mis queridos amigos creativos y talentosos de esta comunidad, el día de hoy les quiero compartir una muy linda y delicada idea para elaborar unas muy coquetas pulseras para las más pequeñas de la casa, desde muy pequeñas las niñas tienden a ser muy coquetas y quieren usar todo lo que miran que mamá usa, lamentablemente hay niñas que no pueden usar toda clase de materiales. Está creación que les comparto el día de hoy la elabore para mí pequeña de dos añitos, está es demasiado fácil de elaborar y el resultado que obtendremos será muy similar a las que están de moda.
Greetings My dear creative and talented friends of this community, today I want to share a very nice and delicate idea to make very cute bracelets for the little ones in the house, from a very young age girls tend to be very flirtatious and want to use everything they see that mom uses, unfortunately there are girls who cannot use all kinds of materials.
I made this creation that I am sharing with you today for my two-year-old girl, it is too easy to make and the result that we will obtain will be very similar to those that are in fashion.
Para todos ustedes he elaborado un muy sencillo tutorial dónde paso a paso podrán disfrutar de la elaboración de esta hermosa mini pulsera.
For all of you I have prepared a very simple tutorial where step by step you will be able to enjoy the elaboration of this beautiful mini bracelet.
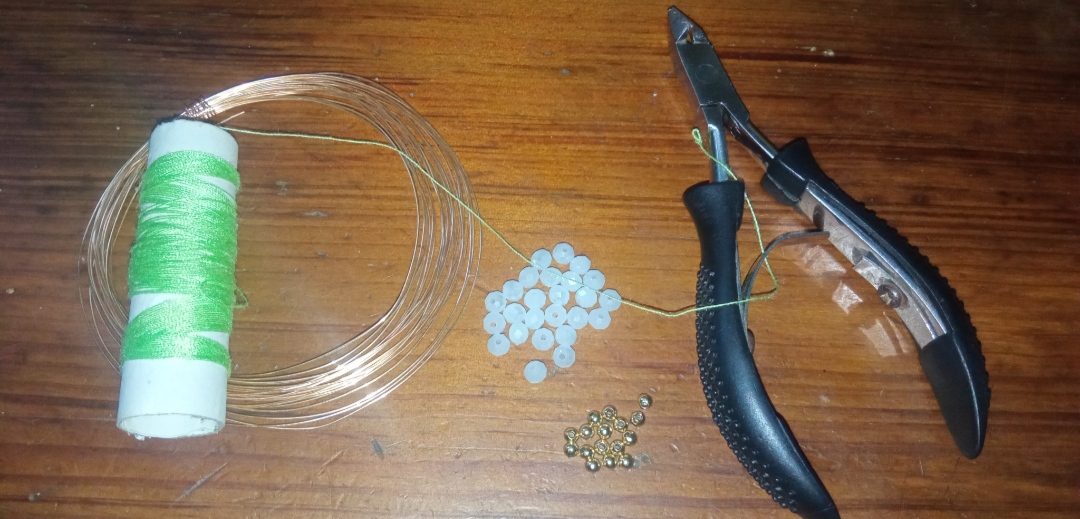
✴️ Que Materiales necesitas:
- Alambre de bisutería calibre 26.
- Alambre de bisutería calibre 22.
- piedras brillantinas color blanco.
- piedras brillantinas color verde.
- piedras pequeñas doradas.
- Hilo de coser verde.
- Terminar de cadena.
- pinza de bisutería.
✴️ What Materials do you need:
- 26 gauge jewelry wire.
- 22 gauge jewelry wire.
- white glitter stones.
- green glitter stones.
- small golden stones.
- Green sewing thread.
- End of chain.
- jewelry clip.
😊 paso a paso
😊 Step by step
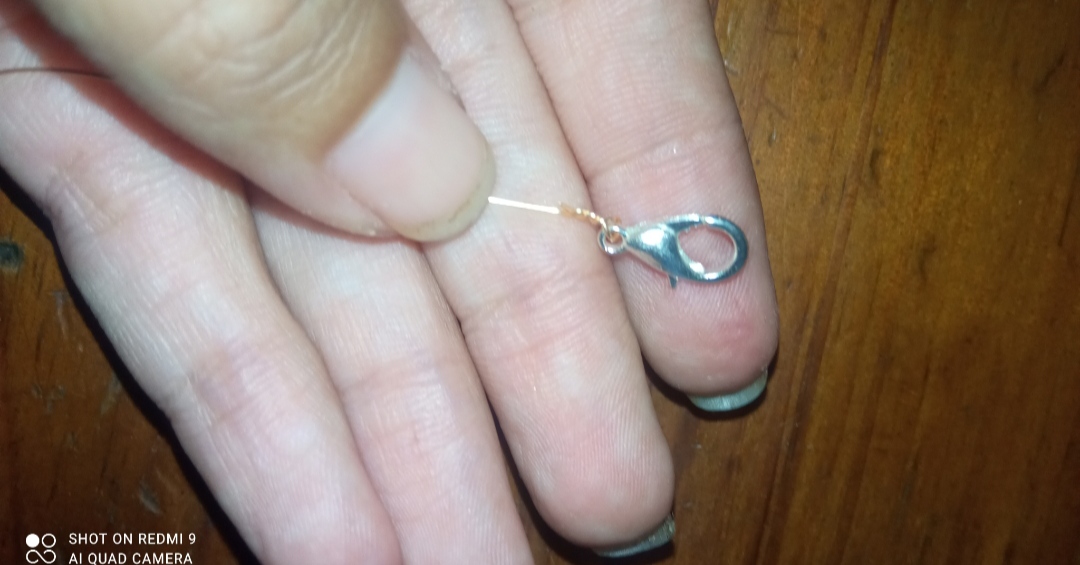
⭐ Paso 1: Para iniciar nuestra elaboración primeramente tomamos el alambre de bisutería calibre 26 y cortamos un pedazo de alambre de 10cm pues la medida es para una niña, por una de las puntas Introducimos el terminal de cadena, doblamos y enrrollamos el alambre para sujetar lo en la punta del alambre.
⭐ Step 1: To start our preparation, we first take the 26 gauge jewelry wire and cut a 10cm piece of wire because the measure is for a girl, through one of the ends We introduce the chain terminal, bend and wind the wire to hold it at the tip of the wire.
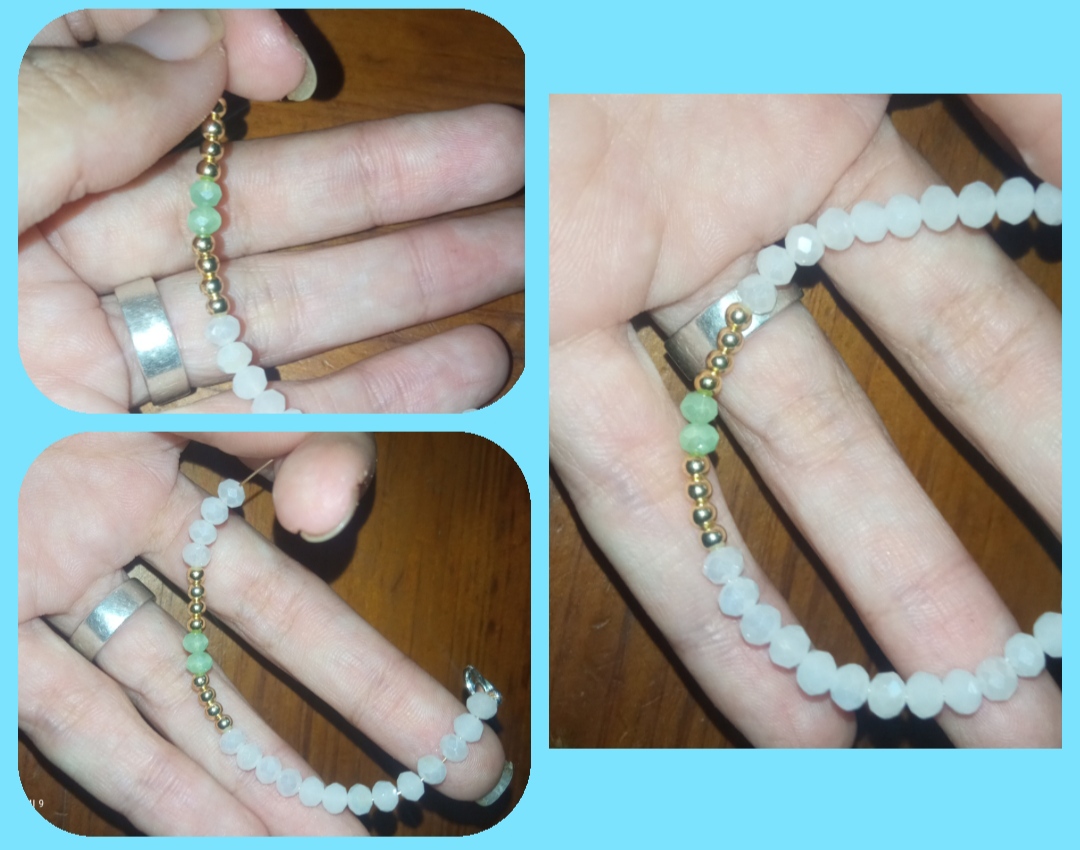
⭐ Paso 2: ahora iniciamos a introducir la pedrería, primeramente Introducimos las piedras blancas una a una, yo coloque exactamente 10, luego introduje 4 piedritas pequeñas doradas y dos verdes está será el centro de nuestra pulsera así que la otra mitad debe ser totalmente igual, Introducimos 4 brillantinas doradas y 10 blancas
⭐ Step 2: now we begin to introduce the rhinestones, first we introduce the white stones one by one, I placed exactly 10, then I introduced 4 small golden stones and two green ones, this will be the center of our bracelet so the other half must be totally the same , We introduce 4 golden glitters and 10 white
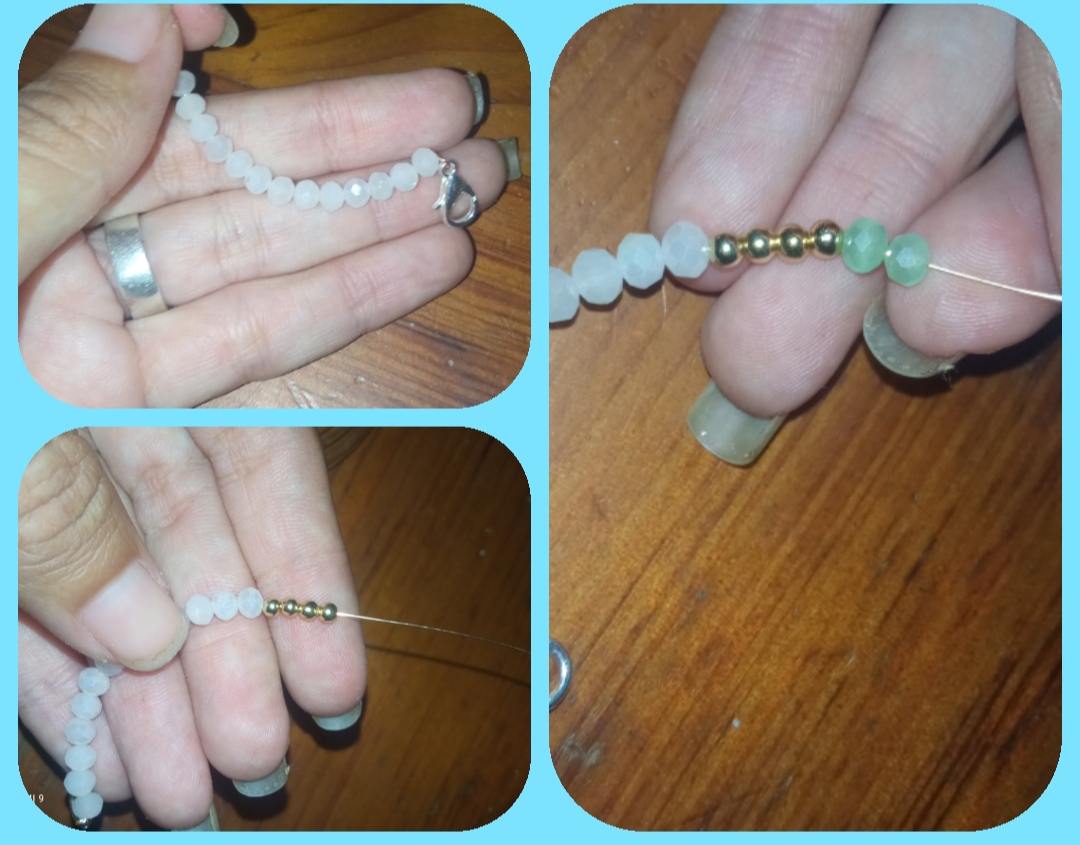
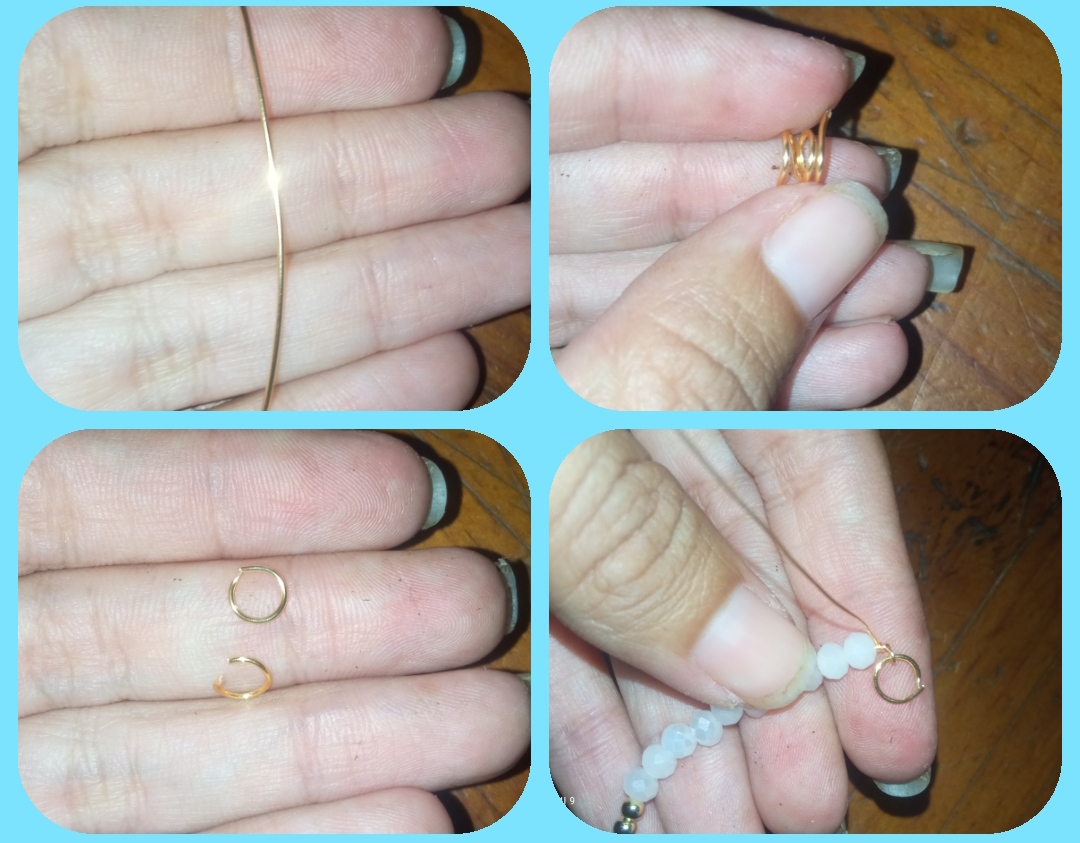
⭐ Paso 3: Seguidamente tomamos 4cm de alambre de bisutería calibre 22 y lo enrollamos en un pequeño tubo delgado y luego con la pinza recortamos cada circuli formando unos pequeñas Argollas.
Tomaremos una de estas la Introducimos por nuestro alambre, la llevamos hasta donde quedamos con la pedrería y con el alambre base la sujetamos pues está será la otra parte del terminal de cadena
⭐ Step 3: Next we take 4cm of 22 gauge jewelry wire and roll it into a small thin tube and then with the pliers we cut each circle forming small rings.
We will take one of these We introduce it through our wire, we take it to where we are with the rhinestones and with the base wire we hold it because this will be the other part of the chain terminal
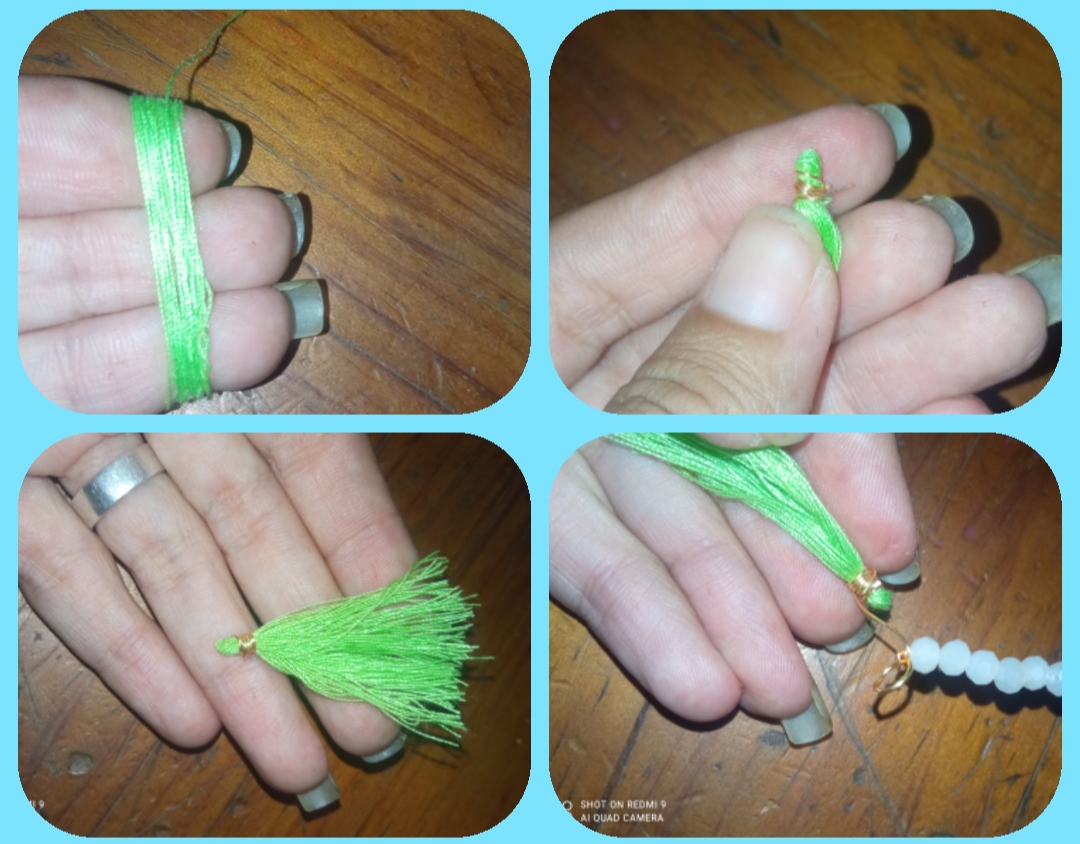
⭐ Paso 4: por último elaboraremos nuestro detalle especial, tomamos el hilo y lo enrrollamos en nuestros dedos en tres o dos dedos dependiendo de lo largo que lo desee, realizamos muchas vueltas, luego sacamos la forma de nuestros dedos y en un extremos sujetaremos con un pedacito de alambre dando varias vueltas circulares y el otro extremo cortaremos la vuelta de la parte inferior del hilo y obtendremos una linda borla.
Está la llevamos a nuestra pulsera u la sujetaremos en el exceso de alambre que nos queda en el terminal de la pulsera y listo
⭐ Step 4: finally we will elaborate our special detail, we take the thread and wind it around our fingers in three or two fingers depending on the length you want it, we make many turns, then we take the shape of our fingers and at one end we will hold with a little piece of wire making several circular turns and the other end we will cut the turn of the lower part of the thread and we will obtain a nice tassel.
We take it to our bracelet and we will hold it in the excess wire that we have left in the terminal of the bracelet and that's it
⭐ Linda y sencilla Pulsera para niñas
⭐ Cute and simple Bracelet for girls
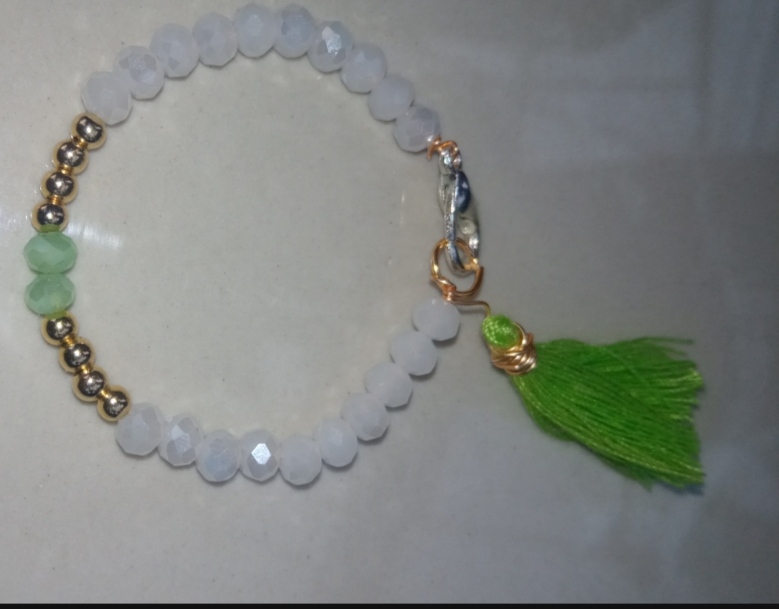
Y así mis queridos compañeros elaboramos una muy sencilla, delicada y hermosa pulsera para las princesas del hogar, pueden jugar con la combinación de colores y agregar otros acsesorios si es de su gusto, mi hija quedó encantada con su bella pulsera y yo totalmente feliz de complacerla.
And so my dear colleagues we made a very simple, delicate and beautiful bracelet for the princesses of the home, they can play with the combination of colors and add other accessories if they like it, my daughter was delighted with her beautiful bracelet and I was totally happy with it. please her
Queridos Amigos espero que este tutorial de esta sencilla creación les pueda ser útil en casa, me despido deseándoles un excelente fin De semana y muy agradecida por su visita y estaré feliz de recibir sus comentarios y sugerencias.
Saludos y bendiciones para ustedes.
Dear Friends, I hope that this tutorial of this simple creation can be useful at home, I say goodbye wishing you an excellent weekend and I am very grateful for your visit and I will be happy to receive your comments and suggestions.
Greetings and blessings to you.
las fotos fueron tomadas con mi teléfono Redmi 9, contenido exclusivo para Hive. Y la traducción fue realizada a través de Google.
photos were taken with my Redmi 9 phone, exclusive content for Hive. And the translation was done through Google.
Me gusta mucho la combinación de colores, lo cristales están preciosos, te quedó muy lindo ✨🌟✨🌟
Me alegra que sean de tu agrado amiga, gracias 😊
Hermosa pulsera amiga @emmaris nos encanta como realizaste elmpaso a paso sencillo es bueno ver que las niñas pueden tener unos lindos accesorios. Gran trabajo.
Gracias por siempre motivarlos. ❤️
Está hermoso 😍, y muy sencillo de hacer. Mucho éxito 👍
Gracias por su comentario ☺️
Amiga @emmaris te quedó muy bella, me encantó la combinación de colores, gracias por compartir tu creación, Saludos 😊
Que bueno que te gustó amiga ☺️. Gracias