[ESP-ENG] Elegantes Argollas Artesanales / Elegant Handmade Rings
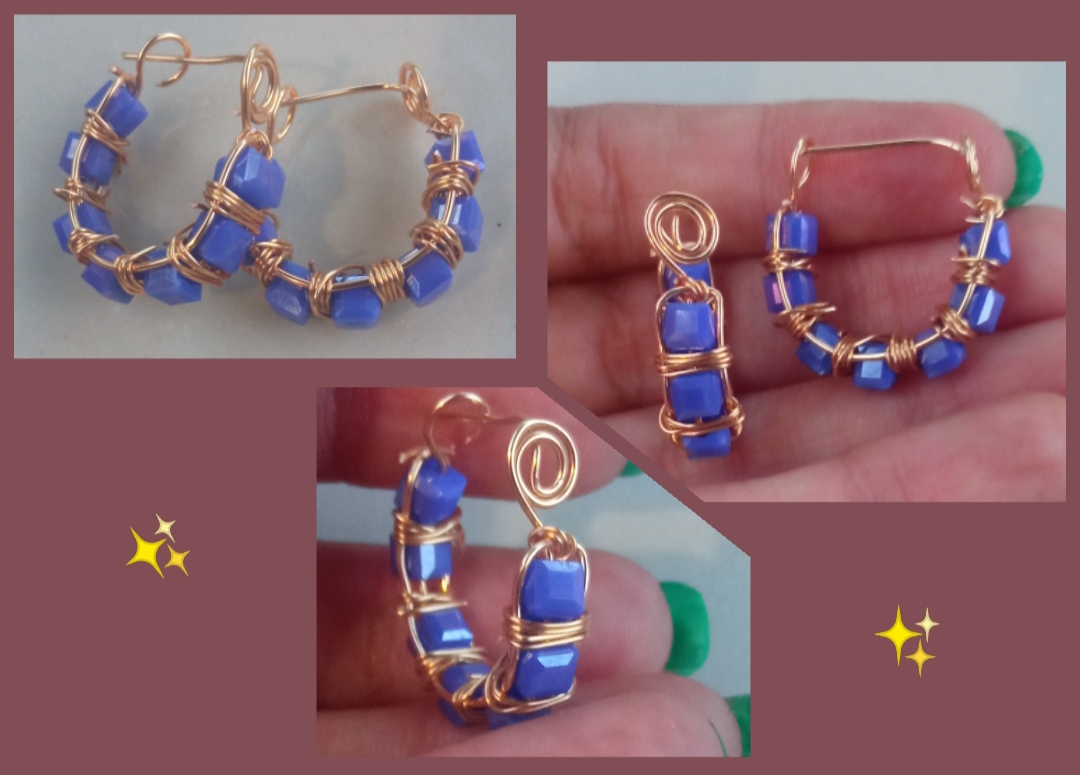
Feliz y bendecida Noche mis queridos amigos, es un gusto y un placer el saludarlos el día de hoy, además de compartirles la elaboración unos hermosos zarcillos tipo argollas elaborados con la técnica del alambrismos. Este es un diseño muy lindos y sencillos de elaborar, para todos ustedes les he traído un muy detallado paso a paso y les invito a que me acompañen en esta elaboración.
Happy and blessed night my dear friends, it is a pleasure and a pleasure to greet you today, in addition to sharing with you the preparation of some beautiful ring-type tendrils made with the technique of wire rope.
This is a very nice and simple design to make, for all of you I have brought you a very detailed step by step and I invite you to join me in this preparation.
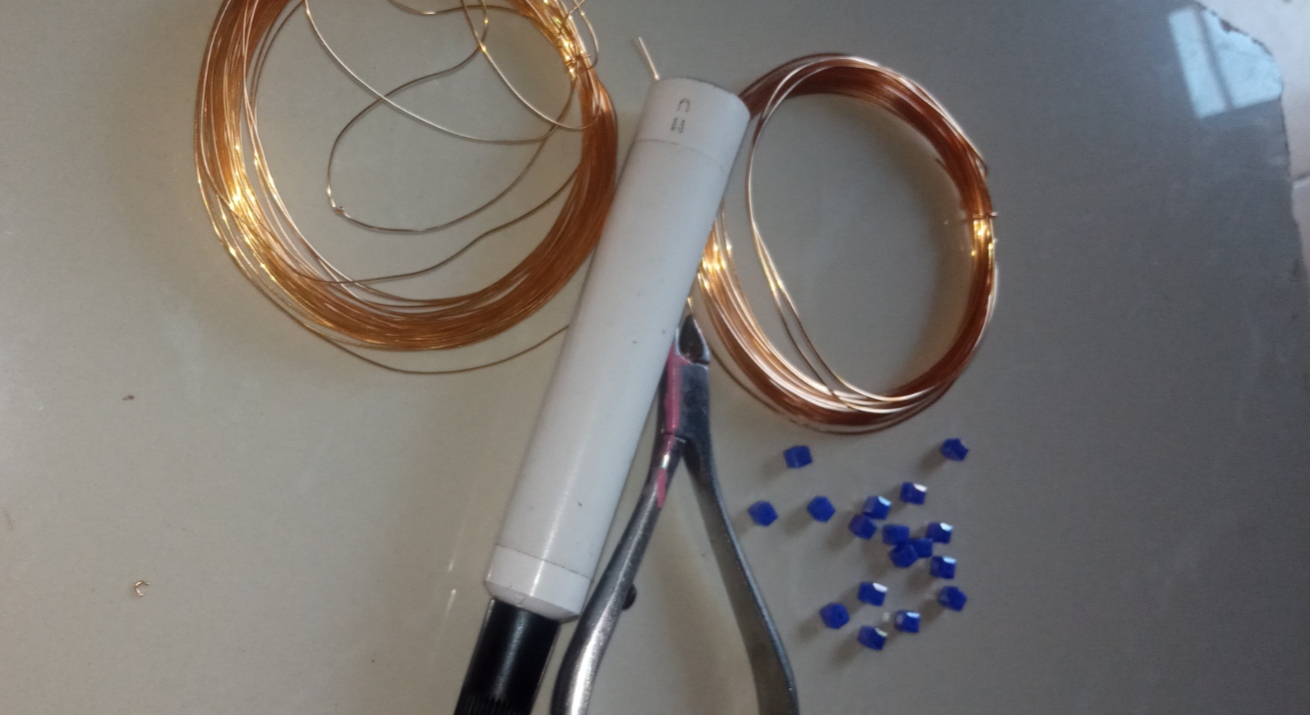
- Alambre de bisutería calibre 20.
- alambre de bisutería calibre 26.
- Cristales cuadrados color azul.
- pinza de bisutería.
- 20 gauge jewelry wire.
- 26 gauge jewelry wire.
- Blue square crystals.
- jewelry clip.
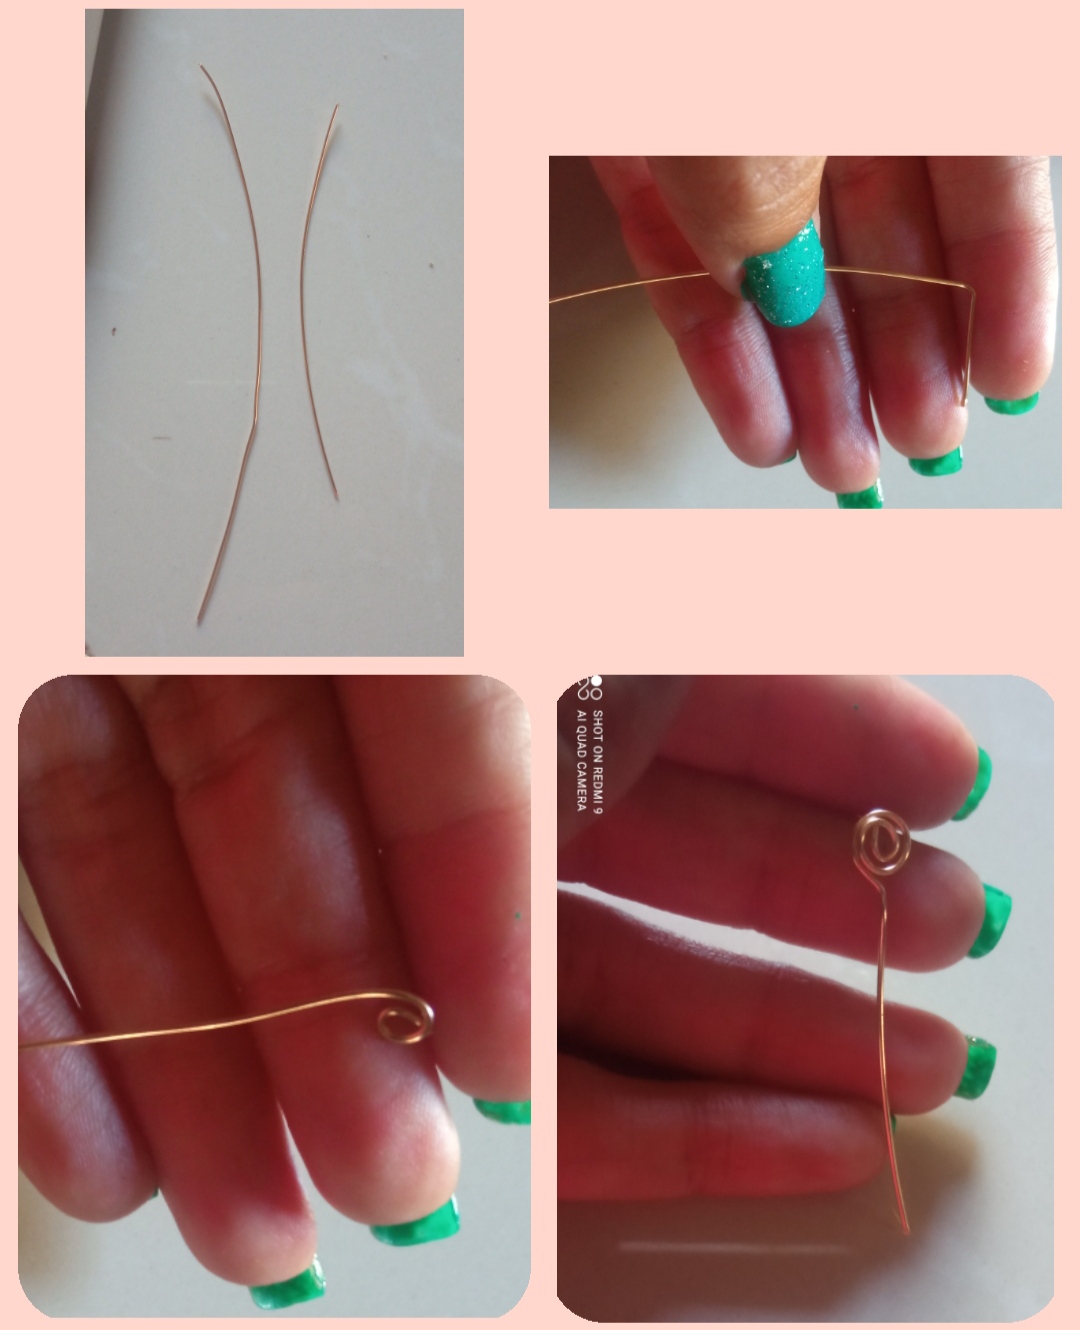
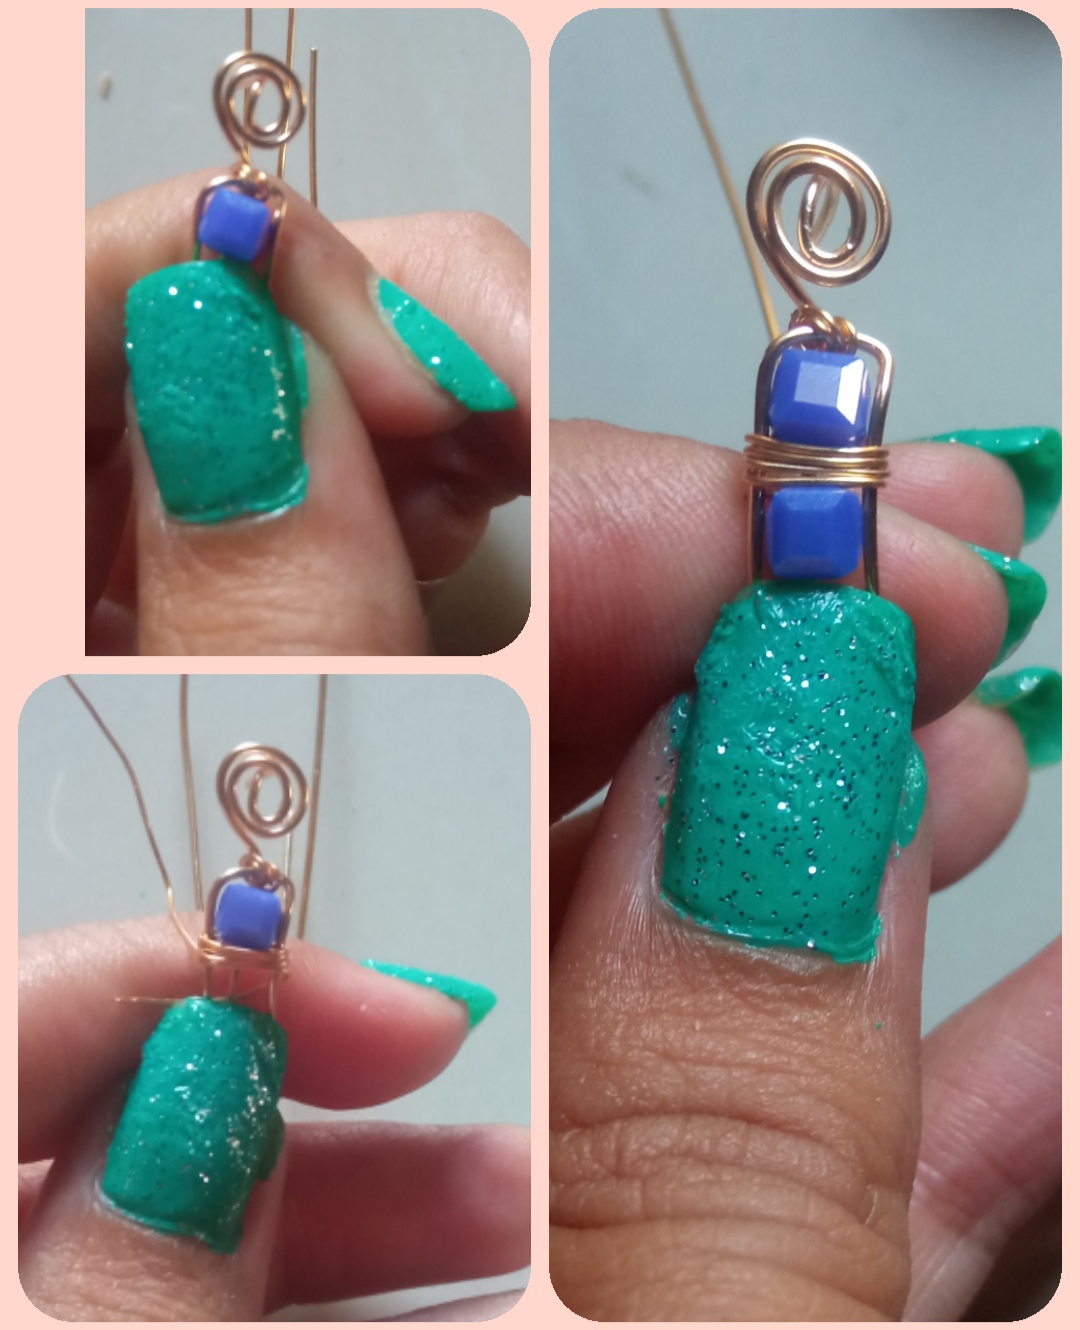
✴️ Paso 1: primeramente tomamos el alambre de bisutería calibre 20 y cortamos 2 pedazos de alambre de aproximadamente 12 cm cada uno. El primero de ellos lo tomaremos y con la pinza doblamos hacia atrás un pedacito de alambre de bisutería de aproximadamente 1,5cm ( este será el clavo de nuestro zarcillo) y en el dobles apoyándonos en la pinza Elaboramos un pequeño espiral, enrrollando el alambre y en la parte de abajo doblamos el alambre y dejamos el alambre estirado hacia abajo.
✴️ Step 1: first we take the 20 gauge jewelry wire and cut 2 pieces of wire of approximately 12 cm each.
We will take the first one and with the tweezers we bend back a little piece of jewelry wire of approximately 1.5cm (this will be the nail of our tendril) and in the double one, leaning on the tweezers, we make a small spiral, winding the wire and at the bottom we bend the wire and leave the wire stretched downwards.
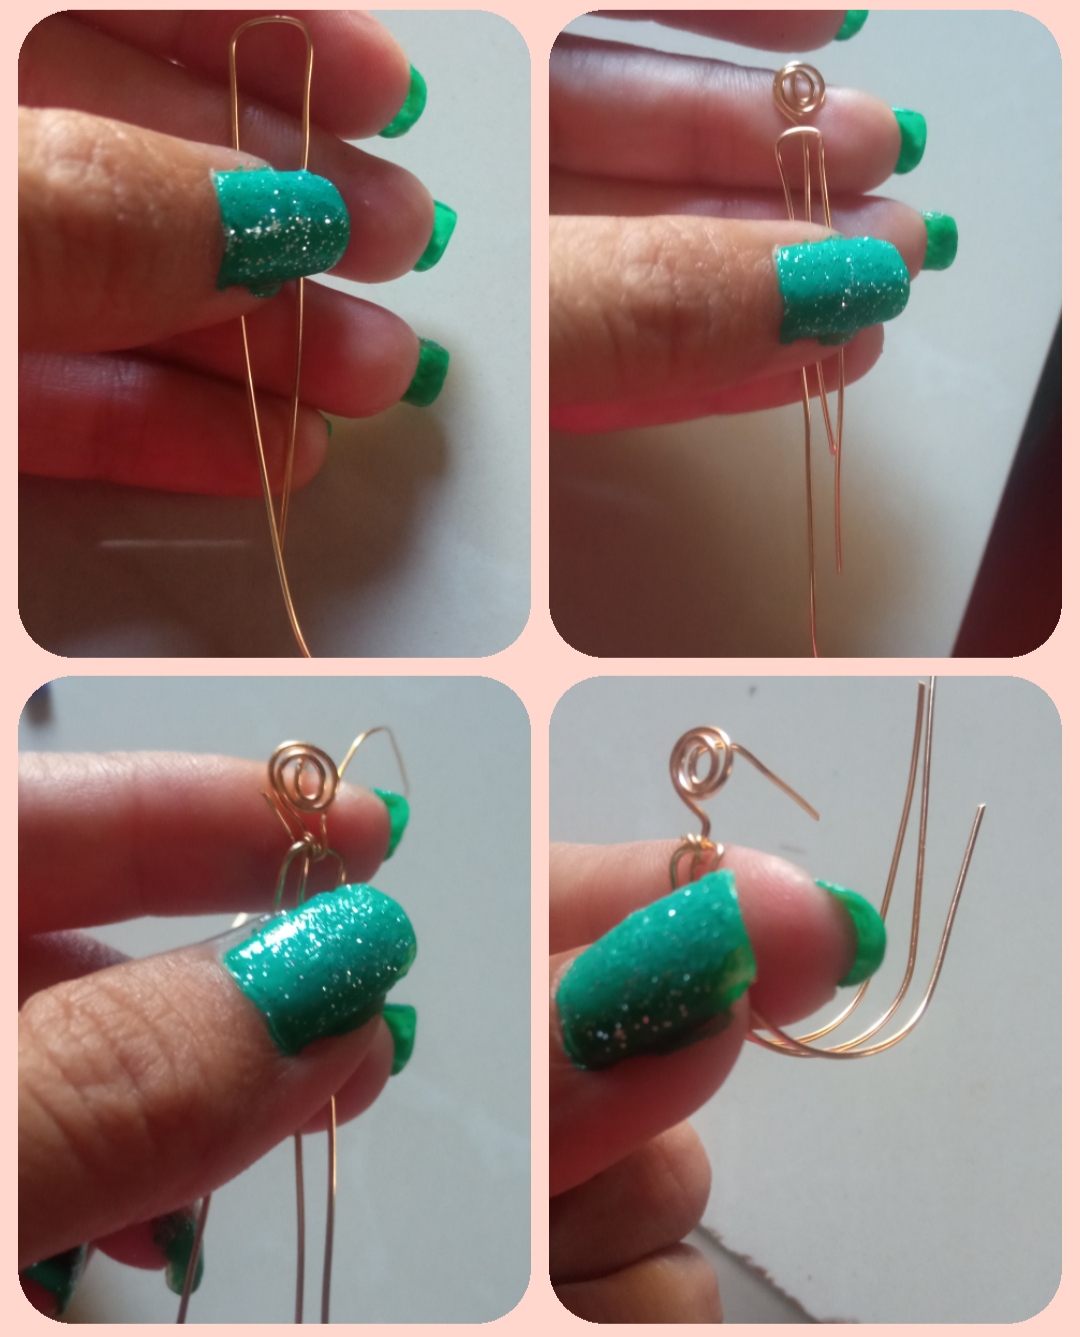
✴️ Step 2: to continue we take the second piece of wire, we fold a piece, we leave a little piece of less than one centimeter in between and we fold the other part, staying as you can see in the images.
We join this to the first piece Prepared previously, for this we place it on top of the first piece under the spiral, leaving the long wire of piece number one in the middle, to join it we take a piece of 26-gauge costume jewelry wire and hold both parts in the Unión.
✴️ Paso 3: Seguidamente con una base circular, en mi caso lo elabore con un marcador, moldeamos y damos forma semicircular a la pieza Elaborada, luego por el alambre del medio Introducimos un cristal cuadrado y lo llevamos a la parte superior y con alambre 26 enrrollamos debajo del cristal realizando varias vueltas y cortamos el exceso, Seguidamente Introducimos otro cristal, lo llevamos hasta arriba y enrrollamos otras vueltas de alambre debajo de cristal.
✴️ Step 3: Next, with a circular base, in my case I elaborate it with a marker, we mold and give a semicircular shape to the Elaborated piece, then through the middle wire we introduce a square glass and we take it to the upper part and We wind under the glass with wire 26 making several turns and cut the excess. Next, we introduce another glass, we take it to the top and we wind other turns of wire under the glass.
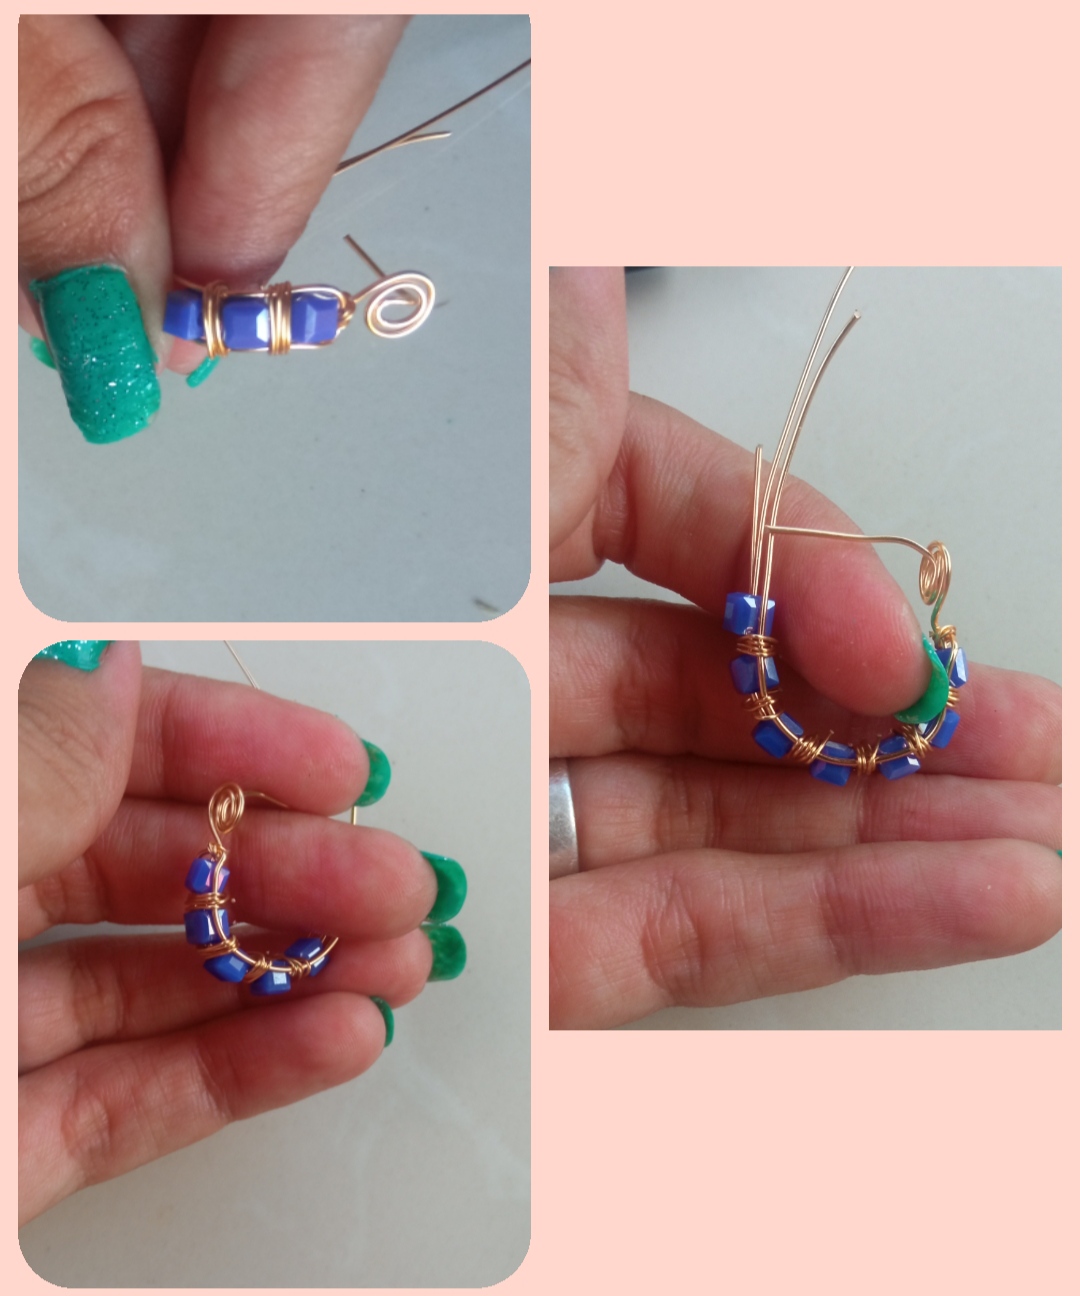
✴️ Paso 4: así seguimos Introduciendo cristales y enrrollando alambre por debajo, en total utilizaremos 7 cristales pues elaboraremos una argolla mediana, de usted desear una más grande puede aumentar el uso de cristales Al final del séptimo cristales doblamos hacia el lado opuesto y cortamos las puntas.
✴️ Step 4: this is how we continue introducing crystals and winding wire underneath, in total we will use 7 crystals as we will make a medium ring, if you want a larger one you can increase the use of crystals
At the end of the seventh crystal we fold to the opposite side and cut the tips.
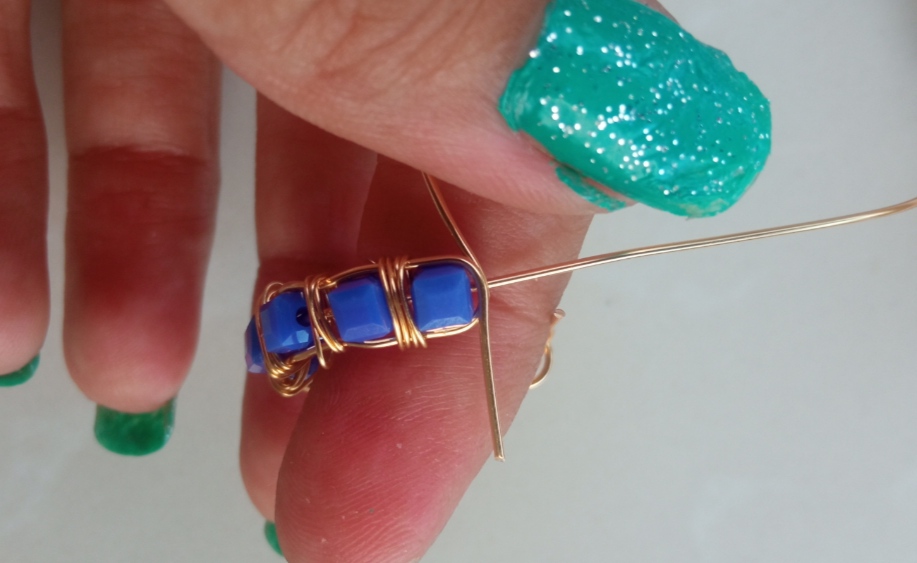
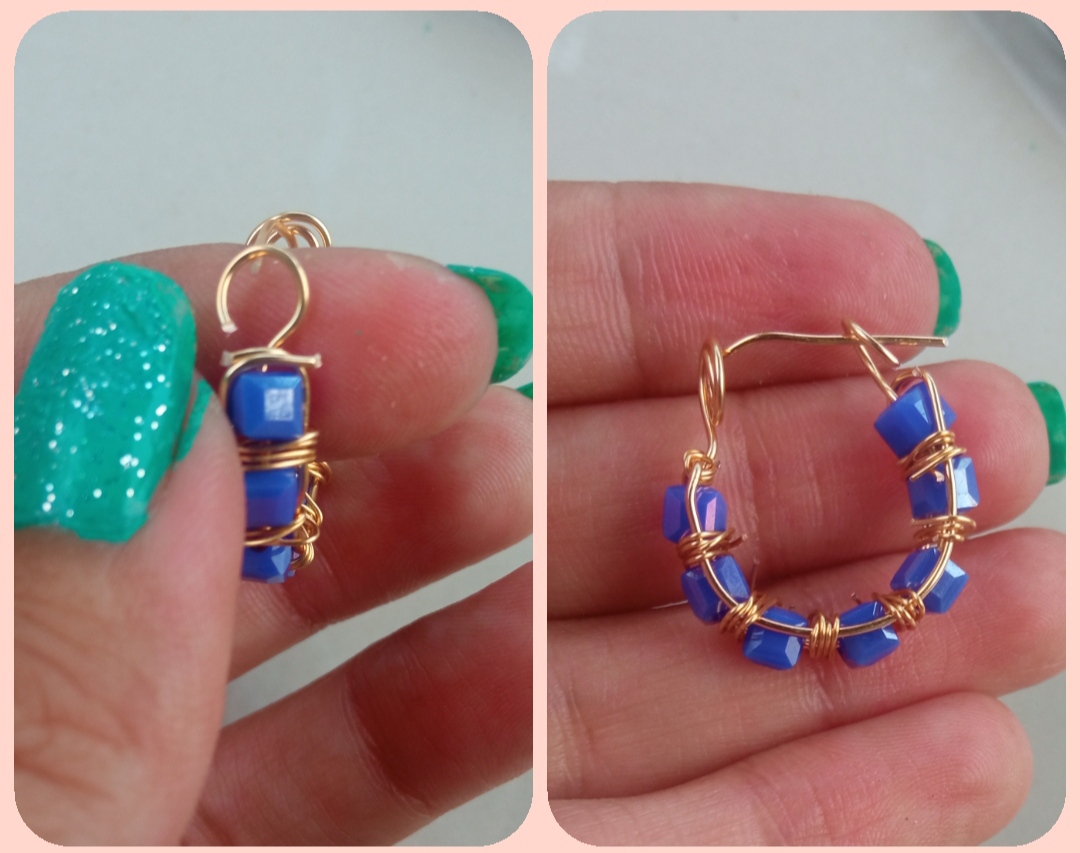
✴️ Paso 5: por último nos quedará un pedazo del alambre del centro, con este elaboraremos una pequeña forma circular no cerrada dónde engancharemos el clavito de el zarcillo a la hora de usarlo.
✴️ Step 5: finally we will have a piece of the wire in the center, with this we will create a small circular shape where we will hook the nail of the tendril when using it.
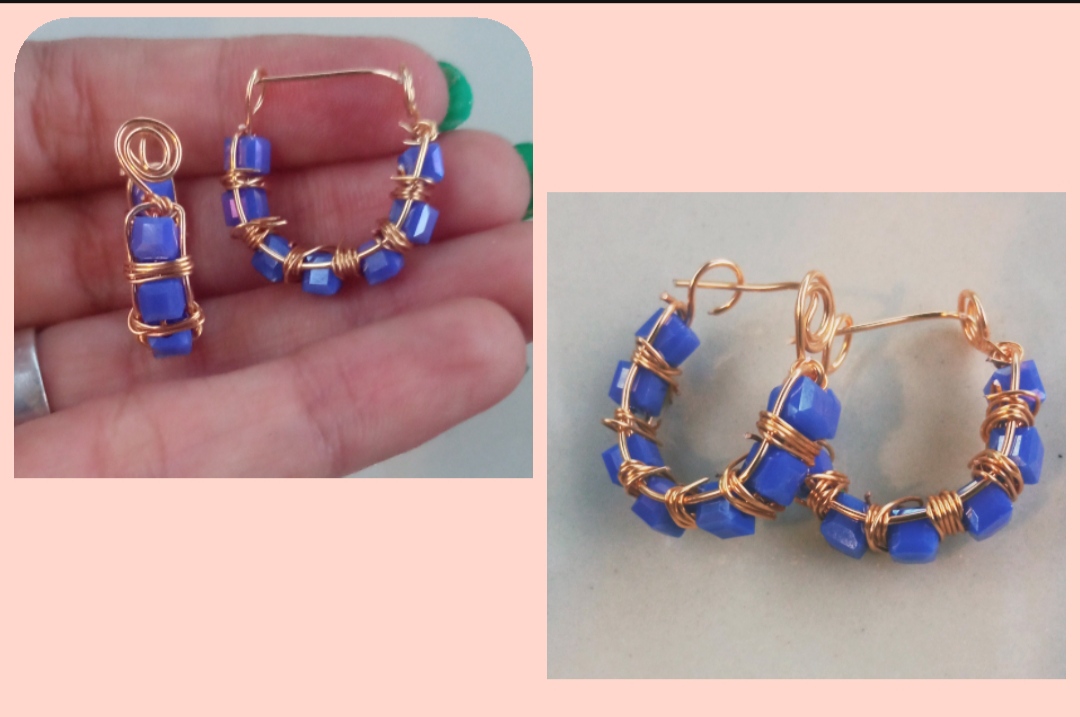
Todas las Fotos son de mi autoría y fueron tomadas con mi Celular Redmi 9 >All Photos are my authorship and were taken with my Redmi 9 CellphoneAnd what did you think of this design my dear friends? I hope you liked them as much as I liked them, I say goodbye for this opportunity, grateful for your visit.
Greetings and blessings.
Hermoso este jueguito de aretes, me encantó el color y el diseño. Cada día me gusta más lo que nos muestras. Gracias por compartir @emmaris ✨
!DIY
Gracias amiga me alegra este comentario de usted que es tan creativa y talentosa ☺️
El trabajo esta hermoso corazón, y hay que darle merito a quien lo merece, en este caso me encantan tus diseños con alambrismo. Siga con ese excelente y bello trabajo... 💕
Excellent work on wire mesh, a nice design with a good end result. Thank you for sharing your step by step in our community.
Thanks, I'm glad you like it.
You can query your personal balance by
!DIYSTATSThis is real beautiful @emmaris. You created something amazing from mesh wire.
!diy
You can query your personal balance by
!DIYSTATS