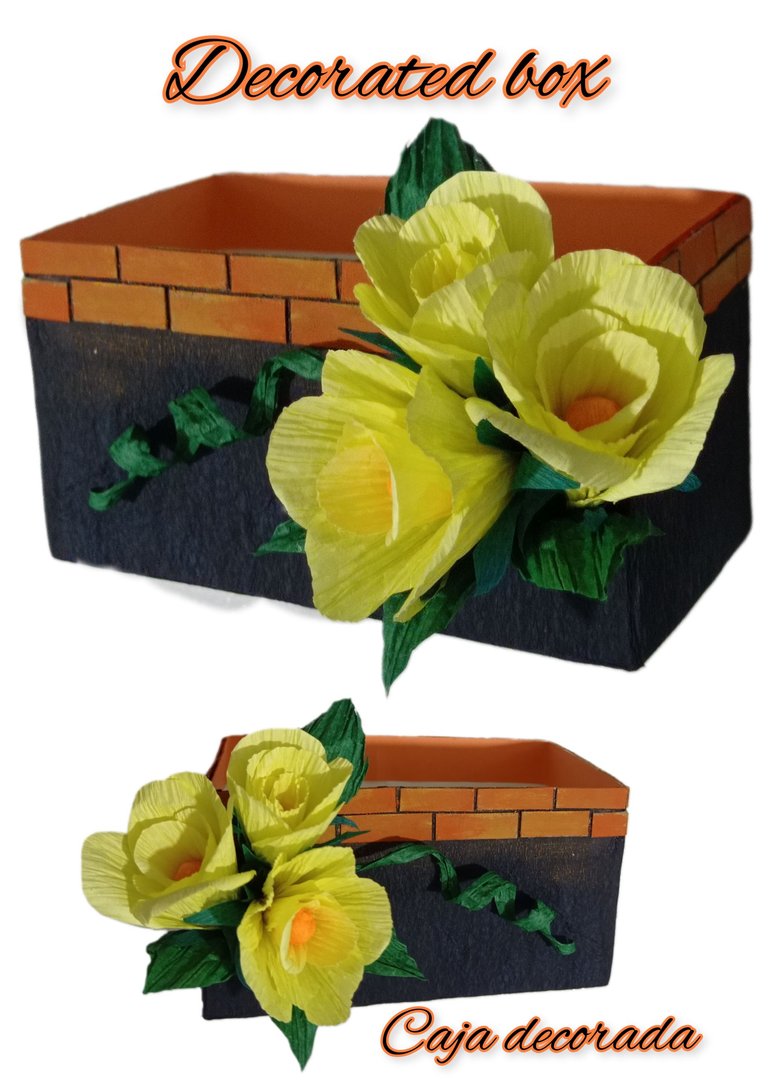
Hagamos flores de papel, recicla y diseña una Linda Caja multiusos. ESP/ ENGLet's make paper flowers, recycle and design a nice multipurpose box.
Buenas noches querida comunidad.
Bienvenidos sean todos a mi Blog.
Así que te invito a que me acompañes y hagas conmigo.
Para este proyecto vas a necesitar:
Papel crepé de colores
Cinta de papel
Caja de cartón
Cartón de piñata y cartulina
Silicón, pinturas y pinceles
Lápiz, tijera y regla
Cola blanca
Ahora manos a la obra, comencemos:
Paso 1:
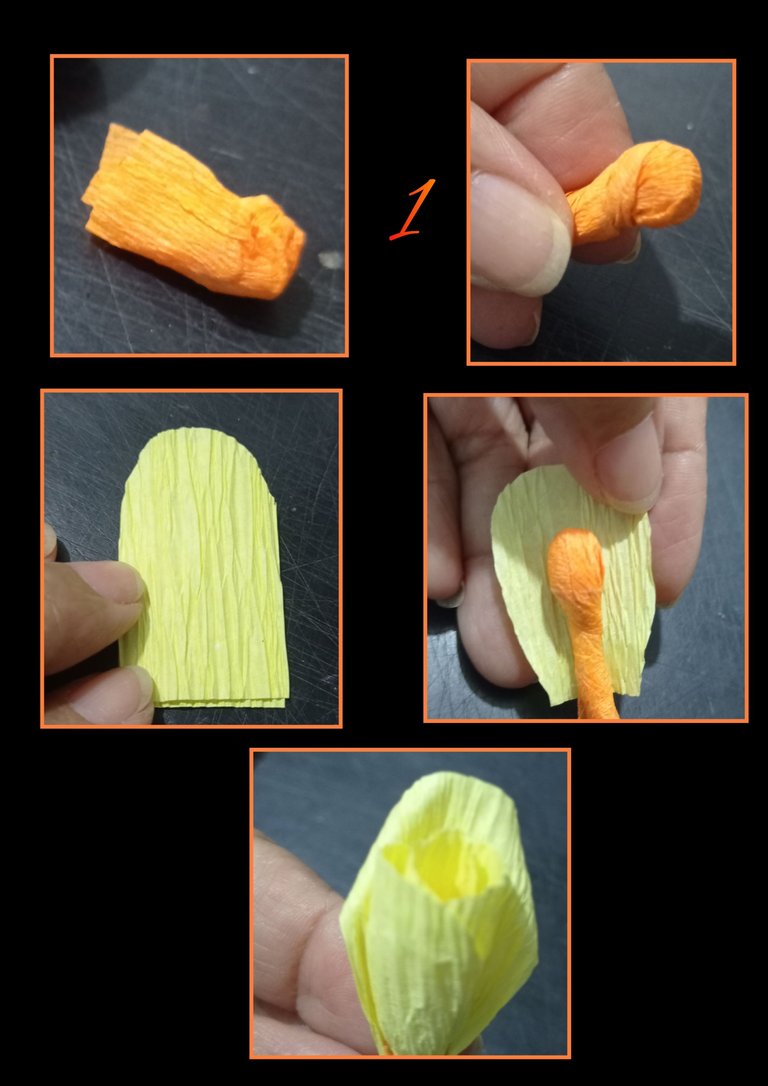
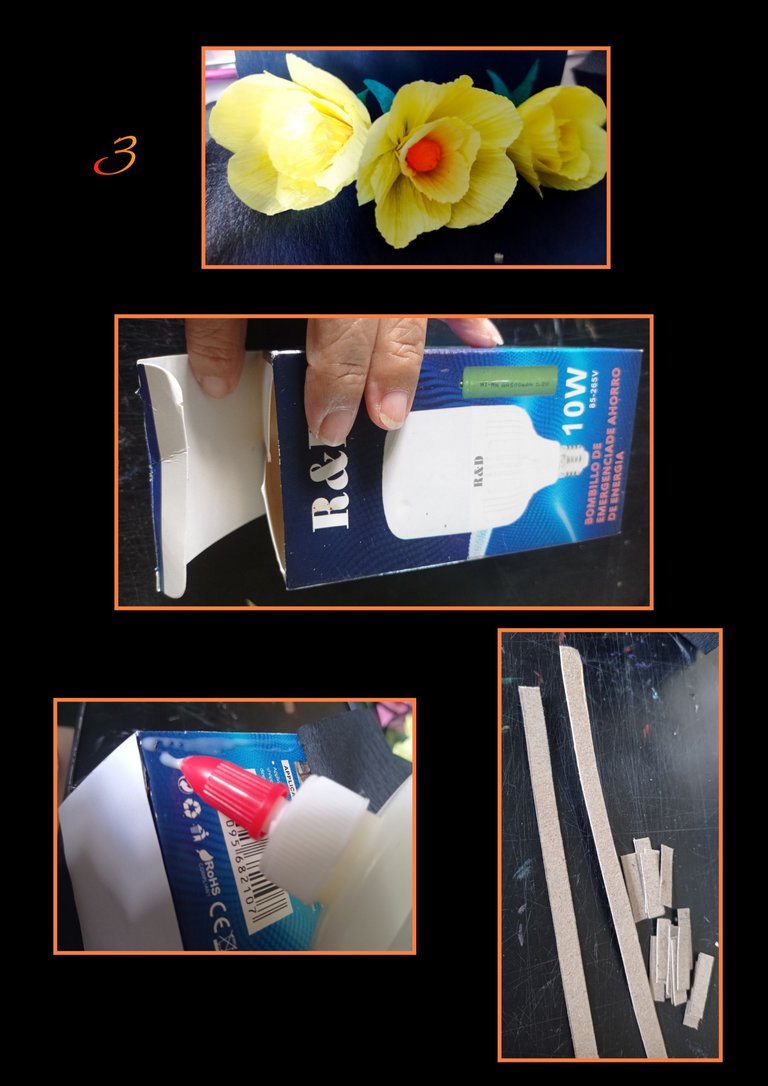
- Recorta un pedacito de papel crepé naranja y enrolla y redondea la punta y aplica silicón para hacer el pistilo como muestro en la foto.
- Luego recorta 3 pétalos de 3cms de altura, aplica silicón al pistilo y pega a uno de los pétalos, luego pega los otros justo a la mitad de cada pétalo para armar el capullo.
Paso 2:
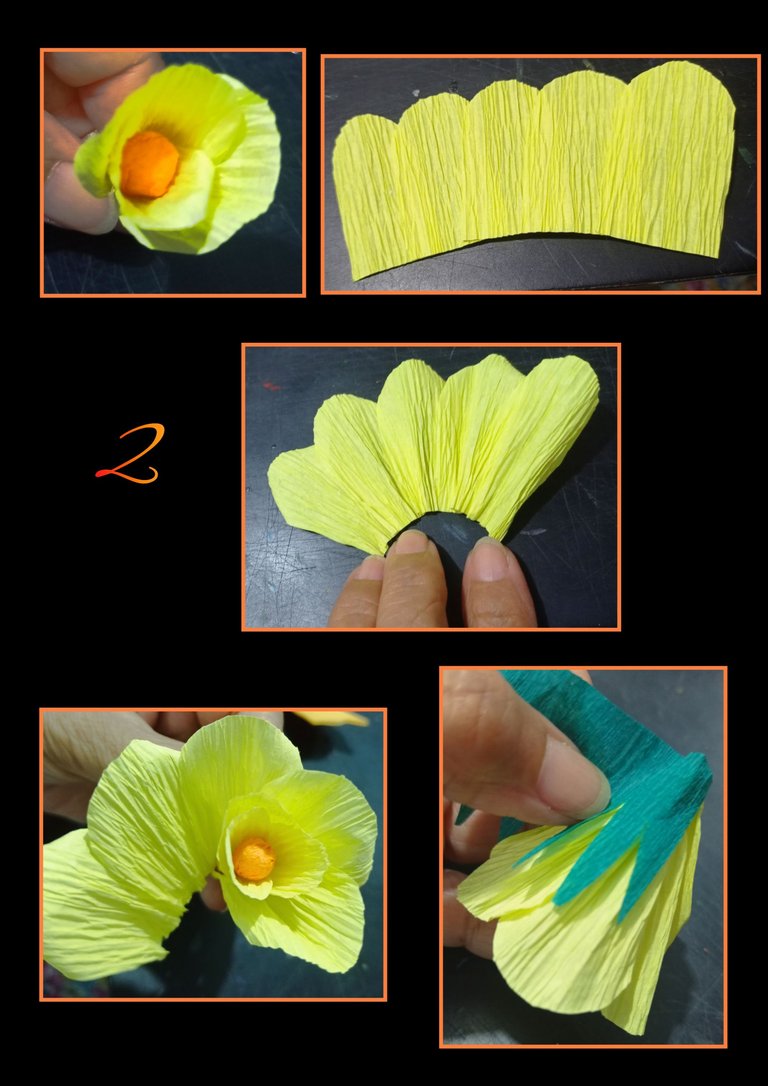
- Después que tengas armado el capullo, recorta 5 petalos de 3,5 o 4cms de altura y pega montando uno sobre otro, justo a la mitad de cada uno y arrucha o haz pliegues en la parte inferior.
- Luego aplica silicón y empieza a pegar al capullo hasta pegar los 5 pétalos.
- Luego recorta una tira de papel crepé verde y recorta en forma de picos para hacer el sépalo y pega.
Paso 3:
- Pega los sépalos a cada flor y deja secar.
- Ahora recorta la caja y quita uno de los laterales más grandes.
- Luego aplica cola blanca y forra toda la caja con papel crepé negro.
- Aparte, marca y recorta tiras de cartón o cartulina y divide en cuadritos de 2cms c/u.
Paso 4:
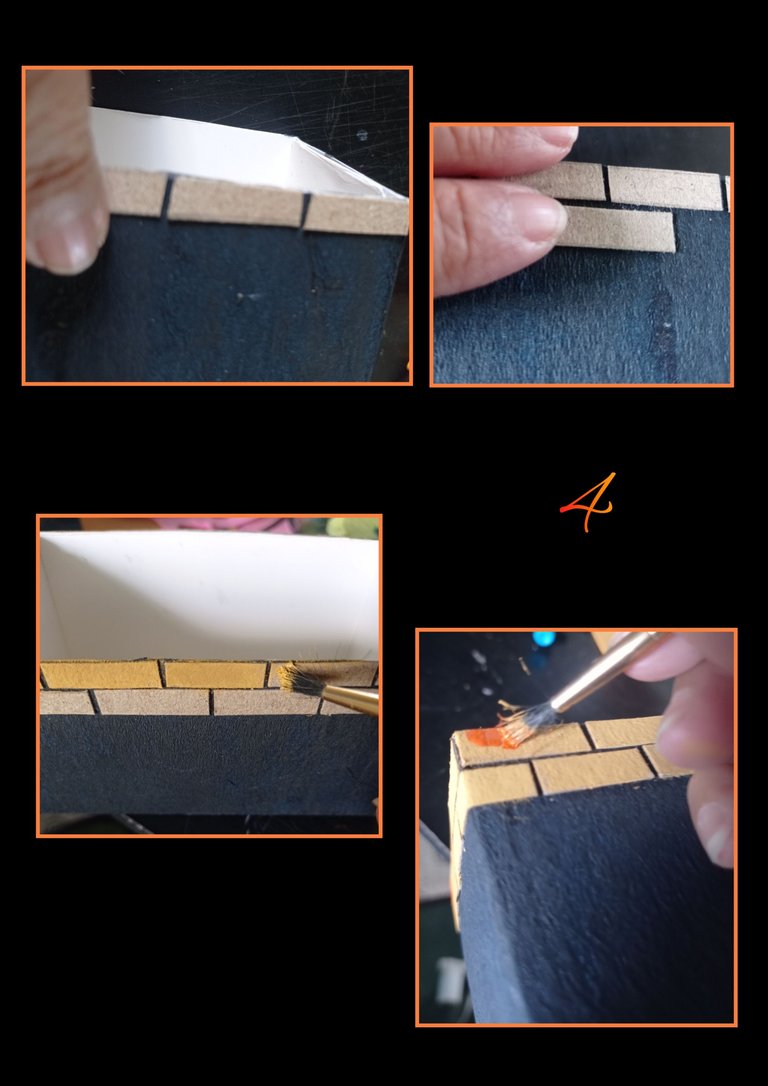
- Aplica cola blanca a cada trocito de cartón y pega por todo el contorno superior, dejando 1milímetro de separación.
- Luego pega otra línea de trocitos pero pegando justo en el medio de los de arriba, así como te muestro en la foto.
- Ahora aplica una capa de pintura color ocre o amarilla sobre los trocitos de cartón y luego aplica una capa con pintura naranja y deja secar.
Paso 5:
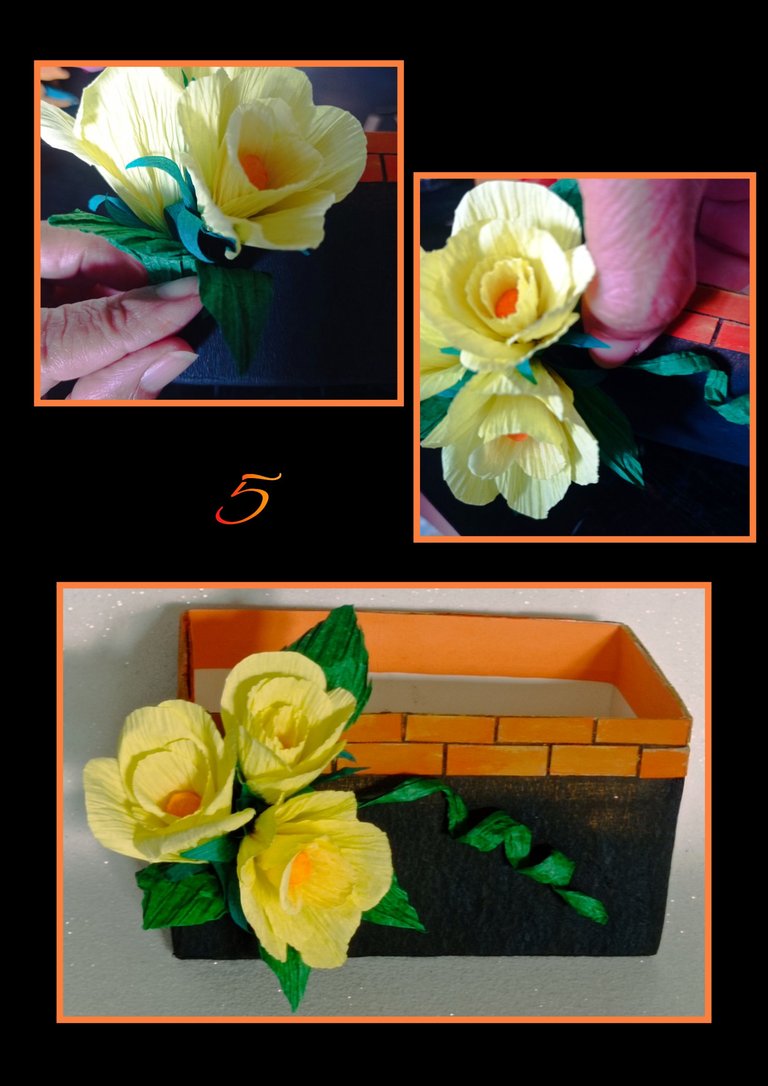
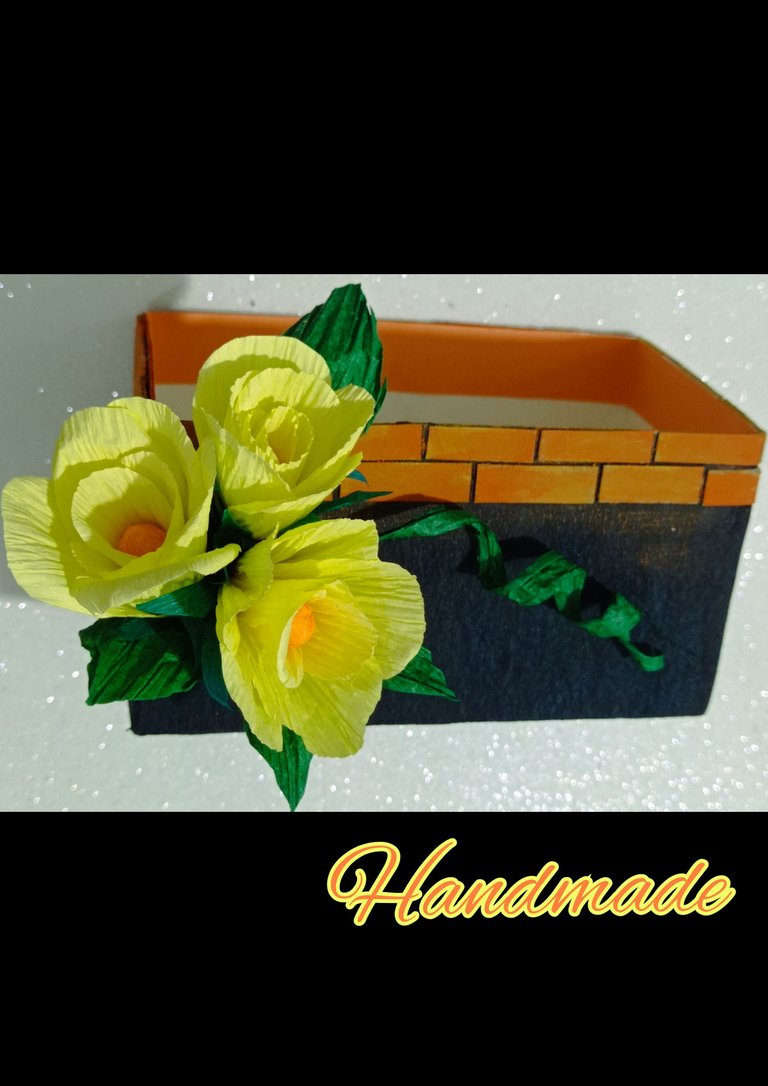
- Ahora solo queda pegar las flores, puedes ubicarlas en el lugar
que prefieras, yo las pegué en una esquina y decora con hojas de cinta de papel verde y por último pega una tira de cartulina en todo el contorno de la caja por el lado interno.
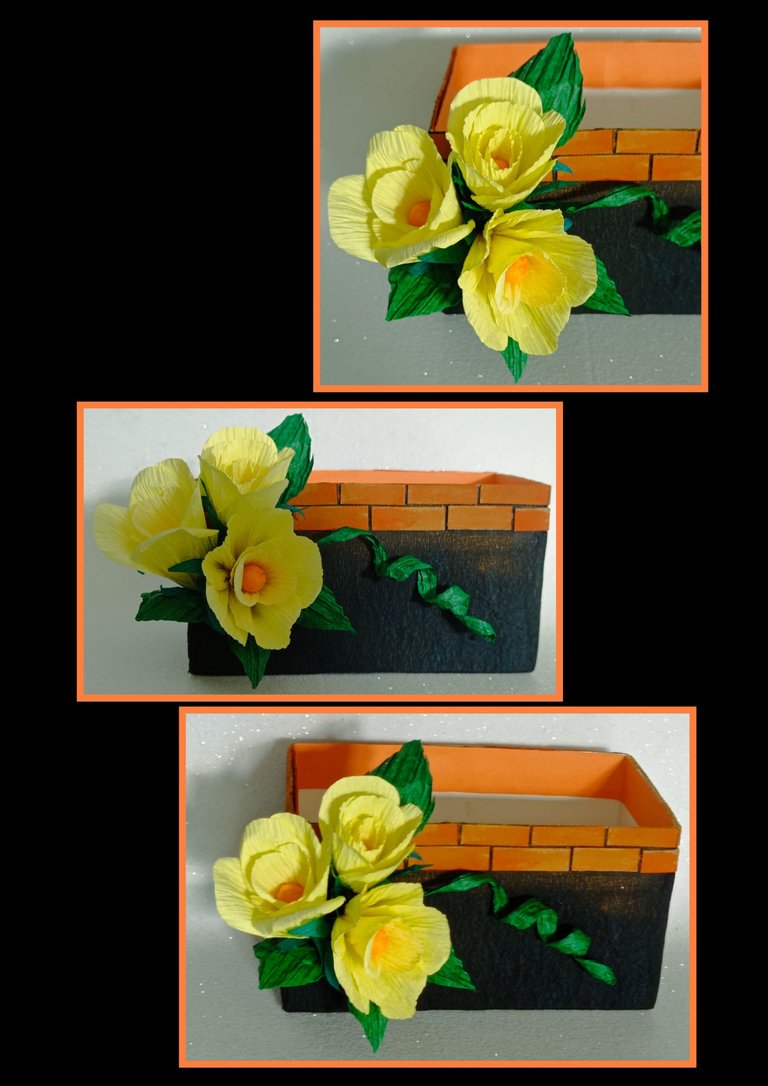
y este será el resultado final.
Las fotos editadas con GridArt
Teléfono Redmi Note 9
Ahora me despido muy feliz de haber compartido con ustedes este paso a paso y deseando les sea de provecho y sirva de apoyo por si te animas a realizar esta Linda caja decorativa y a la que le puedes dar cualquier uso.
Recuerda Recicla y transforma y ayuda a nuestro planeta.
Saludos y hasta mi próxima publicación.
English
Good evening dear community.
Welcome to my Blog.
So I invite you to join me and make with me.
For this project you will need:
Colorful crepe paper
Paper ribbon
Cardboard box
Piñata cardboard and cardboard
Silicone, paints and brushes
Pencil, scissors and ruler
White glue
Now let's get started:
Step 1:
- Cut out a small piece of orange crepe paper and roll and round the tip and apply silicone to make the pistil as shown in the photo.
- Then cut out 3 petals 3cms high, apply silicone to the pistil and glue to one of the petals, then glue the others right in the middle of each petal to make the bud.
Step 2:
- After you have assembled the cocoon, cut 5 petals of 3.5 or 4cms high and glue one on top of the other, right in the middle of each one and crease or make folds at the bottom.
- Then apply silicone and start gluing to the bud until all 5 petals are glued.
- Then cut out a strip of green crepe paper and cut it in the shape of spikes to make the sepal and glue.
Step 3:
- Glue the sepals to each flower and let dry.
- Now cut out the box and remove one of the larger sides.
- Then apply white glue and line the entire box with black crepe paper.
- Separately, mark and cut strips of cardboard or cardboard and divide into squares of 2 cm each.
Step 4:
- Apply white glue to each piece of cardboard and glue all around the top, leaving 1milimeter of separation.
- Then glue another line of pieces but gluing right in the middle of the top ones, as shown in the photo.
- Now apply a coat of ochre or yellow paint on the cardboard pieces and then apply a coat of orange paint and let it dry.
Step 5:
- Now you only have to glue the flowers, you can place them in the place you prefer.
I glued them in a corner and decorate with leaves of green paper tape and finally glue a strip of cardboard around the contour of the box on the inner side.
and this will be the final result.
Photos edited with GridArt
Redmi Note 9 phone
Now I say goodbye very happy to have shared with you this step by step and hoping it will be of benefit and support if you are encouraged to make this nice decorative box and to which you can give any use.
Remember Recycle and transform and help our planet.
Greetings and until my next publication.
Un trabajo precioso... Como siempre, nos presentas un proceso creativo detallado. Gracias por compartir
!PIZZA 🍕
La caja te quedó preciosa, con un nivel de detalle perfecto. Gracias por compartir tu grandioso trabajo, como el que acostumbras a regalarnos siempre.
!discovery 35
This post was shared and voted inside the discord by the curators team of discovery-it
Join our Community and follow our Curation Trail
Discovery-it is also a Witness, vote for us here
Delegate to us for passive income. Check our 80% fee-back Program
As always, you've left us with a magnificent and beautiful piece of work. The box is spectacular and truly beautiful, with a perfect level of detail.
Que cosita mas bonita, que buen reciclaje hiciste y con ese detalle de las flores amarillas quedo muy lindo 😍
Este sin dudas es un hermoso arreglo, te ha quedado hermoso. Te felicito por tu trabajo.
¡Felicidades! Esta publicación obtuvo upvote y fue compartido por @la-colmena, un proyecto de Curación Manual para la comunidad hispana de Hive que cuenta con el respaldo de @curie.
Si te gusta el trabajo que hacemos, te invitamos a darle tu voto a este comentario y a votar como testigo por La Colmena.
Si quieres saber más sobre nuestro proyecto, te invitamos a acompañarnos en nuestro servidor de Discord.
Me encanta este trabajo. Hermoso !!!!
También me gusta hacer flores de papel pero nunca había probado hacerlas de esta manera, se ven hermosas. Gracias por compartir tu método.
Preciosas las flores y el producto final! Se ve elegante y bonito el colorido con el amarillo de las flores. Excelente el paso a paso, con bastante detalle. Me gustó mucho. Gracias por compartir tu arte! 🤗❤️
$PIZZA slices delivered:
@chacald.dcymt(3/5) tipped @elmundodebetty
your work is amazing👍 the flowers are very beautiful, they look like real flowers that have just bloomed