Dulcero Calavera ,hazlo conmigo para los días de Halloween. Skull candy box, make it with me for Halloween days.
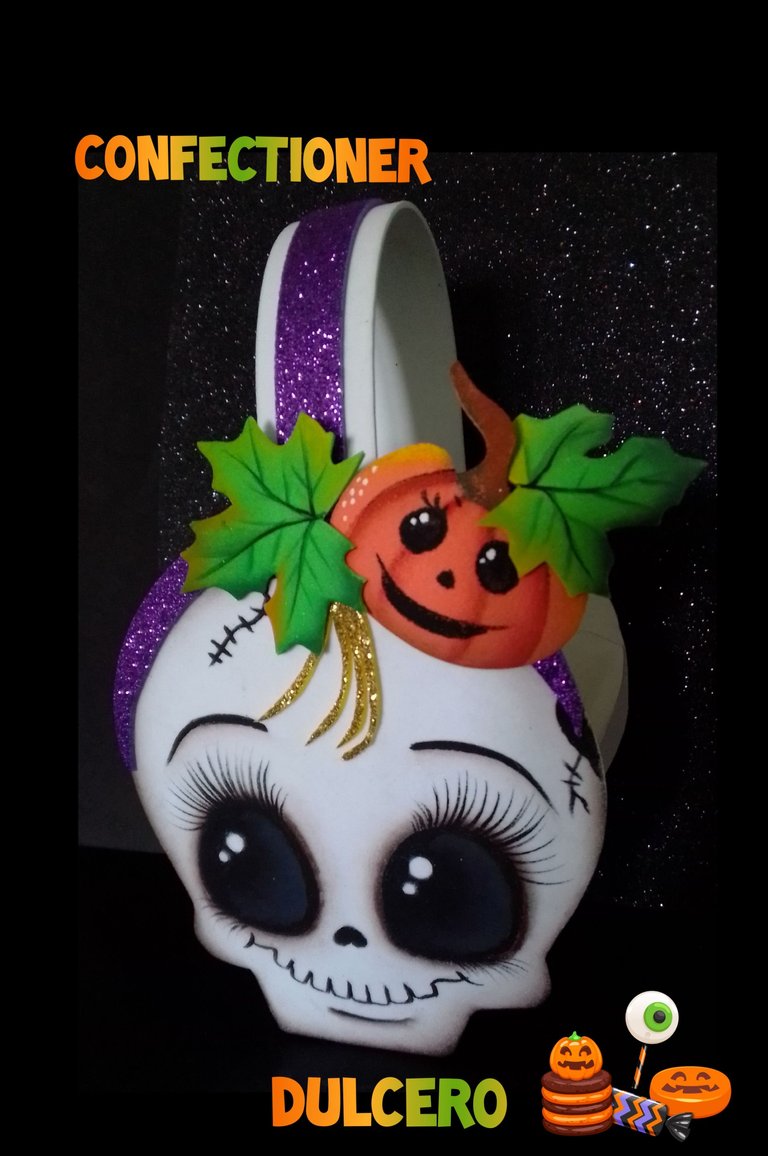
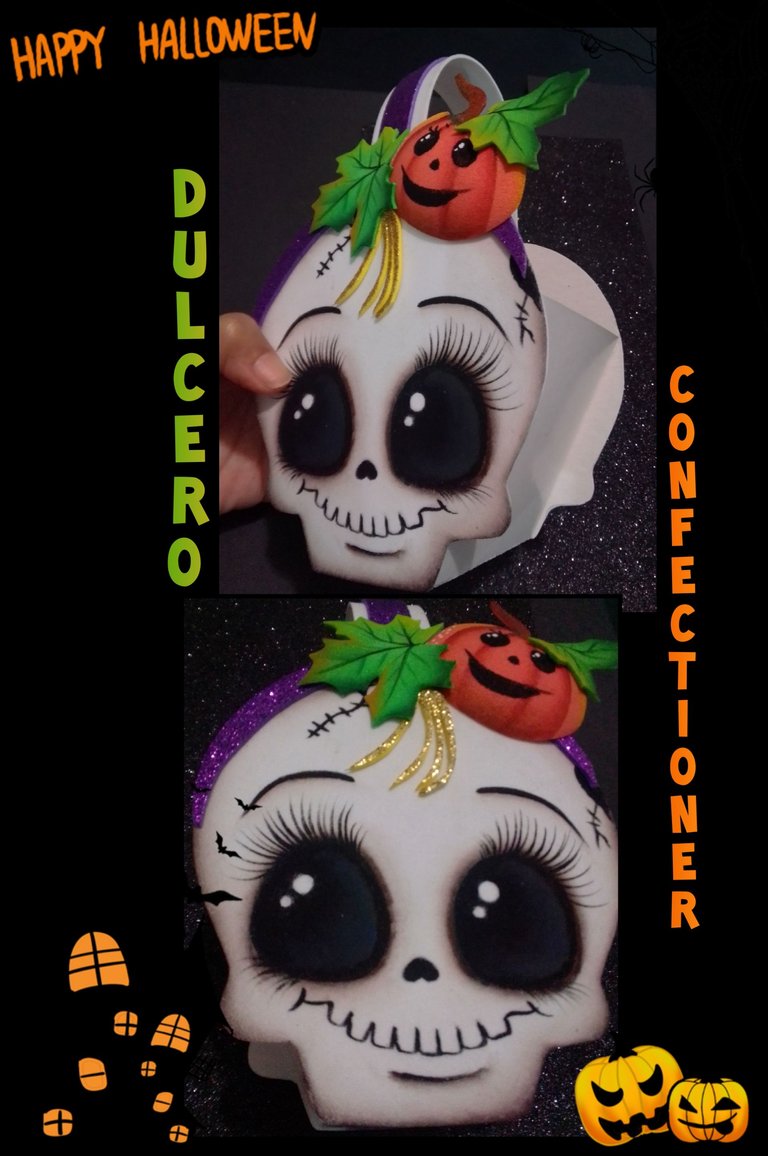
Buenas noches queridos amigos que me visitan. Un placer estar nuevamente compartiendo con ustedes.
Para este paso a paso vas a necesitar:
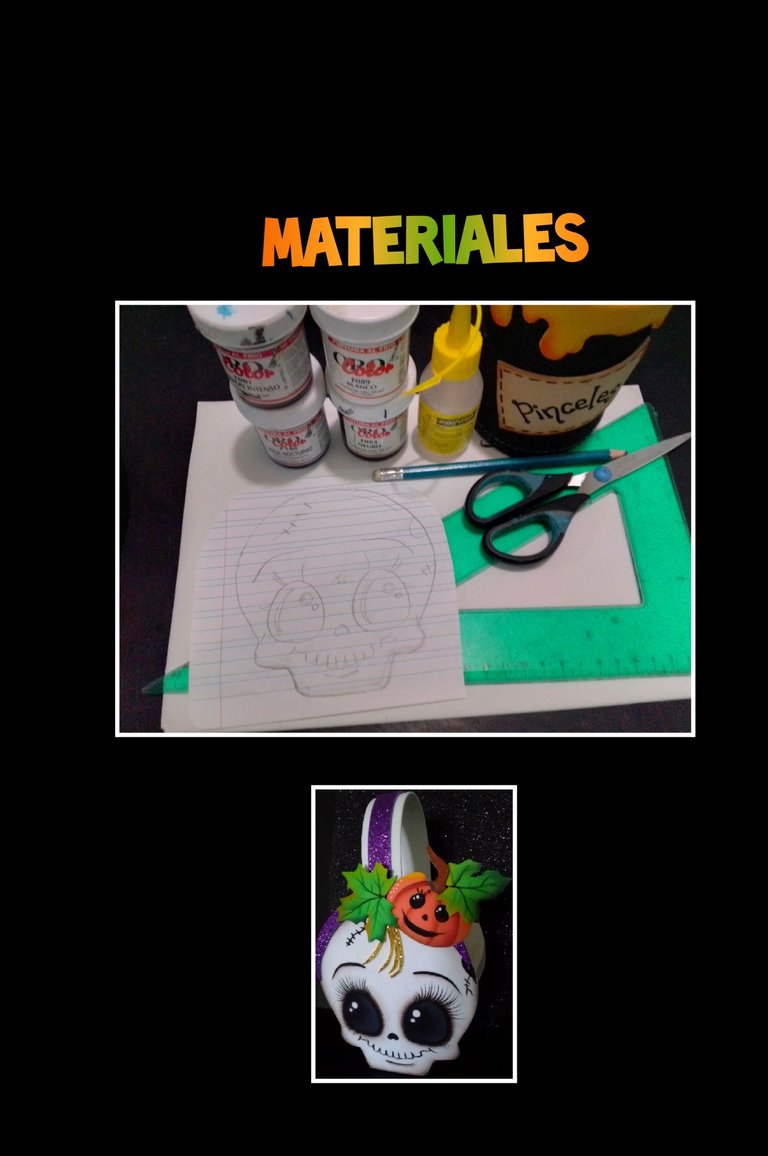

| Foami mate y escarchado | Cartulina blanca |
|---|---|
| Regla y lápiz | Tijera |
| Pinturas y pinceles | Silicón |
| Dibujo |
Comencemos:
Paso 1:
Transferir el dibujo:
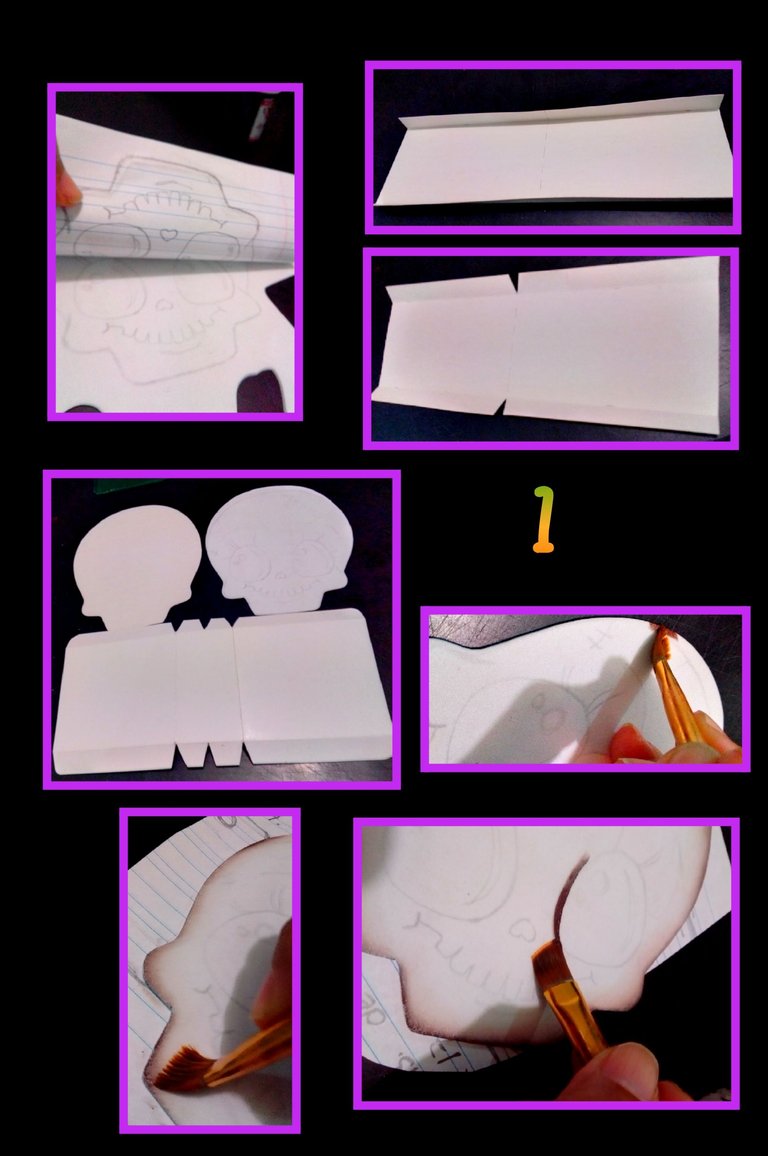
Remarca el dibujo con lápiz de mina blanda (que marque oscuro) o 3B, 4B.
Coloca el dibujo sobre el foami blanco y frota por encima del papel con las asas o anillos de la tijera, luego levanta un extremo del papel sin soltar el otro extremo para mirar si se marcó todo el dibujo y recorta.
Aparte mide el contorno de la calavera sin meter la parte de arriba y marca un rectángulo con la medida tomada y pon el ancho que quieras y aumenta 1,5 cms de pestaña a cada lado, remarca con la tijera y dobla las pestaña.
Luego mide exactamente a la mitad y recorta un triángulo y a las calaveras también marca el centro en la parte de abajo.
Ahora mide el ancho de la barbilla y marca en el rectángulo esa medida partiendo del centro 2,5cm a cada lado y recorta (ver foto del rectángulo).
Humedece el pincel en agua, luego pasa por un pañito para quitar el exceso, moja la punta con pintura marrón y comienza a pasar por todo el borde de la calavera y después por los ojos.
Paso 2:
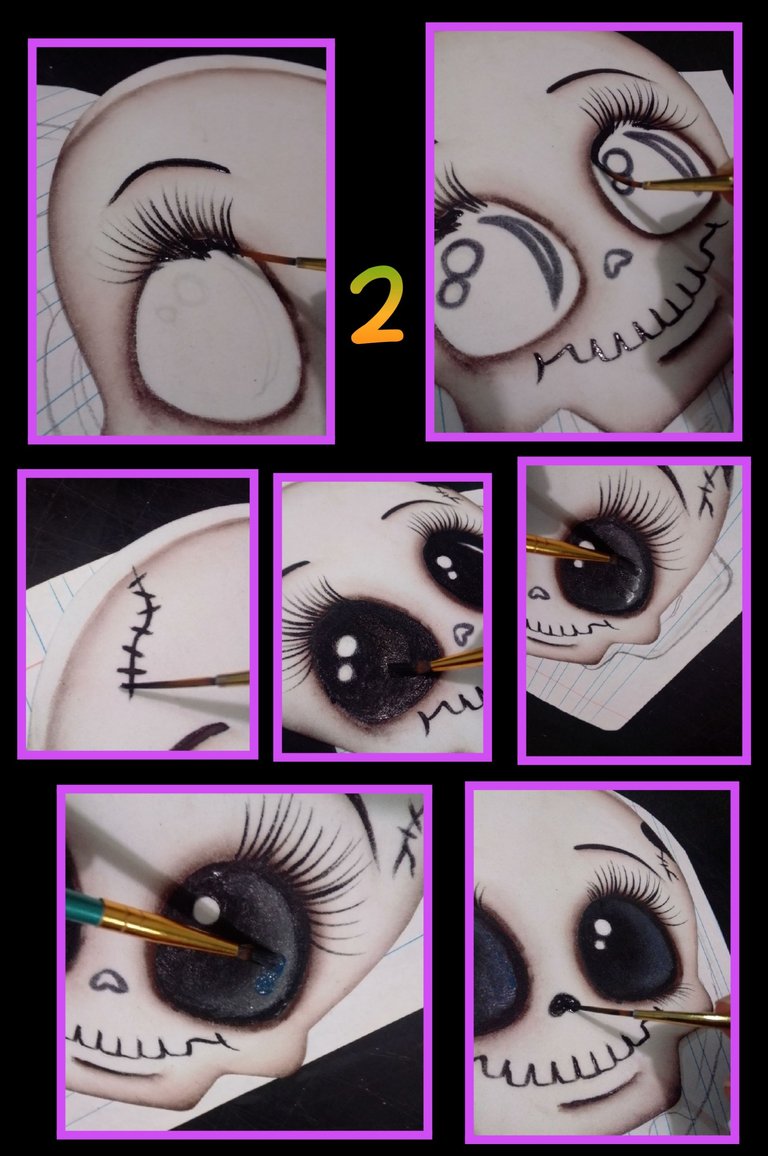
- Ahora con un pincel delineador o marcador punta fina pinta las pestañas comenzando desde abajo hacia arriba en forma curva como si fuera una coma.
- Luego marca con lápiz o marcador los puntos de luz y rellena con pintura negra, pinta la boca y líneas o marcas de la cara.
- Ahora con la pintura un poco húmeda pon un poco de pintura blanca y trata de unir con la base y difumina en un lado de cada ojo, luego difumina con un poco de azul y termina pintando la nariz y deja secar.
Paso 3:
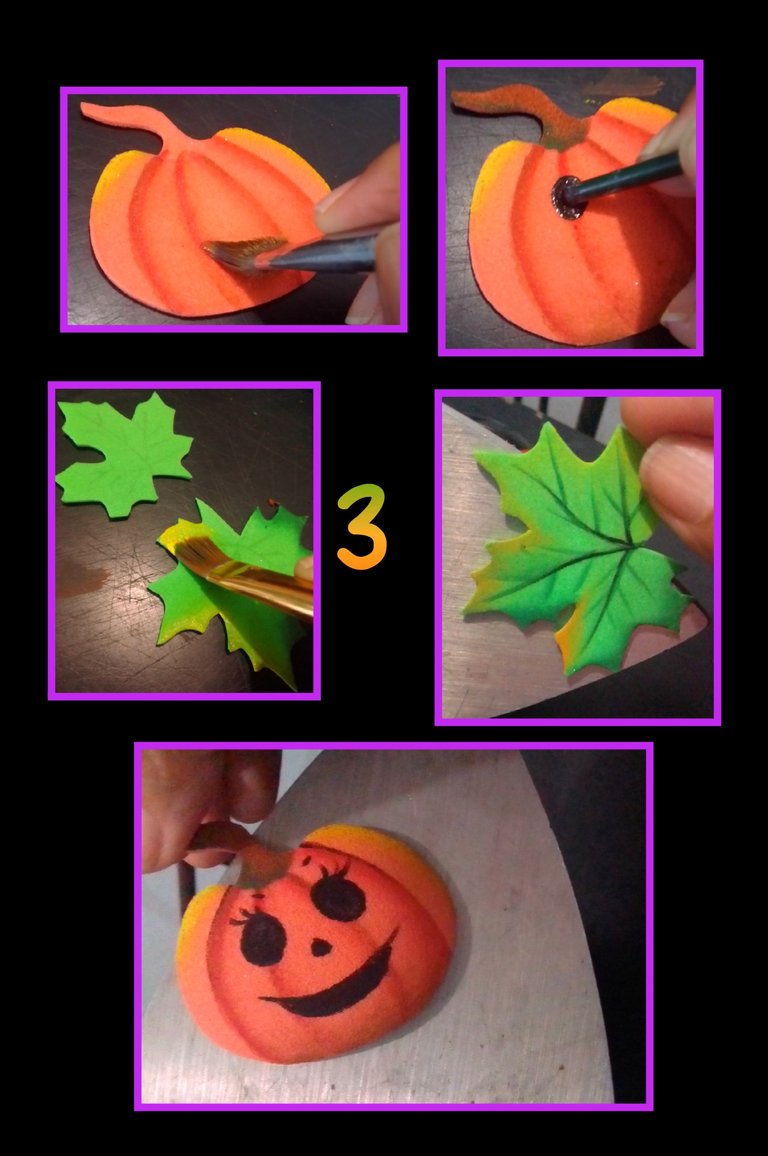
- Ahora recorta y pinta los adornos para la calavera (hojas, calabaza y cintillo.
- Pinta la calabaza y hojas con técnica anterior y deja secar, calienta la plancha y coloca las piezas para que tomen forma y queden al relieve..
Paso 4:
Armar calavera
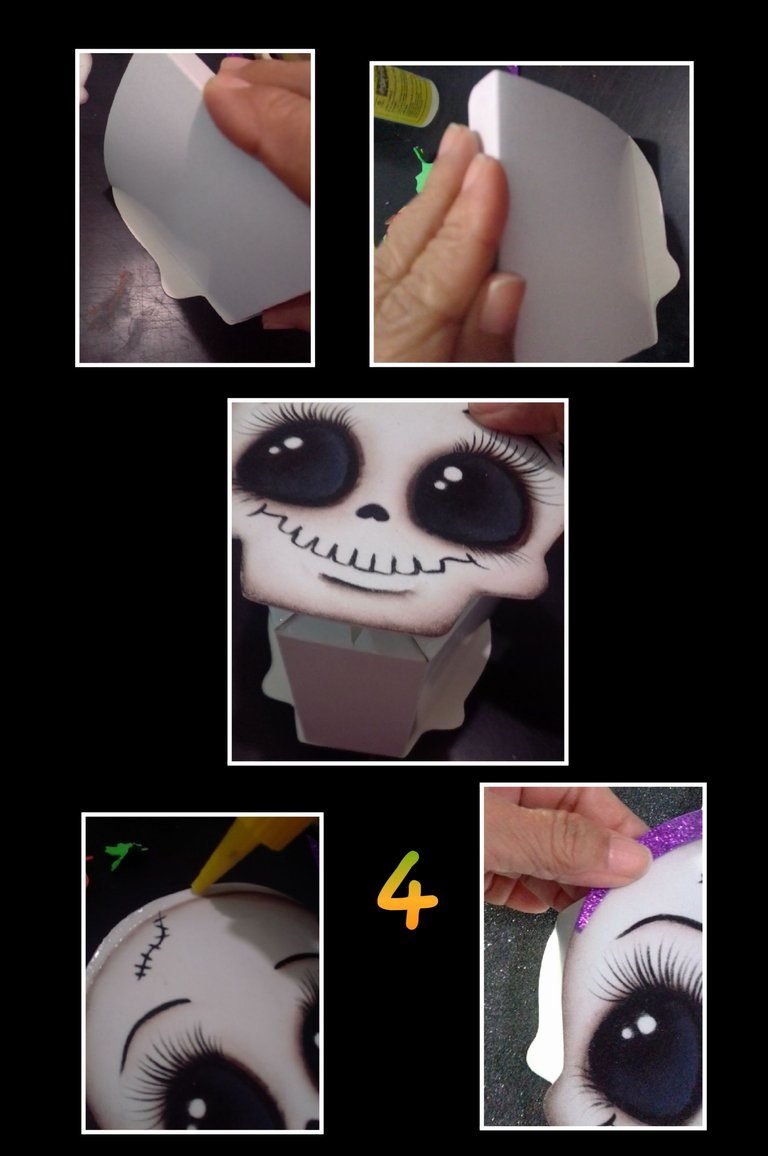
- Ahora aplica silicón en las pestañas del rectángulo y pega dos lados primero a la cara trasera de la calavera, deja secar y pega el otro extremo.
- Luego aplica silicón en la parte de arriba de la cara y pega el cintillo.
Paso 5:
Decoración:
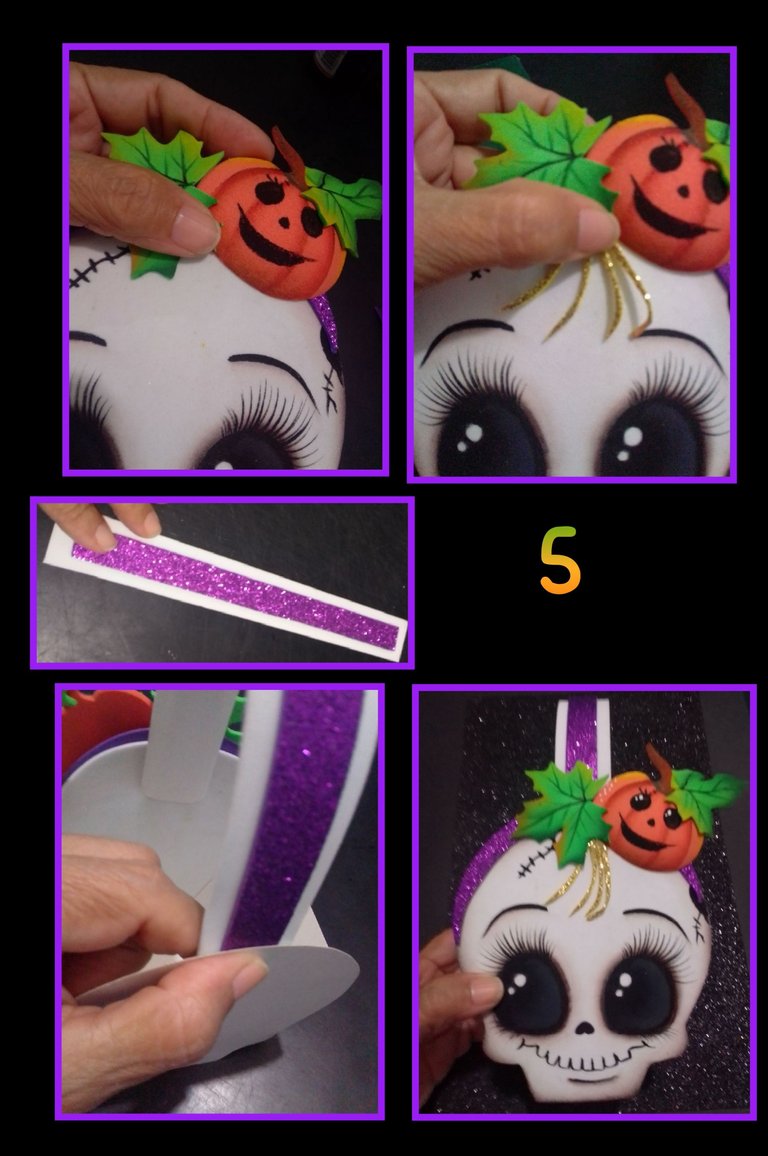
- Ahora decora el cintillo con la calabaza, hojas y unos flequillos dorados.
- Por último recorta dos tiras una en foami blanco y otra en escarchado y pega extremo en en ambas caras, haz un poco de presión hasta que seque y listo... así quedará terminada.
Ahora aquí verás el resultado final!

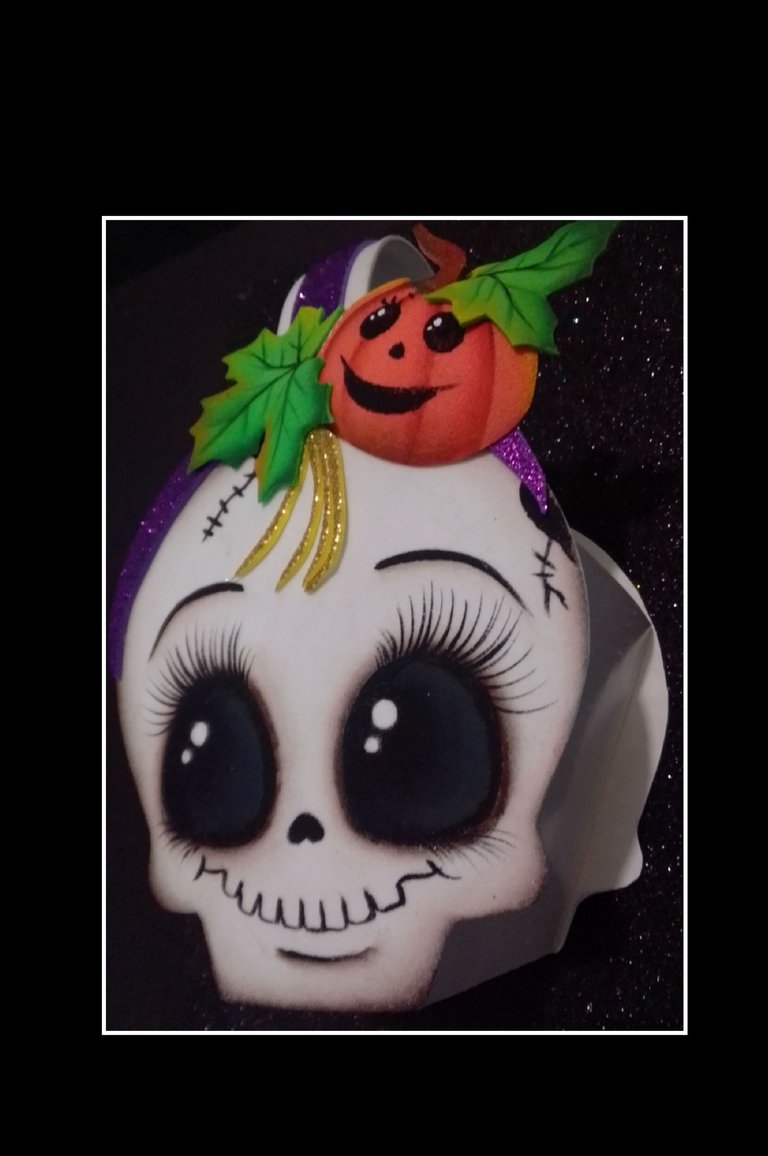
Fuente:
https://www.pinterest.es/pin/476255729359627960/

Espero te guste mi publicación y deseo que te sirva de guía para cualquier ocasión.
Gracias por llegar a visitarme y apoyarme!
Good evening dear friends who visit me. It's a pleasure to be sharing with you again.
For this step by step you will need:

| Foami matte and frosted | white cardboard |
|---|---|
| Ruler and pencil | Scissors |
| Paints and paintbrushes | Silicone |
| Drawing |
Let's get started:
Step 1:
Transfer the drawing:

Outline the drawing with soft lead pencil (dark marking) or 3B, 4B.
Place the drawing on the white foami and rub over the paper with the handles or rings of the scissors, then lift one end of the paper without letting go of the other end to see if the whole drawing is marked and cut out.
Then measure the outline of the skull without putting the top part and mark a rectangle with the measure taken and put the width you want and increase 1.5 cm of flange on each side, mark with the scissors and fold the flanges.
Then measure exactly in half and cut out a triangle and the skulls also mark the center at the bottom.
Now measure the width of the chin and mark on the rectangle that measure starting from the center 2.5cm on each side and cut out (see photo of the rectangle).
Dampen the brush in water, then wipe off the excess, wet the tip with brown paint and start going all around the edge of the skull and then around the eyes.
Step 2:

- Now with an eyeliner brush or fine tip marker paint the eyelashes starting from the bottom upwards in a curved shape as if it were a comma.
- Then mark with pencil or marker the light spots and fill in with black paint, paint the mouth and lines or marks on the face.
- Now with the paint a little wet put some white paint and try to join with the base and blur on one side of each eye, then blur with a little blue and finish painting the nose and let it dry.
Step 3:

- Now cut out and paint the skull decorations (leaves, pumpkin and headband).
- Paint the pumpkin and leaves with the previous technique and let dry, heat the iron and place the pieces so that they take shape and are embossed.
Step 4:
Assemble skull.

- Now apply silicone on the tabs of the rectangle and glue two sides first to the back side of the skull, let dry and glue the other end.
- Then apply silicone to the top of the face and glue the headband.
Step 5:
Decoration:

- Now decorate the headband with the pumpkin, leaves and golden bangs.
- Finally cut out two strips, one in white foami and the other in frosted foami and glue the ends on both sides, press a little bit until it dries and that's it... that's it!
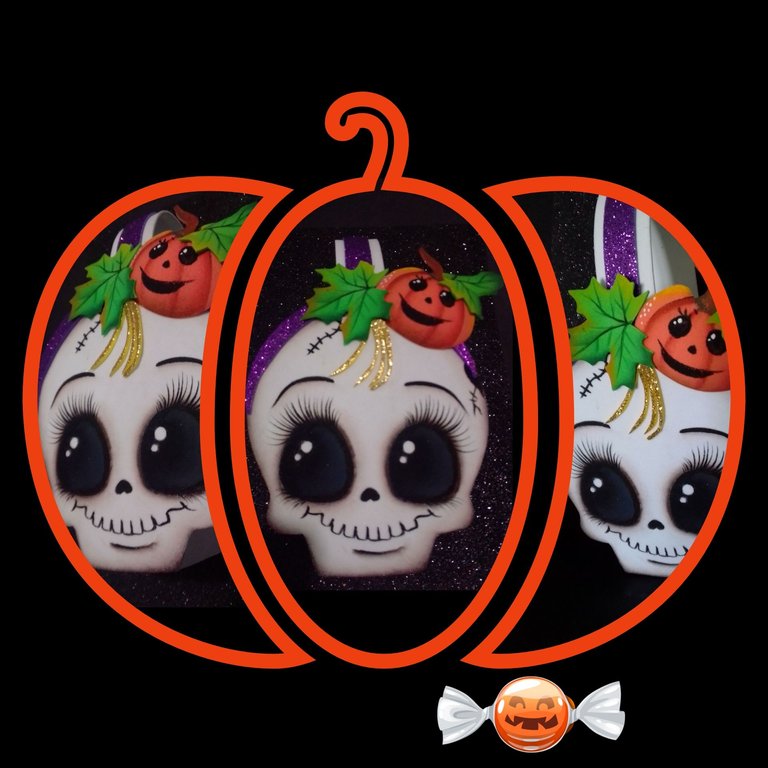
Now here you will see the final result!


Source:
https://www.pinterest.es/pin/476255729359627960/

I hope you like my post and I wish it will serve as a guide for any occasion.
Thanks for reaching out to visit and support me!
Handmade.
Thanks for using the #diy tag. Upovoted.
Remember when you use #diy tag, you will earn $BUIDL tokens in addition to $HIVE.
Power-up (stake) your BUIDL tokens regularly. They will be worth a lot in the future. I have powered-up more than 7 billion BUIDL tokens. https://he.dtools.dev/richlist/BUIDL.
You can power-up your tokens with your wallet here or here.
Benditas tus manos que crean tanta belleza. En cada cosa que realizas se nota el amor y la dedicación por lo que haces. Todos tus trabajos son dignos de admiración. Este dulceros es una muestra de ello. Me encantó.
Hola amiga, que lindo sentir y ver tus palabras y bendiciones, para mi un placer sentir que mi trabajo les gusta, lo hago con mucho amor para todos ustedes y con el buen propósito de que les sirva y aprendan a los que no saben.
De verdad muchas gracias.
Saludos y bendiciones, tus publicaciones también son admirables.
Has sido curado por @visualblock / You've been curated by @visualblock
Bienvenidas delegaciones / Delegations welcome
Trail de Curación / Curation Trail
Vota por nuestro Testigo aliado - @hispapro / Vote for our allied Witness - @hispapro
Más información sobre el testigo aquí / More information about the witness here
Muchas gracias @visualblock por la curación.
@elmundodebetty
https://leofinance.io/threads/view/hive-130560/re-leothreads-jv6jxt8x
https://twitter.com/hivediy47901/status/1711431165230359033
Gracias @hive-130560 por el apoyo.
Buenas tardes @qurator Muchas gracias por su apoyo.
Yay! 🤗
Your content has been boosted with Ecency Points, by @hive-130560.
Use Ecency daily to boost your growth on platform!
Support Ecency
Vote for new Proposal
Delegate HP and earn more
Muchas gracias @ecency por el apoyo a mi publicación.
Reviewed and Approved for an Ecency boost. Keep up the good work.
Muchas gracias @itwithsm y @ecency por el apoyo.
Esto quedó de otro nivel, guao me encanta te felicito
Hola amiga Mayi, que bueno que te gustó.
Gracias!😘
Qué bello te quedó ese dulcero!! Me encantan los ojos, a mi no me quedan tan bonitos. Hay que tener buena técnica para los ojos y me refiero a las pestañas. Felicitaciones!! ❤️💐🌻🌹
Hola amiga, muchas gracias por leer mi contenido y hacer tan bonito comentario.
Bueno lo de los ojos es cuestión de práctica, cualquier cosa estoy a la orden.
Saludos.
Congratulations @elmundodebetty! You have completed the following achievement on the Hive blockchain And have been rewarded with New badge(s)
Your next payout target is 4000 HP.
The unit is Hive Power equivalent because post and comment rewards can be split into HP and HBD
You can view your badges on your board and compare yourself to others in the Ranking
If you no longer want to receive notifications, reply to this comment with the word
STOPCheck out our last posts:
Gracias @hivebuzz por el apoyo y mis nuevas insignias.
¡Eso es genial @elmundodebetty! ¡Estamos aquí para animarte a alcanzar tus próximas metas en Hive!