Aprende conmigo como hacer una muñeca porta lazos. Learn with me how to make a ribbon doll.
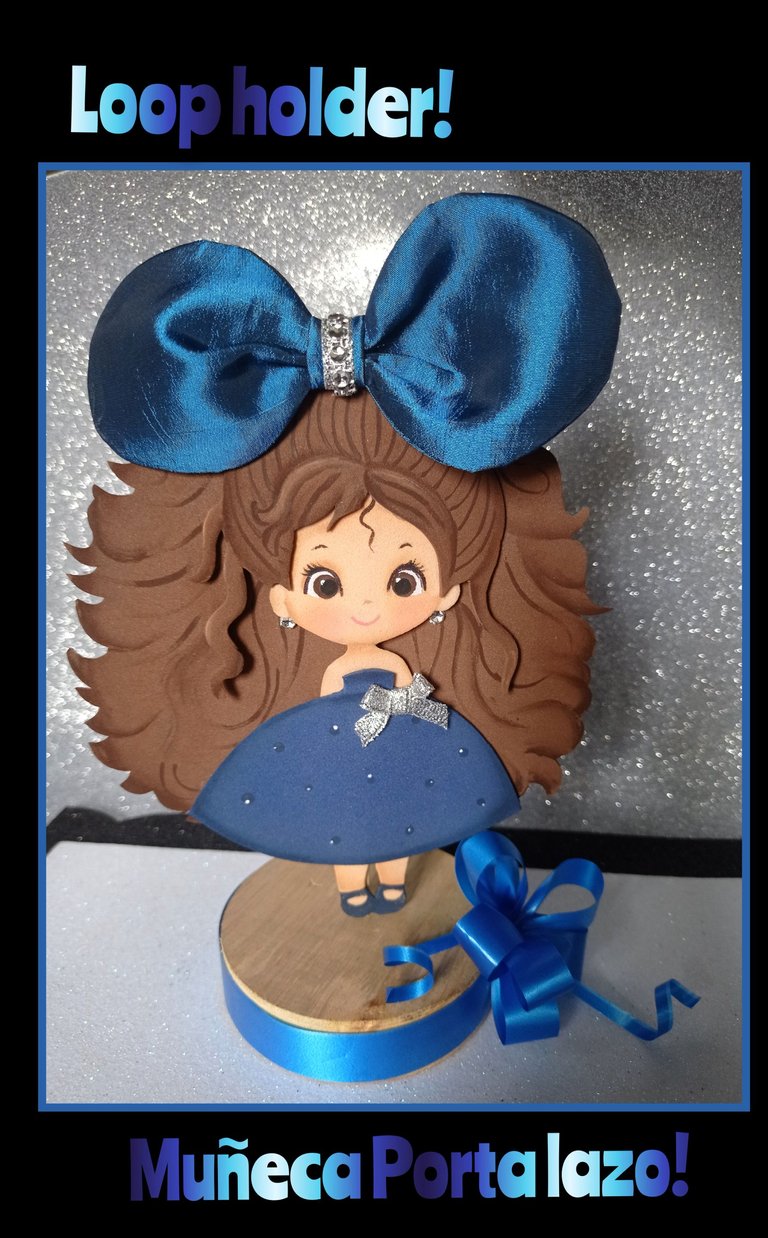
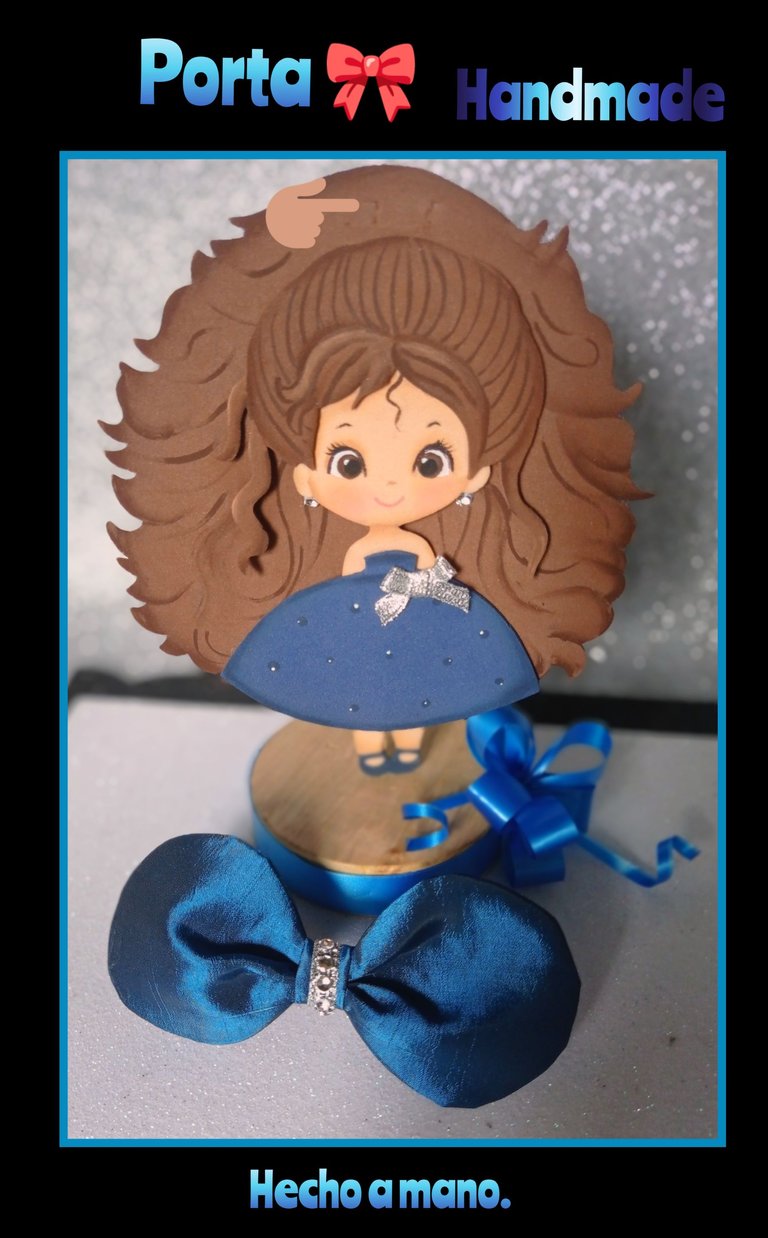
Buenas noches y bienvenidos sean todos mis amigos y creadores a mi espacio favorito.
Así que te invito a que me acompañes y aprendas conmigo.
Para este tutorial necesitarás:
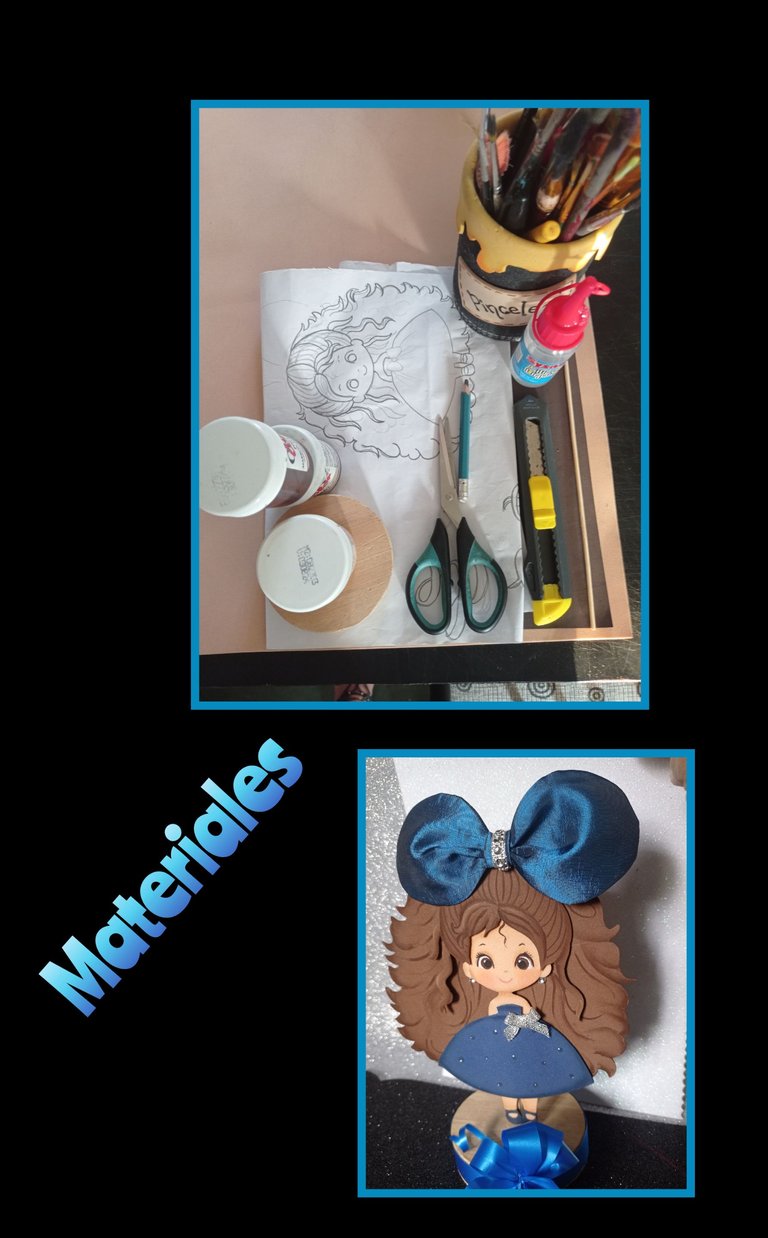
| Foami de colores | Dibujo o impresión |
|---|---|
| Pinturas y pinceles | Lápiz y marcador |
| Cuchilla y tijera | Silicón |
| Palito de madera | Tiza |
| Retazo Tela | Aguja e hilo |
| Base para muñeca | Cinta de tela y de papel |
Listos los materiales ahora comencemos:
Paso 1:
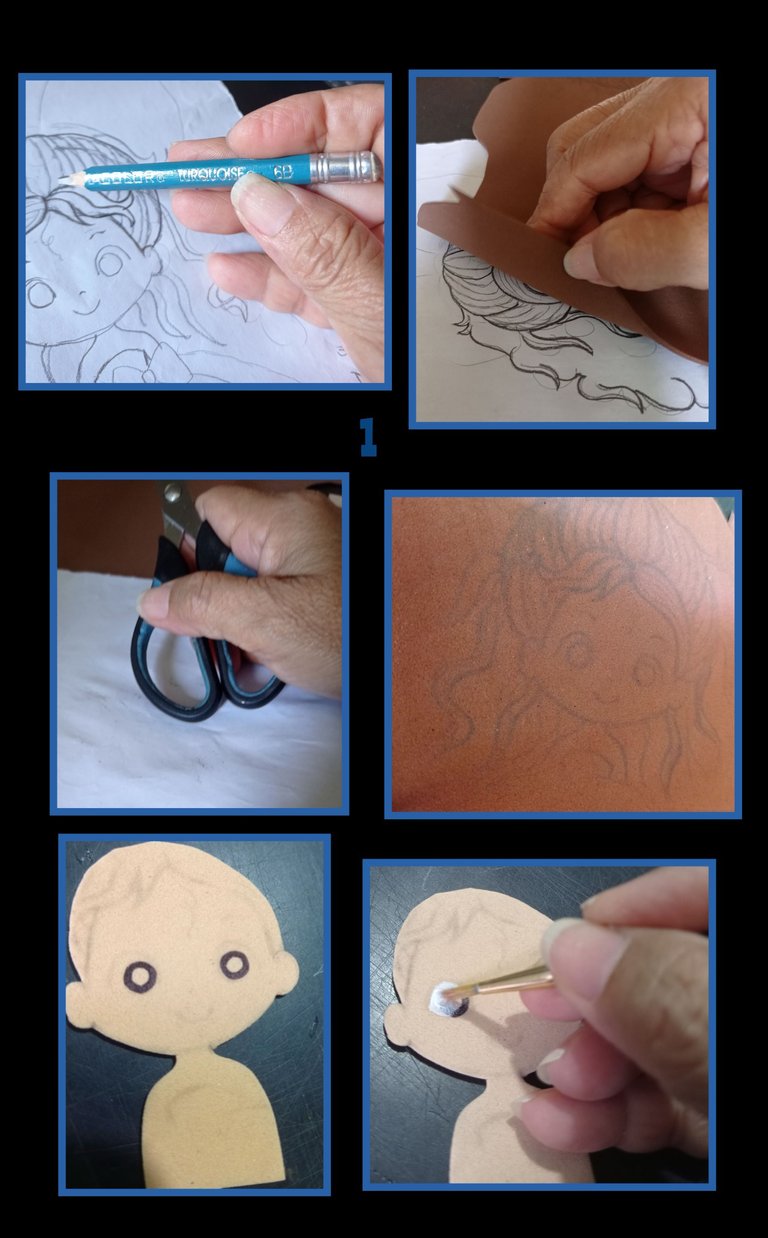
- Remarca el dibujo con un lápiz de mina suave 4 ó 6B para transferir a foami oscuros, luego coloca el foami sobre el dibujo y voltea dejando el dibujo arriba y luego frota presionando los anillos de la tijera por todo el dibujo, así harás con cada una de las piezas, luego recorta.
- Para que te sea más fácil pintar los ojos, con un marcador punta fina y marca un círculo te servirá de guía al momento de pintar, luego pinta con blanco alrededor.
Paso 2:
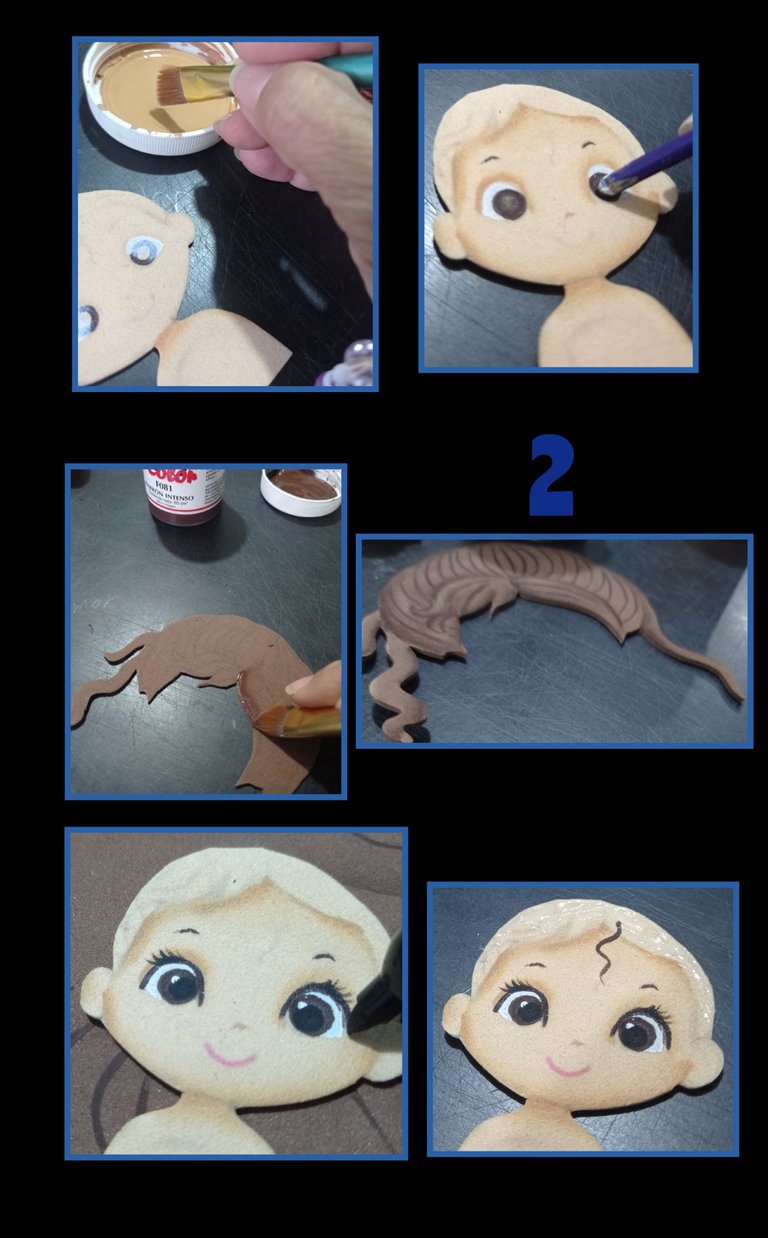
Ahora moja el pincel y retira el exceso de agua pasando suavemente por un pañito seco, moja la punta en pintura piel oscura y comienza a pasar por todo el contorno de la carita y cuerpo y deja secar.
Luego pinta el borde del cabello y delinea las rayas marcadas y así pinta todas las piezas faltantes.
Luego con marcador pinta el contorno de los ojos y pestañas con marcador o pincel punta fina y pinta la boquita.
Moja la parte trasera del pincel y pinta el centro del ojo, trata de poner en el centro y haz un poco de presión para pintar con pintura.
Paso 3:
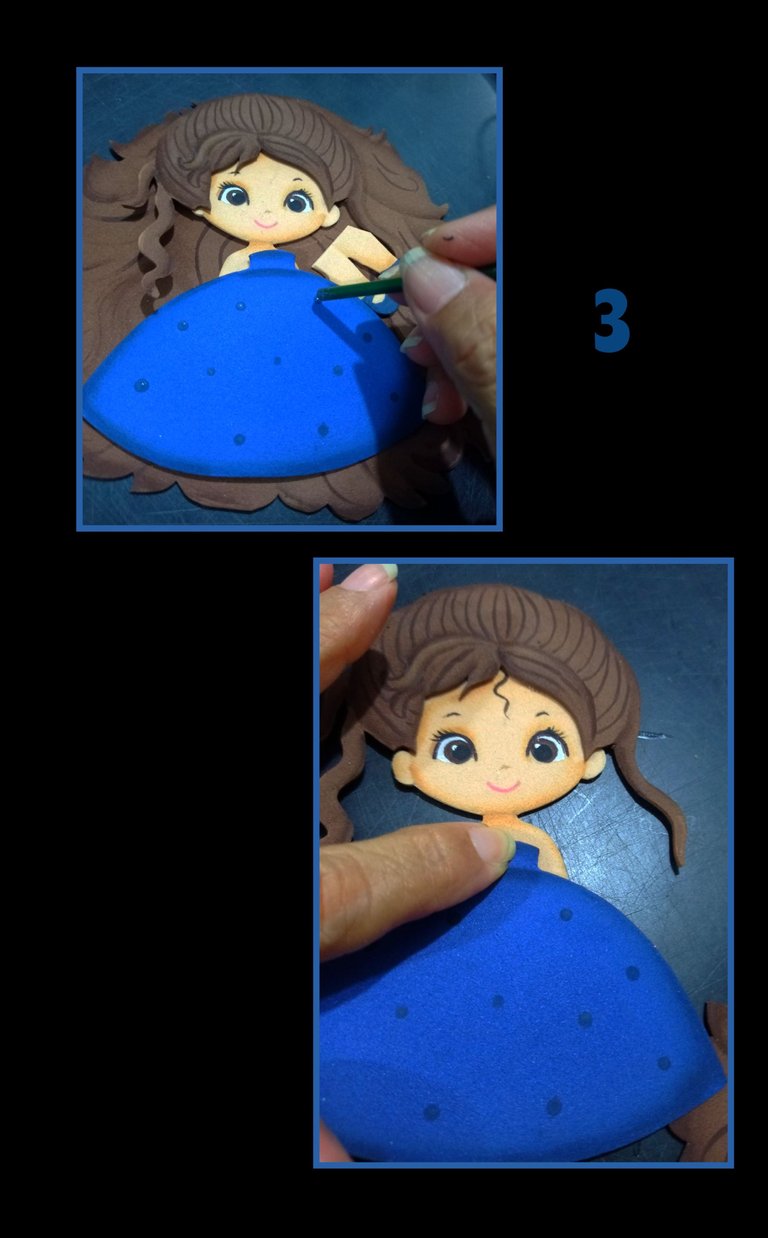
- Pinta lunares sobre el vestido y deja secar.
- Aplica silicón en la parte trasera de la muñeca y comienza a armar y deja secar.
Paso 4:
Lazo
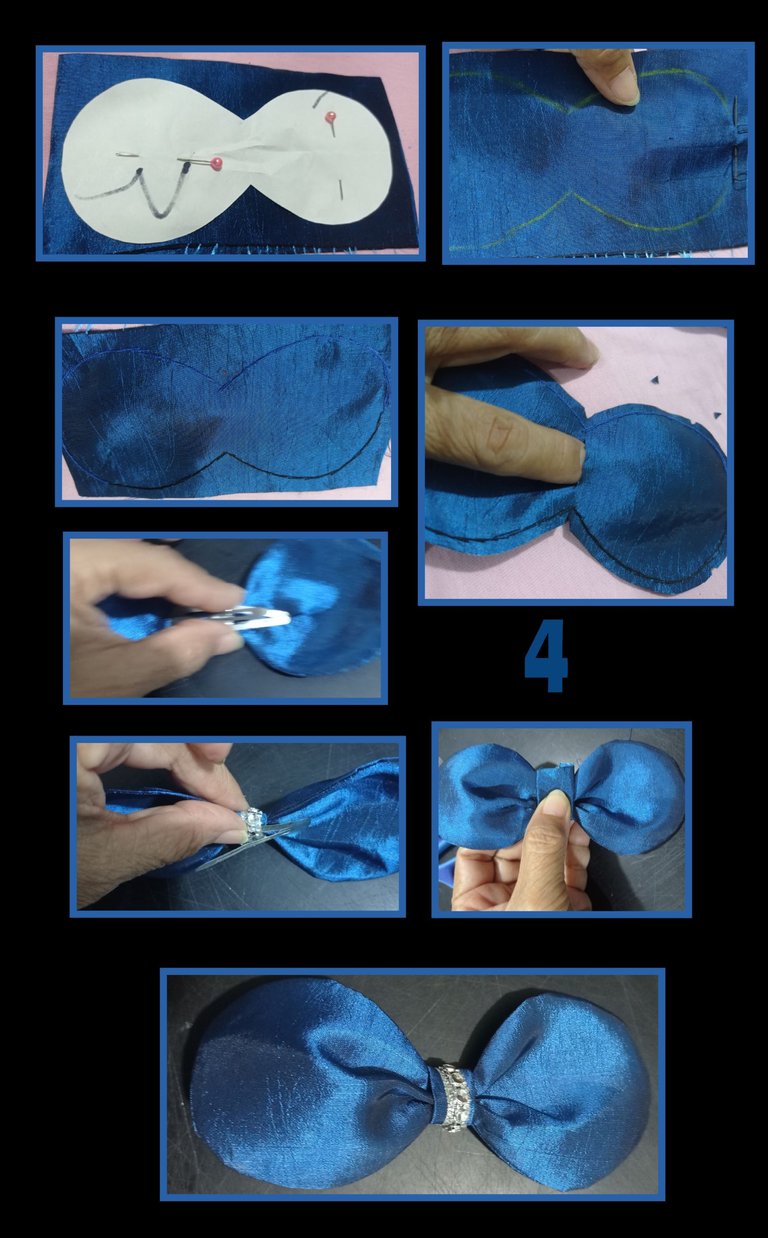
- Traza en papel un óvalo, dobla por la mitad y dale forma reduciendo en el centro y recorta como se ve en la foto.
- Luego fija el molde sobre la tela y marca con un lápiz de color por todo el contorno y comienza a coser con aguja por la orilla dejando un pequeño borde de 1/2 cm también lo puedes coser con máquina.
- Ahora con la tijera haz un pequeño corte en el centro para voltear y mide el ancho de la pinza.
- Recorta un rectángulo en tela de 5 x4cm, dobla por la mitad y pega en el medio con silicón o cose, después pega el gancho o pinza y por último asegura el gancho al lazo pasando la cinta por todo el centro y decora.
- Así quedará listo este bonito y sencillo lazo.
Paso 5:
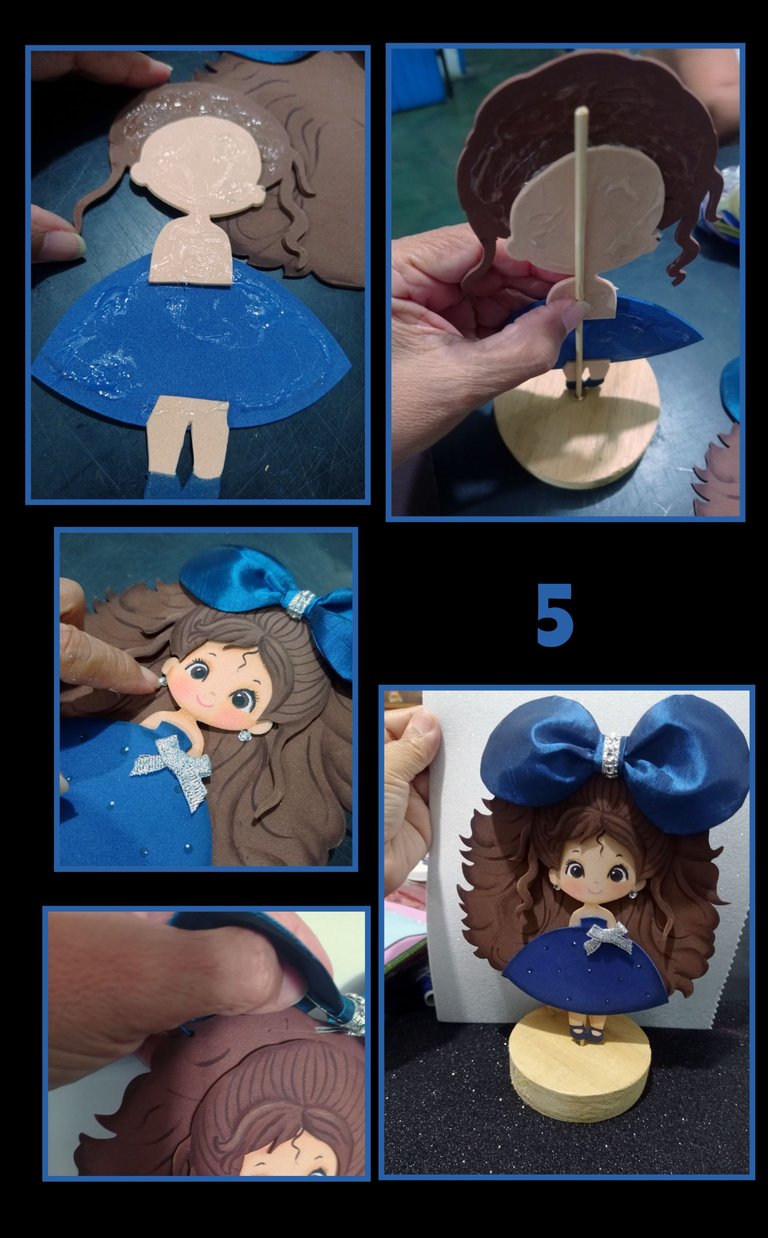
- Aplica silicón por todo el contorno de la muñeca y fija en la parte trasera un palito de altura ya fija a la base de madera, puedes usar una cajita, anime o cartón grueso.
- Acuesta y pega la segunda parte del cabello, luego coloca el lazo para marcar donde harás las aberturas y pega los zarcillos (en las marcas harás dos(2) pequeñas aberturas en forma vertical y luego inserta el lazo.
Así va quedando!
Paso 6:
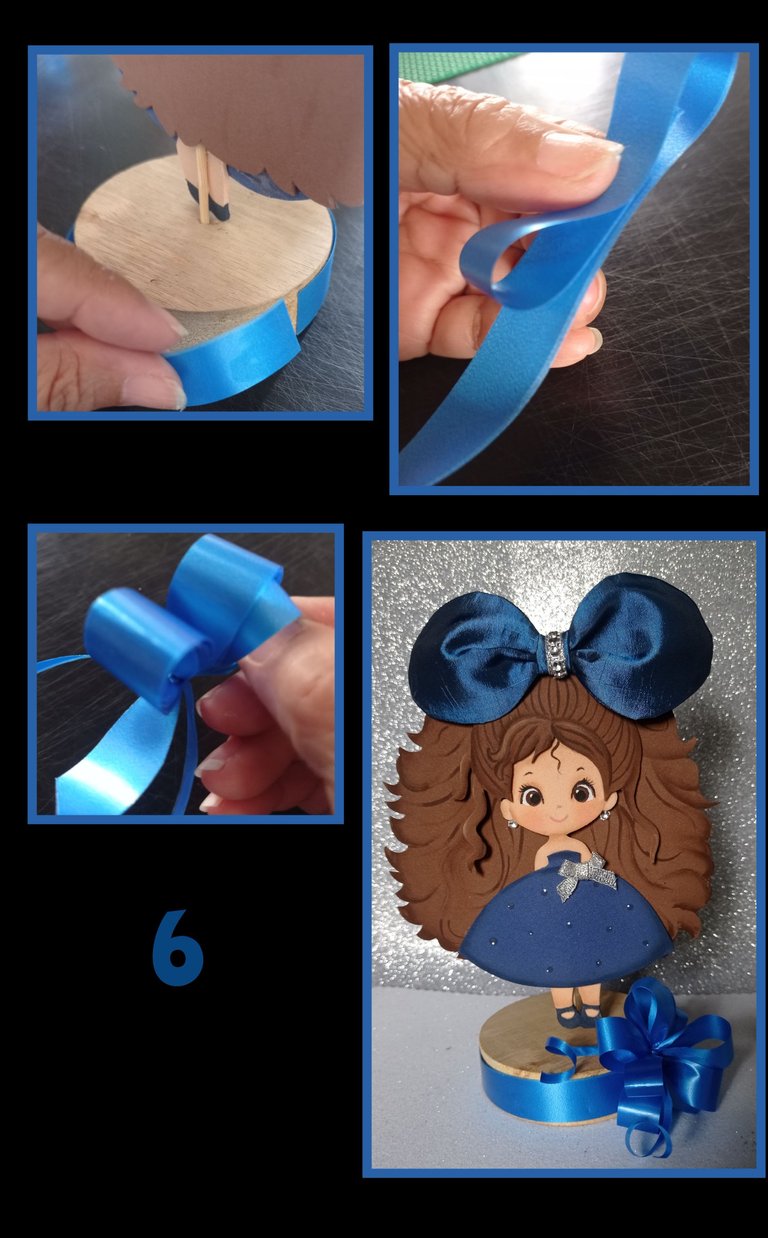
- Por último si quieres puedes decorar la base pegando cinta por todo el contorno de la madera (base),
realiza un pequeño lazo y pega donde uniste la cinta para que no se vea, sabes que mientras menos se vean esos detalles nuestro trabajo será más agradable a la vista.
Ahora sólo queda mostrarte las fotos finales
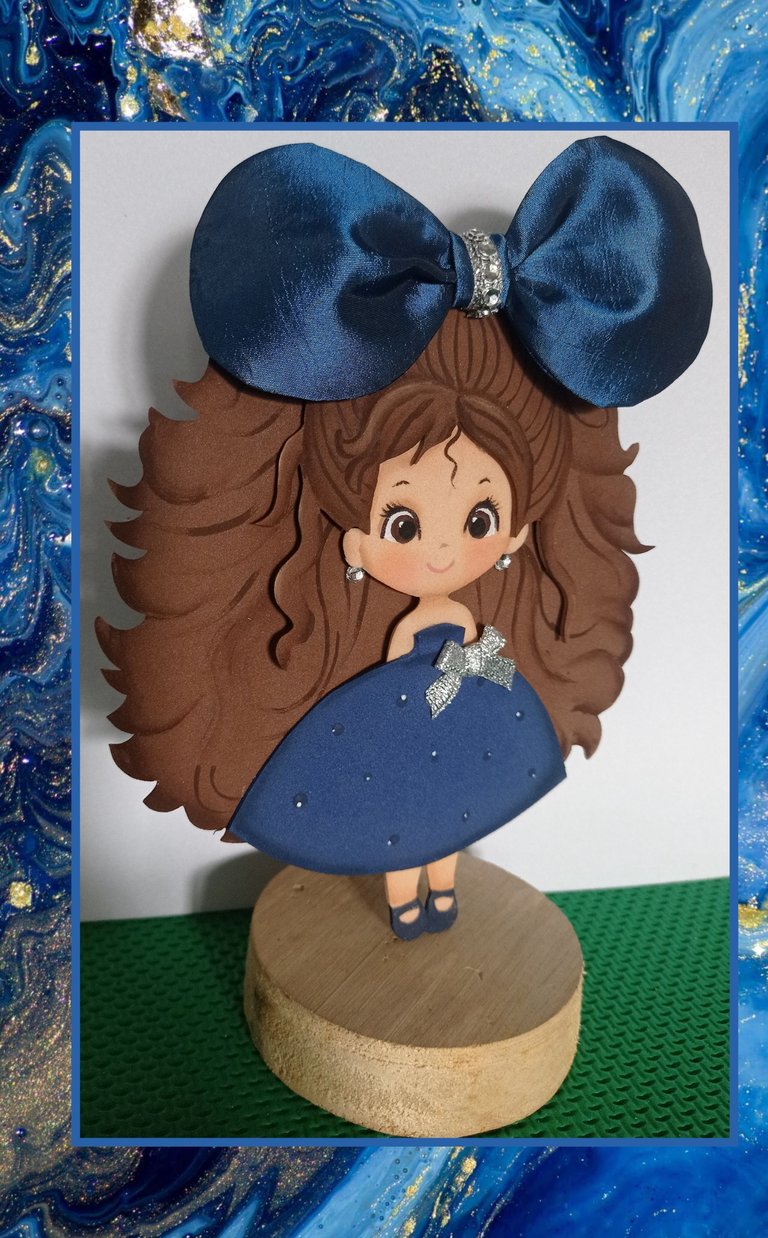

Sólo deja que tu imaginación y creatividad fluyan! tu puedes también realizarla a tu gusto.

Fuente:https://www.pinterest.es/pin/476255729361019187/
Editado con: Etiquetas HTML
Teléfono: Redmi Note 9
Editor de fotos: GridArt.
Y llegó el momento de despedirme, felíz de haber compartido contigo mi tutorial, espero te guste esta idea y te animes a realizarla a tu gusto.
Solo queda agradecer tu visita, compañía y apoyo, si necesitas de mi ayuda, no dudes en escribirme.
Saludos.


Good evening and welcome to all my friends and creators to my favorite space.
Today I bring you a tutorial where I will show you how to make a foami doll and a girl's hair clip, so you will have a different way to decorate her room and will serve her to play as she can exchange different hooks and bows.
For this tutorial you will need:

| Colored Foami | Drawing or print |
|---|---|
| Paints and brushes | Pencil and marker |
| Knife and scissors | Silicone |
| Wooden stick | Chalk |
| Fabric scraps | Needle and thread |
| Wrist base | Cloth and paper ribbon |
Materials are ready, now let's get started:
Step 1:

- Outline the drawing with a soft lead pencil 4 or 6B to transfer to dark foami, then place the foami over the drawing and flip leaving the drawing on top and then rub pressing the rings of the scissors all over the drawing, so you will do with each of the pieces, then cut out.
- To make it easier to paint the eyes, use a fine tip marker and mark a circle that will serve as a guide when painting, then paint with white around them.
Step 2:

Now wet the brush and remove the excess water by gently wiping it with a dry cloth, dip the tip in dark skin paint and begin to go around the contour of the face and body and let it dry.
Then paint the edge of the hair and outline the marked stripes and so paint all the missing pieces.
Then paint the outline of the eyes and eyelashes with a marker or fine tip brush and paint the mouth.
Wet the back of the brush and paint the center of the eye, try to put in the center and make a little pressure to paint with paint.
Step 3:

- Paint polka dots on the dress and let dry.
- Apply silicone to the back of the doll and begin to assemble and let dry.
Step 4:
Lace

- Trace an oval on paper, fold in half and shape it by cutting in the center and cut out as shown in the picture.
- Then fix the mold on the fabric and mark with a colored pencil all around the contour and start sewing with a needle along the edge leaving a small border of 1/2 cm you can also sew it with a machine.
- Now with the scissors make a small cut in the center to flip and measure the width of the clamp.
- Cut a 5 x 4 cm rectangle in fabric, fold in half and glue in the middle with silicone or sew, then glue the hook or clamp and finally secure the hook to the bow by passing the ribbon through the center and decorate.
- This is how this beautiful and simple bow will be ready.
Step 5:

- Apply silicone all around the doll and fix on the back of the doll a stick of height already fixed to the wooden base, you can use a box, anime or thick cardboard.
- Lay down and glue the second part of the hair, then place the ribbon to mark where you will make the openings and glue the tendrils (in the marks you will make two(2) small openings vertically and then insert the ribbon.
This is how it will look like!
Step 6:

- Finally if you want you can decorate the base by gluing ribbon all around the wood (base),
make a small bow and glue where you joined the ribbon so that it is not seen, you know that the less these details are seen our work will be more pleasing to the eye.
Now it only remains to show you the final photos.


Just let your imagination and creativity flow! You can also make it to your liking.

Fuente:https://www.pinterest.es/pin/476255729361019187/
Edited with: HTML tags
Phone: Redmi Note 9
Photo editor: GridArt.
And it was time to say goodbye, happy to have shared with you my tutorial, I hope you like this idea and encourage you to make it to your liking.
It only remains to thank you for your visit, company and support, if you need my help, do not hesitate to write me.
Greetings.
Wow que bonito quedó tu arte , excelente acabado
Hola amigo, Que bueno que te gustó.
Muchas gracias por leer y comentar.
Saludos.
Me encanta es una ternura esta muñeca, trabajas muy hermoso 😍
Hola amiga, muchas gracias.
Que bueno que te gusta.
Gracias por comentar.
https://reddit.com/r/crafting/comments/1bo9njj/loop_holder/
The rewards earned on this comment will go directly to the people( @yolimarag ) sharing the post on Reddit as long as they are registered with @poshtoken. Sign up at https://hiveposh.com.
Very cute your doll. I love it.
Muchas gracias amiga, que bueno que te gusta.
Que hermosa creación, la muñequita te quedó preciosa, amé cada detalle, y me gusta la idea para colocar los lazos, es muy práctica y además decorativa 😊
Gracias María, hecha con mucho amor para ustedes.
Agradecida con tan lindas palabras y sí es útil y decorativa.
Saludos.
https://twitter.com/hivediy47901/status/1773423934962024713