DIY- Set pulsera y anillo colorido con técnica macrame de nudo flecha ✨ || Colorful bracelet and ring set with macrame arrow knot technique ✨ [ESP/ENG]
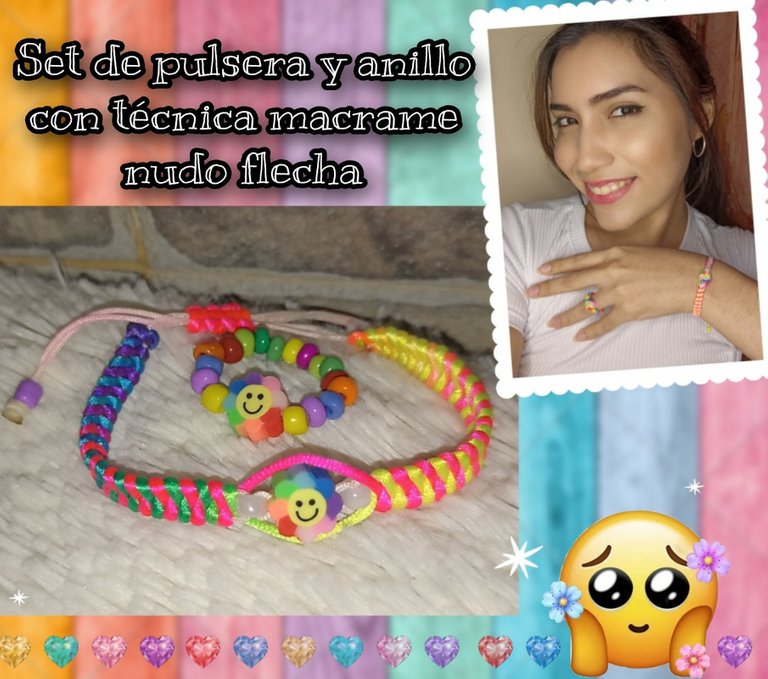


Hola amigos de Hive ❤️ hoy les quiero compartir un pequeño tutorial con un nuevo nudo que aprendí hacer y la verdad queda muy lindo combinandolo con alguna piedra, dije y cristales a juego. la técnica es súper sencilla, lo único que cambia además del nudo, es que usaremos dos hilos centrales en lugar de uno. Para estos accesorios usaré además un hilo colorido o matizado para crear un efecto visual súper llamativo con una piedra central y varias cuentas de varios colores. Si te gusta, te animo a que me acompañes y aprendas junto a mi a realizarlo, y ahora sí, sin más que agregar... Comencémos!!👏🏻😌

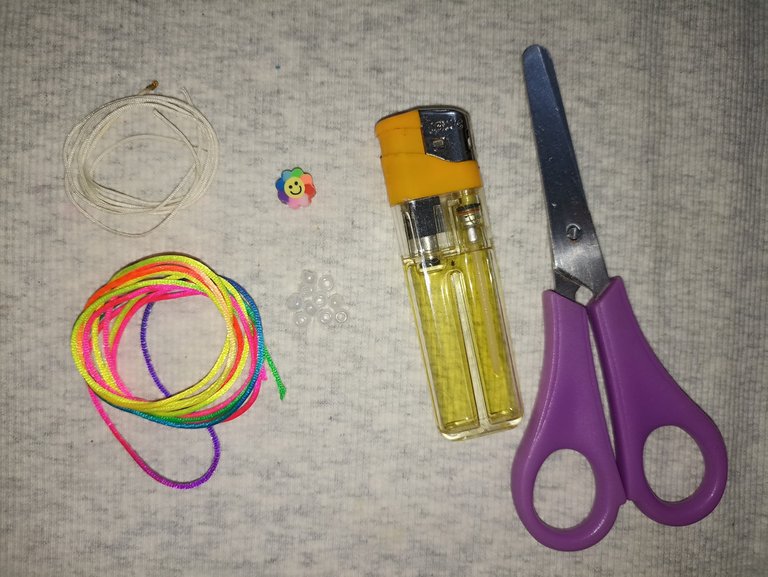
Materiales:
- 150 cm hilo chino colorido
- 90 cm hilo chino blanco
- cuentas
- piedras en forma de carita feliz
- Tijera
- encendedor


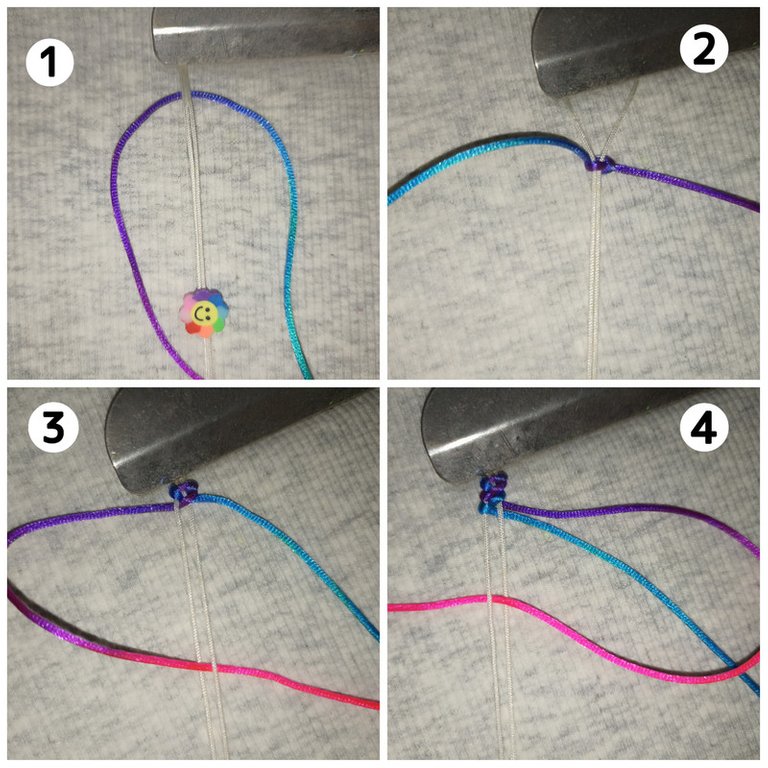
Primero para comenzar hacer la pulsera voy a dejar como separación unos 6 a 7 cm de mis hilos centrales que miden 60cm, luego colocare en ellos con un nudo simple mi otra hebra de hilo matizado tratando que me queden ambas hebras del mismo largo. Hecho esto empezaré mi nudo introduciendo una de las hebras entre los hilos centrales, y repito lo mismo con la otra hebra. Luego me devuelvo con la última y repito todo lo anterior hasta obtener 6 cm de largo aproximadamente, para estar más seguro puedes también ir midiendo a la vez con tu muñeca para identificar la mitad de nuestra pulsera.

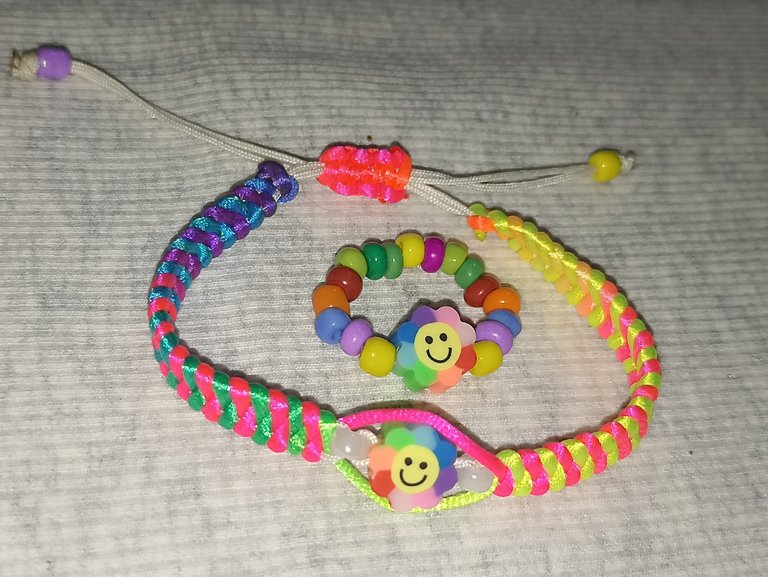
Ahora para este diseño lo que haré a continuación será cruzar los hilos centrales con una cuenta blanca, luego inserto la piedra de cara felíz y cruzo nuevamente con otra para guardar la simetría. Luego con los hilo matizados lo que haré sera simplemente pasarlos alrededor del diseño del centro, como si los estuviera abrazando 😁, y comienzo del otro lado repitiendo el nudo inicial.
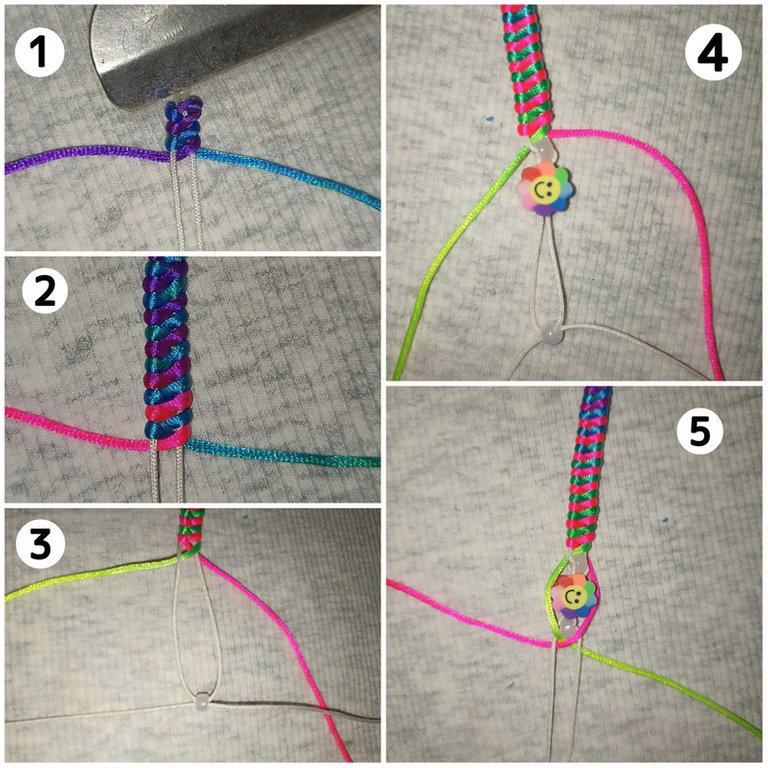

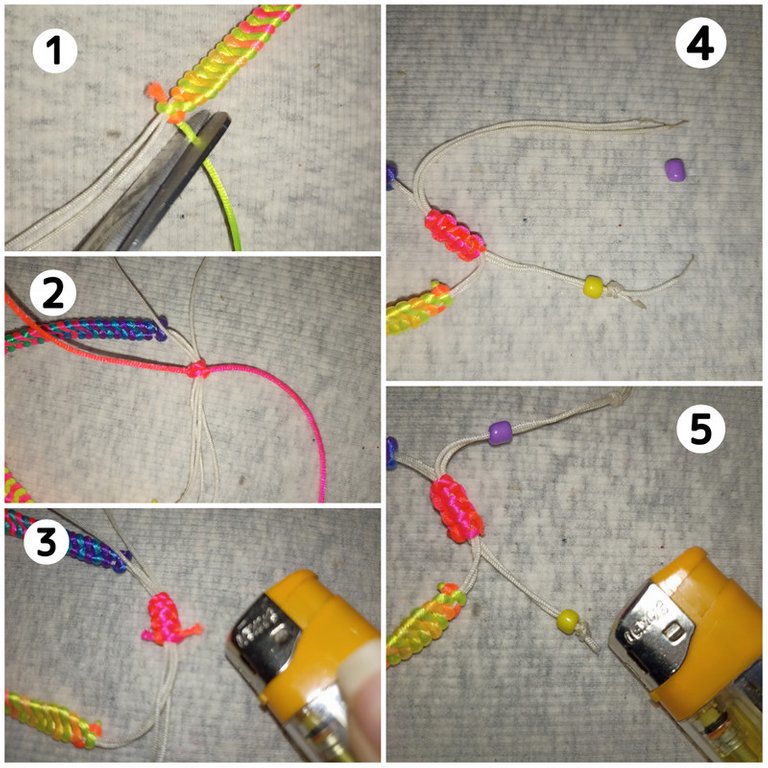
Una vez tengamos el largo deseado de la pulsera, cortamos los hilos de tejer y quemamos sus puntas, seguido a esto haremos el cierre de la pulsera cruzando los hilos centrales y haciendo sobre ellos varios nudos planos, volvemos a cortar el sobrante y quemamos las puntas para asegurar. Además como lindo toque adicional al final de las hebras centrales podemos añadir dos cuentas de diferente color y las aseguramos con nudos simples, sin olvidar quemar también sus puntas.

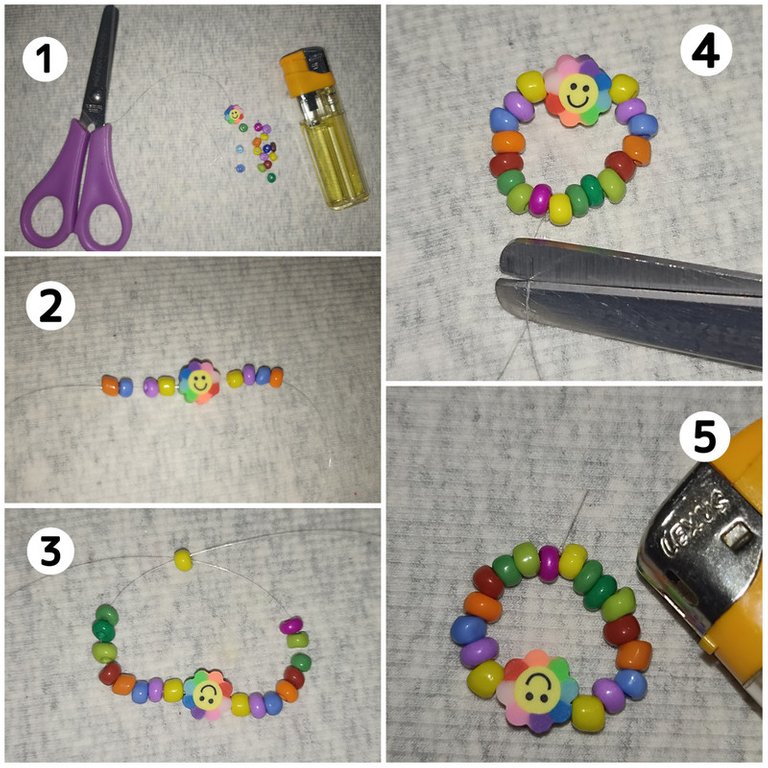
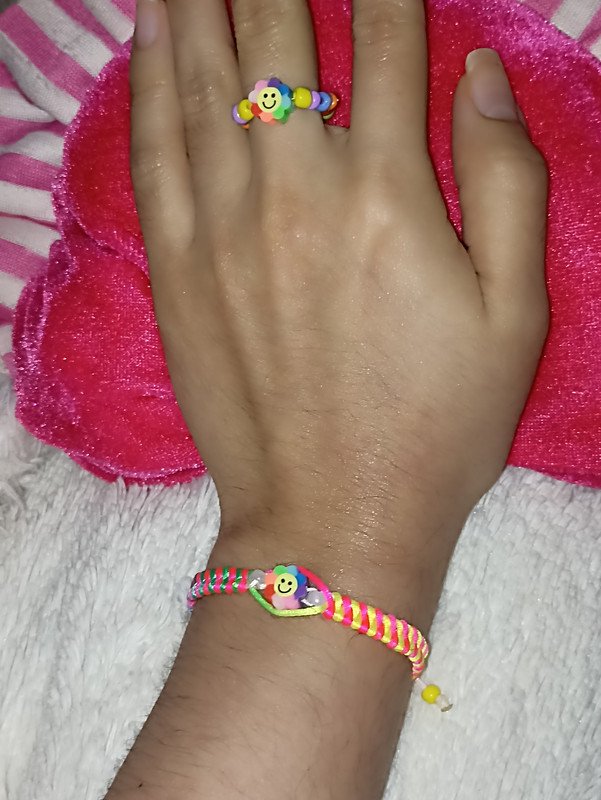
Ya casi para terminar voy a realizar un anillo simplemente introduciendo varias cuentas de varios colores y cruzando con otra, agregando otra piedra igual que usamos para la pulsera justo en el centro, la carita feliz ☺️, para que así nos quede a juego y ya estaría listo para usar!! ☺️

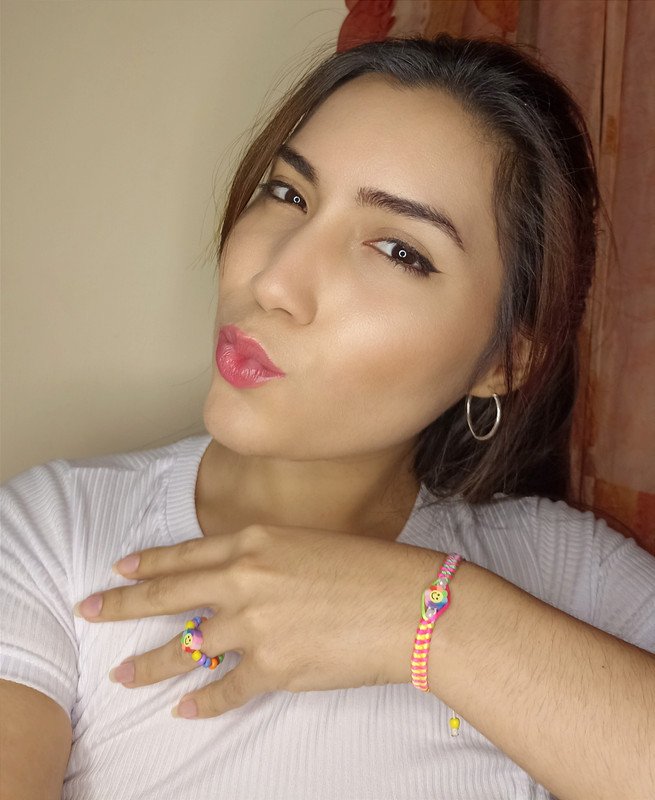
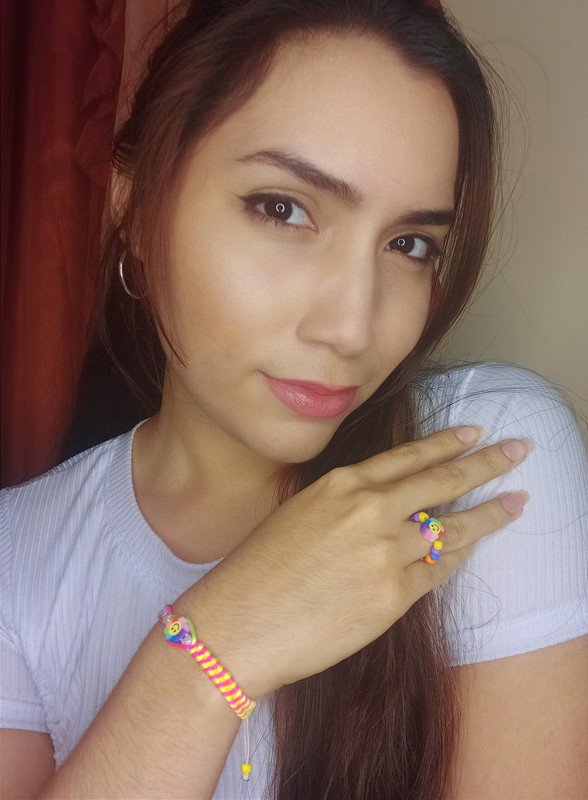
Y aquí les muestro el lindo set terminado!!.. Puedes seguir mi guía tutorial o puedes dejar volar tu imaginación y hacerlo combinando los colores, piedras, cristales y el diseño que quieras... La creatividad es tuya y por supuesto un toque secreto de amor para que el trabajo quede con el mejor acabado 🥰.!! si te gusto te animo a que lo intentes, me encantó mostrarles este pequeño y super sencillo tutorial para que lo hagas para tu uso personal, emprender o para regalar 😁...espero compartirles muy pronto nuevos trabajos, con mucho cariño me despido y será hasta la próxima !!💕


Hi friends of Hive ❤️ today I want to share with you a little tutorial with a new knot that I learned to make and the truth is that it looks very nice combined with a stone, pendant and matching crystals. the technique is super simple, the only thing that changes besides the knot, is that we will use two central strands instead of one. For these accessories I will also use a colorful or shaded thread to create a super eye-catching visual effect with a central stone and several beads of various colors. If you like it, I encourage you to join me and learn how to make it with me, and now yes, without further ado.... Let's get started!!!👏🏻😌


Materials:
- 150 cm colored Chinese thread
- 90 cm white Chinese thread
- beads
- smiley face shaped stones
- scissors
- lighter


First to start making the bracelet I am going to leave as separation about 6 to 7 cm of my central threads that measure 60cm, then I will place in them with a simple knot my other strand of yarn, trying to have both strands of the same length. Once this is done I will start my knot introducing one of the strands between the central threads, and I repeat the same with the other strand. Then I go back with the last one and repeat all the above until I get 6 cm long approximately, to be more sure you can also go measuring at the same time with your wrist to identify the middle of our bracelet.nd we will have both pieces ready.


Now for this design what I will do next will be to cross the center strands with a white bead, then insert the happy face stone and cross again with another one to keep the symmetry. Then with the shaded threads what I will do is simply pass them around the center design, as if I were embracing them 😁, and start on the other side repeating the initial knot.


Once we have the desired length of the bracelet, we cut the weaving threads and burn their ends, followed by the closure of the bracelet by crossing the central threads and making several flat knots on them, we cut the excess and burn the ends to secure. As a nice additional touch at the end of the central strands we can add two beads of different colors and secure them with simple knots, without forgetting to burn their ends as well.


Almost to finish I am going to make a ring by simply inserting several beads of various colors and crossing with another, adding another stone the same as we used for the bracelet right in the center, the smiley face ☺️, so that we get a matching one and it would be ready to wear!!!! ☺️


And here I show you the nice finished set!!!.. You can follow my tutorial guide or you can let your imagination fly and do it combining colors, stones, crystals and the design you want..... The creativity is yours and of course a secret touch of love so that the work is with the best finish 🥰.!!! if you like it I encourage you to try it, I loved to show you this small and super simple tutorial so you can make it for your personal use, undertake or to give away 😁...I hope to share with you very soon new works, with much affection I say goodbye and will be until next time !!!💕


Todo el contenido es de mi autoría y las imágenes son de mi propiedad
Cámara: Redmi note 10s
Uso un aro de luz LED como base para mi teléfono y tomarme las fotos
All content is my own and images are my property
Camera: Redmi note 10s
I use an LED light ring as a base for my phone to take pictures of myself

Edición y Separador|Editing and Separator
App PicMonkey - App Picsart - App Canva
Traductor|Translator
DeepL


https://twitter.com/1048398048240566273/status/1615133651968065544
https://twitter.com/1260211375881814016/status/1615154462343196672
The rewards earned on this comment will go directly to the people( @madushanka ) sharing the post on Twitter as long as they are registered with @poshtoken. Sign up at https://hiveposh.com.
Le ha quedado muy lindo, y sus colores lo hacen muy vistoso y alegre, felicidades @edwarlyn11.
Hola amiga🤗muchas gracias a ti por el apoyo..creo que para estás próximas celebraciones unos accesorios coloridos no nos quedarían nada mal😄. Un saludito para ti también 💕
Super colorido, @edwarlyn11 te han quedado muy lindos 🤗
Muuchas gracias me alegra que te gustaran 🤗quizas un día te animes y te inspires haciendo algo parecido súper colorido para usarlo en estas fechas de carnaval 😄
¡Se ve muy divertida y linda a la vez! ¡muchos exitos para ti querida!💖💖🙋🙋
Hoola 🤗 que linda muchas gracias por decirlo me alegra mucho ver que te gustaron, fue un gusto compartir, un saludito para ti también querida 💕
Thank you for sharing this post on HIVE!
Your content got selected by our fellow curator ashikstd & you just received a little thank you upvote from us for your great work! Your post will be featured in one of our recurring compilations which are aiming to offer you a stage to widen your audience within the DIY scene of Hive. Stay creative & HIVE ON!
Please vote for our hive witness <3
Ayyy amé este trabajo! Yo ya estoy grandecita para usarlo pero a mi hija seguramente le encantaría.
Tendría que practicar el tejido del macrame porque nunca lo he hecho pero lo has explicado bastante bien por lo que sí le pongo empeño me podría quedar bien o por lo menos eso espero jaja.
El anillo es una cuchitura!!
No te creas jaja..por lo menos para usarla en estos próximos carnavales no te quedaría mal...y si es para tu hija estoy segura le quedarían muy lindas☺️..y si, todo es cuestión de práctica, al principio quizás te parezca complicado pero ya después le agarras el hilo es mucho más fácil, además que la mayoría de nudos son repetitivos así que yo estoy segura aprenderás. Me alegra que te gustaran, un saludito para ti también bella 💕
Ayyy amé este trabajo! Yo ya estoy grandecita para usarlo pero a mi hija seguramente le encantaría.
Tendría que practicar el tejido del macrame porque nunca lo he hecho pero lo has explicado bastante bien por lo que sí le pongo empeño me podría quedar bien o por lo menos eso espero jaja.
El anillo es una cuchitura!!